Love this? Save it for later!
Share the inspiration with your friends
My youngest swore they hated mac and cheese. For years. The kind of hate that came with a scrunched-up nose and a dramatic push of the plate away. Then, last Thursday, I was testing this make-ahead version for a busy week, thinking I’d finally have a freezer meal that wasn’t soup. I pulled it out of the oven, let it rest, and turned around to grab a serving spoon. When I turned back, my kid had already snuck a forkful straight from the dish. Honestly, I just stood there, spatula in hand, watching them take another bite without even realizing I was looking. That was the moment I knew this recipe was different. It’s not just about getting dinner on the table—it’s about having a secret weapon for those nights when you need everyone to sit down and eat without a fight. This mac and cheese is creamy, cheesy, and has that golden, slightly crispy top that makes it feel like a treat. And the best part? You can make it ahead, stash it in the fridge or freezer, and bake it off whenever you need a win. Maybe you’ve been there—standing in front of an open fridge at 5 PM with no plan and hungry kids circling. This recipe is for those exact moments.
Why You’ll Love This Recipe
I’ve tested this recipe more times than I can count, and honestly, it keeps surprising me. It’s the kind of dish that solves real problems for families trying to get dinner on the table without losing their minds.
- Quick & Easy: The active prep time is only about 20 minutes. You can throw it together while the kids are doing homework or during a lunch break.
- Simple Ingredients: No fancy cheese counter trips here. This uses regular cheddar, milk, and butter—stuff you probably already have.
- Perfect for Busy Weeknights: Make it on Sunday, bake it on Tuesday. It’s that simple.
- Crowd-Pleaser: Both my kids and the picky neighbor’s kid asked for seconds. That’s a win in my book.
- Unbelievably Delicious: The texture is creamy without being gluey, and the topping gets perfectly crispy. It’s comfort food at its best.
What sets this apart from other recipes is the method. I use a technique where you slightly undercook the pasta and let the sauce thicken just enough so it doesn’t turn into a soupy mess when you reheat it. I’ve been cooking for my family for over a decade, and this is the version I keep coming back to. It’s not just good—it’s the kind of mac and cheese that makes you close your eyes after the first bite. And for a busy parent, having something this reliable in your back pocket is priceless.
What Ingredients You Will Need
This recipe uses straightforward, budget-friendly ingredients that work together to create a rich, creamy sauce and a satisfying crunch on top. Most of these are pantry staples, which makes this perfect for those weeks when you’re trying to stretch your grocery budget.
- Elbow macaroni (1 pound or 454 grams) — I prefer Barilla or store brand; both work fine. Cook it one minute less than the package says so it doesn’t get mushy when baked.
- Unsalted butter (4 tablespoons or 56 grams) — This is the base of the roux. If you only have salted butter, just skip adding extra salt later.
- All-purpose flour (1/4 cup or 30 grams) — This thickens the cheese sauce. You can swap in a gluten-free flour blend if needed, but the texture might be slightly different.
- Whole milk (3 cups or 720 ml) — Whole milk gives the creamiest result. I’ve tried 2% and it works, but it’s not as luxurious. For a dairy-free option, unsweetened oat milk is my go-to.
- Heavy cream (1 cup or 240 ml) — This adds richness that makes the sauce feel indulgent. You can skip it and use all milk, but the sauce won’t be as thick.
- Sharp cheddar cheese (3 cups or 340 grams, shredded) — I recommend buying a block and shredding it yourself. Pre-shredded cheese has anti-caking agents that make the sauce grainy. Cabot and Tillamook are my favorites.
- Monterey Jack cheese (1 cup or 113 grams, shredded) — This melts beautifully and adds a mild creaminess. You can substitute mozzarella or colby jack.
- Dijon mustard (1 teaspoon) — Trust me on this. It doesn’t make it taste like mustard; it just brightens the cheese flavor. You can skip it if you’re out.
- Garlic powder (1/2 teaspoon) — Adds a subtle savory note without being overpowering.
- Salt (1 teaspoon) — Adjust to taste, especially if you’re using salted butter or a salty cheese.
- Black pepper (1/4 teaspoon) — Freshly ground is best, but pre-ground works too.
- Panko breadcrumbs (1 cup or 60 grams) — These create that crispy, golden topping. Regular breadcrumbs work, but panko gives a better crunch.
- Butter for topping (2 tablespoons or 28 grams, melted) — Mixed with the panko to help it brown evenly.
Equipment Needed
You don’t need a fancy kitchen to pull this off. Most of these tools are things you probably already own.
- Large pot (5-6 quart) — For boiling the pasta. I use my old enameled cast iron pot, but any large pot works.
- Medium saucepan — For making the cheese sauce. A heavy-bottomed one helps prevent scorching.
- 9×13 inch baking dish — This is the standard size for a full batch. If you want to make two smaller dishes, use 8×8 inch pans.
- Whisk — Essential for a smooth roux and cheese sauce. A silicone whisk is nice because it won’t scratch your pans.
- Wooden spoon or spatula — For stirring the pasta and sauce together.
- Box grater or food processor — For shredding cheese. I prefer grating by hand because it melts better, but a food processor with a grating disc saves time.
- Mixing bowls — One for the panko mixture, one for combining everything if you want to mix in the baking dish.
- Aluminum foil — For covering the dish if you’re making it ahead or if the top browns too quickly.
If you don’t have a whisk, a fork works in a pinch, but it takes more elbow grease. And honestly, I’ve used a butter knife to stir the roux before—it’s not ideal, but it gets the job done.
Preparation Method
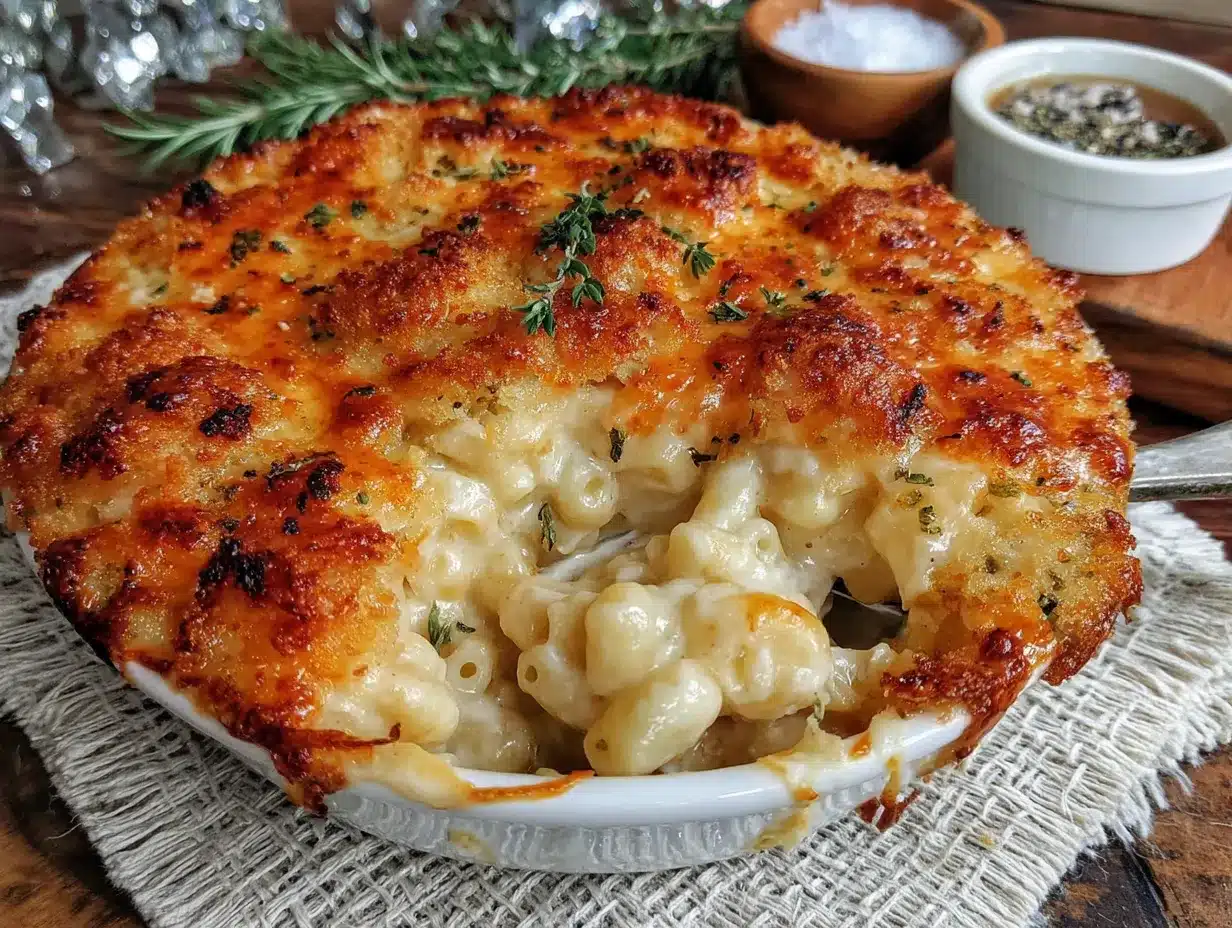
Let’s walk through this step by step. I’ll include the little details I’ve learned from making this a dozen times.
- Preheat your oven to 375°F (190°C). If you’re baking it right away, get the oven going. If you’re making it ahead, you can skip this for now and just preheat when you’re ready to bake.
- Boil the pasta. Fill your large pot with water, add a generous pinch of salt, and bring it to a rolling boil. Add the elbow macaroni and cook for 1 minute less than the package directions say. For most brands, that’s about 6-7 minutes. You want it al dente—firm to the bite. Drain it in a colander and set it aside. Don’t rinse it; you want that starch to help the sauce stick.
- Make the roux. In your medium saucepan, melt 4 tablespoons of butter over medium heat. Once it’s foamy, whisk in the flour. Keep whisking for about 1-2 minutes until it smells nutty and turns a light golden color. This is where you need to pay attention—if it burns, you have to start over. I learned that the hard way.
- Add the milk and cream. Slowly pour in the milk and heavy cream while whisking constantly. Keep whisking until the mixture thickens, about 3-4 minutes. It should coat the back of a spoon. If you see lumps, don’t panic—just whisk harder. They usually smooth out.
- Add the cheese and seasonings. Reduce the heat to low. Add the shredded cheddar and Monterey Jack cheese a handful at a time, stirring until each addition melts before adding more. Stir in the Dijon mustard, garlic powder, salt, and pepper. Taste it and adjust the salt—it should be slightly saltier than you want because the pasta will absorb some.
- Combine the pasta and sauce. Pour the drained macaroni into the saucepan (or transfer everything to a large bowl) and stir until every piece is coated. The sauce will seem thin, but it thickens as it bakes.
- Prepare the topping. In a small bowl, mix the panko breadcrumbs with 2 tablespoons of melted butter until the crumbs are evenly coated. This is what gives you that gorgeous golden crust.
- Assemble the dish. Pour the mac and cheese into your greased 9×13 inch baking dish. Spread it into an even layer. Sprinkle the buttered panko crumbs evenly over the top.
- Bake or make ahead. If baking immediately, place the dish in the oven and bake for 20-25 minutes until bubbly and the top is golden brown. If the top browns too fast, tent it with foil for the last 10 minutes. Let it rest for 5 minutes before serving—this helps it set up so it doesn’t slide off the plate.
Cooking Tips & Techniques
I’ve messed up this recipe enough times to know what works and what doesn’t. Here’s what I’ve learned.
Don’t overmix the sauce. I once stirred the cheese sauce for what felt like forever trying to get it smooth, and it turned into a stringy mess. Cheese is delicate—once it’s melted, stop stirring. Overworking it can cause the proteins to seize up and make it grainy.
Undercook the pasta on purpose. This is the biggest tip I can give you. If you cook the pasta all the way, it will absorb liquid from the sauce during baking and turn into mushy noodles. Cooking it one minute less means it stays firm and holds its shape. Trust me on this one—I’ve had to eat my share of mushy mac and cheese to figure it out.
Let it rest before serving. I know it’s hard to wait when the whole house smells like cheese and butter, but that 5-minute rest is crucial. It lets the sauce thicken up so you get neat servings instead of a soupy puddle. I learned this the hard way when I served it straight from the oven and it ran all over the plates.
If you’re making it ahead, cool it completely before covering. Putting a hot dish in the fridge creates condensation, which makes the topping soggy. Let it sit on the counter for about 30 minutes, then cover it with foil and refrigerate. For freezing, wrap it tightly in plastic wrap first, then foil.
Multitasking is your friend. While the pasta is boiling, you can shred the cheese and measure out the other ingredients. It saves time and keeps you from running around the kitchen like a crazy person.
Variations & Adaptations
One of the best things about this recipe is how flexible it is. Here are some ways I’ve adapted it for different needs.
Gluten-Free Version: Swap the all-purpose flour for a 1:1 gluten-free flour blend and use gluten-free pasta. The sauce might be slightly thinner, so let it cook an extra minute before adding the cheese. I’ve used this for a friend’s celiac kid and it worked great.
Add Some Veggies: I’ve thrown in steamed broccoli florets or sautéed mushrooms before baking. Just make sure you drain them well so they don’t water down the sauce. My kids don’t even notice the broccoli when it’s chopped small and mixed in.
Spice It Up: For the adults, I sometimes add a pinch of cayenne pepper or a dash of hot sauce to the cheese sauce. It doesn’t make it spicy—just adds a little warmth that makes the cheese flavor pop.
Protein Boost: Stir in some cooked, crumbled bacon or diced ham before baking. It turns this into a full meal that satisfies even the hungriest teenagers. I’ve also used leftover rotisserie chicken in a pinch.
Different Cheese Combos: If you don’t have Monterey Jack, try using gouda, havarti, or even pepper jack for a kick. Just keep the total cheese amount the same. I once used all cheddar and it was good, but not as creamy—the softer cheese really helps the texture.
Serving & Storage Suggestions
This mac and cheese is versatile when it comes to serving. Here’s how I handle it.
Serving Temperature: Serve it hot, straight from the oven. Let it rest those 5 minutes, then scoop it out with a large spoon. It’s great on its own or as a side dish with grilled chicken, meatloaf, or roasted vegetables.
What to Serve With It: A simple green salad with a tangy vinaigrette cuts through the richness perfectly. Or serve it with steamed green beans or roasted broccoli for a complete meal. My kids love it with a side of applesauce—don’t ask me why, but it works.
Storage Instructions: Leftovers keep in the fridge for up to 4 days in an airtight container. The topping will lose some crunch, but it still tastes great. To reheat, microwave individual portions for 1-2 minutes, or reheat the whole dish in a 350°F oven for about 15 minutes covered with foil.
Freezer Instructions: This freezes beautifully. Assemble the dish completely but don’t bake it. Wrap it tightly in plastic wrap, then foil, and freeze for up to 3 months. To bake from frozen, remove the plastic wrap, cover with foil, and bake at 375°F for about 45 minutes, then uncover and bake another 15 minutes until bubbly and golden.
Flavor Development: Honestly, this mac and cheese tastes even better the next day. The flavors meld together and the sauce thickens up perfectly. If you’re making it for a special occasion, making it a day ahead is actually a smart move.
Nutritional Information & Benefits
I’m not a nutritionist, but I’ve done my best to estimate the values for a standard serving. Keep in mind that these will vary based on the exact ingredients you use.
Per serving (about 1 cup, based on 8 servings):
- Calories: 520
- Protein: 22g
- Carbohydrates: 45g
- Fat: 28g
- Saturated Fat: 16g
- Calcium: 350mg (35% DV)
- Iron: 2mg (11% DV)
The cheese provides a good amount of calcium and protein, which is great for growing kids. The pasta offers energy from complex carbs, and the milk adds vitamin D and B vitamins. If you’re watching sodium, you can use low-sodium cheese or reduce the added salt. This recipe is not gluten-free or dairy-free as written, but I’ve included adaptations above. It’s also not suitable for vegans, but you could try a plant-based cheese alternative—though I haven’t tested that myself.
From a wellness perspective, I think this dish is about balance. It’s a comfort food that brings the family together, and that has its own kind of nutritional value. I don’t make it every week, but when I do, I feel good knowing everyone is getting a warm, satisfying meal.
Conclusion
This kid-approved make-ahead baked mac and cheese has become a staple in my kitchen for good reason. It solves the real problem of getting dinner on the table when you’re short on time and patience. The creamy cheese sauce, the perfectly cooked pasta, and that crispy golden topping—it’s everything you want in comfort food. And knowing you can make it ahead and have it ready in the freezer is a game-changer.
I hope you give this recipe a try and make it your own. Maybe you’ll add some bacon or sneak in some veggies. Maybe you’ll double it for a potluck or a holiday gathering. Whatever you do, I’d love to hear about it. Drop a comment below and let me know how it turned out for your family. Did the kids ask for seconds? Did you find a new favorite variation? Share your photos and tag me—I’m always looking for inspiration.
Thanks for stopping by, and happy cooking. You’ve got this.
Frequently Asked Questions
Can I use pre-shredded cheese for this recipe?
You can, but I don’t recommend it. Pre-shredded cheese is coated with anti-caking agents that prevent it from melting smoothly, which can make your sauce grainy. Shredding a block of cheese takes just a few extra minutes and makes a big difference in the final texture.
How long can I keep this in the fridge before baking?
You can assemble the dish and keep it in the fridge for up to 2 days before baking. Just make sure it’s covered tightly with foil or plastic wrap. If you’re planning to bake it later, you might want to add the panko topping right before baking so it stays crunchy.
Can I double this recipe?
Absolutely. Just use a larger baking dish or split it between two 9×13 pans. The cooking time might increase by about 5-10 minutes if you’re using one big dish. Just keep an eye on it and look for that bubbly, golden top.
Why did my cheese sauce turn out lumpy?
Lumpy cheese sauce usually happens when the heat is too high or the cheese is added too quickly. Make sure you’re on low heat when you add the cheese, and add it a handful at a time, stirring until each addition melts. If it still gets lumpy, you can try whisking in a splash of milk to smooth it out.
Can I make this without heavy cream?
Yes, you can use all milk instead of the cream. The sauce will be slightly less rich and a bit thinner, but it will still taste great. Whole milk works best, but you can use 2% in a pinch. Just be aware that the sauce might not thicken as much.
Pin This Recipe!
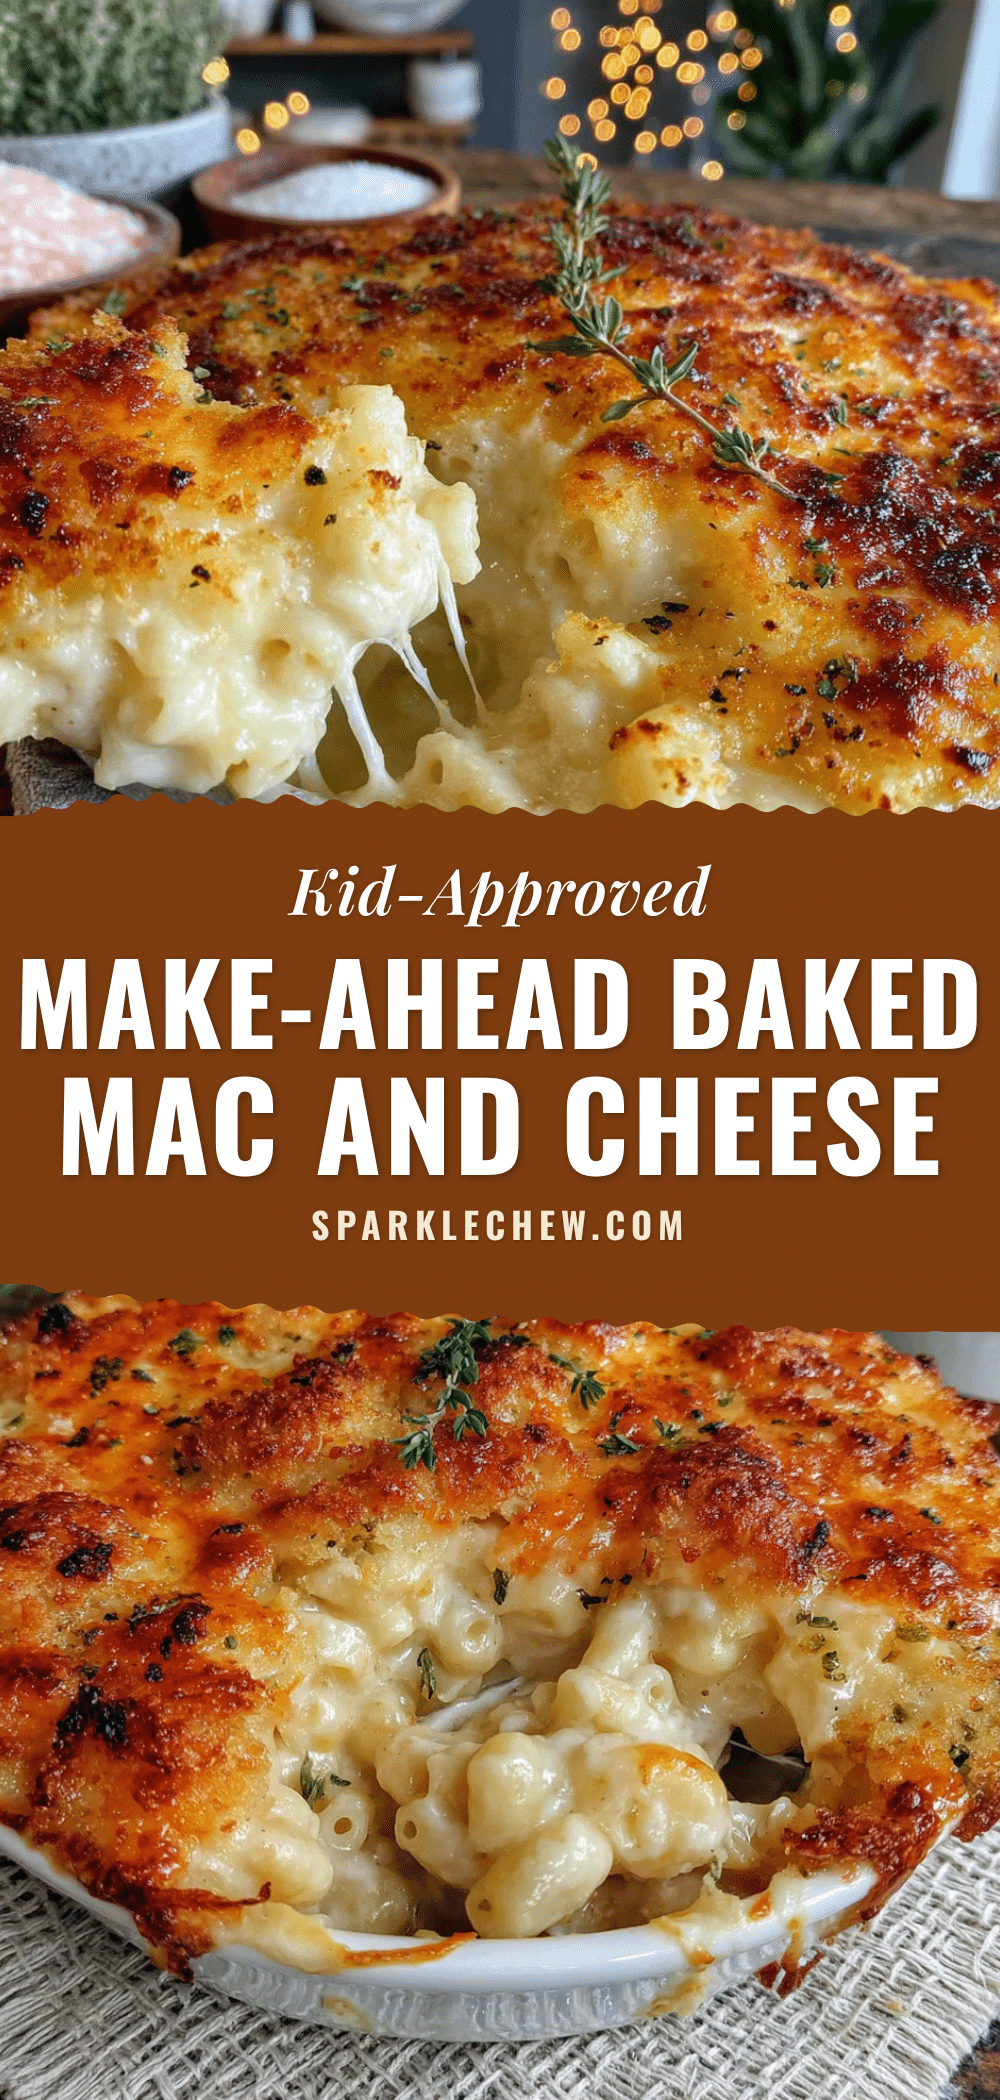
Kid-Approved Make-Ahead Baked Mac and Cheese: Easy & Best Recipe

This creamy, cheesy baked mac and cheese with a golden, crispy topping is perfect for busy weeknights. Make it ahead, stash it in the fridge or freezer, and bake it off whenever you need a comforting meal that everyone will love.
- Prep Time: 20 minutes
- Cook Time: 25 minutes
- Total Time: 45 minutes
- Yield: 8 servings 1x
- Category: Main Course
- Cuisine: American
Ingredients
- 1 pound (454 grams) elbow macaroni
- 4 tablespoons (56 grams) unsalted butter
- 1/4 cup (30 grams) all-purpose flour
- 3 cups (720 ml) whole milk
- 1 cup (240 ml) heavy cream
- 3 cups (340 grams) sharp cheddar cheese, shredded
- 1 cup (113 grams) Monterey Jack cheese, shredded
- 1 teaspoon Dijon mustard
- 1/2 teaspoon garlic powder
- 1 teaspoon salt
- 1/4 teaspoon black pepper
- 1 cup (60 grams) panko breadcrumbs
- 2 tablespoons (28 grams) unsalted butter, melted (for topping)
Instructions
- Preheat your oven to 375°F (190°C). If baking immediately, preheat now; if making ahead, preheat when ready to bake.
- Boil the pasta: Fill a large pot with water, add a generous pinch of salt, and bring to a rolling boil. Add elbow macaroni and cook for 1 minute less than package directions (about 6-7 minutes). Drain in a colander and set aside. Do not rinse.
- Make the roux: In a medium saucepan, melt 4 tablespoons of butter over medium heat. Once foamy, whisk in the flour. Continue whisking for 1-2 minutes until it smells nutty and turns light golden.
- Add the milk and cream: Slowly pour in the milk and heavy cream while whisking constantly. Keep whisking until the mixture thickens, about 3-4 minutes, until it coats the back of a spoon.
- Add the cheese and seasonings: Reduce heat to low. Add shredded cheddar and Monterey Jack cheese a handful at a time, stirring until each addition melts. Stir in Dijon mustard, garlic powder, salt, and pepper. Taste and adjust salt if needed.
- Combine pasta and sauce: Pour the drained macaroni into the saucepan (or transfer to a large bowl) and stir until every piece is coated. The sauce will seem thin but thickens as it bakes.
- Prepare the topping: In a small bowl, mix panko breadcrumbs with 2 tablespoons of melted butter until evenly coated.
- Assemble the dish: Pour the mac and cheese into a greased 9×13 inch baking dish and spread into an even layer. Sprinkle the buttered panko crumbs evenly over the top.
- Bake or make ahead: If baking immediately, place in the oven and bake for 20-25 minutes until bubbly and the top is golden brown. If the top browns too fast, tent with foil for the last 10 minutes. Let rest for 5 minutes before serving.
Notes
Undercook the pasta by 1 minute to prevent mushiness. Let the dish rest for 5 minutes before serving to allow the sauce to thicken. For make-ahead, cool completely before covering and refrigerating. For freezing, wrap tightly in plastic wrap then foil. The topping may lose some crunch upon reheating.
Nutrition
- Serving Size: 1 cup
- Calories: 520
- Sugar: 6
- Sodium: 680
- Fat: 28
- Saturated Fat: 16
- Carbohydrates: 45
- Fiber: 2
- Protein: 22
Keywords: baked mac and cheese, make-ahead mac and cheese, kid-friendly mac and cheese, easy mac and cheese, creamy mac and cheese, freezer meal, comfort food