Love this? Save it for later!
Share the inspiration with your friends
I was at the hardware store, of all places, picking up a new drill bit—don’t ask—when the cashier, a woman named Carol who looked like she’d rather be napping, started describing a pie she’d made for her grandson’s birthday. I wasn’t expecting a dessert revelation between the paint samples and the lightbulbs, but there I was, holding a receipt for a power tool, listening to her explain exactly how to make a Creamy No-Bake Peanut Butter Oreo Pie. She said it was the only thing the kid asked for, year after year. I scribbled the gist on the back of a coupon for lawn bags. Honestly, it sounded too simple to be good. But Carol had this look—the look of someone who knows they’re holding a winning hand. So I tried it that weekend. Let me tell you, she was right. It’s the kind of pie that makes you wonder why you ever bothered with a complicated, oven-baked dessert. Maybe you’ve been there, standing in an aisle you don’t belong in, only to find the exact thing you didn’t know you were looking for. That’s this pie for me.
Why You’ll Love This Recipe
This isn’t your average chocolate and peanut butter pie. It’s the one I bring to every potluck, the one that gets devoured before the salad is even touched. After years of tweaking and testing—and yes, a few crumbly disasters—I’ve landed on the absolute best version. It’s a crowd-pleaser because it hits that perfect sweet-salty-creamy-crunchy note that everyone craves.
- Quick & Easy: Comes together in about 20 minutes of active time. No oven required, which is a lifesaver in the summer or when you just don’t feel like turning on the heat.
- Simple Ingredients: You’ll find almost everything in your pantry right now. Cream cheese, peanut butter, Oreos, and heavy cream. That’s the heart of it.
- Perfect for Any Occasion: It’s fancy enough for a holiday table but casual enough for a Tuesday night craving. It’s my go-to for birthday parties, game day, and “I-need-dessert-now” emergencies.
- Crowd-Pleaser: I’ve served it to kids, grandparents, and my picky uncle who “doesn’t like sweets.” They all went back for seconds. It’s a guaranteed hit.
- Unbelievably Delicious: The filling is silky and rich, not too heavy, with a perfect peanut butter kick. The Oreo crust adds that chocolate crunch that makes every bite a little different.
What makes this recipe different from the rest? It’s the technique. I use a small trick of whipping the cream cheese and peanut butter until it’s light and airy before folding in the whipped cream. This prevents the pie from being dense or gluey. It’s a simple step, but it makes the texture dreamy. This isn’t just another no-bake pie—it’s my best version. It’s the kind of dessert that makes you close your eyes after the first bite, because it’s just that good. It’s comfort food reimagined—faster, easier, but with the same soul-soothing satisfaction. Perfect for impressing guests without stress, or turning a simple meal into something memorable.
What Ingredients You Will Need
This recipe uses simple, wholesome ingredients to deliver bold flavor and satisfying texture without the fuss. Most of these are pantry staples, making this an easy last-minute dessert.
- For the Oreo Crust:
- 24 regular Oreo cookies (about 2 ½ cups of crumbs)
- 5 tablespoons unsalted butter, melted (use salted butter and skip the salt if that’s all you have)
- Pinch of salt (optional, but it balances the sweetness)
- For the Peanut Butter Filling:
- 8 ounces full-fat cream cheese, softened (the block kind, not the tub—it makes a big difference for texture)
- 1 cup creamy peanut butter (I prefer Skippy or Jif for that classic taste; natural peanut butter can be a bit oily and make the filling grainy)
- 1 cup powdered sugar, sifted
- 1 teaspoon vanilla extract
- 1 cup heavy whipping cream (cold)
- For the Topping (optional but recommended):
- ½ cup heavy whipping cream (cold)
- 2 tablespoons powdered sugar
- ¼ teaspoon vanilla extract
- Crushed Oreos, for garnish
- Chocolate shavings or a drizzle of melted peanut butter (for a fancy finish)
A few notes on ingredients. For the peanut butter, I recommend using a standard commercial brand for the best texture. Natural peanut butter can separate and make the filling a bit oily. For the cream cheese, make sure it’s fully softened to room temperature, or you’ll end up with lumps. I’ve made that mistake before—it’s not the end of the world, but the texture won’t be as smooth. If you want a dairy-free version, you can use a dairy-free cream cheese and a coconut cream-based whipped topping, but the flavor will be slightly different.
Equipment Needed
You don’t need a lot of fancy gear for this pie. Here’s what you’ll need:
- 9-inch pie plate (a deep-dish one is ideal)
- Food processor or blender (for crushing the Oreos into fine crumbs. A rolling pin and a zip-top bag work too, but it’s a bit more work)
- Electric hand mixer or stand mixer (a whisk and a strong arm can work, but it’ll take a while)
- Large mixing bowls
- Spatula
- Measuring cups and spoons
If you don’t have a food processor, just place the Oreos in a large zip-top bag and crush them with a rolling pin. It’s a good arm workout! For the whipped cream, a hand mixer is your best friend. I’ve tried whisking by hand, and honestly, it’s not worth the effort. Your arm will thank you.
Preparation Method
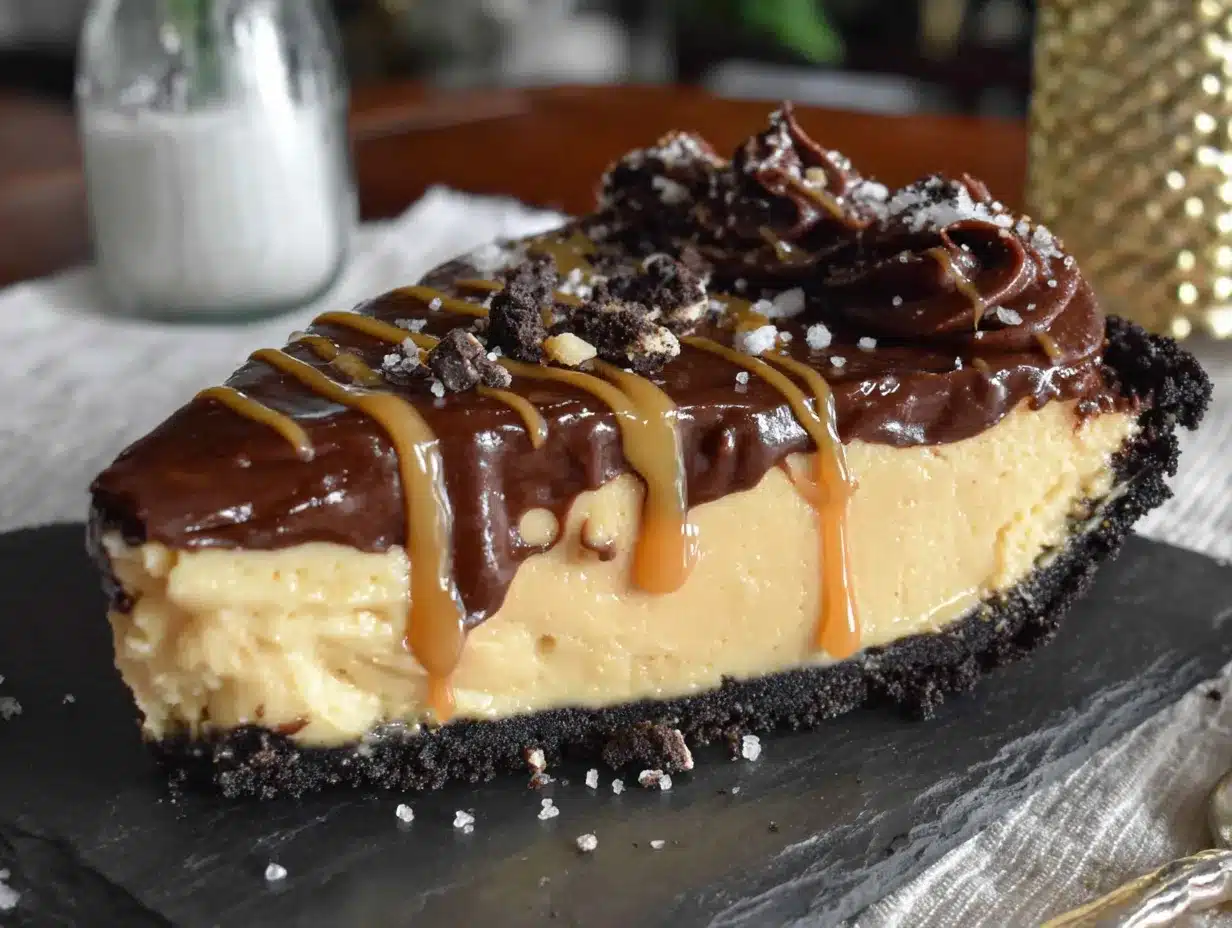
- Make the Oreo Crust: Place the 24 Oreo cookies in a food processor and pulse until they become fine crumbs. You should have about 2 ½ cups. In a medium bowl, combine the Oreo crumbs with the melted butter and a pinch of salt. Stir until the crumbs are evenly moistened. Press the mixture firmly and evenly into the bottom and up the sides of your 9-inch pie plate. Use the bottom of a measuring cup to really pack it down—this prevents it from crumbling when you cut slices. Place the crust in the refrigerator to set while you make the filling.
- Whip the Cream: In a large, chilled bowl, pour the 1 cup of cold heavy whipping cream. Using an electric hand mixer, beat on medium-high speed until soft peaks form. This means the cream will hold its shape when you lift the beaters, but the peaks will flop over slightly. Be careful not to over-whip, or you’ll end up with butter. Set the whipped cream aside.
- Make the Peanut Butter Filling: In another large bowl, beat the softened cream cheese with the peanut butter using an electric mixer on medium speed until smooth and creamy. This takes about 2 minutes. Scrape down the sides of the bowl with a spatula. Add the sifted powdered sugar and vanilla extract, and beat until combined. The mixture will be thick and a bit sticky.
- Fold in the Whipped Cream: Gently fold the whipped cream into the peanut butter mixture. Use a rubber spatula and a gentle, sweeping motion. Fold until no white streaks remain. Be careful not to overmix, or the filling will deflate and become dense. The filling should look light, airy, and mousse-like.
- Assemble the Pie: Pour the filling into the prepared Oreo crust. Spread it evenly with the spatula. If you’re making the whipped cream topping, now is the time. In a clean bowl, beat the remaining ½ cup of heavy cream with 2 tablespoons of powdered sugar and ¼ teaspoon of vanilla until stiff peaks form. Pipe or spread the whipped cream over the pie. I like to pipe it in a decorative pattern, but a simple swirl works too.
- Chill and Set: Cover the pie with plastic wrap or aluminum foil and refrigerate for at least 6 hours, or overnight. This is crucial. The pie needs time to set up properly. If you try to cut it too soon, the filling will be too soft and will slide right off the crust. Patience is key here.
- Garnish and Serve: Before serving, garnish with crushed Oreos, chocolate shavings, or a drizzle of melted peanut butter. Slice with a sharp knife, wiping the blade clean between cuts for neat slices. Serve cold.
Troubleshooting tip: If your filling seems too soft after chilling, it might be that the cream cheese wasn’t fully softened, or the whipped cream was slightly under-whipped. Next time, make sure your cream cheese is at room temperature and your cream is very cold. If you’re in a rush, you can pop the pie in the freezer for about an hour to speed up the setting process, but don’t leave it in there too long or it will become icy.
Cooking Tips & Techniques
Here are a few things I’ve learned from making this pie more times than I can count. First, don’t skip the step of sifting the powdered sugar. I know, it’s annoying, but it prevents little lumps from forming in your filling. I learned this the hard way after making a pie that had a few gritty spots. Not a disaster, but not perfect.
Second, the crust is everything. You want it to be compact. If it’s too loose, it will fall apart when you try to serve the pie. I use the bottom of a measuring cup to really press it into the pan. It makes a huge difference. Also, don’t be shy with the butter. If the crumbs look dry, add a little more melted butter. The mixture should feel like wet sand.
Third, timing. This is a great make-ahead dessert. I often make it the day before a party. The flavors actually meld together and get better overnight. The peanut butter gets a little more intense, and the crust softens just slightly, making it even more delicious. Just don’t add the whipped cream topping until a few hours before serving, or it might start to weep.
One common mistake is over-mixing the filling after adding the whipped cream. You want to fold gently until it’s just combined. If you mix too vigorously, you’ll deflate the air you worked so hard to create, and the pie will be dense. I’ve done this before—it’s still tasty, just not as light and dreamy.
Finally, if you’re using a metal pie plate, the crust might set up a bit faster. Glass or ceramic plates take a little longer to chill, but they work just as well. Just be patient.
Variations & Adaptations
This pie is a fantastic base recipe that you can adapt in so many ways. Here are a few of my favorites:
- Chocolate Lover’s Version: Add ½ cup of melted and slightly cooled semi-sweet chocolate to the peanut butter filling. You’ll get a chocolate-peanut butter swirl effect that’s absolutely divine. Top with a drizzle of chocolate ganache.
- Gluten-Free Option: Use gluten-free chocolate sandwich cookies for the crust. Most major brands have a gluten-free version that works perfectly. The rest of the ingredients are naturally gluten-free.
- Vegan Adaptation: Use a dairy-free cream cheese and a coconut cream-based whipped topping. For the crust, use vegan butter. The texture will be a bit different, but it’s still incredibly delicious.
- Add a Crunch: Fold ½ cup of crushed peanuts or toffee bits into the filling for extra texture. This is my husband’s favorite version.
- Make it a Layered Pie: Spread a layer of chocolate ganache or hot fudge on the crust before adding the peanut butter filling. It creates a beautiful, decadent layer that’s a nice surprise.
I once tried a version with a layer of strawberry jam on the crust. It was a bit of a risk, but the sweet-tartness of the jam paired beautifully with the rich peanut butter and chocolate. It’s now a summer staple for me. Don’t be afraid to experiment!
Serving & Storage Suggestions
This pie is best served cold, straight from the refrigerator. The filling is firm but creamy, and the crust is perfectly crunchy. I like to let it sit at room temperature for about 5 minutes before slicing to make cutting easier. It makes the filling just a little bit softer.
For a beautiful presentation, garnish with a dollop of whipped cream, a sprinkle of crushed Oreos, and a few chocolate shavings. You can also drizzle it with melted peanut butter or chocolate sauce. It’s a showstopper on any dessert table.
This pie pairs wonderfully with a tall glass of cold milk, a cup of hot coffee, or even a scoop of vanilla ice cream on the side. It’s also great with a glass of red wine for a more adult pairing—the richness of the pie plays nicely with a fruity, not-too-tannic wine.
Storage: Cover the pie tightly with plastic wrap or aluminum foil and store it in the refrigerator for up to 5 days. The flavors actually get better after a day or two. You can also freeze the pie for up to 2 months. Wrap it well in plastic wrap and then in foil. Thaw it in the refrigerator overnight before serving. The texture might be slightly different after freezing, but it’s still delicious.
Reheating: This is a no-bake pie, so reheating isn’t really a thing. If you want to soften the filling slightly, let it sit at room temperature for 10-15 minutes. For the crust, avoid any heat, as it will make it soggy.
Nutritional Information & Benefits
Let’s be real: this is a treat, not a health food. But it’s made with real ingredients, and there are a few benefits to note. Peanut butter is a good source of protein and healthy fats, which can help keep you full. The cream cheese provides a bit of calcium. And hey, dark chocolate (if you use it for garnish) has antioxidants.
Here are the estimated nutritional values for one slice (based on 10 servings):
- Calories: ~450
- Fat: ~32g
- Carbohydrates: ~35g
- Protein: ~10g
- Sugar: ~22g
Dietary considerations: This recipe contains dairy, peanuts, and gluten (from the Oreos). For a gluten-free version, use gluten-free cookies. For a dairy-free version, use plant-based substitutes. It is not suitable for those with peanut allergies, but you can try using sunflower seed butter or almond butter as a substitute.
I believe in balance. This pie is for celebrations, for comfort, for when you just need a little something special. Enjoy it without guilt, and savor every bite.
Conclusion
This Creamy No-Bake Peanut Butter Oreo Pie is one of those recipes that feels like a secret weapon. It’s so easy to make, yet it looks and tastes like you spent hours in the kitchen. It’s the pie that Carol from the hardware store swore by, and now I’m passing it on to you. It’s perfect for any occasion, from a casual weeknight treat to a fancy holiday dinner.
I encourage you to make it your own. Add your favorite toppings, try different cookies for the crust, or experiment with the fillings. The beauty of this recipe is its versatility. And when you make it, I’d love to hear about it! Leave a comment below and let me know how it turned out. Did you add a secret ingredient? Did your family love it? Share your stories—I read every single one.
So go ahead, give it a try. I promise you won’t regret it. It might just become your new favorite dessert, too. Happy baking—or, in this case, happy no-baking!
Frequently Asked Questions
Can I use natural peanut butter?
You can, but the texture might be a bit grainier and the filling could be a little oily. I recommend using a standard commercial peanut butter like Skippy or Jif for the best, creamiest results.
How long does this pie need to chill?
At least 6 hours, but overnight is best. This allows the filling to set up properly so you can get clean slices. If you’re in a rush, you can freeze it for about an hour, but don’t leave it in the freezer too long or it will become icy.
Can I make this pie ahead of time?
Absolutely! This pie is perfect for making a day in advance. The flavors meld together beautifully overnight. Just add the whipped cream topping a few hours before serving to keep it looking fresh.
Can I use a different type of cookie for the crust?
Yes! You can use chocolate wafer cookies, graham crackers, or even vanilla wafers. Just adjust the amount of butter as needed. The key is to have about 2 ½ cups of fine crumbs.
How do I get neat slices?
Use a sharp knife and wipe it clean between each cut. You can also run the knife under hot water, dry it off, and then slice. This helps the knife glide through the filling without sticking.
Pin This Recipe!
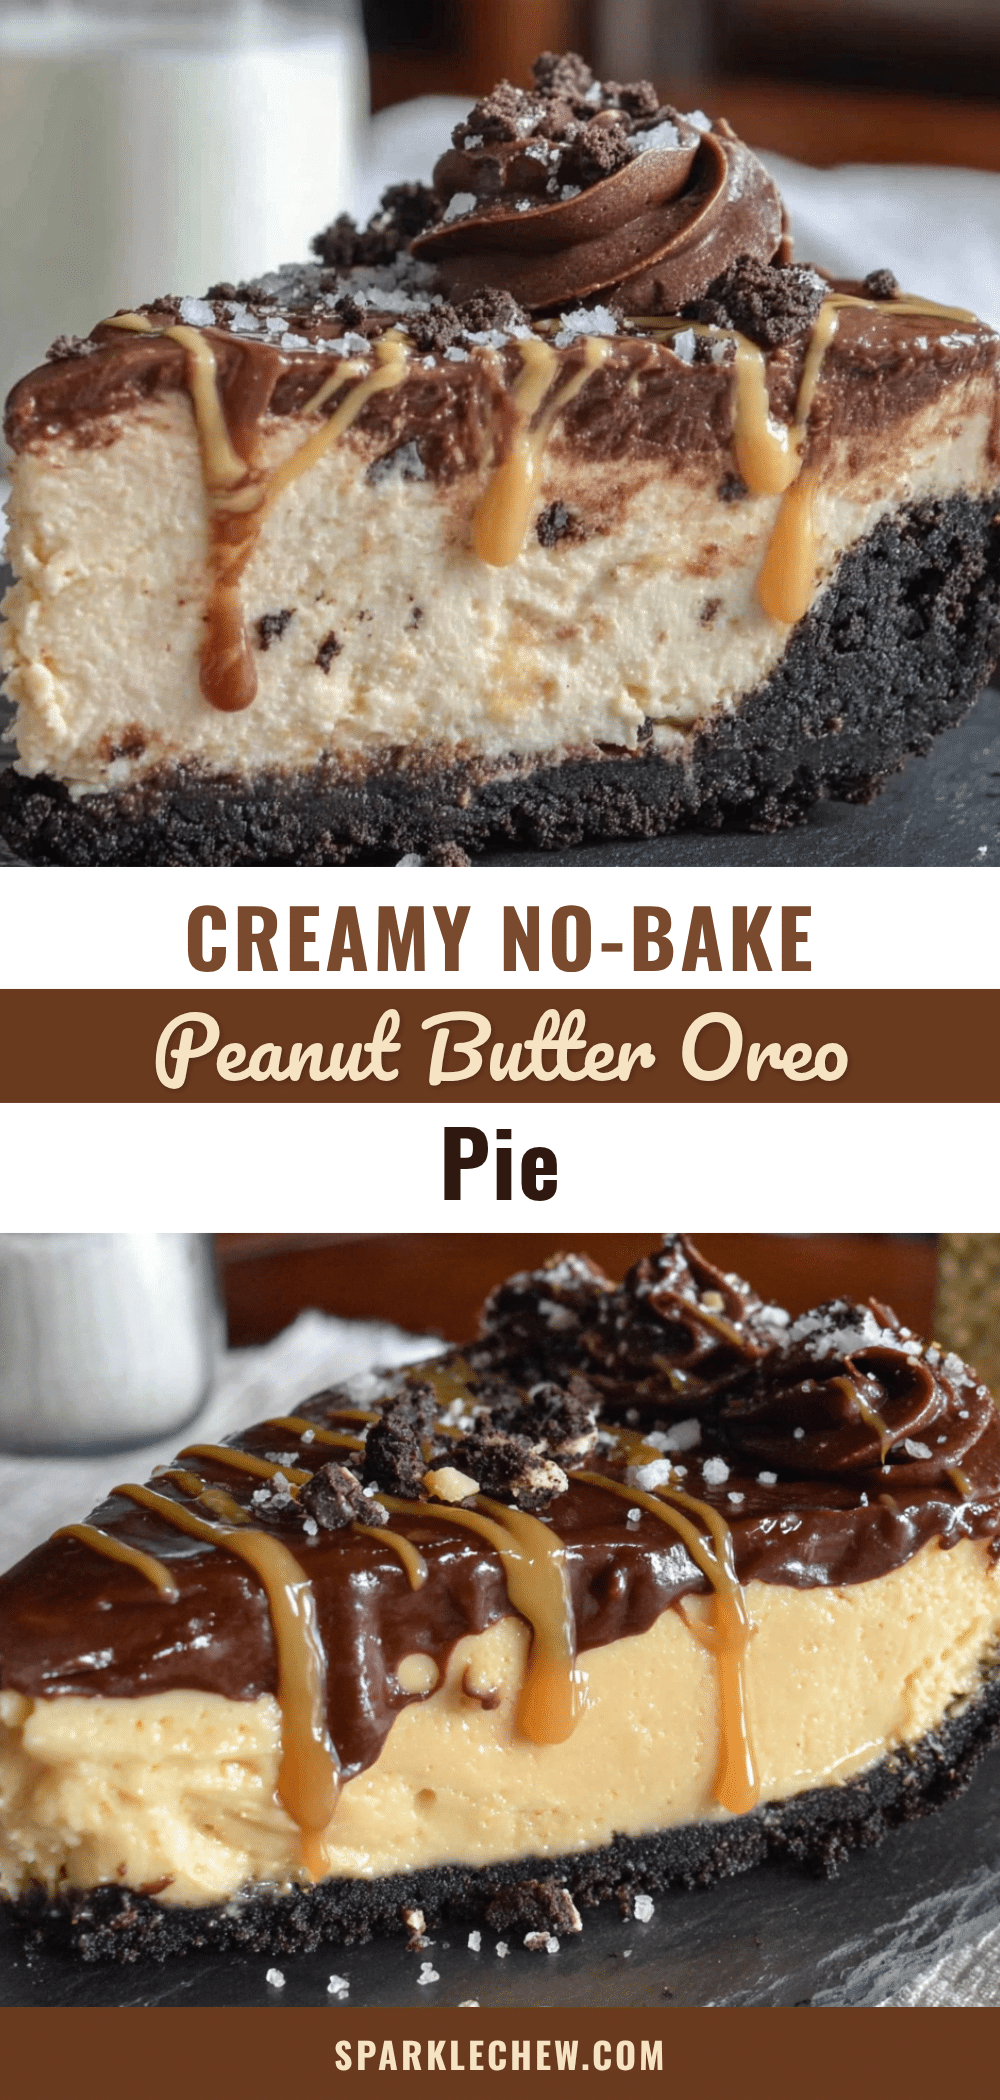
Creamy No-Bake Peanut Butter Oreo Pie: Best Easy Dessert

This no-bake peanut butter Oreo pie is a crowd-pleaser with a silky, rich filling and a crunchy chocolate crust. It’s quick to make, requires no oven, and is perfect for any occasion.
- Prep Time: 20 minutes
- Cook Time: 0 minutes
- Total Time: 6 hours 20 minutes (includes chilling)
- Yield: 10 servings 1x
- Category: Dessert
- Cuisine: American
Ingredients
- 24 regular Oreo cookies (about 2 ½ cups of crumbs)
- 5 tablespoons unsalted butter, melted
- Pinch of salt (optional)
- 8 ounces full-fat cream cheese, softened
- 1 cup creamy peanut butter (e.g., Skippy or Jif)
- 1 cup powdered sugar, sifted
- 1 teaspoon vanilla extract
- 1 cup heavy whipping cream (cold)
- ½ cup heavy whipping cream (cold, for topping)
- 2 tablespoons powdered sugar (for topping)
- ¼ teaspoon vanilla extract (for topping)
- Crushed Oreos, for garnish
- Chocolate shavings or a drizzle of melted peanut butter (optional)
Instructions
- Make the Oreo Crust: Place the 24 Oreo cookies in a food processor and pulse until they become fine crumbs. In a medium bowl, combine the Oreo crumbs with the melted butter and a pinch of salt. Stir until the crumbs are evenly moistened. Press the mixture firmly and evenly into the bottom and up the sides of a 9-inch pie plate. Use the bottom of a measuring cup to pack it down. Place the crust in the refrigerator to set while you make the filling.
- Whip the Cream: In a large, chilled bowl, pour the 1 cup of cold heavy whipping cream. Using an electric hand mixer, beat on medium-high speed until soft peaks form. Set aside.
- Make the Peanut Butter Filling: In another large bowl, beat the softened cream cheese with the peanut butter using an electric mixer on medium speed until smooth and creamy, about 2 minutes. Scrape down the sides of the bowl. Add the sifted powdered sugar and vanilla extract, and beat until combined.
- Fold in the Whipped Cream: Gently fold the whipped cream into the peanut butter mixture using a rubber spatula. Fold until no white streaks remain. Be careful not to overmix.
- Assemble the Pie: Pour the filling into the prepared Oreo crust and spread evenly. For the topping, in a clean bowl, beat the remaining ½ cup of heavy cream with 2 tablespoons of powdered sugar and ¼ teaspoon of vanilla until stiff peaks form. Pipe or spread the whipped cream over the pie.
- Chill and Set: Cover the pie with plastic wrap or aluminum foil and refrigerate for at least 6 hours, or overnight.
- Garnish and Serve: Before serving, garnish with crushed Oreos, chocolate shavings, or a drizzle of melted peanut butter. Slice with a sharp knife, wiping the blade clean between cuts. Serve cold.
Notes
For best texture, use full-fat cream cheese and a standard commercial peanut butter. Make sure cream cheese is fully softened to room temperature to avoid lumps. Sift powdered sugar to prevent lumps. The crust must be packed firmly to prevent crumbling. Chill the pie for at least 6 hours or overnight for clean slices. The pie can be made a day ahead; add whipped cream topping a few hours before serving. For a gluten-free version, use gluten-free chocolate sandwich cookies. For a dairy-free version, use plant-based substitutes.
Nutrition
- Serving Size: 1 slice (1/10 of pie
- Calories: 450
- Sugar: 22
- Sodium: 320
- Fat: 32
- Saturated Fat: 15
- Carbohydrates: 35
- Fiber: 2
- Protein: 10
Keywords: no-bake pie, peanut butter pie, Oreo pie, easy dessert, no-bake dessert, peanut butter Oreo pie, creamy pie