Love this? Save it for later!
Share the inspiration with your friends
My neighbor, Mrs. Kowalski, watched me trying to crack an egg one-handed for about thirty seconds before she finally spoke up. “You’re making a mess, and you’re wasting the yolk,” she said, not unkindly. I was twenty-two, living in my first real apartment, and attempting to impress a few friends with a holiday party. She was in her late seventies, a retired home economics teacher who still wore an apron while gardening. She didn’t offer to help, not exactly. She just started pulling ingredients from my sparse pantry—eggs, milk, sugar, vanilla—and told me to get the nutmeg from her house. “The whole one,” she said. “Not that pre-ground dust.”
That afternoon, standing in my tiny kitchen while snow piled up on the windowsill, she taught me how to make old-fashioned cooked eggnog. It wasn’t a formal lesson. She just talked about her husband’s family, who had made it every Christmas Eve for generations, and I stirred and listened. I messed up the tempering process twice—the first batch curdled into sweet scrambled eggs. She didn’t sigh or scold. She just poured it out, handed me a clean bowl, and said, “Now you know what not to do.” Honestly, that’s how I learn best. By the third try, the mixture was silky and thick, and the fresh nutmeg she grated over the top smelled like nothing I had ever experienced from a spice jar.
This recipe is the one we made together that day. It’s an easy old-fashioned cooked eggnog with fresh nutmeg, and it has become my signature holiday offering. Maybe you’ve been there—standing in a grocery aisle, staring at a carton of mass-produced eggnog, and wondering why it never tastes quite right. This version is different. It’s rich without being cloying, perfectly spiced, and completely safe to serve because the eggs are gently cooked. I keep making it because every sip reminds me that the best recipes aren’t just about food—they’re about the person who took the time to show you how.
Why You’ll Love This Recipe
This isn’t just another eggnog recipe. It’s the one that will make your holiday guests ask for the recipe before they even finish their first cup. Here’s why this easy old-fashioned cooked eggnog with fresh nutmeg stands out from the rest:
- Quick & Easy: Despite sounding fancy, this comes together in about 20 minutes of active time. It’s perfect for busy weeknights during the holiday season when you need something special without the all-day project.
- Simple Ingredients: You likely have everything in your kitchen right now—eggs, milk, cream, sugar, vanilla. The only “special” ingredient is a whole nutmeg, and most grocery stores carry them near the spice aisle.
- Perfect for Holiday Gatherings: Whether it’s a Christmas Eve open house, a New Year’s brunch, or just a quiet Tuesday night when you need some comfort, this eggnog fits the bill.
- Crowd-Pleaser: I’ve served this to kids, grandparents, and everyone in between. It gets rave reviews every single time. The texture is like drinking a warm hug.
- Unbelievably Delicious: The combination of velvety custard and freshly grated nutmeg is next-level. You will close your eyes after the first sip—I promise.
What makes this recipe different from all the others? It’s the cooking method. Many old-fashioned eggnog recipes use raw eggs, which can be a concern for some people. This version gently cooks the eggs into a custard base, giving you that same rich, creamy texture without any worries. And the fresh nutmeg? It’s non-negotiable. Pre-ground nutmeg loses its volatile oils quickly and tastes dusty by comparison. Grating it fresh right before serving makes this eggnog taste like it came from a fancy cocktail bar, not your home kitchen.
This isn’t just good eggnog—it’s the kind that makes you forget about the store-bought stuff forever. It’s comfort in a cup, made with a little patience and a lot of love.
What Ingredients You Will Need
This easy old-fashioned cooked eggnog with fresh nutmeg uses simple, wholesome ingredients to deliver that classic holiday flavor without any fuss. Most of these are pantry staples, so you might not even need a trip to the store.
For the Eggnog Base
- 6 large egg yolks (room temperature works best for smooth tempering; save the whites for another use, like a frittata or meringue cookies)
- ¾ cup granulated sugar (I prefer a standard white sugar for the cleanest flavor, but organic cane sugar works beautifully too)
- 2 cups whole milk (full-fat is key here for richness—low-fat or skim will make a thinner, less satisfying nog)
- 1 cup heavy cream (this adds the luxurious texture; don’t substitute with half-and-half if you can avoid it)
- 1 whole vanilla bean (or 2 teaspoons pure vanilla extract; I personally recommend Nielsen-Massey vanilla for the best depth of flavor)
- ½ teaspoon fine sea salt (just a pinch to balance the sweetness and brighten the flavors)
For the Spice and Finish
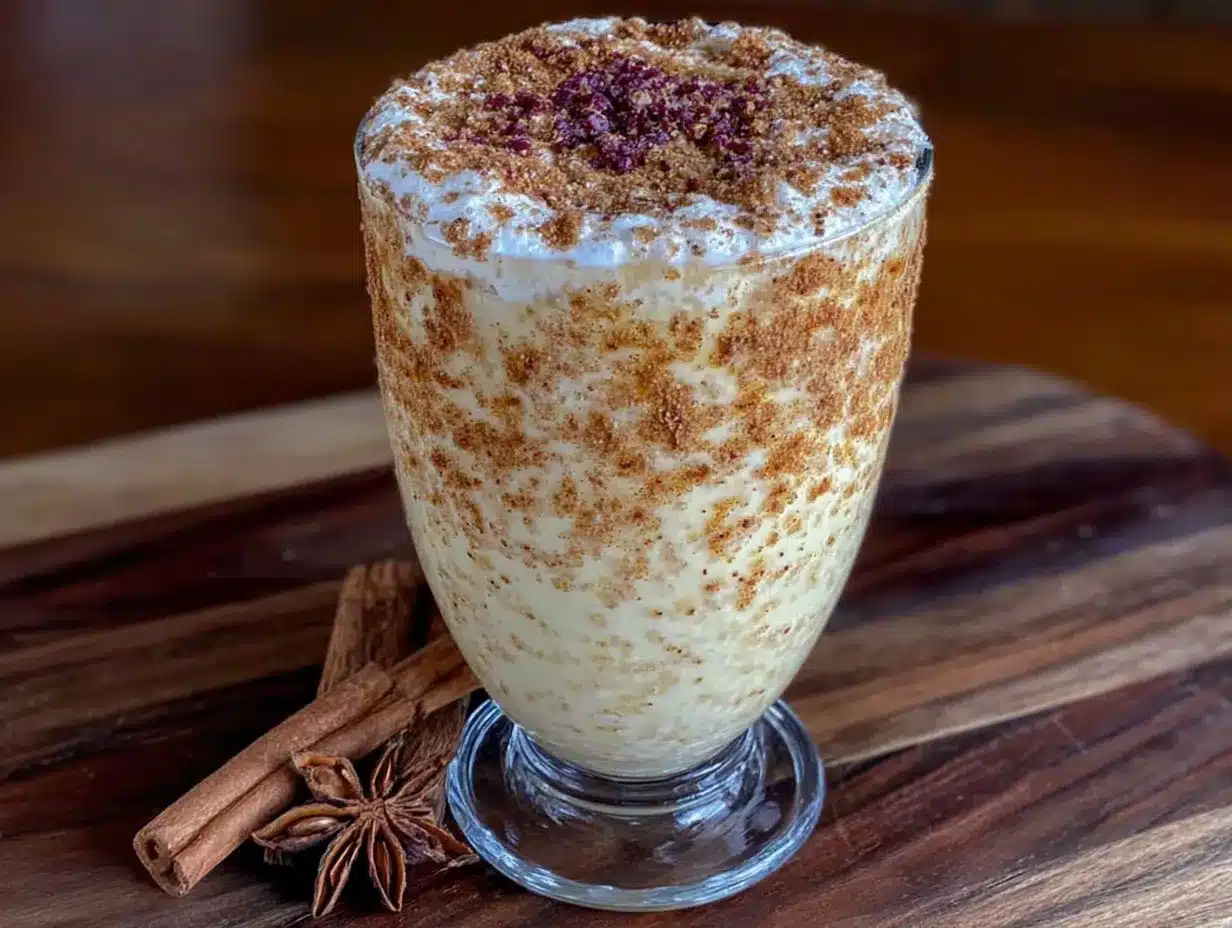
- 1 whole nutmeg (this is the star of the show—buy whole nutmegs and grate them fresh; they keep for months in a sealed jar)
- Optional: ½ cup bourbon, dark rum, or brandy (for an adult version; add after cooking so the alcohol doesn’t cook off entirely)
- Optional: ½ teaspoon ground cinnamon (for extra warmth, though fresh nutmeg is really the signature here)
Ingredient Selection Tips
I always use organic, pasture-raised eggs when I can find them. The yolks are a deeper orange, which gives the eggnog a beautiful golden color. For the dairy, look for milk and cream that are not ultra-pasteurized if possible—they have a cleaner, fresher taste. As for the nutmeg, I buy mine from a spice shop or the bulk section of a well-stocked grocery store. They should feel heavy for their size and release a strong, aromatic scent when you scratch the surface with your fingernail.
Substitution Guidance
If you need a dairy-free version, you can substitute full-fat oat milk for the whole milk and canned coconut cream (the thick part) for the heavy cream. The flavor will change slightly, but it will still be creamy and delicious. For a lower-sugar option, reduce the sugar to ½ cup and add a tablespoon of maple syrup for complexity. And if you don’t have a vanilla bean, the extract works perfectly—just stir it in after you remove the pot from the heat.
Equipment Needed
You don’t need any fancy gadgets for this recipe, which is part of its charm. Here’s what you’ll need:
- Medium heavy-bottomed saucepan (a 2-quart size is perfect; the heavy bottom helps prevent scorching the milk)
- Large heatproof mixing bowl (glass or stainless steel works best for tempering the eggs)
- Whisk (a sturdy balloon whisk is ideal for getting that smooth custard texture)
- Fine-mesh strainer (this is optional but highly recommended for catching any bits of cooked egg that might sneak through)
- Microplane or fine grater (for grating the fresh nutmeg—a standard box grater’s smallest holes work in a pinch)
- Instant-read thermometer (not strictly necessary, but it takes the guesswork out of knowing when the custard is done)
- Glass pitcher or jar for storage (a quart-sized mason jar works great for chilling and serving)
I’ve made this eggnog countless times, and I’ll be honest—I’ve forgotten the thermometer more often than I’ve remembered it. You can absolutely tell when the custard is ready by the way it coats the back of a spoon. If you don’t have a fine-mesh strainer, don’t sweat it. Just whisk vigorously and pour carefully, and you’ll be fine. Budget-friendly tip: a basic saucepan from a discount store works just as well as an expensive one—just keep the heat low and stir constantly.
Preparation Method
Let’s make this easy old-fashioned cooked eggnog with fresh nutmeg. I’ll walk you through every step so you get that silky, restaurant-quality result on your first try.
Step 1: Separate the Eggs (5 minutes)
Crack 6 large eggs and separate the yolks from the whites. Place the yolks in your large heatproof mixing bowl. Save the whites for another use—they freeze beautifully if you don’t have a plan for them right away. Whisk the yolks gently just to break them up, then add ¾ cup of sugar. Whisk until the mixture turns a pale, lemony yellow and thickens slightly. This takes about 2 minutes of steady whisking. You’re building the base here, so don’t rush it.
Step 2: Heat the Dairy (8 minutes)
In your medium saucepan, combine 2 cups of whole milk and 1 cup of heavy cream. If you’re using a vanilla bean, split it lengthwise with a paring knife, scrape the tiny seeds into the milk, and toss the pod in as well. Place the pan over medium heat. You want the mixture to get hot but not boil—look for small bubbles forming around the edges of the pan, which usually takes about 5 to 7 minutes. If you see it starting to simmer, pull it off the heat immediately. Scalded milk is fine; boiled milk is a disaster.
Step 3: Temper the Eggs (10 minutes)
This is the most important step, and honestly, it’s not as scary as it sounds. Slowly drizzle about ½ cup of the hot milk mixture into the egg yolk mixture while whisking constantly. This warms the eggs up gradually so they don’t scramble. Once that’s incorporated, add another ½ cup, still whisking. Now, pour the egg mixture back into the saucepan with the remaining hot milk, whisking the whole time. It should look smooth and uniform at this point.
Step 4: Cook the Custard (8-10 minutes)
Place the saucepan back over medium-low heat. Stir constantly with a wooden spoon or heatproof spatula, making sure to scrape the bottom and corners of the pan. You’re looking for the mixture to thicken enough to coat the back of a spoon—when you run your finger across the spoon, the line should hold. If you’re using a thermometer, aim for 160°F (71°C). This usually takes about 8 minutes. Do not let it boil, or you’ll end up with sweet scrambled eggs. Trust me, I’ve done it. It’s sad.
Step 5: Strain and Cool (5 minutes)
Remove the pan from the heat immediately. If you used a vanilla bean pod, fish it out with tongs. Pour the custard through a fine-mesh strainer into a clean bowl or pitcher. This catches any tiny bits of cooked egg that might have formed. Stir in ½ teaspoon of salt and, if using vanilla extract instead of a bean, add it now. Let the eggnog cool at room temperature for about 15 minutes, then cover and refrigerate for at least 2 hours, or overnight. It thickens more as it chills.
Step 6: Grate and Serve (2 minutes)
When you’re ready to serve, pour the chilled eggnog into cups. Using your Microplane, grate fresh nutmeg generously over the top of each serving. If you’re adding alcohol, stir in ½ cup of bourbon, dark rum, or brandy before serving. Give it a gentle stir, and enjoy immediately.
Cooking Tips & Techniques
I’ve made this easy old-fashioned cooked eggnog with fresh nutmeg at least two dozen times, and I’ve learned a few things the hard way. Here are my best tips for getting it right every time.
Low and slow is the rule. The biggest mistake people make is rushing the cooking process. If you crank the heat to high, you will end up with curdled eggnog. Keep the burner on medium-low or even low, and stir constantly. It takes patience, but the result is worth it. I once tried to multitask by answering a text while stirring—I ended up with a pan of sweet, lumpy milk. Never again.
Use a thermometer if you’re nervous. I know I said you don’t need one, but if this is your first time making cooked custard, a $10 instant-read thermometer takes all the guesswork out. Pull the pan off the heat at exactly 160°F. Anything higher and you risk scrambling the eggs.
Temper slowly and whisk furiously. When you’re adding hot milk to the egg yolks, pour it in a thin, steady stream while whisking like your life depends on it. This slowly raises the temperature of the eggs without shocking them. If you dump it all in at once, you’ll have lumpy eggnog.
Let it rest overnight. Fresh eggnog is good, but day-old eggnog is magical. The flavors meld together as it chills, and the texture becomes even silkier. Make this a day ahead of your party, and your future self will thank you.
Double the batch. Seriously. This recipe makes about 4 cups, which sounds like a lot until you taste it. I always double it for holiday gatherings, and there are never leftovers.
Variations & Adaptations
This easy old-fashioned cooked eggnog with fresh nutmeg is wonderfully adaptable. Here are some ways to make it your own.
Dairy-Free Version
Substitute the whole milk with full-fat oat milk and the heavy cream with canned coconut cream (the thick white part, not the watery liquid). The coconut flavor is subtle and pairs surprisingly well with the nutmeg. I’ve served this to dairy-free friends, and they didn’t miss a thing.
Spiced Variation
Add a cinnamon stick and two whole cloves to the milk while it heats. Remove them before tempering the eggs. You’ll get a warm, chai-like undertone that’s incredible for winter gatherings. I did this on a whim one December, and now it’s my go-to for Christmas Eve.
Low-Sugar Option
Reduce the sugar to ½ cup and add 2 tablespoons of maple syrup or honey. The flavor will be slightly more complex, and the eggnog won’t be cloyingly sweet. It’s still rich and satisfying, just a little more grown-up.
Make It Boozy
Stir in ½ cup of bourbon, dark rum, or brandy after the eggnog has cooled. For a truly decadent treat, add all three in equal parts. Just remember to label the pitcher if you’re serving a crowd that includes kids or non-drinkers.
Chocolate Eggnog
Whisk 2 tablespoons of unsweetened cocoa powder into the egg yolk and sugar mixture before adding the hot milk. It turns into a chocolate-custard base that’s absolutely sinful. Grate a little dark chocolate on top instead of nutmeg for a fun twist.
Serving & Storage Suggestions
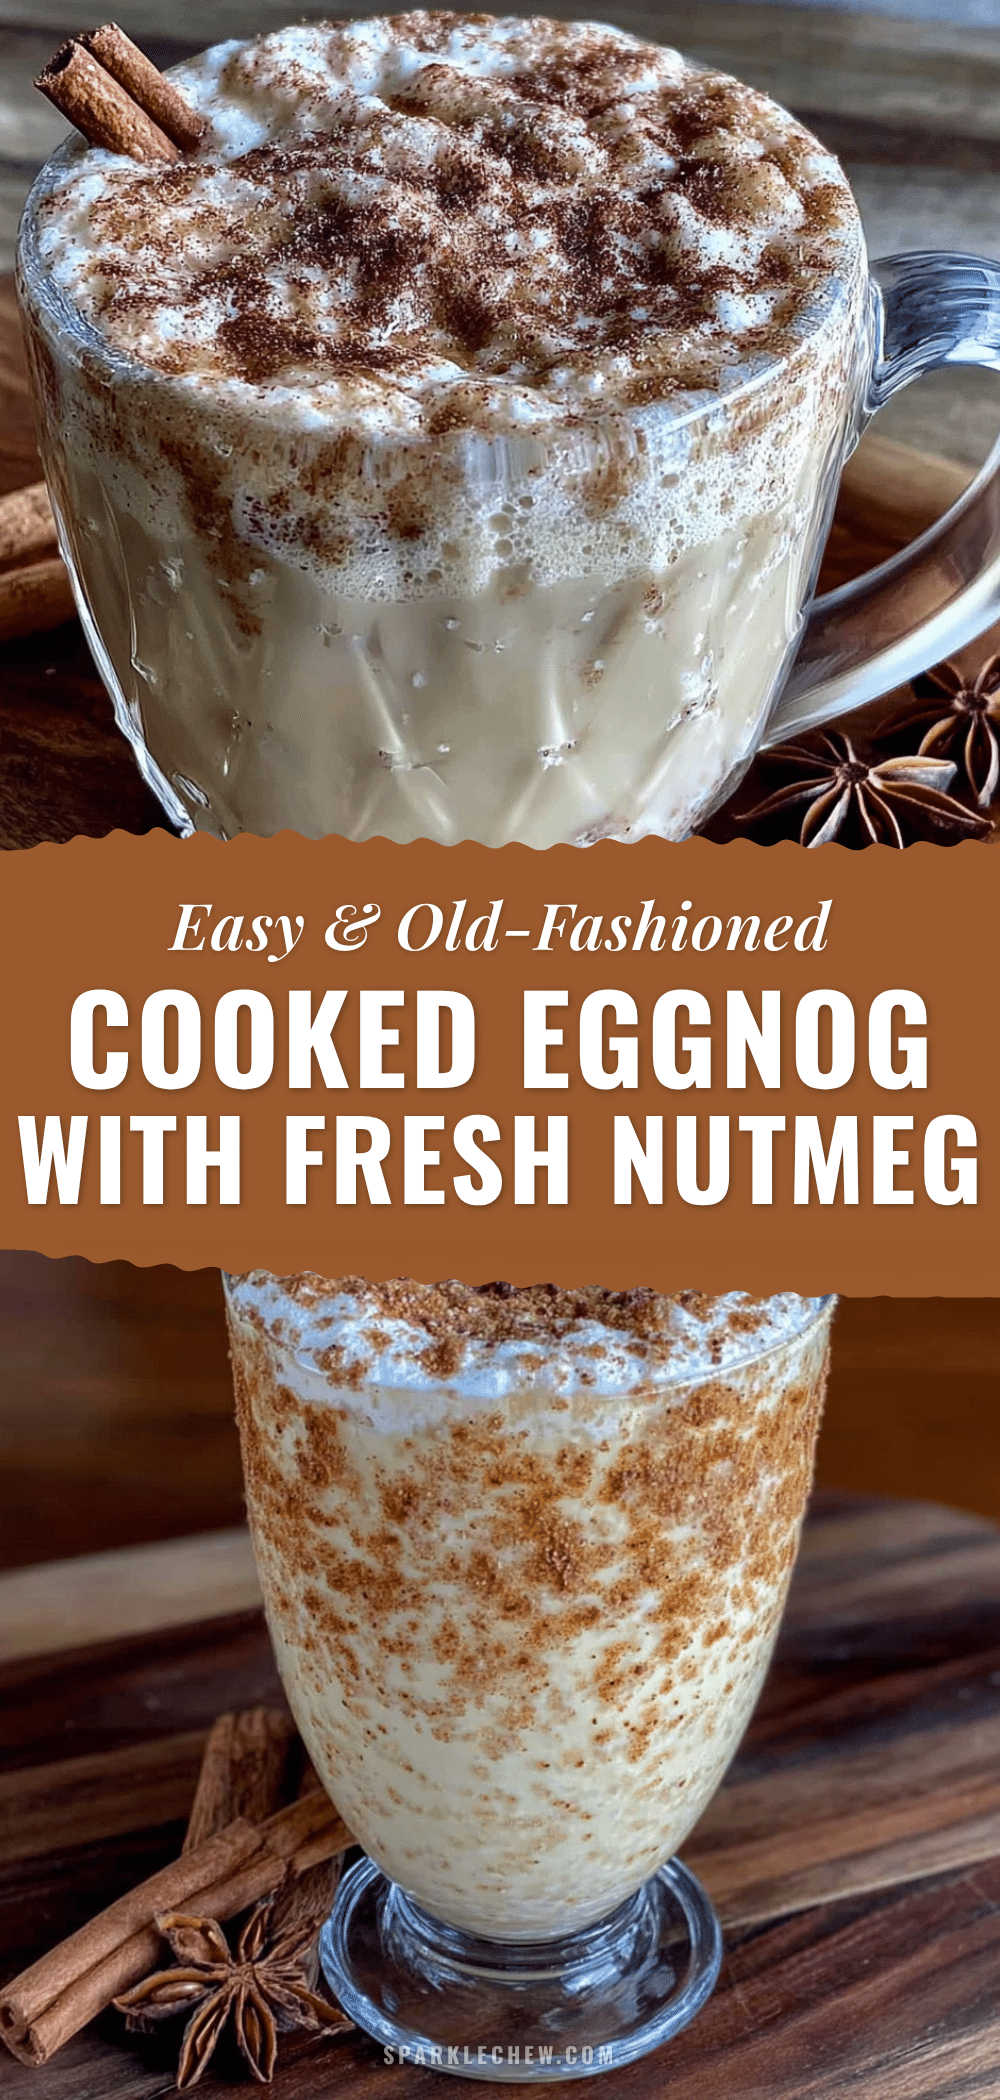
This easy old-fashioned cooked eggnog with fresh nutmeg is best served chilled, straight from the refrigerator. Pour it into small glasses or cups—it’s rich, so a little goes a long way. I like to serve it in clear glass mugs so the beautiful golden color shows through.
Garnish ideas: A generous grating of fresh nutmeg on top is non-negotiable. For extra flair, add a cinnamon stick stirrer or a dollop of lightly sweetened whipped cream. A sprinkle of ground cinnamon or a star anise pod floating on top makes for a stunning presentation.
What to serve with it: This eggnog pairs beautifully with gingerbread cookies, shortbread, or a slice of pound cake. For a savory balance, set out a cheese board with sharp cheddar and crackers. The richness of the eggnog stands up well to bold flavors.
Storage instructions: Store leftover eggnog in an airtight container in the refrigerator for up to 4 days. The flavors actually improve after a day or two. Do not freeze this eggnog—the texture will separate and become grainy upon thawing.
Reheating tips: If you prefer warm eggnog, gently reheat it in a saucepan over low heat, stirring constantly. Do not let it boil. You can also reheat individual servings in the microwave on 50% power in 30-second bursts, stirring between each. The texture won’t be quite as silky as fresh, but it’s still delicious.
Nutritional Information & Benefits
Here’s the nutritional breakdown for one serving (about ½ cup, without alcohol) of this easy old-fashioned cooked eggnog with fresh nutmeg:
- Calories: 320
- Fat: 22g (13g saturated)
- Carbohydrates: 27g (26g sugar)
- Protein: 6g
- Calcium: 150mg (15% DV)
- Vitamin D: 2mcg (10% DV)
This eggnog is definitely a treat, not an everyday drink, but it does have some redeeming qualities. The eggs provide high-quality protein and choline, which is important for brain health. The milk and cream offer calcium and vitamin D for strong bones. And fresh nutmeg contains compounds that have been linked to anti-inflammatory properties.
For those with dietary restrictions, this recipe contains dairy, eggs, and (if you add it) alcohol. It is naturally gluten-free and can be made nut-free by using certified gluten-free and nut-free ingredients. If you’re watching your sugar intake, the low-sugar variation above is a great alternative.
I personally believe that holiday treats should be enjoyed without guilt. One glass of this eggnog is about the same as a small slice of cheesecake—indulgent, satisfying, and absolutely worth it for the joy it brings.
Conclusion
This easy old-fashioned cooked eggnog with fresh nutmeg is more than just a holiday drink. It’s a tradition waiting to happen in your kitchen. It’s the recipe that will make your family pause mid-conversation and say, “Wow, this is amazing.” It’s the one your friends will ask for year after year.
I love this recipe because it reminds me that the best things in life are often the simplest. A few basic ingredients, a little patience, and a whole lot of fresh nutmeg—that’s all it takes to create something truly special. It’s forgiving enough for a beginner and impressive enough for a holiday party.
I encourage you to make this eggnog your own. Adjust the sweetness, add your favorite spices, or spike it with bourbon if that’s your thing. The beauty of cooking is that every batch is a little different, and that’s exactly how it should be.
Have you made this recipe? I’d love to hear how it turned out! Leave a comment below and let me know if you added your own twist. And if you loved it, please share this post with a friend who needs a little holiday cheer. Happy cooking, and cheers to you!
Frequently Asked Questions
Can I make this eggnog without a thermometer?
Absolutely. The visual cue is that the custard should coat the back of a spoon. When you run your finger across the spoon, the line should hold without running. It takes a little practice, but you’ll get the hang of it after one or two tries.
Is it safe to serve this eggnog to pregnant women and children?
Yes! Because the eggs are gently cooked to 160°F, this eggnog is safe for everyone, including pregnant women, children, and the elderly. Just skip the alcohol for those servings.
Can I use pre-ground nutmeg instead of whole nutmeg?
You can, but I really don’t recommend it. Freshly grated nutmeg has a bright, aromatic flavor that pre-ground nutmeg simply can’t match. The pre-ground stuff tastes dusty and flat by comparison. Whole nutmegs last for months in your spice drawer, so it’s worth the small investment.
Why did my eggnog curdle?
Curdling happens when the eggs get too hot too quickly. This usually means your heat was too high, or you didn’t whisk constantly enough. Next time, keep the heat on medium-low and stir without stopping. If it does curdle, you can try straining it through a fine-mesh sieve to remove the lumps, but the texture won’t be as silky.
How far ahead can I make this eggnog?
You can make this eggnog up to 4 days in advance. Store it in an airtight container in the refrigerator. The flavors actually develop and deepen over the first 24 to 48 hours, so making it a day or two ahead is ideal. Just give it a good stir before serving.
Pin This Recipe!
Easy Old-Fashioned Cooked Eggnog with Fresh Nutmeg
This easy old-fashioned cooked eggnog with fresh nutmeg is a rich, creamy, and perfectly spiced holiday drink. The eggs are gently cooked into a custard base, making it safe for everyone, and the freshly grated nutmeg adds an aromatic flavor that store-bought versions can’t match.
- Prep Time: 15 minutes
- Cook Time: 20 minutes
- Total Time: 2 hours 35 minutes (includes chilling)
- Yield: 4 servings 1x
- Category: Beverage
- Cuisine: American
Ingredients
- 6 large egg yolks (room temperature)
- ¾ cup granulated sugar
- 2 cups whole milk
- 1 cup heavy cream
- 1 whole vanilla bean (or 2 teaspoons pure vanilla extract)
- ½ teaspoon fine sea salt
- 1 whole nutmeg (for grating)
- Optional: ½ cup bourbon, dark rum, or brandy
- Optional: ½ teaspoon ground cinnamon
Instructions
- Separate the eggs: Crack 6 large eggs and separate the yolks from the whites. Place the yolks in a large heatproof mixing bowl. Whisk gently to break them up, then add ¾ cup sugar. Whisk until the mixture turns pale, lemony yellow and thickens slightly, about 2 minutes.
- Heat the dairy: In a medium heavy-bottomed saucepan, combine 2 cups whole milk and 1 cup heavy cream. If using a vanilla bean, split it lengthwise, scrape the seeds into the milk, and add the pod. Heat over medium heat until small bubbles form around the edges (about 5-7 minutes). Do not let it boil.
- Temper the eggs: Slowly drizzle about ½ cup of the hot milk mixture into the egg yolk mixture while whisking constantly. Add another ½ cup, still whisking. Then pour the egg mixture back into the saucepan with the remaining hot milk, whisking continuously.
- Cook the custard: Place the saucepan over medium-low heat. Stir constantly with a wooden spoon or heatproof spatula, scraping the bottom and corners. Cook until the mixture thickens enough to coat the back of a spoon (about 8 minutes), or until it reaches 160°F (71°C) on an instant-read thermometer. Do not let it boil.
- Strain and cool: Remove from heat. If using a vanilla bean pod, remove it. Pour the custard through a fine-mesh strainer into a clean bowl or pitcher. Stir in ½ teaspoon salt and, if using vanilla extract instead of a bean, add it now. Let cool at room temperature for 15 minutes, then cover and refrigerate for at least 2 hours or overnight.
- Grate and serve: When ready to serve, pour the chilled eggnog into cups. Grate fresh nutmeg generously over the top. If adding alcohol, stir in ½ cup bourbon, dark rum, or brandy before serving. Enjoy immediately.
Notes
For best results, use whole nutmeg and grate it fresh just before serving. The eggnog can be made up to 4 days in advance and stored in an airtight container in the refrigerator. Do not freeze. If reheating, do so gently over low heat, stirring constantly, and do not let it boil.
Nutrition
- Serving Size: ½ cup
- Calories: 320
- Sugar: 26
- Sodium: 160
- Fat: 22
- Saturated Fat: 13
- Carbohydrates: 27
- Protein: 6
Keywords: eggnog, cooked eggnog, old-fashioned eggnog, fresh nutmeg, holiday drink, Christmas eggnog, homemade eggnog