Love this? Save it for later!
Share the inspiration with your friends
It was 11:47 PM on a random Tuesday in December, and I had a very specific craving for something creamy, spiced, and utterly indulgent. I didn’t have the patience for a full-blown cheesecake with a water bath and hours of cooling time, but I had a box of gingersnaps that were getting stale and a carton of eggnog that was staring at me from the fridge. The idea arrived fully formed, like a little holiday miracle: eggnog cheesecake bars on a crunchy gingersnap crust. Honestly, I wasn’t even sure it would work. I mean, I was tired, my kitchen was a mess, and I was using a 9×9 pan that I’m pretty sure I bought at a garage sale. But something about the late hour loosened the usual rules, you know? I stopped second-guessing and just started mixing.
The gingersnaps crushed beautifully—I used a rolling pin and a Ziploc bag because my food processor was already dirty from earlier. The filling came together in one bowl, and I didn’t even bother to bring the cream cheese to room temperature properly. (Don’t tell the baking purists.) I poured it over the crust, slid it into the oven, and waited. The smell that filled my tiny apartment was pure December magic—warm ginger, nutmeg, and a hint of vanilla. When I pulled them out, they were slightly jiggly in the center, which I knew meant they’d set up perfectly after chilling. I let them cool on the counter, then popped them in the fridge overnight.
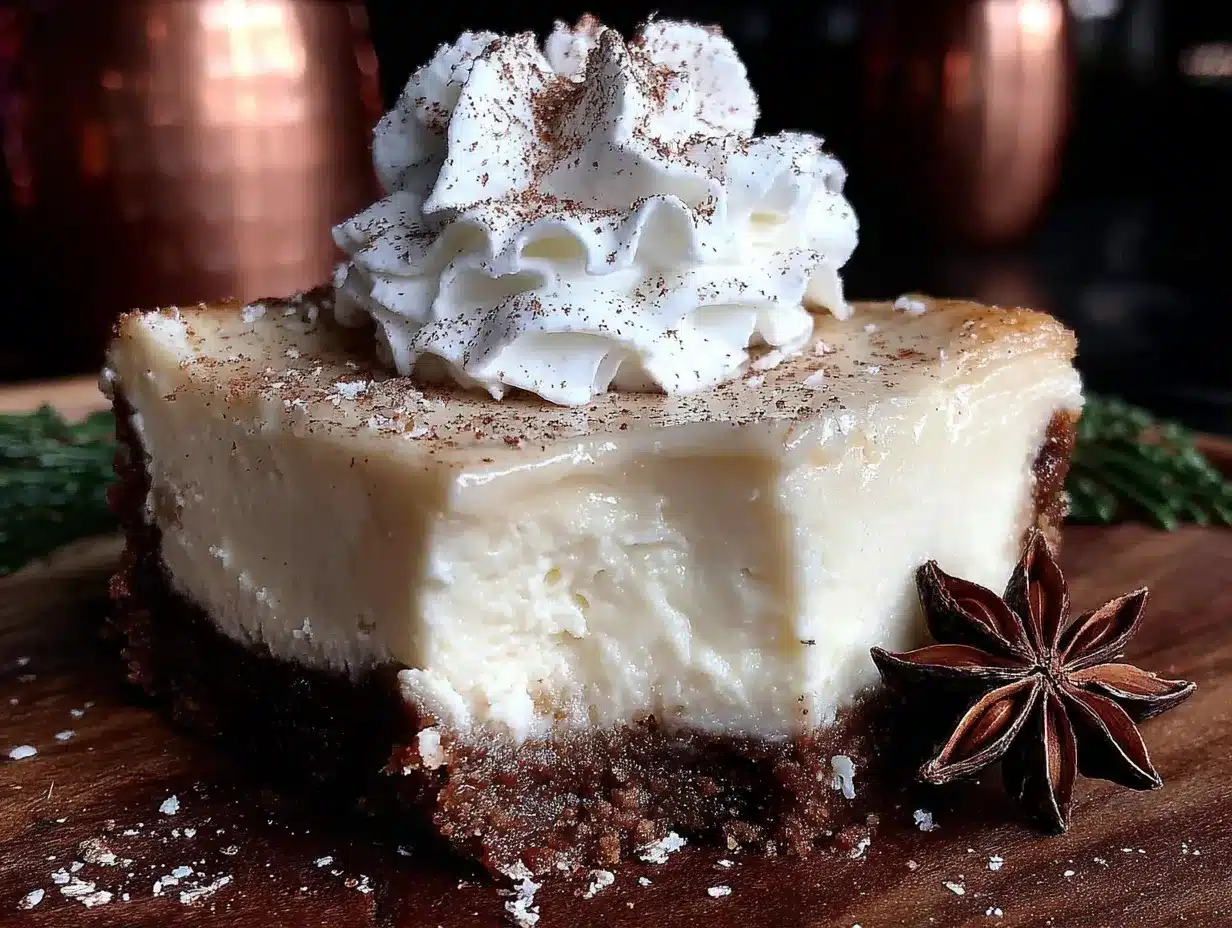
The next morning, I cut into them, and let me tell you, I nearly cried. The crust was snappy and spiced, the filling was silky and rich with that unmistakable eggnog flavor, and the whole thing tasted like a holiday hug. I’ve made these bars every year since that late-night experiment, and they’ve become my go-to for cookie swaps, holiday parties, and those quiet nights when you just need something cozy. Maybe you’ve been there—staring into the fridge at 11 PM, wondering if a craving is worth the effort. Trust me, this one is.
Why You’ll Love This Recipe
These Cozy Eggnog Cheesecake Bars with Gingersnap Crust are everything you want in a holiday dessert without the stress of a traditional cheesecake. I’ve tested this recipe at least a dozen times—tweaking the spice ratio, testing different crust binders, and even trying a low-fat version (don’t do it). Here’s why this version is the one you’ll come back to year after year:
- Quick & Easy: From start to finish, these bars take about 30 minutes of active prep time. The oven does the rest, and the chill time is hands-off. Perfect for busy holiday weeks.
- Simple Ingredients: You probably already have most of these in your pantry. Gingersnaps, cream cheese, eggs, sugar, and eggnog. No weird extracts or hard-to-find spices.
- Perfect for Holiday Gatherings: These bars are a showstopper at cookie swaps, Christmas brunches, or Thanksgiving dessert tables. They cut cleanly and travel well.
- Crowd-Pleaser: I’ve served these to kids, grandparents, and my picky cousin who “doesn’t like cheesecake.” Every single person went back for seconds.
- Unbelievably Delicious: The combination of the crunchy, spicy gingersnap crust and the velvety, spiced eggnog filling is next-level comfort food. It’s like a holiday latte in dessert form.
What makes this recipe different from the rest? It’s the texture. I use a slightly higher ratio of eggnog to cream cheese, which gives the bars a lighter, almost mousse-like consistency instead of a dense, heavy cheesecake. Plus, the crust isn’t just a afterthought—it’s packed with ginger and molasses flavor that stands up to the creamy filling. This isn’t just another cheesecake bar recipe. It’s the one that makes you close your eyes after the first bite and say, “Okay, that’s the one.”
What Ingredients You Will Need
This recipe uses simple, wholesome ingredients to deliver big holiday flavor without any fuss. Most of these are pantry staples during the winter months, and the few specialty items are easy to find at any grocery store. Let’s break down each ingredient and why it matters.
For the Gingersnap Crust
- 2 cups (240g) gingersnap cookie crumbs (about 30-35 cookies): I recommend Nabisco or a store-brand equivalent. Look for cookies with visible ginger pieces for the best flavor. You can crush them in a food processor or by hand in a sealed bag.
- 6 tablespoons (85g) unsalted butter, melted: Use real butter here, not margarine. It binds the crust and adds richness that complements the spicy cookies. If you’re dairy-free, you can use a plant-based butter stick.
- 2 tablespoons (25g) granulated sugar: Just a little extra sweetness to balance the ginger’s heat. You can omit this if your gingersnaps are already very sweet.
- Pinch of salt: Enhances all the flavors and keeps the crust from tasting flat.
For the Eggnog Cheesecake Filling
- 16 ounces (450g) full-fat cream cheese, softened: This is non-negotiable for the silkiest texture. Low-fat cream cheese has too much water and can make the filling grainy. I always use Philadelphia brand for consistent results.
- 3/4 cup (150g) granulated sugar: Just enough sweetness to complement the eggnog without overwhelming it. You can reduce this to 1/2 cup if you prefer a less sweet dessert.
- 2 large eggs, room temperature: Room temperature eggs incorporate more smoothly into the batter, preventing lumps. If you forget to take them out ahead of time, place them in a bowl of warm water for 5 minutes.
- 1 cup (240ml) high-quality eggnog: Use a thick, creamy eggnog—not the low-fat or light version. The richness of the eggnog is what gives these bars their signature texture. I prefer Hood or a local dairy brand.
- 1 teaspoon vanilla extract: Pure vanilla extract, not imitation. It rounds out the spices and adds depth.
- 1/2 teaspoon ground nutmeg, plus more for garnish: Freshly grated nutmeg is a game-changer here. It has a much more aromatic, warm flavor than pre-ground. If you only have pre-ground, it will still work—just use a generous 1/2 teaspoon.
- 1/4 teaspoon ground cinnamon: Adds a subtle warmth that plays beautifully with the ginger in the crust. You can also add a pinch of cloves or allspice if you’re feeling adventurous.
- 1 tablespoon all-purpose flour: This helps stabilize the filling and prevents cracking as the bars cool. You can substitute with cornstarch if you’re gluten-free.
Optional Toppings
- Whipped cream: A dollop on each bar adds a light, airy contrast to the dense cheesecake. I like to sweeten mine with a little powdered sugar and vanilla.
- Extra ground nutmeg or cinnamon: A light dusting right before serving makes them look bakery-worthy.
- Caramel sauce: A drizzle of salted caramel takes these over the top. Trust me on this one.
Equipment Needed
You don’t need a professional bakery setup to make these bars, but having the right tools makes the process smoother. Here’s what you’ll need:
- 9×9-inch square baking pan: This is the perfect size for bars that are thick but not too tall. If you only have an 8×8 pan, your bars will be slightly thicker and may need an extra 5-7 minutes of baking time. A 9×13 pan will yield thinner bars that bake faster—check them at 25 minutes.
- Parchment paper: Line your pan with two overlapping sheets that hang over the edges like slings. This makes lifting the bars out a breeze. I learned this the hard way after destroying my first batch trying to pry them out.
- Food processor or rolling pin: For crushing the gingersnaps. A food processor gives you a finer, more even crumb, but a rolling pin and a Ziploc bag work perfectly. Just make sure there are no large chunks left.
- Electric hand mixer or stand mixer: You need something to beat the cream cheese until smooth. A whisk and some elbow grease will work, but it takes forever and you’ll end up with lumps. I prefer a hand mixer because it’s easier to control.
- Mixing bowls: One large bowl for the filling and one medium bowl for the crust.
- Rubber spatula: For scraping down the sides of the bowl and spreading the filling evenly. A silicone spatula is my favorite—it doesn’t scratch your bowls and it’s heat-resistant.
- Measuring cups and spoons: Accuracy matters in baking, especially with the spices. Use dry measuring cups for the sugar and liquid measuring cups for the eggnog.
- Sharp knife: For cutting clean bars. Run it under hot water and wipe it clean between cuts for the neatest edges.
If you don’t have a 9×9 pan, a 9-inch round springform pan works beautifully. Just adjust the baking time slightly—check at 35 minutes. And if you’re on a budget, skip the food processor. A sturdy Ziploc bag and a heavy skillet do the job just fine.
Preparation Method
Let’s get baking! This recipe comes together quickly, so read through all the steps before you start. I’ve included time estimates and sensory cues to help you know exactly what to look for at each stage.
Step 1: Preheat and Prep the Pan (5 minutes)
Preheat your oven to 325°F (160°C). Line your 9×9-inch baking pan with parchment paper, leaving about 2 inches of overhang on two opposite sides. This creates handles that make lifting the bars out so much easier. Lightly spray the parchment with non-stick cooking spray for extra insurance.
Step 2: Make the Gingersnap Crust (10 minutes)
Place the gingersnap cookies in a food processor and pulse until you have fine crumbs. You should have about 2 cups. If you’re crushing by hand, put the cookies in a Ziploc bag, seal it, and go to town with a rolling pin. In a medium bowl, combine the crumbs, melted butter, sugar, and salt. Stir with a fork until the mixture looks like wet sand and holds together when you squeeze it. Press the mixture firmly into the bottom of the prepared pan. I use the bottom of a measuring cup to get it even and compact. Bake the crust for 10 minutes, then set it aside to cool while you make the filling. Your kitchen will smell amazing right about now.
Step 3: Make the Cheesecake Filling (10 minutes)
In a large mixing bowl, beat the softened cream cheese with an electric mixer on medium speed until it’s completely smooth and fluffy—about 2 minutes. Scrape down the sides and bottom of the bowl with a rubber spatula. Add the sugar and beat for another minute until well combined. Add the eggs one at a time, beating on low speed after each addition just until incorporated. Over-beating at this stage can incorporate too much air, which leads to cracks. On low speed, mix in the eggnog, vanilla extract, nutmeg, cinnamon, and flour. Mix just until the batter is smooth and uniform. The batter should be thick but pourable, with a pale, creamy color. Taste a tiny bit (yes, raw egg, but I do it anyway) to check the spice level. It should taste distinctly like eggnog, with the nutmeg coming through clearly.
Step 4: Assemble and Bake (40-45 minutes)
Pour the filling over the pre-baked crust. Use your spatula to spread it evenly to the edges. Give the pan a gentle tap on the counter to release any air bubbles. Bake at 325°F (160°C) for 38-45 minutes. The edges should be set and slightly puffed, but the center should still jiggle slightly when you gently shake the pan. This is the sweet spot—over-baking will make the bars dry and cracky. I usually start checking at 38 minutes. The top should look matte, not shiny, and might have a few tiny cracks around the edges. That’s totally normal.
Step 5: Cool and Chill (4+ hours)
Place the pan on a wire rack and let it cool completely at room temperature—about 1 hour. Then, cover the pan with plastic wrap and refrigerate for at least 3 hours, but overnight is best. The chilling time is crucial for the bars to set properly and develop that silky, sliceable texture. I know it’s hard to wait, but trust the process. The flavors also meld and deepen overnight. When you’re ready to serve, use the parchment slings to lift the entire block out of the pan. Place it on a cutting board and use a sharp knife to cut into 16 squares. For the cleanest cuts, wipe the knife clean between each slice.
Cooking Tips & Techniques
After making these bars more times than I can count, I’ve collected a few hard-won tips that will save you from my early mistakes. The first time I made these, I used low-fat cream cheese and ended up with a watery, grainy mess. Never again. Full-fat cream cheese is not negotiable here—it provides the structure and creaminess that makes these bars special.
One of the biggest mistakes people make with cheesecake bars is over-mixing the filling. Once you add the eggs, mix on low speed and stop as soon as everything is combined. Over-mixing incorporates too much air, which causes the bars to puff up in the oven and then collapse, creating cracks. Similarly, don’t open the oven door during the first 30 minutes of baking. The sudden temperature change can shock the filling and cause it to crack.
Another tip: if your cream cheese is still cold when you start beating it, you’ll end up with lumps. Let it sit on the counter for at least 30 minutes before you begin. If you’re in a hurry, cut it into small cubes and microwave it on 50% power for 10-second intervals until it’s soft but not melted. The same goes for the eggs—cold eggs can seize up the batter. Place them in a bowl of warm water for 5 minutes to take the chill off.
For the crust, don’t skimp on the pressing step. A loosely packed crust will crumble when you try to cut the bars. I use the bottom of a flat measuring cup or a glass to really compact it. And here’s a pro tip: after you press the crust, poke it a few times with a fork before baking. This prevents it from bubbling up and creating air pockets.
Finally, if your bars do crack (hey, it happens to the best of us), don’t panic. A dollop of whipped cream and a sprinkle of nutmeg covers a multitude of sins. I’ve also been known to drizzle a little caramel sauce over the top for camouflage. Nobody has ever complained.
Variations & Adaptations
One of the things I love about this recipe is how versatile it is. You can tweak it to fit different dietary needs, flavor preferences, or what you have on hand. Here are a few variations I’ve tried and loved:
Gluten-Free Version
Swap the all-purpose flour in the filling for an equal amount of cornstarch or a gluten-free all-purpose blend. For the crust, use gluten-free gingersnap cookies. I’ve used the Pamela’s brand with great success. The texture is slightly more delicate, but the flavor is spot-on.
Dairy-Free Version
Use a high-quality dairy-free cream cheese alternative, like Kite Hill or Miyoko’s. For the crust, use a plant-based butter stick (I like Earth Balance). And for the eggnog, look for a dairy-free eggnog made with oat milk or almond milk. The filling will be slightly less rich, but still delicious. Just make sure your dairy-free cream cheese is softened properly, as some brands are firmer than regular cream cheese.
Bourbon-Infused Version
Add 1-2 tablespoons of bourbon to the filling along with the eggnog. The warmth of the bourbon pairs beautifully with the spices. I did this for a New Year’s Eve party once, and it was a huge hit. Just note that the alcohol won’t cook off completely, so this version is best for adults.
Pumpkin Spice Variation
Replace half of the eggnog with pumpkin puree and add an extra teaspoon of pumpkin pie spice. This gives you a pumpkin-eggnog hybrid that’s perfect for Thanksgiving. The texture will be slightly denser, but the flavor is incredible.
Mini Bar Bites
Use a mini muffin tin lined with paper liners for bite-sized versions. Press about a tablespoon of crust into each cup, then fill with a heaping tablespoon of filling. Bake for 15-18 minutes. These are perfect for parties and cookie trays.
Serving & Storage Suggestions
These bars are best served cold, straight from the fridge. The chill sets the texture perfectly and makes them easy to slice. I like to let them sit at room temperature for about 10 minutes before serving—this takes the edge off the chill and allows the flavors to open up. A light dusting of freshly grated nutmeg on top makes them look like they came from a bakery.
For serving, I love to pair these bars with a hot cup of coffee or a spiced chai latte. The warmth of the drink contrasts beautifully with the cold, creamy bars. If you’re serving them at a party, arrange them on a platter with a bowl of whipped cream on the side and a small dish of extra gingersnap crumbs for sprinkling. It looks gorgeous and lets guests customize their serving.
Storage is straightforward. Place the bars in an airtight container, separating layers with parchment paper, and refrigerate for up to 5 days. I actually think they taste even better on day two or three, as the flavors continue to meld. You can also freeze them for up to 2 months. Wrap each bar individually in plastic wrap, then place them in a freezer-safe bag. To thaw, transfer them to the fridge overnight. I wouldn’t recommend microwaving them to thaw, as it can make the texture rubbery.
One thing to note: the crust will soften slightly over time as it absorbs moisture from the filling. If you’re making these for a party, I recommend baking them no more than 2 days in advance for the best texture. If they do get a bit soft, a quick 5-minute stint in a 300°F oven can help re-crisp the crust.
Nutritional Information & Benefits
Let’s be real—these are an indulgence. But that doesn’t mean they can’t fit into a balanced lifestyle. Here’s the estimated nutritional breakdown for one bar (based on 16 servings):
| Nutrient | Amount Per Serving |
|---|---|
| Calories | 285 |
| Total Fat | 18g |
| Saturated Fat | 10g |
| Cholesterol | 85mg |
| Sodium | 210mg |
| Total Carbohydrates | 27g |
| Dietary Fiber | 1g |
| Sugars | 18g |
| Protein | 5g |
Now, the good stuff. Eggnog is actually a decent source of protein and calcium, thanks to the milk and eggs. The ginger in the gingersnap crust has anti-inflammatory properties, and nutmeg is known for its calming effects. The cream cheese provides a small amount of vitamin A. Of course, these bars are also high in sugar and saturated fat, so they’re best enjoyed as an occasional treat rather than a daily snack. I like to think of them as a holiday luxury—something to savor and share.
If you’re watching your sugar intake, you can reduce the sugar in the filling to 1/2 cup without affecting the texture too much. The bars will be slightly less sweet, but the spices will still shine. For a lower-fat option, you can use Neufchâtel cheese (which has about a third less fat than regular cream cheese), but I can’t promise the same silky texture.
Conclusion
These Cozy Eggnog Cheesecake Bars with Gingersnap Crust are more than just a recipe—they’re a little piece of holiday magic you can make in your own kitchen. They’ve become a staple in my December baking rotation, and I honestly look forward to them all year. The combination of the spicy, crunchy crust and the creamy, spiced filling is pure comfort. It’s the kind of dessert that makes you slow down, take a deep breath, and really enjoy the moment.
I hope you’ll give these bars a try, whether you’re making them for a holiday party, a cozy night in, or just because you have a carton of eggnog that needs using up. Don’t be afraid to make them your own—try the bourbon version, go gluten-free, or pile on the whipped cream. The best recipes are the ones that adapt to your life. And if you make them, I’d love to hear about it. Drop a comment below and let me know how they turned out, or share a photo on social media and tag me. Happy baking, friends. May your holidays be warm, your kitchen smell like nutmeg, and your dessert plate always have room for one more bar.
Frequently Asked Questions
Can I use store-bought gingersnap crumbs instead of whole cookies?
Absolutely! You can find pre-crushed gingersnap crumbs in the baking aisle of most grocery stores. They work perfectly and save you a step. Just use 2 cups of crumbs and proceed with the recipe as written. The texture might be slightly finer, but the flavor will be the same.
Can I make these bars without a food processor?
Yes, definitely. Place the gingersnap cookies in a sturdy Ziploc bag, seal it, and crush them with a rolling pin or the bottom of a heavy skillet. It takes a few minutes and is a great way to work out some stress. Just make sure you end up with fine, even crumbs with no large chunks.
My cheesecake bars cracked on top. What did I do wrong?
Don’t worry—cracks happen to even experienced bakers. The most common causes are over-mixing the filling (which incorporates too much air) or over-baking. Make sure you mix on low speed once you add the eggs, and pull the bars out when the center is still slightly jiggly. If they do crack, a layer of whipped cream or a drizzle of caramel sauce is your best friend.
Can I use light eggnog or a dairy-free alternative?
You can, but the texture will be different. Light eggnog has more water and less fat, which can make the filling less creamy and more prone to cracking. If you use a dairy-free eggnog, look for one that’s thick and creamy, like an oat-based version. Avoid watery almond milk eggnogs. The bars will still taste good, but they won’t have that signature silky texture.
How far in advance can I make these bars?
You can make them up to 2 days in advance and store them in the refrigerator. In fact, I recommend making them a day ahead so the flavors have time to meld. You can also freeze them for up to 2 months. Just wrap each bar individually in plastic wrap, place them in a freezer bag, and thaw in the fridge overnight before serving.
Pin This Recipe!
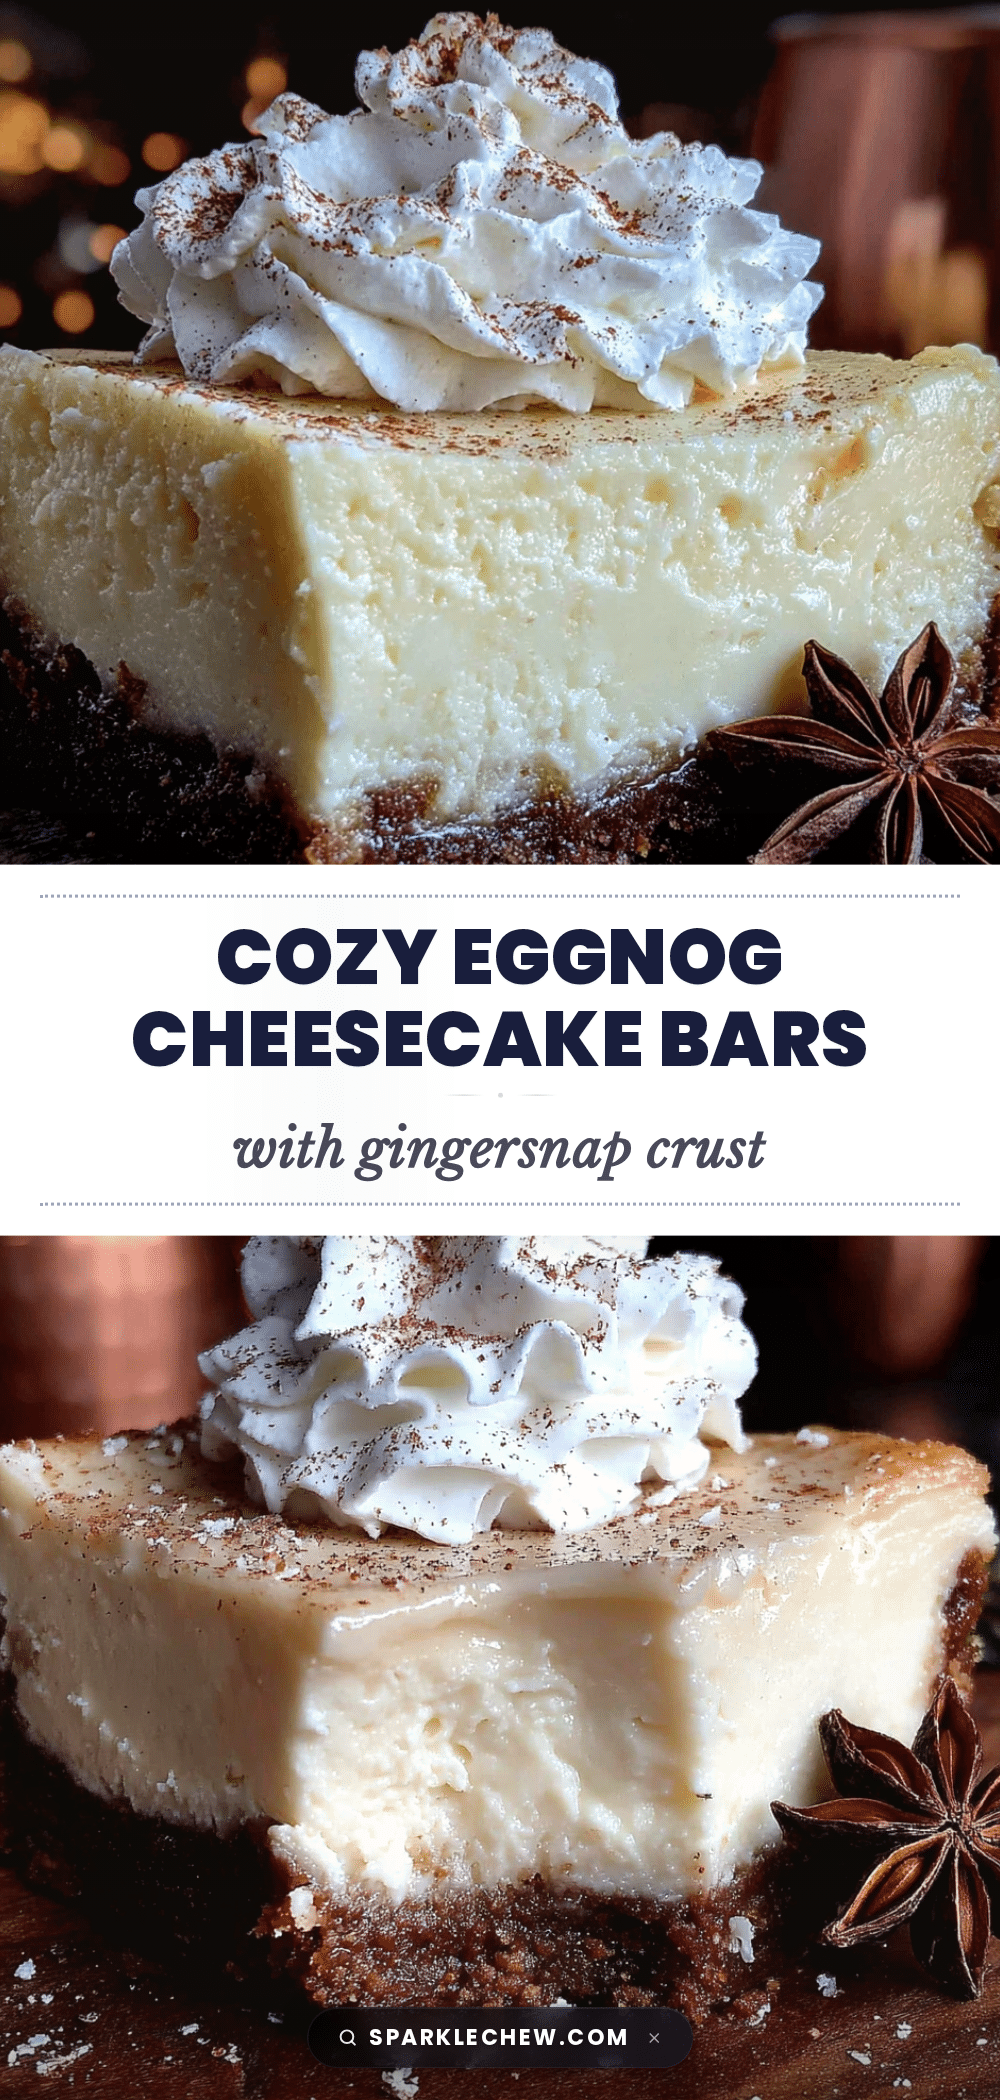
Cozy Eggnog Cheesecake Bars: Easy Gingersnap Crust Recipe
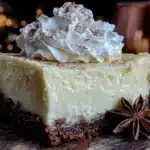
These creamy, spiced eggnog cheesecake bars on a crunchy gingersnap crust are the perfect holiday dessert. Quick and easy to make, they’re a crowd-pleaser for cookie swaps, parties, or cozy nights in.
- Prep Time: 30 minutes
- Cook Time: 40 minutes
- Total Time: 4 hours 10 minutes (includes chilling)
- Yield: 16 servings 1x
- Category: Dessert
- Cuisine: American
Ingredients
- 2 cups (240g) gingersnap cookie crumbs (about 30–35 cookies)
- 6 tablespoons (85g) unsalted butter, melted
- 2 tablespoons (25g) granulated sugar
- Pinch of salt
- 16 ounces (450g) full-fat cream cheese, softened
- 3/4 cup (150g) granulated sugar
- 2 large eggs, room temperature
- 1 cup (240ml) high-quality eggnog
- 1 teaspoon vanilla extract
- 1/2 teaspoon ground nutmeg, plus more for garnish
- 1/4 teaspoon ground cinnamon
- 1 tablespoon all-purpose flour
- Whipped cream (optional, for serving)
- Extra ground nutmeg or cinnamon (optional, for garnish)
- Caramel sauce (optional, for drizzling)
Instructions
- Preheat oven to 325°F (160°C). Line a 9×9-inch baking pan with parchment paper, leaving overhang on two sides. Lightly spray with non-stick cooking spray.
- Make the crust: Pulse gingersnap cookies in a food processor until fine crumbs form (or crush in a sealed bag with a rolling pin). In a medium bowl, combine crumbs, melted butter, sugar, and salt. Stir until mixture resembles wet sand and holds together when squeezed. Press firmly into the bottom of the prepared pan using a measuring cup. Bake for 10 minutes, then set aside to cool.
- Make the filling: In a large bowl, beat softened cream cheese with an electric mixer on medium speed until smooth and fluffy (about 2 minutes). Scrape down sides. Add sugar and beat for 1 minute. Add eggs one at a time, beating on low after each addition just until incorporated. On low speed, mix in eggnog, vanilla, nutmeg, cinnamon, and flour until smooth and uniform.
- Assemble and bake: Pour filling over pre-baked crust. Spread evenly. Tap pan gently on counter to release air bubbles. Bake at 325°F (160°C) for 38-45 minutes, until edges are set and center jiggles slightly when shaken. Top should be matte.
- Cool and chill: Place pan on a wire rack and cool completely at room temperature (about 1 hour). Cover with plastic wrap and refrigerate for at least 3 hours, preferably overnight.
- Serve: Use parchment slings to lift the block out of the pan. Place on a cutting board and cut into 16 squares with a sharp knife, wiping clean between cuts. Garnish with whipped cream, nutmeg, or caramel sauce if desired.
Notes
Full-fat cream cheese is essential for silky texture. Do not over-mix the filling once eggs are added to prevent cracks. Let cream cheese and eggs come to room temperature before starting. For clean cuts, run knife under hot water and wipe clean between slices. Bars can be stored in an airtight container in the refrigerator for up to 5 days or frozen for up to 2 months.
Nutrition
- Serving Size: 1 bar
- Calories: 285
- Sugar: 18
- Sodium: 210
- Fat: 18
- Saturated Fat: 10
- Carbohydrates: 27
- Fiber: 1
- Protein: 5
Keywords: eggnog cheesecake bars, gingersnap crust, holiday dessert, easy cheesecake bars, Christmas dessert, eggnog dessert