Love this? Save it for later!
Share the inspiration with your friends
My brother-in-law Mark claimed he hated buffalo sauce for seventeen years. Seventeen years! He’d push any wing platter to the other side of the table, make a whole show about it. “That orange stuff is nasty,” he’d say, like he was announcing a life philosophy. Then last Super Bowl Sunday, I made these pull-apart sliders for the crowd, and I caught him—I kid you not—standing at the kitchen counter eating the fourth one straight off the pan while pretending to check his fantasy lineup on his phone. He didn’t even notice me watching from the doorway.
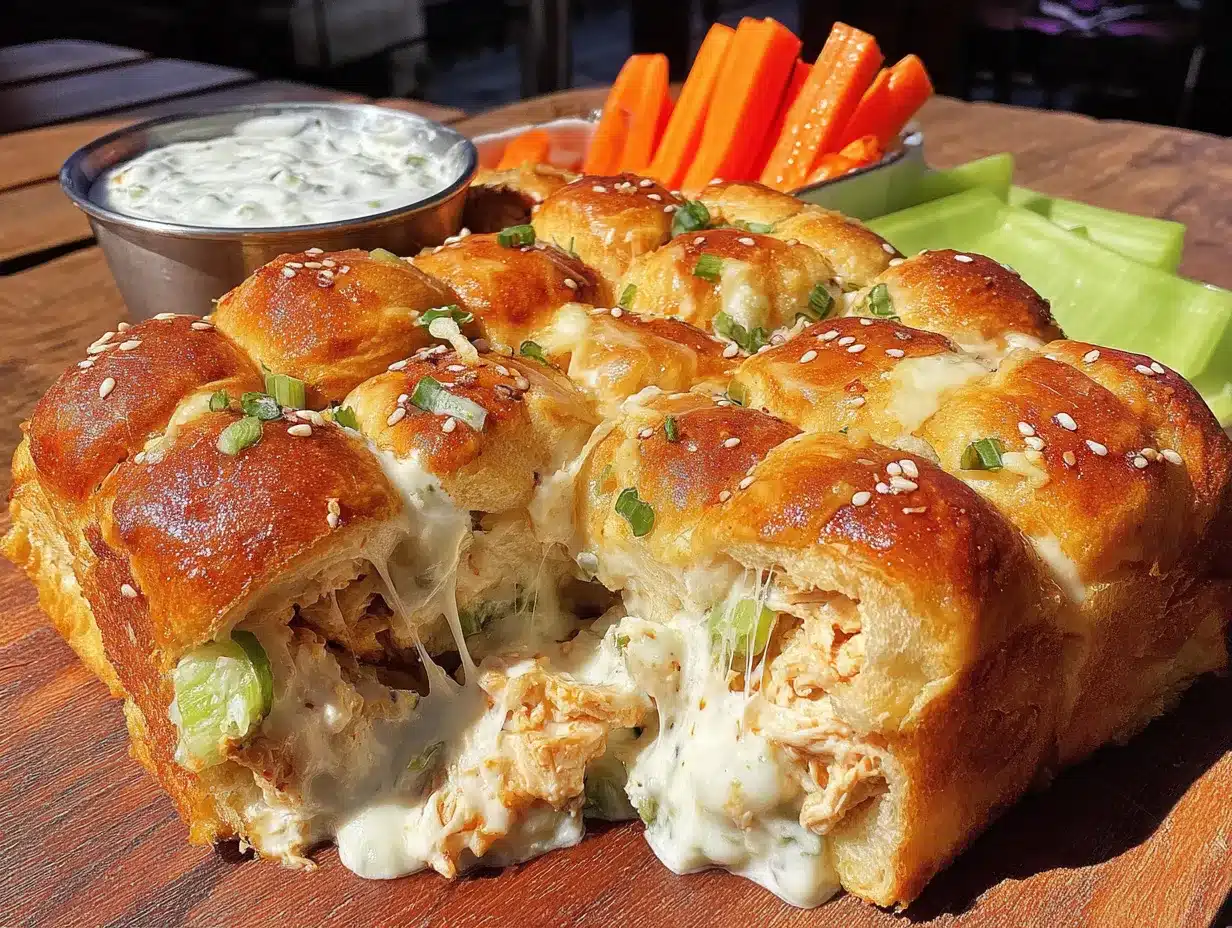
Honestly, I didn’t set out to convert anyone that day. I just wanted something easy that would disappear before halftime. These Game Day Buffalo Chicken Dip Pull-Apart Sliders are exactly that—a messy, cheesy, buttery situation that somehow manages to be both a dip and a sandwich all at once. The first time I made them, I used too much ranch and the buns got soggy. The second time, I forgot the cream cheese entirely. But by the third try, I had it dialed in, and let me tell you, the way the buffalo sauce soaks into those soft slider buns while the top gets all golden and crisp? It’s the kind of thing that makes people forget their long-held opinions about things.
Maybe you’ve been there—staring at a party platter wondering if there’s actually anything worth fighting over. These sliders are that thing. They’re the reason people hover near the kitchen. The reason your friend who “doesn’t do spicy” reaches for a third one. I keep making them because they’re the kind of recipe that proves itself without any convincing. And honestly? Watching Mark eat that fourth one was more satisfying than any touchdown all day.
Why You’ll Love This Recipe
I’ve tested this recipe at least eight times across three different Super Bowl parties, a birthday gathering, and one random Tuesday when I just needed comfort food. Every single time, the pan came back empty. That’s not luck—that’s a recipe built on balance, texture, and a whole lot of experience knowing what actually works for feeding a crowd.
- Quick & Easy: From start to table in under 30 minutes. No marinating, no complicated steps. Just mix, assemble, and bake.
- Simple Ingredients: You probably have most of this in your fridge and pantry right now. No hunting down obscure sauces or specialty cheeses.
- Perfect for Game Day: These sliders hold up beautifully on a buffet table. They stay warm in a slow cooker on low for up to an hour if you need to keep them going through overtime.
- Crowd-Pleaser: My cousin’s picky seven-year-old ate three. My uncle who only eats “real food” asked for the recipe. It bridges every divide.
- Unbelievably Delicious: The combination of creamy buffalo chicken dip sandwiched between soft buns with that buttery garlic topping is next-level. You get the dip experience without needing a plate and a fork.
What makes this recipe different from all the other slider versions out there? It’s the ratio. Most recipes drown the buns or skimp on the filling. I spent four batches getting the cream cheese to buffalo sauce to chicken ratio exactly right—enough moisture to keep the sliders from drying out, but not so much that the bread disintegrates. The technique of splitting the buns while keeping them connected as a slab is a game-changer for serving, too. No individual bun assembly required.
This isn’t just another party appetizer. It’s the one that makes people close their eyes after the first bite. It’s comfort food reimagined—faster, cheesier, and with that perfect buffalo kick that hits just right without overwhelming anyone. Perfect for impressing guests without breaking a sweat, or turning a regular game day into something people talk about long after the final score.
What Ingredients You Will Need
This recipe uses simple, accessible ingredients that come together to create something way bigger than the sum of their parts. Most are pantry staples, and the few fresh items are easy to find at any grocery store. Here’s what you’ll need and why each one matters.
- Cooked chicken, shredded (3 cups or about 450g) — Rotisserie chicken is my go-to here. It’s already seasoned and perfectly cooked. You can also use leftover grilled chicken or even canned chicken in a pinch (just drain it well). I’ve used both breast and thigh meat; thighs stay juicier, but breasts work fine too.
- Cream cheese, softened (8 oz or 226g) — This is the backbone of the buffalo dip. It adds richness and helps bind everything together. Make sure it’s at room temperature so it blends smoothly. I prefer Philadelphia brand for consistent results, but any full-fat cream cheese works. Neufchâtel (reduced fat) is okay but won’t be as creamy.
- Buffalo sauce (1/2 cup or 120ml) — Frank’s RedHot Original is the classic choice and what I always recommend. It has that perfect vinegary heat that defines buffalo flavor. If you want it milder, use 1/3 cup. For extra heat, add a teaspoon of cayenne or use a hotter wing sauce. Avoid thick barbecue-style buffalo sauces; you want the thin, pourable kind.
- Ranch dressing (1/4 cup or 60ml) — This balances the heat and adds creaminess. I use full-fat ranch for best texture. Hidden Valley is my standby. You can substitute blue cheese dressing if you’re team blue cheese—just know it’ll be tangier. For a lighter option, Greek yogurt ranch works but won’t be as rich.
- Shredded cheddar cheese (1 1/2 cups or 170g) — Sharp cheddar gives the best flavor. I shred my own from a block because pre-shredded cheese has anti-caking agents that prevent it from melting as smoothly. If you’re in a rush, pre-shredded will still work—just expect a slightly less creamy melt.
- Shredded mozzarella cheese (1/2 cup or 55g) — This adds that stretchy, gooey pull-apart texture. Low-moisture mozzarella is best. You can use all cheddar if you prefer, but the mozzarella really makes the sliders feel extra indulgent.
- Slider buns (12-count package, about 340g) — Hawaiian sweet rolls are my absolute favorite for this recipe. The slight sweetness against the spicy buffalo sauce is incredible. King’s Hawaiian is the classic brand. You can use plain dinner rolls or even small brioche buns—just avoid anything too dense or dry.
- Unsalted butter (3 tablespoons or 42g) — This goes on top of the buns before baking. It creates that golden, slightly crispy top that contrasts with the soft filling. If you only have salted butter, just reduce or skip any added salt.
- Garlic powder (1 teaspoon) — Mixed into the melted butter for brushing. Fresh minced garlic can burn under the broiler, so stick with powder here. It distributes more evenly anyway.
- Dried parsley (1/2 teaspoon) — Optional, but it makes the tops look pretty and adds a tiny hint of freshness. You can skip it or use fresh chopped parsley if you have it.
- Green onions, sliced (2-3 stalks) — For garnish. They add color and a mild onion bite that cuts through the richness. Don’t skip these if you can help it—they really brighten the whole dish.
Equipment Needed
You don’t need anything fancy for these sliders. I’ve made them in three different kitchens with three different ovens, and they’ve turned out great every time. Here’s what you’ll actually use.
- 9×13-inch baking dish (or similar size) — This is the perfect size for 12 sliders. A 9×9-inch dish works too if you pack them tighter, but they won’t get as crispy on the sides. I use a glass Pyrex dish because I can see how the bottoms are browning.
- Large mixing bowl — For combining the chicken, cream cheese, buffalo sauce, ranch, and cheeses. Any medium-to-large bowl works. I use my grandmother’s old ceramic mixing bowl—it’s nothing special, but it holds everything perfectly.
- Small saucepan or microwave-safe bowl — For melting the butter. I usually use a small saucepan because I’m old-fashioned, but a microwave bowl works in 30-second bursts.
- Pastry brush — For brushing the butter mixture over the buns. A silicone brush is easiest to clean. If you don’t have one, you can use a spoon and spread it carefully, or just drizzle the butter and tilt the pan.
- Sharp knife or serrated bread knife — For cutting the slab of buns in half horizontally. A serrated knife works best because it cuts through the soft rolls without squishing them. I learned this after ruining a batch with a dull chef’s knife.
- Aluminum foil — For covering the dish during the first part of baking. This traps steam and ensures the filling heats through without the tops burning. Heavy-duty foil is nice but regular works fine.
- Cooling rack — Optional, but placing the hot dish on a rack prevents the bottoms from getting soggy from trapped steam. I use a basic wire cooling rack that cost five dollars.
That’s it. No stand mixer, no food processor, no specialty gadgets. If you have these basics, you’re ready.
Preparation Method
Follow these steps carefully, and you’ll have perfect sliders every time. I’ve included all the little details I wish someone had told me the first time I made these.
- Preheat your oven to 350°F (175°C). Get this going first so it’s ready when you are. If your oven runs hot, check the temperature with an oven thermometer—I learned this after burning the tops of my first batch.
- Prepare the chicken. If using a rotisserie chicken, remove the skin and pull the meat off the bones. Shred it with two forks or your fingers. You want bite-sized pieces, not tiny shreds. Aim for about 3 cups. If using canned chicken, drain it thoroughly and flake it apart with a fork. If using leftover cooked chicken, chop or shred it the same way.
- Soften the cream cheese. Take the cream cheese out of the fridge about 30 minutes before you start. If you forgot, microwave it in 10-second bursts until soft but not hot. You should be able to press into it easily with a finger. Cold cream cheese will leave lumps in your filling.
- Mix the filling. In a large bowl, combine the shredded chicken, softened cream cheese, buffalo sauce, ranch dressing, 1 cup of the shredded cheddar, and all of the shredded mozzarella. Stir until everything is evenly distributed. The mixture should be thick but scoopable. If it seems dry, add another tablespoon of ranch or buffalo sauce. If it seems too wet, add a little more shredded cheese. Taste it—yes, raw chicken mixture is fine to taste since the chicken is already cooked. Adjust the heat level now if needed.
- Prepare the buns. Keep the slider buns connected as a slab. Using a serrated knife, carefully cut the entire slab in half horizontally, like you’re splitting a giant hamburger bun. You’ll end up with a top half and a bottom half. Place the bottom half in your 9×13-inch baking dish. If the buns are stuck together, gently separate them with your fingers—don’t tear them.
- Assemble the sliders. Spread the chicken mixture evenly over the bottom half of the buns. Don’t be shy—really pile it on. Use a spatula to press it down gently so it fills the gaps between the buns. Place the top half of the buns over the filling, pressing down lightly to secure everything.
- Make the butter topping. In a small saucepan over low heat, melt the 3 tablespoons of butter. Stir in the garlic powder and dried parsley. Remove from heat. If using the microwave, heat the butter in a bowl for 30 seconds, then stir in the seasonings.
- Brush the tops. Using a pastry brush, generously brush the butter mixture over the top of the buns. Make sure every bun gets some. The butter will soak in slightly and create that golden crust. Don’t pour the butter directly—brushing gives you even coverage.
- Add the remaining cheese. Sprinkle the remaining 1/2 cup of shredded cheddar over the top of the buttered buns. This creates that beautiful, melty cheese crust. If you want extra cheesiness, add another 1/4 cup.
- Bake covered. Cover the dish loosely with aluminum foil. Bake for 15 minutes. The foil traps steam and ensures the filling gets hot all the way through without the tops browning too fast. Don’t seal the foil tight—just lay it over the top.
- Bake uncovered. Remove the foil and bake for another 5-7 minutes, until the cheese on top is melted and bubbly and the edges of the buns are golden brown. Keep an eye on it—ovens vary, and you don’t want the edges to burn.
- Optional broil for extra crisp. If you want the tops extra golden, switch the oven to broil for the last 1-2 minutes. Watch it like a hawk—broiling can go from perfect to burnt in seconds. I’ve lost a batch this way, so I always set a timer for 60 seconds and check.
- Rest before serving. Let the sliders rest in the dish for 5 minutes. This allows the filling to set slightly so the sliders hold together when you pull them apart. If you skip this step, the filling will ooze out everywhere. I know because I’ve done it.
- Garnish and serve. Sprinkle sliced green onions over the top. Use a spatula to lift individual sliders out. Serve warm, with extra ranch or blue cheese dressing on the side for dipping if you want.
Cooking Tips & Techniques
I’ve made these sliders enough times to know exactly where things can go wrong. Here are the lessons I learned the hard way so you don’t have to.
Don’t over-soak the buns. The first time I made these, I poured extra buffalo sauce over the filling before adding the top buns. Big mistake. The buns turned into a mushy, sad mess. The butter topping and the moisture from the filling are enough. Trust the recipe.
Keep the buns connected. I know it’s tempting to separate them for easier eating, but keeping them as a slab is crucial. It creates a structural barrier that holds the filling in place. When you cut the slab in half horizontally, you get a built-in top and bottom that seal the edges. Individual buns let the filling leak out everywhere.
Room temperature ingredients matter. Cold cream cheese won’t blend smoothly into the chicken mixture. Cold butter won’t brush evenly onto the buns. Take everything out of the fridge 30 minutes before you start. If you’re in a rush, microwave the cream cheese in 10-second bursts and soften the butter by pressing it with a fork.
Watch the broiler like your dinner depends on it. I ruined a batch by walking away for “just a minute” to answer a text. Came back to charcoal tops. The broiler is aggressive. Set a timer for 60 seconds, check, and add more time in 30-second increments if needed.
Use a serrated knife for cutting the buns. A straight blade squishes the soft rolls and makes a mess. A serrated knife saws through cleanly. If you don’t have one, use a very sharp chef’s knife and use a gentle sawing motion.
Let them rest. I know you’ll be hungry. I know the smell will be driving you crazy. But those 5 minutes of resting time are non-negotiable. The filling needs to set so the sliders hold their shape when you pull them apart. Cut into them too soon, and you’ll have a delicious but structurally compromised pile of deliciousness.
Make ahead tip. You can assemble the sliders completely (without the butter topping) up to 24 hours in advance. Cover and refrigerate. When ready to bake, add the butter topping and bake as directed, adding 5 extra minutes to the covered baking time since you’re starting from cold.
Variations & Adaptations
One of the best things about this recipe is how flexible it is. Here are some variations I’ve tried and loved.
Blue Cheese Version: Swap the ranch dressing for blue cheese dressing and add 1/4 cup crumbled blue cheese to the filling. The tangy, funky blue cheese pairs beautifully with buffalo sauce. My friend Jenna insists this is the only way to make it. I like both versions equally.
Extra Spicy: Add 1 tablespoon of cayenne pepper to the filling, use a hotter buffalo sauce, and mix in 1 teaspoon of red pepper flakes. Top with sliced jalapeños before baking. This version got devoured at a gathering of spice enthusiasts—but it cleared the room of anyone with a mild palate.
Smoked Chicken Version: Use smoked chicken instead of rotisserie. The smoky flavor adds a whole new dimension. I made this for a fall tailgate and people couldn’t stop talking about it. If you don’t have a smoker, use liquid smoke—just 1/2 teaspoon mixed into the filling.
Vegetarian Option: Replace the chicken with 3 cups of finely chopped mushrooms sautéed with garlic and a splash of soy sauce, or use canned jackfruit shredded and seasoned. The texture is different but still satisfying. I’ve made this for vegetarian friends and they loved it.
Gluten-Free Adaptation: Use gluten-free slider buns. The rest of the ingredients are naturally gluten-free. Just be careful with the baking time—gluten-free buns can dry out faster. Check them at the 12-minute mark of the covered baking time.
Low-Carb/Keto Version: Skip the buns entirely and serve the buffalo chicken dip with celery sticks, cucumber rounds, or pork rinds for dipping. It’s essentially buffalo chicken dip with a different delivery method. My keto cousin requests this every time.
Breakfast Sliders: Add a fried egg to each slider before serving. The runny yolk mixing with the buffalo filling is unexpectedly amazing. I tried this on a lazy Sunday morning and it became a whole new thing.
Serving & Storage Suggestions
These sliders are best served warm, right out of the oven, when the cheese is still stretchy and the tops are golden. But they’re also surprisingly good at room temperature, which makes them perfect for parties and buffets.
Serving temperature: Serve immediately after the 5-minute rest. If you’re holding them for a party, keep them in a warm oven (200°F or 95°C) for up to 30 minutes. Don’t leave them out at room temperature for more than 2 hours.
Presentation: Arrange the sliders on a large platter with the green onions sprinkled over the top. Put small bowls of extra ranch and blue cheese dressing on the side for dipping. I like to add celery sticks and carrot sticks around the platter for color and crunch.
What to serve with them: These sliders are hearty enough to be a meal on their own, but they pair beautifully with a simple side salad, coleslaw, or crispy french fries. For game day, I serve them alongside wings, nachos, and veggie platters. They also go great with a cold beer or a spicy Bloody Mary.
Storing leftovers: If you have any leftovers (unlikely, but possible), store them in an airtight container in the refrigerator for up to 3 days. The buns will soften over time, but the flavor will still be great.
Reheating: The best way to reheat is in the oven at 350°F (175°C) for 10 minutes, uncovered. This crisps the tops back up. The microwave works in a pinch (30-45 seconds per slider), but the buns will be soft. I don’t recommend freezing these—the texture of the buns and cream cheese changes too much.
Flavor development: Honestly, these sliders taste even better the next day. The flavors meld together overnight, and the buffalo heat settles into something more rounded. I’ve been known to make a batch just for weekday lunches. The buns will be softer, but the flavor is incredible.
Nutritional Information & Benefits
Let’s be real—these sliders are indulgent. They’re not health food, and they’re not pretending to be. But knowing what’s in them helps you enjoy them mindfully.
Estimated nutritional values per slider (based on 12 sliders): Approximately 320 calories, 18g fat, 22g carbohydrates, 16g protein, 2g fiber, 8g sugar, 680mg sodium. These numbers will vary based on exact ingredients and portion sizes.
Health benefits of key ingredients: Chicken is a great source of lean protein, which helps keep you full and supports muscle health. Cream cheese provides calcium and vitamin A. The buffalo sauce contains capsaicin from chili peppers, which may boost metabolism and has anti-inflammatory properties. The green onions add a small amount of vitamins K and C.
Dietary considerations: This recipe is not gluten-free (due to the buns) but can be adapted. It’s not low-carb in its standard form, but the keto version works well. It contains dairy from the cream cheese, cheddar, mozzarella, and ranch dressing. It’s not suitable for vegans or vegetarians in its standard form, but the vegetarian adaptation is a good option.
Potential allergens: This recipe contains dairy (cream cheese, cheddar, mozzarella, ranch), gluten (buns), and eggs (in the buns and potentially in the ranch dressing). Check your specific ingredient labels if you have allergies.
My personal take? These sliders are a treat, not an everyday meal. I make them for celebrations, game days, and times when I want to feed people something that feels special. Balance is key—enjoy them fully, then get back to your regular routine. Life’s too short to feel guilty about good food shared with good people.
Conclusion
These Game Day Buffalo Chicken Dip Pull-Apart Sliders are exactly the kind of recipe I love sharing—simple enough for a beginner, impressive enough for a crowd, and endlessly adaptable to whatever you have on hand. They’ve become my go-to for every game day gathering, every potluck, every time I need to bring something that will disappear fast.
The magic is in how the creamy, spicy filling meets the soft, buttery buns. It’s comfort food at its finest—no pretense, no fuss, just pure satisfaction. And honestly? Watching someone take that first bite and see their eyes light up is one of my favorite things in the world. It never gets old.
I’d love to hear how these turn out for you. Did you try a variation? Did your picky eater surprise you? Did you find yourself eating four before the game even started? Drop a comment below and let me know. Tag me in your photos on social media—I love seeing your creations. And if you have a friend who swears they hate buffalo sauce? Make these for them anyway. You might just change their mind.
Now go preheat that oven. Your game day spread is about to get a whole lot better.
Frequently Asked Questions
Can I make these sliders ahead of time?
Absolutely. Assemble the sliders completely (without the butter topping) up to 24 hours in advance. Cover and refrigerate. When you’re ready to bake, add the butter topping and bake as directed, adding about 5 extra minutes to the covered baking time since you’re starting from a cold dish.
Can I use frozen chicken?
Yes, but you’ll need to cook and shred it first. Frozen chicken breasts or thighs work fine—just cook them thoroughly, let them cool slightly, then shred. Rotisserie chicken is easier and more flavorful, but frozen chicken is a perfectly good substitute.
What if I don’t have slider buns?
You can use dinner rolls, small brioche buns, or even cut hot dog buns into smaller pieces. Hawaiian sweet rolls are my top recommendation for their sweetness against the spicy filling, but any soft, slightly sweet roll will work. Avoid dense, crusty bread—it won’t absorb the flavors the same way.
Can I freeze these sliders?
I don’t recommend freezing them. The cream cheese and buns don’t thaw well, and the texture becomes grainy and soggy. These are best made fresh or refrigerated for up to 3 days. If you have leftovers, reheat them in the oven for best results.
How do I make these less spicy for kids or sensitive eaters?
Use only 1/4 cup of buffalo sauce and increase the ranch dressing to 1/3 cup. You can also use a mild wing sauce or even substitute half the buffalo sauce with barbecue sauce for a milder, sweeter version. The cream cheese and cheeses also help mellow the heat significantly.
Pin This Recipe!
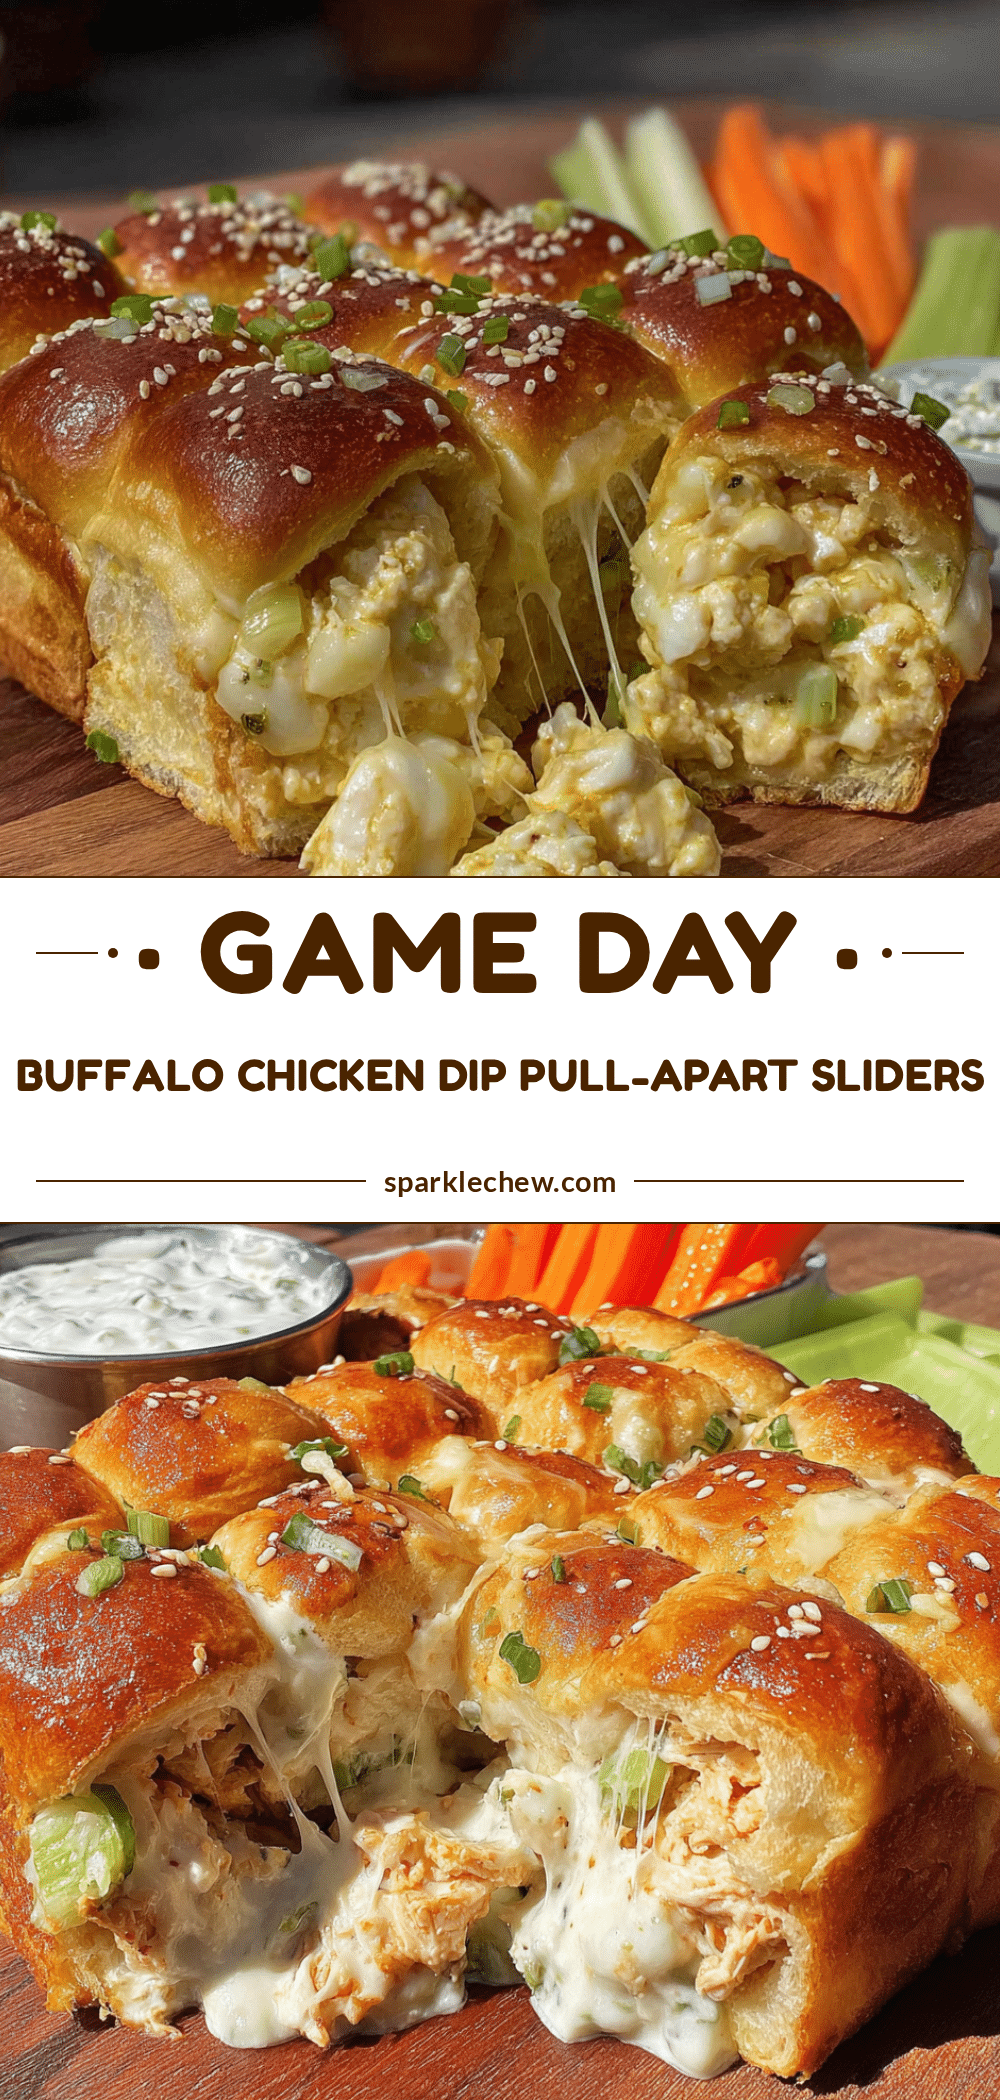
Easy Game Day Buffalo Chicken Dip Pull-Apart Sliders

These messy, cheesy, buttery sliders combine creamy buffalo chicken dip with soft slider buns for the ultimate game day appetizer. Ready in under 30 minutes, they’re a crowd-pleaser that disappears fast.
- Prep Time: 10 minutes
- Cook Time: 20 minutes
- Total Time: 30 minutes
- Yield: 12 servings 1x
- Category: Appetizer
- Cuisine: American
Ingredients
- 3 cups (about 450g) cooked chicken, shredded
- 8 oz (226g) cream cheese, softened
- 1/2 cup (120ml) buffalo sauce (e.g., Frank’s RedHot Original)
- 1/4 cup (60ml) ranch dressing
- 1 1/2 cups (170g) shredded cheddar cheese, divided
- 1/2 cup (55g) shredded mozzarella cheese
- 12-count package slider buns (about 340g, e.g., Hawaiian sweet rolls)
- 3 tablespoons (42g) unsalted butter
- 1 teaspoon garlic powder
- 1/2 teaspoon dried parsley
- 2–3 stalks green onions, sliced
Instructions
- Preheat oven to 350°F (175°C).
- If using rotisserie chicken, remove skin and shred meat into bite-sized pieces. Aim for 3 cups.
- Soften cream cheese by leaving at room temperature for 30 minutes or microwaving in 10-second bursts until soft.
- In a large bowl, combine shredded chicken, softened cream cheese, buffalo sauce, ranch dressing, 1 cup cheddar cheese, and all mozzarella. Stir until evenly mixed. Adjust heat if needed.
- Keep slider buns connected as a slab. Using a serrated knife, cut slab in half horizontally. Place bottom half in a 9×13-inch baking dish.
- Spread chicken mixture evenly over bottom buns, pressing gently to fill gaps. Place top half of buns over filling, pressing lightly.
- In a small saucepan over low heat, melt butter. Stir in garlic powder and dried parsley. Alternatively, microwave butter for 30 seconds and stir in seasonings.
- Brush butter mixture generously over top buns.
- Sprinkle remaining 1/2 cup cheddar cheese over buttered buns.
- Cover dish loosely with aluminum foil. Bake for 15 minutes.
- Remove foil and bake for another 5-7 minutes, until cheese is melted and bubbly and edges are golden brown.
- Optional: Broil for 1-2 minutes for extra crisp tops, watching carefully.
- Let sliders rest in dish for 5 minutes before serving.
- Sprinkle sliced green onions over top. Serve warm with extra ranch or blue cheese dressing for dipping.
Notes
Don’t over-soak the buns; the butter topping and filling moisture are enough. Keep buns connected as a slab for structural integrity. Room temperature ingredients blend better. Watch the broiler carefully to avoid burning. Let sliders rest 5 minutes before serving to set the filling. Can be assembled up to 24 hours in advance (without butter topping) and refrigerated; add 5 extra minutes to covered baking time.
Nutrition
- Serving Size: 1 slider
- Calories: 320
- Sugar: 8
- Sodium: 680
- Fat: 18
- Saturated Fat: 9
- Carbohydrates: 22
- Fiber: 2
- Protein: 16
Keywords: buffalo chicken, sliders, game day, appetizer, party food, buffalo dip, pull-apart sliders