Love this? Save it for later!
Share the inspiration with your friends
It was 10:47 PM on a Tuesday that I’ll never forget—a Tuesday that tasted like failure until it didn’t. The craving hit me out of nowhere: pumpkin pie. Not just any pumpkin pie, but the kind with a buttery, spiced crust that crumbles when you look at it. The kind my grandma used to make for Thanksgiving, the one she’d guard with her life until dessert time. But here’s the thing—I didn’t have a pie plate. I didn’t have the energy to roll out dough. And honestly, I didn’t have the patience for a pie that demands precision when all I wanted was comfort.
What I did have was a half-empty box of gingersnap cookies my toddler had been snacking on, a can of pumpkin puree hiding in the back of the pantry, and this wild idea that maybe—just maybe—I could make something better than pie. Something easier. Something that wouldn’t require me to wrestle with pastry dough at nearly midnight. So I grabbed my 9×13 baking dish (the one with the chip on the corner from that incident last summer), crushed those gingersnaps with the bottom of a measuring cup, and just went for it.
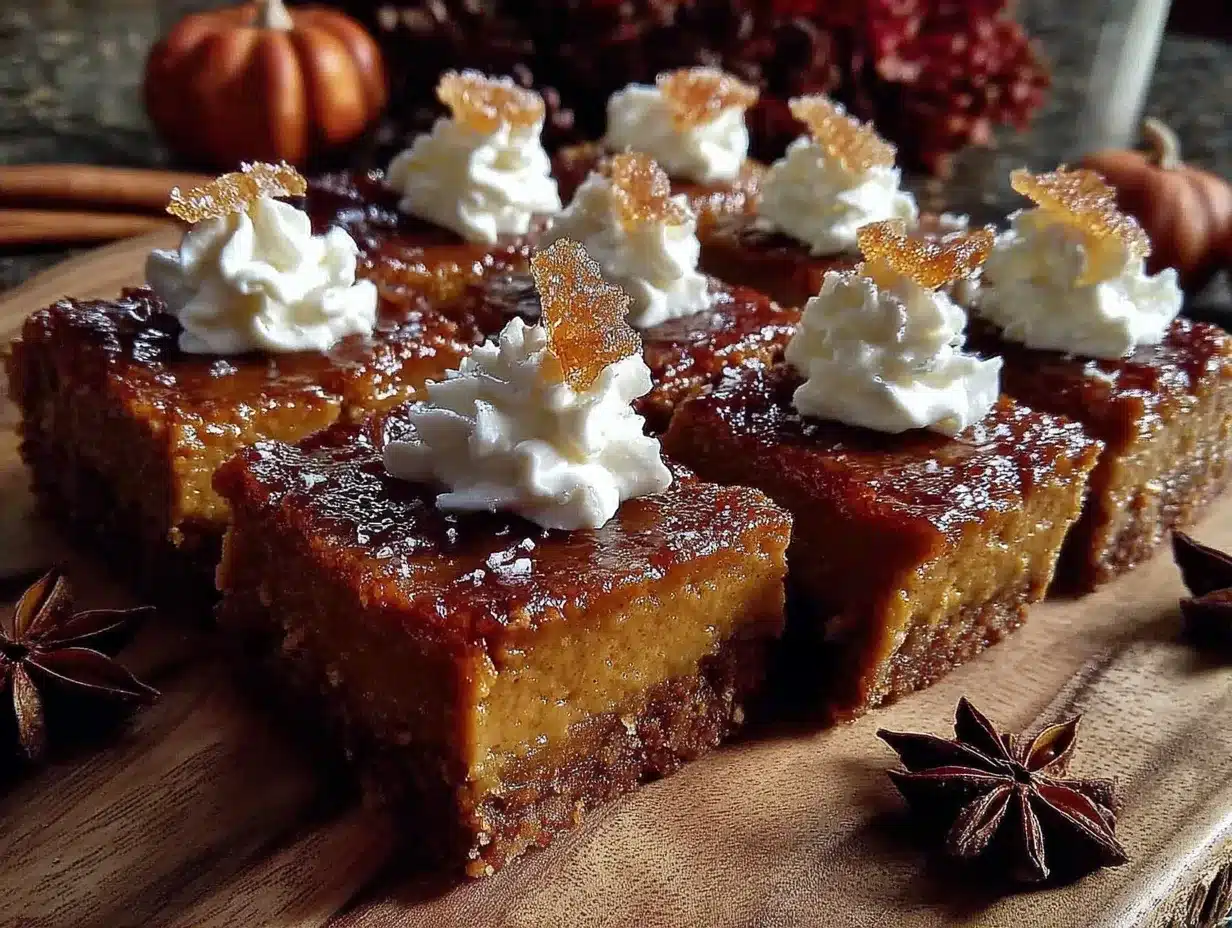
The result? Let me tell you, I nearly cried. Not from exhaustion (though that was real), but because these maple pumpkin pie bars were everything I wanted and nothing I expected. The crust came together in minutes—no chilling, no rolling, no drama. The filling was so creamy and perfectly spiced, with just enough maple to make it feel special without being overpowering. My husband stumbled into the kitchen at 11:15, sleep-eyed and suspicious, took one bite, and said, “You need to make these for the kids tomorrow.” So I did. And they devoured them. Maybe you’ve been there—standing in your kitchen at an unreasonable hour, chasing a craving with whatever you’ve got, wondering if it’ll work out. Trust me on this one. It does.
Why You’ll Love This Recipe
Let me be real with you for a second—I’ve tested this recipe six times. Six. My family has been my willing (and very happy) taste-test crew, and I’ve tweaked everything from the sugar ratio to the baking time until these bars were absolutely perfect. Here’s why these kid-approved maple pumpkin pie bars with gingersnap crust belong in your regular dinner rotation:
- Quick & Easy: From start to finish, these bars come together in about 45 minutes. No pie crust drama, no special equipment, no stress. Just mix, press, pour, and bake.
- Simple Ingredients: You probably have most of these in your kitchen right now. Gingersnap cookies, pumpkin puree, eggs, maple syrup, and basic pantry spices. No fancy grocery trips required.
- Perfect for Family Dinners: These bars are made for the chaos of real family life. They slice cleanly, they’re not too messy for little hands, and they actually taste better the next day.
- Crowd-Pleaser: I’ve served these to picky toddlers, skeptical teenagers, and adults who “don’t really like pumpkin desserts.” Every single person went back for seconds. Every. Single. One.
- Unbelievably Delicious: The gingersnap crust adds this warm, spicy crunch that perfectly complements the silky maple-pumpkin filling. It’s like pumpkin pie and your favorite cookie had a baby, and that baby is better than both parents.
What makes this recipe different from every other pumpkin bar out there? It’s the crust. Most recipes use a boring graham cracker base or a complicated pastry dough. But crushed gingersnaps? They bring ginger, clove, and molasses notes that make the maple flavor sing. Plus, the texture is incredible—crispy on the bottom, tender in the middle, and absolutely irresistible. This isn’t just another pumpkin dessert. It’s the one that’ll have your family asking, “Can you make these again next week?”
What Ingredients You Will Need
This recipe uses simple, wholesome ingredients to deliver bold flavor and satisfying texture without the fuss. Most of these are pantry staples you probably already have, which makes these bars perfect for those “I need dessert NOW” moments.
For the Gingersnap Crust
- 2 cups (about 200g) gingersnap cookies, crushed (I recommend Anna’s or Mi-Del for the best texture—they’re sturdy enough to hold together without being rock-hard)
- 5 tablespoons (70g) unsalted butter, melted (salted butter works too, just reduce the salt elsewhere)
- 2 tablespoons (25g) granulated sugar (optional, but helps the crust hold together better)
For the Maple Pumpkin Filling
- 1 can (15 oz or 425g) pumpkin puree (not pumpkin pie filling—make sure it’s 100% pure pumpkin. Libby’s is my go-to for consistent results)
- 3/4 cup (180ml) pure maple syrup (the real stuff matters here—skip the pancake syrup. Grade A dark amber gives the best flavor)
- 2 large eggs, room temperature (cold eggs can make the filling lumpy, so let them sit out for 15 minutes)
- 1/2 cup (120ml) heavy cream (adds richness and that silky texture. You can substitute half-and-half in a pinch)
- 1 teaspoon vanilla extract (pure vanilla, not imitation—it makes a difference)
- 1 teaspoon ground cinnamon
- 1/2 teaspoon ground ginger
- 1/4 teaspoon ground nutmeg (freshly grated if you have it—it’s worth the extra 30 seconds)
- 1/4 teaspoon ground cloves
- 1/4 teaspoon salt (brings out all the other flavors)
Ingredient Selection Tip: When buying gingersnaps, look for cookies that are firm but not rock-hard. The softer ones tend to clump when crushed, which makes for an uneven crust. I’ve found that store-brand gingersnaps actually work better than fancy artisanal ones for this recipe—they’re more consistent in texture.
Substitution Guidance: For a dairy-free version, use coconut oil instead of butter in the crust and full-fat coconut milk instead of heavy cream. For a gluten-free option, look for gluten-free gingersnap cookies—they exist and work beautifully. Just make sure to check the package because not all brands are created equal.
Equipment Needed
You don’t need a fancy kitchen to make these bars. Here’s what you’ll actually use:
- 9×13-inch baking dish (glass or metal both work—I use a glass Pyrex dish and love how evenly it bakes)
- Mixing bowls (one medium for the crust, one large for the filling)
- Rolling pin or measuring cup (for crushing the gingersnaps—a food processor works too, but I actually prefer the uneven texture you get from crushing by hand)
- Whisk (for smoothing out the filling)
- Rubber spatula (for scraping every last bit of filling into the pan)
- Parchment paper (trust me on this—it makes lifting the bars out so much easier)
- Measuring cups and spoons (for accuracy)
If you don’t have a 9×13 dish, you can use a 9×9 square pan—just increase the baking time by about 5-7 minutes and expect thicker bars. I’ve also made these in disposable aluminum pans for potlucks, and they work perfectly. Just keep an eye on the edges so they don’t over-brown.
Budget-Friendly Tip: Skip the food processor and crush the gingersnaps the old-fashioned way—put them in a zip-top bag and go to town with a rolling pin or even a heavy skillet. It’s oddly satisfying and saves you from washing another appliance.
Preparation Method
Alright, let’s make these kid-approved maple pumpkin pie bars with gingersnap crust. I’ve broken everything down so even a beginner baker can nail this on the first try.
- Preheat your oven to 350°F (175°C). Line your 9×13 baking dish with parchment paper, leaving some overhang on the long sides—this makes lifting the bars out later a breeze. Lightly spray the parchment with non-stick cooking spray just to be safe.
- Make the gingersnap crust. Place the gingersnap cookies in a zip-top bag and crush them with a rolling pin until you have fine crumbs mixed with some small chunks. You want texture here—not powder. Transfer to a medium bowl, add the melted butter and sugar, and stir until everything looks like wet sand. It should hold together when you squeeze a handful.
- Press the crust into the pan. Dump the crust mixture into your prepared baking dish and press it down firmly and evenly. Use the bottom of a measuring cup or a flat glass to really pack it in. Don’t skimp on this step—a loose crust will fall apart when you cut the bars. Bake for 8 minutes, then set aside to cool slightly while you make the filling.
- Whisk the filling ingredients together. In a large bowl, whisk the pumpkin puree and maple syrup until smooth. Add the eggs one at a time, whisking well after each. Then add the heavy cream, vanilla, cinnamon, ginger, nutmeg, cloves, and salt. Whisk until everything is completely combined and silky. Don’t over-whisk—you don’t want to incorporate too much air, which can cause cracks.
- Pour the filling over the crust. Slowly pour the pumpkin mixture over the pre-baked crust. It should spread evenly on its own, but give the pan a gentle tilt if needed. Tap the pan on the counter a few times to release any air bubbles—this helps prevent cracks later.
- Bake the bars. Place the pan in the preheated oven and bake for 30-35 minutes. The edges should be set and slightly puffed, but the center should still jiggle just a tiny bit when you gently shake the pan. This is the sweet spot—overbaking will make the filling dry and grainy. I’ve learned this the hard way, trust me.
- Cool completely. Let the bars cool in the pan on a wire rack for at least 1 hour at room temperature. Then transfer to the refrigerator and chill for at least 3 hours—overnight is even better. This is crucial for clean slices. I know it’s hard to wait, but cold bars cut like a dream.
- Slice and serve. Use the parchment overhang to lift the entire block of bars out of the pan. Place on a cutting board and use a sharp knife to cut into squares. For the cleanest cuts, wipe the knife clean between slices. Serve cold or at room temperature—both are delicious.
Sensory Cue: When the bars are done, your kitchen will smell like autumn in heaven. The filling should look set around the edges with a slight wobble in the very center. If the top starts cracking, you’ve gone a minute too long—but don’t worry, it still tastes amazing.
Cooking Tips & Techniques
After six rounds of testing (and a few spectacular failures), here’s what I’ve learned about making these bars perfect every time:
Don’t over-bake the crust. I made this mistake on my second attempt—baked the crust for 12 minutes thinking “more is better.” It came out too hard and slightly bitter. Eight minutes is the sweet spot. The crust should be set but not fully browned because it’ll bake again with the filling.
Room temperature eggs are non-negotiable. I know, I know—who has time to wait for eggs to warm up? But cold eggs can seize the maple syrup and create a lumpy filling. Here’s my trick: place the eggs in a bowl of warm water for 5 minutes while you prep everything else. Problem solved.
Chill before cutting. This is the hardest lesson I learned. On my first attempt, I cut into the bars after just 30 minutes of cooling. What a disaster—the filling oozed everywhere, the crust crumbled, and I ended up eating pumpkin soup with a spoon. (Delicious, but not the goal.) Three hours minimum in the fridge. Overnight is ideal. Your patience will be rewarded with perfect, clean squares.
Use a hot knife for cleaner cuts. Run your knife under hot water, dry it off, then slice. The heat glides through the filling without dragging. Wipe and repeat between each cut. This is a game-changer for presentation.
Watch the edges. Every oven is different. If the edges of your bars are browning too quickly while the center is still jiggly, tent the pan loosely with aluminum foil for the last 10 minutes of baking. This saved my third batch from becoming hockey pucks around the perimeter.
Double the recipe for a crowd. These bars disappear fast. If you’re bringing them to a potluck or family gathering, I strongly recommend making two pans. Trust me on this—one pan won’t be enough.
Variations & Adaptations
One of the best things about this recipe is how flexible it is. Here are some variations I’ve tried and loved:
Dairy-Free Version
Swap the butter in the crust for melted coconut oil or vegan butter. Use full-fat coconut milk instead of heavy cream. The texture is slightly different—a little less rich—but still absolutely delicious. My sister-in-law, who’s dairy-free, has requested these for every family gathering since I figured out the swap.
Gluten-Free Adaptation
Use gluten-free gingersnap cookies for the crust. I’ve tested this with several brands, and they all work well. Just be careful not to over-process the crumbs—gluten-free cookies can turn into paste if you go too far. Also, add an extra tablespoon of butter to help the crust hold together since gluten-free cookies tend to be drier.
Spice It Up or Down
For a milder version that picky kids will love, reduce the ginger and cloves by half and add an extra teaspoon of cinnamon. For the adventurous eaters in your house, add 1/4 teaspoon of cayenne pepper or a pinch of black pepper—it sounds weird, but it makes the maple flavor pop in a way you won’t believe.
Pumpkin-Free Option
Believe it or not, you can substitute the pumpkin puree with sweet potato puree (canned or homemade). The flavor is slightly different—a bit earthier—but the texture is identical. I did this by accident one Thanksgiving when I grabbed the wrong can, and nobody noticed until I told them.
Mini Bar Version
Make these in a muffin tin for individual servings. Line 12 muffin cups with parchment paper strips (for easy removal), press the crust into each cup, fill, and bake for 18-22 minutes. Perfect for lunchboxes or portion control—though “portion control” is a joke when they’re this good.
Serving & Storage Suggestions
These kid-approved maple pumpkin pie bars with gingersnap crust are incredibly versatile when it comes to serving. Here’s how I like to do it:
Serving Temperature: I actually prefer these bars cold, straight from the fridge. The filling firms up beautifully and the crust stays perfectly crunchy. But if you’re a warm-dessert person, microwave individual bars for 10-15 seconds—just enough to take the chill off without melting the structure.
Toppings That Work: A dollop of whipped cream is the classic choice, but I also love a drizzle of caramel sauce or a sprinkle of cinnamon sugar. For something extra, serve with a scoop of vanilla ice cream—the warm-cold contrast is incredible.
Storage Instructions: Store leftover bars in an airtight container in the refrigerator for up to 5 days. Place a piece of parchment paper between layers to prevent sticking. I’ve never had them last longer than 3 days in my house, but theoretically they’re good for a week.
Freezer-Friendly: These bars freeze beautifully. Wrap individual slices tightly in plastic wrap, then place them in a freezer-safe bag or container. They’ll keep for up to 3 months. To thaw, just transfer to the refrigerator overnight or let sit at room temperature for 30 minutes.
Flavor Development: Here’s a secret—these bars actually taste better on day two. The spices meld together, the maple flavor deepens, and the crust softens just slightly into this perfect, almost cookie-like texture. So if you can, make them a day ahead. Your future self will thank you.
Beverage Pairings: A warm cup of coffee or chai tea is the perfect companion. For the kids, a glass of cold milk or warm apple cider makes these bars feel extra special.
Nutritional Information & Benefits
While these bars are definitely a treat (let’s not pretend otherwise), they do have some redeeming qualities. Here’s the breakdown per bar (assuming 12 servings):
- Calories: Approximately 280
- Total Fat: 14g
- Saturated Fat: 8g
- Carbohydrates: 36g
- Fiber: 2g
- Sugar: 24g
- Protein: 4g
- Vitamin A: 120% of the Daily Value (hello, pumpkin!)
- Iron: 6% of the Daily Value
Health Benefits: Pumpkin is packed with vitamin A, which supports eye health and immune function. The fiber from the pumpkin and gingersnaps helps with digestion—though I’m not saying these are health food. The maple syrup provides antioxidants and minerals like zinc and manganese, which is more than you can say for refined sugar. The ginger in the crust has anti-inflammatory properties, so basically these bars are medicine. (I’m kidding. Mostly.)
Dietary Considerations: This recipe contains gluten, dairy, and eggs. For gluten-free and dairy-free versions, see the variations section above. These bars are nut-free, making them safe for school events or nut-allergy households.
My Perspective: Look, I’m not a nutritionist—I’m a mom who loves dessert and wants her kids to eat real food. These bars use real ingredients like pumpkin, eggs, and maple syrup. Are they a health food? No. But they’re a hell of a lot better than anything from a box, and they make my kids happy. That’s a win in my book.
Conclusion
These kid-approved maple pumpkin pie bars with gingersnap crust have become a staple in my kitchen for good reason. They’re everything I want in a dessert—easy to make, incredibly delicious, and loved by everyone from my toddler to my father-in-law (who claims he doesn’t like pumpkin desserts). The gingersnap crust is a stroke of genius, the maple filling is silky and perfectly spiced, and the whole thing comes together with minimal fuss and maximum payoff.
What I love most about this recipe is how forgiving it is. You don’t need to be a pastry chef. You don’t need special equipment. You don’t even need to be awake at 11 PM with a random craving—though that’s how I discovered them. All you need is a box of gingersnaps, a can of pumpkin, and about 45 minutes of your time. The result is a dessert that looks impressive, tastes incredible, and makes everyone at the table feel special.
So go ahead—make these for your next family dinner, your kid’s school bake sale, or just because it’s Tuesday. Customize them however you like, and don’t be afraid to experiment. And when your family asks for the recipe (because they will), send them my way. I’d love to hear how yours turned out—leave a comment below and tell me about your favorite variation. Happy baking, friends!
Frequently Asked Questions
Can I use store-bought pumpkin pie filling instead of pure pumpkin puree?
I wouldn’t recommend it. Pumpkin pie filling already has sugar and spices added, which will throw off the sweetness and spice balance of this recipe. Stick with 100% pure pumpkin puree for the best results. If that’s all you have, reduce the maple syrup to 1/2 cup and skip the cinnamon and cloves—the filling already has them.
Why did my crust fall apart when I tried to cut the bars?
This usually happens for one of two reasons: either you didn’t press the crust firmly enough into the pan, or you didn’t chill the bars long enough before cutting. Make sure you really pack that crust down with the bottom of a measuring cup, and give the bars at least 3 hours in the fridge. Overnight is even better.
Can I make these bars ahead of time for a party?
Absolutely! In fact, I recommend it. These bars taste even better on day two, when the flavors have had time to meld. You can make them up to two days in advance and store them in the refrigerator. Just keep them covered to prevent them from drying out or absorbing other fridge odors.
My filling cracked on top. What did I do wrong?
Don’t worry—cracked tops are purely cosmetic and don’t affect the taste at all. Cracks usually happen from over-baking or over-whisking the filling. Next time, take the bars out when the center still has a slight jiggle, and whisk the filling just until combined—no more. You can also cover cracks with whipped cream, which is what I do when I’m feeling fancy.
Can I use a different cookie for the crust?
You can, but it won’t be the same. Gingersnaps bring a unique warmth and spice that perfectly complements the maple-pumpkin filling. Graham crackers work in a pinch, but they’re much milder. Speculoos cookies or even vanilla wafers would also work—just adjust the sugar in the crust since those cookies are sweeter than gingersnaps.
PrintKid-Approved Maple Pumpkin Pie Bars with Easy Gingersnap Crust
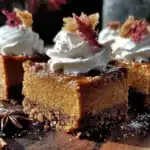
These easy maple pumpkin pie bars feature a crunchy gingersnap crust and a silky, perfectly spiced pumpkin filling. They come together in about 45 minutes with simple ingredients and are a crowd-pleasing dessert for family dinners or holidays.
- Prep Time: 15 minutes
- Cook Time: 30 minutes
- Total Time: 45 minutes
- Yield: 12 servings 1x
- Category: Dessert
- Cuisine: American
Ingredients
- 2 cups (about 200g) gingersnap cookies, crushed
- 5 tablespoons (70g) unsalted butter, melted
- 2 tablespoons (25g) granulated sugar
- 1 can (15 oz or 425g) pumpkin puree
- 3/4 cup (180ml) pure maple syrup
- 2 large eggs, room temperature
- 1/2 cup (120ml) heavy cream
- 1 teaspoon vanilla extract
- 1 teaspoon ground cinnamon
- 1/2 teaspoon ground ginger
- 1/4 teaspoon ground nutmeg
- 1/4 teaspoon ground cloves
- 1/4 teaspoon salt
Instructions
- Preheat your oven to 350°F (175°C). Line your 9×13 baking dish with parchment paper, leaving some overhang on the long sides. Lightly spray the parchment with non-stick cooking spray.
- Make the gingersnap crust: Place the gingersnap cookies in a zip-top bag and crush them with a rolling pin until you have fine crumbs mixed with some small chunks. Transfer to a medium bowl, add the melted butter and sugar, and stir until everything looks like wet sand.
- Press the crust into the pan: Dump the crust mixture into your prepared baking dish and press it down firmly and evenly. Use the bottom of a measuring cup or a flat glass to really pack it in. Bake for 8 minutes, then set aside to cool slightly while you make the filling.
- Whisk the filling ingredients together: In a large bowl, whisk the pumpkin puree and maple syrup until smooth. Add the eggs one at a time, whisking well after each. Then add the heavy cream, vanilla, cinnamon, ginger, nutmeg, cloves, and salt. Whisk until everything is completely combined and silky.
- Pour the filling over the crust: Slowly pour the pumpkin mixture over the pre-baked crust. Give the pan a gentle tilt if needed. Tap the pan on the counter a few times to release any air bubbles.
- Bake the bars: Place the pan in the preheated oven and bake for 30-35 minutes. The edges should be set and slightly puffed, but the center should still jiggle just a tiny bit when you gently shake the pan.
- Cool completely: Let the bars cool in the pan on a wire rack for at least 1 hour at room temperature. Then transfer to the refrigerator and chill for at least 3 hours—overnight is even better.
- Slice and serve: Use the parchment overhang to lift the entire block of bars out of the pan. Place on a cutting board and use a sharp knife to cut into squares. For the cleanest cuts, wipe the knife clean between slices. Serve cold or at room temperature.
Notes
For clean slices, chill bars at least 3 hours or overnight. Use a hot knife for cleaner cuts. Bars taste even better on day two. For dairy-free, use coconut oil instead of butter and full-fat coconut milk instead of heavy cream. For gluten-free, use gluten-free gingersnap cookies.
Nutrition
- Serving Size: 1 bar
- Calories: 280
- Sugar: 24
- Sodium: 200
- Fat: 14
- Saturated Fat: 8
- Carbohydrates: 36
- Fiber: 2
- Protein: 4
Keywords: pumpkin pie bars, maple pumpkin bars, gingersnap crust, easy pumpkin dessert, kid-friendly pumpkin bars, fall dessert, Thanksgiving dessert