Love this? Save it for later!
Share the inspiration with your friends
I was standing in my pantry last Tuesday, staring at a half-used bag of flour and wondering if I had the energy for another round of baking with my three-year-old. The afternoon sun was hitting the counter just right, and I caught a whiff of something—almond extract, maybe, or was it vanilla?—and suddenly I was seven years old, sitting cross-legged on my Aunt Louise’s linoleum floor, watching her roll out dough with a wine bottle because she couldn’t find her rolling pin. She was laughing about something, and the flour was floating in the air like snow, and I remember thinking that this was what magic felt like.
Aunt Louise passed about five years ago, and honestly, I still haven’t unpacked all the feelings around that. But her sugar cookies? Those I remember with my whole body. The way the edges were just slightly darker than the centers. The way the icing had that faint, almost-perfumed almond taste that made you close your eyes when you bit into it. She never chilled her dough—said it was a waste of time when you had hungry kids waiting—and she never used a recipe written down. It was all in her hands.
So I’ve spent the last few years trying to recreate that exact cookie. The one that doesn’t spread into a puddle. The one that holds its shape even when a toddler’s hands are pressing the cutter in sideways. The one that makes you feel like you’ve done something right, even when the kitchen looks like a flour bomb went off. Maybe you’ve been there—standing in your own kitchen, covered in dough, wondering if you’ll ever get it right. Let me tell you, this is the recipe that finally did it for me.
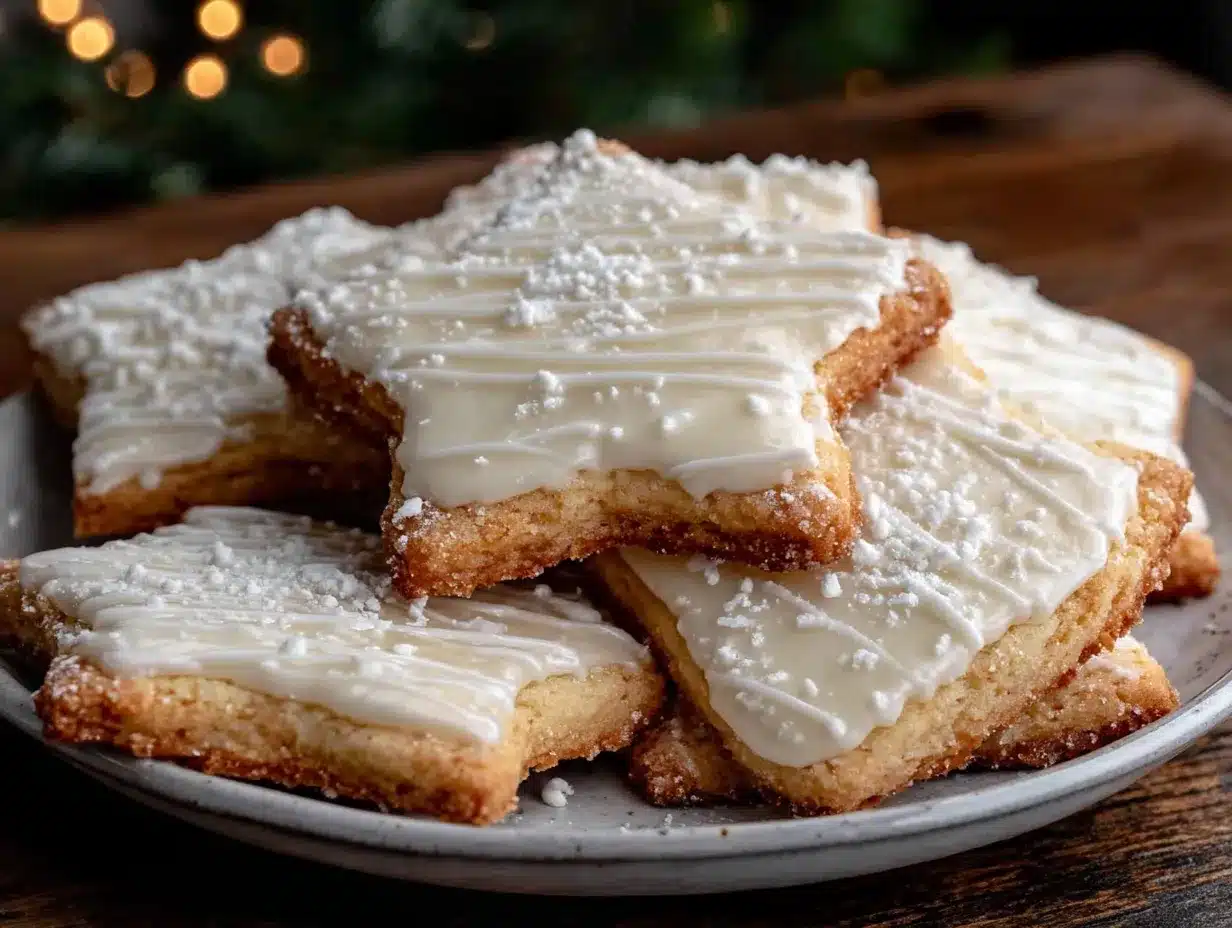
These no-chill cutout sugar cookies with almond icing are the ones I’ve been chasing. They’re not fancy. They’re not fussy. But they taste like that afternoon on Aunt Louise’s floor, and honestly, that’s worth more than any complicated bakery cookie I’ve ever tried.
Why You’ll Love This Recipe
I’ve tested this recipe about a dozen times—no exaggeration—to make sure it works for real families in real kitchens. Not test kitchens with fancy equipment. Just me, my three-year-old, and a counter that’s never quite clean enough. Here’s why this one’s a keeper.
- No Chill Time Required: You read that right. No waiting for the dough to firm up in the fridge. No rushing back to the kitchen because you forgot to set a timer. Roll, cut, bake. That’s it. Perfect for impatient little hands and busy schedules.
- Simple Pantry Ingredients: Butter, sugar, flour, eggs, almond extract—you probably have most of this already. No weird specialty items that cost a fortune and sit in your cabinet for years.
- Holds Its Shape Beautifully: This dough doesn’t spread. I mean it. Your snowmen will still look like snowmen, not blobs. Your stars will have actual points. It’s honestly kind of magical.
- Kid-Approved and Parent-Approved: My daughter has declared these “the best cookies ever,” and she’s a tough critic. Plus, they’re sturdy enough to decorate without falling apart, which saves a lot of tears.
- Perfect for Any Occasion: Birthdays, holidays, rainy afternoons, Tuesday mornings—these cookies don’t need a special reason to exist. They’re just good.
What makes these different from every other sugar cookie recipe out there? It’s the texture, honestly. Most no-chill recipes end up either too cakey or too flat. This one hits that sweet spot—crisp edges, soft centers, and enough structure to hold up to a thick layer of almond icing without getting soggy. I spent weeks adjusting the butter-to-flour ratio and testing different mixing methods until I got it right. And the almond icing? It’s not just a frosting—it’s the thing that makes people say “wait, what’s in these?” and then go back for another one.
This is comfort food, plain and simple. The kind that makes you feel like everything’s going to be okay, even when the day’s been rough. And honestly, isn’t that what we all need sometimes?
What Ingredients You Will Need
This recipe uses simple, honest ingredients to create cookies that taste like they came from a bakery. Nothing complicated, nothing hard to find—just good basics that work together beautifully.
For the Cookies
- 1 cup (226g) unsalted butter, softened – I prefer using Land O’Lakes for consistent results, but any good-quality butter works. Make sure it’s truly softened—leave it out for about an hour, or until you can press your finger into it and it leaves an indent without sliding.
- 1 cup (200g) granulated sugar – Regular white sugar is perfect here. Don’t substitute with brown sugar; it changes the texture and makes the cookies spread more.
- 1 large egg, room temperature – Cold eggs can make the dough seize up. If you forgot to take it out ahead of time, place it in a bowl of warm water for 5 minutes.
- 2 teaspoons vanilla extract – Pure vanilla extract gives the best flavor, but imitation works fine too. I’ve used both and honestly, the difference is subtle once the almond icing goes on.
- 1/2 teaspoon almond extract – This is optional for the cookie dough itself, but I love the subtle nuttiness it adds. If you’re serving someone with nut allergies, just leave it out and add an extra 1/2 teaspoon of vanilla.
- 2 1/2 cups (312g) all-purpose flour – Spoon and level your flour for best results. Scooping directly from the bag can pack in too much flour and make the cookies dry. I use Gold Medal or King Arthur Flour—both work beautifully.
- 1/2 teaspoon baking powder – Make sure it’s fresh! Old baking powder won’t give you the right lift. Test it by dropping a bit in hot water—if it fizzes, you’re good.
- 1/4 teaspoon salt – Just regular table salt. It balances the sweetness and enhances the other flavors.
For the Almond Icing
- 1 1/2 cups (180g) powdered sugar – Sift it if it’s lumpy. Nobody wants lumpy icing on their pretty cookies.
- 2-3 tablespoons milk – Whole milk gives a creamier texture, but 2% or even almond milk works. Start with 2 tablespoons and add more if needed.
- 1/2 teaspoon almond extract – This is the star of the show. Use a good quality extract—I like Nielsen-Massey for special occasions, but store brand works fine for everyday baking.
- Food coloring (optional) – Gel food coloring gives brighter colors without thinning the icing. Liquid drops work too, but you’ll need to add a bit more powdered sugar to compensate.
One thing I’ve learned the hard way: don’t skimp on the almond extract in the icing. It’s what makes these cookies memorable. I once used a generic brand that tasted oddly like cherry cough syrup, and let me tell you, that was a disappointing batch. Stick with a reputable brand and you’ll be fine.
Equipment Needed
You don’t need a fancy kitchen to make these cookies. Here’s what you’ll actually use:
- Electric mixer – A stand mixer is ideal, but a hand mixer works perfectly too. I’ve made these with both, and honestly, the hand mixer just means you have to hold it a little longer.
- Large mixing bowl – Any big bowl works. I use my grandmother’s old ceramic one, but metal or glass is fine.
- Rolling pin – I have a proper rolling pin now, but I’ve also used a wine bottle in a pinch. Just make sure whatever you use is clean and smooth.
- Cookie cutters – Any shape you like. Stars, hearts, circles, dinosaurs—whatever makes your kids happy. I have a set of basic shapes that cost about $8 and they’ve lasted years.
- Baking sheets – Light-colored metal sheets work best. Dark sheets can make the bottoms brown too quickly.
- Parchment paper or silicone baking mat – Parchment paper is cheaper and disposable. Silicone mats are reusable and non-stick. Both work great.
- Cooling rack – Essential for letting the cookies cool completely before icing. If you don’t have one, you can use the counter, but the bottoms might get slightly soggy.
- Small piping bags or zip-top bags – For the icing. You can also just use a butter knife, but piping gives you more control for decorating.
If you’re on a budget, skip the fancy piping tips and just snip a tiny corner off a zip-top bag. It works perfectly and costs nothing extra. I’ve been doing it that way for years and nobody’s ever complained.
Preparation Method
Alright, let’s get to the good part. Here’s how to make these cookies step by step, with all the little details I wish someone had told me when I first started.
- Preheat your oven to 350°F (175°C). Line two baking sheets with parchment paper or silicone mats. Do this first so everything’s ready to go—trust me, you don’t want to be preheating while covered in flour.
- Cream the butter and sugar together. In your large mixing bowl, beat the softened butter and granulated sugar together on medium speed until light and fluffy—about 2-3 minutes. You’re looking for a pale yellow color and a texture that looks like fluffy sand. Scrape down the sides of the bowl halfway through. I’ve forgotten to do this before, and the cookies turned out fine, but they weren’t quite as tender.
- Add the egg and extracts. Beat in the room-temperature egg, vanilla extract, and almond extract (if using) until well combined. The mixture might look slightly curdled at this point—that’s totally normal. Don’t panic. Just keep mixing until it comes back together.
- Whisk the dry ingredients together. In a separate bowl, whisk together the flour, baking powder, and salt. This ensures the baking powder is evenly distributed so you don’t end up with one cookie that’s puffy and another that’s flat. Yes, I learned this the hard way.
- Gradually add the dry ingredients to the wet. Add the flour mixture in two or three additions, mixing on low speed just until combined. Stop as soon as you don’t see any more streaks of flour. Overmixing at this stage develops gluten and makes tough cookies. The dough should be soft but not sticky—if it sticks to your fingers, add another tablespoon of flour.
- Roll out the dough immediately. Here’s the magic part—no chilling! Lightly flour your work surface and rolling pin. Place the dough on the floured surface and roll it to about 1/4-inch thickness. I like to roll between two sheets of parchment paper for easy cleanup, but a floured counter works too. If the dough feels too sticky, dust it lightly with flour as you roll.
- Cut out your shapes. Dip your cookie cutters in flour before each cut to prevent sticking. Press straight down and lift straight up—no twisting. Twisting seals the edges and prevents the cookies from rising evenly. Place the cutouts on your prepared baking sheets, spacing them about 2 inches apart. They don’t spread much, but they need a little breathing room.
- Bake for 8-10 minutes. The cookies are done when the edges are just barely golden. The centers should still look slightly pale and set. They’ll continue to firm up as they cool on the sheet. I usually check at 8 minutes and add a minute if needed. Every oven runs differently, so watch your first batch closely.
- Cool completely before icing. Let the cookies sit on the baking sheet for 5 minutes, then transfer them to a cooling rack. And I mean completely cool—if you try to ice them while they’re still warm, the icing will slide right off and pool on your counter. I’ve made that mistake more times than I’d like to admit.
- Make the almond icing. While the cookies cool, whisk together the powdered sugar, 2 tablespoons of milk, and almond extract in a small bowl. You’re looking for a consistency that’s thick but pourable—it should slowly drip off a spoon. Add more milk a teaspoon at a time if it’s too thick, or more powdered sugar if it’s too thin.
- Decorate your cookies. Spoon the icing into a piping bag or zip-top bag with a tiny corner snipped off. Pipe outlines around the edges of each cookie, then fill in the centers with more icing. Use a toothpick to spread it evenly if needed. Add sprinkles while the icing is still wet—once it sets, nothing sticks.
- Let the icing set. This takes about 1-2 hours at room temperature, depending on humidity. If you’re impatient (like me), you can pop them in the fridge for 20 minutes to speed things up.
Cooking Tips & Techniques
I’ve made these cookies more times than I can count, and I’ve definitely made every mistake in the book. Here’s what I’ve learned so you don’t have to repeat my errors.
Don’t overwork the dough. This is the number one mistake people make with sugar cookies. The more you handle the dough, the tougher the cookies get. Mix just until combined, roll gently, and reroll scraps only once or twice. After that, the scraps are better off baked as “test cookies” for the kids to snack on.
Flour your cutters, not just your surface. I cannot stress this enough. A floured cutter releases the dough cleanly without distorting the shape. I keep a small bowl of flour next to my work station just for dipping cutters between each cut. It takes two seconds and saves so much frustration.
Watch your baking time like a hawk. These cookies go from perfectly baked to overdone in about 60 seconds. The difference between a soft, tender cookie and a dry, crumbly one is literally one minute. Set a timer for the minimum time and check them immediately. If they need more time, add it in 30-second increments.
Let the cookies cool completely on the sheet. I know it’s tempting to move them right away, but those first 5 minutes on the hot sheet are crucial for setting the structure. If you try to move them too soon, they’ll crumble or bend. Trust the process.
Make the icing while the cookies cool. This is my favorite multitasking trick. By the time the icing is ready, the cookies are cool enough to decorate. It saves time and keeps the workflow smooth, especially when you have impatient little helpers hovering nearby.
If your icing is too thin, add more powdered sugar. I once made icing that was basically almond-flavored milk, and decorating was a nightmare. Start thick and thin it out gradually—you can always add more milk, but you can’t take it out.
Variations & Adaptations
One of the best things about this recipe is how flexible it is. Here are some ways I’ve adapted it over the years for different occasions and dietary needs.
Gluten-Free Version: Substitute the all-purpose flour with a 1:1 gluten-free baking flour blend. I’ve had good results with Bob’s Red Mill and King Arthur Flour blends. Add an extra tablespoon of milk to the dough since gluten-free flours tend to be more absorbent. The texture will be slightly more delicate, so handle the dough gently.
Lemon Sugar Cookies: Replace the almond extract in the dough with 1 tablespoon of fresh lemon zest and 1 teaspoon of lemon extract. For the icing, swap the almond extract for lemon extract and add a teaspoon of fresh lemon juice. These are perfect for spring and summer—they taste like sunshine.
Chocolate Sugar Cookies: Replace 1/4 cup (30g) of the flour with 1/4 cup (20g) of unsweetened cocoa powder. Reduce the vanilla to 1 teaspoon and add 1/2 teaspoon of espresso powder to deepen the chocolate flavor. The almond icing pairs surprisingly well with the chocolate—it’s like a chocolate-covered almond in cookie form.
Dairy-Free Version: Use vegan butter sticks (I like Miyoko’s or Country Crock Plant Butter) and substitute the milk in the icing with almond milk or oat milk. The cookies will be slightly less tender but still delicious. Avoid using margarine in tubs—the water content is too high and will make the cookies spread.
Spiced Holiday Cookies: Add 1 teaspoon of cinnamon, 1/2 teaspoon of nutmeg, and 1/4 teaspoon of cloves to the dry ingredients. Skip the almond extract in the dough and use the icing as is. These smell incredible while baking and taste like Christmas morning.
My personal favorite variation is the lemon version. I made it last summer for a backyard barbecue, and they disappeared faster than the burgers. There’s just something about that bright, citrusy flavor with the sweet almond icing that hits differently.
Serving & Storage Suggestions
These cookies are best served at room temperature, ideally within a day or two of baking. The almond icing stays slightly soft, which gives them a lovely texture contrast—crisp cookie, creamy icing. I like to arrange them on a pretty platter for parties, but honestly, they’re just as good straight off the cooling rack.
For serving: These pair beautifully with a cold glass of milk, a hot cup of coffee, or a cup of tea. They’re also great for cookie exchanges, bake sales, or just packing in lunchboxes for a sweet surprise. If you’re serving them at a party, arrange them by color or shape for a visually stunning display.
Storage instructions: Store undecorated cookies in an airtight container at room temperature for up to a week. Once iced, they’ll stay fresh for about 3-4 days. Layer them between sheets of parchment paper to prevent the icing from sticking together. I’ve found that glass containers work better than plastic for keeping the cookies crisp.
Freezer instructions: You can freeze the baked, undecorated cookies for up to 3 months. Place them in a single layer on a baking sheet and freeze until solid, then transfer to a freezer-safe bag or container. When you’re ready to serve, thaw them at room temperature for about 30 minutes, then ice and decorate. The icing doesn’t freeze well, so always add it after thawing.
Reheating tips: These cookies don’t really need reheating, but if you want that fresh-from-the-oven warmth, pop them in a 300°F (150°C) oven for 3-5 minutes. Keep an eye on the icing—it can melt if it gets too hot. Honestly, I prefer them at room temperature, but to each their own.
One thing I’ve noticed: the flavors actually get better after a day or two. The almond extract mellows out and blends with the vanilla, creating a more complex taste. So if you can resist eating them all on day one, you’re in for a treat on day two.
Nutritional Information & Benefits
Let’s be real—these are cookies, not health food. But that doesn’t mean they can’t be part of a balanced life. Here’s the estimated nutritional breakdown per cookie (based on 30 cookies with icing):
| Nutrient | Amount Per Cookie |
|---|---|
| Calories | 145 |
| Total Fat | 7g |
| Saturated Fat | 4g |
| Carbohydrates | 20g |
| Sugar | 12g |
| Protein | 2g |
These values are estimates and will vary based on the exact ingredients you use and how big you cut your cookies. If you’re watching your sugar intake, you can reduce the icing amount or skip it altogether—the cookies are still delicious on their own.
On the bright side, these cookies do contain some butter and eggs, which provide small amounts of vitamin A and protein. The almond extract in the icing is purely for flavor, but almonds themselves are rich in vitamin E and healthy fats. Not that you’re eating these for the health benefits, of course.
If you have nut allergies, definitely skip the almond extract and use extra vanilla instead. The cookies will still taste great—just different. And as always, check your labels if you’re serving people with specific dietary restrictions.
My personal philosophy? Food is about joy and connection, not just numbers. These cookies bring people together, make kids smile, and create memories. That’s worth more than any calorie count.
Conclusion
These no-chill cutout sugar cookies with almond icing are everything I wanted them to be—simple, reliable, and absolutely delicious. They’ve become our go-to recipe for every occasion, from birthday parties to “it’s Tuesday and we need something fun” afternoons. My daughter now helps me roll and cut, and I see that same spark in her eyes that I felt sitting on Aunt Louise’s floor all those years ago.
What I love most about this recipe is that it doesn’t demand perfection. The dough forgives a little extra flour. The icing covers up uneven edges. And at the end of the day, you have a plate of cookies that taste like love, no matter what shape they turned out to be. That’s the kind of recipe worth keeping.
I’d love to hear how these turn out for you. Did your kids help decorate? Did you try a fun variation? Drop a comment below and let me know—I read every single one, and I promise to respond. And if you’re feeling generous, share this recipe with a friend who needs a little sweetness in their life. Because honestly, isn’t that what we all need?
Happy baking, friends. Go make some memories.
Frequently Asked Questions
Can I chill this dough if I want to?
Sure, you can chill it for 30 minutes to an hour if you prefer, but it’s really not necessary. The dough is designed to work straight away. Chilling will make it slightly firmer to roll, which can actually be helpful if your kitchen is very warm or humid.
Why did my cookies spread?
If your cookies spread, it’s usually because the butter was too soft or the dough was overmixed. Make sure your butter is softened, not melted, and stop mixing as soon as the flour is incorporated. Also, check that your baking powder is fresh—old leavening can cause spreading.
Can I freeze the dough instead of baked cookies?
Absolutely! Shape the dough into a disc, wrap it tightly in plastic wrap, and freeze for up to 3 months. Thaw in the refrigerator overnight, then roll and cut as directed. The dough might be slightly more crumbly after freezing, so let it sit at room temperature for 10-15 minutes before rolling.
How do I get smooth, even icing?
The key is getting the consistency right. Your icing should be thick enough to hold its shape but thin enough to spread easily. If it’s too thick, add milk a drop at a time. If it’s too thin, add more powdered sugar. Use a toothpick to gently spread the icing into the corners of your cookie shapes.
Can I use this recipe for royal icing instead?
Yes, but you’ll need to modify it. For royal icing, replace the milk with 2 tablespoons of meringue powder and 3-4 tablespoons of water. Beat until stiff peaks form. Royal icing dries harder and shinier than this almond icing, which makes it better for detailed decorating but less kid-friendly for eating.
PrintEasy Kid-Approved No-Chill Cutout Sugar Cookies with Almond Icing

These no-chill cutout sugar cookies with almond icing are simple, reliable, and absolutely delicious. They hold their shape beautifully and are perfect for busy families and impatient little hands.
- Prep Time: 20 minutes
- Cook Time: 10 minutes
- Total Time: 30 minutes
- Yield: 30 cookies 1x
- Category: Dessert
- Cuisine: American
Ingredients
- 1 cup (226g) unsalted butter, softened
- 1 cup (200g) granulated sugar
- 1 large egg, room temperature
- 2 teaspoons vanilla extract
- 1/2 teaspoon almond extract (optional)
- 2 1/2 cups (312g) all-purpose flour
- 1/2 teaspoon baking powder
- 1/4 teaspoon salt
- 1 1/2 cups (180g) powdered sugar
- 2–3 tablespoons milk
- 1/2 teaspoon almond extract
- Food coloring (optional)
Instructions
- Preheat your oven to 350°F (175°C). Line two baking sheets with parchment paper or silicone mats.
- Cream the butter and sugar together in a large mixing bowl on medium speed until light and fluffy, about 2-3 minutes. Scrape down the sides halfway through.
- Beat in the room-temperature egg, vanilla extract, and almond extract (if using) until well combined.
- In a separate bowl, whisk together the flour, baking powder, and salt.
- Gradually add the dry ingredients to the wet in two or three additions, mixing on low speed just until combined. Stop as soon as no streaks of flour remain.
- Lightly flour your work surface and rolling pin. Roll the dough to about 1/4-inch thickness immediately (no chilling).
- Dip cookie cutters in flour before each cut. Press straight down and lift straight up. Place cutouts on prepared baking sheets, spacing them about 2 inches apart.
- Bake for 8-10 minutes, until edges are just barely golden. Let cookies sit on the baking sheet for 5 minutes, then transfer to a cooling rack to cool completely.
- While cookies cool, whisk together powdered sugar, 2 tablespoons of milk, and almond extract in a small bowl until thick but pourable. Add more milk or powdered sugar as needed.
- Spoon icing into a piping bag or zip-top bag with a tiny corner snipped off. Pipe outlines around each cookie, then fill in centers. Add sprinkles while icing is wet.
- Let icing set for 1-2 hours at room temperature, or 20 minutes in the fridge.
Notes
Don’t overwork the dough to keep cookies tender. Flour your cutters to prevent sticking. Watch baking time closely—cookies go from perfect to overdone in about 60 seconds. Let cookies cool completely before icing. The flavors improve after a day or two.
Nutrition
- Serving Size: 1 cookie
- Calories: 145
- Sugar: 12
- Sodium: 50
- Fat: 7
- Saturated Fat: 4
- Carbohydrates: 20
- Protein: 2
Keywords: sugar cookies, no-chill cookies, cutout cookies, almond icing, kid-friendly cookies, easy sugar cookies