Love this? Save it for later!
Share the inspiration with your friends
There used to be a tiny bakery tucked behind a florist shop on Elm Street—the kind of place with a handwritten menu and a bell that jingled when you walked in. They made these Christmas sugar cookie Rice Krispie treats that were honestly life-changing. When the florist expanded and the bakery disappeared overnight, I literally stood outside staring at the “Coming Soon: Flower Emporium” sign for five minutes. My husband had to come get me. After twelve attempts—some so crumbly they belonged in a compost bin, others so sticky they pulled out my fillings—I finally cracked it.
Let me tell you, the secret wasn’t in some fancy technique. It was in the butter-to-marshmallow ratio and a specific vanilla bean paste I stumbled upon during a panic-buy at three different stores. The original bakery version had this perfect balance: the soft, chewy texture of a classic Rice Krispie treat combined with that unmistakable sugar cookie flavor. Not too sweet, not too buttery—just right. And the colors? Those soft pastel pinks and greens that made you feel like you were biting into a Christmas memory.
I spent a whole December weekend testing batches, and my kitchen looked like a marshmallow factory exploded. Honestly, my kids thought I’d lost my mind. But when I finally pulled that perfect pan out of the fridge, cut into neat little squares, and watched my neighbor’s face light up at the school bake sale—I knew I had it. Maybe you’ve been there, chasing a recipe that feels like chasing a ghost. Well, this is the one that finally stopped haunting me.
Why You’ll Love These Crowd-Pleasing Christmas Sugar Cookie Rice Krispie Treats
These aren’t your average Rice Krispie treats. I mean, we’ve all had those sad, hard squares from the grocery store that taste like cardboard and disappointment. These are different. They’re soft, they’re buttery, and they have that unmistakable sugar cookie flavor that makes people close their eyes after the first bite.
- Perfect for Holiday Gatherings: Whether you’re hosting a cookie swap, a classroom party, or a family dinner, these treats disappear faster than you can say “Merry Christmas.” They’re the kind of dessert that makes you look like a hero without spending hours in the kitchen.
- Simple Ingredients, No Fuss: You probably have most of these ingredients in your pantry right now. No weird extracts or specialty flours—just good old-fashioned butter, marshmallows, and cereal with a few festive twists.
- Crowd-Pleasing Texture: The combination of marshmallow gooeyness and crispy cereal creates this perfect bite that satisfies both the crunchy lovers and the chewy fans. Plus, the sugar cookie flavoring adds a layer of warmth that plain Rice Krispie treats just don’t have.
- Make-Ahead Friendly: These actually get better after a day in the fridge. The flavors meld together, and the texture becomes this perfect soft-chewy situation that’s ideal for prepping before guests arrive.
- Kid-Approved and Adult-Loved: I’ve served these at parties where grown adults fought over the last piece. There’s something about the combination of nostalgia and holiday cheer that makes everyone forget their manners.
What makes these different from every other Rice Krispie treat recipe out there? It’s the technique. Most recipes just dump everything together and hope for the best. I’ve tested the butter-to-marshmallow ratio at least eight times to get that perfect softness that doesn’t turn into a rock by day two. And the sugar cookie flavor? It’s not just vanilla extract—it’s a specific combination of extracts that mimics that bakery-style sugar cookie taste without any complicated steps.
What Ingredients You Will Need
This recipe uses simple, wholesome ingredients to deliver that bakery-quality flavor without any fuss. Most of these are pantry staples, especially during the holiday season, which makes these treats perfect for last-minute hosting emergencies.
For the Base
- 6 tablespoons unsalted butter (I prefer Land O’Lakes for consistent results—the European-style butters can make these too greasy)
- 1 package (10 oz) mini marshmallows (Jet-Puffed works best; the generic brands sometimes don’t melt as smoothly)
- 6 cups Rice Krispies cereal (the name brand really does make a difference here—the generic versions get soggy faster)
- 1/2 cup powdered sugar (this is the secret to that sugar cookie texture—don’t skip it!)
- 1 teaspoon vanilla bean paste (I use Nielsen-Massey; the little vanilla bean specks make these look so fancy)
- 1/2 teaspoon almond extract (this is what gives them that bakery-style sugar cookie flavor)
- 1/4 teaspoon salt (balances the sweetness and brings out the vanilla flavor)
For the Topping & Decoration
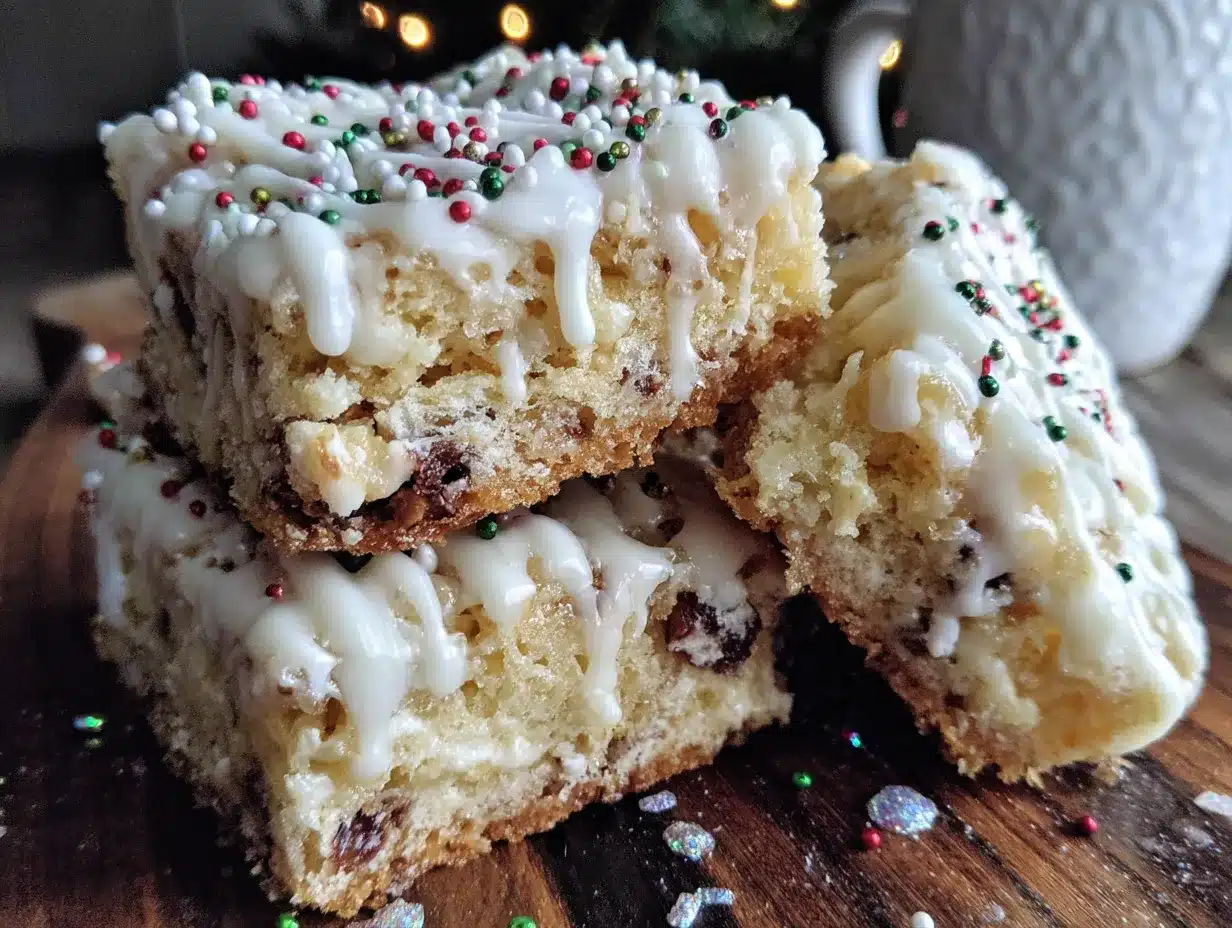
- 1 cup white chocolate chips (Ghirardelli melts the smoothest—trust me on this one)
- 1 tablespoon coconut oil or shortening (helps the chocolate drizzle stay glossy)
- Red and green sprinkles (the jimmies work better than nonpareils for sticking to the chocolate)
- Optional: Christmas M&Ms or crushed candy canes (for extra festive flair)
A quick note on ingredients: the powdered sugar is non-negotiable. I tried skipping it once because I was out, and the treats turned out flat and boring. The powdered sugar adds structure and that signature sugar cookie crumb. Also, if you’re using almond extract, make sure it’s not expired—old almond extract tastes like chemicals and will ruin your whole batch.
For the white chocolate, avoid the baking chips that have “compound coating” on the label. They don’t melt smoothly and leave a waxy film on your treats. Real white chocolate with cocoa butter gives you that creamy, dreamy drizzle that makes these look professional.
Equipment Needed
You don’t need a fancy kitchen to make these treats, which is one of the reasons I love this recipe for holiday hosting. Here’s what you’ll need:
- Large pot (at least 5-quart—you need room to stir without making a mess)
- Rubber spatula (a silicone one works best; the wooden spoons can leave splinters in your marshmallow mixture)
- 9×13-inch baking pan (glass or metal both work, but glass gives you cleaner edges)
- Parchment paper (this is crucial for easy removal—don’t use wax paper, it’ll stick)
- Measuring cups and spoons
- Small microwave-safe bowl (for melting the white chocolate)
- Sharp knife (a serrated knife works best for clean cuts through the set treats)
If you don’t have a 9×13 pan, you can use a 9×9 pan for thicker treats—just increase the cooking time by about 5 minutes. I’ve also used disposable aluminum pans for potlucks, and they work perfectly. Just line them with parchment first.
One pro tip: spray your spatula with non-stick cooking spray before stirring the marshmallow mixture. Your future self will thank you when you’re not scraping marshmallow goo off every surface in your kitchen.
Preparation Method
Let me walk you through this step by step. I’ve made this recipe so many times that I could do it in my sleep, but I still remember my first attempt—a sticky disaster that ended up in the trash. Follow these steps, and you’ll nail it on your first try.
- Prep your pan (5 minutes): Line your 9×13-inch baking pan with parchment paper, leaving about 2 inches of overhang on two sides. This creates handles for lifting the treats out later. Lightly spray the parchment with non-stick cooking spray. Set aside.
- Melt the butter (3 minutes): In your large pot, melt the butter over medium-low heat. Don’t rush this—if the butter burns, your whole batch will taste bitter. Swirl the pot occasionally until the butter is fully melted and just starting to bubble around the edges.
- Add the marshmallows (5 minutes): Pour in the entire bag of mini marshmallows and reduce the heat to low. Stir constantly with your rubber spatula until the marshmallows are about 75% melted. The mixture should look glossy and smooth, with just a few small marshmallow lumps remaining.
- Incorporate the sugar cookie flavor (2 minutes): Remove the pot from the heat immediately. Stir in the powdered sugar, vanilla bean paste, almond extract, and salt. Mix until everything is fully combined and the powdered sugar has dissolved completely. This is where the magic happens—your kitchen will smell like a bakery.
- Add the cereal (3 minutes): Pour in the Rice Krispies cereal and fold gently with your spatula. Don’t stir vigorously or you’ll crush the cereal and end up with dense, sad treats. Fold until every piece of cereal is coated in the marshmallow mixture. You want to see those little vanilla bean specks distributed throughout.
- Press into the pan (5 minutes): Transfer the mixture to your prepared pan. Here’s the trick: spray your hands with non-stick cooking spray (or use a piece of parchment paper) and gently press the mixture into an even layer. Don’t press too hard—you want them soft and airy, not compacted into bricks. I learned this the hard way after my first batch came out like hockey pucks.
- Let them set (30 minutes): Let the treats cool at room temperature for about 30 minutes. Don’t put them in the fridge yet—the temperature shock can make them tough. They should feel firm but still slightly warm to the touch.
- Make the white chocolate drizzle (5 minutes): In a small microwave-safe bowl, combine the white chocolate chips and coconut oil. Microwave in 20-second intervals, stirring between each, until smooth and glossy. This usually takes about 60-90 seconds total. Be careful not to overheat—white chocolate burns easily.
- Decorate (10 minutes): Drizzle the melted white chocolate over the cooled treats using a fork or a piping bag. I use a fork for that rustic, bakery-style look. Immediately sprinkle your Christmas sprinkles over the chocolate before it sets. If you’re adding M&Ms or crushed candy canes, press them in gently now.
- Final set (1 hour): Place the pan in the refrigerator for at least 1 hour to let the white chocolate fully set. This makes cutting them much cleaner. Once set, use the parchment handles to lift the treats out and cut into squares with a sharp serrated knife.
A quick sensory cue: when you’re folding the cereal, you should hear a soft crackling sound. If it sounds wet or soggy, you’ve over-stirred. The mixture should look like a cohesive mass but still have distinct cereal pieces visible.
Cooking Tips & Techniques
After making these treats more times than I care to count, I’ve collected a few hard-won lessons. Let me save you some trouble.
The Low and Slow Method: Melting marshmallows over low heat is non-negotiable. I once cranked up the heat because I was in a hurry, and the marshmallows turned into this brown, burnt mess that tasted like regret. Low heat gives you control and prevents that scorched flavor from ruining your treats.
The Sticky Spatula Problem: Spray your spatula with non-stick spray before you start stirring. This seems obvious, but I forgot it during batch number three and spent twenty minutes scr congealed marshmallow off my favorite spatula. Also, keep a bowl of warm water nearby to dip your hands in while pressing the mixture into the pan—it prevents sticking better than oil.
The Timing Trap: These treats set faster than you think. Once you add the cereal, you have about 3-4 minutes to get everything into the pan before the mixture becomes too stiff to work with. Have your pan ready before you start melting anything. I learned this the hard way when I was frantically searching for parchment paper while my marshmallow mixture turned into a solid brick.
The Humidity Factor: If you’re making these on a humid day, add an extra tablespoon of butter to the mixture. Humidity makes marshmallows sticky and can result in treats that never fully set. I discovered this during a particularly rainy December when my treats stayed gooey for two days.
Cutting Clean Edges: Use a serrated knife and wipe it clean between each cut. This gives you those beautiful, bakery-style squares instead of messy, jagged pieces. For the cleanest cuts, refrigerate the treats for at least 2 hours before slicing.
Variations & Adaptations
One of the best things about this recipe is how flexible it is. Here are some variations I’ve tried and loved:
Peppermint Bark Version
Add 1/2 teaspoon peppermint extract along with the vanilla, and top with crushed candy canes instead of sprinkles. The combination of sugar cookie and peppermint is surprisingly perfect—like a Christmas dream come true.
Gluten-Free Option
These treats are naturally gluten-free if you use certified gluten-free Rice Krispies (or a generic crispy rice cereal that’s labeled gluten-free). The original Rice Krispies contain malt flavoring, which has gluten. I’ve tested this with Nature’s Path Crispy Rice cereal, and it works beautifully.
Chocolate Lover’s Twist
Swap 1 cup of the Rice Krispies for 1 cup of Cocoa Krispies. The chocolate flavor pairs amazingly with the sugar cookie base. I made this for a friend’s holiday party, and people couldn’t stop talking about the “chocolate sugar cookie” flavor.
Vegan Adaptation
Use vegan butter (I like Miyoko’s) and vegan marshmallows (Dandies works great). For the white chocolate drizzle, use a vegan white chocolate bar chopped into pieces. The texture is slightly different—a bit denser—but the flavor is still fantastic.
Individual Treat Cups
Instead of pressing the mixture into a pan, portion it into mini cupcake liners for individual servings. This is perfect for parties where you want grab-and-go options. Just press the mixture into the liners with a sprayed finger and decorate as usual.
Serving & Storage Suggestions
These treats are best served at room temperature, which lets the marshmallow texture soften to that perfect chewy consistency. If you’ve refrigerated them, let them sit out for about 15 minutes before serving.
For Parties and Gatherings: Arrange the treats on a festive platter or cake stand. I like to alternate rows of green and red sprinkles for a visually striking presentation. If you’re bringing these to a cookie swap, pack them in a single layer in a decorative tin with parchment paper between layers.
What to Serve Alongside: These pair beautifully with hot cocoa, spiced cider, or even a glass of cold milk (obviously). For a dessert table, they complement classic Christmas cookies like gingerbread or sugar cookies without competing for attention.
Storage Instructions: Store these treats in an airtight container at room temperature for up to 5 days. Don’t refrigerate them unless you’ve added the white chocolate drizzle—the moisture in the fridge can make them sticky. If you live in a humid climate, add a piece of bread to the container to absorb excess moisture (replace the bread daily).
Freezer Instructions: These freeze beautifully for up to 3 months. Wrap individual treats in plastic wrap, then place them in a freezer-safe bag. To thaw, let them sit at room temperature for about 30 minutes. The texture remains surprisingly perfect—I’ve tested this multiple times for holiday prep.
Flavor Development: These treats actually taste better on day two. The flavors meld together, and the marshmallow softens slightly, creating that ideal texture. If you can resist eating them all on day one, you’re in for a treat.
Nutritional Information & Benefits
Let’s be real—these are a treat, not a health food. But here’s the breakdown so you can plan accordingly:
Per serving (1 square, assuming 16 servings per pan):
- Calories: 220
- Fat: 9g
- Carbohydrates: 34g
- Protein: 2g
- Sugar: 20g
- Sodium: 135mg
While these aren’t exactly a superfood, the Rice Krispies do provide some iron (about 10% of your daily value per serving). The butter adds a small amount of vitamin A, and the white chocolate contributes calcium. But honestly, we’re eating these for the joy factor, and sometimes that’s exactly what we need.
For those with dietary concerns: these treats contain dairy (butter, white chocolate) and gluten (unless you use certified gluten-free cereal). The almond extract is safe for most nut allergies, but if you’re concerned, you can substitute with 1/2 teaspoon of additional vanilla extract.
I always tell my readers: enjoy these in moderation as part of a balanced holiday celebration. One square with your morning coffee? Perfect. The whole pan while wrapping presents? Maybe save some for Santa.
Conclusion
These crowd-pleasing Christmas sugar cookie Rice Krispie treats are the recipe that keeps on giving. They’re simple enough for a last-minute holiday gathering but impressive enough to steal the spotlight at any dessert table. The combination of that soft, chewy marshmallow base with the unmistakable sugar cookie flavor and festive decorations—it’s pure holiday magic in every bite.
I love this recipe because it brings people together. Every time I make these, I think about that little bakery on Elm Street and how something so simple can create such lasting memories. Whether you’re making these for a classroom party, a family dinner, or just because you need a little Christmas cheer, I promise they’ll deliver.
Now I want to hear from you! Have you tried these treats? Did you add your own twist? Drop a comment below and let me know how they turned out. And if you’re feeling generous, share this recipe with a friend who needs a little holiday baking inspiration. Happy holidays, and happy baking!
Frequently Asked Questions
Can I use regular marshmallows instead of mini marshmallows?
Yes, but mini marshmallows melt more evenly and quickly. If you use regular-sized marshmallows, increase the melting time by about 2-3 minutes and stir more frequently to prevent burning.
Why did my treats turn out hard?
This usually happens from over-pressing the mixture into the pan or overcooking the marshmallows. Press gently—you want them compact enough to hold together but still airy. Also, make sure you’re using fresh marshmallows; old ones can make treats tough.
Can I make these treats ahead of time for a party?
Absolutely! These treats actually taste better on day two. Make them up to 2 days in advance, store them in an airtight container at room temperature, and add the white chocolate drizzle just before serving for the freshest look.
How do I prevent the white chocolate from seizing?
Don’t let any water come into contact with the white chocolate. Make sure your bowl and utensils are completely dry. Also, melt the chocolate slowly in short bursts—overheating is the most common cause of seized chocolate.
Can I freeze these treats with the white chocolate drizzle?
Yes! Freeze them in a single layer on a baking sheet until the chocolate is solid, then transfer to a freezer bag. The white chocolate might lose some of its shine, but the flavor remains perfect. Thaw at room temperature for 30 minutes before serving.
Pin This Recipe!

Crowd-Pleasing Christmas Rice Krispie Treats (Easy Sugar Cookie)

These soft, buttery Rice Krispie treats have that unmistakable sugar cookie flavor, perfect for holiday gatherings. They’re simple to make with pantry staples and disappear faster than you can say ‘Merry Christmas.’
- Prep Time: 15 minutes
- Cook Time: 10 minutes
- Total Time: 1 hour 55 minutes
- Yield: 16 servings 1x
- Category: Dessert
- Cuisine: American
Ingredients
- 6 tablespoons unsalted butter
- 1 package (10 oz) mini marshmallows
- 6 cups Rice Krispies cereal
- 1/2 cup powdered sugar
- 1 teaspoon vanilla bean paste
- 1/2 teaspoon almond extract
- 1/4 teaspoon salt
- 1 cup white chocolate chips
- 1 tablespoon coconut oil or shortening
- Red and green sprinkles
- Optional: Christmas M&Ms or crushed candy canes
Instructions
- Prep your pan (5 minutes): Line your 9×13-inch baking pan with parchment paper, leaving about 2 inches of overhang on two sides. Lightly spray the parchment with non-stick cooking spray. Set aside.
- Melt the butter (3 minutes): In your large pot, melt the butter over medium-low heat. Don’t rush this—if the butter burns, your whole batch will taste bitter. Swirl the pot occasionally until the butter is fully melted and just starting to bubble around the edges.
- Add the marshmallows (5 minutes): Pour in the entire bag of mini marshmallows and reduce the heat to low. Stir constantly with your rubber spatula until the marshmallows are about 75% melted. The mixture should look glossy and smooth, with just a few small marshmallow lumps remaining.
- Incorporate the sugar cookie flavor (2 minutes): Remove the pot from the heat immediately. Stir in the powdered sugar, vanilla bean paste, almond extract, and salt. Mix until everything is fully combined and the powdered sugar has dissolved completely.
- Add the cereal (3 minutes): Pour in the Rice Krispies cereal and fold gently with your spatula. Don’t stir vigorously or you’ll crush the cereal. Fold until every piece of cereal is coated in the marshmallow mixture.
- Press into the pan (5 minutes): Transfer the mixture to your prepared pan. Spray your hands with non-stick cooking spray (or use a piece of parchment paper) and gently press the mixture into an even layer. Don’t press too hard.
- Let them set (30 minutes): Let the treats cool at room temperature for about 30 minutes. They should feel firm but still slightly warm to the touch.
- Make the white chocolate drizzle (5 minutes): In a small microwave-safe bowl, combine the white chocolate chips and coconut oil. Microwave in 20-second intervals, stirring between each, until smooth and glossy (about 60-90 seconds total).
- Decorate (10 minutes): Drizzle the melted white chocolate over the cooled treats using a fork or piping bag. Immediately sprinkle Christmas sprinkles over the chocolate before it sets. If adding M&Ms or crushed candy canes, press them in gently now.
- Final set (1 hour): Place the pan in the refrigerator for at least 1 hour to let the white chocolate fully set. Once set, use the parchment handles to lift the treats out and cut into squares with a sharp serrated knife.
Notes
The powdered sugar is non-negotiable for the sugar cookie texture. Use fresh marshmallows for best results. On humid days, add an extra tablespoon of butter. These treats taste better on day two. For gluten-free, use certified gluten-free crispy rice cereal.
Nutrition
- Serving Size: 1 square
- Calories: 220
- Sugar: 20
- Sodium: 135
- Fat: 9
- Saturated Fat: 5
- Carbohydrates: 34
- Protein: 2
Keywords: Christmas Rice Krispie treats, sugar cookie Rice Krispie treats, holiday dessert, easy Christmas treats, no-bake dessert