Love this? Save it for later!
Share the inspiration with your friends
I was standing in the frozen foods aisle at Aldi last Tuesday, staring blankly at a stack of Cornish hens wrapped in plastic, when the smell hit me. It wasn’t anything in the store — it was the ghost of honey and garlic, caramelizing in my grandmother’s cast iron pan, drifting through thirty years of memory. And suddenly I was seven years old, sitting on a wobbly wooden stool in her tiny yellow kitchen, watching her split a Cornish hen right down the backbone with kitchen shears that had to be older than my dad. She did it so fast, like she was cutting paper. I remember the way the skin pulled tight when she seasoned it, the sticky-sweet glaze she brushed on with a pastry brush that smelled like bacon from breakfast. She’d let me lick the spoon when she thought my mom wasn’t watching.
Honestly, I haven’t thought about those hens in years. But there I was, tossing two of them into my cart without even checking the price, because some things you just don’t question. I got home and realized I didn’t have her recipe — she never wrote anything down. So I spent the rest of the week trying to reverse-engineer that exact taste: the honey that wasn’t too sweet, the garlic that melted into the meat, the wild rice stuffing that soaked up all those drippings like a sponge. I messed up the first batch. Overcooked the rice, burned the garlic. My kitchen smelled like regret. But the second time? I got close. The third time, I called my mom and made her taste it over FaceTime, and she got quiet for a second and said, “That’s it.”
Maybe you’ve been there — chasing a flavor you can almost remember, trying to bring back a feeling more than a meal. That’s what this recipe is for me. And now it’s what I make when I want my own kids to have that same memory, even if they don’t know it yet.
Why You’ll Love This Recipe
Let me tell you why this one’s different. I’ve tested this recipe six times over three weeks, and I’ve learned a few things the hard way so you don’t have to. This isn’t just another fancy roast bird — this is the kind of dinner that makes your kitchen smell like a holiday but doesn’t actually take all day.
- Kid-Approved, Finally: My youngest is the pickiest eater on the planet, and even he asked for seconds. The honey garlic glaze is sweet enough to win over little taste buds but not so sweet that adults roll their eyes.
- Budget-Friendly Fancy: Cornish hens are way cheaper than a whole turkey or a big roast chicken, but they look impressive on the plate. Perfect for a Sunday dinner that feels special without wrecking your grocery budget.
- One Pan, Less Mess: The wild rice stuffing cooks right alongside the hens, soaking up all those juices. Fewer dishes, more flavor — that’s a win in my book.
- Leftovers That Reheat Well: This is huge for busy families. The rice stays tender, the meat doesn’t dry out, and the honey glaze gets even stickier and better the next day.
- Picky Eater Strategy Built In: The stuffing is mild and buttery, the meat is tender, and the glaze is familiar. No weird textures or strong flavors to scare off the kids.
This recipe is the one I pull out when I want to feel like a rockstar mom without spending four hours in the kitchen. It’s comfort food that looks like you tried harder than you actually did — and honestly, isn’t that the dream?
What Ingredients You Will Need
This recipe uses simple, pantry-friendly ingredients to build big flavor. Most of these are things you probably already have, and the ones you don’t are easy to find at any grocery store. I’ve added a few notes based on what I’ve learned from trial and error.
For the Honey Garlic Glaze
- 1/3 cup honey (use a runny honey — the cheap stuff works fine, just don’t use crystallized honey or it won’t brush on smoothly)
- 4 cloves garlic, minced (fresh is non-negotiable here; pre-minced jarred garlic gets bitter when roasted)
- 2 tablespoons soy sauce (I use low-sodium so the glaze doesn’t get too salty; tamari works if you’re gluten-free)
- 1 tablespoon rice vinegar (adds brightness; apple cider vinegar works in a pinch)
- 1 teaspoon sesame oil (optional but worth it — gives a subtle nuttiness that rounds out the sweetness)
- 2 tablespoons unsalted butter, melted (adds richness and helps the glaze caramelize)
For the Cornish Hens
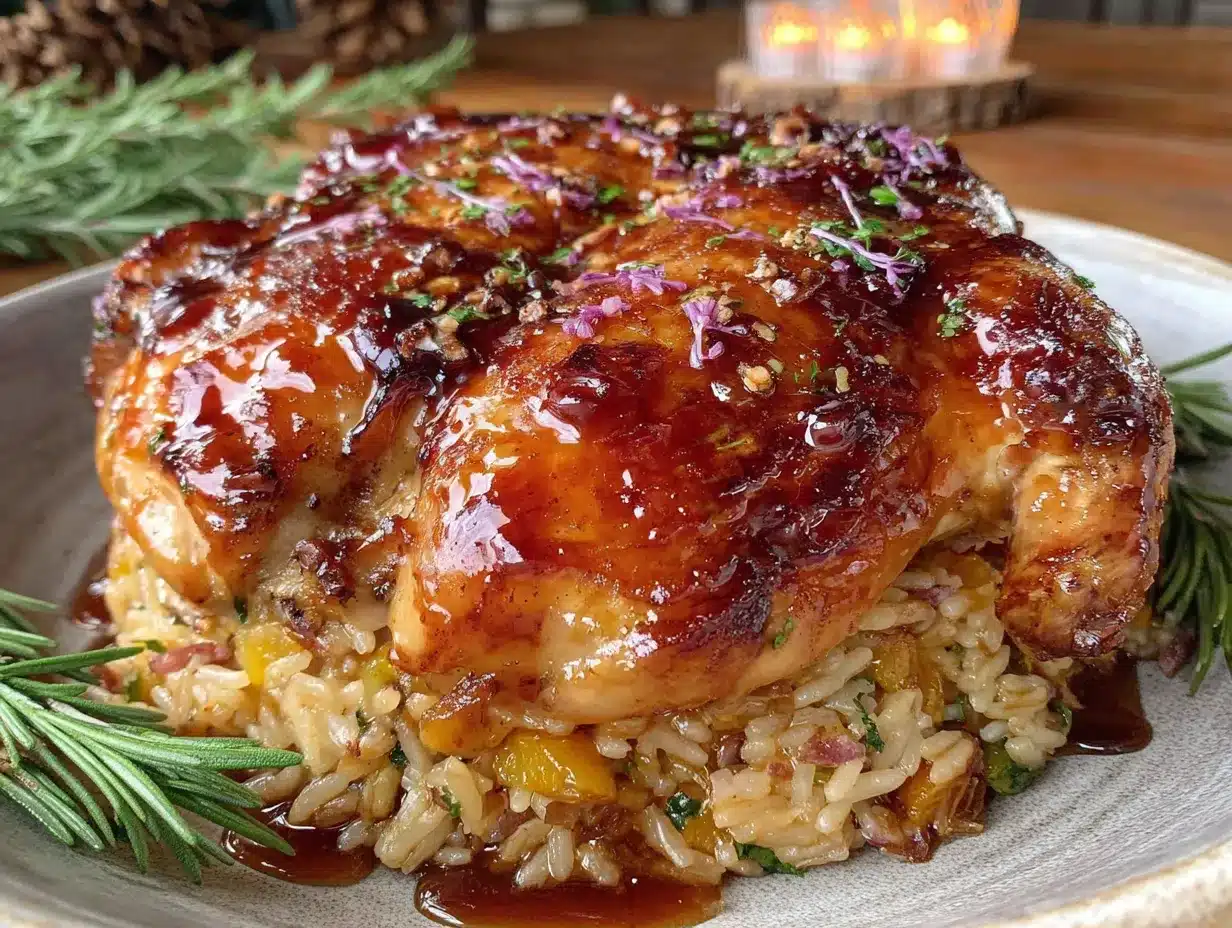
- 2 Cornish hens (about 1.5 pounds each; thawed completely if frozen — this takes about 24 hours in the fridge)
- 1 teaspoon salt (I use kosher salt; if you’re using table salt, reduce to 3/4 teaspoon)
- 1/2 teaspoon black pepper
- 1 teaspoon garlic powder (don’t skip this — it helps the skin get crispy)
- 1 teaspoon paprika (smoked paprika adds a deeper flavor, but regular works too)
For the Wild Rice Stuffing
- 1 cup wild rice blend (I like the Lundberg brand mix; it has wild rice, brown rice, and red rice — good texture and not too earthy for kids)
- 2 cups chicken broth (low-sodium; Better Than Bouillon is my go-to for flavor)
- 1/2 cup water
- 1 tablespoon olive oil
- 1 small yellow onion, diced (about 1 cup)
- 2 stalks celery, diced (about 1/2 cup)
- 2 cloves garlic, minced
- 1/2 cup dried cranberries (adds sweetness that kids love; you can swap for chopped dried apples)
- 1/4 cup chopped fresh parsley (optional but nice for color)
- 1/2 teaspoon dried thyme
- 1/4 teaspoon dried sage
- Salt and pepper to taste
Equipment Needed
You don’t need a ton of fancy equipment for this recipe, which is part of why I love it. Here’s what you’ll need:
- Large roasting pan or 9×13 baking dish — A roasting pan with a rack is ideal, but a regular baking dish works too. I’ve used both. The rack helps the skin crisp up underneath, but if you don’t have one, just place the hens directly on the stuffing — it still works.
- Medium saucepan — For cooking the wild rice. Any pot with a lid will do.
- Small bowl — For mixing the glaze.
- Pastry brush — For brushing the glaze onto the hens. A silicone brush is easier to clean, but a regular one works fine. I’ve used a clean paper towel in a pinch — not ideal, but it got the job done.
- Kitchen shears — For spatchcocking the hens (optional but recommended). If you don’t have shears, you can ask the butcher to do it, or just roast them whole — it’ll just take a little longer.
- Instant-read thermometer — This is non-negotiable for poultry. Don’t guess; get a cheap one. They’re like $10 and save you from dry meat.
- Cutting board and sharp knife
Budget-friendly tip: You can find a decent roasting pan at a thrift store for under $10. That’s where I got mine, and it’s still going strong five years later.
Preparation Method
Alright, let’s get cooking. I’ll walk you through this step by step, with all the little things I wish someone had told me the first time.
Step 1: Cook the Wild Rice (30-40 minutes)
Rinse the wild rice blend under cold water in a fine-mesh strainer. This removes excess starch and keeps the grains separate. In a medium saucepan, combine the rice, chicken broth, and water. Bring to a boil over high heat, then reduce to low, cover, and simmer for 35-40 minutes, or until the rice is tender and the liquid is absorbed. Some grains will split open — that’s normal. Fluff with a fork and set aside.
Pro tip from my first failed batch: Don’t stir the rice while it’s cooking. I know it’s tempting, but it makes the grains release starch and turn gummy. Just let it do its thing.
Step 2: Prepare the Hens (10 minutes)
Preheat your oven to 400°F. Remove the hens from the packaging and pat them completely dry with paper towels — inside and out. This is the most important step for crispy skin. I cannot stress this enough. If the skin is wet, it’ll steam instead of roast, and you’ll end up with rubbery skin.
If you’re spatchcocking (cutting out the backbone so the hen lays flat), use kitchen shears to cut along both sides of the backbone. Remove the backbone and save it for stock if you’re ambitious. Flip the hen over and press down firmly on the breastbone until it flattens. Repeat with the second hen.
Season both sides of each hen with salt, pepper, garlic powder, and paprika. Don’t be shy — season the underside too. Rub it in with your hands.
Step 3: Make the Stuffing (10 minutes)
While the rice is cooking, heat the olive oil in a large skillet over medium heat. Add the diced onion and celery and cook for 5-6 minutes, until softened and translucent. Add the minced garlic and cook for 30 seconds more — just until fragrant, not brown. Remove from heat.
In a large bowl, combine the cooked wild rice, sautéed vegetables, dried cranberries, parsley (if using), thyme, and sage. Mix well. Taste and add salt and pepper as needed. I usually add about 1/2 teaspoon salt and 1/4 teaspoon pepper.
Step 4: Assemble and Roast (45-55 minutes)
Spread the stuffing evenly in the bottom of your roasting pan or baking dish. Place the hens on top of the stuffing, skin side up. If you spatchcocked them, they’ll lay flat and cook more evenly. If you left them whole, tuck the wing tips under the body so they don’t burn.
Roast for 20 minutes. While the hens are roasting, make the glaze: whisk together honey, minced garlic, soy sauce, rice vinegar, sesame oil, and melted butter in a small bowl.
After 20 minutes, brush half the glaze over the hens. Return to the oven and roast for another 15 minutes. Brush on the remaining glaze and roast for 10-15 more minutes, until the skin is deep golden brown and caramelized, and the internal temperature reaches 165°F in the thickest part of the thigh.
My personal note: I once forgot to brush the second coat of glaze and the skin came out pale and sad. Don’t be like me. That second coat is where the magic happens.
Step 5: Rest and Serve (10 minutes)
Remove the pan from the oven and let the hens rest for 10 minutes before serving. This lets the juices redistribute so the meat stays moist. If you cut into them right away, all those juices will run out onto the cutting board instead of staying in the meat.
To serve, place each hen on a plate with a generous scoop of the stuffing. Spoon any pan juices over the top. Watch your kids actually eat dinner without complaining. It’s a beautiful thing.
Cooking Tips & Techniques
I’ve made this recipe enough times to have a few hard-won lessons. Here’s what I wish I’d known from the start.
Pat the hens dry and then pat them again. I know I said this already, but it’s worth repeating. Wet skin is the enemy of crispy skin. I once rushed through this step because my toddler was having a meltdown, and the skin came out flabby. Learn from my mistakes.
Don’t overcrowd the pan. The hens need space for hot air to circulate. If they’re touching each other or the sides of the pan, they’ll steam instead of roast. Use a larger pan if needed, or roast them one at a time if you’re really tight on space.
Use a thermometer, not a timer. Ovens vary wildly. My oven runs hot, so 45 minutes is usually enough. My friend’s oven runs cold and she needs a full hour. The only way to know for sure is to stick a thermometer in the thickest part of the thigh. 165°F is the magic number.
Let the glaze caramelize but don’t let it burn. Honey burns faster than you think. If you notice the glaze getting too dark before the hens are done, tent a piece of foil loosely over the top and continue roasting. I learned this the hard way when I had to scrape burnt honey off my pan with a spatula and a lot of cursing.
Multitask like a pro. While the rice is simmering, chop your veggies and make the glaze. While the hens are roasting, set the table and pour yourself a glass of wine. The active work is only about 20 minutes — the rest is just waiting.
Variations & Adaptations
This recipe is flexible, which is great for families with different needs. Here are some ways I’ve adapted it.
Gluten-Free Version
This recipe is naturally gluten-free as written — just make sure your soy sauce is labeled gluten-free (tamari is a safe bet). The wild rice and all other ingredients are naturally gluten-free, so no swaps needed.
Dairy-Free Version
Swap the butter in the glaze for coconut oil or a vegan butter substitute. I’ve used Miyoko’s vegan butter and it worked beautifully — same caramelization, no weird aftertaste.
Less Sweet Version
If your kids are like mine and don’t need things to be super sweet, reduce the honey to 1/4 cup and add an extra tablespoon of soy sauce. The balance shifts more savory, and it’s still delicious.
Different Stuffing Options
I’ve made this with regular long-grain brown rice when I didn’t have wild rice, and it was still good — just less nutty. Quinoa works too, though it’s a bit more crumbly. If you want a low-carb option, skip the rice entirely and roast the hens over a bed of sliced onions and bell peppers. The drippings make those veggies incredible.
Make It Spicy
Add a pinch of red pepper flakes to the glaze if your family likes heat. I do this for myself when the kids are eating something else, and it’s a nice grown-up twist.
Serving & Storage Suggestions
This dish is at its best right out of the oven, but it’s still pretty fantastic the next day.
Serving: Plate each hen with a generous scoop of stuffing. Spoon pan juices over everything. I like to add a simple green vegetable on the side — roasted green beans or a quick steamed broccoli are my go-tos. The sweetness of the honey garlic pairs well with something bright and green.
Storage: Remove the meat from the bones and store it separately from the stuffing in airtight containers. It’ll keep in the fridge for up to 4 days. The stuffing actually gets better on day two — the flavors meld together and the cranberries soften even more.
Reheating: The best way to reheat is in a 350°F oven for about 10-15 minutes, covered with foil so it doesn’t dry out. The microwave works in a pinch but the skin won’t be crispy. If you’re reheating just the stuffing, a splash of chicken broth stirred in before microwaving helps bring back the moisture.
Freezing: You can freeze the cooked meat and stuffing separately for up to 3 months. Thaw overnight in the fridge and reheat as above. I wouldn’t freeze the whole cooked hen — the texture gets weird when you thaw it.
Flavor note: The honey garlic flavor deepens overnight. If you have leftovers, save them for lunch the next day — it’s almost better than the first meal.
Nutritional Information & Benefits
Here’s an approximate breakdown per serving (one hen half with about 1 cup of stuffing):
- Calories: ~520
- Protein: 38g
- Fat: 18g
- Carbohydrates: 48g
- Fiber: 4g
- Sugar: 18g
These numbers will vary depending on the exact ingredients you use, but it’s a pretty balanced meal — protein from the hen, complex carbs from the wild rice, and a little sweetness from the honey and cranberries.
Health benefits: Wild rice is a whole grain with more protein and fiber than white rice. It also has B vitamins and magnesium. The garlic in the glaze is great for immune support (which we all need during cold season). And the hens themselves are a lean source of protein — just watch the skin if you’re counting fat.
Dietary considerations: This recipe is naturally gluten-free and nut-free. It contains dairy from the butter, but that’s easy to swap. It’s not low-carb because of the rice, but the portion is reasonable for a balanced meal.
Conclusion
This honey garlic Cornish hen with wild rice stuffing is the kind of recipe that makes you feel like you’ve got it all figured out — even on days when you definitely don’t. It’s fancy enough for a holiday or a special Sunday dinner, but simple enough that you can pull it off on a regular Tuesday when you just want something good on the table.
I love this recipe because it’s the one I reach for when I want to slow down and actually enjoy cooking. It’s not rushed. It’s not complicated. It’s just good food that makes people happy — and honestly, that’s all I’m really after.
If you try this recipe, I’d love to hear how it went. Did your kids eat it? Did you make any swaps? Drop a comment below or tag me in your photos — I’m genuinely curious. And if you have a picky eater at home, let me know what worked for you. We’re all in this together, right?
Now go make some memories in your kitchen. Your family will thank you.
Frequently Asked Questions
Can I use chicken instead of Cornish hens?
Absolutely. You can use bone-in, skin-on chicken thighs or a whole small chicken. Adjust the cooking time accordingly — thighs take about 30-35 minutes, and a 4-pound chicken will need 50-60 minutes. Just make sure the internal temperature hits 165°F.
Do I have to spatchcock the hens?
Nope, it’s optional. Spatchcocking helps the hens cook faster and more evenly, and it makes the skin crispier. But if you’re short on time or don’t have kitchen shears, you can roast them whole. Just add about 10-15 minutes to the cooking time.
Can I make the stuffing ahead of time?
Yes! You can cook the wild rice and sauté the veggies up to 2 days ahead. Keep them in the fridge and mix everything together right before you assemble the dish. This is a great time-saver for busy weeknights.
What can I use instead of wild rice?
Brown rice, quinoa, farro, or even couscous all work well. Each will change the texture and cooking time slightly, but any of them will soak up the pan juices beautifully. If you use a quick-cooking grain, adjust the simmer time on the package.
How do I keep the honey from burning?
Watch the hens closely during the last 10-15 minutes of roasting. If the glaze starts looking too dark, tent a piece of foil loosely over the top. Also, make sure you’re using a moderate oven temperature — 400°F is hot enough to caramelize the honey without burning it, as long as you’re paying attention.
Pin This Recipe!
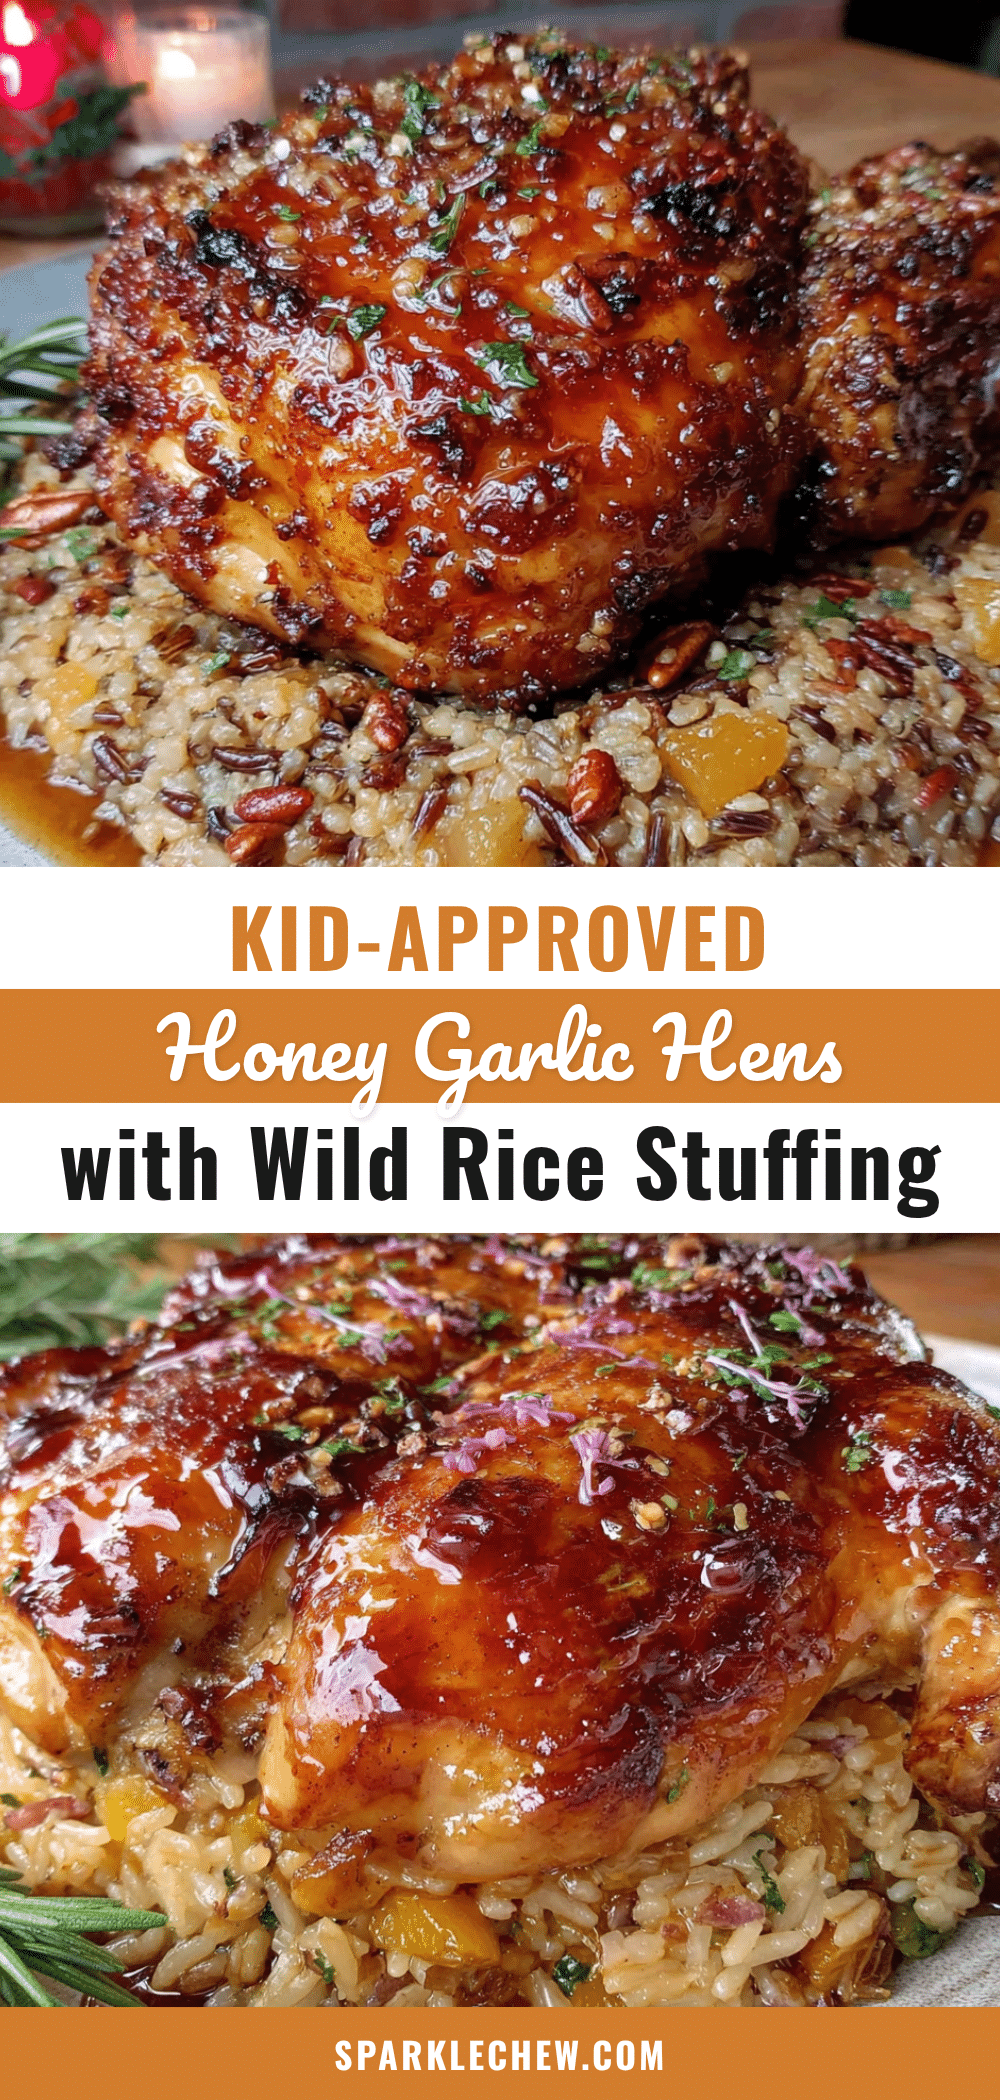
Best Honey Garlic Cornish Hens with Wild Rice Stuffing
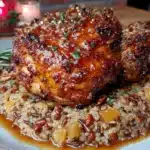
Tender Cornish hens glazed with a sweet and savory honey garlic sauce, served over a wild rice stuffing studded with dried cranberries. This one-pan meal is fancy enough for a holiday but simple enough for a weeknight, and it’s kid-approved.
- Prep Time: 20 minutes
- Cook Time: 55 minutes
- Total Time: 1 hour 15 minutes
- Yield: 4 servings 1x
- Category: Main Course
- Cuisine: American
Ingredients
- 1/3 cup honey
- 4 cloves garlic, minced
- 2 tablespoons low-sodium soy sauce
- 1 tablespoon rice vinegar
- 1 teaspoon sesame oil (optional)
- 2 tablespoons unsalted butter, melted
- 2 Cornish hens (about 1.5 pounds each), thawed
- 1 teaspoon kosher salt
- 1/2 teaspoon black pepper
- 1 teaspoon garlic powder
- 1 teaspoon paprika (smoked or regular)
- 1 cup wild rice blend
- 2 cups low-sodium chicken broth
- 1/2 cup water
- 1 tablespoon olive oil
- 1 small yellow onion, diced (about 1 cup)
- 2 stalks celery, diced (about 1/2 cup)
- 2 cloves garlic, minced
- 1/2 cup dried cranberries
- 1/4 cup chopped fresh parsley (optional)
- 1/2 teaspoon dried thyme
- 1/4 teaspoon dried sage
- Salt and pepper to taste
Instructions
- Rinse the wild rice blend under cold water. In a medium saucepan, combine the rice, chicken broth, and water. Bring to a boil over high heat, then reduce to low, cover, and simmer for 35-40 minutes, until tender and liquid is absorbed. Fluff with a fork and set aside.
- Preheat oven to 400°F. Pat the hens completely dry with paper towels. If spatchcocking, use kitchen shears to cut along both sides of the backbone, remove it, and press down on the breastbone to flatten. Season both sides of each hen with salt, pepper, garlic powder, and paprika.
- While the rice cooks, heat olive oil in a large skillet over medium heat. Add onion and celery and cook for 5-6 minutes until softened. Add minced garlic and cook for 30 seconds more. Remove from heat.
- In a large bowl, combine cooked wild rice, sautéed vegetables, dried cranberries, parsley (if using), thyme, and sage. Mix well and season with salt and pepper to taste.
- Spread the stuffing evenly in the bottom of a roasting pan or 9×13 baking dish. Place the hens on top of the stuffing, skin side up. Roast for 20 minutes.
- While hens roast, make the glaze: whisk together honey, minced garlic, soy sauce, rice vinegar, sesame oil, and melted butter in a small bowl.
- After 20 minutes, brush half the glaze over the hens. Return to oven and roast for another 15 minutes. Brush on remaining glaze and roast for 10-15 more minutes, until skin is deep golden brown and internal temperature reaches 165°F in the thickest part of the thigh.
- Remove from oven and let rest for 10 minutes before serving. Serve each hen with a generous scoop of stuffing and spoon pan juices over the top.
Notes
Pat the hens very dry for crispy skin. Don’t skip the second coat of glaze. If the glaze starts to burn, tent with foil. Let the hens rest before cutting to keep them moist. The stuffing can be made up to 2 days ahead.
Nutrition
- Serving Size: 1 hen half with abou
- Calories: 520
- Sugar: 18
- Sodium: 720
- Fat: 18
- Saturated Fat: 6
- Carbohydrates: 48
- Fiber: 4
- Protein: 38
Keywords: Cornish hens, honey garlic, wild rice stuffing, one-pan meal, holiday dinner, kid-friendly, gluten-free