Love this? Save it for later!
Share the inspiration with your friends
Introduction
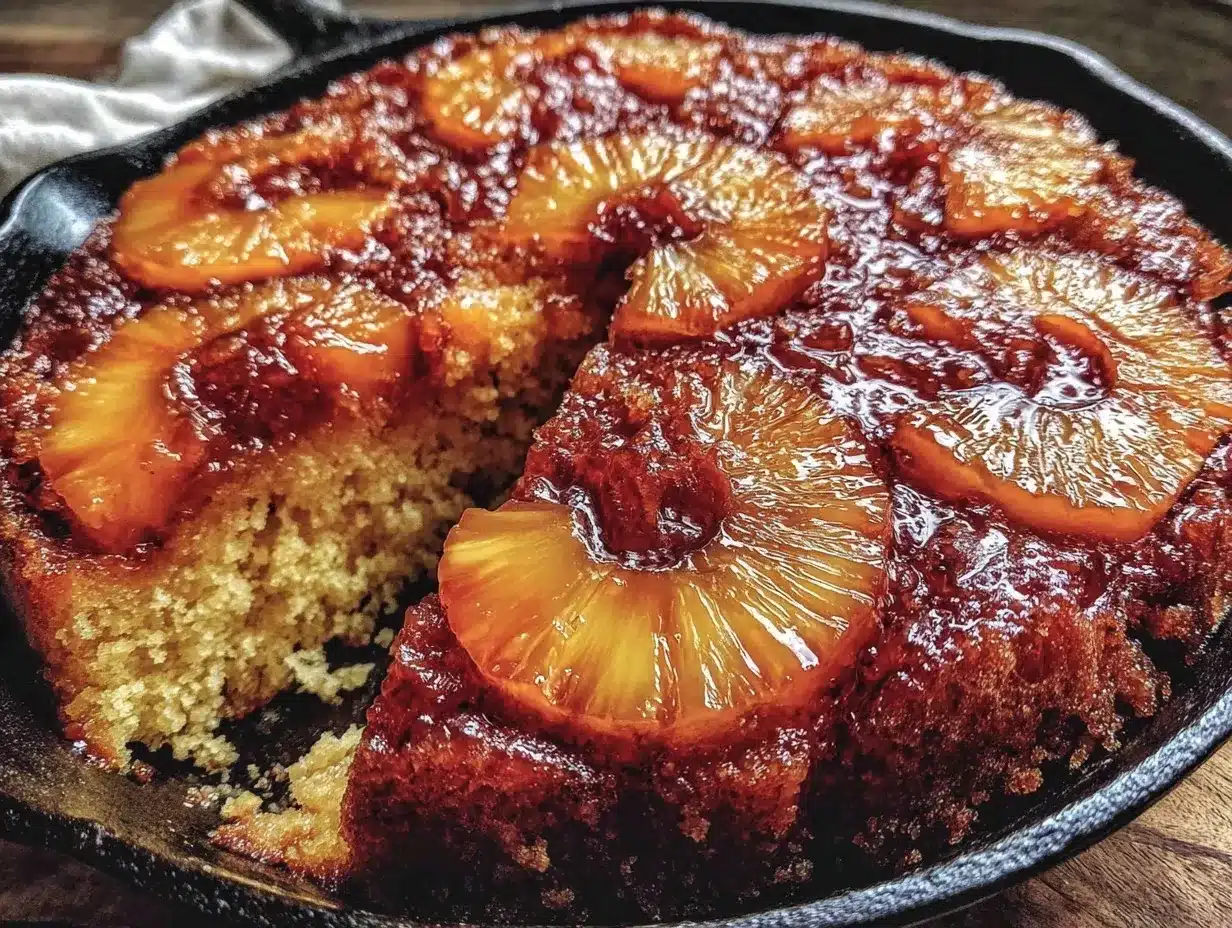
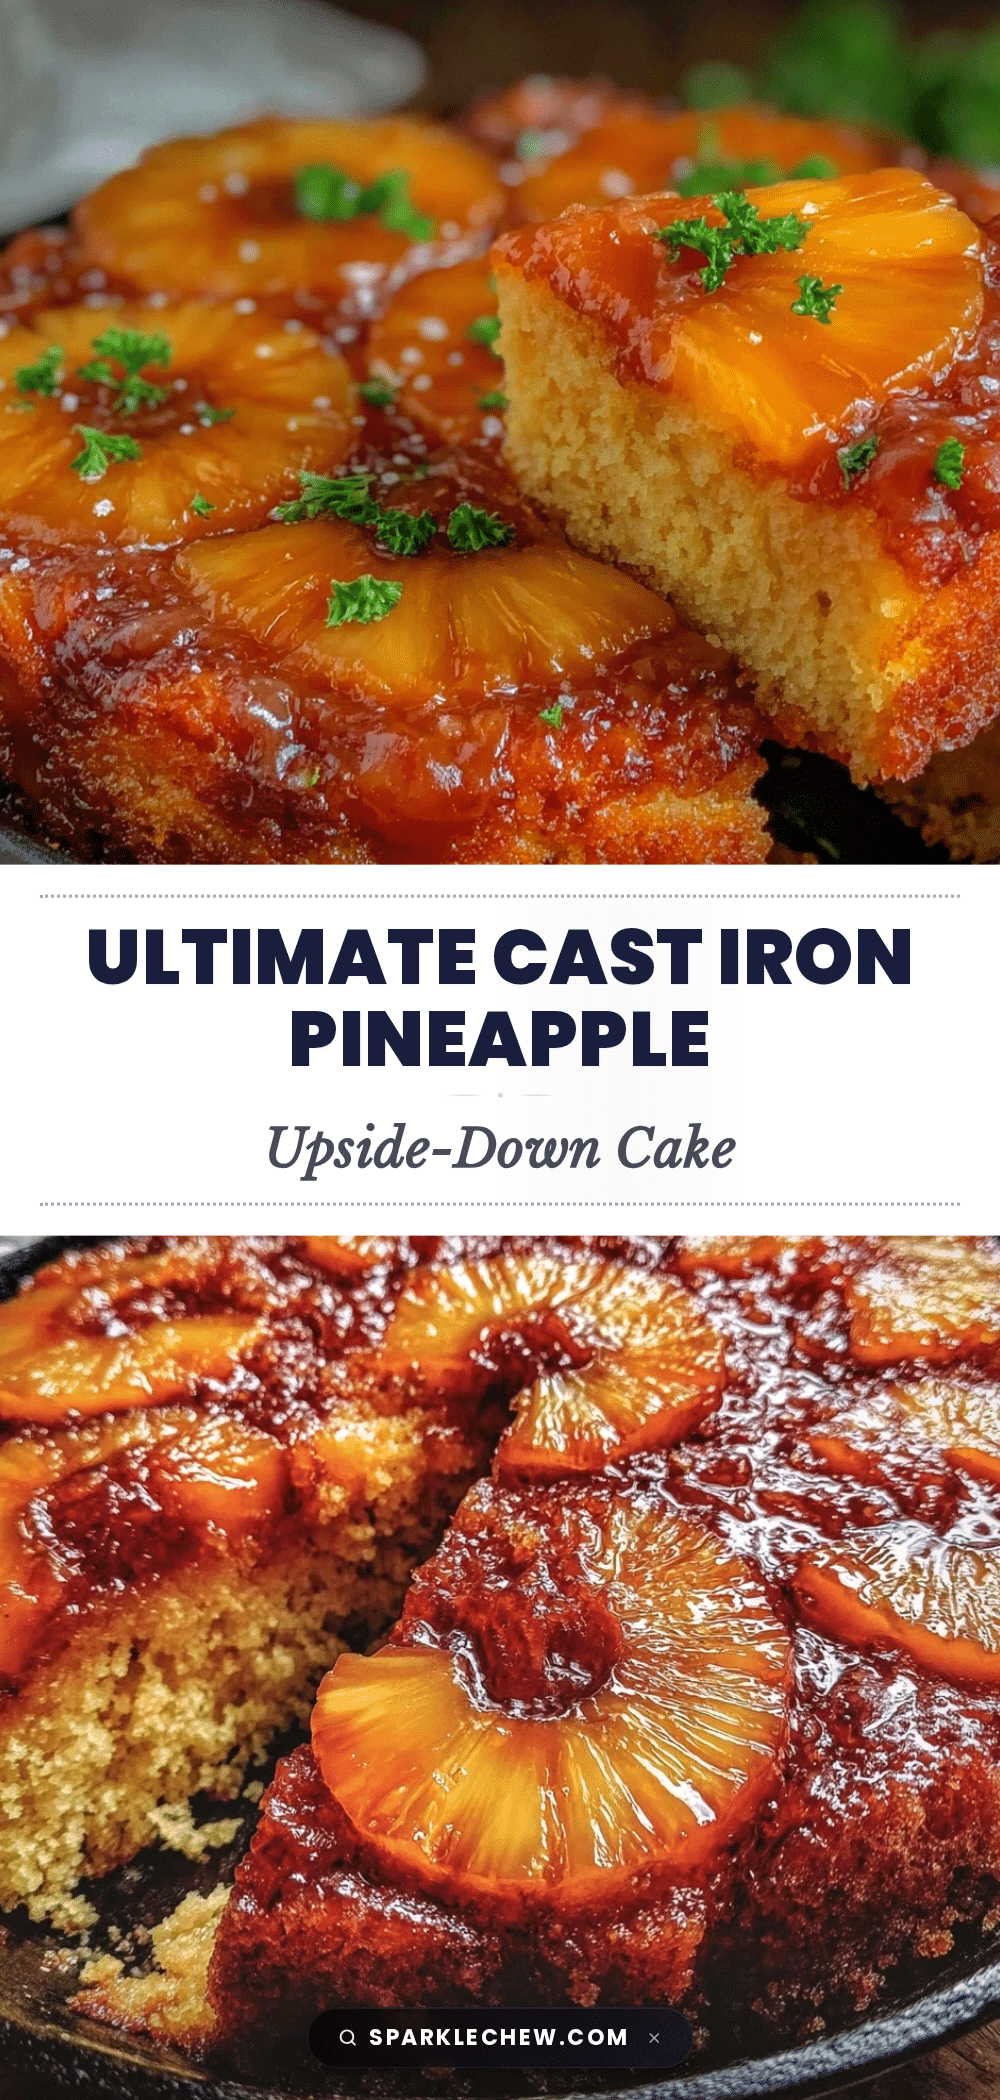
“You know, I wasn’t planning to bake a pineapple upside-down cake that afternoon,” I admitted to my friend as I stirred the caramelized brown sugar and butter mixture in my trusty cast iron skillet. It was one of those unexpectedly perfect spring Sundays—the kind where the sunlight hits just right, and the kitchen fills with the aroma of something sweet and nostalgic. I’d originally set out to make a quick snack, but somehow, that old skillet and a can of pineapple rings sparked a memory that pulled me deep into baking this classic treat. Honestly, it wasn’t just about the cake itself.
That cast iron pan, a hand-me-down from a neighbor named Mr. Jenkins who swore by its heat retention, gave the cake this golden, caramelized crust that no ordinary baking pan could. The way the pineapple slices bubbled in that buttery, brown sugar glaze reminded me of a tiny bakery I once stumbled upon during a trip across the country—one with a faded sign and the best pineapple upside-down cake I’d ever tasted. Maybe you’ve been there too, that moment when a simple dessert tastes like a warm hug or a sunbeam, right?
Let me tell you, I forgot to set a timer the first time I tried this recipe. The kitchen filled with the scent of caramel and pineapple, and I was halfway through cleaning when the timer finally went off, jolting me back to reality. The result? A perfectly sticky, sweet, and moist cake that’s been my go-to ever since. So if you’re ready to make a classic homemade pineapple upside-down cake in cast iron that’s as delightful to bake as it is to eat, keep reading—I promise this one might just become your favorite too.
Why You’ll Love This Recipe
This classic homemade pineapple upside-down cake is a crowd-pleaser with a twist—cooked right in a cast iron skillet that delivers that signature caramelized crust and deep flavor you just can’t fake with other pans. After testing this recipe multiple times (including a few burnt edges and one too-runny glaze), I’ve landed on a version that balances sweet, tangy, and buttery perfectly.
- Quick & Easy: Ready in under an hour from start to finish, making it perfect for busy weeknights or spontaneous dessert cravings.
- Simple Ingredients: Pantry staples and a few fresh touches—no fancy shopping trips required.
- Perfect for Gatherings: Whether it’s a Sunday brunch or a potluck, this cake adds a nostalgic pop of color and flavor.
- Crowd-Pleaser: Kids and adults alike rave about the moist cake paired with caramelized pineapple rings.
- Unbelievably Delicious: The cast iron method creates a texture and caramelization that’s truly next-level comfort food.
What makes this recipe stand out is the use of the cast iron skillet, which not only helps with even baking but also creates those crispy edges and a sticky, golden pineapple topping that’s pure magic. The brown sugar glaze is buttery and rich without being too sweet, and the cake itself is tender and buttery with just enough vanilla and cinnamon to keep it interesting. Honestly, this isn’t just another pineapple upside-down cake—it’s my best version, tested and tweaked until it’s just right.
If you’ve ever struggled with soggy toppings or bland caramel, this method will make you rethink the way you bake this classic dessert. It’s comfort food reimagined, really—simple, satisfying, and seriously delicious.
What Ingredients You Will Need
This recipe uses simple, wholesome ingredients to deliver bold flavor and satisfying texture without the fuss. Most of these are likely already in your pantry or fridge, making it a perfect last-minute dessert to whip up.
- For the Topping:
- 1/4 cup (60g) unsalted butter, melted (adds richness and helps caramelize sugar)
- 1/2 cup (100g) packed light brown sugar (for that signature caramel flavor)
- 1 can (about 8 oz/227g) pineapple rings, drained (you can use fresh pineapple slices if you prefer)
- Maraschino cherries (optional, for a pop of color in the center of pineapple rings)
- For the Cake Batter:
- 1 1/2 cups (190g) all-purpose flour
- 2 tsp baking powder
- 1/4 tsp salt
- 1/2 cup (115g) unsalted butter, softened (I like using Land O’Lakes for best texture)
- 3/4 cup (150g) granulated sugar
- 2 large eggs, room temperature
- 1 tsp pure vanilla extract
- 1/2 cup (120ml) whole milk (substitute with almond or oat milk for dairy-free)
- 1/4 tsp ground cinnamon (optional, adds warmth and depth)
Tip: If fresh pineapple is in season, I recommend swapping the canned for fresh rings cut about 1/4-inch thick. It makes a noticeable difference in brightness and texture. For a gluten-free option, you can swap the all-purpose flour with a 1-to-1 gluten-free baking flour blend.
Equipment Needed
- 10-inch cast iron skillet: The star of the show here. If you don’t have cast iron, you can use an oven-safe skillet or a round cake pan, but the caramelization won’t be quite the same.
- Mixing bowls: For combining dry and wet ingredients separately.
- Hand mixer or stand mixer: Makes creaming butter and sugar easier, though a sturdy whisk and some elbow grease work too.
- Measuring cups and spoons: For precise ingredient amounts.
- Rubber spatula: To fold in flour and scrape the batter cleanly.
- Cooling rack: To let the cake cool slightly before flipping.
If you’re on a budget, a well-seasoned cast iron skillet doesn’t have to be expensive—local thrift stores or online marketplaces often have hidden gems. Just be sure to season it well to avoid sticking. I’ve found that the thicker the skillet, the better the heat distribution and caramelization, but honestly, any cast iron you have will work wonders here.
Preparation Method
- Preheat the oven to 350°F (175°C). Place your cast iron skillet in the oven while it preheats to warm it up slightly—this helps the butter and sugar melt evenly.
- Prepare the topping: Carefully remove the hot skillet (use oven mitts!) and add the melted butter, swirling to coat the bottom evenly. Sprinkle the brown sugar over the butter, spreading it into an even layer. Arrange the pineapple rings on top of the sugar—try to fit them snugly but don’t overlap. Place a cherry in the center of each ring if using.
- Mix dry ingredients: In a medium bowl, whisk together the flour, baking powder, salt, and cinnamon until well combined.
- Cream butter and sugar: In a large bowl, beat the softened butter and granulated sugar until light and fluffy—about 3-4 minutes. This step is key for a tender, airy cake.
- Add eggs and vanilla: Beat in eggs one at a time, then stir in vanilla extract. Scrape down the sides as needed.
- Alternate adding dry ingredients and milk: Add the dry mixture in three parts, alternating with the milk (start and end with dry). Mix gently after each addition until just combined—don’t overmix or the cake could get tough.
- Pour batter over pineapples: Carefully spoon the batter over the arranged pineapple rings in the skillet. Spread it evenly with a spatula, covering the fruit completely.
- Bake: Place the skillet back in the oven and bake for 40-45 minutes, or until a toothpick inserted in the center comes out clean. The edges should be golden and slightly caramelized.
- Cool and invert: Let the cake cool in the skillet for about 10 minutes. Then, place a large plate or cutting board over the skillet and carefully flip it to release the cake. If any pineapple sticks, gently loosen it with a knife.
- Serve warm or at room temperature: This cake is fantastic right out of the oven, but the flavors deepen if you let it sit a bit.
Pro tip: If the brown sugar starts to harden too much after cooling, warm the cake slightly before serving to bring back that gooey texture. And yes, I once forgot the vanilla extract—don’t do that. It’s the little things that make all the difference!
Cooking Tips & Techniques
Getting the perfect pineapple upside-down cake texture can be tricky, but here are some tips I’ve learned from trial and error:
- Butter and sugar layer: Make sure your butter is fully melted and hot when you pour it into the skillet. This helps the brown sugar dissolve and caramelize nicely.
- Don’t overcrowd the pineapple: Overlapping the pineapple slices can cause uneven caramelization and soggy spots. Arrange them neatly for a better presentation and texture.
- Cream butter and sugar well: This step traps air that helps the cake rise and stay fluffy. Rushing this part leads to dense cake.
- Alternating dry and wet ingredients: Adding them in parts prevents overmixing, which can make the cake tough. Stop mixing as soon as the batter looks homogenous.
- Watch your bake time: Oven temperatures vary, so start checking around 35 minutes. The cake should spring back lightly when pressed, and a toothpick should come out clean.
- Flipping the cake: This is the moment of truth—use a sturdy plate and steady hands to avoid a pineapple mess. If it sticks, gently loosen the edges with a butter knife.
One time, I baked this cake without preheating the skillet first, and the caramel never really set. Lesson learned: that warm skillet is a game changer. Also, multitasking in the kitchen? I usually prep the batter while the topping is melting in the skillet. It saves time and lets me keep an eye on things.
Variations & Adaptations
This classic recipe is incredibly versatile. Here are some ideas to make it your own:
- Tropical twist: Add diced mango or papaya alongside pineapple for a fruitier, more exotic flavor.
- Gluten-free version: Swap all-purpose flour with a gluten-free blend like Bob’s Red Mill 1-to-1 baking flour without altering other ingredients.
- Vegan adaptation: Use coconut oil instead of butter, a flax egg (1 tbsp ground flaxseed + 3 tbsp water) instead of eggs, and a plant-based milk like almond or oat milk.
- Spiced up: Add a pinch of nutmeg or ginger to the batter for warm, cozy notes.
- Mini cakes: Use a muffin tin lined with pineapple rings and pour batter over for single servings—great for parties.
I personally love adding a touch of freshly grated ginger to the batter during cooler months—it adds a subtle zing that brightens the caramel sweetness. Feel free to experiment with your favorite mix-ins or toppings; this cake is forgiving and fun.
Serving & Storage Suggestions
Serve your pineapple upside-down cake warm or at room temperature, ideally within a few hours of baking to enjoy the gooey caramel topping at its best. A scoop of vanilla ice cream or a dollop of whipped cream on the side is the classic move, but a drizzle of coconut cream or a sprinkle of toasted coconut flakes adds a nice touch too.
If you’re planning to store leftovers, cover the cake loosely with plastic wrap or foil and refrigerate for up to 3 days. When ready to eat, warm slices gently in the microwave for 15-20 seconds to bring back that melting caramel texture. You can also freeze the cake (wrapped well) for up to a month; just thaw overnight in the fridge before reheating.
Interestingly, the flavors meld more after a day, making the cake even tastier the next day. So if you can wait, it’s worth it! For presentation, a rustic cast iron skillet right to the table never fails to impress guests and brings a cozy, homey vibe.
Nutritional Information & Benefits
Per serving (based on 8 slices): approximately 320 calories, 15g fat, 45g carbohydrates, 3g protein.
This cake offers some nutritional perks thanks to pineapple, which is rich in vitamin C and manganese. The use of real butter and eggs provides good fats and protein, while the sugar amount keeps it balanced for an occasional treat.
For those watching carbs or sugars, consider reducing the sugar slightly or swapping brown sugar for coconut sugar. The recipe is naturally gluten-free adaptable and can be made dairy-free with simple substitutions.
From a wellness perspective, this cake is a lovely reminder that treats can be made thoughtfully without sacrificing flavor or comfort—just a little homemade love in every bite.
Conclusion
This classic homemade pineapple upside-down cake in cast iron is a recipe that’s stood the test of time and kitchen goofs alike. It’s simple, satisfying, and full of those golden, caramelized flavors that make dessert feel like a celebration. I love how this cake manages to feel both nostalgic and fresh, and I hope it finds a place in your recipe rotation too.
Feel free to tweak the toppings or spices to make it your own, and don’t be shy about sharing your baking stories or tips—I always enjoy hearing how this cake turns out in your kitchen. If you try it, leave a comment below and let me know what you think!
Happy baking, and remember: sometimes the best recipes come with a little mess, a little patience, and a whole lot of love.
Frequently Asked Questions
Can I use fresh pineapple instead of canned?
Absolutely! Fresh pineapple rings work wonderfully in this recipe. Just make sure to slice them about 1/4-inch thick and pat them dry to avoid excess moisture.
How do I prevent the cake from sticking to the skillet when flipping?
Using a well-seasoned cast iron skillet and melting the butter completely before adding brown sugar helps a lot. Letting the cake cool for 10 minutes before flipping also makes it easier to release.
Can I make this cake without a cast iron skillet?
Yes, you can use an oven-safe skillet or a round cake pan, but the caramelization and crispy edges won’t be quite the same as with cast iron.
What’s the best way to store leftover pineapple upside-down cake?
Store leftovers covered in the refrigerator for up to 3 days. Warm slices in the microwave before serving to bring back the gooey texture.
Is there a dairy-free version of this recipe?
Definitely! Substitute butter with coconut oil, use plant-based milk, and replace eggs with flax eggs for a vegan and dairy-free option.
For a twist on nostalgic comfort desserts, you might also enjoy trying my crispy garlic chicken or the deeply flavorful slow cooker beef stew, both perfect for cozy dinners after baking this delightful cake.
Pin This Recipe!
Classic Homemade Pineapple Upside-Down Cake Recipe Easy Cast Iron Method
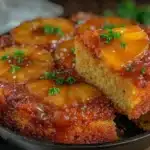
A classic pineapple upside-down cake baked in a cast iron skillet for a perfectly caramelized crust and moist, tender cake. This easy recipe uses simple pantry ingredients and delivers nostalgic, crowd-pleasing flavors.
- Prep Time: 15 minutes
- Cook Time: 45 minutes
- Total Time: 1 hour
- Yield: 8 servings 1x
- Category: Dessert
- Cuisine: American
Ingredients
- 1/4 cup (4 tbsp) unsalted butter, melted
- 1/2 cup packed light brown sugar
- 1 can (8 oz) pineapple rings, drained (or fresh pineapple slices about 1/4-inch thick)
- Maraschino cherries (optional)
- 1 1/2 cups all-purpose flour
- 2 tsp baking powder
- 1/4 tsp salt
- 1/4 tsp ground cinnamon (optional)
- 1/2 cup (1 stick) unsalted butter, softened
- 3/4 cup granulated sugar
- 2 large eggs, room temperature
- 1 tsp pure vanilla extract
- 1/2 cup whole milk (or almond/oat milk for dairy-free)
Instructions
- Preheat the oven to 350°F (175°C). Place the cast iron skillet in the oven to warm it slightly.
- Carefully remove the hot skillet and add the melted butter, swirling to coat the bottom evenly.
- Sprinkle the brown sugar over the butter in an even layer.
- Arrange the pineapple rings on top of the sugar without overlapping. Place a cherry in the center of each ring if using.
- In a medium bowl, whisk together flour, baking powder, salt, and cinnamon until combined.
- In a large bowl, beat the softened butter and granulated sugar until light and fluffy, about 3-4 minutes.
- Beat in eggs one at a time, then stir in vanilla extract, scraping down the sides as needed.
- Add the dry ingredients in three parts, alternating with the milk, starting and ending with dry ingredients. Mix gently until just combined.
- Pour the batter evenly over the pineapple rings in the skillet, spreading to cover the fruit.
- Bake for 40-45 minutes or until a toothpick inserted in the center comes out clean and edges are golden.
- Let the cake cool in the skillet for 10 minutes.
- Place a large plate or cutting board over the skillet and carefully invert to release the cake.
- Serve warm or at room temperature.
Notes
Use a well-seasoned cast iron skillet for best caramelization. If using fresh pineapple, slice about 1/4-inch thick and pat dry. Avoid overlapping pineapple slices to prevent soggy spots. Warm the skillet before adding butter and sugar to help caramelize evenly. Let the cake cool 10 minutes before flipping to avoid sticking. For gluten-free, substitute flour with a 1-to-1 gluten-free baking blend. For vegan, use coconut oil, flax eggs, and plant-based milk.
Nutrition
- Serving Size: 1 slice (1/8 of cake
- Calories: 320
- Sugar: 30
- Sodium: 150
- Fat: 15
- Saturated Fat: 9
- Carbohydrates: 45
- Fiber: 1
- Protein: 3
Keywords: pineapple upside-down cake, cast iron skillet cake, classic dessert, caramelized pineapple cake, easy pineapple cake, nostalgic dessert