Love this? Save it for later!
Share the inspiration with your friends
There used to be a tiny Italian deli on the corner of 4th and Main in my hometown that made the most incredible zucchini fritters. When they closed after twenty years—the owner finally retired to be with her grandkids—I honestly felt a little lost. I mean, those fritters were the reason I looked forward to summer. After about eight tries—some embarrassingly soggy, a few that fell apart in the pan—I finally got it. But it wasn’t until I switched to a sheet pan method that these Crispy Parmesan Zucchini Bars were born, and honestly, they might be even better than the original.
The first time I made these on a sheet pan, the power went out halfway through preheating. Classic me. I sat there in the dark kitchen, staring at the bowl of shredded zucchini and Parmesan, wondering if I should just give up and order pizza. Instead, I waited it out, and when the oven finally kicked back on, I crossed every finger I had. The result was this golden, crispy, cheesy sheet pan of goodness that made me forget all about the original fritters.
Maybe you’ve been there—chasing a flavor from your past, trying to capture that specific crunch or that perfect salty-cheesy bite. These crispy Parmesan zucchini bars are that recipe for me now. They’re the kind of thing you make when you need a vegetable side that actually feels like a treat, or when you want something crunchy to snack on while you’re waiting for dinner. And the best part? No flipping individual fritters in a skillet. Just one pan, one bake, and a whole lot of crispy, cheesy goodness.
This recipe stayed with me because it solved the problem. It took that nostalgic deli memory and turned it into something I could make on a busy Tuesday without breaking a sweat. Honestly, I think the original owner would approve.
Why You’ll Love This Recipe
Let me tell you why these crispy Parmesan zucchini bars have become my go-to summer side dish and the first thing I bring to every potluck. I’ve tested this recipe more times than I care to admit—some batches were too wet, some not crispy enough, and one memorable disaster where I forgot the eggs entirely (don’t ask). But this version? It’s the one.
- Quick & Easy: Comes together in under 30 minutes, perfect for busy weeknights or last-minute cravings. From shredding to serving, you’re looking at about 10 minutes of active prep and 20 minutes of baking.
- Simple Ingredients: No fancy grocery trips needed. You likely already have zucchini, Parmesan, eggs, and breadcrumbs in your kitchen. I always do.
- Perfect for Summer: Great for using up that bumper crop of zucchini from your garden or your neighbor’s overflowing CSA box. It’s the ultimate way to deal with too much zucchini.
- Crowd-Pleaser: Always gets rave reviews from kids and adults alike. Even my picky nephew, who swears he hates vegetables, asked for seconds.
- Unbelievably Delicious: The texture combo is next-level comfort food. Crispy on the outside, tender in the middle, and that salty, nutty Parmesan flavor throughout.
What makes this recipe different from the rest is the technique. Instead of frying individual fritters in oil, we’re pressing the mixture onto a sheet pan and baking it until golden and crispy. This means less mess, less fat, and way more even cooking. Plus, the larger surface area means more crispy edges per bite—and let’s face it, the crispy edges are the best part.
This recipe isn’t just good—it’s the kind that makes you close your eyes after the first bite. It’s comfort food reimagined: healthier, faster, but with the same soul-soothing satisfaction. Perfect for impressing guests without stress, or turning a simple summer vegetable into something memorable.
What Ingredients You Will Need
This recipe uses simple, wholesome ingredients to deliver bold flavor and satisfying texture without the fuss. Most of these are pantry staples, and the few fresh ingredients are easy to find at any grocery store.
- Zucchini (about 2 medium, or 3 cups shredded): Look for firm, medium-sized zucchini. Avoid the giant ones—they’re watery and seedy. I prefer organic when I can find it, but conventional works just fine. You’ll need to squeeze out the excess moisture, so don’t skip that step.
- Parmesan cheese (1 cup, freshly grated): Please, for the love of all things crispy, grate your own Parmesan. The pre-shredded stuff in the bag has anti-caking agents that prevent it from melting properly. I recommend a block of Parmigiano-Reggiano for the best flavor and texture.
- Panko breadcrumbs (1/2 cup): These are key for that ultra-crispy texture. Regular breadcrumbs will work in a pinch, but panko gives you that light, airy crunch that makes these bars so addictive. I like the Kikkoman brand for consistent results.
- Large eggs (2, beaten): These act as the binder that holds everything together. Make sure your eggs are at room temperature for easier mixing. If you’re out of eggs, you can try using a flax egg (1 tablespoon ground flaxseed mixed with 3 tablespoons water, let sit for 5 minutes).
- Garlic powder (1 teaspoon): Don’t use fresh garlic here—it adds too much moisture. Garlic powder gives you that savory punch without making the bars soggy. I’ve tried both, and the powder wins every time.
- Dried oregano (1/2 teaspoon): Adds a subtle Italian herb note that pairs beautifully with the Parmesan. You can substitute dried basil or thyme if that’s what you have.
- Salt and black pepper (to taste): I use about 1/2 teaspoon of salt and 1/4 teaspoon of pepper. Go easy on the salt since Parmesan is already salty.
- Olive oil spray (for the pan): This ensures the bars don’t stick and helps them get golden brown. You can use a pastry brush to coat the pan with oil if you don’t have spray.
Optional add-ins: A pinch of red pepper flakes for heat, or 1/4 cup of chopped fresh herbs like parsley or chives for freshness. I sometimes add a tablespoon of nutritional yeast for extra cheesy flavor without the dairy.
Equipment Needed
You don’t need any fancy equipment for this recipe, which is part of why I love it so much. Here’s what you’ll need:
- Box grater or food processor with shredding disc: For shredding the zucchini. A box grater works great and gives you nice, even shreds. If you’re using a food processor, just be careful not to over-process—you want shreds, not mush. I’ve used both, and honestly, the box grater gives me better control.
- Clean kitchen towel or cheesecloth: This is essential for squeezing out the excess moisture from the shredded zucchini. A thin dish towel works perfectly. Don’t use paper towels—they’ll fall apart and leave bits of paper in your zucchini.
- Large mixing bowl: For combining all the ingredients. Any large bowl will do—I use my grandmother’s old ceramic mixing bowl, but glass or stainless steel works just as well.
- Rimmed sheet pan (half-sheet pan, about 13×18 inches): The key to this recipe. A rimmed sheet pan keeps the mixture contained and allows for even baking. If you only have a smaller pan, you can use a 9×13-inch baking dish—just note that the bars will be thicker and may need a few extra minutes of baking time.
- Parchment paper or silicone baking mat: For easy cleanup and to prevent sticking. I prefer parchment paper because it makes lifting the bars out of the pan so much easier. Plus, no scrubbing!
- Spatula: For spreading the mixture evenly on the sheet pan. An offset spatula works beautifully, but a regular rubber spatula will do the job.
Budget-friendly tip: If you don’t have a box grater, you can use a vegetable peeler to create thin ribbons of zucchini, then chop them finely. It takes a bit longer, but it works in a pinch.
Preparation Method
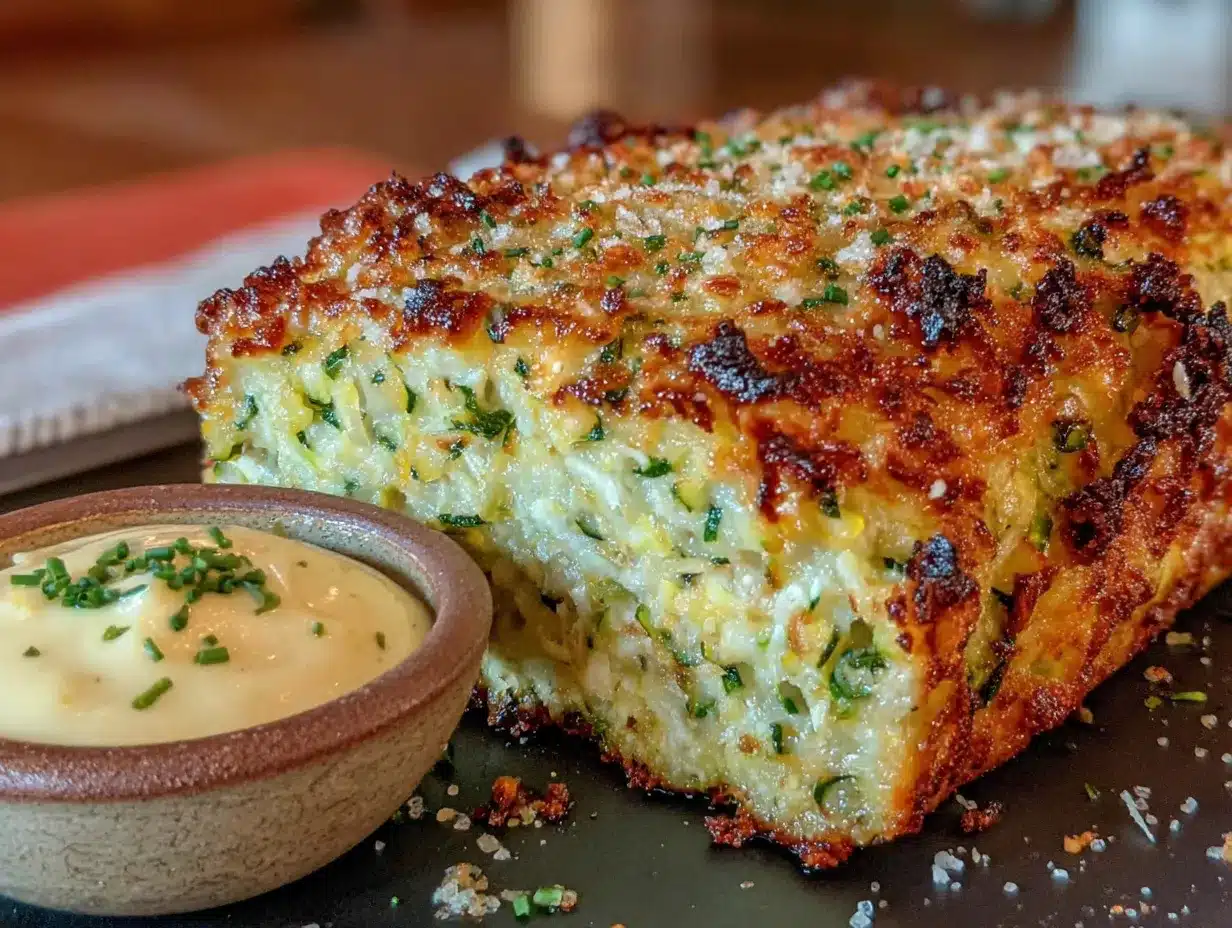
Now let’s get to the good part—making these crispy Parmesan zucchini bars. Follow these steps carefully, and you’ll have a sheet pan full of golden, cheesy goodness in no time.
- Preheat your oven to 400°F (200°C). Place the oven rack in the middle position. While the oven is heating, line your sheet pan with parchment paper or a silicone baking mat. Give it a light spray with olive oil—this extra step ensures the bars won’t stick and helps them get extra crispy on the bottom.
- Shred the zucchini. Wash the zucchini thoroughly and trim off the ends. Using a box grater or food processor with a shredding disc, shred the zucchini into a large bowl. You should have about 3 cups of shredded zucchini. Don’t worry about peeling the zucchini—the skin adds color and nutrients.
- Squeeze out the moisture. This is the most important step, and I cannot stress this enough. Transfer the shredded zucchini to a clean kitchen towel or cheesecloth. Gather the corners and twist tightly over the sink, squeezing out as much liquid as possible. You’ll be shocked at how much water comes out—I usually get about 1/2 cup of liquid. Keep squeezing until the zucchini feels dry to the touch. If you skip this step, your bars will be soggy and sad. Trust me, I learned this the hard way on attempt number three.
- Combine the dry ingredients. In a large mixing bowl, whisk together the panko breadcrumbs, freshly grated Parmesan cheese, garlic powder, dried oregano, salt, and black pepper. Make sure everything is evenly distributed. The Parmesan should look like it’s coating every breadcrumb.
- Add the wet ingredients. Add the squeezed-dry zucchini and beaten eggs to the bowl with the dry ingredients. Use a fork or your hands (I prefer my hands—it’s faster and you can feel when everything is combined) to mix until fully incorporated. The mixture should be thick and slightly sticky, not runny. If it seems too wet, add another tablespoon of panko.
- Spread on the sheet pan. Transfer the mixture to the prepared sheet pan. Using a spatula or your hands, press the mixture into an even layer about 1/4 to 1/2 inch thick. Make sure it’s spread all the way to the edges—the edges will get the crispiest. Don’t make it too thick, or the center won’t crisp up properly.
- Bake until golden and crispy. Place the sheet pan in the preheated oven and bake for 18-22 minutes, or until the edges are deep golden brown and the top is crispy to the touch. The center should be set and slightly firm. I usually check at the 18-minute mark and add a few minutes if needed. Every oven is different, so keep an eye on it.
- Cool slightly before cutting. Remove the sheet pan from the oven and let it cool on a wire rack for 5 minutes. This allows the bars to set and makes them easier to cut. Use a sharp knife or pizza cutter to slice into squares or rectangles. I like cutting them into 12 even bars, but you can make them smaller for appetizers or larger for a main dish.
- Serve immediately. These bars are best served warm, when the edges are still crispy and the cheese is melty. Transfer to a serving platter and enjoy!
Cooking Tips & Techniques
After making these crispy Parmesan zucchini bars more times than I can count, I’ve picked up a few tricks that make all the difference. Let me share them with you so you can avoid my mistakes.
The moisture squeeze is everything. I know I said it before, but I’ll say it again because this is where most people go wrong. Zucchini is basically a water balloon with seeds. If you don’t squeeze out the moisture, your bars will steam instead of crisp. I once skipped this step because I was in a hurry, and I ended up with a pan of soggy, sad zucchini mush. Never again. Squeeze until you can’t squeeze anymore, then squeeze one more time.
Don’t overcrowd the pan. Make sure your mixture is spread in a thin, even layer. If it’s too thick, the center won’t crisp up before the edges burn. Think of it like a thin crust pizza—you want even cooking throughout. If you’re making a double batch, use two sheet pans instead of one.
Use freshly grated Parmesan. I know it’s tempting to grab the pre-shredded bag, but please don’t. The anti-caking agents in pre-shredded cheese prevent it from melting smoothly and can make your bars gritty. Plus, freshly grated Parmesan has way more flavor. I grate a whole block at once and keep it in the fridge for recipes like this.
Let the bars rest before cutting. I learned this one the hard way when I tried to cut into the bars right out of the oven and they fell apart. Letting them cool for 5-10 minutes allows the structure to set. They’ll still be warm, but they’ll hold their shape when you cut them.
Use a pizza cutter for clean cuts. A sharp knife works, but a pizza cutter glides through these bars like butter. It gives you clean edges without dragging the filling around. Plus, it’s faster for cutting into smaller appetizer-sized pieces.
Variations & Adaptations
One of the best things about this recipe is how adaptable it is. Here are some of my favorite variations that I’ve tested over the years.
- Gluten-Free Version: Swap the panko breadcrumbs for gluten-free panko or almond flour. I’ve used both, and they work beautifully. Almond flour adds a slightly nutty flavor that pairs well with the Parmesan. Just note that almond flour absorbs more moisture, so you might need to add an extra egg.
- Dairy-Free Version: Use dairy-free Parmesan-style shreds or nutritional yeast in place of the Parmesan. I’ve had good results with the Violife brand of dairy-free Parmesan. The texture is slightly different—less melty—but the flavor is still delicious. Nutritional yeast gives it a cheesy, umami flavor without any dairy at all.
- Add Some Heat: Stir in 1/4 teaspoon of red pepper flakes or a finely diced jalapeño (seeds removed) for a spicy kick. I love this version with a side of ranch dressing for dipping. The cool ranch balances the heat perfectly.
- Herb Garden Variation: Add 2 tablespoons of chopped fresh herbs like basil, parsley, chives, or dill. I made this version last summer with fresh basil and chives from my garden, and it was absolutely divine. The fresh herbs brighten up the whole dish.
- Cheese Swap: Try using pecorino Romano or Asiago in place of the Parmesan for a different flavor profile. Pecorino is saltier and more pungent, while Asiago is milder and creamier. I’ve also made a version with half Parmesan and half sharp cheddar, and it was dangerously good.
- Add Protein: Stir in 1/2 cup of cooked, crumbled bacon or chopped ham for a heartier version. This turns the bars into a complete meal. I made this for a Super Bowl party once, and they disappeared in minutes.
Serving & Storage Suggestions
These crispy Parmesan zucchini bars are incredibly versatile when it comes to serving. Here’s how I like to enjoy them and how to store any leftovers (if there are any).
Serving Temperature: These bars are best served warm, straight from the oven. The edges are at their crispiest, and the cheese is perfectly melty. That said, they’re also delicious at room temperature—I’ve packed them for picnics and lunches, and they hold up beautifully.
Presentation Ideas: Arrange the bars on a wooden serving board or a white platter for maximum visual appeal. Sprinkle with a little extra Parmesan and some fresh chopped parsley for a pop of color. For parties, I cut them into smaller bite-sized pieces and serve them with a dipping sauce like marinara, ranch, or a garlic aioli.
Complementary Dishes: These bars pair wonderfully with grilled chicken, fish, or steak. They’re also fantastic alongside a big green salad or as part of a summer vegetable spread. For a light dinner, I serve them with a simple tomato salad and crusty bread.
Storage Instructions: Store any leftovers in an airtight container in the refrigerator for up to 3 days. Place a layer of parchment paper between the bars to prevent them from sticking together. I don’t recommend storing them at room temperature because the zucchini can spoil.
Reheating Tips: To restore the crispy texture, reheat the bars in a 350°F (175°C) oven for 5-7 minutes, or until heated through and crispy again. Avoid the microwave—it will make them soggy and sad. If you’re in a hurry, you can reheat them in an air fryer at 350°F for 3-4 minutes.
Freezing Instructions: These bars freeze surprisingly well. Arrange them in a single layer on a baking sheet and freeze until solid, then transfer to a freezer-safe bag or container. They’ll keep for up to 2 months. Reheat directly from frozen in a 375°F (190°C) oven for 10-12 minutes.
Nutritional Information & Benefits
Let’s talk about what’s actually in these crispy Parmesan zucchini bars. While they’re definitely a treat, they also pack some surprising nutritional benefits.
Estimated Nutritional Values (per bar, based on 12 servings):
- Calories: 85
- Total Fat: 4g
- Saturated Fat: 2g
- Cholesterol: 35mg
- Sodium: 220mg
- Total Carbohydrates: 6g
- Dietary Fiber: 1g
- Sugars: 2g
- Protein: 6g
Health Benefits: Zucchini is low in calories and high in water content, making it a great choice for hydration. It’s also a good source of vitamin C, vitamin A, and potassium. The Parmesan cheese adds calcium and protein, while the eggs provide additional protein and healthy fats. The panko breadcrumbs are relatively low in sugar compared to other binding options.
Dietary Considerations: This recipe is naturally vegetarian. For a gluten-free version, use gluten-free panko or almond flour. For a dairy-free version, use dairy-free Parmesan or nutritional yeast. The recipe is also low-carb friendly if you substitute the panko with almond flour (roughly 3g net carbs per serving).
Potential Allergens: This recipe contains dairy (Parmesan cheese), eggs, and gluten (panko breadcrumbs). Please adjust accordingly for your dietary needs.
From my personal wellness perspective, I love that this recipe lets me enjoy a vegetable-forward dish that doesn’t feel like a sacrifice. It’s satisfying, flavorful, and packed with good-for-you ingredients. Plus, it’s a great way to get picky eaters to eat their zucchini without complaint.
Conclusion
These crispy Parmesan zucchini bars have become a staple in my kitchen for good reason. They’re quick, easy, and incredibly satisfying—the kind of recipe that makes you feel like a genius with minimal effort. Whether you’re using up a summer zucchini bounty or just looking for a new side dish to add to your rotation, this sheet pan recipe delivers every time.
I encourage you to make these your own. Play with the herbs, swap the cheese, add some heat—whatever feels right to you. That’s the beauty of a simple recipe like this. It’s a canvas for your creativity, and it’s forgiving enough to handle whatever you throw at it.
Honestly, I think the reason I keep coming back to this recipe is that it reminds me of that little deli on 4th and Main. Not because it tastes exactly like those fritters, but because it captures that same feeling—the joy of biting into something crispy and cheesy and knowing that summer has truly arrived. I hope it brings you that same joy.
Have you tried these crispy Parmesan zucchini bars? I’d love to hear how they turned out for you! Drop a comment below with your favorite variation or any questions you have. And if you loved this recipe, please share it with a friend who needs a new way to use up their garden zucchini. Happy cooking!
Frequently Asked Questions
Can I use yellow squash instead of zucchini?
Absolutely! Yellow squash works perfectly in this recipe. It has a similar texture and moisture content, so you can swap them one-to-one. The flavor is slightly milder, but it’s a great substitute if that’s what you have on hand.
Why are my zucchini bars soggy?
The most common reason for soggy bars is not squeezing enough moisture out of the shredded zucchini. Make sure you squeeze until the zucchini feels dry to the touch. Another culprit could be spreading the mixture too thick on the sheet pan—aim for a thin, even layer. Finally, make sure your oven is fully preheated before baking.
Can I make these ahead of time?
You can prepare the zucchini mixture up to a day in advance and store it in the refrigerator. When you’re ready to bake, spread it on the sheet pan and add a few extra minutes to the baking time since the mixture will be cold. You can also bake the bars completely and reheat them in the oven before serving.
Can I use frozen zucchini?
I don’t recommend using frozen zucchini for this recipe. Frozen zucchini releases even more water when thawed, making it harder to get a crispy result. If you must use frozen zucchini, thaw it completely and squeeze out every drop of moisture before using. You’ll likely need to add an extra tablespoon of panko to absorb the excess liquid.
What dipping sauces go well with these bars?
These bars are delicious on their own, but they’re even better with a dipping sauce. My personal favorites are marinara sauce (for an Italian vibe), ranch dressing (classic and crowd-pleasing), garlic aioli (elevated and delicious), or a simple yogurt dill sauce (cool and tangy). For a spicy kick, try sriracha mayo or chipotle ranch.
Pin This Recipe!
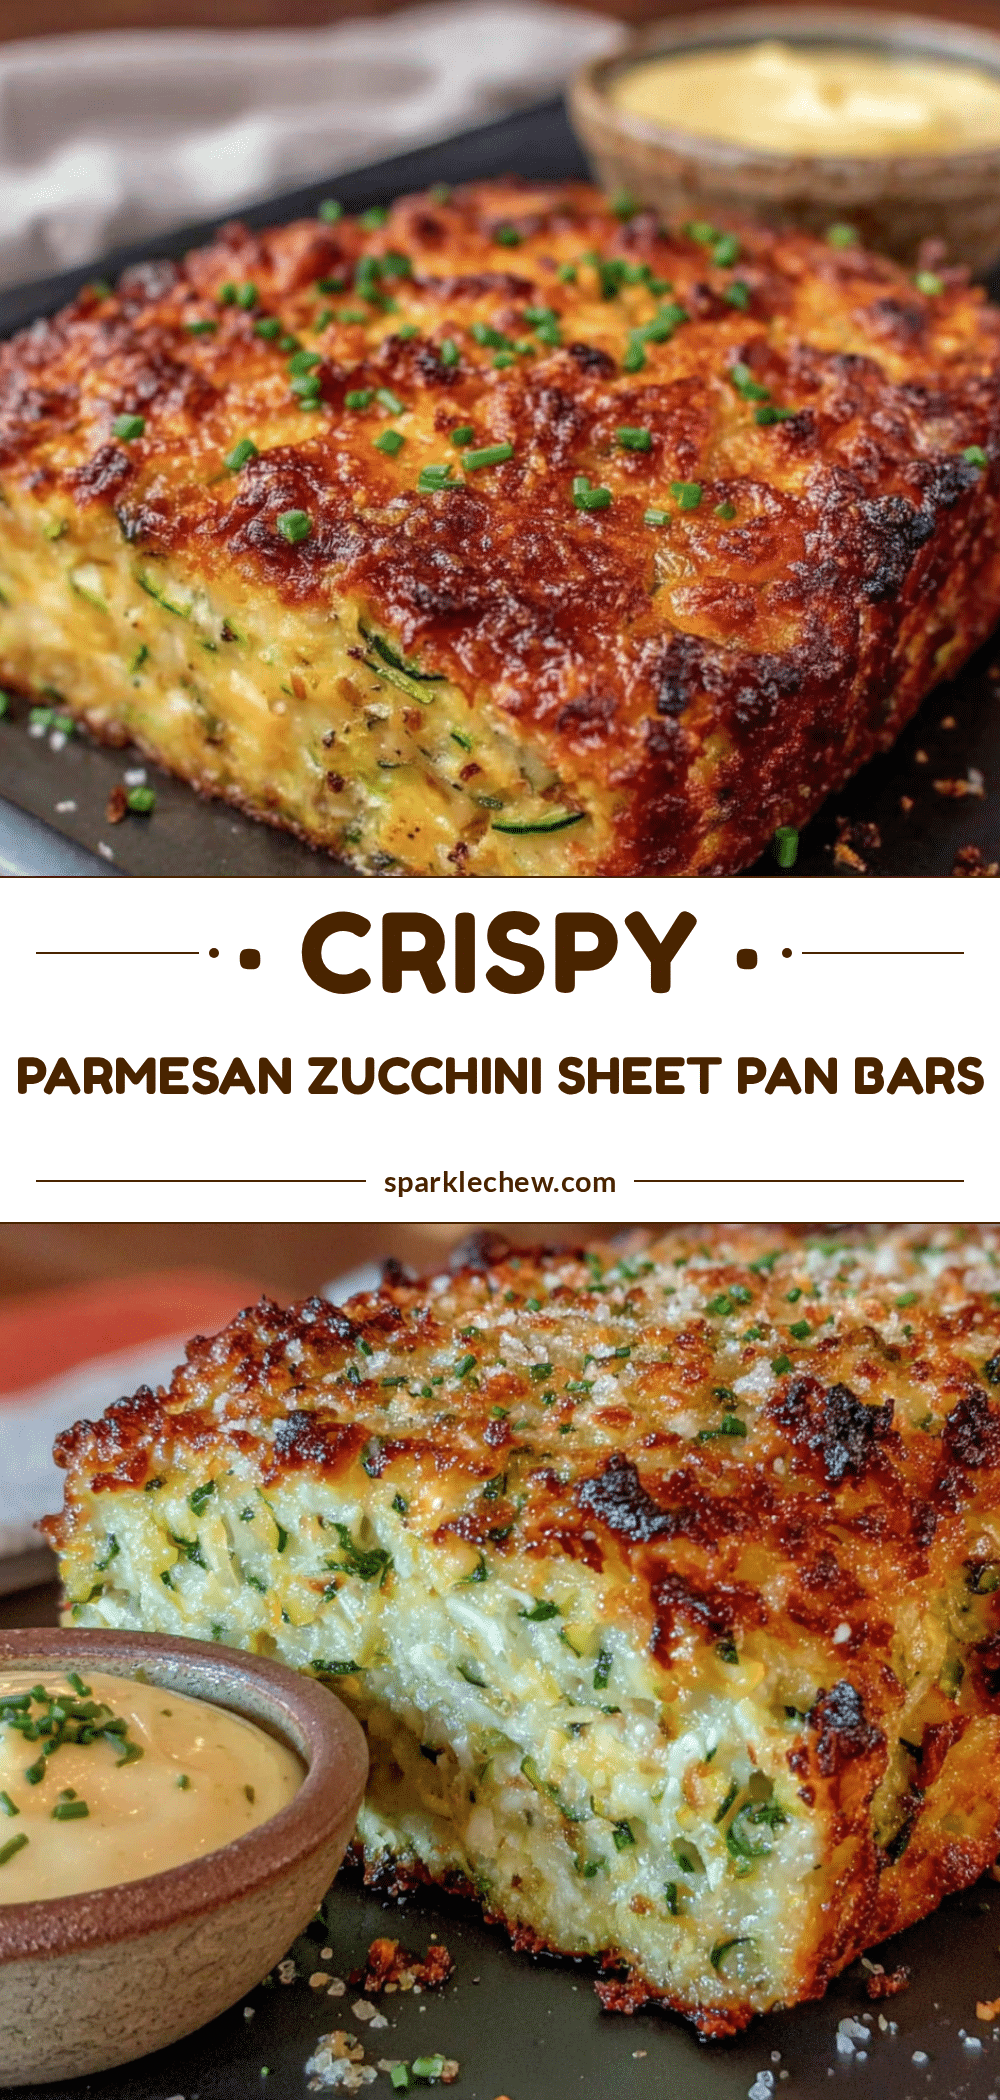
Sheet Pan Crispy Parmesan Zucchini Bars: Easy 30-Min Recipe

These crispy Parmesan zucchini bars are baked on a sheet pan for a quick, easy, and delicious side dish or snack. Made with simple ingredients, they come together in under 30 minutes and are perfect for using up summer zucchini.
- Prep Time: 10 minutes
- Cook Time: 20 minutes
- Total Time: 30 minutes
- Yield: 12 bars 1x
- Category: Side Dish
- Cuisine: Italian-American
Ingredients
- 2 medium zucchini (about 3 cups shredded)
- 1 cup freshly grated Parmesan cheese
- 1/2 cup panko breadcrumbs
- 2 large eggs, beaten
- 1 teaspoon garlic powder
- 1/2 teaspoon dried oregano
- 1/2 teaspoon salt
- 1/4 teaspoon black pepper
- Olive oil spray (for the pan)
Instructions
- Preheat your oven to 400°F (200°C). Line a rimmed sheet pan with parchment paper or a silicone baking mat and lightly spray with olive oil.
- Wash the zucchini, trim the ends, and shred using a box grater or food processor with a shredding disc. You should have about 3 cups of shredded zucchini.
- Transfer the shredded zucchini to a clean kitchen towel or cheesecloth. Gather the corners and twist tightly over the sink to squeeze out as much liquid as possible. Continue squeezing until the zucchini feels dry to the touch.
- In a large mixing bowl, whisk together the panko breadcrumbs, freshly grated Parmesan cheese, garlic powder, dried oregano, salt, and black pepper until evenly combined.
- Add the squeezed-dry zucchini and beaten eggs to the bowl with the dry ingredients. Mix with a fork or your hands until fully incorporated. The mixture should be thick and slightly sticky.
- Transfer the mixture to the prepared sheet pan. Using a spatula or your hands, press it into an even layer about 1/4 to 1/2 inch thick, spreading all the way to the edges.
- Bake for 18-22 minutes, or until the edges are deep golden brown and the top is crispy to the touch. The center should be set and slightly firm.
- Remove from the oven and let cool on a wire rack for 5 minutes. Use a sharp knife or pizza cutter to slice into squares or rectangles (about 12 bars).
- Serve warm. These bars are best enjoyed fresh from the oven.
Notes
The most important step is squeezing out the moisture from the shredded zucchini—this ensures crispy bars. Use freshly grated Parmesan for best melting and flavor. Let the bars rest for 5 minutes before cutting to help them hold their shape. For gluten-free, use gluten-free panko or almond flour. For dairy-free, use dairy-free Parmesan or nutritional yeast.
Nutrition
- Serving Size: 1 bar
- Calories: 85
- Sugar: 2
- Sodium: 220
- Fat: 4
- Saturated Fat: 2
- Carbohydrates: 6
- Fiber: 1
- Protein: 6
Keywords: zucchini bars, crispy zucchini, Parmesan zucchini, sheet pan zucchini, easy zucchini recipe, summer zucchini, vegetarian side dish


