Love this? Save it for later!
Share the inspiration with your friends
My neighbor, an older woman named Margaret, watched me struggle with a wobbly, under-baked pumpkin pie one Thanksgiving. She didn’t say anything at first. Then, the next day, she knocked on my door holding a pie plate covered in foil. “Try this one,” she said, with a knowing smile. “No oven required.”
That was three years ago, and honestly, I haven’t baked a traditional pumpkin pie since. Margaret’s recipe wasn’t just easy—it was a revelation. The gingersnap crust had this incredible snap and spice that perfectly balanced the silky, creamy pumpkin filling. I remember standing in her kitchen, watching her crush those cookies with a rolling pin, laughing about how my crust had turned into a soggy mess. She just shrugged and said, “Why complicate things?”
This easy no-bake pumpkin pie with gingersnap crust has become my go-to for every fall gathering. It’s the kind of dessert that makes people close their eyes after the first bite, then immediately ask for the recipe. Maybe you’ve been there—standing over a hot oven, hoping your pie crust doesn’t shrink, worrying about cracks in the filling. Let me tell you, this version takes all that stress away. The filling sets up perfectly in the fridge, the crust stays crisp, and the flavor? It’s pure autumn in every single bite. I keep making it because it proves that sometimes the simplest approach creates the most memorable results.
Why You’ll Love This Recipe
This isn’t just another pumpkin pie recipe—it’s the one that will save your holiday sanity. I’ve tested this at least a dozen times, tweaking the spice blend and the crust ratio, and I can confidently say this version is foolproof. Here’s why it stands out:
- No Oven Required: This frees up valuable oven space for side dishes and main courses, especially during the holidays. You can make it days ahead without any last-minute baking stress.
- Simple Ingredients: You probably already have most of these in your pantry. No obscure ingredients or specialty items needed—just good, honest staples.
- Perfect for Thanksgiving: It’s a lifesaver when your oven is packed with turkey and stuffing. Plus, it looks impressive on the dessert table without any effort.
- Crowd-Pleaser: I’ve brought this to potlucks, family dinners, and even a Friendsgiving, and it always disappears first. Even the pumpkin pie skeptics come back for seconds.
- Unbelievably Creamy: The texture is like a dream—smooth, rich, and velvety. The gingersnap crust adds this wonderful crunch and warmth that store-bought crusts just can’t match.
What makes this recipe different from the rest? It’s the combination of a perfectly spiced, no-bake filling with a crust that stays crunchy instead of getting soggy. I use a clever trick with the gelatin that gives the filling a firm, sliceable texture without any baking. And the gingersnap crust? It’s not just a crust—it’s a flavor powerhouse that elevates the entire pie. This is comfort food reimagined: easier, faster, but with the same soul-soothing satisfaction that makes pumpkin pie a holiday classic.
What Ingredients You Will Need
This recipe uses simple, wholesome ingredients to deliver bold flavor and satisfying texture without the fuss. Most of these are pantry staples you might already have on hand, which makes this pie perfect for last-minute dessert emergencies.
For the Gingersnap Crust
- 2 cups crushed gingersnap cookies (about 8 ounces) – I recommend using Nabisco brand for consistent texture, but any crisp gingersnap works. The molasses and ginger in these cookies are what give the crust its signature warmth.
- 6 tablespoons unsalted butter, melted – This binds the crust together. Use salted butter if that’s all you have, just reduce any added salt elsewhere.
- 2 tablespoons granulated sugar – Optional, but adds a touch of sweetness if your cookies aren’t very sweet. Taste your cookie crumbs first.
- ¼ teaspoon ground cinnamon – A little extra warmth to complement the ginger in the cookies.
For the Pumpkin Filling
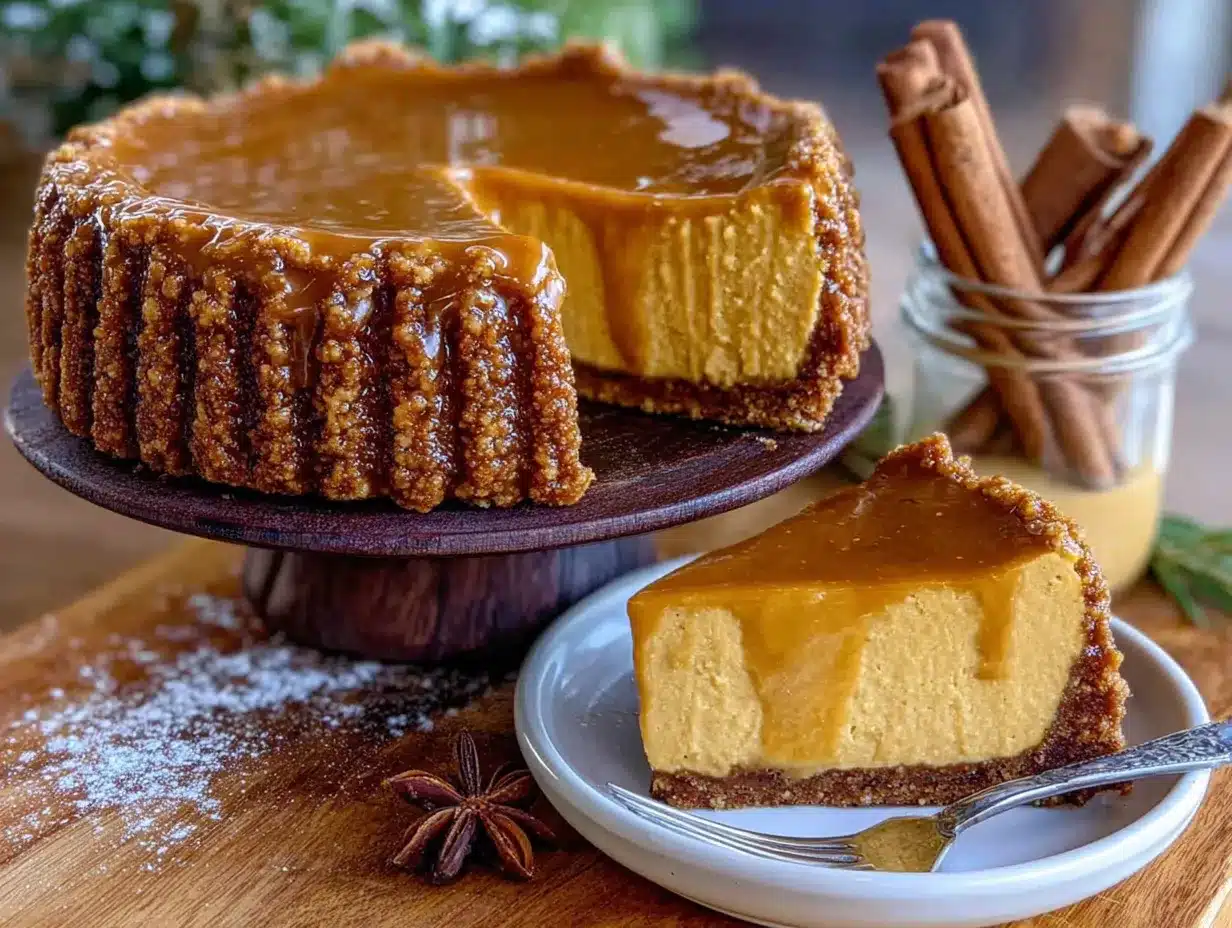
- 1 (15-ounce) can pumpkin puree – Not pumpkin pie filling! Make sure you grab 100% pure pumpkin. I prefer Libby’s brand for its consistent texture and flavor.
- 1 (14-ounce) can sweetened condensed milk – This adds sweetness and creates that luscious, creamy texture. There’s no substitute that works quite as well.
- 8 ounces cream cheese, softened – Full-fat cream cheese gives the best texture. Let it sit out for at least 30 minutes before using so it blends smoothly.
- 1 teaspoon vanilla extract – Pure vanilla extract adds depth. Imitation works in a pinch, but pure is worth the splurge here.
- 1 teaspoon pumpkin pie spice – You can use store-bought or make your own blend (see tip below).
- ½ teaspoon ground ginger – Extra ginger to tie the filling to the gingersnap crust.
- ¼ teaspoon salt – Balances the sweetness and enhances all the flavors.
- 1 envelope (2 ¼ teaspoons) unflavored gelatin – This is the secret to a firm, sliceable no-bake pie. Don’t skip it.
- 3 tablespoons cold water – For blooming the gelatin.
For the Topping (Optional but Recommended)
- 1 ½ cups heavy whipping cream – For homemade whipped cream. Make sure it’s very cold.
- 2 tablespoons powdered sugar – Sweetens the cream without making it grainy.
- ½ teaspoon vanilla extract – For flavor.
- Additional crushed gingersnaps and cinnamon for garnish – Adds a beautiful finishing touch.
Substitution Tip: For a gluten-free version, use gluten-free gingersnap cookies. The filling is naturally gluten-free. For a dairy-free option, use dairy-free cream cheese and a coconut cream-based whipped topping, though the texture will be slightly different.
Equipment Needed
You don’t need a fancy kitchen to pull off this pie. Here’s what you’ll need:
- 9-inch pie plate – A standard glass or ceramic pie dish works perfectly. I prefer glass because you can see when the crust is evenly pressed.
- Rolling pin or food processor – For crushing the gingersnaps. A rolling pin and a zip-top bag work great if you want to get out some frustration. A food processor makes it quicker and gives more even crumbs.
- Medium mixing bowl – For the crust ingredients.
- Large mixing bowl – For the filling.
- Electric hand mixer or stand mixer – For beating the cream cheese and whipping the cream. A whisk and some elbow grease work too, but it’ll take a bit longer.
- Small microwave-safe bowl – For blooming and melting the gelatin.
- Rubber spatula – For scraping every last bit of filling into the crust.
- Plastic wrap – For covering the pie while it chills.
Budget-Friendly Tip: If you don’t have a food processor, place the cookies in a sturdy zip-top bag and crush them with a rolling pin or even a heavy skillet. It’s a great way to release some cooking stress!
Preparation Method
Let’s walk through this step by step. Trust me, it’s easier than you think.
Step 1: Make the Gingersnap Crust (10 minutes)
Place your gingersnap cookies in a food processor and pulse until you have fine, even crumbs. If you’re using the bag-and-rolling-pin method, make sure there are no large chunks left. You should have about 2 cups of crumbs. Pour the crumbs into a medium bowl, add the melted butter, sugar, and cinnamon. Stir with a fork until every crumb is moistened. The mixture should look like wet sand and hold together when you squeeze it in your fist.
Transfer the mixture to your 9-inch pie plate. Press it firmly into the bottom and up the sides. Use the bottom of a measuring cup or a flat glass to get an even, compact layer. Pay special attention to the edges—you want them thick enough to hold the filling. Place the crust in the refrigerator while you prepare the filling. This helps it set up and prevents sogginess.
Step 2: Bloom the Gelatin (5 minutes)
In a small microwave-safe bowl, sprinkle the unflavored gelatin over the 3 tablespoons of cold water. Let it sit for 5 minutes. It will look like a firm, jiggly mass. Don’t worry—that’s exactly what you want. This process is called “blooming” and it ensures the gelatin dissolves evenly later.
Step 3: Prepare the Pumpkin Filling (15 minutes)
In a large bowl, beat the softened cream cheese with an electric mixer until it’s smooth and fluffy, about 2 minutes. Scrape down the sides of the bowl. Add the sweetened condensed milk and beat until combined. The mixture should be silky and smooth.
Now add the pumpkin puree, vanilla extract, pumpkin pie spice, ground ginger, and salt. Mix on low speed until everything is well incorporated. Stop and scrape the bowl a few times to make sure there are no streaks of cream cheese. The filling should be a beautiful, uniform orange color.
Step 4: Dissolve and Add the Gelatin (5 minutes)
Microwave the bloomed gelatin for 15-20 seconds, until it becomes liquid. Stir it gently—it should be clear and smooth. Don’t overheat it or it might lose its setting power. With the mixer running on low, slowly pour the liquid gelatin into the pumpkin mixture. Mix for about 30 seconds until it’s fully incorporated. The filling will look slightly thinner at this point, but that’s normal.
Step 5: Assemble the Pie (5 minutes)
Remove the crust from the refrigerator. Pour the pumpkin filling into the prepared crust. Use a rubber spatula to spread it evenly. Give the pie plate a gentle tap on the counter to release any air bubbles. The filling should come right up to the top of the crust.
Step 6: Chill and Set (4 hours minimum)
Cover the pie loosely with plastic wrap and refrigerate for at least 4 hours, but overnight is even better. The filling needs this time to set completely. When it’s ready, the pie should feel firm to the touch and slice cleanly. Don’t rush this step—I learned the hard way that a wobbly pie is a messy pie.
Step 7: Make the Whipped Cream (10 minutes)
Just before serving, pour the cold heavy cream into a chilled bowl. Add the powdered sugar and vanilla extract. Beat with an electric mixer on medium-high speed until soft peaks form. This means when you lift the beaters, the cream forms gentle peaks that flop over slightly. Don’t overbeat or you’ll end up with butter!
Cooking Tips & Techniques
After making this pie more times than I can count, I’ve picked up a few tricks that make a real difference.
Don’t skip the gelatin. I know, it might seem like an extra step, but it’s what gives this no-bake pie its structure. Without it, you’ll have a soupy mess instead of a sliceable pie. Trust me, I tried skipping it once out of laziness, and the result was a delicious but very messy pudding.
Press the crust firmly. This is the most common mistake I see. If your crust is too loose, it will crumble when you try to serve the pie. Use the bottom of a measuring cup and really press down. The crust should feel solid, not sandy. Take your time with this step.
Use room temperature cream cheese. Cold cream cheese will leave you with lumpy filling. Let it sit on the counter for at least 30 minutes before you start. If you’re in a hurry, you can microwave it in 10-second bursts, but be careful not to melt it.
Make it ahead of time. This pie actually tastes better after a full day in the fridge. The flavors meld together, and the texture becomes even creamier. I often make it two days before Thanksgiving, and it’s always perfect.
Watch the gelatin carefully. When you microwave the bloomed gelatin, don’t let it boil. Just warm it enough to become liquid. Boiling can damage the gelatin’s setting ability, and then you’re back to pudding territory.
Variations & Adaptations
This recipe is wonderfully flexible. Here are a few ways I’ve adapted it over the years:
Gluten-Free Version
Simply swap the regular gingersnaps for gluten-free ones. Many brands make excellent gluten-free gingersnaps these days. The rest of the filling is naturally gluten-free, so this is an easy switch.
Maple Pumpkin Pie
Replace ¼ cup of the sweetened condensed milk with pure maple syrup. The maple flavor pairs beautifully with the ginger in the crust. Just note that the filling might be slightly softer, so chill it for the full 4 hours.
Chocolate Gingersnap Crust
Replace half of the gingersnap crumbs with chocolate wafer crumbs. The chocolate and ginger combination is absolutely divine. I tried this on a whim one year, and it was a huge hit.
Vegan Adaptation
Use dairy-free cream cheese, coconut cream instead of sweetened condensed milk (blend 1 can full-fat coconut milk with ½ cup sugar), and a vegan butter substitute. The texture will be slightly different, but still delicious. Use agar agar instead of gelatin for a vegan setting agent.
Spice It Up
Add ¼ teaspoon of cayenne pepper or chipotle powder to the filling for a spicy-sweet kick. The heat sneaks up on you and balances the sweetness perfectly. I love serving this version at adult gatherings.
Serving & Storage Suggestions
This pie is best served cold, straight from the refrigerator. The filling should be firm but still creamy, and the crust should have a satisfying snap. Here’s how to serve and store it:
Serving: Remove the pie from the fridge about 10 minutes before slicing. This takes the chill off just enough to let the flavors shine. Use a sharp knife dipped in hot water and wiped dry for clean slices. Top each slice with a generous dollop of whipped cream and a sprinkle of crushed gingersnaps and cinnamon. For a truly stunning presentation, add a few candied pecans or a drizzle of caramel sauce.
Complementary dishes: This pie pairs beautifully with a hot cup of coffee or spiced cider. For a full dessert spread, serve it alongside a classic apple crisp or a batch of pumpkin cheesecake bars. The combination of textures and flavors is irresistible.
Storage: Cover the pie tightly with plastic wrap or aluminum foil and store it in the refrigerator for up to 5 days. The crust will stay crisp for the first 2-3 days, then gradually soften. If you’re making it for a holiday, I recommend assembling it no more than 2 days ahead for the best texture.
Freezing: This pie freezes beautifully! Wrap the fully chilled pie (without whipped cream) in a layer of plastic wrap, then a layer of foil. Freeze for up to 2 months. To serve, thaw overnight in the refrigerator. Add fresh whipped cream after thawing. The texture remains remarkably creamy.
Leftover whipped cream: Store any leftover whipped cream in an airtight container in the fridge for up to 3 days. It will deflate slightly, but you can re-whip it briefly to bring it back to life.
Nutritional Information & Benefits
Here’s the estimated nutritional breakdown for one slice of this pie (based on 8 servings, without whipped cream):
- Calories: 385
- Total Fat: 22g
- Saturated Fat: 13g
- Carbohydrates: 43g
- Sugar: 32g
- Protein: 7g
- Fiber: 2g
- Sodium: 310mg
Health Benefits: Pumpkin is a nutritional powerhouse. It’s packed with vitamin A (over 200% of your daily needs per serving), which supports eye health and immune function. It’s also a good source of fiber, which aids digestion and helps you feel full. The ginger in the crust has anti-inflammatory properties and can help settle your stomach after a big meal. While this is definitely a treat, it’s one that offers some redeeming nutritional qualities.
Dietary Considerations: This recipe contains dairy (butter, cream cheese, sweetened condensed milk, heavy cream) and gluten (gingersnap cookies). For gluten-free and dairy-free adaptations, see the Variations section above. The pie is naturally egg-free, which is great for those with egg allergies.
Conclusion
This easy no-bake pumpkin pie with gingersnap crust has become a staple in my kitchen for good reason. It’s the dessert that saves Thanksgiving, the one that impresses without stress, and the recipe that people beg me to share year after year. The combination of the spicy, crunchy crust and the silky, spiced filling is simply unbeatable.
I encourage you to make this recipe your own. Add extra ginger if you love the kick. Swap in a different cookie for the crust. Pile on the whipped cream. The beauty of this pie is that it’s forgiving and flexible. It’s meant to be enjoyed, not stressed over.
So go ahead—give it a try. I promise you’ll be amazed at how something so simple can taste so incredible. And when you take that first bite, with the crunch of the gingersnap and the creamy pumpkin melting on your tongue, you’ll understand why I keep coming back to this recipe. Let me know how it turns out for you! Drop a comment below or tag me in your photos. I’d love to hear about your own twists and variations.
Frequently Asked Questions
Can I use pumpkin pie filling instead of pumpkin puree?
No, I don’t recommend it. Pumpkin pie filling already has sugar and spices added, which will throw off the balance of this recipe. Stick with 100% pure pumpkin puree for the best results.
How long does this pie need to set in the fridge?
At least 4 hours, but overnight is ideal. The gelatin needs time to fully set, and the flavors develop beautifully overnight. If you’re in a hurry, 4 hours will work, but the slices won’t be as clean.
Can I use a store-bought graham cracker crust instead?
You can, but the flavor won’t be the same. The gingersnap crust is what makes this pie special. If you’re in a pinch, a graham cracker crust will work, just add an extra ½ teaspoon of ground ginger to the filling to compensate.
Why did my crust turn out soggy?
This usually happens if the crust wasn’t pressed firmly enough or if the pie wasn’t chilled long enough. Make sure you press the crust down very firmly and chill it for at least 30 minutes before adding the filling. Also, don’t skip the gelatin in the filling—it helps prevent moisture from seeping into the crust.
Can I make this pie dairy-free?
Yes! Use dairy-free cream cheese, a dairy-free butter substitute, and coconut cream instead of sweetened condensed milk (blend 1 can full-fat coconut milk with ½ cup sugar). For the whipped cream, use a coconut cream-based whipped topping. The texture will be slightly different, but still delicious.
Pin This Recipe!
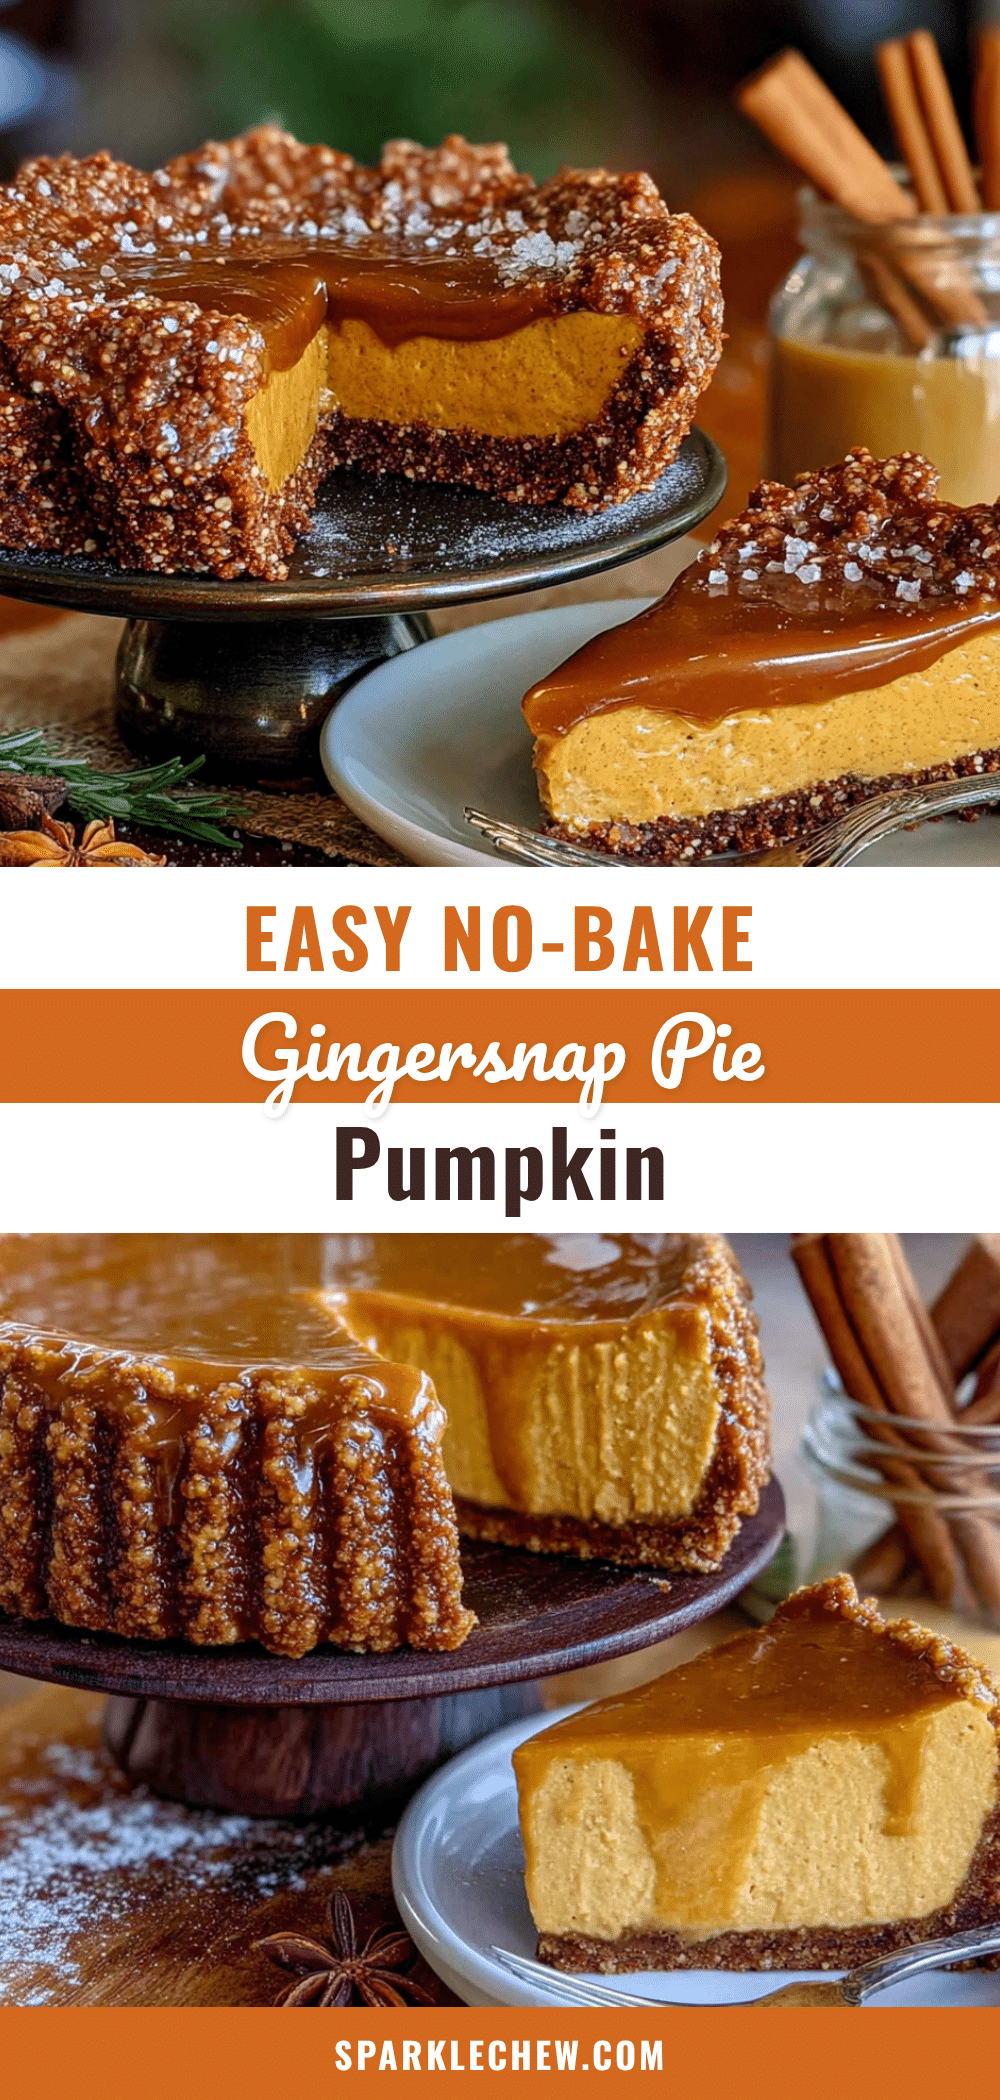
Easy No-Bake Pumpkin Pie with Gingersnap Crust
A foolproof no-bake pumpkin pie with a crunchy gingersnap crust and silky, creamy filling. Perfect for Thanksgiving or any fall gathering, this dessert frees up oven space and delivers incredible flavor without the stress.
- Prep Time: 30 minutes
- Cook Time: 0 minutes
- Total Time: 4 hours 30 minutes (includes chilling)
- Yield: 8 servings 1x
- Category: Dessert
- Cuisine: American
Ingredients
- 2 cups crushed gingersnap cookies (about 8 ounces)
- 6 tablespoons unsalted butter, melted
- 2 tablespoons granulated sugar
- ¼ teaspoon ground cinnamon
- 1 (15-ounce) can pumpkin puree (100% pure pumpkin)
- 1 (14-ounce) can sweetened condensed milk
- 8 ounces cream cheese, softened
- 1 teaspoon vanilla extract
- 1 teaspoon pumpkin pie spice
- ½ teaspoon ground ginger
- ¼ teaspoon salt
- 1 envelope (2 ¼ teaspoons) unflavored gelatin
- 3 tablespoons cold water
- 1 ½ cups heavy whipping cream (for topping)
- 2 tablespoons powdered sugar (for topping)
- ½ teaspoon vanilla extract (for topping)
- Additional crushed gingersnaps and cinnamon for garnish
Instructions
- Make the crust: Crush gingersnap cookies into fine crumbs. Mix with melted butter, sugar, and cinnamon. Press firmly into a 9-inch pie plate. Refrigerate while preparing filling.
- Bloom the gelatin: Sprinkle gelatin over cold water in a small bowl. Let sit for 5 minutes until firm and jiggly.
- Prepare the filling: Beat softened cream cheese until smooth. Add sweetened condensed milk and mix. Add pumpkin puree, vanilla, pumpkin pie spice, ginger, and salt. Mix until well combined.
- Dissolve gelatin: Microwave bloomed gelatin for 15-20 seconds until liquid. Slowly pour into filling while mixing on low speed until incorporated.
- Assemble: Pour filling into prepared crust. Spread evenly and tap gently to release air bubbles.
- Chill: Cover with plastic wrap and refrigerate for at least 4 hours, preferably overnight, until firm.
- Make whipped cream: Beat cold heavy cream with powdered sugar and vanilla until soft peaks form. Serve pie with whipped cream and garnish with crushed gingersnaps and cinnamon.
Notes
Don’t skip the gelatin—it’s essential for a firm, sliceable pie. Press the crust firmly to prevent crumbling. Use room temperature cream cheese for a smooth filling. The pie tastes even better after a full day in the fridge. For gluten-free, use gluten-free gingersnaps. For dairy-free, use dairy-free cream cheese and coconut cream.
Nutrition
- Serving Size: 1 slice (1/8 of pie)
- Calories: 385
- Sugar: 32
- Sodium: 310
- Fat: 22
- Saturated Fat: 13
- Carbohydrates: 43
- Fiber: 2
- Protein: 7
Keywords: no-bake pumpkin pie, gingersnap crust, easy pumpkin pie, Thanksgiving dessert, no oven pumpkin pie


