Love this? Save it for later!
Share the inspiration with your friends
My nephew asked why I couldn’t just crush up Reese’s cups and fold them into the frosting. I started to explain why that wouldn’t work — something about texture and how the candy would mess with the buttercream consistency. Then I stopped. Honestly, I had no real reason. I had just never tried it.
So I let him do it. The kitchen was already a disaster — flour on the counter, a cracked eggshell I hadn’t fished out of the bowl yet, butter smeared on the cupboard handle. What was a few crushed peanut butter cups going to hurt? He stood on a step stool, dumping a whole chopped-up bag of mini cups into my Swiss meringue buttercream while I held my breath. I was sure I’d be scraping it into the trash and starting over.
The first bite of that frosting changed everything. You know that feeling when you’re proven wrong and you’re actually happy about it? The chocolate chunks melted on your tongue, and the peanut butter candy blended right into the silky buttercream like it was always meant to be there. I mean, I’ve been making cakes for years, but that kid taught me something that afternoon: sometimes the best ideas come from people who haven’t learned what’s “supposed” to work yet.
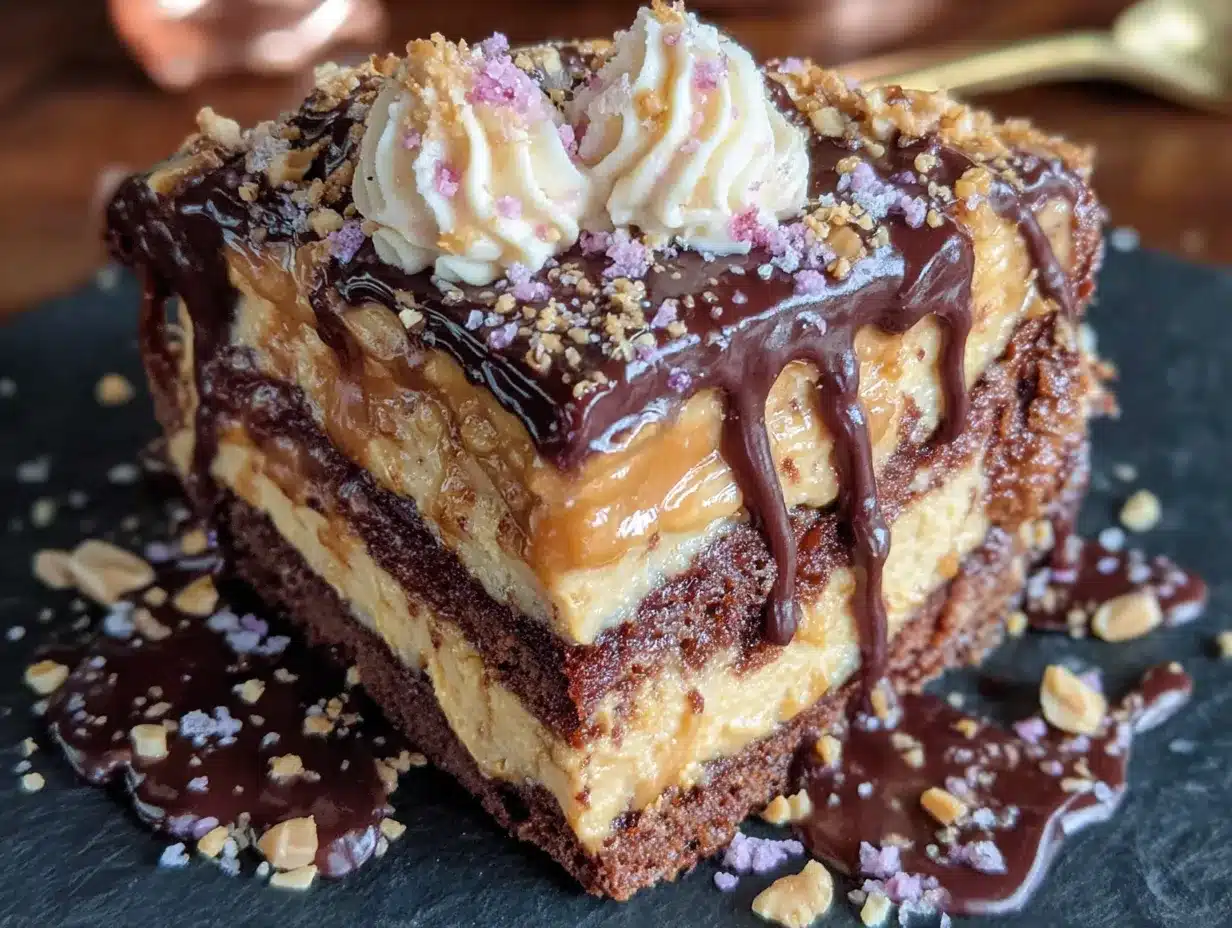
This Ultimate Reese’s Peanut Butter Layer Cake is the result of that happy accident. It’s three layers of moist chocolate cake, filled and frosted with a peanut butter buttercream that has actual Reese’s pieces running through it. Maybe you’ve been stuck in your own cooking routines, following the same recipes the same way every time. Let me tell you — breaking the rules tastes pretty incredible.
Why You’ll Love This Recipe
This isn’t just another chocolate cake with peanut butter frosting. I’ve tested this recipe more times than I care to admit, and every single batch confirmed one thing: this is the version worth making. The cake stays moist for days, the frosting is stable enough to pipe but light enough to melt in your mouth, and those little bits of Reese’s cups add a texture that makes every bite exciting.
Here’s what makes this one stand out:
- Simple Ingredients: You probably have most of this in your pantry right now. No weird stabilizers or hard-to-find extracts.
- Perfect for Celebrations: Birthdays, game days, or just a Tuesday that needs a little extra — this cake shows up.
- Crowd-Pleaser: I’ve brought this to three different gatherings and watched it disappear every single time. Kids and adults go back for seconds.
- Unbelievably Delicious: The combo of rich chocolate cake with creamy peanut butter frosting and those little pockets of melted candy is next-level comfort food.
- Make-Ahead Friendly: The cakes freeze beautifully, and the frosting keeps in the fridge for a week. You can spread the work out over a few days.
This is the kind of cake that makes people close their eyes after the first bite. It’s familiar enough to feel like comfort food but special enough to feel like an occasion. And honestly? It’s hard to mess up.
What Ingredients You Will Need
This recipe uses simple, wholesome ingredients to deliver that classic chocolate-peanut butter combo. Most of these are pantry staples, but I’ve included a few notes to help you pick the best options for the best results.
For the Chocolate Cake Layers
- All-purpose flour — 2 ½ cups (315g), spooned and leveled. Don’t scoop directly from the bag or you’ll pack in too much.
- Granulated sugar — 2 cups (400g). This gives the cake structure and sweetness.
- Unsweetened cocoa powder — ¾ cup (75g). I prefer Dutch-process for a deeper, richer chocolate flavor, but natural works fine too.
- Baking powder — 1 ½ teaspoons
- Baking soda — 1 ½ teaspoons
- Salt — 1 teaspoon
- Large eggs — 2, at room temperature. Cold eggs won’t emulsify properly with the butter.
- Whole milk — 1 cup (240ml), room temperature. Buttermilk works beautifully here too — it makes the cake even more tender.
- Vegetable oil — ½ cup (120ml). This keeps the cake moist for days. I use canola or avocado oil.
- Vanilla extract — 2 teaspoons
- Hot coffee — 1 cup (240ml). Don’t skip this! The coffee doesn’t make it taste like coffee — it deepens the chocolate flavor. Instant espresso powder dissolved in hot water works great.
For the Reese’s Peanut Butter Buttercream
- Unsalted butter — 1 ½ cups (3 sticks, 340g), softened. Let it sit out for at least an hour.
- Creamy peanut butter — 1 cup (240g). Use the regular kind — not natural, not the stuff with oil separation. I prefer Jif or Skippy for the best texture.
- Powdered sugar — 4 cups (480g), sifted if you have the patience
- Heavy cream — ¼ cup (60ml), plus more if needed
- Vanilla extract — 1 teaspoon
- Salt — ¼ teaspoon, to balance the sweetness
- Mini Reese’s cups — 1 ½ cups, roughly chopped. Plus more for decorating the top.
For the Chocolate Ganache Drip (Optional but Recommended)
- Semi-sweet chocolate chips — ½ cup (85g)
- Heavy cream — ⅓ cup (80ml)
Equipment Needed
You don’t need a professional bakery setup to pull this off. Here’s what you’ll actually use:
- Three 8-inch round cake pans — I’ve tried 9-inch pans, and the layers come out too thin. Stick with 8-inch for that impressive height.
- Stand mixer or hand mixer — A stand mixer makes the frosting easier, but a hand mixer works just fine. Your arm might get a little tired beating the buttercream.
- Parchment paper — Cut circles for the bottom of your pans. Trust me, this is the difference between a cake that releases cleanly and one that sticks.
- Cooling rack — Essential for even cooling. Don’t leave the cakes in the pans or they’ll get soggy.
- Offset spatula — Makes frosting the layers so much smoother. A butter knife works in a pinch, but an offset spatula is worth the $8.
- Cake turntable — Not required, but it makes decorating infinitely easier. I got mine for $15 at a kitchen supply store.
- Bench scraper — For those smooth, professional-looking sides.
Preparation Method
Set aside about 3 hours total — 45 minutes of active work, then cooling and assembly time. The cake itself bakes for about 30 minutes.
- Preheat and prep the pans. Preheat your oven to 350°F (175°C). Grease three 8-inch round cake pans with butter or non-stick spray. Line the bottoms with parchment paper circles, then grease the parchment too. Lightly dust with cocoa powder and tap out the excess.
- Mix the dry ingredients. In a large bowl, whisk together the flour, sugar, cocoa powder, baking powder, baking soda, and salt. Make sure there are no lumps of cocoa — I always use my fingers to break them up.
- Combine the wet ingredients. In a separate bowl, whisk the eggs, milk, oil, and vanilla until smooth. The mixture should look slightly emulsified, not separated.
- Bring it all together. Pour the wet ingredients into the dry ingredients and mix on medium speed for about 30 seconds. The batter will be thick — don’t worry, that’s normal.
- Add the hot coffee. With the mixer running on low, slowly pour in the hot coffee. The batter will become very thin. That’s exactly what you want. Scrape the sides and bottom of the bowl, then mix for another 10 seconds. The batter should be smooth and silky.
- Divide and bake. Pour the batter evenly into the three prepared pans. I use a kitchen scale to get exactly 450g per pan, but you can also use a measuring cup. Bake for 28-32 minutes, rotating the pans halfway through. The cakes are done when a toothpick inserted in the center comes out with just a few moist crumbs — not wet batter.
- Cool completely. Let the cakes cool in the pans for 10 minutes. Then run a thin knife around the edges and turn them out onto a cooling rack. Peel off the parchment paper. Let them cool completely — at least 1 hour. If you frost them while they’re warm, you’ll have a melty mess.
- Make the frosting. While the cakes cool, beat the softened butter on medium speed for 3 minutes until pale and creamy. Add the peanut butter and beat for another 2 minutes. Gradually add the powdered sugar, one cup at a time, alternating with splashes of heavy cream. Add the vanilla and salt. Beat on medium-high for 3-4 minutes until light and fluffy. Fold in the chopped Reese’s cups by hand.
- Level the cakes. Use a serrated knife to level the tops of the cooled cakes. I hold the knife parallel to the counter and gently saw back and forth. Save the scraps for snacking — no judgment here.
- Assemble the layers. Place one cake layer on your serving plate or cake board. Spread about 1 cup of frosting evenly on top. Repeat with the second and third layers. Apply a thin crumb coat — a thin layer of frosting that traps all the loose crumbs. Refrigerate for 20 minutes to set.
- Frost the outside. Apply the remaining frosting to the top and sides. Use your bench scraper for smooth sides. If you’re doing the ganache drip, refrigerate the frosted cake for 30 minutes.
- Add the ganache drip (optional). Heat the heavy cream until just simmering. Pour over the chocolate chips and let sit for 3 minutes. Whisk until smooth. Let it cool for 5-7 minutes, then drizzle around the edges of the chilled cake. Fill in the center with more ganache. Top with extra chopped Reese’s cups.
Cooking Tips & Techniques
I’ve made this cake enough times to know where things can go sideways. Here’s what I’ve learned the hard way:
- Room temperature ingredients matter. Cold eggs and cold milk won’t emulsify properly with the butter, and you’ll end up with a dense, greasy cake. Set everything out 30-60 minutes before you start.
- Don’t overmix the batter. Once you add the flour mixture, mix just until combined. Overmixing develops gluten and makes the cake tough. I stop the mixer the second I don’t see any more flour streaks.
- Use a kitchen scale for even layers. I used to eyeball it and always ended up with one thin layer and one that overflowed. Weighing the batter guarantees three perfectly even cakes.
- Chill the cake before the ganache drip. I learned this the messy way. If the cake isn’t cold, the ganache will run straight down the sides and pool on your plate. Thirty minutes in the fridge makes all the difference.
- Warm your offset spatula. Dip it in hot water, dry it off, and use it to smooth the frosting. The warmth melts the buttercream just enough to create a flawless finish.
Variations & Adaptations
This recipe is flexible enough to adapt to different needs and cravings. Here are a few ways I’ve made it work in different situations:
- Gluten-Free Version: Substitute the all-purpose flour with a 1:1 gluten-free baking flour blend. I’ve used Bob’s Red Mill with great results. The texture is slightly more crumbly, but the flavor is spot on.
- Dairy-Free Adaptation: Use vegan butter (I like Miyoko’s), dairy-free milk, and a dairy-free heavy cream alternative. The ganache also works with full-fat coconut cream. The frosting will be a bit softer, so refrigerate it for 15 minutes before piping.
- Peanut Butter Cup Explosion: For the truly obsessed, add a layer of chopped Reese’s cups between each cake layer before frosting. I did this for my nephew’s birthday and the cake was practically a candy bar in cake form.
- Chocolate Peanut Butter Cupcakes: This batter makes about 30 cupcakes. Bake for 18-20 minutes. Pipe the frosting on top and press a mini Reese’s cup into each one.
- No-Ganache Version: Skip the ganache and press crushed Reese’s cups into the sides of the frosted cake. It gives a beautiful textured look and adds crunch to every slice.
Serving & Storage Suggestions
This cake tastes best at room temperature. Take it out of the fridge about 30 minutes before serving — the frosting softens and the cake becomes incredibly tender.
For serving, I like to slice it with a long, sharp knife dipped in hot water and wiped dry between cuts. You get clean, beautiful slices that show off all those layers. Serve it with a cold glass of milk or a scoop of vanilla ice cream. The contrast of cold ice cream with the rich cake and creamy frosting is pure magic.
Storage: Keep the cake in an airtight container in the refrigerator for up to 5 days. The flavors actually deepen after the first day — the peanut butter and chocolate meld together even more. If you’ve already sliced into it, press a piece of plastic wrap against the cut sides to keep the cake from drying out.
Freezing: You can freeze the unfrosted cake layers wrapped tightly in plastic wrap and foil for up to 3 months. The frosting also freezes well for up to 2 months. Thaw overnight in the refrigerator, then bring to room temperature before assembling.
Nutritional Information & Benefits
Let’s be real — this is a celebration cake, not a health food. But here’s the estimated breakdown per slice (assuming 12 slices):
- Calories: Approximately 620
- Fat: 38g
- Carbohydrates: 68g
- Protein: 10g
- Sugar: 48g
The peanut butter does bring some redeeming qualities — it’s a good source of protein and healthy fats, plus a bit of fiber. The cocoa powder is rich in antioxidants. But honestly, this cake is about joy, not nutrition. It’s the kind of dessert you make when you want to celebrate something, comfort someone, or just treat yourself. And that has its own kind of value.
Allergen note: This recipe contains wheat, dairy, eggs, and peanuts. Not suitable for those with allergies to these ingredients.
Conclusion
This Ultimate Reese’s Peanut Butter Layer Cake is everything I want in a dessert — rich, indulgent, and full of those chocolate-peanut butter moments that make you close your eyes and savor every bite. The moist chocolate cake, the creamy peanut butter frosting studded with candy pieces, and that glossy ganache drip all come together in a cake that feels special without being fussy.
I hope you make this for your next celebration — or for no reason at all. Customize it however you like. Add more candy, skip the ganache, turn it into cupcakes. The best recipes are the ones you make your own.
When you make it, I’d love to hear how it turned out. Drop a comment below and let me know if your family went back for seconds. And if you crushed up some extra Reese’s cups against my nephew’s advice? Well, now you know it works.
Frequently Asked Questions
Can I use natural peanut butter for the frosting?
I don’t recommend it. Natural peanut butter has oil separation and a looser texture, which can make the frosting greasy and unstable. Stick with regular creamy peanut butter like Jif or Skippy for the best results.
Do I have to use coffee in the cake?
Yes, and here’s why — the coffee doesn’t make the cake taste like coffee. It enhances the chocolate flavor and makes the cake incredibly moist. If you’re really opposed, use hot water instead, but the chocolate flavor won’t be as deep.
Can I make this cake ahead of time?
Absolutely. You can bake the cake layers up to 2 days ahead and store them wrapped tightly at room temperature. The frosting can be made up to a week ahead and refrigerated. Just bring it to room temperature and re-whip before using. The assembled cake keeps in the fridge for up to 5 days.
How do I get clean slices?
Use a long, sharp knife and dip it in hot water between each cut. Wipe the blade dry before slicing. This gives you those beautiful, clean slices that look like they came from a bakery.
Can I use a different size pan?
You can use two 9-inch pans, but the layers will be thinner and you’ll need to reduce the baking time by about 5 minutes. For a 9×13 sheet cake, bake for 35-40 minutes. The frosting amount will be plenty for a single-layer sheet cake.
Pin This Recipe!
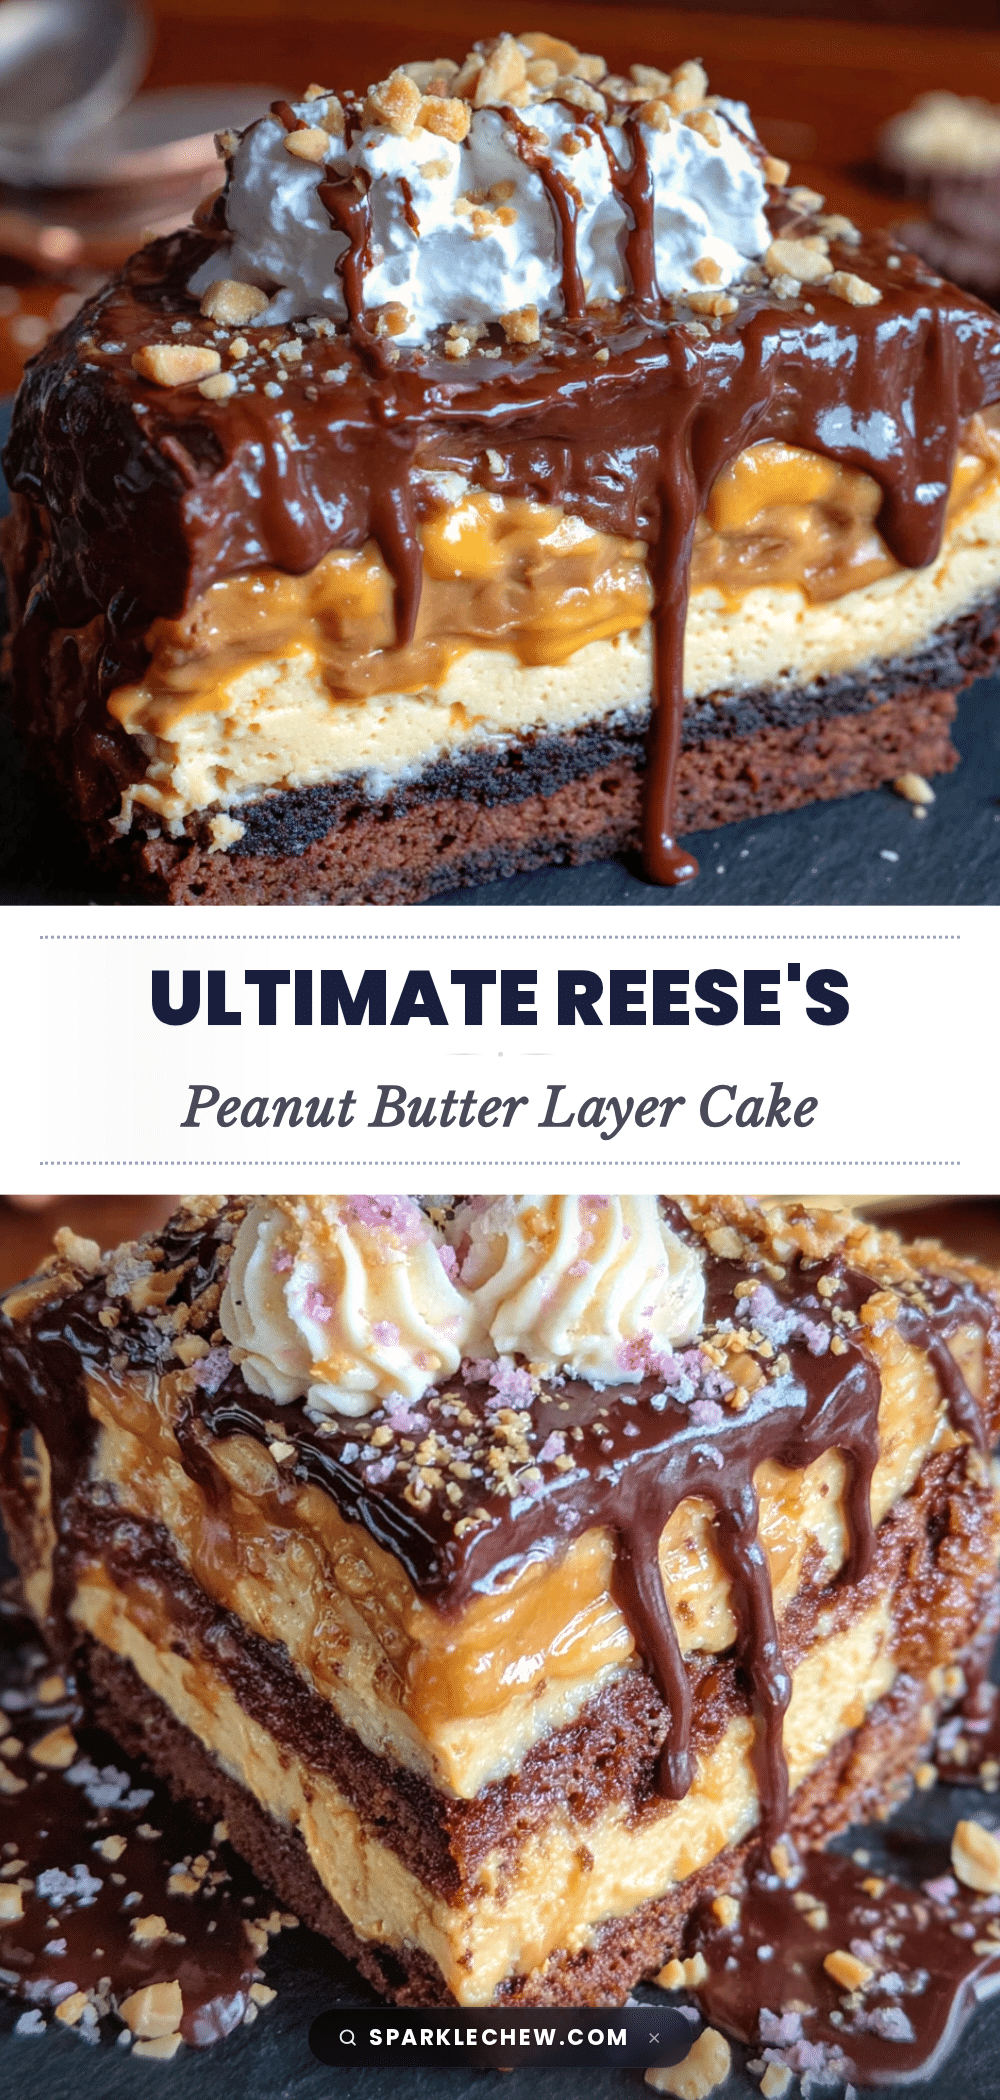
Ultimate Reeses Peanut Butter Layer Cake: Easy Homemade Recipe
This Ultimate Reese’s Peanut Butter Layer Cake features three layers of moist chocolate cake filled and frosted with a peanut butter buttercream studded with chopped Reese’s cups, topped with a chocolate ganache drip. It’s a crowd-pleasing celebration cake that’s both indulgent and surprisingly easy to make.
- Prep Time: 45 minutes
- Cook Time: 30 minutes
- Total Time: 3 hours
- Yield: 12 servings 1x
- Category: Dessert
- Cuisine: American
Ingredients
- 2 ½ cups (315g) all-purpose flour, spooned and leveled
- 2 cups (400g) granulated sugar
- ¾ cup (75g) unsweetened cocoa powder (Dutch-process preferred)
- 1 ½ teaspoons baking powder
- 1 ½ teaspoons baking soda
- 1 teaspoon salt
- 2 large eggs, at room temperature
- 1 cup (240ml) whole milk, at room temperature
- ½ cup (120ml) vegetable oil (canola or avocado)
- 2 teaspoons vanilla extract
- 1 cup (240ml) hot coffee
- 1 ½ cups (3 sticks, 340g) unsalted butter, softened
- 1 cup (240g) creamy peanut butter (Jif or Skippy recommended)
- 4 cups (480g) powdered sugar, sifted if desired
- ¼ cup (60ml) heavy cream, plus more if needed
- 1 teaspoon vanilla extract
- ¼ teaspoon salt
- 1 ½ cups mini Reese’s cups, roughly chopped, plus more for decorating
- ½ cup (85g) semi-sweet chocolate chips
- ⅓ cup (80ml) heavy cream
Instructions
- Preheat oven to 350°F (175°C). Grease three 8-inch round cake pans, line bottoms with parchment paper, grease parchment, and dust with cocoa powder.
- In a large bowl, whisk together flour, sugar, cocoa powder, baking powder, baking soda, and salt until no lumps remain.
- In a separate bowl, whisk eggs, milk, oil, and vanilla until smooth and emulsified.
- Pour wet ingredients into dry ingredients and mix on medium speed for about 30 seconds until thick batter forms.
- With mixer on low, slowly pour in hot coffee. Batter will become thin. Scrape bowl and mix for another 10 seconds until smooth and silky.
- Divide batter evenly among prepared pans (about 450g per pan). Bake for 28-32 minutes, rotating pans halfway, until a toothpick inserted in center comes out with a few moist crumbs.
- Cool cakes in pans for 10 minutes, then run a thin knife around edges and turn out onto a cooling rack. Peel off parchment and cool completely (at least 1 hour).
- For frosting: Beat softened butter on medium speed for 3 minutes until pale and creamy. Add peanut butter and beat for 2 minutes. Gradually add powdered sugar, one cup at a time, alternating with splashes of heavy cream. Add vanilla and salt. Beat on medium-high for 3-4 minutes until light and fluffy. Fold in chopped Reese’s cups by hand.
- Level cooled cake layers with a serrated knife.
- Place one cake layer on serving plate. Spread about 1 cup frosting evenly on top. Repeat with second and third layers. Apply a thin crumb coat and refrigerate for 20 minutes.
- Frost top and sides with remaining frosting. Use a bench scraper for smooth sides. Refrigerate frosted cake for 30 minutes if adding ganache drip.
- For ganache: Heat heavy cream until just simmering. Pour over chocolate chips and let sit for 3 minutes. Whisk until smooth. Cool for 5-7 minutes, then drizzle around edges of chilled cake. Fill center with more ganache. Top with extra chopped Reese’s cups.
Notes
Room temperature ingredients are crucial for proper emulsification. Don’t overmix the batter. Use a kitchen scale for even layers. Chill the cake before adding ganache drip. Warm your offset spatula for a smooth finish. The cake tastes best at room temperature; remove from fridge 30 minutes before serving.
Nutrition
- Serving Size: 1 slice
- Calories: 620
- Sugar: 48
- Fat: 38
- Carbohydrates: 68
- Protein: 10
Keywords: Reese's cake, peanut butter cake, chocolate cake, layer cake, birthday cake, celebration cake, peanut butter buttercream, chocolate ganache


