Love this? Save it for later!
Share the inspiration with your friends
I was elbow-deep in a mountain of end-of-season tomatoes, my kitchen looking like a red-and-green crime scene, when my phone rang. It was my accountant, Mr. Henderson — a man who, in the ten years I’d known him, had never once mentioned food outside of his lunch break routine. “You got too many tomatoes, right?” he asked, not even bothering with hello. I admitted I did, staring at the boxes threatening to take over my counter. “Roast ’em. Then can ’em with basil. That’s the secret.” He hung up before I could ask a single question. Honestly, I stood there holding the phone, looking at my tomatoes like they’d just been given a new purpose. That conversation — brief, cryptic, and from the most unexpected source — is the entire reason this Homemade Roasted Tomato Basil Soup for Canning exists in my kitchen today.
I spent the next week testing his vague instructions, calling him back at least three times for clarification. “How long do I roast them?” I’d ask. “Until they look sorry,” he’d reply. It was maddening. But you know what? He was right. The roasting transforms everything. It pulls out this deep, almost caramelized sweetness from the tomatoes that you just can’t get from a stovetop simmer. The basil isn’t just an afterthought — it gets roasted right alongside the tomatoes, its oils infusing every single piece of fruit. Let me tell you, the smell that fills your house during this process is the kind of thing that makes neighbors suddenly want to be your best friend.
Maybe you’ve been there — staring down a bumper crop of tomatoes, wondering what on earth you’re going to do with them all. Or maybe you just want a taste of summer in the dead of winter, something that doesn’t come from a can with a label. This recipe became my annual ritual, the thing I look forward to when the farmers’ market starts overflowing. It’s the soup that got me through a particularly snowy February last year, each jar a little time capsule of August sunshine. And honestly, it all started because my accountant decided to share his kitchen wisdom.
Why You’ll Love This Recipe
This isn’t just another tomato soup recipe. After countless batches — some that were too watery, some that were too acidic, and one memorable disaster where I forgot the basil entirely — I landed on a version that works every single time. It’s been tested by my picky family, approved by neighbors who showed up unannounced during canning season, and even survived a power outage during processing (long story, don’t ask).
- Perfect for Pantry Stocking : This recipe is designed specifically for canning, giving you shelf-stable jars of soup that last up to 18 months. No freezer space required.
- Roasting Does the Heavy Lifting : The oven caramelizes the tomatoes and garlic, creating a depth of flavor that tastes like it simmered all day — but the active prep time is only about 30 minutes.
- Simple, Whole Ingredients : You’ll find nothing weird here. Tomatoes, basil, garlic, onion, olive oil, salt, and a splash of lemon juice for safe canning. That’s it.
- Budget-Friendly : When tomatoes are in season, this is one of the cheapest ways to stock your pantry. A single batch can cost less than $10 and yields multiple jars.
- Crowd-Pleasing Flavor : The roasted sweetness balances the acidity perfectly, and the basil adds a fresh, peppery note that makes this soup feel special. Kids love it, adults crave it.
- Customizable for Dietary Needs : It’s naturally vegan, gluten-free, and dairy-free. You can add cream when serving if you want, but the base is pure and clean.
What makes this recipe different from the dozens of tomato soup recipes out there? It’s the method. Roasting the tomatoes and aromatics together before pureeing creates a texture that’s velvety without needing any cream. The high heat concentrates the flavors and reduces the water content, which means you get a thicker, more intense soup that holds up beautifully during the canning process. I’ve tried stovetop versions, slow cooker versions, even a raw blender version (don’t do it). This roasted method is the one that makes people close their eyes after the first spoonful. It’s comfort in a jar, ready whenever you need it.
What Ingredients You Will Need
This recipe relies on a handful of quality ingredients to deliver that deep, roasted flavor. The beauty of it is that each component has a specific job, and together they create something far greater than the sum of their parts. Here’s what you’ll need to gather:
- Roma Tomatoes (10 pounds) : These are my go-to for canning because they have fewer seeds and less water content than beefsteak or heirloom varieties. They roast up beautifully. Look for firm, deep red tomatoes with no soft spots. If you can’t find Romas, use plum tomatoes instead. (I’ve also used San Marzano in a pinch — they work great, just watch the roasting time as they can be a bit juicier.)
- Fresh Basil (1 cup, packed) : Don’t skimp here. The basil gets roasted alongside the tomatoes, which mellows its sharpness and brings out a slightly sweet, almost minty quality. Use the big leaves, stems removed. I prefer Genovese basil for its classic flavor, but any sweet basil works. (If you’re growing your own, harvest it in the morning for the best oil content.)
- Garlic (1 whole head) : Roasting a whole head of garlic alongside the tomatoes transforms it into something buttery and mild. You’ll squeeze the softened cloves out of their skins after roasting. It adds a subtle sweetness and depth that minced raw garlic just can’t match.
- Yellow Onion (1 large) : Diced and roasted, the onion adds a savory backbone to the soup. It caramelizes slightly in the oven, contributing to that rich, complex flavor profile. A sweet onion like Vidalia works beautifully here too.
- Extra Virgin Olive Oil (¼ cup) : Use a good quality oil here since it’s a primary flavor component. It helps the vegetables roast evenly and adds richness to the final soup. (I usually reach for a bottle from California Olive Ranch — consistent quality without breaking the bank.)
- Coarse Sea Salt (2 teaspoons) : Salt is crucial for bringing out the tomatoes’ natural sweetness. I use kosher salt because it’s easy to control and dissolves well. You can adjust to taste, but remember that salt is a preservative in canning — don’t reduce it too much.
- Black Pepper (1 teaspoon) : Freshly ground, please. It adds a subtle warmth that complements the basil beautifully.
- Lemon Juice, Bottled (2 tablespoons per quart jar) : This is non-negotiable for safe canning. Bottled lemon juice has a consistent acidity level that fresh lemons can’t guarantee. It raises the acidity of the soup enough to safely water bath can it. (I use ReaLemon — it’s reliable and widely available.)
- Optional: Red Pepper Flakes (½ teaspoon) : If you like a little heat, add these to the roasting pan. They infuse the soup with a gentle warmth that doesn’t overpower the basil. I add them about half the time, depending on my mood.
That’s the complete list. No heavy cream, no chicken broth, no sugar. The natural sweetness of the roasted tomatoes carries the entire soup. If you’re worried about acidity, trust the roasting process — it mellows the tomatoes significantly.
Equipment Needed
Before you start, make sure you have the right tools on hand. Canning requires some specific equipment for safety, but most of these items are standard kitchen staples.
- Large Baking Sheets (2-3) : You’ll need enough surface area to spread the tomatoes in a single layer. Overcrowding leads to steaming instead of roasting. I use half-sheet pans — they fit perfectly in a standard oven.
- Parchment Paper or Silicone Baking Mats : These make cleanup a breeze and prevent the tomatoes from sticking to the pans. The sugars in the tomatoes can get pretty sticky during roasting.
- Large Stockpot (8-10 quart) : For simmering the roasted tomatoes and pureeing everything together. A heavy-bottomed pot works best to prevent scorching.
- Immersion Blender or Regular Blender : An immersion blender lets you puree the soup right in the pot, which is less messy and easier. If using a regular blender, work in batches and be careful with hot liquids — never fill the blender more than halfway.
- Water Bath Canner with Rack : This is essential for safe canning. The rack keeps the jars off the bottom of the pot, allowing water to circulate freely. You can use a deep stockpot if you have a rack that fits, but a proper canner is easiest.
- Canning Jars (Quart or Pint Size) : I prefer quart jars because one jar makes a perfect meal for two people. Make sure they’re free of cracks or chips. (Ball or Kerr are the most reliable brands.)
- New Canning Lids and Screw Bands : Never reuse lids — they won’t seal properly. Screw bands can be reused as long as they’re not rusted or bent.
- Jar Lifter and Canning Funnel : These are worth every penny. The jar lifter lets you safely lower and lift hot jars, and the funnel prevents spills when filling.
- Clean Kitchen Towels : For wiping jar rims and setting hot jars on. A damp towel is useful for cleaning the rims before applying lids.
If you don’t have a water bath canner, you can freeze this soup instead. Just let it cool completely, pour into freezer-safe containers, and leave an inch of headspace for expansion. It’ll keep for up to 6 months in the freezer.
Preparation Method
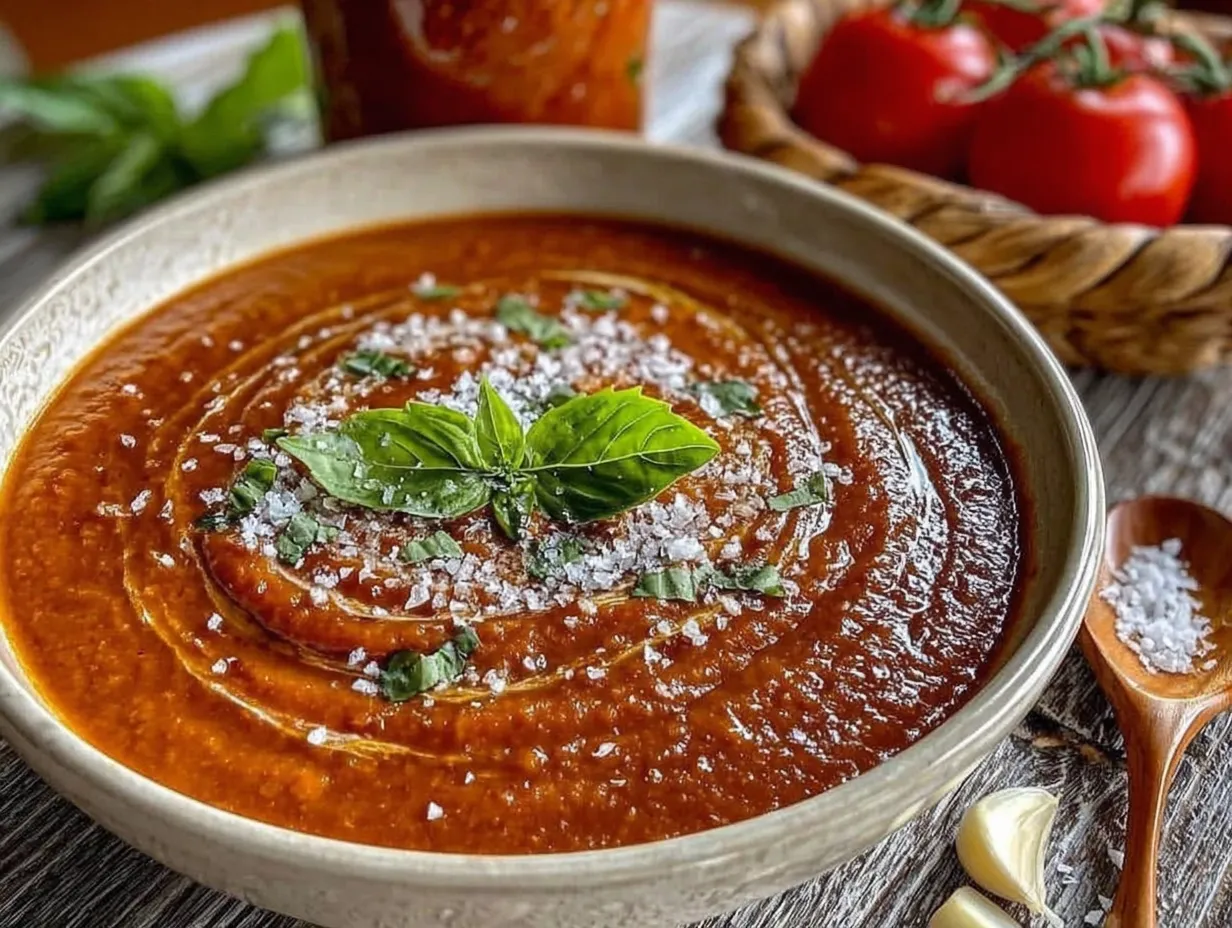
This process takes a few hours from start to finish, but most of that time is hands-off roasting and processing. The active work is straightforward. Let’s walk through it step by step.
- Preheat Your Oven to 400°F (200°C) : Position the racks in the upper and lower thirds of the oven. You’ll be roasting multiple trays at once, so good air circulation is important. While the oven heats, wash your tomatoes thoroughly and pat them dry.
- Prepare the Tomatoes : Cut each tomato in half lengthwise. Remove the tough core where the stem was attached. If you’re using Roma tomatoes, you don’t need to remove the seeds — they’re small enough that they’ll break down during roasting. For larger tomatoes, you might want to give them a gentle squeeze to remove some of the seed pockets.
- Arrange on Baking Sheets : Line your baking sheets with parchment paper. Place the tomato halves cut-side down on the sheets. Don’t overlap them — they need space to roast, not steam. Tuck the whole head of garlic (unpeeled) into one corner of a pan. Scatter the diced onion and basil leaves around the tomatoes. Drizzle everything with olive oil and sprinkle with salt and pepper.
- Roast for 45-60 Minutes : Roast until the tomato skins are wrinkled and starting to brown in spots. The onions should be soft and caramelized, and the basil leaves will look crispy and dark. The garlic should feel soft when squeezed gently. About halfway through, rotate the pans between racks for even cooking. (My first time, I didn’t rotate, and one pan came out perfect while the other was still raw. Learn from my mistake.)
- Cool Slightly : Remove the pans from the oven and let them cool for about 10 minutes. This makes handling safer and allows the flavors to settle. When cool enough to touch, squeeze the roasted garlic cloves out of their skins into a bowl. Discard the skins.
- Transfer to Stockpot : Scrape all the roasted tomatoes, onions, basil, and garlic into your large stockpot. Include any juices from the baking sheets — that’s liquid gold. Add about 1 cup of water to each baking sheet and scrape up the browned bits, then pour that into the pot too. (Those browned bits are packed with flavor.)
- Simmer and Puree : Bring the mixture to a gentle simmer over medium heat. Let it cook for about 10 minutes, stirring occasionally. This helps the flavors meld together. Remove the pot from heat. Using an immersion blender, puree the soup until completely smooth. If you want an extra-silky texture, you can pass it through a fine-mesh strainer, but I usually skip this step — I like a little texture.
- Adjust Seasoning : Taste your soup and adjust the salt and pepper as needed. Remember that flavors will concentrate slightly during canning, so don’t overseason. If the soup tastes too acidic, a pinch of sugar can help, but I find the roasted tomatoes sweet enough on their own.
- Prepare Your Canning Equipment : While the soup simmers, wash your jars, lids, and bands in hot soapy water. Rinse well. Place the jars in your water bath canner, cover with water, and bring to a simmer (180°F). Keep the jars hot until you’re ready to fill them. Place the lids in a small saucepan of hot water (not boiling) to soften the rubber seals.
- Add Lemon Juice to Jars : For quart jars, add 2 tablespoons of bottled lemon juice to each jar. For pint jars, use 1 tablespoon. This ensures the soup has enough acidity for safe water bath canning. (I once forgot this step and had to re-process everything the next day. Don’t be like me.)
- Fill the Jars : Using your canning funnel, ladle the hot soup into the hot jars, leaving ½ inch of headspace from the top. Remove any air bubbles by running a non-metallic spatula or chopstick around the inside of the jar. Wipe the jar rims with a clean, damp towel to remove any residue. (A clean rim is essential for a good seal.)
- Apply Lids and Bands : Center a lid on each jar and screw on the band until it’s fingertip-tight — don’t overtighten. Air needs to be able to escape during processing.
- Process in Water Bath Canner : Using your jar lifter, carefully lower the filled jars onto the rack in the canner. The water should cover the jars by at least 1 inch. Add more boiling water if needed. Cover the canner and bring the water to a full rolling boil. Process quart jars for 40 minutes (pint jars for 35 minutes) at altitudes up to 1,000 feet. Adjust processing time for higher altitudes (add 5 minutes for 1,001-3,000 feet, 10 minutes for 3,001-6,000 feet).
- Cool and Check Seals : After processing, turn off the heat and let the jars sit in the canner for 5 minutes. Then remove them with the jar lifter and place them on a clean towel, leaving at least 1 inch of space between jars. Let them cool completely for 12-24 hours. As they cool, you’ll hear the satisfying “pop” of the lids sealing. After cooling, press the center of each lid — it should be concave and not flex. Remove the screw bands and test the seal by gently lifting the jar by the lid. Any unsealed jars should be refrigerated and used within a week.
Label your sealed jars with the date and store them in a cool, dark place. They’ll keep for up to 18 months.
Cooking Tips & Techniques
After making this soup more times than I can count, I’ve collected a few insights that make the process smoother and the results more consistent. Here are the things I wish someone had told me the first time.
Don’t Skip the Roasting : I know it’s tempting to just dump everything in a pot and simmer it. But roasting is what transforms this soup from average to extraordinary. The high heat caramelizes the natural sugars in the tomatoes and onions, creating a depth of flavor that no amount of stovetop cooking can replicate. The first time I made this, I was short on time and skipped the roasting step. The result was a thin, acidic soup that tasted like plain canned tomatoes. Never again.
Watch Your Oven Temperature : Ovens vary wildly. My old oven ran hot, and I burned a batch of tomatoes so badly that the soup tasted bitter. If your oven runs hot, check the tomatoes at 35 minutes instead of 45. The tomatoes should be wrinkled and starting to brown, not blackened. A little char is okay — it adds smokiness — but too much will ruin the flavor.
Use the Right Tomatoes : Roma or plum tomatoes are ideal because they’re meaty and low in moisture. If you use beefsteak or heirloom tomatoes, you’ll need to roast them longer to evaporate the extra water. I made this mistake with a box of beautiful heirlooms from the farmers’ market, and the soup came out watery despite extra roasting time. Save the heirlooms for eating fresh.
Don’t Overfill the Jars : That ½ inch of headspace isn’t arbitrary. It allows for expansion during processing and helps create a proper vacuum seal. I learned this the hard way when I overfilled a jar and it leaked during processing, leaving me with a sticky canner and a jar that didn’t seal. Use the canning funnel and measure carefully.
Keep Everything Hot : For safe canning, the soup needs to be hot when it goes into the jars, and the jars need to be hot too. Cold jars filled with hot soup can crack. I keep my jars simmering in the canner until I’m ready to fill them. It’s a little extra work, but it prevents disaster.
Multitask Wisely : While the tomatoes are roasting, wash your jars and set up your canner. While the soup simmers, prepare your lids and lemon juice. This isn’t a recipe you can rush, but you can definitely streamline the process by doing prep work during the downtime.
Variations & Adaptations
This base recipe is wonderful as-is, but it’s also incredibly flexible. Here are some variations I’ve tried and loved over the years.
Smoky Roasted Tomato Soup : Add 2-3 smoked dried chipotle peppers to the roasting pan. They’ll rehydrate and infuse the tomatoes with a warm, smoky heat. Remove the peppers before pureeing if you want a mild heat, or leave them in for a spicier soup. This version is incredible with a grilled cheese sandwich.
Herb Garden Variation : Swap half the basil for an equal amount of fresh oregano, thyme, or rosemary. Each herb brings a different personality to the soup. Rosemary adds a piney, aromatic quality that pairs beautifully with the roasted tomatoes. Thyme adds an earthy, slightly floral note. (I made a rosemary version last fall and it was gone by December.)
Roasted Red Pepper Addition : Add 2-3 red bell peppers to the roasting pan alongside the tomatoes. Roast them until the skins are blistered, then peel and puree with the soup. The peppers add a subtle sweetness and a beautiful orange-red color. This is my favorite variation for when I want something a little different.
Dairy-Free Creamy Version : If you want a creamy soup without dairy, add a can of full-fat coconut milk to the pot after pureeing. It adds richness and a silky texture without overwhelming the tomato flavor. (I served this to a friend who’s lactose intolerant, and she asked for the recipe three times.)
Low-Sodium Option : Reduce the salt to 1 teaspoon and rely on herbs and spices for flavor. You can also add a splash of balsamic vinegar at the end to brighten the flavors without extra salt. This version is perfect for anyone watching their sodium intake.
Serving & Storage Suggestions
This soup is incredibly versatile when it comes to serving. Here’s how I like to enjoy it throughout the year.
Serving Temperature and Presentation : Serve the soup hot, straight from the jar. I like to garnish each bowl with a drizzle of good olive oil, a few fresh basil leaves (if I have them), and a sprinkle of red pepper flakes. A dollop of pesto on top is also amazing. For a heartier meal, serve with crusty bread, a grilled cheese sandwich, or a simple green salad.
Complementary Dishes : This soup is practically made for grilled cheese. Try it with sharp cheddar on sourdough, or go fancy with brie and apple slices. It also pairs well with a simple panini, a quinoa salad, or roasted vegetables. In the summer, I serve it chilled as a gazpacho-style soup with fresh croutons.
Storage Instructions : Sealed jars can be stored in a cool, dark place (like a pantry or basement) for up to 18 months. Once opened, refrigerate the soup and use within 5-7 days. I don’t recommend freezing canned soup, as the texture can change. If you’re making this for immediate use, it will keep in the refrigerator for up to a week.
Reheating Methods : To reheat, pour the soup into a saucepan and warm over medium heat, stirring occasionally. You can also microwave individual portions in a microwave-safe bowl for 2-3 minutes, stirring halfway through. If the soup thickens during storage, add a splash of water or vegetable broth to thin it out.
Flavor Development : Like many soups, this one actually improves after a few days in the fridge. The flavors meld and deepen, becoming even more complex. I’ve found that jars that have been stored for a month or two taste noticeably richer than freshly made soup. It’s one of those magical things about canning.
Nutritional Information & Benefits
This soup is as nourishing as it is delicious. Here’s a general breakdown per 1-cup serving (approximate, based on the base recipe without optional additions):
- Calories : 85
- Total Fat : 4g
- Saturated Fat : 0.5g
- Sodium : 380mg (varies with added salt)
- Total Carbohydrates : 12g
- Dietary Fiber : 3g
- Sugars : 7g (naturally occurring)
- Protein : 3g
- Vitamin A : 20% of Daily Value
- Vitamin C : 25% of Daily Value
- Potassium : 420mg
Health Benefits : Tomatoes are packed with lycopene, a powerful antioxidant that’s been linked to heart health and reduced cancer risk. Roasting actually increases the bioavailability of lycopene, making it easier for your body to absorb. The olive oil adds healthy monounsaturated fats, and the garlic provides anti-inflammatory compounds. This soup is naturally low in calories and fat, making it a great option for weight management.
Dietary Considerations : This recipe is naturally vegan, gluten-free, dairy-free, and nut-free. It’s also Whole30-compliant if you skip the optional sugar. The only potential allergen is the garlic, which is generally well-tolerated. If you’re on a low-sodium diet, adjust the salt accordingly.
FAQs
Can I use dried basil instead of fresh?
I really recommend using fresh basil for this recipe. Dried basil doesn’t have the same volatile oils, and it can become bitter during the long roasting process. If you’re in a pinch, you can add dried basil after roasting, but the flavor won’t be as vibrant. Fresh basil is worth the extra effort.
Do I have to peel the tomatoes before roasting?
Nope! The skins soften during roasting and break down completely when you puree the soup. I’ve never peeled a single tomato for this recipe, and the texture is always smooth. The skins actually add a bit of extra fiber and nutrients, so there’s no reason to remove them.
Why do I need bottled lemon juice instead of fresh?
This is a safety issue for canning. Bottled lemon juice has a standardized acidity level (usually around 5% citric acid), while fresh lemons can vary widely. Using bottled lemon juice ensures that your soup has enough acidity to prevent the growth of harmful bacteria during storage. For immediate eating, fresh lemon juice works fine.
My jars didn’t seal. What should I do?
Don’t panic! If a jar didn’t seal, simply refrigerate it and use the soup within a week. You can also reprocess the jar within 24 hours: remove the lid, check the jar rim for nicks, use a new lid, and reprocess for the full time. If the jar rim is damaged, transfer the soup to a new jar before reprocessing.
Can I double this recipe?
Absolutely. This recipe scales beautifully. Just make sure you have enough baking sheets to roast the tomatoes in a single layer, and use your largest stockpot for simmering. You’ll also need a bigger canner or process the jars in batches. I routinely make triple batches during peak tomato season.
Conclusion
This Homemade Roasted Tomato Basil Soup for Canning has become a staple in my pantry, and I hope it becomes one in yours too. It’s the kind of recipe that makes you feel accomplished — like you’ve captured a little piece of summer and tucked it away for later. Every time I open a jar in the middle of winter, I’m transported back to that hot August afternoon when my accountant gave me the best cooking advice I’ve ever received.
Don’t be afraid to make this recipe your own. Adjust the herbs, add a little heat, or experiment with different tomato varieties. The beauty of canning is that you’re preserving not just food, but the memory of the season. And honestly, there’s something deeply satisfying about pulling a jar off the shelf and knowing exactly what went into it.
I’d love to hear how your batch turns out. Did you try any variations? Did you have any sealing adventures? Drop a comment below and share your experience — your tips might help another home cook on their canning journey. And if you found this recipe helpful, please share it with a friend who’s drowning in tomatoes this season. Happy canning!
Pin This Recipe!
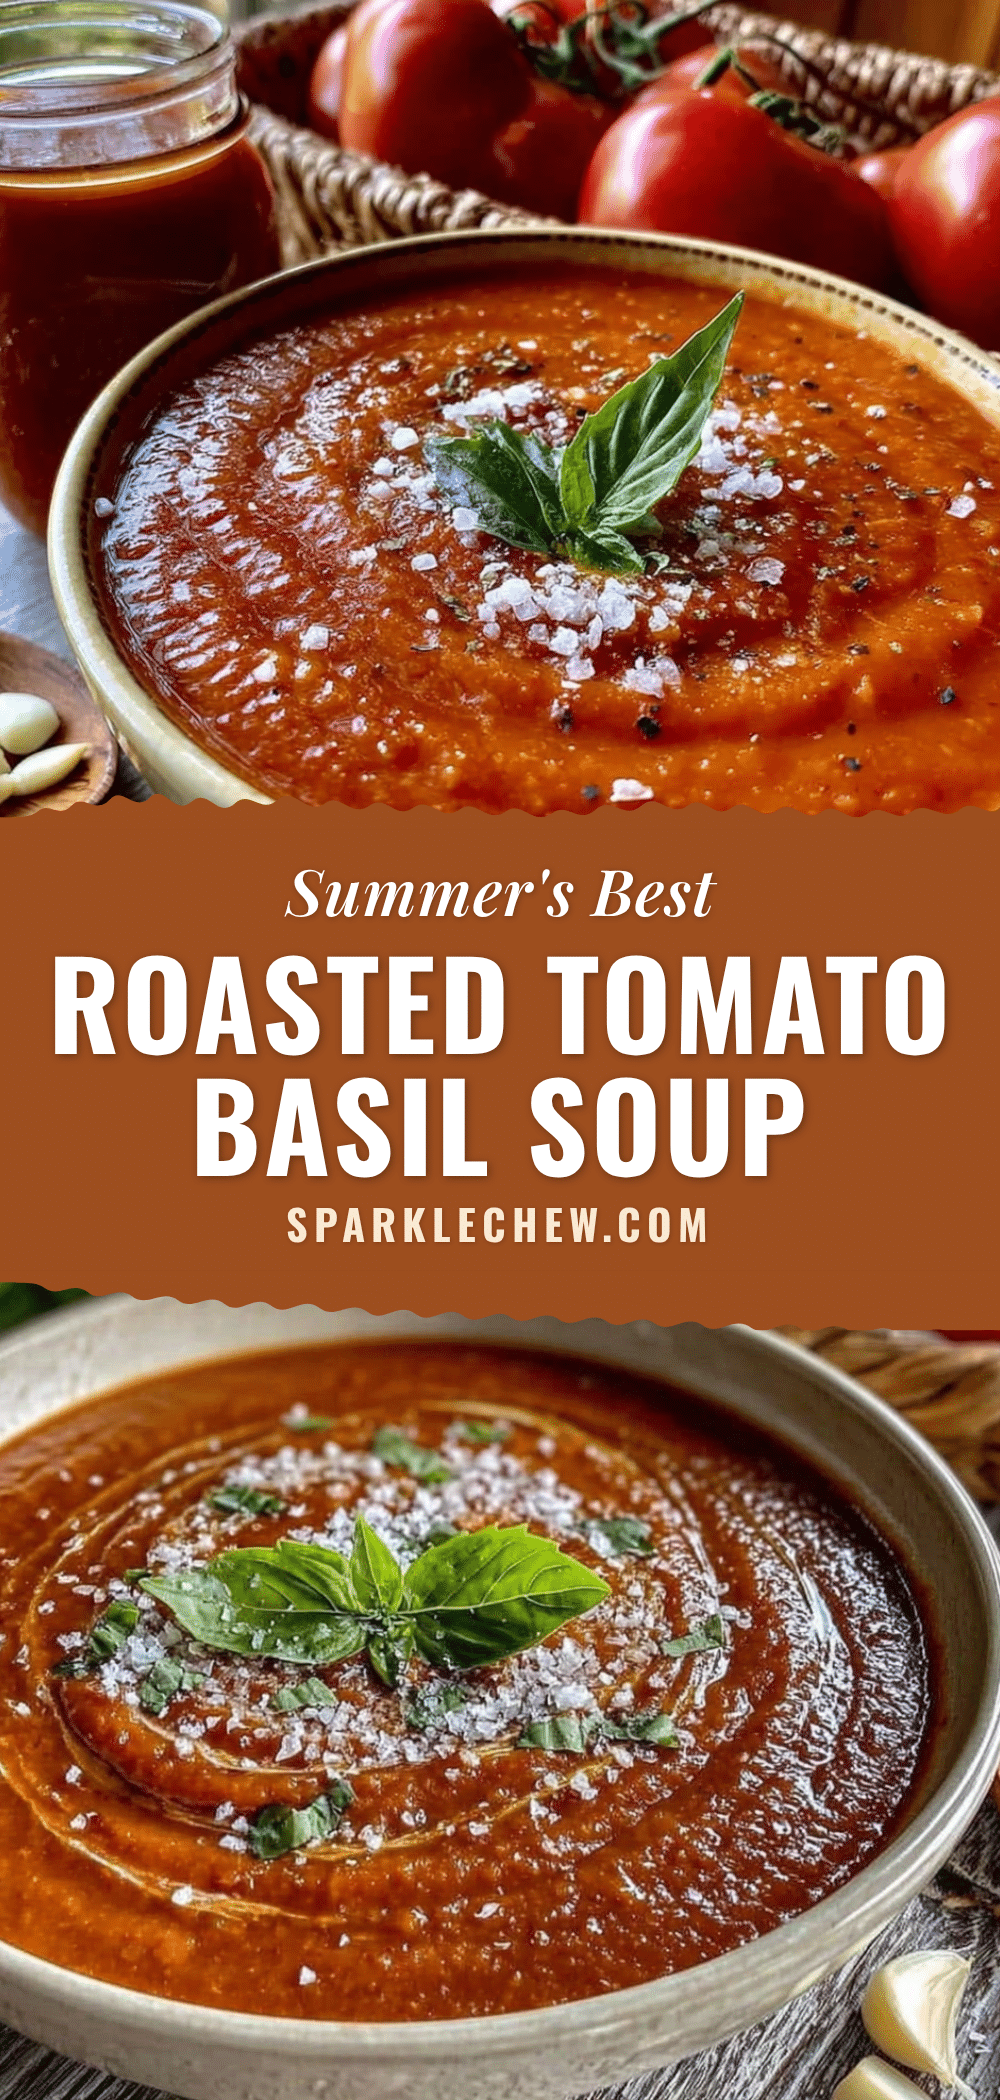
Homemade Roasted Tomato Basil Soup for Easy Canning
This roasted tomato basil soup is designed for canning, capturing the deep, caramelized sweetness of end-of-season tomatoes with fresh basil. It’s a simple, whole-ingredient recipe that yields shelf-stable jars of velvety soup, perfect for enjoying summer’s flavor all year round.
- Prep Time: 30 minutes
- Cook Time: 1 hour 40 minutes (includes roasting and processing)
- Total Time: 2 hours 10 minutes (plus cooling time)
- Yield: 4-5 quarts (or 8-10 pints) 1x
- Category: Soup
- Cuisine: American
Ingredients
- 10 pounds Roma tomatoes (or plum tomatoes)
- 1 cup packed fresh basil leaves (Genovese or sweet basil)
- 1 whole head garlic
- 1 large yellow onion, diced
- ¼ cup extra virgin olive oil
- 2 teaspoons coarse sea salt (kosher salt)
- 1 teaspoon freshly ground black pepper
- 2 tablespoons bottled lemon juice per quart jar (1 tablespoon per pint jar)
- ½ teaspoon red pepper flakes (optional)
Instructions
- Preheat oven to 400°F (200°C). Position racks in upper and lower thirds of oven.
- Wash and dry tomatoes. Cut each in half lengthwise; remove tough stem core. (For Roma tomatoes, seeds can remain.)
- Line baking sheets with parchment paper. Place tomato halves cut-side down in a single layer. Tuck whole garlic head (unpeeled) into a corner. Scatter diced onion and basil leaves around tomatoes. Drizzle with olive oil; sprinkle with salt and pepper.
- Roast for 45-60 minutes, rotating pans halfway through, until tomato skins are wrinkled and starting to brown, onions are soft and caramelized, basil is crispy and dark, and garlic feels soft when squeezed.
- Remove from oven; let cool about 10 minutes. Squeeze roasted garlic cloves out of skins into a bowl; discard skins.
- Scrape all roasted tomatoes, onions, basil, and garlic into a large stockpot (8-10 quart). Add about 1 cup water to each baking sheet, scrape up browned bits, and pour into pot.
- Bring mixture to a gentle simmer over medium heat; cook 10 minutes, stirring occasionally. Remove from heat. Using an immersion blender, puree until completely smooth. (For extra-silky texture, pass through a fine-mesh strainer.)
- Taste and adjust salt and pepper as needed. (Flavors will concentrate slightly during canning.)
- While soup simmers, wash jars, lids, and bands in hot soapy water; rinse well. Place jars in water bath canner, cover with water, and bring to a simmer (180°F). Keep jars hot. Place lids in a small saucepan of hot water (not boiling) to soften rubber seals.
- Add 2 tablespoons bottled lemon juice to each quart jar (1 tablespoon per pint jar).
- Using a canning funnel, ladle hot soup into hot jars, leaving ½ inch headspace. Remove air bubbles with a non-metallic spatula or chopstick. Wipe jar rims with a clean, damp towel.
- Center a lid on each jar; screw on band until fingertip-tight (do not overtighten).
- Using a jar lifter, lower filled jars onto rack in canner. Water should cover jars by at least 1 inch; add more boiling water if needed. Cover canner; bring to a full rolling boil. Process quart jars for 40 minutes (pint jars for 35 minutes) at altitudes up to 1,000 feet. Adjust for higher altitudes: add 5 minutes for 1,001-3,000 feet, 10 minutes for 3,001-6,000 feet.
- After processing, turn off heat; let jars sit in canner 5 minutes. Remove with jar lifter; place on a clean towel with at least 1 inch space between jars. Cool completely for 12-24 hours. Check seals: press center of each lid; it should be concave and not flex. Remove screw bands; test seal by gently lifting jar by the lid. Refrigerate any unsealed jars and use within a week.
- Label sealed jars with date; store in a cool, dark place for up to 18 months.
Notes
Roasting is essential for deep flavor; don’t skip it. Use Roma or plum tomatoes for best results (less water content). Bottled lemon juice is required for safe canning (standardized acidity). If jars don’t seal, refrigerate and use within a week, or reprocess within 24 hours with a new lid. For freezing, let soup cool completely, pour into freezer-safe containers leaving 1 inch headspace, and freeze for up to 6 months.
Nutrition
- Serving Size: 1 cup
- Calories: 85
- Sugar: 7
- Sodium: 380
- Fat: 4
- Saturated Fat: 0.5
- Carbohydrates: 12
- Fiber: 3
- Protein: 3
Keywords: roasted tomato basil soup, canning tomato soup, homemade tomato soup, pantry soup, summer tomato soup, vegan tomato soup, gluten-free soup


