Love this? Save it for later!
Share the inspiration with your friends
This was supposed to be a batch of homemade pigs in a blanket for a Halloween party. I had the crescent dough thawing on the counter, the hot dogs ready to go, and I was feeling pretty smug about my plan to bring something “homemade” instead of a store-bought veggie tray. Then my phone rang—my sister, needing emergency advice about her costume—and by the time I got back to the kitchen, the dough was too warm to cut into neat little strips. It was sticky, it was tearing, and honestly, I was ready to scrap the whole thing and grab a bag of chips on the way out the door.
But I had already told everyone I was bringing something. You know that feeling when you’re committed and there’s no graceful way to back out? So I grabbed a knife and started cutting the dough into ragged, uneven strips. I wrapped them around the hot dogs in a haphazard way, leaving gaps because the dough was just too soft to work with neatly. I popped them in the oven, fully expecting a mess. What came out was nothing like the plan—and better. They looked like little mummies! The uneven wrapping actually worked perfectly; the gaps looked like bandages, and the golden brown spots looked like ancient linen. I dabbed on little mustard eyes with a toothpick, and suddenly I had the hit of the party.
That was three Halloweens ago, and I haven’t made pigs in a blanket since. These mummy hot dogs are now my go-to for every Halloween gathering, movie night, or anytime I want something that looks impressive but takes almost no effort. I mean, let me tell you—if you can wrap a present badly, you can make these. And that’s exactly the point.
Why You’ll Love This Recipe
I’ve tested this recipe more times than I care to admit, tweaking the dough thickness, the bake time, and even the eye placement. After years of trial and error (and plenty of mummies that looked more like blobs), I can confidently say this version is foolproof. Here’s why you’ll fall for it too:
- Quick & Easy: These come together in under 20 minutes from start to finish. Perfect for last-minute Halloween plans or when the kids suddenly announce they want to bring treats to the school party tomorrow.
- Simple Ingredients: You only need four things—hot dogs, crescent roll dough, mustard, and maybe some ketchup for dipping. No specialty stores, no weird ingredients, no stress.
- Perfect for Halloween: They look spooky and fun without being scary for little ones. Kids actually get excited about eating these, which is a win in my book.
- Crowd-Pleaser: I’ve brought these to parties with adults and kids, and they disappear every single time. There’s something about the mummy look that makes people smile before they even take a bite.
- Unbelievably Delicious: The combination of flaky, buttery dough wrapped around a juicy hot dog is simple comfort food at its finest. The mustard eyes add a tiny tangy pop that ties it all together.
What makes this version different from other Halloween hot dog recipes I’ve seen is the wrapping technique. Most recipes tell you to cut perfect, even strips—but that’s not how mummies look! The uneven, slightly messy wrapping is actually more authentic. I learned this the hard way after trying to make them “perfect” and ending up with something that looked more like a striped snake than a mummy. Embrace the imperfection. It’s part of the charm.
This recipe isn’t just good—it’s the kind that makes you close your eyes after the first bite. It’s Halloween fun reimagined: faster, easier, but with the same nostalgic satisfaction of biting into warm dough and a salty hot dog. Perfect for impressing your kids without spending hours in the kitchen, or turning a simple snack into something memorable.
What Ingredients You Will Need
This recipe uses simple, everyday ingredients to create something that looks like you spent way more effort than you actually did. Here’s what you’ll need to grab:
- Hot dogs: 8 standard-size hot dogs. I prefer beef hot dogs for the best flavor, but any kind works—turkey, chicken, or even plant-based options. Look for hot dogs that are uniform in size so they cook evenly. I’ve found that the all-beef ones from Nathan’s or Hebrew National hold up really well and don’t shrink too much during baking.
- Crescent roll dough: 1 can (8 ounces) of refrigerated crescent roll dough. This is the shortcut that makes the recipe so easy. Pillsbury is the most common brand, and it works perfectly. You can also use the sheet-style crescent dough if you prefer, but the perforated kind actually makes it easier to separate into strips. Just unroll the dough and cut along the perforations—each triangle becomes one long strip.
- Mustard: A small amount for the eyes. Yellow mustard works best because it’s bright and visible against the golden dough. You’ll only need a tiny dab per mummy, so don’t worry about buying a huge bottle. If you’re not a mustard fan, you can use ketchup or even small dots of sriracha for a spicier look.
- Ketchup or dipping sauce (optional): For serving. While not technically part of the mummy itself, having something to dip them in makes the experience complete. My kids prefer ketchup, but I’ve seen adults go for honey mustard or even ranch dressing.
A quick note on dough alternatives: If you can’t find crescent roll dough or want to try something different, puff pastry works beautifully. It’s flakier and a little more buttery, but it takes slightly longer to bake. Just thaw the puff pastry according to package directions, cut it into thin strips, and proceed as usual. You can also make your own pizza dough if you’re feeling ambitious—just roll it out very thin and cut into strips. The bake time will be similar, but keep an eye on it because homemade dough can vary.
For the hot dogs: I recommend using standard-size hot dogs rather than jumbo ones. The jumbo ones take too long to cook through, and the dough tends to burn before the hot dog is heated properly. Cocktail sausages or mini hot dogs also work great for a party appetizer version—just cut the dough strips shorter and adjust the bake time down by a few minutes.
Equipment Needed
You don’t need any fancy equipment for this recipe. Here’s what you’ll need:
- Baking sheet: A standard half-sheet pan works perfectly. Line it with parchment paper or a silicone baking mat for easy cleanup. I’ve forgotten the parchment before, and let me tell you—scrubbing baked-on mustard off a pan is not fun.
- Sharp knife or pizza cutter: For cutting the dough into strips. A pizza cutter makes quick work of it, but a regular knife works just fine. I actually prefer a knife because I can control the width of the strips better.
- Toothpick or small skewer: For applying the mustard eyes. You can also use the tip of a knife, but a toothpick gives you more control for tiny dots.
- Pastry brush (optional): If you want to brush the mummies with an egg wash for extra golden color. It’s not necessary, but it does give them a nice shine.
If you don’t have a baking sheet, a cast-iron skillet or even an oven-safe frying pan works in a pinch. Just make sure whatever you use has a rim to catch any drips. I once tried to bake these on a flat cookie sheet without a rim, and the butter from the dough dripped all over the bottom of my oven. It smoked up the whole kitchen and set off the smoke alarm right as the doorbell rang. Learn from my mistakes!
Preparation Method
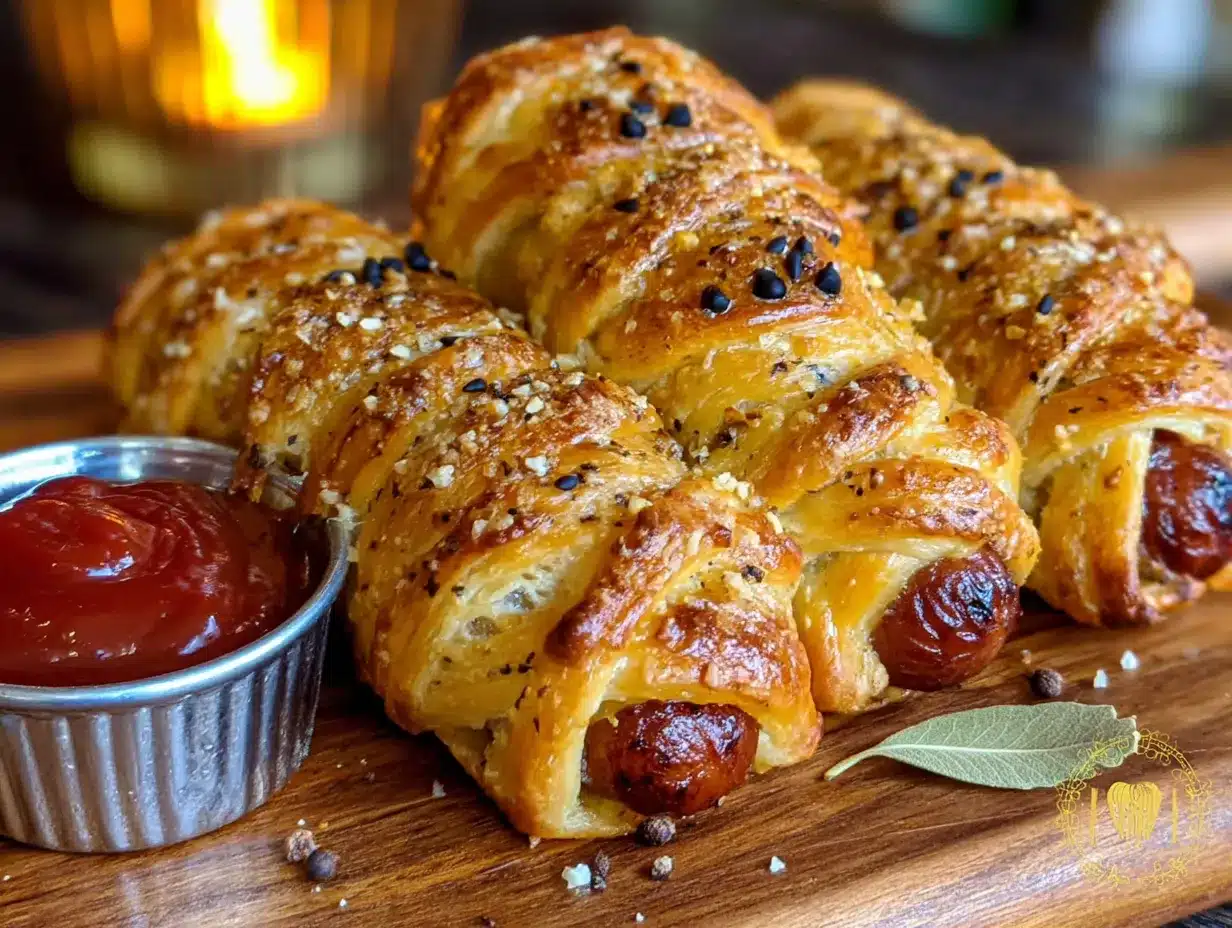
Let’s get to the fun part. These mummy hot dogs come together in about 20 minutes, and most of that is hands-off baking time. Here’s how to do it:
- Preheat your oven to 375°F (190°C). Line a baking sheet with parchment paper or a silicone baking mat. This step is important—the dough can stick to an ungreased pan, and nobody wants to peel their mummies off the metal.
- Prepare the crescent roll dough. Open the can and unroll the dough. You’ll see it’s perforated into 8 triangles. Separate them along the perforations. If you’re using the sheet-style dough, just unroll it and cut it into 8 long triangles using a knife or pizza cutter.
- Cut each triangle into thin strips. Take one triangle of dough and cut it lengthwise into 3-4 thin strips, depending on how wide you want them. The strips should be about 1/2 inch wide. Don’t worry if they’re not perfectly even—remember, uneven wrapping looks more authentic for mummies! Repeat with all 8 triangles.
- Wrap the hot dogs. Take one hot dog and start wrapping a strip of dough around it, starting at one end and working your way to the other. Leave a small gap at the top of the hot dog for the “face” area. Overlap the dough slightly as you go, but leave small gaps here and there so the hot dog peeks through. This is what gives them the mummy look. Don’t wrap too tightly—the dough will expand as it bakes, and you want it to have room to puff up.
- Repeat with all hot dogs. Place each wrapped mummy on the prepared baking sheet, leaving about an inch of space between them. They won’t spread much, but they need a little breathing room for even browning.
- Bake for 12-15 minutes. The exact time depends on your oven and how thick your dough strips are. They’re done when the dough is golden brown and the hot dogs are heated through. I usually check at the 12-minute mark and add a minute or two if needed. The dough should look puffy and lightly browned, not dark brown.
- Add the eyes. Remove the baking sheet from the oven and let the mummies cool for about 2 minutes. They’ll be hot! Dip a toothpick into yellow mustard and dot two small eyes onto each mummy face. You can make them look any way you want—some people do big round eyes, others do tiny dots. I like to vary the expressions so they all look different. My kids think it’s hilarious when one mummy looks surprised and another looks grumpy.
- Serve immediately. These are best eaten warm, right out of the oven. The dough is flaky and buttery, and the hot dog is juicy. Set them out with ketchup, mustard, or any dipping sauce you like.
Sensory cues: When you’re wrapping the dough, it should feel cool and slightly pliable. If it’s too warm and sticky, pop it in the fridge for 5 minutes. During baking, your kitchen will smell like buttery crescent rolls—that’s how you know they’re almost ready. The finished mummies should be golden brown with visible darker spots where the dough overlapped. The hot dog should be steaming when you cut into it.
My personal tip: I always make a few extra mummies to test. They never make it to the party, but that’s the cook’s privilege, right?
Cooking Tips & Techniques
After making these mummy hot dogs more times than I can count, I’ve picked up a few tricks that make the process smoother and the results better. Here’s what I’ve learned:
Keep the dough cold. Crescent roll dough is much easier to work with when it’s cold. If your kitchen is warm, the dough can get sticky and tear easily. If that happens, just pop the whole sheet of dough in the freezer for 5 minutes before cutting. I learned this the hard way after a particularly warm day when my dough turned into a sticky mess that stuck to everything including my fingers, the counter, and the cat who walked through the kitchen at the worst possible moment.
Don’t overthink the wrapping. The beauty of these mummies is that they’re supposed to look messy. If your strips are uneven, great. If the dough overlaps in some places and leaves big gaps in others, even better. I once spent 20 minutes trying to make perfect, even wraps, and they looked worse than the ones I threw together in a hurry. Trust the process.
Watch the bake time closely. Ovens vary, and thin strips of dough can go from golden to burnt very quickly. I recommend checking at the 10-minute mark and rotating the pan if one side is browning faster. If the dough is browning too quickly but the hot dogs aren’t hot yet, tent the mummies loosely with foil for the last few minutes.
Make ahead tip: You can assemble the mummies up to 4 hours ahead of time and keep them in the refrigerator on the baking sheet. Just cover them loosely with plastic wrap. When you’re ready to bake, add 2-3 minutes to the bake time since they’re starting from cold. I’ve tried freezing them before baking, and honestly, the texture isn’t as good—the dough gets a little soggy when it thaws.
Double the batch. If you’re serving a crowd, these disappear fast. I always make at least two batches, and sometimes three if it’s a party. They’re small enough that people eat two or three without thinking about it.
Variations & Adaptations
One of the best things about this recipe is how easy it is to customize. Here are some variations I’ve tried and loved:
Spicy Mummies: For adults who want a kick, use spicy Italian sausages instead of hot dogs. The spicy sausage pairs beautifully with the buttery dough. You can also add a thin slice of jalapeño under the dough before wrapping, or use sriracha for the eyes instead of mustard. My husband requests this version every year for his Halloween party, and they’re always the first thing to disappear.
Cheesy Mummies: Before wrapping the hot dog, cut a slit lengthwise down the center and stuff it with a thin strip of cheddar cheese or a string cheese stick. The cheese melts as it bakes, creating a gooey surprise inside. Just be careful when eating—that melted cheese is hot! I learned this the hard way and now I warn everyone to let them cool for a minute before biting in.
Veggie Mummies: For a vegetarian version, use plant-based hot dogs or even carrot dogs. To make carrot dogs, peel a carrot, trim it to hot dog size, and boil it in a mixture of vegetable broth, soy sauce, and a little liquid smoke for about 15 minutes. Then wrap and bake as usual. They’re actually really good, and even my non-vegetarian friends have asked for the recipe.
Breakfast Mummies: This is a fun twist for Halloween morning. Use breakfast sausages instead of hot dogs, and serve them with maple syrup for dipping. The sweet and salty combination is surprisingly delicious. My kids love having “monster breakfast” on Halloween before school.
Gluten-Free Option: Use gluten-free crescent roll dough or make your own gluten-free dough. There are a few brands available now, and they work surprisingly well. Just be aware that gluten-free dough can be more fragile, so handle it gently and don’t overwork it.
Serving & Storage Suggestions
These mummy hot dogs are best served warm, right after baking. The dough is at its flakiest and the hot dog is perfectly juicy. Here’s how to serve and store them:
Serving: Arrange the mummies on a platter with a small bowl of mustard or ketchup for dipping. For a Halloween party, I like to serve them alongside other spooky snacks like ghost-shaped cheese slices or “witch’s fingers” (breadsticks with an almond for the nail). If you’re feeling extra festive, you can arrange them on a platter with black and orange napkins or serve them in a cauldron-shaped bowl.
Storage: If you have leftovers (unlikely, but possible), store them in an airtight container in the refrigerator for up to 3 days. The dough will lose its crispness, but they’ll still taste good. I don’t recommend freezing them after baking—the texture suffers too much.
Reheating: The best way to reheat these is in the oven or toaster oven at 350°F for about 5 minutes. The microwave works in a pinch, but the dough will be soft and a little soggy. If you’re reheating a large batch, spread them on a baking sheet and warm them in the oven for 8-10 minutes. They’ll crisp back up nicely.
Flavor development: Honestly, these are best fresh. The dough doesn’t improve with time, and the hot dog can get a little rubbery when reheated. That’s why I always make them right before serving. If you’re planning a party, assemble them ahead of time and bake them just before guests arrive. Your kitchen will smell amazing, and people will think you spent hours on them.
Nutritional Information & Benefits
Let’s be real—these are a treat, not a health food. But here’s what you can expect nutritionally, along with a few bright spots:
- Estimated per mummy: Approximately 220 calories, 15g fat, 18g carbohydrates, 7g protein. These numbers will vary based on the brand of hot dogs and dough you use.
- Protein punch: Hot dogs are a decent source of protein, which helps keep you full. Each mummy provides about 7 grams of protein, which isn’t bad for a snack.
- Portion control: Because they’re individually wrapped, it’s easy to keep portions reasonable. Two mummies make a satisfying snack, and three are a light meal.
- Customizable for dietary needs: As mentioned in the variations section, you can easily make these vegetarian, gluten-free, or lower in fat by choosing lighter ingredients.
A note on balance: I believe in enjoying treats without guilt. Halloween comes once a year, and these mummy hot dogs are part of the fun. Pair them with a veggie tray or a side of apple slices to round out the meal, but don’t stress about the numbers. Food is about joy, connection, and celebration—and these deliver on all three.
Conclusion
These mummy hot dogs are proof that the best recipes often come from happy accidents. What started as a ruined batch of pigs in a blanket turned into a Halloween tradition that my family looks forward to every year. They’re easy enough for kids to help make, fun enough to impress party guests, and delicious enough to satisfy everyone from picky eaters to foodies.
I encourage you to make these your own. Experiment with different sausages, try new dipping sauces, or get creative with the face expressions. The beauty of this recipe is that it’s forgiving—you really can’t mess it up. And if you do? Well, you’ll still have a warm, buttery hot dog, and that’s never a bad thing.
I’d love to hear how yours turn out! Drop a comment below with your mummy creations, your favorite dipping sauce combos, or any fun variations you tried. And if you share them on social media, tag me—I want to see your spooky snack spread. Happy Halloween, and happy cooking!
Frequently Asked Questions
Can I make these ahead of time for a party?
Absolutely! You can assemble the mummies up to 4 hours ahead and keep them in the fridge on the baking sheet. Just add 2-3 minutes to the bake time since they’re starting cold. I don’t recommend baking them more than an hour ahead, as the dough loses its crispness.
Can I use puff pastry instead of crescent rolls?
Yes! Puff pastry works beautifully. Thaw it according to package directions, roll it out slightly, and cut it into thin strips. The bake time will be similar, but keep an eye on it because puff pastry can brown quickly. The result is flakier and more buttery—absolutely delicious.
How do I keep the dough from tearing?
Cold dough is the key. If your dough is too warm and sticky, it will tear easily. Pop it in the fridge or freezer for 5-10 minutes before cutting and wrapping. Also, don’t stretch the dough as you’re wrapping—let it rest naturally around the hot dog.
Can I use cocktail sausages instead of full-size hot dogs?
Definitely! Mini mummies are perfect for appetizers. Use cocktail sausages or mini hot dogs, cut the dough strips shorter, and bake for about 8-10 minutes instead of 12-15. They’re always a hit at parties because they’re easy to eat in one bite.
What can I use instead of mustard for the eyes?
Ketchup works well and gives a red “angry eye” look. You can also use sriracha for spicy eyes, or even small dots of melted cheese. For a non-food option, you can use edible markers or gel food coloring. Just make sure whatever you use is safe to eat!
Pin This Recipe!
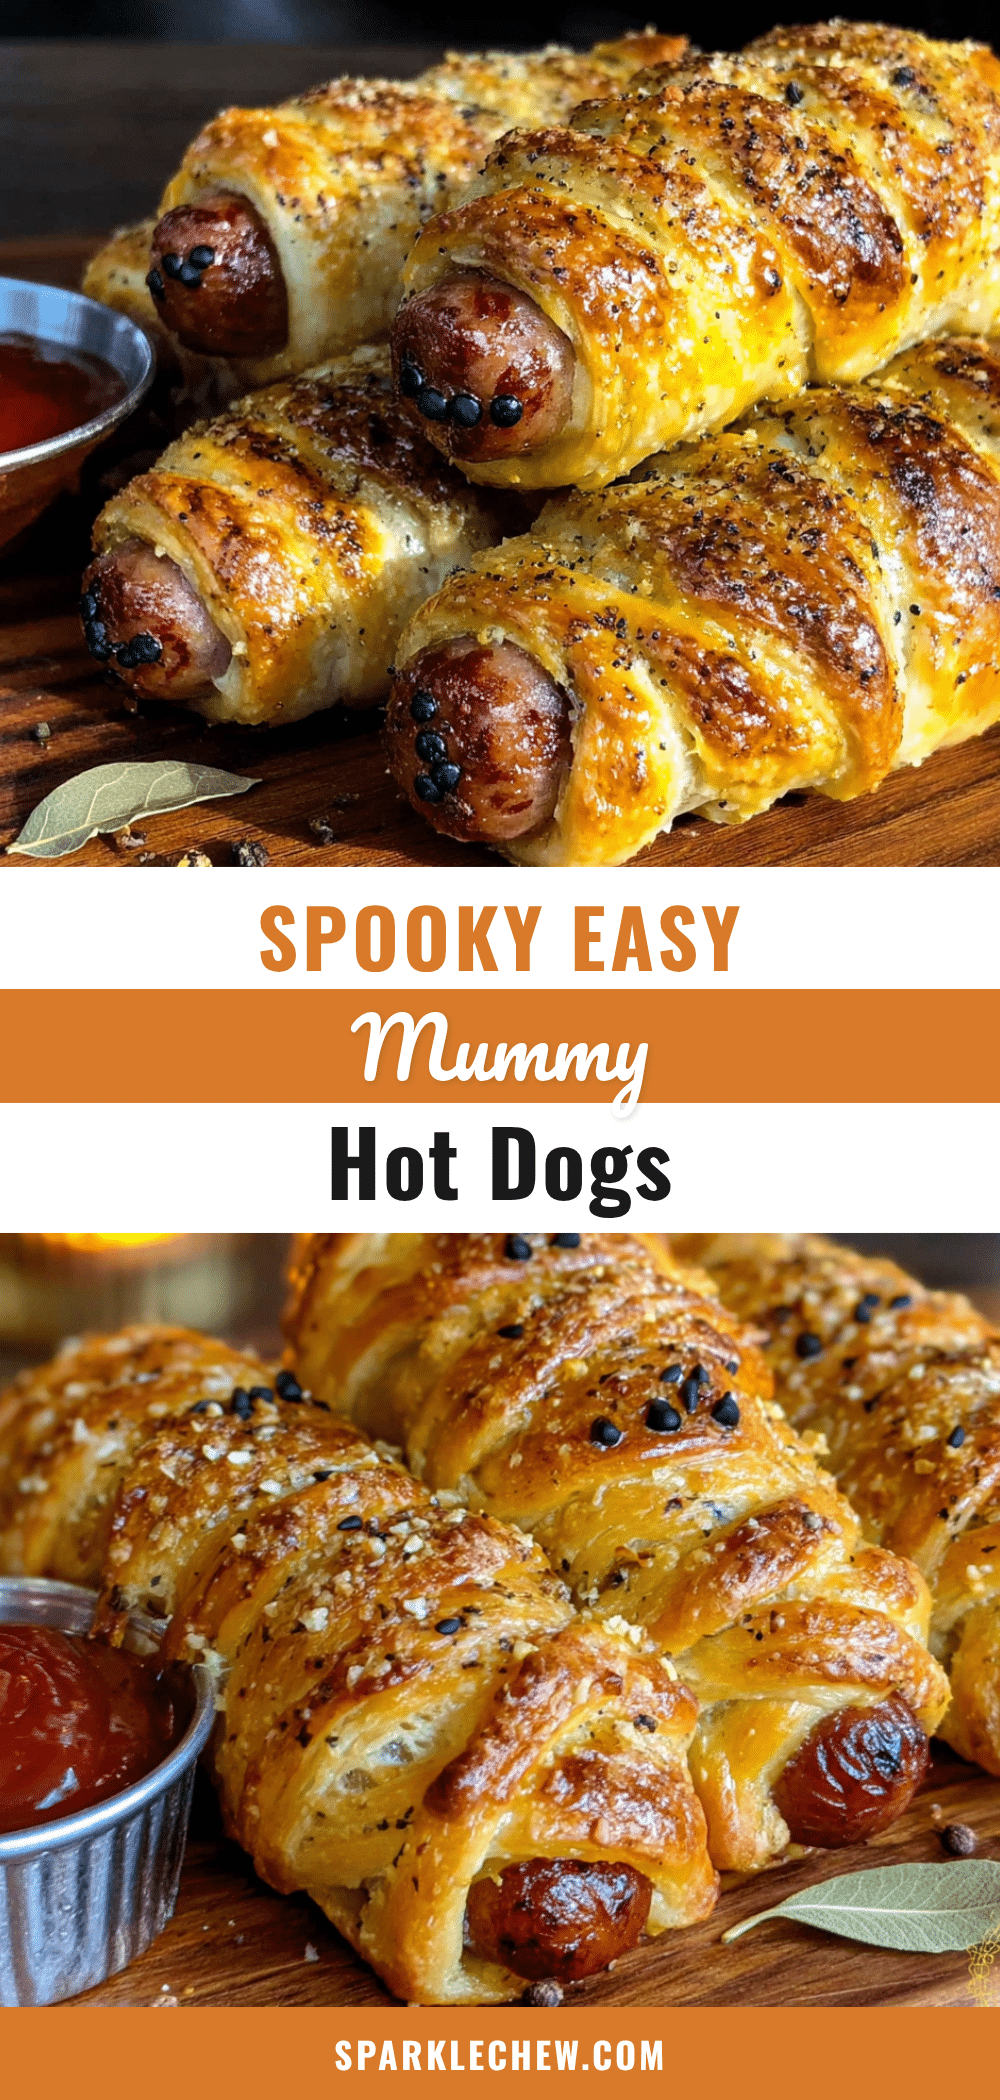
Easy Mummy Hot Dogs: Perfect Halloween Recipe
These mummy hot dogs are a fun and easy Halloween treat made with hot dogs wrapped in crescent roll dough, baked until golden, and finished with mustard eyes. They come together in under 20 minutes and are perfect for parties, movie nights, or last-minute school treats.
- Prep Time: 10 minutes
- Cook Time: 15 minutes
- Total Time: 25 minutes
- Yield: 8 servings 1x
- Category: Appetizer
- Cuisine: American
Ingredients
- 8 standard-size hot dogs (beef recommended, but turkey, chicken, or plant-based work)
- 1 can (8 ounces) refrigerated crescent roll dough (e.g., Pillsbury)
- Yellow mustard (for eyes; about 1 tablespoon)
- Ketchup or dipping sauce (optional, for serving)
Instructions
- Preheat oven to 375°F (190°C). Line a baking sheet with parchment paper or a silicone baking mat.
- Open the can of crescent roll dough and unroll it. Separate into 8 triangles along the perforations. If using sheet-style dough, cut into 8 long triangles.
- Cut each triangle lengthwise into 3-4 thin strips, about 1/2 inch wide. Strips don’t need to be even.
- Take one hot dog and wrap a strip of dough around it, starting at one end and leaving a small gap at the top for the face. Overlap slightly and leave small gaps for the mummy look. Don’t wrap too tightly.
- Repeat with all hot dogs. Place wrapped mummies on the prepared baking sheet, about 1 inch apart.
- Bake for 12-15 minutes, until dough is golden brown and hot dogs are heated through. Check at 12 minutes.
- Remove from oven and let cool for 2 minutes. Dip a toothpick into yellow mustard and dot two small eyes onto each mummy face.
- Serve immediately with ketchup or dipping sauce.
Notes
Keep dough cold for easier handling. If dough becomes sticky, refrigerate for 5 minutes. For make-ahead, assemble up to 4 hours ahead and refrigerate; add 2-3 minutes to bake time. For gluten-free, use gluten-free crescent roll dough. For vegetarian, use plant-based hot dogs or carrot dogs.
Nutrition
- Serving Size: 1 mummy hot dog
- Calories: 220
- Sugar: 4
- Sodium: 580
- Fat: 15
- Saturated Fat: 5
- Carbohydrates: 18
- Protein: 7
Keywords: mummy hot dogs, Halloween recipe, easy appetizer, crescent roll hot dogs, spooky snacks, kids Halloween food


