Love this? Save it for later!
Share the inspiration with your friends
It was 11:47 PM on a particularly damp Tuesday in late October, and I had the kind of sore throat that felt like I’d been swallowing gravel. I didn’t have any fancy elderberry syrup in the fridge, and the last of my store-bought cold remedy had that weird, syrupy aftertaste I just couldn’t stomach. But I had a head of garlic that was starting to sprout, a jar of honey that was crystallizing at the back of the pantry, and a wild idea that arrived like a lightning bolt—what if I just let them hang out together for a while? Honestly, I wasn’t even sure if it would work. I mean, I’d heard whispers about fermented honey on some crunchy wellness forum, but I’d never actually tried making it myself. So there I stood, in my pajamas, peeling garlic cloves with slightly shaking hands, wondering if I was about to create a miracle tonic or a very expensive science experiment. Let me tell you, the kitchen smelled like a vampire’s worst nightmare, but something about that late-night alchemy felt right. The next morning, I gave the jar a little swirl, and the honey had already thinned out, turning into this gorgeous, runny gold. That first tiny spoonful—spicy, sweet, and with a warmth that spread through my chest—made me a believer. Maybe you’ve been there, staring at a half-empty pantry and a nagging cough, wishing for something that felt more like food and less like medicine. This homemade garlic honey fermented immune tonic is that thing. It’s the recipe that stuck because it’s so simple, it almost feels like cheating, and it actually works.
Why You’ll Love This Recipe
This isn’t just another wellness trend—it’s a time-tested, probiotic-packed powerhouse that my whole family swears by. I’ve been making this for three cold seasons now, and I’ve tested it on grumpy toddlers, skeptical in-laws, and even my own stubborn self during a brutal flu season. It’s the kind of recipe that earns its spot on your counter.
- Simple Ingredients: You only need two main ingredients—raw honey and fresh garlic. No fancy trips to a specialty store required.
- Quick Prep, Patience Pays: Active prep time is about 10 minutes. The fermentation does the rest of the work over a few weeks.
- Immune-Boosting Powerhouse: This tonic combines the antimicrobial properties of garlic with the prebiotic and soothing benefits of raw honey.
- Versatile Uses: Use it as a daily wellness shot, drizzle it on toast, or stir it into tea. It’s not just medicine; it’s a pantry staple.
- Cost-Effective: A single batch costs pennies compared to store-bought immune supplements, and it lasts for months.
What makes this recipe different from the rest is the fermentation process itself. It’s not just mixing garlic into honey—it’s letting them transform into something greater. The garlic mellows out, losing that harsh bite, while the honey becomes infused with a subtle, spicy warmth. The result is a runny, golden elixir that’s simultaneously sweet, pungent, and completely addictive. It’s comfort food reimagined as preventative medicine—healthier, faster, and with the same soul-soothing satisfaction as a warm blanket on a cold day. Perfect for impressing your immune system without any stress at all.
What Ingredients You Will Need
This recipe uses the simplest of ingredients to deliver a bold, functional result. You likely have both of these in your kitchen right now, which is honestly the beauty of it. Let’s break down what you need and why it matters.
- Raw, Unfiltered Honey (1 cup / 340g): This is non-negotiable. Raw honey contains natural yeasts and enzymes that are essential for fermentation. Processed honey has been heated, which kills these beneficial microbes. I personally recommend a local wildflower honey or a Manuka honey if you want an extra immune boost. The flavor of the honey will directly impact the final taste, so use one you love. (Look for a jar that says “raw” and “unfiltered” on the label.)
- Fresh Garlic Cloves (1 cup / about 140g, peeled): Use firm, plump cloves. Avoid any that are soft, shriveled, or have green sprouts in the center (those can be bitter). You can use pre-peeled cloves from the store in a pinch, but they tend to be less flavorful. I like to use organic garlic when I can find it, as the skins come off easier. (Pro tip: give the cloves a gentle smash with the flat side of your knife—it helps release the allicin, which is the compound that makes garlic so good for you.)
- A Pinch of Sea Salt (optional, 1/4 tsp / 1g): This is not strictly necessary, but a tiny pinch of salt can help kickstart the fermentation by creating a slightly more favorable environment for the good bacteria. It also balances the sweetness. I use a fine-grained Celtic sea salt.
Substitution Guidance: If you are vegan or avoiding honey, this specific recipe won’t work as a ferment, but you can make a quick “garlic syrup” by simmering garlic in water and maple syrup. It won’t have the probiotic benefits, but it will taste great. For a low-sugar option, you cannot substitute the honey with a sugar-free alternative, as the fermentation requires the natural sugars to feed the microbes.
Equipment Needed
You don’t need a fancy laboratory for this. A few basic kitchen tools will get the job done perfectly.
- A Clean Glass Jar (16 oz / 500ml capacity): A wide-mouth mason jar is ideal. The wide mouth makes it easy to pack the garlic in. Make sure it is thoroughly washed with hot, soapy water and completely dry. (I ruined my first batch by using a jar that still had a faint smell of pickles—the garlic honey absorbed it!)
- A Wooden Spoon or Chopstick: You’ll need this to poke down the garlic and release any air bubbles. Avoid metal utensils, as they can react with the honey and the fermentation process.
- A Butter Knife or Small Spatula: For scraping every last bit of honey out of the measuring cup.
- A Clean Cloth or Paper Towel: If you are using a lid that seals tightly, you will need to “burp” the jar daily. Alternatively, you can use a fermentation lid or simply cover the jar with a cloth and a rubber band to allow gases to escape.
Budget-Friendly Tip: Don’t run out and buy a special “fermentation jar.” A clean pasta sauce jar works perfectly. Just make sure the lid is not rusted.
Preparation Method
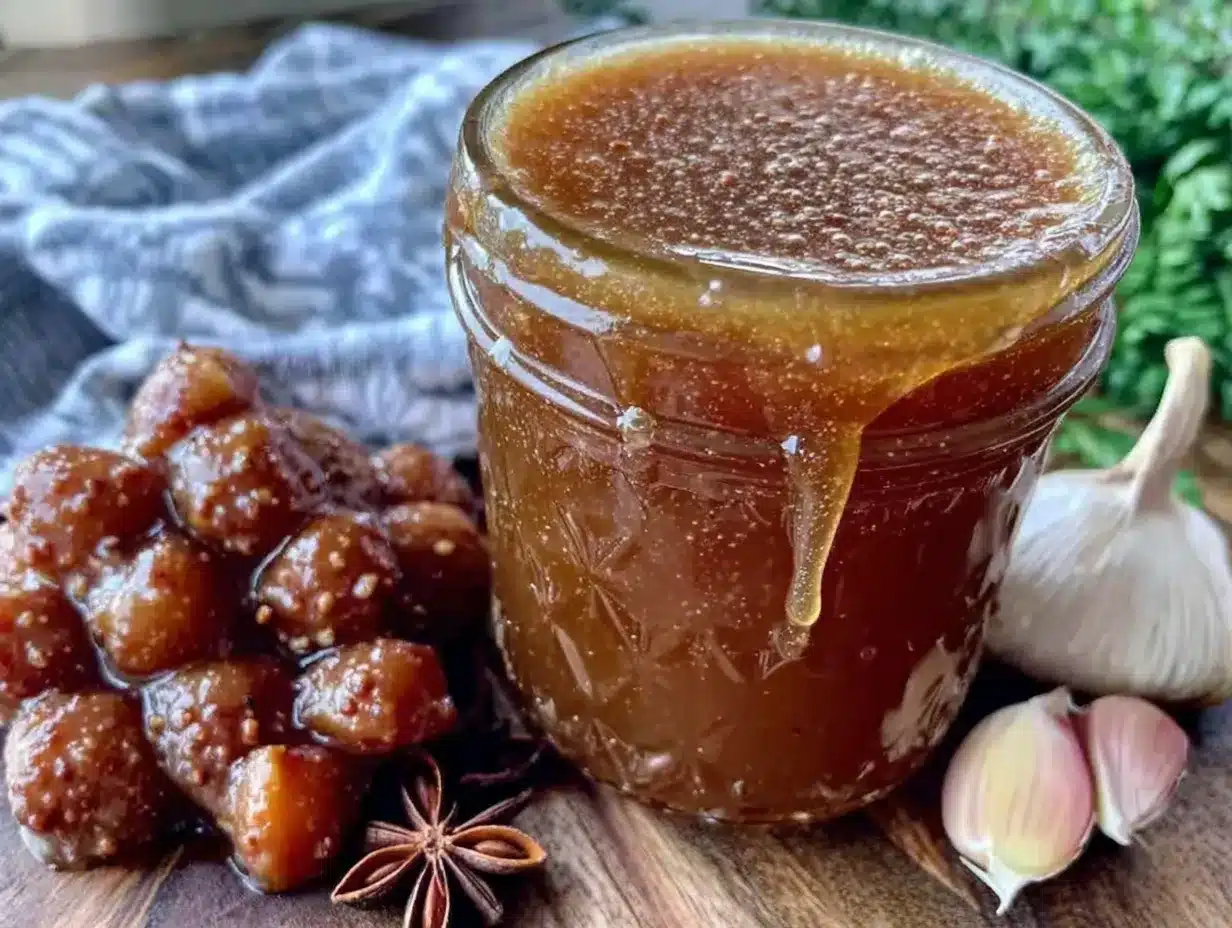
This is where the magic happens. The process is incredibly simple, but the waiting is the hardest part. Follow these steps, and you will be rewarded with a jar of liquid gold.
- Prepare the Garlic (5 minutes): Peel 1 cup (about 140g) of garlic cloves. To make peeling easier, smash each clove lightly with the flat side of your knife. This cracks the skin and makes it slip right off. (I learned this trick after spending 20 minutes painfully picking at skins with my fingernails.) Leave the cloves whole; do not chop or mince them.
- Fill the Jar (2 minutes): Pack the peeled garlic cloves into your clean, dry 16 oz glass jar. You want them to be snug but not crammed. Leave about an inch of headspace at the top of the jar.
- Cover with Honey (3 minutes): Pour the 1 cup (340g) of raw honey directly over the garlic cloves. Use your wooden spoon or chopstick to stir gently, ensuring every single clove is coated. You want the honey to fill all the gaps between the cloves. If you are using the salt, sprinkle it in now.
- Poke and Release (2 minutes): Here is the most important step. Use your chopstick to poke down into the jar, releasing any trapped air bubbles. You will see tiny bubbles rise to the surface. Do this thoroughly. If any garlic is floating above the honey line, it is at risk of molding. (I lost my first batch to mold because I was too lazy to do this properly.)
- The Initial Rest (24 hours): Place the jar on your kitchen counter, out of direct sunlight. Do NOT seal the lid tightly. Either leave the lid slightly ajar, or cover the jar with a clean cloth secured with a rubber band. The fermentation process produces carbon dioxide, and if the jar is sealed tight, it could build up pressure and explode. (Trust me on this—I had a honey volcano on my counter once.)
- The Daily Burp and Swirl (Days 2-14): For the next two weeks, you will “burp” the jar once a day. Open the lid (if using a cloth, just lift it), give the jar a gentle swirl to re-coat any exposed garlic, and then close it back up loosely. You will notice the honey becoming much thinner and more liquid. This is good! It means the fermentation is active.
- The Taste Test (Day 14): After two weeks, the garlic will have softened and mellowed significantly. The honey will be runny and have a slight fizz. Taste a tiny spoonful. It should be sweet, spicy, and savory all at once. If you like it, you can move it to the fridge. If you want it stronger, let it ferment for another week.
- Storage (Day 14+ ): Once the tonic has reached your desired flavor, seal the jar tightly and store it in the refrigerator. The cold will slow down the fermentation, preserving the flavor. It will keep for up to 6 months, though I doubt it will last that long.
Cooking Tips & Techniques
I’ve made this tonic at least a dozen times, and I’ve made every mistake in the book so you don’t have to.
- The Molding Mistake: The single biggest issue is mold. If you see fuzzy green or white spots on the garlic, you have to throw the whole batch away. This happens when garlic is exposed to air. The daily swirl is your best defense. Make sure every clove stays submerged. I now use a small glass weight (like the ones used for kimchi) to keep the garlic down.
- The “Burp” is Crucial: Don’t skip the daily burping. I got lazy for three days once, and when I opened the jar, it erupted like a shaken soda bottle. Honey went everywhere—on the ceiling, on my cat, on my face. It was a sticky disaster.
- Patience is Key: The flavor changes dramatically over time. On day one, it’s just garlic in honey. On day seven, it starts to mellow. By day twenty-one, the garlic is almost candy-like, and the honey has a complex, almost balsamic depth. Don’t rush the process.
- Temperature Matters: Keep the jar in a relatively cool part of your kitchen (65-75°F / 18-24°C). If it’s too hot, the fermentation will happen too fast and might create off-flavors. If it’s too cold, it will take forever.
Variations & Adaptations
Once you master the basic recipe, it’s fun to play around. Here are a few variations I’ve tried and loved.
- Spicy Immune Booster: Add 1-2 thinly sliced fresh chili peppers (like jalapeño or Thai bird chili) to the jar along with the garlic. The heat infuses beautifully into the honey, creating a spicy-sweet tonic that is incredible drizzled over pizza or roasted vegetables.
- Herbal Infusion: Layer in some fresh herbs. A sprig of rosemary or a few sprigs of thyme add an earthy, medicinal quality. I made a batch with fresh ginger slices and turmeric root once, and it was like a golden latte in a jar—so warming and anti-inflammatory.
- Citrus Twist: Add the zest of one organic lemon or orange to the jar. Be careful not to include the white pith, which is bitter. The citrus oils add a bright, sunny note that cuts through the garlic’s pungency.
- For the Faint of Heart (Milder Version): If you are nervous about the strong garlic flavor, you can blanch the garlic cloves in boiling water for 30 seconds before adding them to the honey. This neutralizes some of the harsh compounds, resulting in a much milder, sweeter final product.
Serving & Storage Suggestions
This tonic is incredibly versatile, which is why I always have a jar in my fridge.
- Daily Wellness Shot: Take 1 teaspoon straight from the jar every morning during cold and flu season. Let it sit on your tongue for a few seconds before swallowing. The warmth is immediate and comforting.
- In Tea: Stir 1 tablespoon into a cup of hot water with a squeeze of lemon. It makes a fantastic, soothing tea that is perfect for sore throats. (The heat will kill some of the probiotics, but the garlic and honey benefits remain.)
- On Toast: This is my secret weapon. Spread the honey and a few of the fermented garlic cloves on a piece of crusty bread with some butter or goat cheese. The garlic cloves become soft, sweet, and almost jam-like. It is ridiculously good.
- In Salad Dressings: Use the infused honey in a vinaigrette. Whisk 1 tablespoon of the honey with 2 tablespoons of apple cider vinegar, 1/4 cup of olive oil, and a pinch of salt. It adds a complex, savory sweetness.
- Storage: Keep the jar sealed in the refrigerator. It will last for up to 6 months. The flavor will continue to deepen and mellow over time. I actually prefer the taste after it’s been sitting for a month.
Nutritional Information & Benefits
This tonic is more than just a tasty condiment; it’s a functional food with serious benefits.
- Garlic (Allicin): Garlic is a powerhouse. It contains allicin, a compound with potent antimicrobial and antiviral properties. It’s been used for centuries to support the immune system and fight off infections.
- Raw Honey (Probiotics & Enzymes): Raw honey is a prebiotic, meaning it feeds the good bacteria in your gut. It also contains natural enzymes that aid digestion and has soothing, anti-inflammatory properties for sore throats.
- Fermentation (Increased Bioavailability): The fermentation process actually makes the nutrients in garlic and honey more bioavailable, meaning your body can absorb them more easily. It also introduces beneficial lactic acid bacteria.
Estimated Nutritional Values (per 1 tsp / 5g serving):
| Nutrient | Amount |
|---|---|
| Calories | ~20 kcal |
| Carbohydrates | ~5g |
| Sugar | ~5g |
| Vitamin C | Trace |
| Manganese | ~1% DV |
Dietary Considerations: This recipe is naturally gluten-free, dairy-free, and vegan (if you consider honey vegan—this is a personal choice). It is not suitable for infants under 1 year old due to the risk of botulism from raw honey.
Conclusion
This homemade garlic honey fermented immune tonic is the kind of recipe that makes you feel like you’ve unlocked a secret level of wellness. It’s proof that the most powerful remedies are often the simplest. It’s not about complicated techniques or exotic ingredients; it’s about letting two humble ingredients do what they do best when you give them a little time and a little patience. I love this recipe because it makes me feel prepared—like I have a secret weapon in my fridge against the winter sniffles. I encourage you to make it your own. Add a chili, throw in some ginger, or just keep it pure and simple. The jar doesn’t judge. So go ahead, grab that head of garlic and that jar of honey, and start your own little jar of magic. You’ll be so glad you did. Have you tried making this? I’d love to hear about your fermentation adventures in the comments below—share your variations, your successes, and even your sticky failures!
Frequently Asked Questions
How long does it take for garlic honey to ferment?
It typically takes 2 to 4 weeks for the fermentation to become active and for the flavor to mellow significantly. You can taste it after 14 days and decide if you want to let it go longer. The honey will become thinner and more liquid as it ferments.
Can I use regular honey from the grocery store?
You can, but it won’t ferment properly. Most commercial honey is pasteurized, which means it has been heated to kill any natural yeasts and enzymes. For fermentation to occur, you need raw honey. Look for “raw” and “unfiltered” on the label.
Why is my garlic turning blue or green?
Don’t panic! This is a completely natural and harmless chemical reaction. When garlic is exposed to an acid (like the mild acidity in honey) over time, it can turn a blue-green color. This is the same reaction that happens when you pickle garlic. It is perfectly safe to eat and does not affect the flavor.
How do I know if my garlic honey has gone bad?
The main sign is mold. If you see any fuzzy growth—white, green, or black—on the surface of the honey or on any garlic cloves that are exposed to air, you must discard the entire batch. A healthy ferment will have small bubbles and a slightly tangy, yeasty smell. If it smells foul, putrid, or like alcohol, throw it away.
Can I eat the fermented garlic cloves?
Absolutely! The fermented garlic cloves are one of the best parts. They become soft, sweet, and surprisingly mild—almost like a savory candy. They are delicious spread on toast, mixed into salad dressings, or eaten straight as a potent immune booster.
Pin This Recipe!
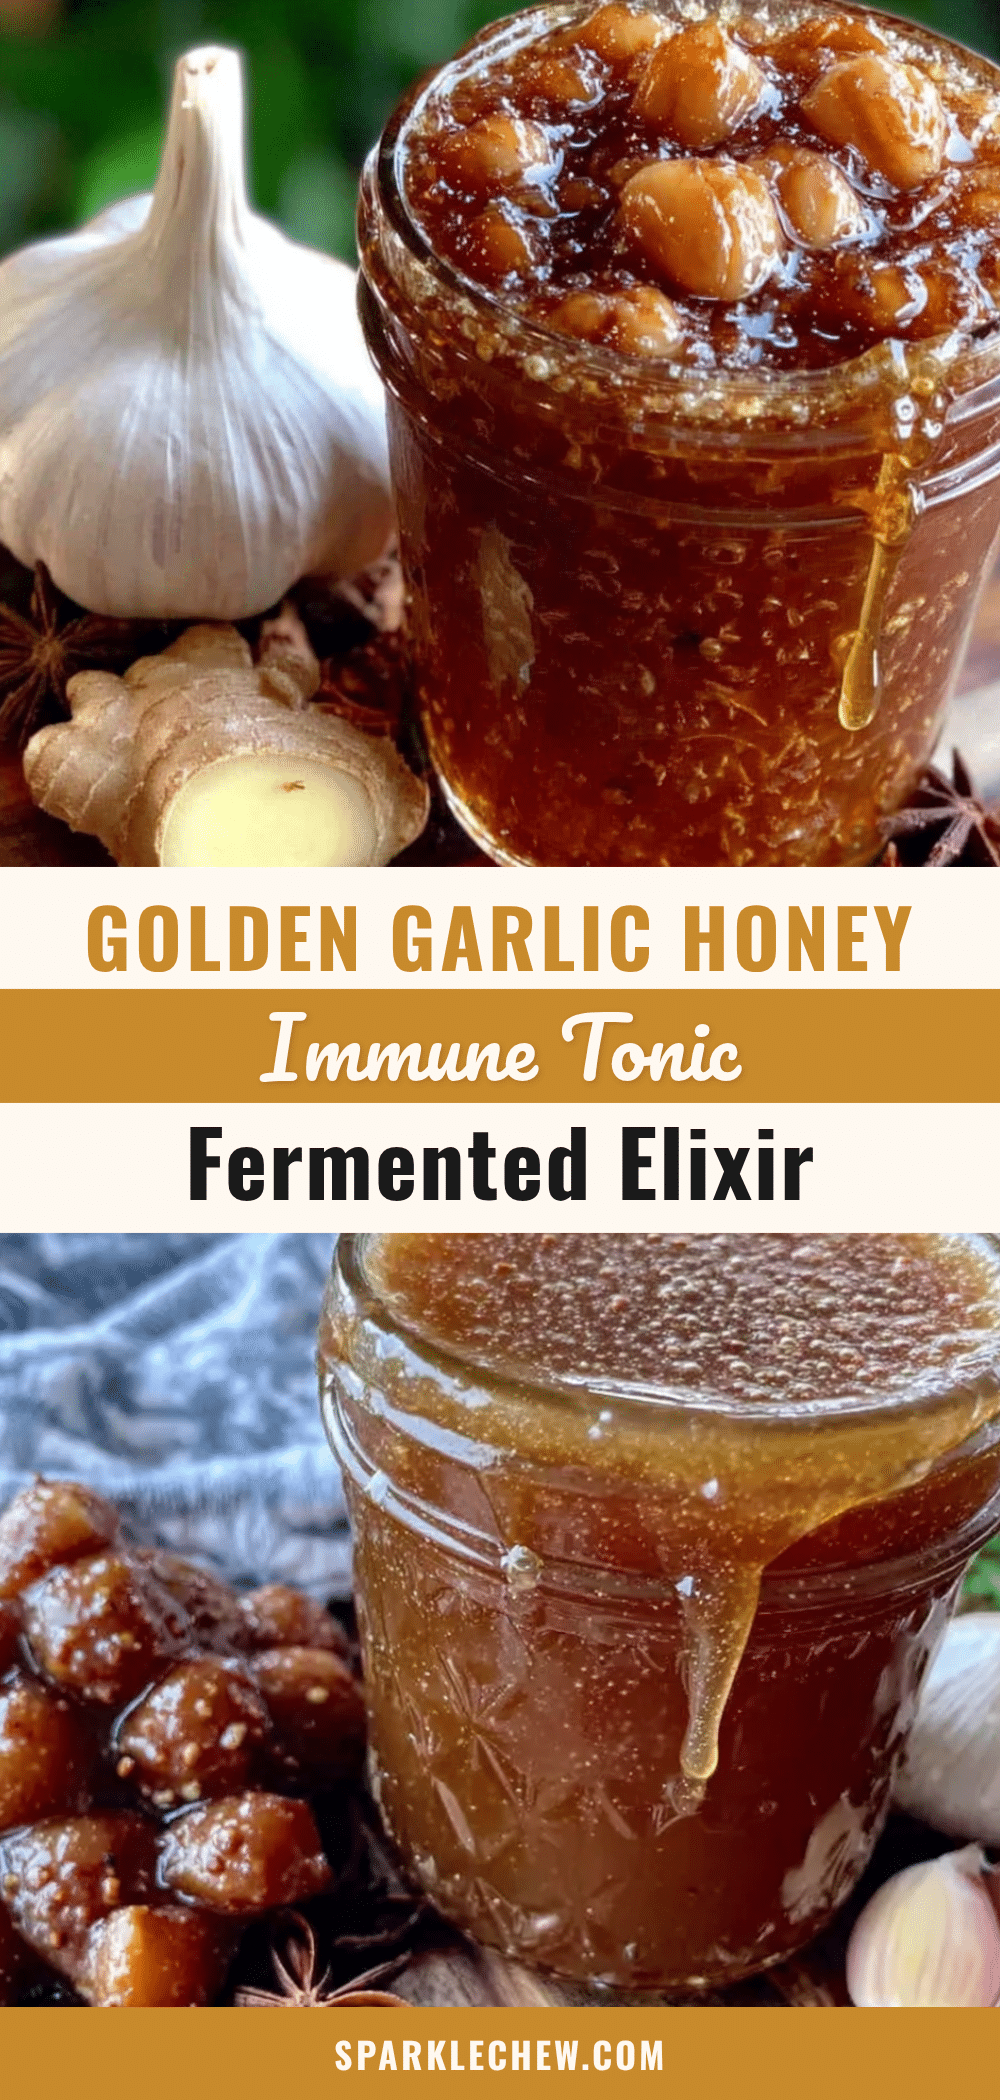
Homemade Garlic Honey Immune Tonic: Easy Best Recipe
This homemade garlic honey fermented immune tonic is a simple, probiotic-packed powerhouse that combines raw honey and fresh garlic to create a versatile, immune-boosting elixir. It’s a time-tested remedy that’s perfect for cold and flu season, and it can be used as a daily wellness shot, in tea, or on toast.
- Prep Time: 10 minutes
- Cook Time: 0 minutes
- Total Time: 14-28 days (fermentation time)
- Yield: 1 cup (about 48 servings of 1 tsp each) 1x
- Category: Condiment / Wellness Tonic
- Cuisine: American
Ingredients
- 1 cup (340g) raw, unfiltered honey
- 1 cup (about 140g) fresh garlic cloves, peeled
- 1/4 tsp (1g) sea salt (optional)
Instructions
- Prepare the Garlic: Peel 1 cup (about 140g) of garlic cloves. To make peeling easier, smash each clove lightly with the flat side of your knife. Leave the cloves whole; do not chop or mince them.
- Fill the Jar: Pack the peeled garlic cloves into a clean, dry 16 oz glass jar. Leave about an inch of headspace at the top.
- Cover with Honey: Pour 1 cup (340g) of raw honey directly over the garlic cloves. Use a wooden spoon or chopstick to stir gently, ensuring every clove is coated. If using salt, sprinkle it in now.
- Poke and Release: Use a chopstick to poke down into the jar, releasing any trapped air bubbles. Ensure no garlic is floating above the honey line.
- The Initial Rest: Place the jar on your kitchen counter, out of direct sunlight. Do not seal the lid tightly. Either leave the lid slightly ajar or cover with a clean cloth secured with a rubber band.
- The Daily Burp and Swirl (Days 2-14): For the next two weeks, ‘burp’ the jar once a day. Open the lid, give the jar a gentle swirl to re-coat any exposed garlic, then close it back up loosely.
- The Taste Test (Day 14): After two weeks, taste a tiny spoonful. If you like it, move it to the fridge. If you want it stronger, let it ferment for another week.
- Storage (Day 14+): Once the tonic has reached your desired flavor, seal the jar tightly and store it in the refrigerator. It will keep for up to 6 months.
Notes
The single biggest issue is mold. If you see fuzzy green or white spots on the garlic, throw the whole batch away. The daily swirl is your best defense. Make sure every clove stays submerged. Don’t skip the daily burping to prevent pressure buildup. The flavor changes dramatically over time; patience is key. Keep the jar in a relatively cool part of your kitchen (65-75°F / 18-24°C).
Nutrition
- Serving Size: 1 teaspoon (5g)
- Calories: 20
- Sugar: 5
- Carbohydrates: 5
Keywords: garlic honey, immune tonic, fermented honey, homemade remedy, wellness shot, garlic honey recipe, immune booster, raw honey, fermented garlic


