Love this? Save it for later!
Share the inspiration with your friends
The guy behind the meat counter at my local grocery store watched me staring at a pile of fresh jalapeños for a solid two minutes. He didn’t say anything at first. Then he just pointed at the peppers, raised an eyebrow, and said, “You making poppers?” I laughed and admitted I’d never actually made them myself. He grinned, wiped his hands on his apron, and told me his secret—something about the cream cheese needing to be room temperature and the bacon needing to be thin-cut, not thick. I scribbled his tips on a napkin right there by the register.
Honestly, I’d always thought bacon wrapped jalapeño poppers were one of those things you only ordered at a bar or a Super Bowl party. They felt like a “someone else makes these” kind of food. But that conversation changed everything. I went home, cream cheese softening on the counter, and gave it a shot. The first batch? A mess. The cream cheese leaked out, the bacon was floppy, and I burned my fingers on the baking sheet. But the second batch? Let me tell you, something clicked.
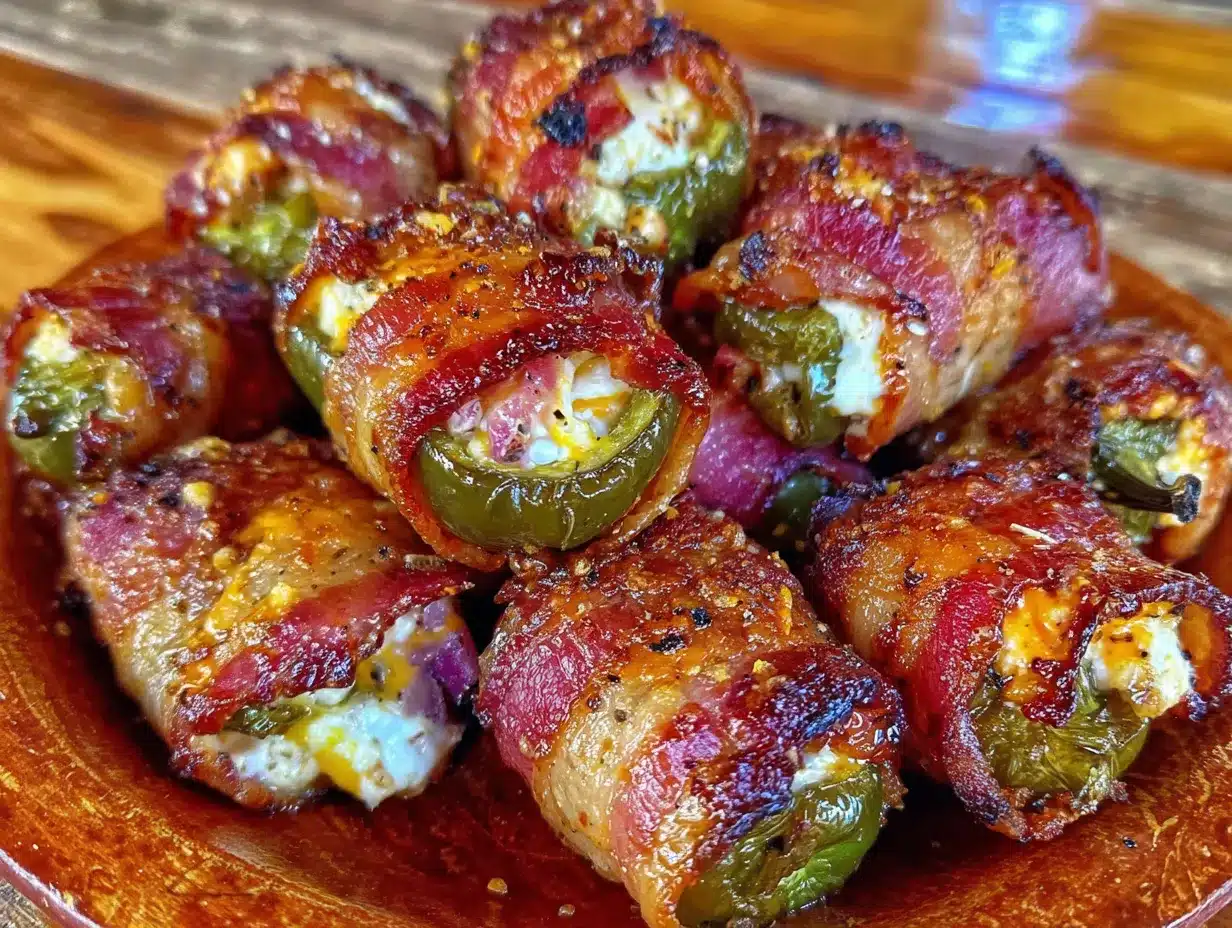
These crispy bacon wrapped jalapeño poppers are now my go-to appetizer for everything. Game day, backyard barbecues, even random Tuesday nights when I need a little crunch in my life. Maybe you’ve been there—wanting something that feels impressive but doesn’t require a culinary degree. These poppers deliver every single time. They’ve got that perfect balance of spicy, creamy, salty, and crispy that makes you reach for another one before you’ve even finished the first. I keep making them because they’re forgiving, they’re flexible, and honestly, they make me look like I tried way harder than I actually did.
Why You’ll Love This Recipe
I’ve tested this recipe more times than I care to admit. I’ve tried different cheeses, different bacon thicknesses, different cooking methods. What I’m giving you here is the version that works every single time, no matter your skill level in the kitchen.
- Quick & Easy: From start to finish, you’re looking at about 35 minutes. Perfect for when guests show up unexpectedly or when you need a last-minute appetizer that doesn’t scream “I panicked.”
- Simple Ingredients: Jalapeños, cream cheese, bacon, and a few pantry staples. That’s it. No weird specialty items or trips to three different stores.
- Perfect for Game Day and Gatherings: These disappear faster than almost anything else I put out. They’re handheld, they’re bite-sized, and they’ve got that universal appeal that makes everyone happy.
- Crowd-Pleaser: I’ve served these to spice wimps and heat seekers alike. The cream cheese tames the jalapeño heat beautifully, so even people who usually avoid spicy food end up grabbing seconds.
- Unbelievably Delicious: The texture combo here is next-level. You get the crunch of crispy bacon, the creamy coolness of the filling, and that slight pop from the jalapeño. It’s comfort food disguised as something fancy.
What makes this recipe different from the dozens of others out there? It’s the little things. I let the cream cheese sit out for a full 30 minutes before mixing, which gives you a smoother filling that stays put. I also par-cook the bacon just slightly before wrapping, which ensures it gets perfectly crispy without overcooking the pepper. These aren’t just any poppers—they’re the best version I’ve found after years of trial and error.
This recipe isn’t just good. It’s the kind that makes you close your eyes after the first bite. It’s comfort food reimagined—faster than you’d expect, but with the same soul-soothing satisfaction. Perfect for impressing guests without stress, or turning a simple snack into something memorable.
What Ingredients You Will Need
This recipe uses simple, everyday ingredients to deliver big flavor and that irresistible crispy texture. Most of these are probably already in your kitchen, which makes these poppers perfect for spontaneous cravings.
For the Filling
- 8 ounces cream cheese, softened to room temperature (this is crucial for a smooth, lump-free filling—I use Philadelphia brand for the creamiest texture)
- 1/2 cup shredded cheddar cheese (sharp cheddar adds the most flavor, but mild works too)
- 1/4 teaspoon garlic powder (don’t skip this—it adds a subtle savory depth)
- 1/4 teaspoon onion powder
- 1/4 teaspoon smoked paprika (optional, but it adds a lovely smoky note that pairs perfectly with the bacon)
- Salt and black pepper, to taste
For the Poppers
- 12 fresh jalapeño peppers (look for firm, evenly shaped peppers—avoid any that are soft or have wrinkled skin)
- 12 slices thin-cut bacon (this is important—thick-cut bacon takes too long to crisp up and will overcook the peppers. I prefer Wright Brand or Oscar Mayer)
- Toothpicks, for securing the bacon (soak them in water for 10 minutes first to prevent burning)
Substitution Guidance
If you need a dairy-free option, use dairy-free cream cheese and a plant-based shredded cheese. For a lower-fat version, Neufchâtel cheese works beautifully—it has about a third less fat than regular cream cheese but the same creamy texture. You can also swap the cheddar for pepper jack cheese if you want extra heat, or use Monterey Jack for a milder, meltier filling. If you’re watching your sodium, look for low-sodium bacon or turkey bacon, though keep in mind turkey bacon won’t get quite as crispy.
Equipment Needed
You don’t need much for this recipe, which is part of its beauty. Here’s what you’ll want on hand:
- Baking sheet with a rim (to catch any grease drippings—a half-sheet pan works perfectly)
- Wire rack that fits inside your baking sheet (this is the secret to crispy bacon all around—the air circulates underneath instead of the bacon sitting in its own grease)
- Small mixing bowl for the filling
- Sharp knife for slicing the jalapeños (a paring knife gives you the most control)
- Small spoon or butter knife for scooping out seeds and membranes
- Cutting board
- Toothpicks (soaked in water for 10 minutes to prevent burning)
- Tongs for handling hot peppers after baking
If you don’t have a wire rack, don’t worry. You can line your baking sheet with aluminum foil and place the poppers directly on the foil. They won’t be quite as crispy on the bottom, but they’ll still be delicious. I’ve done it both ways, and honestly, the rack makes a noticeable difference but isn’t a dealbreaker.
Preparation Method
Let’s get cooking. Follow these steps carefully, and you’ll have a tray of perfect poppers in about 35 minutes.
-
Preheat your oven to 400°F (200°C). Place your wire rack inside the rimmed baking sheet and set aside. If you’re not using a rack, line the baking sheet with aluminum foil for easier cleanup.
-
Prepare the jalapeños. Put on some disposable gloves if you have them—trust me on this one. I learned the hard way that jalapeño oil lingers on your fingers for hours, and nothing ruins a good evening like accidentally rubbing your eye. Cut each jalapeño in half lengthwise. Use a small spoon to scrape out the white membranes and seeds. The membranes hold most of the heat, so if you want milder poppers, be thorough. If you like more spice, leave a little bit of membrane intact.
-
Make the filling. In your small mixing bowl, combine the softened cream cheese, shredded cheddar, garlic powder, onion powder, smoked paprika (if using), and a pinch of salt and pepper. Mix until everything is smooth and well combined. Taste a tiny bit—yes, it’s safe to eat raw—and adjust the seasoning if needed. The filling should be creamy and flavorful on its own.
-
Fill the peppers. Using a small spoon, fill each jalapeño half with the cream cheese mixture. Don’t overfill them—you want the filling to be level with the cut edge of the pepper, not mounded on top. Overfilled poppers tend to leak in the oven, and nobody wants a greasy mess.
-
Wrap with bacon. Take one slice of bacon and wrap it around each filled jalapeño half. Start at one end and wrap diagonally, overlapping slightly as you go. The bacon should cover the filling completely to help hold it in place during baking. Secure the end of the bacon with a soaked toothpick, pushing it through the bacon and into the pepper.
-
Arrange on the rack. Place the wrapped poppers on the wire rack, seam side down if possible. Leave a little space between each one so the heat can circulate. If you’re using a foil-lined sheet without a rack, place them directly on the foil.
-
Bake for 20-25 minutes. The poppers are done when the bacon is crispy and golden brown, and the peppers are tender but still holding their shape. Start checking at 20 minutes—oven temperatures vary, and you don’t want to over-bake them. The filling should be hot and bubbly.
-
Let them rest. Remove the baking sheet from the oven and let the poppers cool on the rack for 5 minutes. This is important—the filling is molten hot straight out of the oven, and biting into one too soon will burn your mouth. Trust me, I’ve done it. Five minutes is all it takes for them to cool to a safe but still warm temperature.
-
Remove toothpicks and serve. Gently pull out the toothpicks before serving. Arrange the poppers on a platter and watch them disappear.
Cooking Tips & Techniques
I’ve made these poppers more times than I can count, and I’ve learned a few things along the way. Here are my best tips for perfect results every time.
Par-cook the bacon slightly. If you’re worried about the bacon not getting crispy enough, lay the slices on a microwave-safe plate lined with paper towels and microwave for 30-45 seconds before wrapping. This renders some of the fat and gives the bacon a head start. Don’t cook it all the way through—you just want it to start sizzling.
Watch your oven temperature. 400°F is the sweet spot. Any lower, and the bacon won’t crisp up before the peppers get too soft. Any higher, and the bacon might burn before the filling is hot all the way through. If your oven runs hot, check the poppers at 18 minutes.
Don’t skip the wire rack. I know I mentioned this already, but it’s worth repeating. The rack allows hot air to circulate underneath the poppers, which means the bacon crisps up evenly on all sides. Without it, the bottoms of the poppers can end up soggy from sitting in rendered bacon fat.
Use thin-cut bacon. Thick-cut bacon might seem like a good idea, but it takes longer to cook through, which means the jalapeños end up overcooked and mushy. Thin-cut bacon crisps up perfectly in the same time it takes the peppers to soften.
One mistake I made early on: I tried to rush the cream cheese softening by microwaving it. Big mistake. The filling ended up grainy and didn’t hold together well during baking. Letting the cream cheese sit on the counter for 30 minutes makes all the difference. Plan ahead for this one small step.
Variations & Adaptations
One of the best things about this recipe is how easy it is to customize. Here are some variations I’ve tried and loved.
Spicy Sausage Poppers: Brown 1/4 pound of spicy breakfast sausage, crumble it, and mix it into the cream cheese filling. The sausage adds a savory, meaty depth that takes these poppers to another level. This is my husband’s favorite version.
Smoked Gouda & Chive: Swap the cheddar for smoked gouda and add 2 tablespoons of chopped fresh chives to the filling. The smoky flavor pairs beautifully with the bacon, and the chives add a fresh, oniony pop.
Air Fryer Method: If you have an air fryer, these poppers come out incredibly crispy. Preheat the air fryer to 375°F (190°C). Place the poppers in a single layer in the basket (you may need to work in batches). Cook for 10-12 minutes, flipping halfway through, until the bacon is crispy and the peppers are tender. No toothpicks needed since the air fryer keeps everything in place.
Vegetarian Option: Skip the bacon entirely and brush the filled jalapeños with olive oil before baking. They won’t be crispy in the same way, but they’ll be tender, flavorful, and much lighter. Bake at 375°F for about 15 minutes.
Extra Heat: Mix 1-2 teaspoons of finely chopped fresh jalapeño (from the scraps you scooped out) into the cream cheese filling. Or add a few dashes of your favorite hot sauce. I’ve used Cholula and Sriracha—both work great.
Serving & Storage Suggestions
These poppers are best served warm, right after that 5-minute resting period. The bacon is at its crispiest, the filling is still warm and creamy, and the peppers have just the right amount of tenderness. Arrange them on a platter with a small bowl of ranch dressing or blue cheese dip on the side if you want extra dipping action.
They pair beautifully with grilled meats, burgers, or as part of a larger appetizer spread. I often serve them alongside chicken wings, loaded nachos, or a big bowl of guacamole. For drinks, a cold beer or a margarita is the perfect companion—the acidity and carbonation cut through the richness beautifully.
Storage: If you have leftovers (unlikely, but possible), store them in an airtight container in the refrigerator for up to 3 days. The bacon will lose some of its crispiness, but the flavor will still be there.
Reheating: The best way to reheat these is in the oven or air fryer. Preheat to 350°F (175°C) and heat for 5-7 minutes, or until warmed through. The microwave works in a pinch, but the bacon will be soft rather than crispy. If you’re in a hurry, microwave for 30-45 seconds.
Freezing: You can freeze unbaked poppers for up to 2 months. Assemble them completely, place them on a baking sheet in a single layer, and freeze until solid. Then transfer to a freezer bag. When you’re ready to bake, add 5-10 minutes to the cooking time—no need to thaw first.
One thing I’ve noticed: these poppers actually taste even better the next day. The flavors meld together overnight, and while the bacon isn’t as crispy, the overall taste is somehow deeper and more satisfying. They’re great cold, straight from the fridge, as a snack.
Nutritional Information & Benefits
Here’s the thing about poppers—they’re indulgence food, and that’s okay. But let’s look at what you’re actually getting.
Per serving (2 poppers, based on 12 servings total):
- Calories: approximately 220
- Protein: 9g
- Fat: 18g
- Carbohydrates: 4g
- Fiber: 1g
- Sugar: 2g
- Sodium: 480mg
These numbers will vary based on the exact ingredients you use, but this gives you a general idea.
Jalapeños are actually a great source of vitamin C and capsaicin, the compound that gives them their heat. Capsaicin has been linked to boosting metabolism and reducing inflammation. The cream cheese provides calcium and protein, and the bacon adds a little extra protein too. Are these a health food? No. But they’re not as bad as you might think, especially if you use the lighter substitutions I mentioned earlier.
For those watching their carb intake, these poppers are naturally low-carb and keto-friendly. Just make sure your cream cheese is full-fat for the keto diet, and you’re good to go. They’re also gluten-free, which makes them a safe option for guests with celiac disease or gluten sensitivity.
Conclusion
These crispy bacon wrapped jalapeño poppers have become my secret weapon for every gathering. They look impressive, they taste incredible, and they’re surprisingly simple to put together. The combination of spicy pepper, creamy filling, and salty, crunchy bacon is one of those flavor trios that just works on every level.
What I love most about this recipe is how forgiving it is. You can adjust the heat, swap the cheese, change the cooking method—it always turns out delicious. It’s the kind of recipe that makes you look like you spent hours in the kitchen when really, you just followed a few simple steps and let the oven do the work.
I’d love to hear how these turn out for you. Did you try a variation? Did you add extra spice? Did they disappear as fast at your party as they do at mine? Drop a comment below and let me know. And if you share a photo on Pinterest, tag me—I love seeing your creations. Now go make some poppers. You’ve got this.
Frequently Asked Questions
Can I make these ahead of time?
Absolutely. You can assemble the poppers up to 24 hours in advance and keep them covered in the refrigerator. Just add 2-3 minutes to the baking time since they’ll be starting from cold. You can also freeze them unbaked for up to 2 months.
How do I make these less spicy?
The heat in jalapeños lives mostly in the white membranes and seeds. Be very thorough when you scoop them out, and you’ll remove most of the spice. You can also rinse the jalapeño halves under cold water after seeding to remove any remaining capsaicin. For the mildest version, look for jalapeños that are larger and have smooth skin—they tend to be milder than smaller, more wrinkled ones.
Can I use turkey bacon instead of regular bacon?
Yes, but turkey bacon doesn’t have as much fat, so it won’t get as crispy. To help it along, brush the turkey bacon slices with a little olive oil before wrapping. You’ll also want to watch the cooking time—turkey bacon can go from perfectly cooked to burnt pretty quickly.
Do I have to use toothpicks?
Not necessarily, but they help keep the bacon in place during baking, especially if you’re using a wire rack. If you’re baking directly on a foil-lined sheet, the bacon often stays put on its own. You can also try placing the poppers seam-side down on the rack so the weight of the pepper holds the bacon in place.
What if I can’t find fresh jalapeños?
Fresh jalapeños are best for this recipe because they hold their shape during baking. If you can’t find them, you can use canned or pickled jalapeño halves, but they’ll be much softer and more tangy. Drain them well and pat them dry before filling. The texture will be different, but the flavor can still be good in a pinch.
Pin This Recipe!

Best Easy Bacon Wrapped Jalapeño Poppers Recipe

These crispy bacon wrapped jalapeño poppers are the perfect appetizer for game day, backyard barbecues, or any gathering. With a creamy, cheesy filling and salty, crunchy bacon, they’re surprisingly simple to make and always a crowd-pleaser.
- Prep Time: 15 minutes
- Cook Time: 25 minutes
- Total Time: 40 minutes
- Yield: 12 servings 1x
- Category: Appetizer
- Cuisine: American
Ingredients
- 8 ounces cream cheese, softened to room temperature
- 1/2 cup shredded cheddar cheese
- 1/4 teaspoon garlic powder
- 1/4 teaspoon onion powder
- 1/4 teaspoon smoked paprika (optional)
- Salt and black pepper, to taste
- 12 fresh jalapeño peppers
- 12 slices thin-cut bacon
- Toothpicks, soaked in water for 10 minutes
Instructions
- Preheat your oven to 400°F (200°C). Place a wire rack inside a rimmed baking sheet and set aside. If not using a rack, line the baking sheet with aluminum foil.
- Wearing disposable gloves, cut each jalapeño in half lengthwise. Use a small spoon to scrape out the white membranes and seeds.
- In a small mixing bowl, combine the softened cream cheese, shredded cheddar, garlic powder, onion powder, smoked paprika (if using), and a pinch of salt and pepper. Mix until smooth.
- Fill each jalapeño half with the cream cheese mixture, level with the cut edge.
- Wrap each filled jalapeño half with one slice of bacon, starting at one end and wrapping diagonally. Secure the end with a soaked toothpick.
- Place the wrapped poppers on the wire rack, seam side down if possible, leaving space between each.
- Bake for 20-25 minutes, until the bacon is crispy and golden brown and the peppers are tender.
- Remove from the oven and let cool on the rack for 5 minutes.
- Remove toothpicks and serve warm.
Notes
Let cream cheese sit at room temperature for 30 minutes for a smooth filling. Par-cook bacon slightly (30-45 seconds in microwave) if you want extra crispiness. For milder poppers, remove all membranes and seeds thoroughly. For extra heat, mix some chopped jalapeño into the filling. Store leftovers in an airtight container in the refrigerator for up to 3 days. Reheat in oven or air fryer at 350°F for 5-7 minutes.
Nutrition
- Serving Size: 2 poppers
- Calories: 220
- Sugar: 2
- Sodium: 480
- Fat: 18
- Saturated Fat: 8
- Carbohydrates: 4
- Fiber: 1
- Protein: 9
Keywords: bacon wrapped jalapeño poppers, easy appetizer, game day snack, keto, gluten-free


