Love this? Save it for later!
Share the inspiration with your friends
It was 10:47 PM on a rainy Tuesday in October, and I had a ridiculous, specific craving for something I couldn’t quite name. Not candy corn, not pumpkin spice—something that tasted like childhood Halloweens and smelled like butter and vanilla. I didn’t have the energy for a complicated project, but I had a stick of butter sitting out, a bag of powdered sugar, and the sudden, stubborn idea that I could make sugar cookies that actually tasted good. Not just for decor, but the kind you sneak back to the kitchen for after the kids go to bed.
Honestly, most decorated sugar cookies are a letdown, right? You spend hours on them, they look like a Pinterest dream, and then you take a bite and it’s… dry. Bland. A cardboard canvas for pretty frosting. I was determined to change that, even at nearly eleven o’clock at night. I grabbed my favorite cookie scoop and decided this was happening, rainstorm and all.
I made a mess, of course. Powdered sugar ended up on the dog, and I definitely forgot to set the timer once. But when those cookies came out of the oven—golden on the edges, soft in the center—I knew I had stumbled onto something. They were perfect. Not just for Halloween, but for any day you need a little bit of magic. And the spiderweb icing? That was the happy accident that turned a late-night craving into a yearly tradition. Maybe you’ve been there, standing in your kitchen at a weird hour, just needing to make something beautiful. This recipe is for you.
Why You’ll Love This Recipe
Let me tell you why these cookies are different. I’ve tested this recipe more times than I care to admit, tweaking the butter temperature and the flour ratio until it was just right. This isn’t just another sugar cookie—it’s the one that stays soft for days, holds its shape perfectly in the oven, and tastes like a bakery treat you’d pay too much for.
- Quick & Easy: The dough comes together in under 15 minutes, and the chilling time is minimal. You can have cookies on the table in under an hour.
- Simple Ingredients: No weird extracts or specialty flours. You probably have everything in your pantry right now.
- Perfect for Halloween Parties: These cookies are showstoppers. The spiderweb design looks impressive but is surprisingly easy to pull off.
- Crowd-Pleaser: I’ve brought these to potlucks, classroom parties, and family dinners. They disappear every single time.
- Unbelievably Delicious: The texture is the real star—crisp edges with a soft, buttery center that melts in your mouth. The royal icing sets firm but doesn’t taste like glue.
What makes this recipe different is the technique. I use a secret ingredient—a tiny bit of cream cheese in the dough—that keeps the cookies tender without making them spread. It’s a trick I learned from a pastry chef friend, and honestly, it changes everything. This isn’t just another version of Halloween cookies. It’s the best version, and I’m not afraid to say it.
These cookies make you close your eyes after the first bite. They’re comfort food reimagined—faster than a trip to the bakery, but with the same soul-soothing satisfaction. Perfect for impressing guests without stress, or turning a simple Tuesday night into something memorable.
What Ingredients You Will Need
This recipe uses straightforward ingredients to create a cookie that’s anything but ordinary. Each component plays a specific role, from the fat that creates tenderness to the sugar that adds structure and sweetness.
- Unsalted Butter: 1 cup (2 sticks), softened to room temperature. I prefer using Kerrygold or Plugrà for the best flavor. The butter needs to be soft but not melted—press it with your finger, and it should leave an indent without feeling greasy.
- Cream Cheese: 2 ounces, softened. This is my secret weapon. It adds a slight tang and keeps the cookies incredibly tender. Use full-fat block cream cheese, not the spreadable kind.
- Granulated Sugar: 1 cup. Regular white sugar is perfect here. It creates those slightly crispy edges we all love.
- Large Egg: 1, at room temperature. A cold egg will seize the butter and make the dough hard to mix.
- Vanilla Extract: 2 teaspoons. Pure vanilla extract makes a difference. I use Nielsen-Massey, but any good brand works.
- All-Purpose Flour: 2 and 1/2 cups, spooned and leveled. Don’t scoop directly from the bag—you’ll end up with too much flour and dry cookies.
- Baking Powder: 1/2 teaspoon. This gives the cookies a slight lift without making them puffy.
- Salt: 1/4 teaspoon. Fine sea salt is best. It balances the sweetness.
For the Royal Icing:
- Powdered Sugar: 3 cups, sifted. Sifting is non-negotiable here. Lumps will clog your piping tip.
- Meringue Powder: 2 tablespoons. This stabilizes the icing and helps it dry hard. You can find it in the baking aisle or online.
- Warm Water: 4-5 tablespoons. The amount varies based on humidity. Start with 4 and add more as needed.
- Black Gel Food Coloring: For the spiderwebs. I prefer gel over liquid because it doesn’t thin out the icing.
- White Sparkling Sugar or Edible Glitter: Optional, but it makes the webs look magical.
Equipment Needed
You don’t need a professional bakery setup for these cookies, but having the right tools makes the process so much smoother. Here’s what I use:
- Stand Mixer or Hand Mixer: A stand mixer with the paddle attachment is ideal, but a hand mixer works perfectly fine. I’ve made these cookies with both, and honestly, the hand mixer is easier to clean.
- Large Mixing Bowls: You’ll need at least two—one for the dough and one for the icing.
- Rolling Pin: A standard rolling pin works, but I love my adjustable rolling pin with thickness rings. It ensures even cookies every time.
- Halloween Cookie Cutters: Spider, pumpkin, ghost, or bat shapes. I found a great set at Target for under $10.
- Baking Sheets: Light-colored, rimmed baking sheets are best. Dark sheets can cause the bottoms to brown too quickly.
- Parchment Paper or Silicone Baking Mats: Parchment is easier for cleanup, but silicone mats provide even heat distribution.
- Piping Bags and Tips: For the royal icing. A small round tip (size 2 or 3) is perfect for the spiderwebs. If you don’t have piping bags, a zip-top bag with a tiny corner snipped off works in a pinch.
- Cooling Rack: Essential for letting the cookies cool completely before icing. I learned this the hard way—warm cookies melt royal icing instantly.
Preparation Method
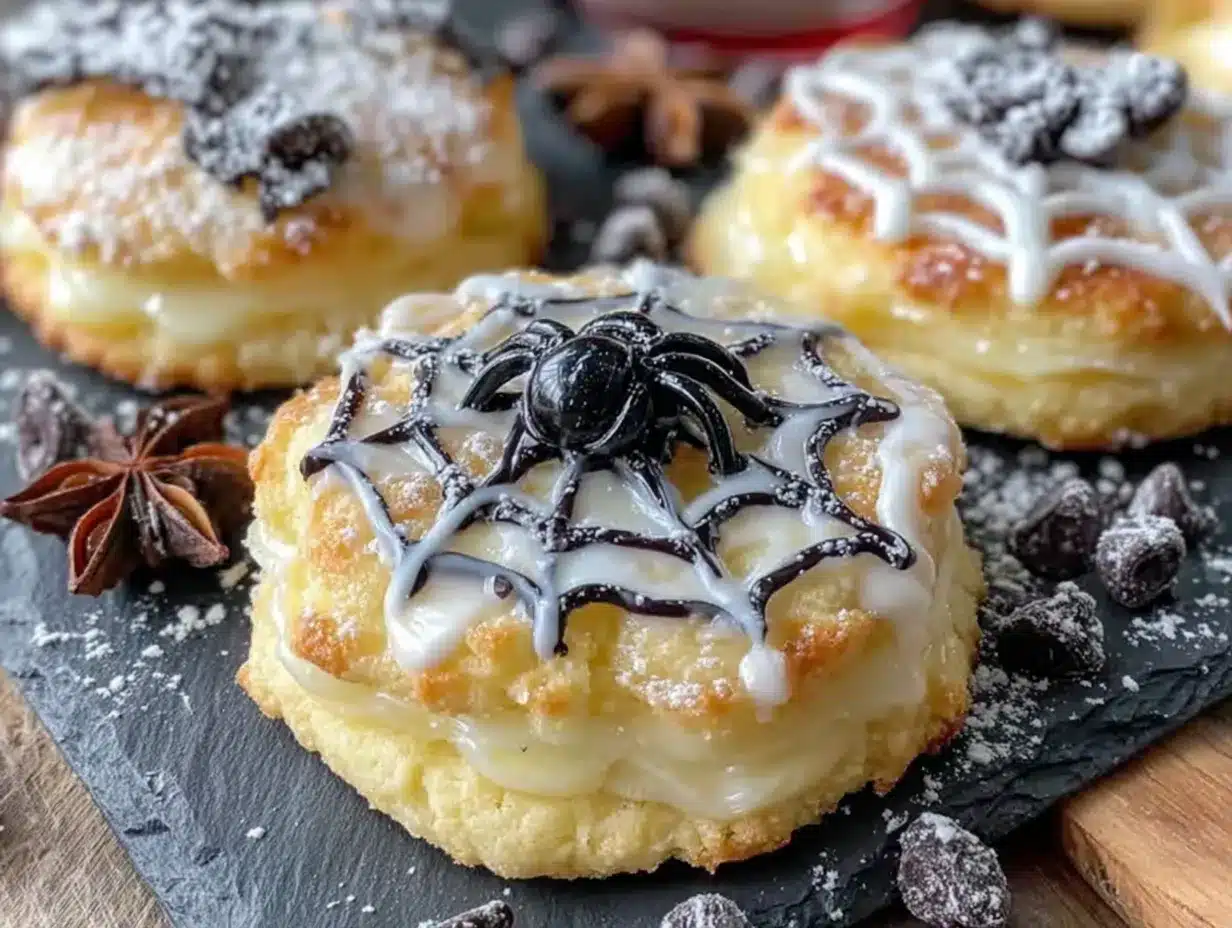
Let’s make some Halloween magic. I’ve broken this down into clear steps, with all the little tricks I’ve picked up along the way.
-
Cream the Butter and Cream Cheese. In the bowl of your stand mixer fitted with the paddle attachment, beat the softened butter and cream cheese together on medium speed until smooth and creamy—about 2 minutes. Scrape down the sides and bottom of the bowl. You want the mixture to be light and fluffy, without any lumps of cream cheese.
-
Add the Sugar. Add the granulated sugar and beat on medium-high speed for 2-3 minutes until the mixture is pale and fluffy. This step is crucial for creating those tender, melt-in-your-mouth cookies. Don’t rush it. Scrape the bowl again.
-
Incorporate the Egg and Vanilla. Add the egg and vanilla extract, then beat on medium speed until fully combined. The mixture might look slightly curdled—that’s totally normal. It will come together once you add the flour.
-
Mix the Dry Ingredients. In a separate bowl, whisk together the all-purpose flour, baking powder, and salt. This ensures the leavening agent is evenly distributed.
-
Combine Wet and Dry. With the mixer on low speed, gradually add the flour mixture to the butter mixture. Mix until just combined—overmixing will make the cookies tough. You should see a few streaks of flour remaining. Stop the mixer and fold the last bits in by hand with a rubber spatula.
-
Chill the Dough. Divide the dough in half, flatten each half into a disk, and wrap tightly in plastic wrap. Refrigerate for at least 30 minutes, or up to 3 days. Chilling is non-negotiable. It prevents the cookies from spreading and makes the dough easier to roll. I once skipped this step in a hurry, and my ghosts looked like melted snowmen.
-
Preheat and Prep. When you’re ready to bake, preheat your oven to 350°F (175°C). Line your baking sheets with parchment paper or silicone mats.
-
Roll and Cut. On a lightly floured surface, roll one disk of dough to 1/4-inch thickness. Use your Halloween cookie cutters to cut out shapes. Re-roll the scraps once—after that, the dough gets tough. Place the cutouts 2 inches apart on the prepared baking sheets.
-
Bake. Bake for 8-10 minutes, rotating the pan halfway through. The cookies are done when the edges are just barely golden. The centers will look slightly underdone—that’s what keeps them soft. Let them cool on the baking sheet for 5 minutes, then transfer to a wire rack to cool completely. Do not ice warm cookies. Trust me on this.
-
Make the Royal Icing. In the bowl of your stand mixer fitted with the whisk attachment, combine the sifted powdered sugar and meringue powder. Add 4 tablespoons of warm water and beat on low speed until combined, then increase to medium-high and beat for 5-7 minutes until the icing is thick, glossy, and forms stiff peaks. Add more water, one teaspoon at a time, if the icing is too thick. The consistency should be like toothpaste—stiff enough to hold its shape but soft enough to pipe.
-
Color the Icing. Divide the icing into two bowls. Leave one bowl white. Add black gel food coloring to the other bowl until you reach your desired shade. Transfer each color to separate piping bags fitted with small round tips.
-
Pipe the Base. Outline each cookie with the white icing, then flood the center by filling in the outline with a thinner consistency of icing. Use a toothpick to spread the icing into the corners. Let the base layer dry completely—this takes about 2 hours. I usually do this step the night before.
-
Pipe the Spiderwebs. Once the base is dry, pipe concentric circles on each cookie using the black icing. Start from the center and work your way out. Then, using a toothpick or a small knife, drag lines from the center outward through the circles to create the web pattern. Wipe the toothpick clean between each drag. This is the fun part—it looks so impressive with minimal effort.
-
Let the Icing Set. Allow the spiderweb icing to dry completely—another 2-3 hours. The royal icing will harden to a smooth, glossy finish. If you’re adding sparkling sugar or edible glitter, sprinkle it on while the black icing is still wet.
Cooking Tips & Techniques
I’ve messed up this recipe more times than I’d like to admit. Here’s everything I’ve learned so you don’t have to make the same mistakes.
Don’t Overwork the Dough. The biggest mistake people make is overmixing. Once you add the flour, mix until it just comes together. Overmixing develops gluten, which makes cookies tough and dense. I learned this the hard way when I made a batch that could have doubled as frisbees.
Chill the Dough Thoroughly. I cannot stress this enough. Chilling the dough solidifies the fat, which prevents the cookies from spreading in the oven. If you’re in a rush, pop the shaped cutouts in the freezer for 15 minutes before baking. It works like a charm.
Use a Light Hand with Flour. When rolling out the dough, use just enough flour to prevent sticking. Too much flour on the surface will dry out the cookies. I use a pastry cloth dusted lightly with flour—it keeps the dough from sticking without adding excess flour.
Rotate Your Pans. Every oven has hot spots. Rotate your baking sheets halfway through baking to ensure even browning. I forgot to do this once, and half my cookies came out darker than the other half. It was a sad Halloween.
Royal Icing Consistency is Key. The icing for outlining should be stiff enough to hold a peak. The icing for flooding should be thinner—it should flow off a spoon in a ribbon and settle into a smooth surface within 10 seconds. Add water one drop at a time to adjust the consistency. Too thin, and it will run off the cookie. Too thick, and it won’t spread.
Work in an Assembly Line. When piping the spiderwebs, pipe all the circles first, then go back and drag the lines. Working in steps keeps the icing from drying before you create the web effect. It’s faster and looks more uniform.
Variations & Adaptations
One of the best things about this recipe is how versatile it is. Here are some ways to make it your own.
Gluten-Free Version: Swap the all-purpose flour for a 1:1 gluten-free baking flour blend. I’ve tested this with Bob’s Red Mill 1-to-1 Baking Flour, and the texture is remarkably similar. Add an extra tablespoon of butter to compensate for the lack of gluten. The cookies might spread slightly more, so chill the dough for an extra 15 minutes.
Vegan Adaptation: Use vegan butter (I like Miyoko’s) and a flax egg (1 tablespoon ground flaxseed mixed with 3 tablespoons water). For the royal icing, replace the meringue powder with aquafaba—the liquid from a can of chickpeas. Whip it to stiff peaks before adding the powdered sugar. It works surprisingly well.
Different Flavors: Add 1/2 teaspoon of almond extract along with the vanilla for a subtle, nutty flavor that pairs beautifully with the butter. Or try adding the zest of one orange to the dough for a bright, citrusy twist. I made an orange version for a fall party, and people couldn’t stop talking about them.
Spooky Variations: Instead of spiderwebs, try piping simple ghosts, bats, or jack-o’-lantern faces. Use orange and purple gel colors for a different palette. You can even add candy eyes to the wet icing for a fun, kid-friendly decoration.
No Royal Icing Option: If you’re short on time, skip the royal icing altogether. Dust the cooled cookies with powdered sugar for a simple, elegant look. Or drizzle with melted white chocolate and top with Halloween sprinkles. It’s not as fancy, but it’s just as delicious.
Serving & Storage Suggestions
These cookies are best at room temperature, served with a cold glass of milk or a warm cup of spiced cider. The contrast between the crisp royal icing and the soft cookie is pure magic.
For Parties: Arrange the cookies on a platter lined with black or orange tissue paper. Add a few fake spider webs from the dollar store for extra Halloween flair. I always set out a small bowl of extra sparkling sugar for guests to sprinkle on their own cookies—it makes for a fun interactive element.
Storage: Store the decorated cookies in an airtight container at room temperature for up to 1 week. Layer them between sheets of parchment or wax paper to prevent the icing from sticking. Do not refrigerate—the humidity will soften the royal icing and make it sticky.
Freezing: You can freeze the undecorated baked cookies for up to 3 months. Wrap them tightly in plastic wrap and then in foil. Thaw at room temperature, then decorate as directed. The royal icing itself does not freeze well, so always ice after thawing. I usually bake a double batch in October and freeze half for last-minute Halloween treats.
Flavor Development: These cookies actually taste better the day after baking. The flavors meld together, and the texture becomes even more tender. If you can resist eating them all immediately, let them sit overnight in an airtight container. You’ll be rewarded with an even better cookie.
Nutritional Information & Benefits
Let’s be real—these are sugar cookies, so they’re not health food. But here’s the breakdown so you can plan accordingly.
Per Cookie (based on 24 cookies):
- Calories: 185
- Fat: 8g
- Carbohydrates: 27g
- Protein: 2g
- Sugar: 18g
Health Highlights: The cream cheese adds a small amount of protein and calcium. The butter provides vitamin A. And honestly, the biggest benefit is the joy these cookies bring. Halloween is about treats and celebration, and there’s something to be said for the mental health boost of creating something beautiful and sharing it with people you love.
Dietary Considerations: This recipe contains dairy, eggs, and gluten. For vegan and gluten-free options, see the variations section above. The royal icing is naturally dairy-free and egg-free when made with meringue powder (which is pasteurized egg whites).
Allergen Notes: If you’re serving these at a party, be aware that they contain common allergens. I always label the platter clearly when bringing them to school events or potlucks.
Conclusion
These Halloween sugar cookies are more than just a pretty face—they’re genuinely delicious, surprisingly easy to make, and endlessly customizable. Whether you’re a seasoned baker or a total beginner, this recipe will make you look like a pro. The spiderweb design is impressive enough to steal the show at any Halloween gathering, but simple enough that you can whip up a batch on a weeknight.
I love this recipe because it captures everything I want in a holiday treat: nostalgia, creativity, and pure, buttery deliciousness. It’s the kind of recipe that becomes a tradition—the one your kids will ask for year after year, the one you’ll pull out when you need a little bit of Halloween magic in your life.
Now I want to hear from you. Have you tried these cookies? Did you come up with your own spiderweb design or try a different variation? Drop a comment below and share your creations. Tag me on Pinterest with your photos—I love seeing what you make. And if you have a friend who needs a little Halloween inspiration, share this post with them. Happy baking, and have a spooktacular Halloween!
Frequently Asked Questions
Can I make the dough ahead of time?
Absolutely. The dough can be refrigerated for up to 3 days or frozen for up to 3 months. If freezing, wrap the dough disks tightly in plastic wrap and place them in a freezer bag. Thaw overnight in the refrigerator before rolling and cutting.
Why did my cookies spread in the oven?
This usually happens for one of three reasons: the dough wasn’t chilled long enough, the butter was too soft, or the baking sheet was warm when you placed the cookies on it. Make sure your dough is thoroughly chilled, and use cool baking sheets. If you’re baking multiple batches, let the sheets cool completely between batches.
Can I use liquid food coloring for the royal icing?
I don’t recommend it. Liquid food coloring will thin out the icing and make it harder to pipe. Gel or paste food coloring is much better because it adds color without changing the consistency. I use Wilton or Americolor gels—they’re vibrant and easy to find.
How do I get the royal icing to dry faster?
Royal icing dries best in a cool, dry environment. Avoid humid days if possible. You can use a fan to circulate air around the cookies, but don’t point it directly at them—it can cause the icing to crack. Some bakers use a dehydrator on the lowest setting, but I’ve never needed to. Patience is key here.
Can I use a different icing for the spiderwebs?
Yes, but royal icing is the best choice because it dries hard and holds its shape. You can use a simple powdered sugar glaze, but it won’t set as firmly and might smudge. Melted chocolate or candy melts also work well for the spiderweb design—just pipe them directly onto the baked cookies without a base layer.
Pin This Recipe!
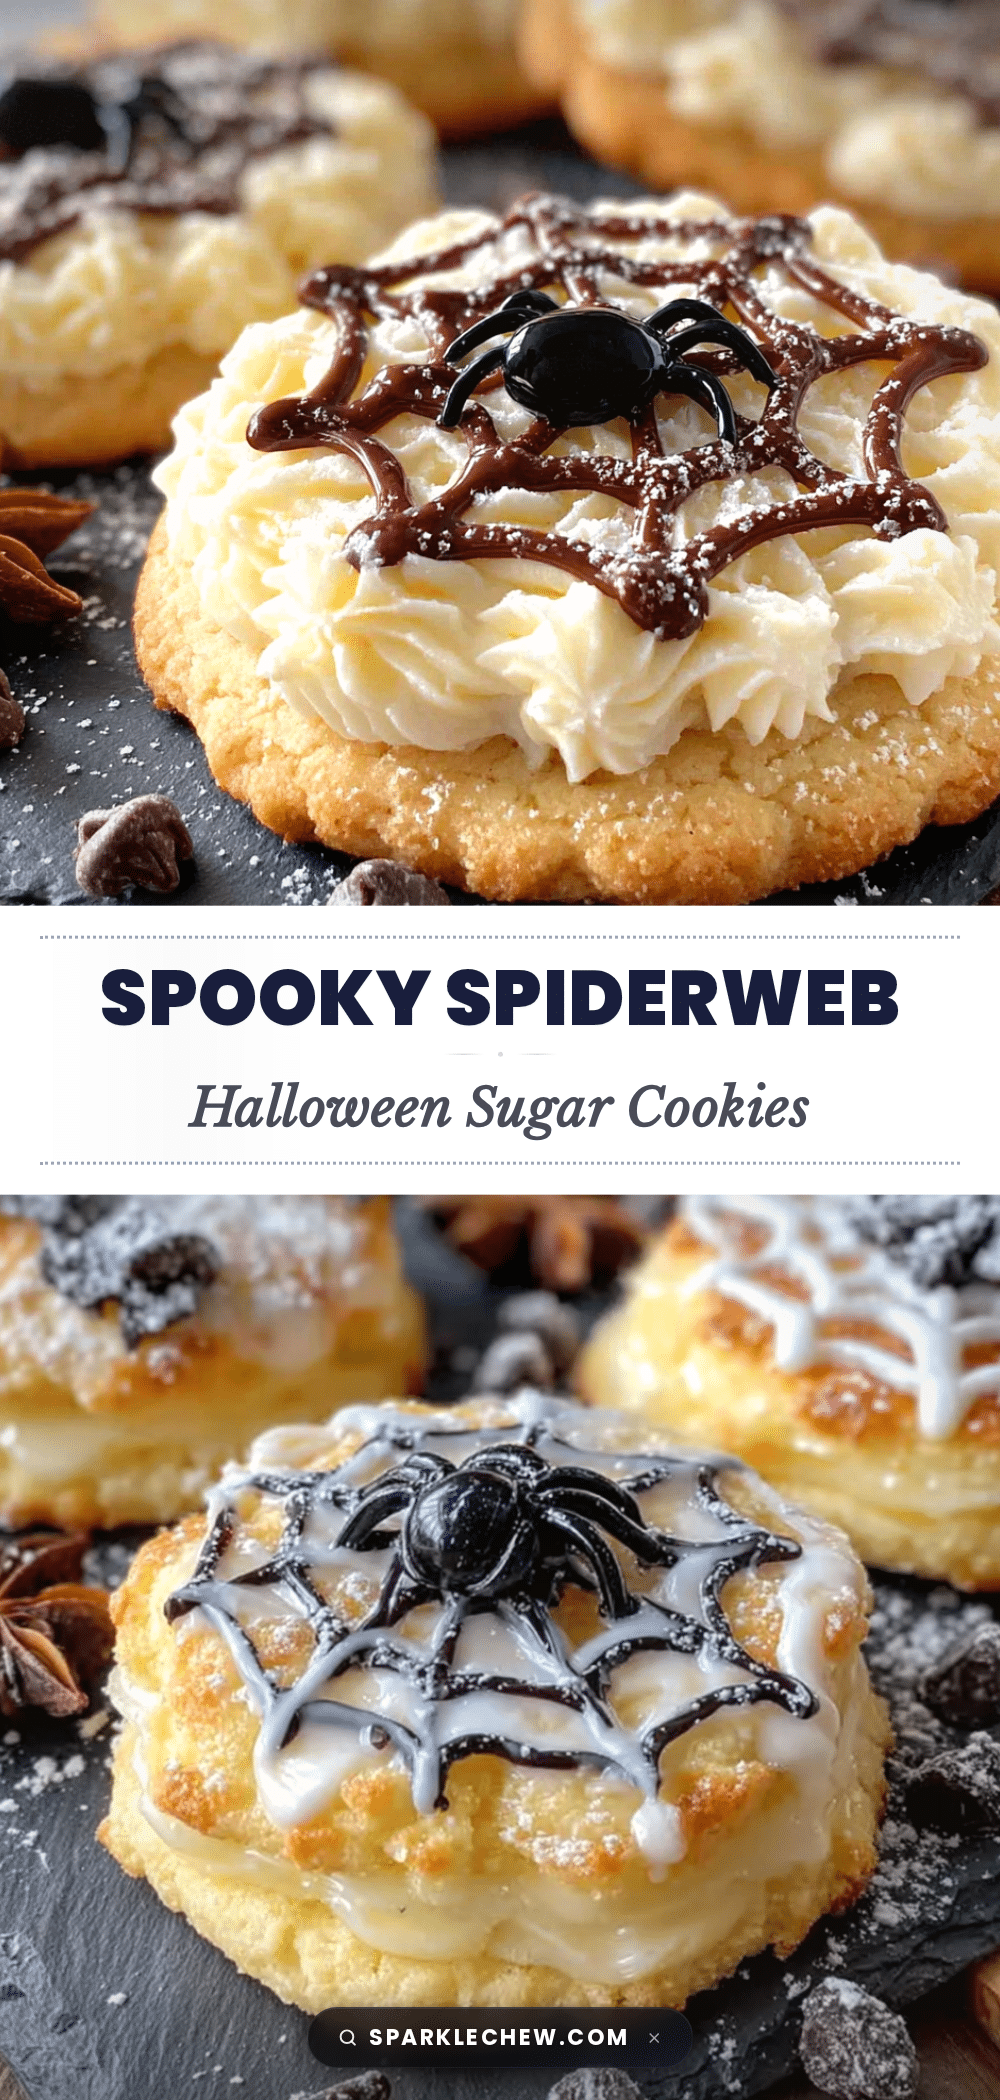
Perfect Halloween Sugar Cookies with Royal Icing Spiderwebs

These soft, buttery sugar cookies are the perfect Halloween treat, featuring a secret ingredient for tenderness and a stunning spiderweb royal icing design that’s surprisingly easy to create.
- Prep Time: 15 minutes
- Cook Time: 10 minutes
- Total Time: 25 minutes (plus chilling and drying time)
- Yield: 24 cookies 1x
- Category: Dessert
- Cuisine: American
Ingredients
- 1 cup (2 sticks) unsalted butter, softened
- 2 ounces cream cheese, softened
- 1 cup granulated sugar
- 1 large egg, at room temperature
- 2 teaspoons vanilla extract
- 2 and 1/2 cups all-purpose flour, spooned and leveled
- 1/2 teaspoon baking powder
- 1/4 teaspoon fine sea salt
- 3 cups powdered sugar, sifted
- 2 tablespoons meringue powder
- 4–5 tablespoons warm water
- Black gel food coloring
- White sparkling sugar or edible glitter (optional)
Instructions
- Cream the butter and cream cheese together in a stand mixer with paddle attachment on medium speed until smooth and creamy, about 2 minutes. Scrape down the sides.
- Add the granulated sugar and beat on medium-high speed for 2-3 minutes until pale and fluffy. Scrape the bowl again.
- Add the egg and vanilla extract, beating on medium speed until fully combined. The mixture may look slightly curdled.
- In a separate bowl, whisk together the flour, baking powder, and salt.
- With the mixer on low speed, gradually add the flour mixture to the butter mixture, mixing until just combined. Fold in any remaining flour by hand with a rubber spatula.
- Divide the dough in half, flatten each half into a disk, and wrap tightly in plastic wrap. Refrigerate for at least 30 minutes or up to 3 days.
- Preheat oven to 350°F (175°C). Line baking sheets with parchment paper or silicone mats.
- On a lightly floured surface, roll one disk of dough to 1/4-inch thickness. Cut out shapes with Halloween cookie cutters. Place cutouts 2 inches apart on prepared baking sheets.
- Bake for 8-10 minutes, rotating the pan halfway through, until edges are just barely golden. Cool on baking sheet for 5 minutes, then transfer to a wire rack to cool completely.
- Make the royal icing: In a stand mixer with whisk attachment, combine sifted powdered sugar and meringue powder. Add 4 tablespoons warm water and beat on low, then increase to medium-high and beat for 5-7 minutes until thick, glossy, and forms stiff peaks. Add more water, 1 teaspoon at a time, if needed.
- Divide the icing into two bowls. Leave one white. Add black gel food coloring to the other bowl until desired shade. Transfer each color to separate piping bags fitted with small round tips.
- Pipe the base: Outline each cookie with white icing, then flood the center with a thinner consistency. Use a toothpick to spread into corners. Let dry completely, about 2 hours.
- Pipe the spiderwebs: Pipe concentric circles on each cookie with black icing, starting from the center. Use a toothpick to drag lines from the center outward through the circles to create the web pattern. Wipe toothpick clean between each drag.
- Let the icing set completely, another 2-3 hours. If using, sprinkle sparkling sugar or edible glitter on the wet black icing.
Notes
Chill the dough thoroughly to prevent spreading. Do not overmix the dough. Royal icing consistency is key: outline icing should be stiff, flooding icing should flow like a ribbon. Work in an assembly line for spiderwebs. Cookies taste even better the next day.
Nutrition
- Serving Size: 1 cookie
- Calories: 185
- Sugar: 18
- Sodium: 75
- Fat: 8
- Saturated Fat: 5
- Carbohydrates: 27
- Protein: 2
Keywords: Halloween sugar cookies, spiderweb cookies, royal icing, soft sugar cookies, Halloween dessert, decorated cookies


