Love this? Save it for later!
Share the inspiration with your friends
I was folding laundry last Tuesday—a truly riveting activity, let me tell you—when the smell of garlic and parmesan from my neighbor’s apartment drifted through the wall. It hit me so hard I almost dropped the sock I was holding. Suddenly I was twenty-two, standing in my first tiny kitchen with a broken oven knob, trying to convince myself I could cook something that didn’t come from a box. That neighbor, Mrs. Gable, was always making something that smelled like pure comfort. She never gave me the recipe, just tapped her nose and winked. I’ve spent years trying to recreate that exact moment—the crispy skin, the salty kick, the way the whole apartment felt warmer when she was cooking. Honestly? I think I’ve finally nailed it. And the best part is I can do it in the air fryer in under twenty minutes, which means I get that feeling without the broken oven knob. Maybe you’ve had that moment too—where a single smell takes you somewhere you didn’t know you missed.
Why You’ll Love This Recipe
Let me be real with you—I’ve tested this recipe at least seven times to get the texture just right. The first batch came out soggy. The second was too dry. But the third? That was the one where I actually yelled “yes!” in my kitchen. Here’s why this version works so well:
- Quick & Easy: From fridge to plate in about 20 minutes. Perfect for those nights when you forgot to thaw anything.
- Simple Ingredients: You probably have garlic powder, parmesan, and chicken thighs in your kitchen right now. No fancy trips needed.
- Perfect for Busy Weeknights: This is the dinner that saves you from ordering takeout for the third time this week.
- Crowd-Pleaser: My picky-eating nephew actually asked for seconds. That never happens.
- Unbelievably Crispy: The air fryer gives you that golden, crunchy skin without the mess of deep frying. It’s kind of magic, honestly.
What makes this different from every other air fryer chicken recipe out there? It’s the garlic parmesan crust. Most recipes just sprinkle cheese on top and hope for the best. I’ve found a way to get that crust to actually stick and crisp up into something you can hear when you bite into it. It’s not just another version—it’s the version I actually make for myself when I want comfort food that doesn’t take all evening. The kind that makes you close your eyes after the first bite and forget about that email you still need to send.
What Ingredients You Will Need
This recipe uses simple, honest ingredients to deliver that crispy, savory goodness without any fuss. Most of these are probably already in your pantry or fridge, which is exactly how I like to cook.
For the Chicken
- 4 bone-in, skin-on chicken thighs (about 1.5 pounds total) — the skin is crucial for that crispy texture we’re chasing
- 1 tablespoon olive oil — helps the seasoning stick and encourages browning
- 1 teaspoon salt — I prefer kosher salt for better distribution
- 1/2 teaspoon black pepper — freshly ground if you have it
- 1 teaspoon garlic powder — not garlic salt, we’re controlling the sodium here
- 1/2 teaspoon onion powder — adds depth without being overpowering
- 1/2 teaspoon paprika — gives that beautiful golden color (smoked paprika works great too)
For the Garlic Parmesan Crust
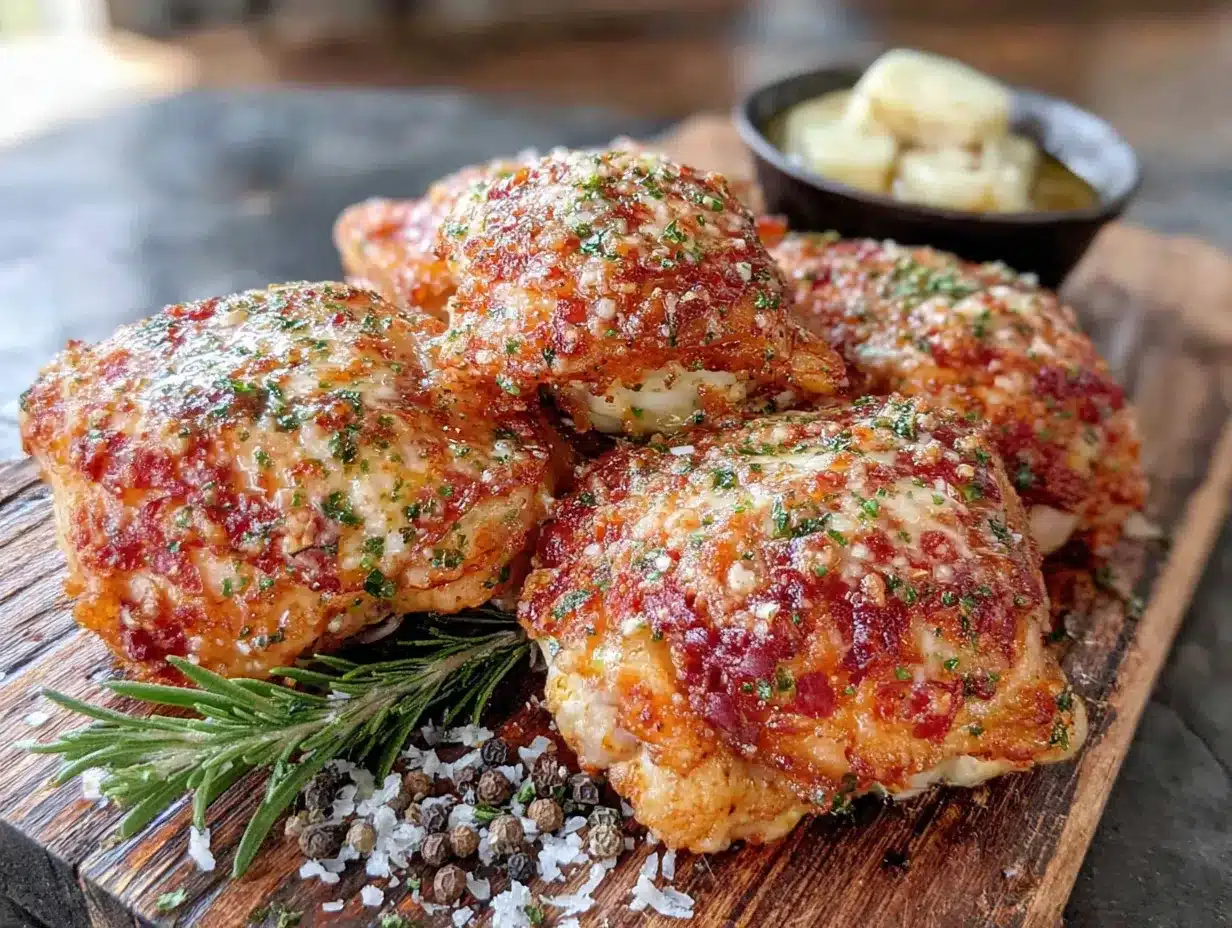
- 1/3 cup grated parmesan cheese — the real stuff from a block, not the green can (trust me on this)
- 2 cloves garlic, minced — fresh garlic makes a huge difference here
- 2 tablespoons melted butter — unsalted is best so we don’t oversalt
- 1 tablespoon fresh parsley, chopped — for color and freshness (optional but recommended)
I always use Kirkland Signature parmesan from Costco because it grates beautifully and melts evenly. If you’re using pre-shredded cheese, just know it won’t stick as well because of the anti-caking agents. For the garlic, I’ve tried jarred minced garlic in a pinch, and it works okay, but fresh cloves give you that punchy flavor that makes this recipe special. If you don’t have bone-in thighs, boneless will work—just reduce the cooking time by about 5 minutes and watch them closely.
Equipment Needed
You don’t need a professional kitchen for this. Here’s what I use:
- Air fryer — any brand works; I use a 5.8-quart Cosori and it handles four thighs perfectly
- Small bowl — for mixing the seasoning blend
- Medium bowl — for the garlic parmesan mixture
- Tongs — for flipping the chicken without burning your fingers
- Meat thermometer — this is non-negotiable for me; I’ve ruined too many batches guessing
- Cutting board and knife — for mincing garlic and chopping parsley
- Paper towels — for patting the chicken dry (this step matters more than you think)
If you don’t have an air fryer, you can use a convection oven set to 400°F, but the cooking time will be longer—about 25-30 minutes. I’ve also tried this in a regular oven, and honestly, the texture just isn’t the same. The air fryer’s circulating air is what gives you that shatteringly crispy skin. A good meat thermometer costs about $15 and will save you from serving dry chicken. Worth every penny.
Preparation Method
Alright, let’s get cooking. I’ve broken this down so even if you’re new to air fryers, you’ll nail it on the first try.
- Pat the chicken thighs dry with paper towels. This is the most important step—wet skin won’t crisp up. I learned this the hard way with my first soggy batch. Really get in there and make sure they’re dry on all sides.
- Season the chicken. In a small bowl, mix together the salt, pepper, garlic powder, onion powder, and paprika. Drizzle the olive oil over the chicken thighs, then rub the seasoning blend all over—under the skin too if you can. Let them sit at room temperature for about 10 minutes while you preheat the air fryer to 380°F (193°C).
- Make the garlic parmesan mixture. While the chicken rests, combine the grated parmesan, minced garlic, melted butter, and chopped parsley in a medium bowl. Stir until it forms a thick paste. It should smell amazing already—that’s a good sign.
- Preheat the air fryer to 380°F (193°C) for 3 minutes. I know some recipes skip this, but preheating gives you that immediate sear that locks in flavor.
- Arrange the chicken in the air fryer basket skin-side down. Don’t overcrowd—leave space between each thigh so the air can circulate. If your air fryer is smaller, cook in batches. I can fit four thighs comfortably in my 5.8-quart basket.
- Cook for 10 minutes at 380°F. You’ll hear that satisfying sizzle almost immediately. Don’t open the basket to check too early—let the heat do its thing.
- Flip the chicken using tongs. Now it’s skin-side up. Spread the garlic parmesan mixture evenly over the top of each thigh. Don’t be shy with it—this is where all the flavor lives.
- Cook for another 8-10 minutes at 380°F. The internal temperature should reach 165°F (74°C) when measured at the thickest part without touching bone. The skin should be golden brown and bubbling where the parmesan has melted.
- Let them rest for 5 minutes before serving. I know it’s hard to wait, but this lets the juices redistribute so every bite is tender and moist.
A quick note: if your chicken thighs are particularly large (over 6 ounces each), add 2-3 minutes to the cooking time. If they’re on the smaller side, check them at the 16-minute mark. Every air fryer runs a little differently, so trust your thermometer more than the timer.
Cooking Tips & Techniques
I’ve made every mistake you can imagine with air fryer chicken, so let me save you some trouble. Here’s what I’ve learned:
Don’t skip drying the skin. This is the number one mistake people make. I once thought “it’s fine, the air fryer will crisp it anyway.” It won’t. Wet skin steams instead of crisps. Use paper towels and really press them dry.
Season under the skin too. Most recipes just season the outside. Gently lift the skin with your fingers (carefully—it tears easily) and rub some seasoning directly onto the meat. This gives you flavor in every bite, not just on the surface.
Watch the parmesan. Parmesan burns faster than you think. That’s why I add it halfway through cooking—if you put it on at the beginning, it’ll be black and bitter by the time the chicken is done. I learned this when my first batch looked like charcoal briquettes with chicken inside.
Let the air fryer breathe. Don’t pack the basket full. If the pieces are touching, the skin won’t crisp where they overlap. I’ve made this mistake when cooking for company, and I ended up with half-crispy, half-soggy chicken. Cook in batches if you need to.
Resting matters. I know you’re hungry. I know it smells incredible. But cutting into that chicken right away will send all those juices running onto your plate, leaving you with dry meat. Five minutes. Set a timer if you have to.
Variations & Adaptations
Once you’ve mastered the basic recipe, here are some ways to mix it up:
Spicy Buffalo Version: Skip the parmesan mixture and toss the cooked chicken in a mixture of melted butter and hot sauce (Frank’s RedHot is my go-to). Serve with ranch or blue cheese dressing. I made this for game day once and it disappeared in ten minutes.
Lemon Herb Version: Add the zest of one lemon and a teaspoon of dried thyme to the seasoning blend. Swap the parsley for fresh rosemary. The lemon cuts through the richness of the chicken beautifully—perfect for spring dinners.
Keto-Friendly Adaptation: This recipe is already low-carb, but you can amp up the fat by adding an extra tablespoon of butter and using more parmesan. I’ve also experimented with adding crushed pork rinds to the parmesan mixture for even more crunch. It works surprisingly well.
Dairy-Free Version: Use nutritional yeast instead of parmesan (about 2 tablespoons) and olive oil instead of butter. The texture won’t be quite the same, but the flavor is still excellent. My dairy-intolerant friend approved this version.
Honey Garlic Version: Add 1 tablespoon of honey to the garlic butter mixture before spreading it on the chicken. The sweetness balances the saltiness and creates a gorgeous glaze. Just watch it closely in the last few minutes—honey can burn quickly.
Serving & Storage Suggestions
These chicken thighs are versatile enough for any occasion. Here’s how I serve and store them:
Serving Temperature: Serve hot, straight from the air fryer. That crispy skin is at its best within the first 15 minutes. If you’re serving a crowd, keep them warm in a 200°F oven on a wire rack (not on a plate, or the bottom will steam).
What to Serve With: I love these with a simple arugula salad dressed with lemon vinaigrette—the peppery greens cut through the richness. Roasted asparagus or green beans work beautifully too. For a heartier meal, serve over garlic mashed potatoes or with crusty bread to soak up the juices. And honestly? They’re incredible cold the next day, sliced over a lunch salad.
Storage: Store leftovers in an airtight container in the refrigerator for up to 4 days. The skin will soften as they sit, but don’t worry—you can fix that.
Reheating: The air fryer is your best friend here. Reheat at 350°F for 3-4 minutes, and the skin will crisp right back up. The microwave will make them soggy, so avoid it if you can. I’ve also reheated them in a skillet with a little butter—not as crispy as the air fryer, but still delicious.
Freezing: Cooked chicken thighs freeze well for up to 3 months. Wrap each thigh individually in plastic wrap, then place in a freezer bag. Thaw overnight in the refrigerator and reheat in the air fryer. The flavor stays great, but the texture won’t be quite as perfect as fresh.
Nutritional Information & Benefits
Here’s the approximate nutritional breakdown per serving (one chicken thigh with garlic parmesan crust):
- Calories: 320
- Protein: 28g
- Fat: 22g
- Carbohydrates: 2g
- Fiber: 0g
- Sugar: 0g
Chicken thighs are actually more nutrient-dense than chicken breasts in some ways. They contain more iron, zinc, and B vitamins, plus they stay juicier during cooking because of their higher fat content. The parmesan adds calcium and protein, while garlic brings allicin—a compound known for its immune-supporting properties.
This recipe is naturally low-carb and gluten-free, making it suitable for keto, paleo, and whole30 diets (just skip the parmesan for whole30). It’s also nut-free and egg-free. The only potential allergen is dairy from the butter and parmesan, but as I mentioned, you can easily make it dairy-free.
I’m not a nutritionist, but I’ve learned to pay attention to how food makes me feel. This meal leaves me satisfied without feeling heavy—the kind of dinner that fuels you for the evening without sending you into a food coma.
Conclusion
Look, I know there are a million air fryer chicken recipes out there. I’ve tried a bunch of them. But this one—crispy, garlicky, parmesan-crusted, ready in 20 minutes—this is the one I keep coming back to. It’s the recipe I make when I’m tired, when I’m busy, when I want something that feels special without the effort of a Sunday roast.
What I love most about it is how forgiving it is. You don’t need to be a perfect cook. You don’t need fancy equipment. You just need chicken, some pantry staples, and an air fryer that’s willing to do the hard work for you. The first time I made this, I forgot to pat the chicken dry. The second time, I burned the parmesan. The third time, I got it right—and it was worth every mistake along the way.
So here’s my invitation to you: try this recipe this week. Customize it however you like—spicy, herby, honey-glazed, whatever calls to you. And when you make it, I’d love to hear how it turned out. Drop a comment below, share your twist on it, or just tell me if you managed to resist eating it straight from the air fryer basket (I certainly didn’t). Happy cooking, friends!
Frequently Asked Questions
Can I use boneless, skinless chicken thighs?
Yes, but the texture will be different. Boneless thighs cook faster (about 12-15 minutes total) and won’t have that crispy skin we’re going for. You’ll still get great flavor from the garlic parmesan crust, though. Just reduce the cooking time and check for doneness earlier.
Why is my chicken skin not getting crispy?
Most likely, you didn’t pat it dry enough before seasoning. Moisture is the enemy of crispiness. Also, make sure you’re not overcrowding the air fryer basket—the pieces need space for air to circulate. And don’t skip the preheating step; a hot start makes a big difference.
Can I make this recipe ahead of time?
You can season the chicken and prepare the garlic parmesan mixture up to 24 hours in advance. Store them separately in the refrigerator. When you’re ready to cook, just follow the instructions as written. The cooked chicken is best fresh, but leftovers reheat beautifully in the air fryer.
What if I don’t have an air fryer?
You can bake these in a conventional oven at 400°F for 25-30 minutes. Place the chicken on a wire rack set over a baking sheet to allow air circulation underneath. The skin won’t be quite as crispy as the air fryer version, but it’ll still be delicious. A convection oven setting will give you better results.
How do I know when the chicken is fully cooked?
Use a meat thermometer! Insert it into the thickest part of the thigh without touching the bone. The USDA recommends an internal temperature of 165°F (74°C). Don’t rely on color or juices running clear—those methods aren’t reliable. A $15 thermometer will save you from both undercooked and overcooked chicken.
Pin This Recipe!
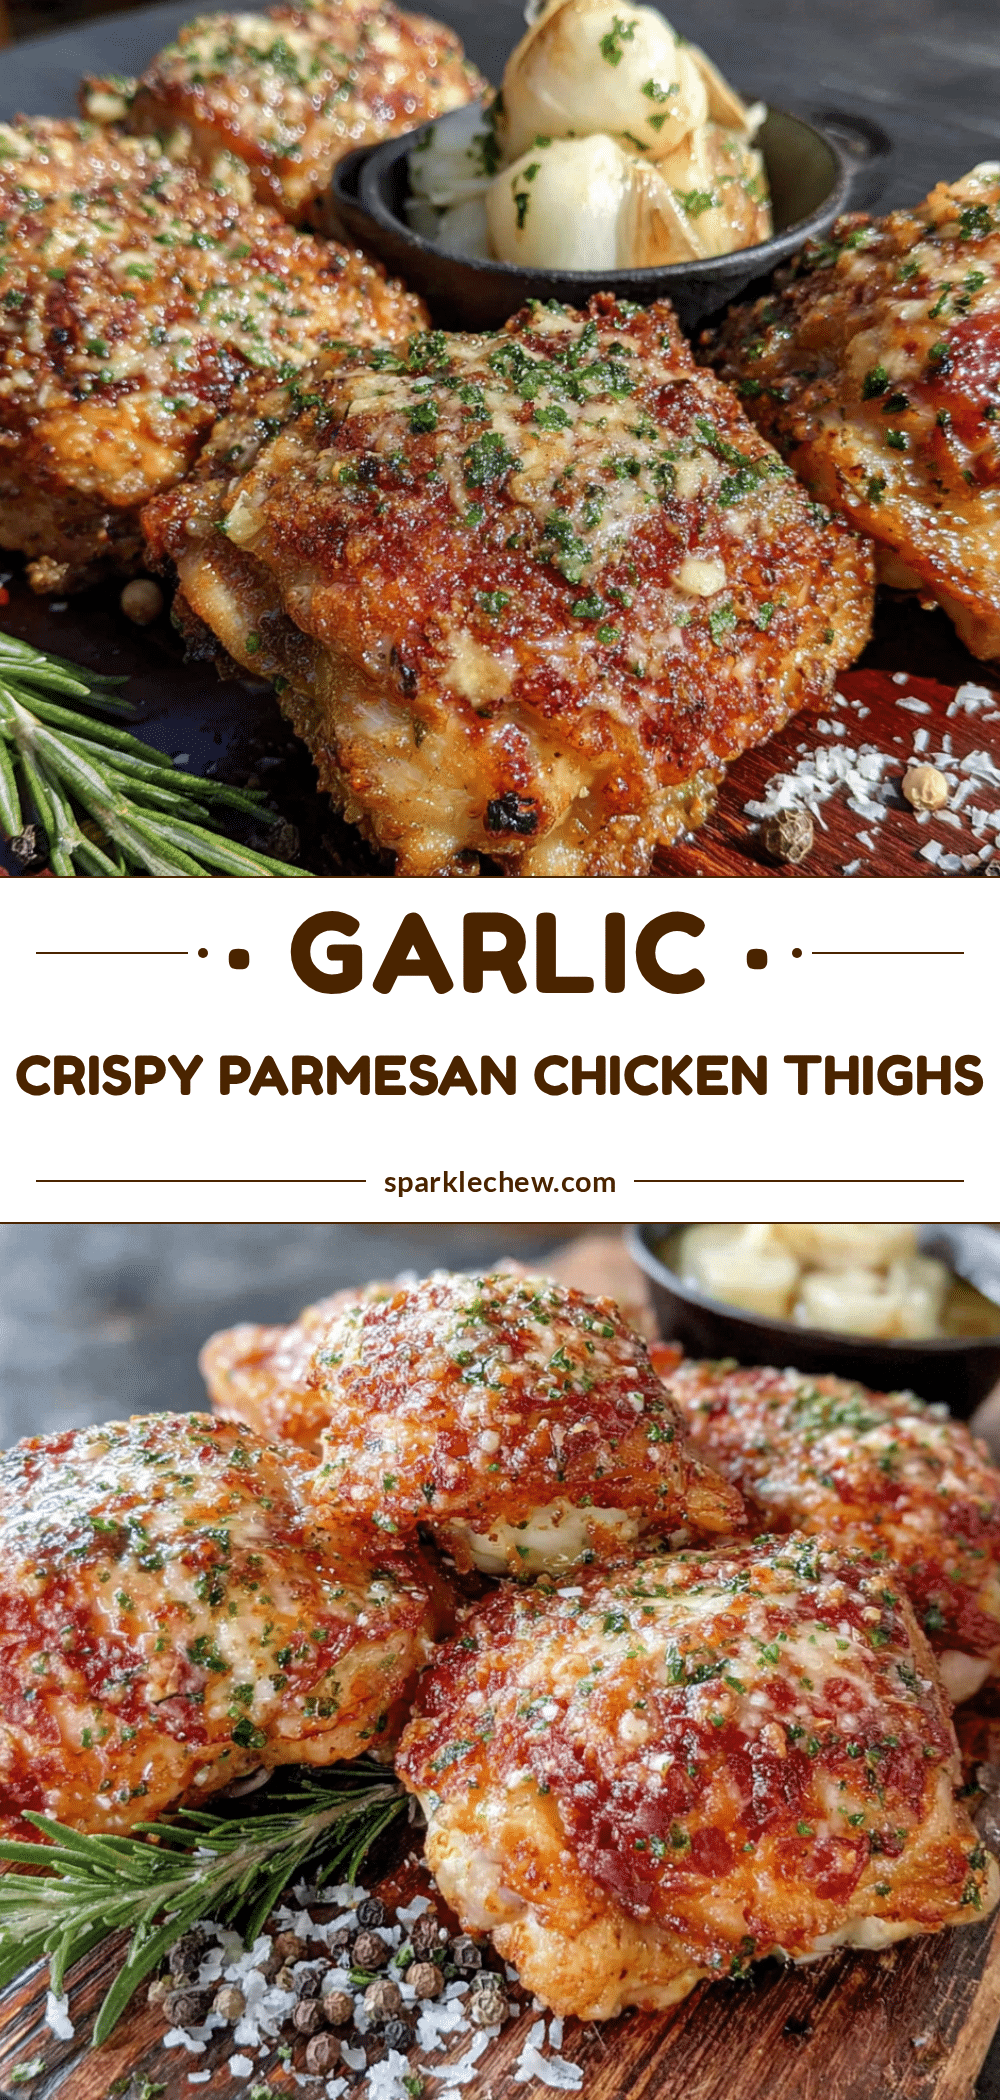
Crispy Air Fryer Chicken Thighs with Garlic Parmesan

Crispy, garlicky, parmesan-crusted chicken thighs ready in 20 minutes in the air fryer. Perfect for busy weeknights, this recipe delivers golden, crunchy skin without the mess of deep frying.
- Prep Time: 10 minutes
- Cook Time: 18-20 minutes
- Total Time: 28-30 minutes
- Yield: 4 servings 1x
- Category: Main Course
- Cuisine: American
Ingredients
- 4 bone-in, skin-on chicken thighs (about 1.5 pounds total)
- 1 tablespoon olive oil
- 1 teaspoon kosher salt
- 1/2 teaspoon black pepper, freshly ground
- 1 teaspoon garlic powder
- 1/2 teaspoon onion powder
- 1/2 teaspoon paprika (smoked paprika works great too)
- 1/3 cup grated parmesan cheese (from a block)
- 2 cloves garlic, minced
- 2 tablespoons unsalted butter, melted
- 1 tablespoon fresh parsley, chopped (optional)
Instructions
- Pat the chicken thighs dry with paper towels. This is the most important step—wet skin won’t crisp up.
- In a small bowl, mix together the salt, pepper, garlic powder, onion powder, and paprika. Drizzle the olive oil over the chicken thighs, then rub the seasoning blend all over—under the skin too if you can. Let them sit at room temperature for about 10 minutes while you preheat the air fryer to 380°F (193°C).
- While the chicken rests, combine the grated parmesan, minced garlic, melted butter, and chopped parsley in a medium bowl. Stir until it forms a thick paste.
- Preheat the air fryer to 380°F (193°C) for 3 minutes.
- Arrange the chicken in the air fryer basket skin-side down. Don’t overcrowd—leave space between each thigh so the air can circulate.
- Cook for 10 minutes at 380°F.
- Flip the chicken using tongs. Now it’s skin-side up. Spread the garlic parmesan mixture evenly over the top of each thigh.
- Cook for another 8-10 minutes at 380°F. The internal temperature should reach 165°F (74°C) when measured at the thickest part without touching bone.
- Let them rest for 5 minutes before serving.
Notes
Don’t skip drying the skin—wet skin steams instead of crisps. Season under the skin too for flavor in every bite. Add the parmesan mixture halfway through cooking to prevent burning. Don’t overcrowd the air fryer basket; cook in batches if needed. Let the chicken rest for 5 minutes before serving to keep it juicy. For larger thighs (over 6 ounces each), add 2-3 minutes to cooking time. For smaller thighs, check at 16 minutes.
Nutrition
- Serving Size: 1 chicken thigh with
- Calories: 320
- Sodium: 620
- Fat: 22
- Saturated Fat: 8
- Carbohydrates: 2
- Protein: 28
Keywords: air fryer chicken thighs, garlic parmesan chicken, crispy chicken thighs, easy chicken recipe, weeknight dinner, low-carb chicken, gluten-free chicken


