Love this? Save it for later!
Share the inspiration with your friends
I was at my local apple orchard last October, juggling a bag of Honeycrisps and trying to pay, when the woman behind me—a retired schoolteacher named Margaret with flour on her sweater—started talking about apple fritter bread. Not just any apple fritter bread, mind you. She described a version she’d been tweaking for years, one that had the same sticky-sweet, cinnamon-swirled magic of a real fritter but didn’t leave you feeling like you needed a nap afterward. I wasn’t expecting baking advice from a stranger in a checkout line, but there I was, holding my change, listening to her explain exactly how to make a lighter version that still tasted like a bakery treat.
Margaret told me her secret was swapping out half the oil for unsweetened applesauce and using a touch of whole wheat pastry flour. She scribbled the rough recipe on the back of a receipt, and honestly, I almost lost it in my car between the seat and the console. But I found it, and I’ve been making this Lighter Maple Glazed Apple Fritter Bread ever since. It’s the kind of bread that fills your kitchen with that cozy, spiced smell that makes everyone wander in asking, “What’s baking?”
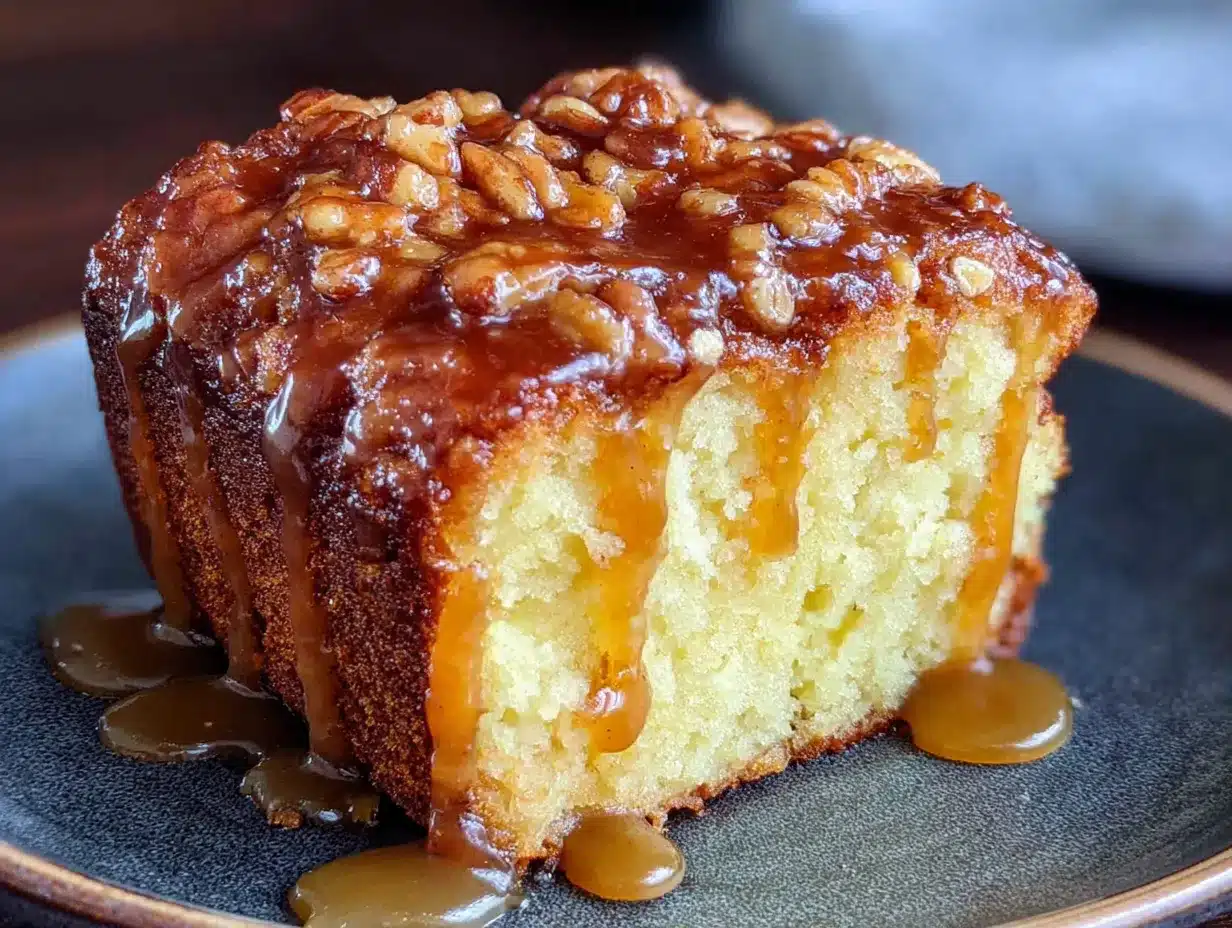
This isn’t just another quick bread. It’s got tender chunks of apple in every bite, a ribbon of brown sugar and cinnamon running through the middle, and that glossy maple glaze on top that pools into all the nooks and crannies. Maybe you’ve been searching for a fall recipe that feels indulgent but doesn’t wreck your healthy eating goals. I get it. This one fits the bill perfectly. It’s become my go-to for weekend mornings, and I think it’s about to become yours too.
Why You’ll Love This Recipe
Let me tell you why this Lighter Maple Glazed Apple Fritter Bread has earned a permanent spot in my recipe rotation. After testing it at least six times—yes, six—I can confidently say it delivers on every promise. Here’s what makes it special:
- Quick & Easy: You don’t need a stand mixer or any fancy gadgets. Just two bowls, a whisk, and about 15 minutes of hands-on time. The oven does the rest.
- Simple Ingredients: No weird flours or hard-to-find items. You probably have most of this in your pantry right now, especially if you’re a fall baker.
- Perfect for Fall Mornings: This bread screams “cozy Sunday” or “impromptu brunch with friends.” It’s also fantastic for Thanksgiving morning while the turkey prep begins.
- Crowd-Pleaser: I brought this to a potluck last month, and three people asked for the recipe before I even sat down. Kids love the sweetness, adults love the texture.
- Unbelievably Delicious: The texture is where this bread shines. It’s moist but not dense, with tender apple pieces that melt into the crumb. The maple glaze is the perfect finishing touch—not too sweet, just right.
What sets this apart from other apple breads? It’s the way the fritter-inspired swirl works. Most apple breads just mix the fruit into the batter, but this one layers half the batter, then a cinnamon-sugar apple mixture, then more batter on top. That creates a ribbon of spiced goodness right through the middle, mimicking the gooey center of a real apple fritter. Plus, using applesauce and a bit of yogurt keeps it light without sacrificing moisture. I’ve had friends tell me it tastes “decadent but not heavy,” which is exactly the balance I was after.
This recipe isn’t just good—it’s the kind that makes you close your eyes after the first bite. It’s comfort food reimagined: healthier, faster, but with the same soul-soothing satisfaction. Perfect for impressing guests without stress, or turning a simple fall morning into something memorable.
What Ingredients You Will Need
This recipe uses simple, wholesome ingredients to deliver bold flavor and satisfying texture without the fuss. Most are pantry staples, and I’ve included notes on substitutions where they work well.
For the Apple Filling & Swirl
- 2 medium apples, peeled, cored, and diced small (I prefer Honeycrisp or Fuji for sweetness that holds up during baking; Granny Smith works for a tarter contrast)
- 2 tablespoons light brown sugar, packed (adds caramel-like sweetness; coconut sugar works too)
- 1 teaspoon ground cinnamon (the star spice here—use a good quality one like Simply Organic)
- 1/4 teaspoon ground nutmeg (freshly grated if you have it, but pre-ground is fine)
For the Bread Batter
- 1 1/2 cups all-purpose flour (or use 1 cup all-purpose + 1/2 cup whole wheat pastry flour for a heartier texture)
- 1 teaspoon baking powder
- 1/2 teaspoon baking soda
- 1/2 teaspoon salt
- 1/2 cup unsweetened applesauce (this replaces some of the oil, keeping it lighter)
- 1/4 cup melted coconut oil (or vegetable oil; coconut oil adds a subtle flavor that pairs nicely with apple)
- 1/2 cup maple syrup (use real maple syrup, not pancake syrup—it makes a difference in flavor)
- 2 large eggs, room temperature
- 1/3 cup plain Greek yogurt (full-fat or 2% works best for moisture; dairy-free yogurt is fine too)
- 1 teaspoon vanilla extract
For the Maple Glaze
- 1/2 cup powdered sugar, sifted
- 2 tablespoons maple syrup
- 1–2 tablespoons milk (any kind—dairy, oat, or almond all work)
- Pinch of salt (to balance the sweetness)
I recommend using real maple syrup for both the batter and the glaze. I’ve tried it with a cheaper syrup once, and the flavor was noticeably flat. For the apples, look for firm, not mealy, fruit. If you’re in a pinch, you can use frozen diced apples, but thaw and drain them first to avoid extra liquid in the batter.
Equipment Needed
You don’t need a fully stocked bakery kitchen for this one. Here’s what you’ll need:
- 9×5-inch loaf pan (a standard size; if you use an 8×4, the bread will take a few extra minutes to bake)
- Parchment paper (for easy removal—trust me on this)
- Two medium mixing bowls (one for dry, one for wet ingredients)
- Whisk and rubber spatula
- Small skillet (for cooking the apple filling briefly—optional but recommended)
- Cooling rack (essential for even cooling so the glaze doesn’t slide off)
- Measuring cups and spoons
If you don’t have a loaf pan, you can bake this in an 8×8 square pan, but reduce the baking time by about 10 minutes and watch it closely. I’ve also used a disposable aluminum loaf pan when traveling, and it works fine—just grease it well. A good quality whisk makes a difference; I use a sturdy one from OXO that doesn’t bend. Budget-friendly tip: skip the fancy apple peeler and just use a vegetable peeler. It’s faster than you think.
Preparation Method
Let’s get baking. This method is straightforward, but I’ve added notes so you know exactly what to look for at each stage.
- Preheat your oven to 350°F (175°C). Grease a 9×5-inch loaf pan and line it with parchment paper, leaving an overhang on the long sides. This makes lifting the bread out a breeze.
- Make the apple filling. In a small bowl, toss the diced apples with the brown sugar, cinnamon, and nutmeg. Heat a small skillet over medium heat and cook the apples for 3–4 minutes, stirring occasionally, until they soften slightly and release some juice. Don’t cook them all the way—you want them tender but still holding their shape. Set aside to cool while you prepare the batter.
- Mix the dry ingredients. In a medium bowl, whisk together the flour, baking powder, baking soda, and salt. Set aside.
- Mix the wet ingredients. In a larger bowl, whisk together the applesauce, melted coconut oil, maple syrup, eggs, Greek yogurt, and vanilla extract until smooth. The mixture should look homogeneous and slightly glossy. If the coconut oil solidifies on contact with cold ingredients, don’t worry—just whisk a bit more, or warm the bowl slightly.
- Combine wet and dry. Pour the dry ingredients into the wet mixture. Fold gently with a rubber spatula just until combined. A few streaks of flour are okay—overmixing will make the bread tough. The batter will be thick but scoopable.
- Layer the batter and apples. Pour half the batter into the prepared loaf pan and spread it evenly. Spoon the cooked apple mixture over the batter, spreading it to within 1/2 inch of the edges. Dollop the remaining batter over the apples and carefully spread it to cover. It doesn’t have to be perfect—some apples peeking through is fine.
- Bake. Place the pan in the center of the oven and bake for 50–60 minutes, or until a toothpick inserted into the center comes out clean or with just a few moist crumbs. If the top is browning too quickly (around the 40-minute mark), tent loosely with foil. Every oven is different—mine runs hot, so I check at 50 minutes.
- Cool completely. Let the bread cool in the pan for 10 minutes, then lift it out using the parchment overhang and transfer to a cooling rack. Cool completely before glazing—at least 1 hour. I know it’s tempting, but warm glaze will just soak in and disappear.
- Make the glaze. In a small bowl, whisk together the powdered sugar, maple syrup, and 1 tablespoon of milk. Add more milk, a teaspoon at a time, until the glaze is thick but pourable. Drizzle over the cooled bread. Let the glaze set for 10 minutes before slicing.
One thing I’ve learned: if you skip the step of briefly cooking the apples, they can release too much liquid into the batter during baking, making the bread soggy in spots. That quick sauté concentrates the flavor and prevents that issue. Also, when glazing, place the bread on a rack over a sheet pan to catch drips—it saves you a sticky counter cleanup.
Cooking Tips & Techniques
Over the years, I’ve made plenty of mistakes with quick breads, and this one taught me a few lessons. Here’s what I’ve learned to help you nail it every time.
Don’t overmix the batter. This is the number one mistake. When you combine wet and dry ingredients, mix only until you don’t see dry flour anymore. Overmixing develops gluten, which makes bread dense and tough instead of tender. I’ve done it—once I was so distracted by a phone call that I kept stirring, and the bread came out like a brick. Learn from my error.
Room temperature eggs matter. Cold eggs can seize up the coconut oil or yogurt, creating a lumpy batter. Let your eggs sit on the counter for 15–20 minutes before starting. If you forget, place them in a bowl of warm water for 5 minutes. It’s a small step that makes a big difference in texture.
Check for doneness with a thermometer. A toothpick is great, but an instant-read thermometer is more reliable. The internal temperature of a fully baked quick bread should be around 200–205°F (93–96°C). I started using this method after underbaking a loaf once—it was gummy in the middle, and nobody wants that.
Let the glaze set before slicing. I know you’re eager, but slicing too soon makes the glaze smear and the bread crumble. Give it at least 10 minutes, or pop the loaf in the fridge for 5 minutes to speed things up. The glaze firms up into a lovely, crackly shell.
Use a serrated knife for clean slices. A regular knife can squish the tender crumb. A serrated bread knife saws through gently, giving you neat pieces that show off the apple swirl.
If you’re multitasking, start the apple filling first, then mix the dry and wet ingredients while the apples cool. That way, everything is ready to layer without a wait.
Variations & Adaptations
This bread is wonderfully flexible. Here are some ways I’ve changed it up depending on the season or what’s in my pantry.
Gluten-free option: Substitute the all-purpose flour with a 1:1 gluten-free baking blend that contains xanthan gum. I’ve used Bob’s Red Mill with good results. The texture is slightly more crumbly, but the flavor is still spot on.
Dairy-free adaptation: Use a dairy-free yogurt (coconut or almond-based) and swap the milk in the glaze for oat milk. The bread stays moist and tender. I’ve made this for a friend with lactose intolerance, and she couldn’t tell the difference.
Seasonal twist: In the fall, I sometimes add 1/2 cup of chopped pecans or walnuts to the apple filling for extra crunch. In summer, try using fresh peaches instead of apples—just cook them a minute less since they’re softer. I did this last July, and the maple-peach combo was incredible.
Lower sugar version: Reduce the maple syrup in the batter to 1/3 cup and use a sugar substitute like monk fruit sweetener in the filling. The glaze can be made with just powdered sugar and a splash of vanilla if you want to skip the extra maple. It’s still sweet, but more subtly so.
Spice it up: Add 1/4 teaspoon of ground ginger or cardamom to the flour mixture. I tried this on a whim one rainy afternoon, and the warmth of the ginger paired beautifully with the apple and maple.
One personal variation I love: swapping the diced apples for grated apple. It distributes the fruit more evenly through the batter, creating a moist, almost pudding-like texture. It’s less visually striking but incredibly tender. Try it if you’re in the mood for something different.
Serving & Storage Suggestions
This bread is best served slightly warm or at room temperature. If you want to reheat slices, pop them in a toaster oven at 300°F for 5 minutes—the edges crisp up a bit, and the interior stays soft. A drizzle of extra maple syrup on top never hurts.
For a cozy fall breakfast, pair a slice with a hot cup of coffee or chai latte. It also works beautifully as a dessert with a scoop of vanilla ice cream or a dollop of whipped cream. I’ve served it at brunch alongside a frittata and fresh fruit, and it disappeared faster than the savory dishes.
Storage: Keep the bread in an airtight container at room temperature for up to 3 days. The glaze may soften slightly, but that’s part of its charm. If you live in a humid climate, store it in the fridge to prevent mold—just bring slices to room temperature before serving.
Freezing: This bread freezes beautifully. Wrap the unglazed loaf tightly in plastic wrap, then foil, and freeze for up to 3 months. When ready to serve, thaw overnight in the fridge, then warm in the oven and glaze fresh. I’ve done this for holiday visits, and it’s a lifesaver. The flavors actually deepen after freezing—the spices meld together even more.
Reheating: For a single slice, microwave for 15–20 seconds. For the whole loaf, wrap in foil and warm in a 300°F oven for 10–15 minutes. The glaze will melt slightly, but it re-sets as it cools. Leftover slices also make fantastic French toast—just dip in egg mixture and pan-fry.
The bread’s flavor improves on day two, as the apple and cinnamon settle into the crumb. So if you can resist, make it a day ahead.
Nutritional Information & Benefits
Here’s an approximate nutritional breakdown per slice (based on 10 slices):
- Calories: 210
- Fat: 7g
- Saturated Fat: 5g
- Carbohydrates: 34g
- Fiber: 2g
- Sugar: 18g
- Protein: 4g
This bread is lighter than traditional versions thanks to the applesauce and yogurt, which reduce the need for excess oil and butter. Apples are a good source of fiber and vitamin C, while the cinnamon offers anti-inflammatory properties. Using maple syrup instead of refined sugar adds a touch of minerals like zinc and manganese.
For those watching their sugar intake, the glaze is optional—the bread is still delicious without it. This recipe is also nut-free (unless you add the pecans) and can be made gluten-free or dairy-free with the substitutions above. It’s a balanced treat that fits into a mostly whole-foods diet without feeling restrictive.
I love that I can enjoy a slice of this bread without the heavy feeling that often comes with bakery-style fritters. It’s a small win for eating well without sacrificing joy.
Conclusion
This Lighter Maple Glazed Apple Fritter Bread is the kind of recipe that feels like a hug in loaf form. It’s got all the cozy, spiced goodness of fall, wrapped up in a tender, moist bread with a glossy maple finish. I love that it came from a chance conversation with Margaret at the orchard—it reminds me that the best recipes often come from unexpected places.
I hope you give this a try and make it your own. Maybe you’ll add extra cinnamon, swap the apples for pears, or skip the glaze for a less sweet version. Whatever you do, I’d love to hear about it. Drop a comment below and tell me how it turned out—did you make any tweaks? Share a photo on Pinterest and tag me if you’re feeling social. Your feedback helps other readers discover this little gem too.
Happy baking, friends. May your kitchen smell like apples and maple, and may every slice bring you a moment of peace.
Frequently Asked Questions
Can I use a different type of apple?
Absolutely. Honeycrisp, Fuji, Gala, or Granny Smith all work well. Softer apples like McIntosh may break down more during cooking, so keep an eye on them. Firm apples hold their shape better in the swirl.
Can I make this without the glaze?
Yes, the bread is delicious on its own. The glaze adds sweetness and a pretty finish, but it’s optional. You can also dust the top with powdered sugar for a simpler look.
How do I know when the bread is done?
Insert a toothpick into the center—it should come out clean or with a few moist crumbs. An instant-read thermometer should read 200–205°F (93–96°C). If the top is browning too fast, tent with foil.
Can I double this recipe?
Yes, you can double all ingredients and bake in two loaf pans. Adjust baking time slightly—check at 50 minutes. You may need to bake a few minutes longer if the pans are crowded in the oven.
Why did my bread sink in the middle?
This can happen if the batter is overmixed, the oven door is opened too early, or the bread is underbaked. Make sure your oven is fully preheated and avoid opening the door for the first 30 minutes of baking.
Pin This Recipe!
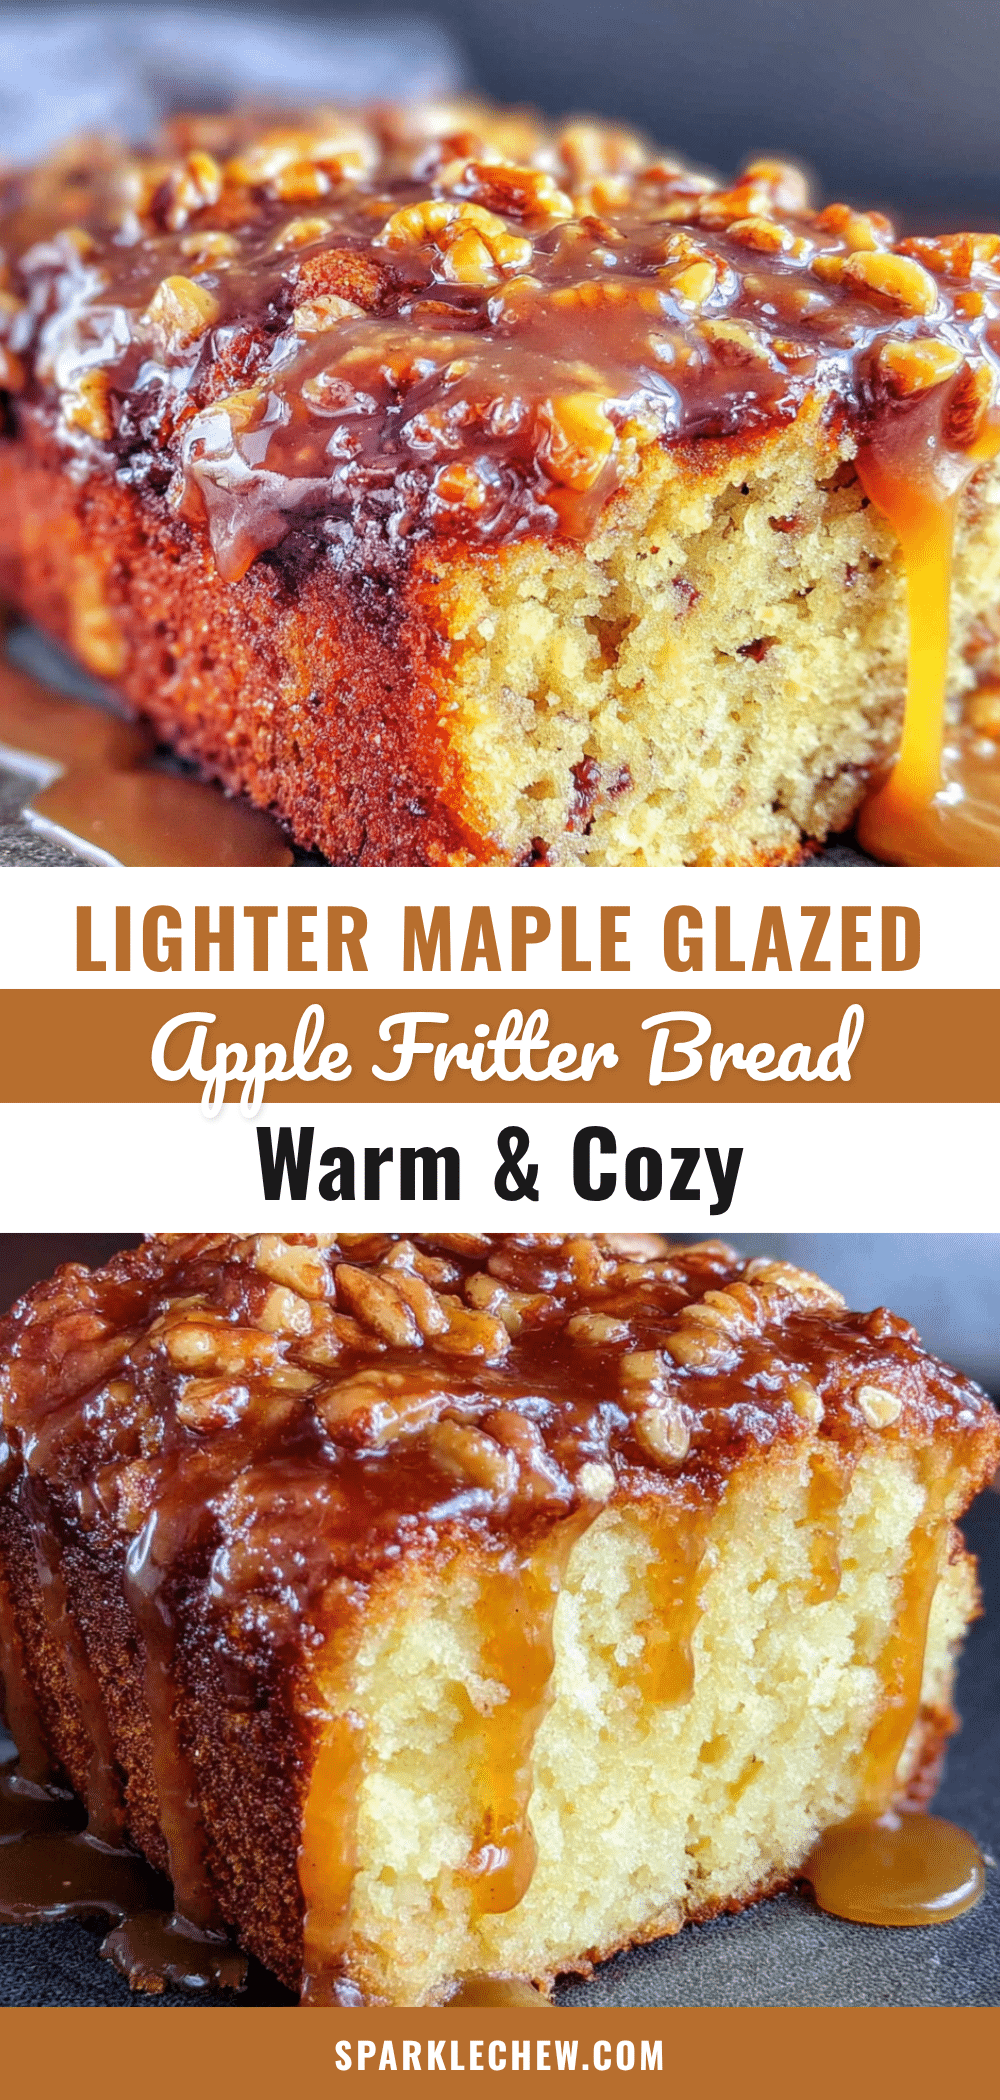
Lighter Maple Glazed Apple Fritter Bread
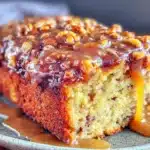
A lighter version of classic apple fritter bread, featuring tender apple chunks, a cinnamon-sugar swirl, and a glossy maple glaze. Made with applesauce and yogurt for a moist, tender crumb without the heaviness.
- Prep Time: 15 minutes
- Cook Time: 55 minutes
- Total Time: 1 hour 10 minutes
- Yield: 10 servings 1x
- Category: Bread
- Cuisine: American
Ingredients
- 2 medium apples, peeled, cored, and diced small (Honeycrisp, Fuji, or Granny Smith)
- 2 tablespoons light brown sugar, packed
- 1 teaspoon ground cinnamon
- 1/4 teaspoon ground nutmeg
- 1 1/2 cups all-purpose flour (or 1 cup all-purpose + 1/2 cup whole wheat pastry flour)
- 1 teaspoon baking powder
- 1/2 teaspoon baking soda
- 1/2 teaspoon salt
- 1/2 cup unsweetened applesauce
- 1/4 cup melted coconut oil (or vegetable oil)
- 1/2 cup maple syrup (real maple syrup)
- 2 large eggs, room temperature
- 1/3 cup plain Greek yogurt (full-fat or 2%)
- 1 teaspoon vanilla extract
- 1/2 cup powdered sugar, sifted
- 2 tablespoons maple syrup
- 1–2 tablespoons milk (any kind)
- Pinch of salt
Instructions
- Preheat your oven to 350°F (175°C). Grease a 9×5-inch loaf pan and line it with parchment paper, leaving an overhang on the long sides.
- Make the apple filling: In a small bowl, toss the diced apples with the brown sugar, cinnamon, and nutmeg. Heat a small skillet over medium heat and cook the apples for 3–4 minutes, stirring occasionally, until they soften slightly. Set aside to cool.
- Mix the dry ingredients: In a medium bowl, whisk together the flour, baking powder, baking soda, and salt. Set aside.
- Mix the wet ingredients: In a larger bowl, whisk together the applesauce, melted coconut oil, maple syrup, eggs, Greek yogurt, and vanilla extract until smooth.
- Combine wet and dry: Pour the dry ingredients into the wet mixture. Fold gently with a rubber spatula just until combined. A few streaks of flour are okay.
- Layer the batter and apples: Pour half the batter into the prepared loaf pan and spread it evenly. Spoon the cooked apple mixture over the batter, spreading to within 1/2 inch of the edges. Dollop the remaining batter over the apples and carefully spread to cover.
- Bake: Place the pan in the center of the oven and bake for 50–60 minutes, or until a toothpick inserted into the center comes out clean or with a few moist crumbs. If the top is browning too quickly, tent loosely with foil.
- Cool completely: Let the bread cool in the pan for 10 minutes, then lift it out using the parchment overhang and transfer to a cooling rack. Cool completely before glazing—at least 1 hour.
- Make the glaze: In a small bowl, whisk together the powdered sugar, maple syrup, and 1 tablespoon of milk. Add more milk, a teaspoon at a time, until the glaze is thick but pourable. Drizzle over the cooled bread. Let the glaze set for 10 minutes before slicing.
Notes
Don’t overmix the batter. Room temperature eggs matter. Check for doneness with a thermometer (200–205°F). Let the glaze set before slicing. Use a serrated knife for clean slices. The bread’s flavor improves on day two.
Nutrition
- Serving Size: 1 slice
- Calories: 210
- Sugar: 18
- Sodium: 200
- Fat: 7
- Saturated Fat: 5
- Carbohydrates: 34
- Fiber: 2
- Protein: 4
Keywords: apple fritter bread, maple glaze, fall recipe, lighter, healthy, quick bread, apple bread