Love this? Save it for later!
Share the inspiration with your friends
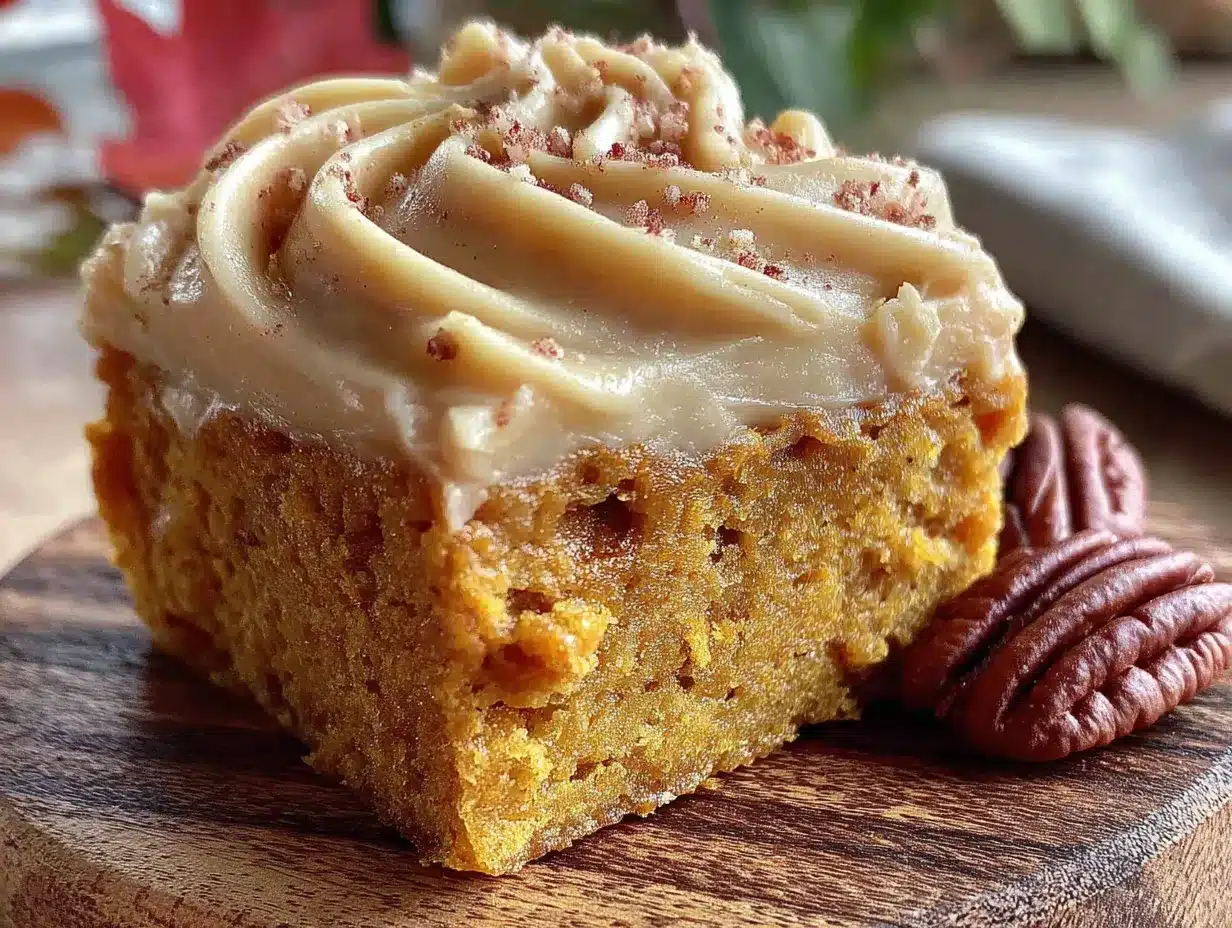
There used to be a tiny bakery tucked into a strip mall off Highway 99 in Portland — the kind of place with a handwritten menu board and a single pastry case that held maybe eight things at a time. They called themselves Gingersnap & Co., and they made a pumpkin bar with brown butter frosting that I still dream about, years after they locked their doors for good. When they closed — just a quiet “thank you for the memories” sign taped to the window one Tuesday — I felt a little ridiculous for how crushed I was. But honestly? Those bars were the reason I showed up early to meetings in that neighborhood. The reason I took the long way home.
After about twelve attempts — twelve pans of bars that were too dry, too sweet, or just missing that nutty, almost-caramel thing the frosting did — I finally got it. And let me tell you, the victory dance in my kitchen that afternoon was something my neighbors still bring up at block parties. The trick, I learned, wasn’t just in the brown butter (though that’s obviously huge). It was in how you treated the pumpkin, how long you let the frosting sit before spreading, and a little patience thing I’ll walk you through below.
Maybe you’ve been there — that specific ache for a bakery treat that no longer exists. Or maybe you’re just looking for the pumpkin bar recipe that’ll make everyone at your next gathering close their eyes after the first bite. Either way, this is it. This is the one I keep making, year after year, because it’s the only version that tastes like that memory. And honestly? It might be even better than the original.
Why You’ll Love This Recipe
Let me be real with you — I’ve tested a lot of pumpkin bar recipes over the years. Some were too dense, like eating a pumpkin brick. Others were so light they fell apart the second you looked at them. This one? It hits that perfect middle ground: tender, moist, and sturdy enough to hold a generous swipe of brown butter frosting without crumbling into disaster. It’s the kind of bar that makes you look like a hero at a potluck with minimal actual effort.
- Perfect for a Crowd: This recipe makes a full sheet pan of bars — we’re talking 24 generous servings. That’s enough for a Thanksgiving gathering, a fall birthday party, or a “just because” dessert table.
- Make-Ahead Friendly: The bars actually taste better the next day. The pumpkin flavor deepens, and the frosting sets into this creamy, fudgy layer that’s even more irresistible. You can prep everything a day ahead and frost the morning of your event.
- Simple Pantry Ingredients: Nothing weird here. Canned pumpkin, basic baking staples, and butter. The brown butter frosting might sound fancy, but it’s just butter, powdered sugar, vanilla, and a little milk.
- Unbelievably Delicious: That brown butter frosting is the star of the show. It’s nutty, rich, and just salty enough to balance the sweet pumpkin bar underneath. People will ask for the recipe. I promise.
- Crowd-Pleaser Guaranteed: I’ve brought these to everything from casual game nights to formal Friendsgiving dinners. They disappear fast. Kids love them, adults love them, and even the “I don’t usually like pumpkin desserts” people come back for seconds.
What Ingredients You Will Need
This recipe uses simple, wholesome ingredients to deliver that unforgettable flavor and tender texture. Most of these are pantry staples, which makes this recipe perfect for those moments when you need a showstopper dessert without a special grocery run.
For the Pumpkin Bars
- 2 cups all-purpose flour (spooned and leveled — don’t scoop straight from the bag)
- 2 teaspoons baking powder
- 1 teaspoon baking soda
- 2 teaspoons ground cinnamon (I prefer McCormick for consistent flavor)
- 1 teaspoon ground ginger
- ½ teaspoon ground nutmeg (freshly grated if you have it — the difference is real)
- ½ teaspoon salt
- 4 large eggs, room temperature
- 1 ⅔ cups granulated sugar
- 1 cup vegetable oil (canola or avocado oil work great too)
- 1 can (15 ounces) pumpkin puree (not pumpkin pie filling — make sure it’s 100% pure pumpkin)
- 1 teaspoon vanilla extract
For the Brown Butter Frosting
- 1 cup unsalted butter (2 sticks — this is not the time for salted butter, trust me)
- 4 cups powdered sugar, sifted (sifting prevents lumps, and lumps are the enemy of smooth frosting)
- 2 teaspoons vanilla extract
- 2 to 4 tablespoons milk (whole milk gives the richest texture, but 2% works fine)
- Pinch of salt (to balance the sweetness)
Equipment Needed
You don’t need a fancy kitchen to pull this off — just a few reliable tools that make the process smooth and enjoyable.
- Half-sheet pan (13×18 inches): This is the standard size for these bars. If you only have a 9×13 pan, you can halve the recipe or bake in batches. Just adjust the baking time — a 9×13 pan will need about 30-35 minutes.
- Parchment paper: A total lifesaver for easy removal and clean-up. Let the paper hang over the edges a bit so you can lift the whole slab out.
- Electric hand mixer or stand mixer: You can whisk by hand if you’re feeling ambitious, but a mixer makes the batter come together in minutes.
- Medium saucepan: For browning the butter. Light-colored pans work best so you can see the butter change color.
- Large mixing bowls: One for dry ingredients, one for wet ingredients.
- Whisk and rubber spatula: For combining and scraping every last bit of batter.
- Cooling rack: Essential for even cooling before frosting. Trust me on this — warm bars + frosting = a melty mess.
Preparation Method
Alright, let’s get into the good stuff. I’ve broken this down into clear steps with all the little details I wish someone had told me the first time I made these.
- Preheat your oven to 350°F (175°C). Line your half-sheet pan with parchment paper, leaving a couple inches of overhang on the long sides. This is your handle for lifting the finished bars out later.
- Whisk the dry ingredients together. In a large bowl, combine the flour, baking powder, baking soda, cinnamon, ginger, nutmeg, and salt. Give it a good whisk — about 15 seconds — to aerate everything and distribute the spices evenly. Set this aside.
- Mix the wet ingredients. In a separate large bowl (or the bowl of your stand mixer), beat the eggs and sugar together on medium speed until thick and pale, about 2 minutes. The mixture should look like a light caramel color and fall in ribbons when you lift the beaters.
- Add the oil and pumpkin. With the mixer on low, stream in the vegetable oil, then add the pumpkin puree and vanilla extract. Mix until just combined — don’t overmix here. A few streaks of oil are okay; they’ll incorporate when you add the flour.
- Combine wet and dry. Add the dry ingredients to the wet mixture in two additions, mixing on low speed after each until just incorporated. Stop and scrape down the sides and bottom of the bowl with your rubber spatula. The batter will be thick and smell incredible — that’s the cinnamon and ginger doing their thing.
- Spread the batter. Pour the batter into your prepared pan and use an offset spatula or the back of a spoon to spread it evenly into the corners. The batter is thick, so take your time. It should be about ¼-inch thick across the pan.
- Bake for 22-25 minutes. The bars are done when the edges pull away slightly from the pan and a toothpick inserted in the center comes out clean or with a few moist crumbs. Don’t overbake — dry pumpkin bars are a tragedy. Let the pan cool completely on a wire rack, about 1 hour. I know it’s tempting to rush this, but warm bars will melt your frosting into a puddle.
- Make the brown butter frosting. While the bars cool, melt the butter in a medium saucepan over medium heat. Stir constantly with a rubber spatula or wooden spoon. The butter will foam, then turn from yellow to golden to a deep amber color — this takes about 5-7 minutes. Watch closely; it can go from perfect to burnt in seconds. When you see brown specks forming at the bottom and smell that nutty, toasty aroma, remove it from the heat immediately. Pour the browned butter into a heat-safe bowl, including all those brown bits — that’s where the flavor lives. Let it cool for 10 minutes until it’s warm but not hot.
- Finish the frosting. Transfer the cooled brown butter to a large mixing bowl. Add the sifted powdered sugar, vanilla extract, and a pinch of salt. Beat on low speed until combined — it will look crumbly at first, which is normal. Add 2 tablespoons of milk and beat on medium-high until smooth and creamy. If it’s too thick, add more milk a teaspoon at a time. If it’s too thin, add a little more powdered sugar. The frosting should be spreadable but not runny.
- Frost the cooled bars. Once the bars are completely cool, spread the brown butter frosting evenly over the top. Use an offset spatula for a smooth finish, or leave it rustic with swirls and swoops — both look beautiful.
- Slice and serve. Let the frosting set for about 15 minutes before slicing. Use the parchment overhang to lift the whole slab onto a cutting board. Slice into 24 bars — I go for 6 rows by 4 rows. A sharp chef’s knife works best; wipe it clean between cuts for neat edges.
Cooking Tips & Techniques
I’ve made this recipe more times than I can count, and I’ve definitely learned a few things the hard way. Here are the tips that make the biggest difference.
Don’t skip sifting the powdered sugar. I know, it feels like an extra step that doesn’t matter. But lumpy brown butter frosting is a real disappointment, and sifting takes about 30 seconds. Just do it.
Watch the brown butter like a hawk. The first time I made this, I walked away to answer a text and came back to burnt butter that smelled like a campfire. The color change happens fast — once you see those brown specks, pull it off the heat. Swirl the pan a little to help you see the color through the foam.
Room temperature eggs matter. Cold eggs can seize up your batter and make the bars dense. If you forgot to take them out of the fridge, place them in a bowl of warm water for 5 minutes before cracking. Problem solved.
Let the bars cool completely. This is non-negotiable. I once frosted slightly warm bars because I was in a rush, and the frosting slid right off into a sweet, buttery puddle at the bottom of the pan. It still tasted good, but it looked like a disaster. Give it the full hour.
Toast the spices for extra depth. If you want to take these bars to another level, toast your cinnamon, ginger, and nutmeg in a dry skillet over medium heat for about 30 seconds until fragrant. Let them cool before adding to the flour. It’s a small step that adds a layer of warmth you can’t get any other way.
Variations & Adaptations
One of the best things about this recipe is how flexible it is. Here are some variations I’ve tried and loved.
Gluten-Free Version: Swap the all-purpose flour for a 1:1 gluten-free baking flour blend (I like Bob’s Red Mill). The texture will be slightly more tender, but the flavor is spot-on. Don’t use almond flour or coconut flour — they’ll change the structure too much.
Spice It Up: Add ½ teaspoon of cloves or allspice to the spice mix for a warmer, more complex flavor. Or stir in ¼ teaspoon of black pepper — it sounds weird, but it adds a subtle heat that pairs beautifully with the brown butter.
Add Mix-Ins: Fold 1 cup of toasted pecans or walnuts into the batter before baking. Or sprinkle chocolate chips on top of the batter right after spreading — the chips melt into little pockets of sweetness that contrast with the spiced pumpkin.
Dairy-Free Frosting: Use plant-based butter for the brown butter frosting. I’ve tested this with Miyoko’s and Country Crock plant butter, and both work well. The browning process might take an extra minute or two, and the flavor won’t be quite as rich, but it’s still delicious.
Pumpkin Spice Latte Twist: Add 1 tablespoon of instant espresso powder dissolved in 1 tablespoon of hot water to the wet ingredients. It deepens the pumpkin flavor and adds that coffee-shop vibe that’s so popular in fall.
Serving & Storage Suggestions
These bars are incredibly versatile when it comes to serving. Here’s how to make them shine at your next gathering.
Serve at room temperature for the best texture and flavor. The frosting softens slightly, and the pumpkin bar stays tender. If you’ve refrigerated them, let them sit out for about 20 minutes before serving.
Presentation tip: Arrange the bars on a large wooden board or a white platter. Dust with a little cinnamon or nutmeg for a pop of color. They look gorgeous alongside a cup of hot cider or coffee.
What to serve alongside: These bars are rich enough to stand alone, but they pair beautifully with a dollop of whipped cream or a scoop of vanilla ice cream. For a full fall dessert spread, add some apple cider donuts or a simple chocolate tart.
Storage: Store the bars in an airtight container at room temperature for up to 3 days. If your kitchen runs warm, refrigerate them — the frosting can get a little soft. Layer them with parchment paper between each row to prevent sticking.
Freezing: These freeze like a dream. Freeze unfrosted bars in a single layer on a baking sheet, then wrap tightly in plastic wrap and foil. They’ll keep for up to 3 months. Frost after thawing for the best texture. Alternatively, freeze the frosted bars in an airtight container for up to 2 months — just let them thaw in the fridge overnight.
Flavor development: The bars actually taste better the day after baking. The pumpkin flavor deepens, and the spices meld together. If you can, make them a day ahead and frost the morning of your event. Your guests will thank you.
Nutritional Information & Benefits
Here’s the estimated nutritional breakdown for one bar (based on 24 servings). Keep in mind this is an approximation — actual values depend on specific ingredients and portion sizes.
| Nutrient | Amount per Bar |
|---|---|
| Calories | 285 |
| Total Fat | 16g |
| Saturated Fat | 7g |
| Cholesterol | 48mg |
| Sodium | 210mg |
| Total Carbohydrates | 34g |
| Dietary Fiber | 1g |
| Sugars | 24g |
| Protein | 3g |
Health benefits: Pumpkin is packed with vitamin A (over 200% of your daily needs per cup), which supports eye health and immune function. It’s also rich in fiber and antioxidants. The cinnamon in this recipe may help regulate blood sugar, and ginger is known for its anti-inflammatory properties. Of course, this is still a dessert — enjoy it in moderation as part of a balanced diet.
Dietary considerations: This recipe contains gluten, dairy, and eggs. For gluten-free or dairy-free options, see the variations section above. It’s nut-free as written, making it a safe choice for school events or gatherings where allergies are a concern.
Conclusion
These pumpkin bars with brown butter frosting have become my signature fall dessert, and I’m honestly a little proud of that. They’re the recipe I bring to every Friendsgiving, the one my sister requests for her birthday every October, and the one that finally let me stop mourning that little bakery in Portland. There’s something deeply satisfying about recreating a memory in your own kitchen — and sharing it with the people you love.
I’d love to hear how these turn out for you. Did you add any fun mix-ins? Serve them at a big gathering? Forget to watch the brown butter and have to start over? (Been there, friend.) Drop a comment below and let me know. And if you’re looking for another crowd-pleasing dessert, you might want to check out these crispy garlic chicken thighs for a savory option that’s just as impressive. Happy baking, and may your kitchen smell like brown butter and cinnamon all season long.
Frequently Asked Questions
Can I use fresh pumpkin instead of canned?
You can, but I don’t recommend it for this recipe. Canned pumpkin has a consistent moisture content that yields reliable results every time. Fresh pumpkin puree can be watery, which might make the bars dense or gummy. If you really want to use fresh, roast and puree the pumpkin, then strain it through cheesecloth for at least an hour to remove excess liquid.
Why did my brown butter frosting turn out grainy?
Grainy frosting usually happens when the brown butter is too hot when you add the powdered sugar. Let the butter cool for at least 10 minutes after browning — it should be warm but not hot. Also, make sure your powdered sugar is sifted to remove any lumps before mixing.
Can I make these bars ahead of time for a party?
Absolutely! These are actually better made a day ahead. Bake the bars, let them cool completely, and store them uncovered at room temperature overnight. Make the frosting the morning of your event, spread it on, and you’re good to go. The bars stay moist and the frosting sets perfectly.
How do I know when the brown butter is done?
Watch for three signs: the butter will turn a deep amber color, you’ll see tiny brown specks at the bottom of the pan, and it will smell nutty and toasty — almost like hazelnuts. This usually takes 5-7 minutes over medium heat. Swirl the pan occasionally to check the color through the foam. Remove it from the heat immediately when you see those brown specks.
Can I freeze these bars with the frosting already on?
Yes, you can! Freeze the frosted bars in a single layer on a baking sheet until solid, then transfer to an airtight container with parchment paper between layers. They’ll keep for up to 2 months. Thaw in the refrigerator overnight, then let them come to room temperature before serving. The frosting might lose a tiny bit of its shine, but the flavor is still fantastic.
Pin This Recipe!
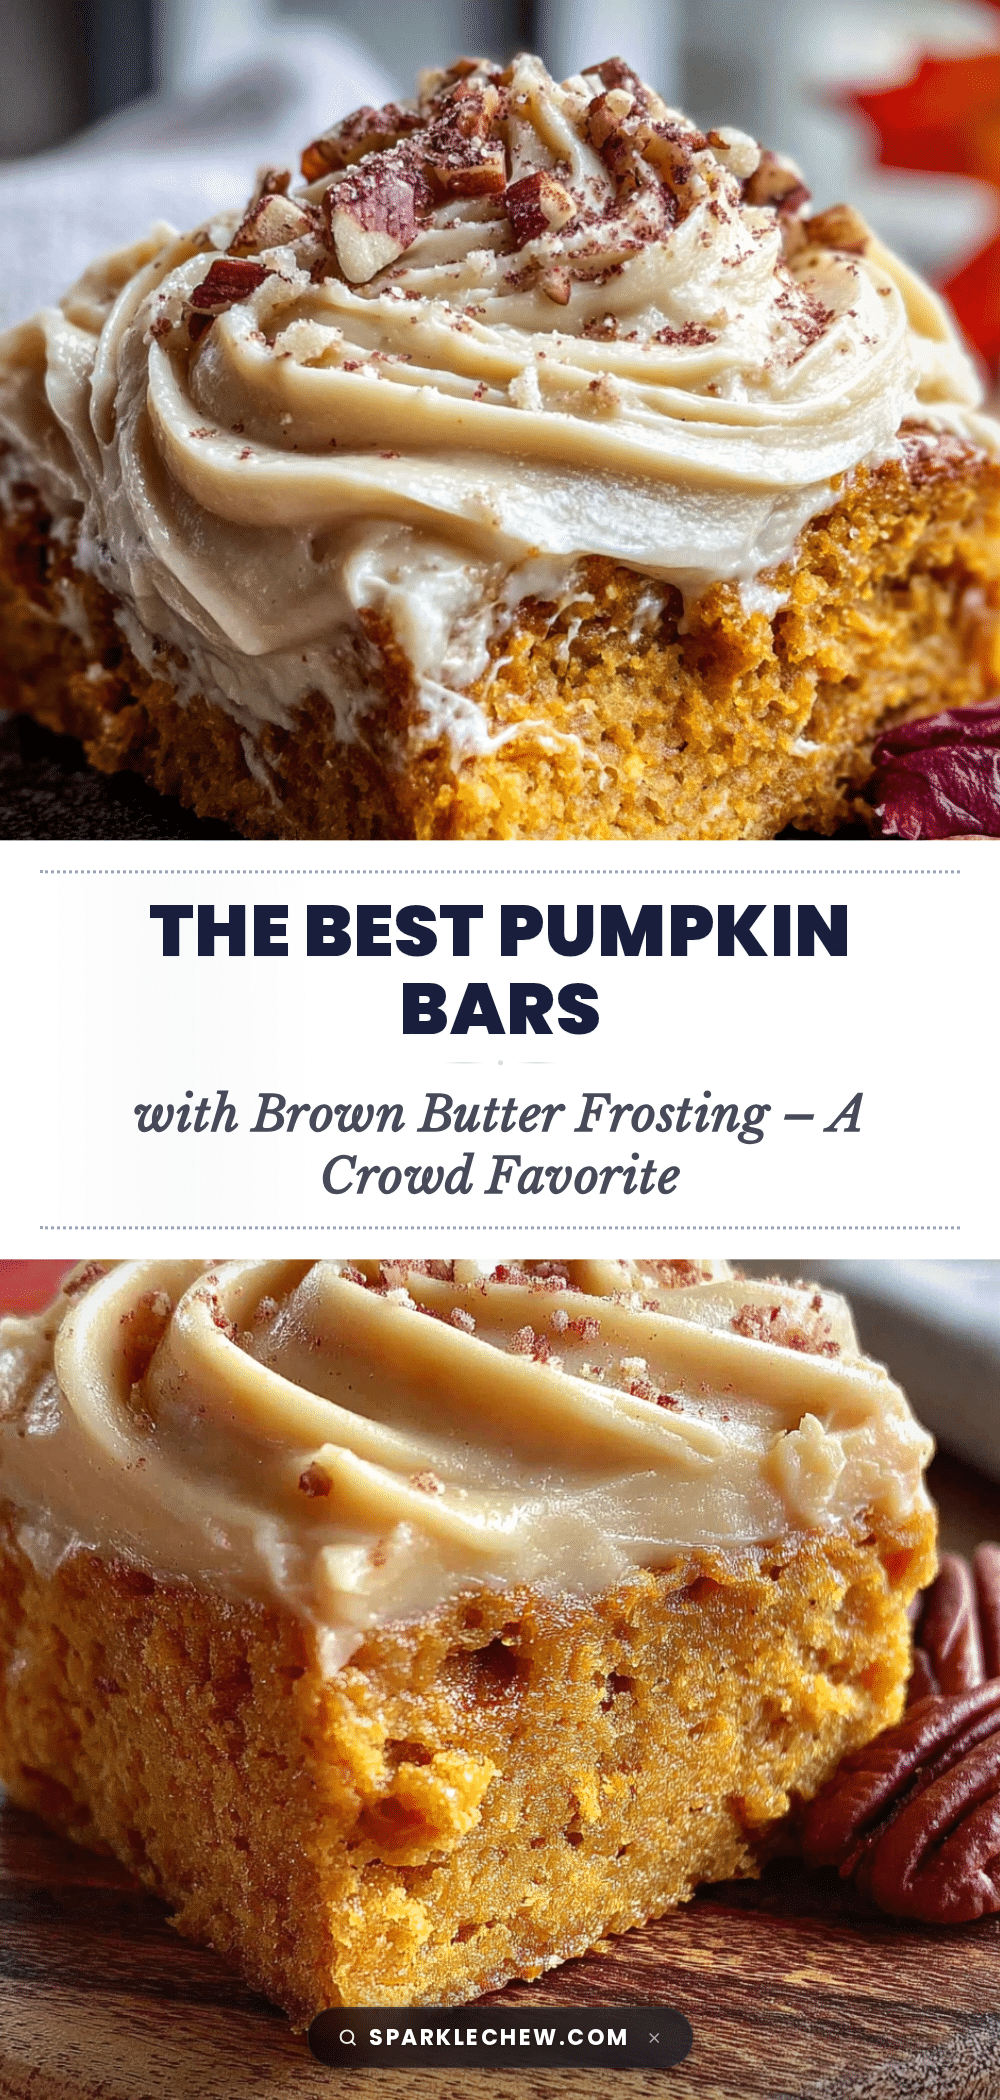
The Best Pumpkin Bars with Brown Butter Frosting
Tender, moist pumpkin bars topped with a nutty, rich brown butter frosting. This recipe recreates a beloved bakery treat and is perfect for fall gatherings, potlucks, or any time you need a crowd-pleasing dessert.
- Prep Time: 20 minutes
- Cook Time: 25 minutes
- Total Time: 1 hour 45 minutes (includes cooling)
- Yield: 24 servings 1x
- Category: Dessert
- Cuisine: American
Ingredients
- 2 cups all-purpose flour (spooned and leveled)
- 2 teaspoons baking powder
- 1 teaspoon baking soda
- 2 teaspoons ground cinnamon
- 1 teaspoon ground ginger
- ½ teaspoon ground nutmeg (freshly grated preferred)
- ½ teaspoon salt
- 4 large eggs, room temperature
- 1 ⅔ cups granulated sugar
- 1 cup vegetable oil (canola or avocado oil work)
- 1 can (15 ounces) pumpkin puree (100% pure pumpkin, not pie filling)
- 1 teaspoon vanilla extract
- 1 cup unsalted butter (2 sticks)
- 4 cups powdered sugar, sifted
- 2 teaspoons vanilla extract
- 2 to 4 tablespoons milk (whole milk preferred)
- Pinch of salt
Instructions
- Preheat oven to 350°F (175°C). Line a half-sheet pan (13×18 inches) with parchment paper, leaving overhang on the long sides.
- In a large bowl, whisk together flour, baking powder, baking soda, cinnamon, ginger, nutmeg, and salt until well combined.
- In a separate large bowl, beat eggs and sugar on medium speed until thick and pale, about 2 minutes.
- With mixer on low, stream in vegetable oil, then add pumpkin puree and vanilla extract. Mix until just combined.
- Add dry ingredients to wet mixture in two additions, mixing on low after each until just incorporated. Scrape down bowl.
- Pour batter into prepared pan and spread evenly to corners (about ¼-inch thick).
- Bake for 22-25 minutes until edges pull away and toothpick inserted in center comes out clean or with moist crumbs. Cool completely on wire rack, about 1 hour.
- For frosting: Melt butter in a medium saucepan over medium heat, stirring constantly. Cook 5-7 minutes until butter turns deep amber with brown specks and smells nutty. Remove from heat immediately.
- Pour browned butter into a heat-safe bowl, including brown bits. Cool for 10 minutes until warm but not hot.
- Transfer cooled brown butter to a large bowl. Add sifted powdered sugar, vanilla extract, and pinch of salt. Beat on low until crumbly, then add 2 tablespoons milk and beat on medium-high until smooth and creamy. Add more milk if needed.
- Once bars are completely cool, spread frosting evenly over top. Let frosting set for 15 minutes.
- Use parchment overhang to lift slab onto cutting board. Slice into 24 bars (6 rows by 4 rows).
Notes
Bars taste even better the next day. For best results, let bars cool completely before frosting. Watch brown butter closely as it can burn quickly. Room temperature eggs are important for proper texture. For gluten-free, use a 1:1 gluten-free flour blend. For dairy-free frosting, use plant-based butter.
Nutrition
- Serving Size: 1 bar
- Calories: 285
- Sugar: 24
- Sodium: 210
- Fat: 16
- Saturated Fat: 7
- Carbohydrates: 34
- Fiber: 1
- Protein: 3
Keywords: pumpkin bars, brown butter frosting, fall dessert, pumpkin dessert, sheet pan bars, Thanksgiving dessert