Love this? Save it for later!
Share the inspiration with your friends
I wasn’t expecting cooking advice from my accountant, but there I was, knee-deep in tax receipts last October, listening to him describe exactly how to carve a face into a bell pepper. Honestly, it was the last place I’d expect to find dinner inspiration—midway through a conversation about deductions and quarterly estimates. But Frank, who handles numbers by day and apparently runs a secret supper club by night, started telling me about how his kids refuse to eat regular stuffed peppers anymore. They only want the ones with faces. Jack-o-lantern faces, cut right into the pepper before baking.
I laughed it off at first. I mean, carving a pepper? That felt like something you’d see on Pinterest and think, “cute, but who has the time?” But Frank was serious. He told me his trick—use a small paring knife, save the cut-out pieces to chop up for the filling, and don’t overthink the face design. Simple triangles for eyes, a jagged smile, maybe a little nose if you’re feeling fancy. He even drew me a diagram on the back of an envelope. I stuffed that envelope in my purse and forgot about it for two weeks.
Then came one of those chilly October evenings where the air smells like fallen leaves and you just want something warm and comforting. I remembered Frank’s envelope. I had bell peppers in the fridge, ground turkey in the freezer, and a bag of rice in the pantry. Maybe you’ve been there—staring at ingredients, wanting something fun but not complicated. So I gave it a shot. And honestly? Watching those little pepper faces peek out from the baking dish, all golden and bubbly, made my whole week. The kids at my dinner table actually cheered. That’s when I knew this recipe was staying in rotation forever.
Why You’ll Love This Recipe
Let me tell you why these cozy jack-o-lantern stuffed peppers are about to become your new fall favorite. I’ve tested this recipe about seven times now—yes, seven—tweaking the filling ratios, the cooking time, even the angle of the pepper carving. What I landed on is foolproof.
- Fun for All Ages : Kids absolutely lose it over the little faces. Adults pretend to be too cool, but they smile too.
- Simple Ingredients : Everything is pantry-friendly. Ground meat, rice, cheese, tomatoes, and spices. No weird specialty items.
- Perfect for Fall Evenings : This is the definition of comfort food. Warm, hearty, and just a little bit whimsical.
- Crowd-Pleaser : I’ve served these at a casual dinner party and got texts the next day asking for the recipe. They work for both kids and grown-ups.
- Unbelievably Delicious : The roasted pepper gets sweet and tender, while the filling stays savory and satisfying. That combo is pure magic.
What makes this recipe different from all the other stuffed pepper recipes out there? It’s the visual payoff. You get that cozy, homey flavor everyone loves, but with a presentation that makes people stop and smile. Plus, I figured out that carving the peppers before baking actually helps them cook more evenly—the steam escapes through the little openings, so you don’t end up with soggy peppers. Trust me, I learned that one the hard way.
This isn’t just another stuffed pepper recipe. It’s the kind of meal that makes you feel like you pulled off something special, even on a random Tuesday night. And honestly, isn’t that what we all want?
What Ingredients You Will Need
This recipe uses simple, wholesome ingredients to deliver bold flavor and satisfying texture without the fuss. Most of these are probably already in your kitchen, which makes this perfect for those last-minute dinner decisions.
For the Peppers:
- 4 large bell peppers – any color works, but orange or red look the most jack-o-lantern-like (orange is my personal favorite for the full effect)
- 1 tablespoon olive oil – for brushing the peppers before baking (adds richness and helps them soften)
For the Filling:
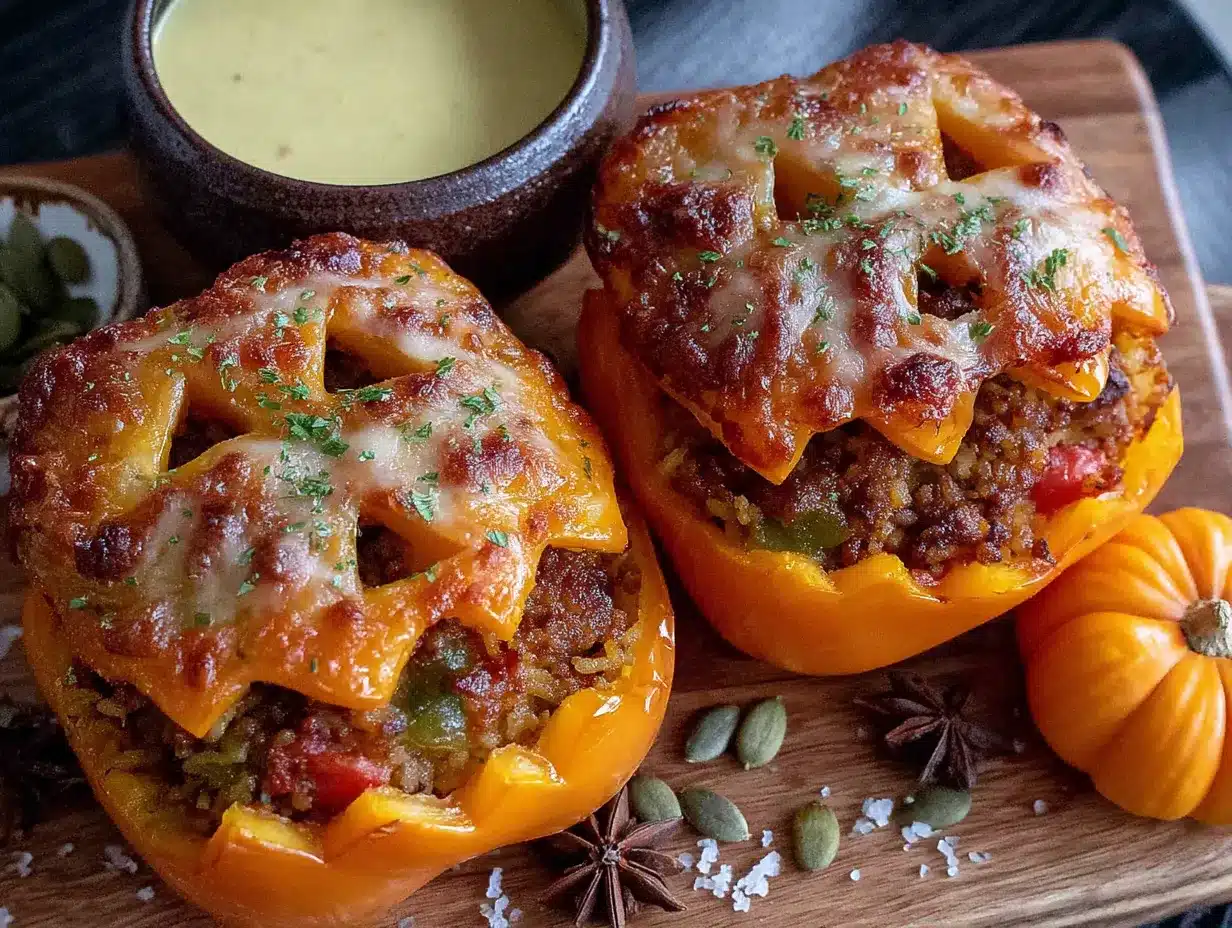
- 1 lb ground beef or turkey – I’ve used both; beef gives a richer flavor, turkey is leaner (I recommend 85/15 ground beef for best texture)
- 1 cup cooked rice – white, brown, or even cauliflower rice works (leftover rice is perfect here)
- 1 small onion, diced – about 1/2 cup (adds sweetness and depth)
- 2 cloves garlic, minced – fresh is best, but jarred minced garlic works in a pinch
- 1 can (14.5 oz) diced tomatoes, drained – fire-roasted adds a lovely smoky note (I prefer Muir Glen brand)
- 1 cup shredded cheddar cheese – plus extra for topping (sharp cheddar gives the most flavor)
- 1 teaspoon chili powder – for that cozy warmth
- 1/2 teaspoon cumin – adds an earthy, slightly nutty flavor
- 1/2 teaspoon smoked paprika – trust me on this one, it makes a difference
- Salt and black pepper to taste
- 2 tablespoons tomato paste – this thickens the filling and adds concentrated tomato flavor
For Topping (Optional but Recommended):
- Fresh parsley or cilantro, chopped – for a pop of color
- Sour cream or Greek yogurt – for serving (adds a cool, creamy contrast)
Ingredient Tips: For the peppers, look for ones that are squat and wide rather than tall and skinny. They sit better in the baking dish and give you more surface area for carving faces. If you want a gluten-free option, use certified gluten-free rice or quinoa. For a dairy-free version, swap the cheddar with a plant-based shred that melts well—I’ve had good luck with the Daiya brand.
Equipment Needed
You don’t need fancy equipment for this one. Here’s what you’ll want:
- Large baking dish – 9×13 inch works perfectly (glass or ceramic both work great)
- Sharp paring knife – this is crucial for carving the faces (a dull knife will tear the pepper)
- Cutting board – preferably one with a groove to catch juices
- Large skillet – for cooking the filling (I use a cast iron for even heat)
- Mixing bowl – for combining the filling ingredients
- Measuring cups and spoons
- Small spoon – for scooping out pepper seeds and stuffing the filling
- Aluminum foil – for covering the dish during baking
If you don’t have a paring knife, a small serrated knife works okay too. I actually used a steak knife the first time I tried this—not ideal, but it got the job done. Just go slow and be careful. Also, if your baking dish is too big, the peppers might tip over. Nestle them in tight or use crumpled foil to keep them upright. Learned that one after a pepper face-planted into the sauce.
Preparation Method
Alright, let’s get cooking. Take your time with the carving part—it’s honestly the most fun step.
- Preheat your oven to 375°F (190°C). While it’s heating, bring a large pot of water to a boil. You’ll blanch the peppers briefly to soften them up.
- Prep the peppers. Wash your bell peppers and pat them dry. Using a sharp paring knife, carefully cut around the stem of each pepper and remove the top. Save the tops! You can chop those up and add them to the filling if you want. Scoop out all the seeds and membranes from inside. Rinse them out if needed.
- Carve the faces. This is where the magic happens. On one side of each pepper, use your paring knife to cut out a jack-o-lantern face. Keep it simple—two triangle eyes and a jagged smile. You can add a little triangle nose if you’re feeling ambitious. Save the cut-out pieces! Chop them finely and add them to the filling for extra veggie goodness.
- Blanch the peppers. Submerge the hollowed peppers in the boiling water for about 3 minutes. This softens them just enough so they cook through without getting mushy. Remove them with tongs and set them upside down on a paper towel to drain.
- Cook the filling. In your large skillet, heat a drizzle of olive oil over medium heat. Add the diced onion and cook for 3-4 minutes until translucent. Add the minced garlic and cook for another 30 seconds until fragrant. Add your ground meat and cook, breaking it up with a spoon, until browned—about 6-8 minutes. Drain any excess fat if needed.
- Season the meat. Stir in the chili powder, cumin, smoked paprika, salt, and pepper. Cook for 1 minute until the spices smell amazing. Then add the drained diced tomatoes and tomato paste. Stir everything together and let it simmer for 2-3 minutes until thickened.
- Combine the filling. Remove the skillet from heat. Stir in the cooked rice and 1 cup of shredded cheddar cheese. Also add any chopped pepper pieces you saved from carving. Mix until the cheese is melted and everything is well combined. Taste and adjust seasoning if needed.
- Stuff the peppers. Place the blanched peppers upright in your baking dish. Using a small spoon, generously fill each pepper with the meat and rice mixture. Pack it in gently but firmly—you want them full. Top each pepper with a little extra shredded cheese.
- Bake. Cover the baking dish with aluminum foil and bake for 25 minutes. Then remove the foil and bake for another 10-15 minutes until the cheese is bubbly and golden and the peppers are tender. The peppers should be easy to pierce with a fork but still hold their shape.
- Rest and serve. Let the peppers sit for 5 minutes before serving. This helps them set so they don’t fall apart. Serve warm, garnished with fresh parsley or cilantro and a dollop of sour cream if you like.
Pro tip: If your peppers are leaning, spoon a little of the tomato sauce from the pan around the bottom to help them stay upright. Also, don’t skip the resting time—I know it’s hard to wait, but it makes a real difference.
Cooking Tips & Techniques
I’ve made a lot of mistakes with this recipe so you don’t have to. Here’s what I learned:
Don’t overthink the carving. The first time I tried, I spent twenty minutes on one pepper face, trying to make it perfect. It looked like a confused robot. Now I just cut quick triangles and a wavy smile. Imperfect faces have character. They look more like real jack-o-lanterns that way.
Use a spoon to scoop seeds. A melon baller or a small teaspoon works wonders for cleaning out the inside without damaging the pepper walls. Your fingers work too, but it’s messier.
Blanching is non-negotiable. I skipped it once because I was in a hurry. The peppers came out crunchy on the outside and the filling was cold in the center. Just take the three minutes. It’s worth it.
Watch your cheese. If you add too much cheese on top, it can slide off the pepper and burn on the pan. A generous sprinkle is enough. You want it melted and bubbly, not a cheese puddle.
Multitask smartly. While the peppers are blanching, you can cook the filling. While the filling simmers, you can carve the faces. This whole recipe comes together in about 45 minutes if you keep moving.
Check for doneness. Peppers should be tender but not collapsing. Stick a fork into the side of a pepper—it should slide in easily with a little resistance. If it’s mushy, you’ve gone too far.
Variations & Adaptations
This recipe is super flexible. Here are some ways to make it your own:
- Vegetarian Version: Swap the ground meat for cooked lentils or a plant-based ground crumble. I’ve used brown lentils with great results—they have a similar texture and soak up all the spices beautifully. Add an extra 1/4 cup of rice to bulk it up.
- Spicy Kick: Add 1/2 teaspoon of cayenne pepper or a diced jalapeño to the filling. You can also use pepper jack cheese instead of cheddar for extra heat. My husband loves this version.
- Mexican-Inspired: Use taco seasoning instead of the individual spices, and add a can of drained black beans and some corn kernels to the filling. Top with salsa and avocado when serving.
- Low-Carb Option: Skip the rice entirely and use riced cauliflower instead. Sauté it briefly before adding to the filling to remove excess moisture. It works surprisingly well.
- Different Grains: Quinoa, farro, or even cooked barley all work great instead of rice. Each gives a slightly different texture—quinoa is light and fluffy, farro is chewy and hearty.
- Cheese Variations: Try mozzarella for stretchiness, Monterey Jack for mildness, or a Mexican blend for complexity. I once used crumbled feta on top and it was surprisingly good—salty and tangy against the sweet pepper.
I personally love the Mexican-inspired version for summer dinners. Something about the corn and black beans just feels right when the weather is warm. But the classic version is what I make most often—it’s the one that feels like a hug on a plate.
Serving & Storage Suggestions
These peppers are best served warm, straight from the oven. Let them rest for 5 minutes first, then place each one on a plate with the face facing up so everyone can see your handiwork. I like to serve them with a side of simple rice or a crisp green salad to round out the meal.
What to serve with them:
- A side of Mexican street corn or elote
- Simple steamed broccoli or green beans
- Warm tortillas or crusty bread for soaking up any juices
- A dollop of sour cream and a sprinkle of fresh cilantro
Storage: Leftover stuffed peppers keep well in the refrigerator for up to 4 days. Store them in an airtight container. The flavors actually meld together overnight and get even better—seriously, they’re amazing the next day.
Freezing: You can freeze these for up to 3 months. Let them cool completely, then wrap each pepper individually in plastic wrap and place them in a freezer bag. To reheat, thaw overnight in the fridge, then bake at 350°F (175°C) for 20-25 minutes until warmed through.
Reheating: The microwave works in a pinch, but the oven is better for keeping the peppers from getting soggy. Cover with foil and bake at 350°F for 15 minutes. If you’re in a hurry, microwave on medium power for 2-3 minutes.
One thing I love about this recipe is that the peppers actually get more tender and flavorful after a day in the fridge. So don’t be afraid to make a double batch. Future you will thank you.
Nutritional Information & Benefits
Here’s an approximate breakdown per serving (one stuffed pepper with beef and cheddar):
- Calories: 420
- Protein: 28g
- Carbohydrates: 32g
- Fat: 18g
- Fiber: 5g
- Sugar: 8g
- Sodium: 620mg
Health Benefits: Bell peppers are packed with vitamin C—actually, one red bell pepper has more vitamin C than an orange. They’re also a great source of vitamin A and antioxidants. The protein from the meat and cheese keeps you full and satisfied. If you use brown rice, you get extra fiber and B vitamins. This is comfort food that actually has some nutritional heft to it.
Dietary Considerations: This recipe can easily be made gluten-free (use certified gluten-free rice), dairy-free (swap cheese for plant-based), or lower-carb (use cauliflower rice). It’s naturally nut-free and egg-free. Just check your ingredient labels if you have specific allergies.
I always feel good serving these because they’re a complete meal in one package—protein, veggies, and carbs all together. No need for complicated sides. And honestly, when dinner looks this fun, you don’t even think about the fact that you’re eating a bell pepper.
Conclusion
These cozy jack-o-lantern stuffed peppers are the kind of recipe that makes you look forward to dinner. They’re fun to make, even more fun to serve, and they taste like the best kind of comfort food—warm, hearty, and full of flavor. Whether you’re making them for a Halloween party, a fall family dinner, or just because you want to smile while you eat, they deliver every single time.
I love how this recipe brings people together. There’s something about seeing those little pepper faces that makes everyone at the table grin. And the best part? You can customize them however you want. Spicy, mild, vegetarian, cheesy—make them your own. That’s what cooking is all about.
I’d love to hear how yours turn out! Drop a comment below and let me know what faces you carved, what fillings you used, or if your kids gave them a thumbs up. Tag me in your photos on social media too—I seriously get so excited seeing your creations. Happy cooking, and don’t forget to save the cut-out pieces for the filling. Trust me on that one.
Frequently Asked Questions
Can I make these ahead of time?
Absolutely. You can assemble the stuffed peppers completely (carve, fill, top with cheese) and refrigerate them uncovered for up to 24 hours. When you’re ready to bake, just pop them in the oven and add about 10 minutes to the baking time since they’ll be cold from the fridge.
What if my peppers tip over while baking?
This happens to the best of us. If your peppers are wobbly, spoon a little of the tomato sauce or even just water into the bottom of the baking dish to create a little “glue.” You can also crumple up small pieces of aluminum foil and tuck them between the peppers to keep them upright. No one will see the foil once the dish is on the table.
Can I use different colored peppers?
Yes, but orange and red peppers look the most jack-o-lantern-like. Green peppers work too—they just look a little more like a slightly unripe pumpkin. Yellow peppers are cheerful but don’t have that classic Halloween vibe. Use whatever you have on hand, honestly. The taste is still great.
How do I prevent the cheese from burning?
Cover the dish with foil for the first 25 minutes of baking, then remove it for the last 10-15 minutes. This gives the cheese time to melt and bubble without burning. If your cheese is browning too quickly, just cover it back up with foil for the remaining time.
Can I make these in an air fryer?
Yes! Preheat your air fryer to 350°F (175°C). Place the stuffed peppers in the basket (work in batches if needed) and cook for 15-18 minutes, checking halfway through. The air fryer gives the peppers a slightly firmer texture and the cheese gets extra crispy on top. Just make sure your peppers fit comfortably without touching the heating element.
Pin This Recipe!
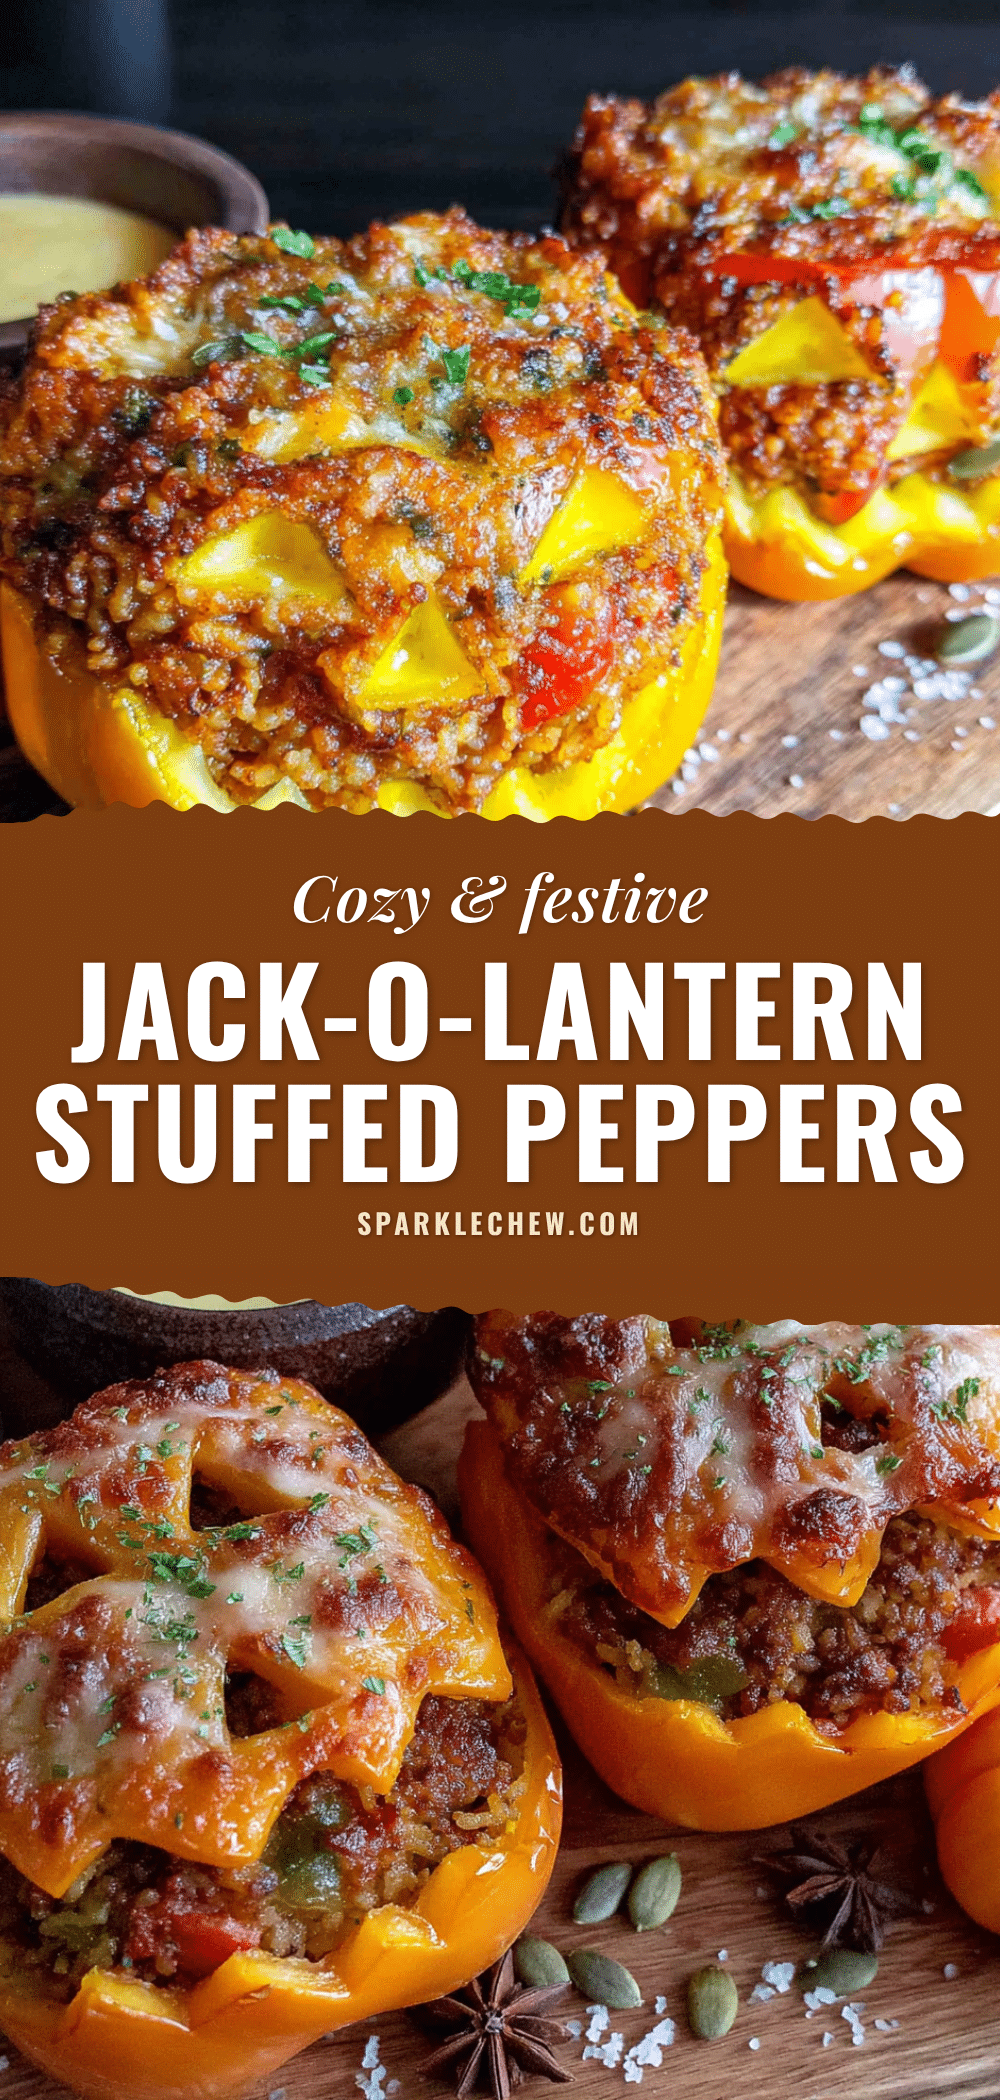
Cozy Jack-o-Lantern Stuffed Peppers: Easy Fall Dinner

Fun and festive stuffed bell peppers carved with jack-o-lantern faces, filled with a savory mixture of ground meat, rice, cheese, and spices. Perfect for a cozy fall dinner that delights kids and adults alike.
- Prep Time: 15 minutes
- Cook Time: 40 minutes
- Total Time: 55 minutes
- Yield: 4 servings 1x
- Category: Main Course
- Cuisine: American
Ingredients
- 4 large bell peppers (orange or red recommended)
- 1 tablespoon olive oil
- 1 lb ground beef or turkey (85/15 recommended)
- 1 cup cooked rice (white, brown, or cauliflower)
- 1 small onion, diced (about 1/2 cup)
- 2 cloves garlic, minced
- 1 can (14.5 oz) diced tomatoes, drained (fire-roasted preferred)
- 1 cup shredded cheddar cheese, plus extra for topping
- 1 teaspoon chili powder
- 1/2 teaspoon cumin
- 1/2 teaspoon smoked paprika
- Salt and black pepper to taste
- 2 tablespoons tomato paste
- Fresh parsley or cilantro, chopped (for garnish, optional)
- Sour cream or Greek yogurt (for serving, optional)
Instructions
- Preheat oven to 375°F (190°C). Bring a large pot of water to a boil.
- Wash and dry bell peppers. Cut around the stem and remove the top. Save tops for chopping into filling. Scoop out seeds and membranes.
- Using a sharp paring knife, carve jack-o-lantern faces on one side of each pepper (simple triangles for eyes and a jagged smile). Save cut-out pieces and chop finely for filling.
- Submerge hollowed peppers in boiling water for 3 minutes to blanch. Remove with tongs and drain upside down on paper towels.
- In a large skillet, heat olive oil over medium heat. Add diced onion and cook 3-4 minutes until translucent. Add garlic and cook 30 seconds.
- Add ground meat and cook, breaking it up, until browned (6-8 minutes). Drain excess fat if needed.
- Stir in chili powder, cumin, smoked paprika, salt, and pepper. Cook 1 minute. Add drained diced tomatoes and tomato paste. Simmer 2-3 minutes until thickened.
- Remove skillet from heat. Stir in cooked rice, 1 cup shredded cheddar cheese, and any chopped pepper pieces. Mix until cheese melts. Adjust seasoning.
- Place blanched peppers upright in a baking dish. Stuff each pepper generously with the filling. Top with extra shredded cheese.
- Cover dish with aluminum foil and bake for 25 minutes. Remove foil and bake another 10-15 minutes until cheese is bubbly and peppers are tender.
- Let peppers rest for 5 minutes before serving. Garnish with fresh parsley or cilantro and a dollop of sour cream if desired.
Notes
For best results, use squat, wide peppers for easier carving and stability. Blanching is essential to ensure even cooking. Save cut-out pepper pieces to add to filling. If peppers tip over, use crumpled foil to keep them upright. Resting after baking helps them hold their shape.
Nutrition
- Serving Size: 1 stuffed pepper
- Calories: 420
- Sugar: 8
- Sodium: 620
- Fat: 18
- Saturated Fat: 8
- Carbohydrates: 32
- Fiber: 5
- Protein: 28
Keywords: stuffed peppers, jack-o-lantern, fall dinner, Halloween, bell peppers, ground beef, comfort food


