Love this? Save it for later!
Share the inspiration with your friends
There used to be a little dive bar on the corner of 7th and Pine called The Lazy Eye that made the most ridiculous deviled eggs. They weren’t fancy—just classic, creamy, with a tiny sliver of pickled jalapeño on top. When they closed in 2018—turned into a juice bar, if you can believe it—I genuinely mourned those eggs. I mean, I actually stood outside the locked door one afternoon like a weirdo, peeking through the window. After 12 tries—12, honestly, with some truly tragic batches involving too much mustard and one where I accidentally used sweet relish—I finally got it. And then, because I can’t leave well enough alone, I turned them into these Easy Monster Eyeball Deviled Eggs for Halloween.
The first time I made these for a Halloween party, I showed up with a platter and my friend Jen said, “These are disturbing and I love them.” That’s pretty much the highest compliment you can get for a spooky appetizer. The thing is, they look like they took forever—like you spent your whole weekend piping and decorating—but the secret is they come together fast. Like, thirty minutes fast. You know that feeling when you’re scrambling to get a dish together before guests arrive and you just need something that looks impressive without the stress? These are it.
The best part? They taste exactly like the deviled eggs you already love. The “monster eyeball” part is just a clever little makeover with olives and a swipe of food coloring. No weird ingredients, no complicated techniques. Just good, classic deviled eggs that happen to look like they’re staring at you from the platter. Honestly, I keep making them long after Halloween passes—they’re that good.
Why You’ll Love This Recipe
Let’s be real—Halloween food can be a mixed bag. Some of it looks amazing but tastes like cardboard, and some of it tastes great but looks like, well, regular food. These Easy Monster Eyeball Deviled Eggs nail both. They’re creepy, they’re cute, and they taste like the deviled eggs your grandma used to make. Here’s why they work so well for busy weeknights and last-minute Halloween parties:
- Quick & Easy: From start to finish, you’re looking at about 30 minutes. The eggs boil while you prep the filling, and assembly takes maybe 10 minutes. Perfect for that “oh no, the party is in an hour” panic.
- Simple Ingredients: Eggs, mayo, mustard, vinegar, olives, and a drop of food coloring. That’s it. Nothing fancy, no special trip to a gourmet store. You probably have everything except maybe the olives.
- Perfect for Halloween: These are the star of any Halloween spread. Kids love them, adults love them, and they photograph beautifully for social media. Trust me, your Instagram story will get more taps than you expect.
- Crowd-Pleaser: Deviled eggs are one of those foods that everyone gravitates toward. Add a spooky twist, and suddenly you’re the hero of the party. Even people who “don’t like Halloween food” will grab two.
- Unbelievably Delicious: The filling is creamy, tangy, and perfectly seasoned. The olive “eyeball” adds a briny pop that complements the richness of the yolk mixture. It’s not just a gimmick—it genuinely tastes amazing.
What makes these different from every other Halloween deviled egg recipe out there? It’s the texture. I spent a long time getting the filling just right—not too runny, not too stiff, with that perfect balance of tang and creaminess. Plus, the olive placement is key. You want the eyeballs to look slightly unhinged, like they’re rolling around in their sockets. It’s a tiny detail, but it makes all the difference between “cute” and “disturbing in the best way.”
These are the kind of appetizer that makes people close their eyes after the first bite. It’s comfort food with a spooky twist—familiar, satisfying, but with a little Halloween magic thrown in. Perfect for impressing guests without breaking a sweat.
What Ingredients You Will Need
This recipe uses simple, pantry-friendly ingredients to create something that looks way more complicated than it actually is. Most of these are things you probably already have on hand, which is exactly what you want when you’re scrambling to get Halloween snacks together on a busy weeknight.
For the Deviled Eggs:
- 12 large eggs (room temperature if possible—they peel easier, but honestly, cold works in a pinch)
- 1/3 cup mayonnaise (I prefer Hellmann’s or Duke’s for that classic tangy flavor, but any good mayo works)
- 1 tablespoon yellow mustard (regular yellow mustard, not Dijon—you want that bright color and mild tang)
- 1 tablespoon white vinegar (or apple cider vinegar if that’s what you have; it adds a slightly fruitier note)
- 1/4 teaspoon salt (plus more for the boiling water)
- 1/4 teaspoon black pepper (freshly ground if you have it, but pre-ground is fine)
- 1/4 teaspoon paprika (plus extra for garnish; smoked paprika adds a nice depth if you’re feeling fancy)
For the Monster Eyeballs:
- 1 can (6 ounces) large pitted black olives (get the jumbo ones if you can find them—they look more eyeball-like)
- 1 jar (4 ounces) pimentos or roasted red peppers (for the “bloodshot” veins; you can also use small strips of sun-dried tomato)
- Red food coloring (gel works best for a deeper color, but liquid is fine; you only need a drop)
- 1 tablespoon olive oil (to give the eyeballs a little shine)
Ingredient Tips & Substitutions:
For the eggs, I always recommend using eggs that are at least a week old for easier peeling. Fresh eggs are a nightmare to peel—trust me, I learned this the hard way. If you’re short on time, you can buy pre-peeled hard-boiled eggs from some grocery stores, though they’re usually more expensive and not quite as fresh.
For the mayo, don’t use the low-fat or Miracle Whip varieties. The texture won’t be right, and the flavor will be off. Full-fat mayonnaise is non-negotiable here—it’s what gives the filling that silky, luxurious texture.
If you want to make these dairy-free, most mayonnaise is already dairy-free (check the label). For a vegan version, you can use vegan mayo and substitute the eggs with firm tofu, but honestly, it’s not quite the same. These are best made with real eggs.
For the olives, I’ve tried using green olives with pimentos, but the flavor is too sharp. Black olives have that mild, buttery taste that works perfectly with the creamy filling. Plus, they look more like actual eyeballs—dark center with a little red veining. It’s kind of creepy, and I mean that as a compliment.
Equipment Needed
You don’t need anything fancy for these monster eyeball deviled eggs. Most of this stuff is probably already in your kitchen drawers. Here’s what you’ll need:
- Large saucepan or pot (big enough to hold 12 eggs in a single layer without crowding)
- Slotted spoon (for gently lowering eggs into boiling water and fishing them out)
- Mixing bowls (one medium for the filling, one small for the olive prep)
- Fork or potato masher (for mashing the yolks; a fork works fine, a masher is faster)
- Piping bag or zip-top bag (for filling the eggs neatly; a zip-top bag with the corner snipped off works perfectly)
- Small knife (for slicing olives and pimentos)
- Cutting board (preferably a small one for easy cleanup)
- Measuring spoons (for mayo, mustard, vinegar, and seasonings)
- Egg platter or serving dish (something with a little lip to keep the eggs from sliding around)
If you don’t have a piping bag, don’t stress. A zip-top bag works just as well—just fill it with the yolk mixture, snip off a tiny corner, and pipe away. I’ve done it this way for years, and honestly, it’s less messy than a piping bag because you can throw the whole thing away when you’re done.
For the eggs, I highly recommend using a dedicated egg steamer if you have one. I picked up a cheap one at a garage sale for three dollars, and it changed my hard-boiled egg game completely. The shells practically fall off. If you don’t have one, no worries—the boiling method works great too.
Preparation Method
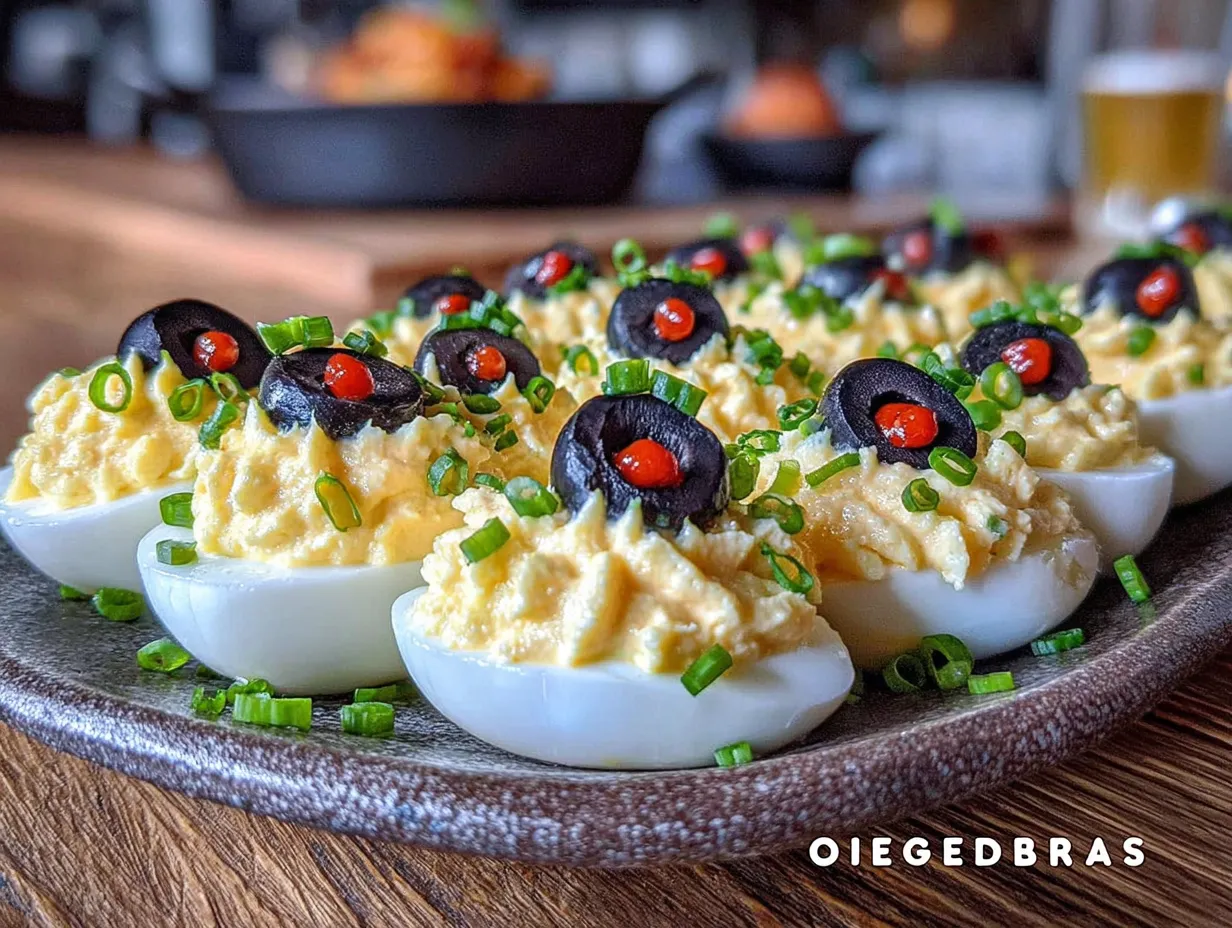
Alright, let’s make some monster eyeballs. This whole process takes about 30 minutes, and most of that is just waiting for the eggs to cook. Here’s how it goes down:
- Boil the eggs. Place your 12 eggs in a large saucepan and cover them with cold water by about an inch. Add a generous pinch of salt—this helps the shells peel off easier, I promise. Bring the water to a rolling boil over high heat. Once it’s boiling hard, cover the pot, turn off the heat, and let it sit for exactly 12 minutes. Set a timer—don’t guess. After 12 minutes, drain the hot water and fill the pot with ice water. Let the eggs sit in the ice bath for at least 5 minutes. This stops the cooking and makes peeling a breeze.
- Peel the eggs. Gently tap each egg on the counter to crack the shell all over, then roll it between your palms to loosen the shell. Start peeling from the wider end—there’s usually an air pocket there that makes it easier. Rinse each peeled egg under cold water to remove any tiny shell fragments. Pat them dry with a paper towel. If some eggs get a little beat up during peeling, don’t worry—they’ll still taste fine, and the filling covers a multitude of sins.
- Slice the eggs in half. Using a sharp knife, cut each egg lengthwise. Wipe the knife clean between cuts for neat edges. Gently pop the yolks out into a medium mixing bowl. Arrange the egg white halves on your serving platter, cut side up. Try to keep them in neat rows—it makes the decorating step easier later.
- Make the filling. Add the mayonnaise, yellow mustard, white vinegar, salt, pepper, and paprika to the bowl with the egg yolks. Mash everything together with a fork until it’s completely smooth. I like to press the mixture through a fine-mesh sieve for an ultra-creamy texture, but honestly, that’s optional. If you’re in a hurry, just mash well with a fork. Taste the filling and adjust the seasoning—maybe a little more salt, maybe another splash of vinegar. Trust your taste buds here.
- Prepare the “eyeballs.” While the eggs are cooling, drain the black olives and pat them dry with paper towels. Slice each olive in half crosswise (not lengthwise—you want round slices that look like pupils). You’ll need one olive half per egg half, so 24 olive halves total. For the “bloodshot” veins, take your pimentos or roasted red peppers and cut them into tiny, irregular strips—about the size of a matchstick. You want them to look like burst blood vessels, so don’t be too neat about it.
- Pipe the filling. Spoon the yolk mixture into a piping bag or a zip-top bag. If using a zip-top bag, squeeze the mixture into one corner and snip off about 1/4 inch from the tip. Pipe the filling into each egg white half, mounding it slightly. You want it to look full and generous—not flat. If you don’t have a piping bag, you can spoon the filling in, but piping gives a much nicer presentation.
- Add the monster eyes. Take each olive half and place it in the center of the piped filling, cut side down. Press gently so it stays put. Then, take your tiny pimento strips and arrange them around the olive like bloodshot veins. You want them to radiate outward from the olive, like little red lightning bolts. Don’t overthink this—a few strips per egg is plenty. The goal is “disturbing,” not “surgical.”
- Add the creepy finishing touches. Mix a drop of red food coloring with the olive oil and lightly brush it around the edges of the olive “eyeballs.” This gives them a slightly bloody, glossy look that really sells the monster effect. Dust the entire platter with a light sprinkle of paprika for color contrast. If you want extra creep factor, add a tiny dot of red food coloring at the corner of each “eye” to look like a tear of blood. I know that sounds intense, but it’s honestly hilarious at a party.
- Chill before serving. Pop the platter in the refrigerator for at least 15 minutes before serving. This lets the filling firm up and the flavors meld together. Plus, cold deviled eggs taste better—the filling gets creamy and the olives stay firm.
A quick note: if you’re making these for a party, you can prep everything a day ahead. Boil and peel the eggs, make the filling, and slice the olives. Store everything separately in the fridge. Assemble the eggs about an hour before serving. This makes party day so much less stressful—you just pipe, decorate, and go.
Cooking Tips & Techniques
After making these monster eyeball deviled eggs about fifty times (I’m not exaggerating—my family is so tired of them), I’ve picked up a few tricks that make the process smoother and the results better. Here are the ones that actually matter:
The egg peeling struggle is real. I’ve had batches where the shells came off in one perfect sheet and batches where I ended up with eggs that looked like they’d been through a war. The secret? Older eggs peel better. If your eggs are super fresh (like from a farm or your neighbor’s chickens), let them sit in the fridge for a week before boiling. Also, shocking them in an ice bath immediately after boiling is non-negotiable. That temperature shock loosens the membrane from the shell.
Don’t overmix the filling. I know it’s tempting to keep stirring until it’s perfectly smooth, but overmixing can make the filling gummy. Stop as soon as everything is combined and there are no big lumps. A few tiny bits of yolk are fine—they add texture. If you want it silky smooth, press it through a sieve, but don’t overmix by hand.
The olive placement matters. I learned this the hard way after making a batch where all the eyeballs looked like they were staring in different directions. Place the olive half in the center of the filling, and press it down just enough that it stays put but doesn’t sink into the filling. You want it to sit on top, like a real eyeball in its socket. And make sure the cut side is facing down—the rounded side up looks more natural (or, you know, more monstrous).
Multitask like a pro. While the eggs are boiling, slice your olives and pimentos. While the eggs are cooling in the ice bath, make the filling. While the filling chills, arrange your egg whites on the platter. Every minute counts when you’re cooking on a weeknight, and this recipe is designed for efficiency.
Temperature matters. Cold eggs are harder to peel, cold filling is harder to pipe, and cold deviled eggs taste better. Keep everything chilled until the last minute. If you’re piping the filling and it’s too stiff, let it sit at room temperature for 5 minutes. If it’s too runny, pop it in the fridge for 10 minutes. The perfect consistency is like thick peanut butter—pipeable but not runny.
One mistake I still make: Overfilling the eggs. I get excited and pipe too much filling, and then the olive eyeball slides off. Less is more. Leave a tiny border around the edge of the egg white so the filling stays contained. You can always add more, but you can’t take it away.
Variations & Adaptations
One of the best things about this recipe is how easy it is to customize. I’ve tried a bunch of variations over the years, and some of them have become new favorites. Here are a few ways to make these monster eyeballs your own:
Spicy Monster Eyes: Add 1/2 teaspoon of sriracha or hot sauce to the yolk mixture for a spicy kick. The heat pairs surprisingly well with the creamy filling and briny olives. I made these for a Halloween party where someone brought ghost pepper salsa, and these were the perfect cooling counterpoint—until they weren’t, because the heat sneaks up on you.
Smoky Eyeballs: Substitute the regular paprika with smoked paprika and add 1/4 teaspoon of liquid smoke to the filling. This gives the deviled eggs a subtle barbecue flavor that’s unexpected but delicious. The smoky notes complement the black olives beautifully. I tried this on a whim one year and now it’s my go-to for fall gatherings.
Zombie Eyeballs: For a truly gruesome look, add a few drops of green food coloring to the filling. The green yolk mixture looks like something from a zombie movie, especially with the dark olive “pupil” staring out from the center. My nephew requested these for his “zombie birthday party” and they were a huge hit with the 10-year-old crowd.
Dairy-Free Monster Eyes: Use vegan mayonnaise and skip the butter in any optional garnishes. The filling will be slightly less rich, but still creamy and delicious. I’ve made these for friends with dairy allergies and no one noticed the difference—the olives and spices do most of the heavy lifting flavor-wise.
Bloodshot Eyeballs: Instead of pimentos, use thin strips of sun-dried tomato or even tiny pieces of roasted red pepper from a jar. The deeper red color looks more like actual blood vessels. I’ve also used sriracha sauce drizzled in thin lines around the olive for a spicy, bloody effect. It’s not for the faint of heart, but it sure is fun.
Mini Monster Eyes: Use quail eggs instead of chicken eggs for bite-sized appetizers. Quail eggs are smaller and cook in about 4 minutes instead of 12. They’re perfect for cocktail parties where you want people to grab and go. Plus, they look even more eyeball-like because they’re so tiny. Just be prepared—peeling quail eggs is a delicate operation. I recommend using a small pair of tweezers for the stubborn bits of shell.
Serving & Storage Suggestions
These monster eyeball deviled eggs are best served cold, straight from the refrigerator. The filling firms up nicely when chilled, and the olives stay firm and glossy. Here’s how to serve and store them for maximum impact:
Serving Temperature: Take the platter out of the fridge about 10 minutes before serving. This takes the chill off without letting the filling get soft. If you’re serving them at a party, keep the platter on a bed of ice to maintain the temperature. Deviled eggs left out for more than 2 hours should be discarded—food safety first, even on Halloween.
Presentation Tips: Arrange the eggs on a dark platter or black serving tray for maximum contrast. The white eggs and dark olives pop against a dark background. I like to garnish the platter with a few whole black olives and a sprinkle of paprika for visual interest. If you’re feeling extra spooky, add a few plastic spiders or fake eyeballs around the platter for decoration. Just make sure they’re clearly not food—I’ve had guests almost eat the plastic ones.
Complementary Dishes: These deviled eggs pair perfectly with other Halloween snacks. Serve them alongside mummy hot dogs, spiderweb dip with tortilla chips, or pumpkin-shaped cheese balls. For drinks, a crisp white wine or a dark beer complements the creamy, tangy filling. For non-alcoholic options, apple cider or sparkling water with a splash of pomegranate juice works great.
Storage Instructions: Store leftover deviled eggs in an airtight container in the refrigerator for up to 3 days. Place them in a single layer with a sheet of paper towel on top to absorb any moisture. Do not freeze deviled eggs—the texture will be ruined when thawed. The filling will become watery and the egg whites will get rubbery.
Make-Ahead Notes: You can boil and peel the eggs up to 3 days in advance. Store the peeled eggs in a bowl of cold water in the refrigerator, changing the water daily. You can also make the filling up to 2 days ahead and store it in a piping bag in the fridge. Assemble the eggs no more than 6 hours before serving for the best presentation. The olives may weep a little liquid if they sit too long on the filling.
Flavor Development: Honestly, these taste even better the next day. The flavors meld together overnight, and the filling gets creamier. If you’re making them for a party, I recommend assembling them the night before and refrigerating overnight. Just add the olive “eyeballs” right before serving so they stay fresh and glossy.
Nutritional Information & Benefits
Let’s be real—deviled eggs aren’t health food, but they’re not terrible for you either. Here’s the breakdown for one monster eyeball deviled egg (one egg half with filling and olive):
- Calories: Approximately 85-95 calories per piece
- Protein: 6 grams
- Fat: 7 grams (mostly from the egg yolk and mayonnaise)
- Carbohydrates: 1 gram
- Fiber: 0 grams
- Sugar: 0 grams
- Sodium: 180-200 mg
Health Benefits: Eggs are a fantastic source of high-quality protein and contain essential nutrients like vitamin B12, vitamin D, and choline, which supports brain health. The yolks contain lutein and zeaxanthin, antioxidants that are good for eye health—which is kind of ironic for a recipe about eyeballs, isn’t it? Olives provide healthy monounsaturated fats and vitamin E. While this isn’t a low-calorie snack, it’s a satisfying one that provides real nutritional value.
Dietary Considerations: These deviled eggs are naturally gluten-free, low-carb, and keto-friendly. They contain dairy (if you use regular mayonnaise, check the label—some brands add milk solids). They are not suitable for vegans or those with egg allergies. For a lower-fat version, you can substitute half the mayonnaise with plain Greek yogurt, though the texture will be slightly different—tangier and less rich.
Allergen Note: Eggs are a common allergen, and some mayonnaise brands may contain soy or other allergens. Always check labels if you’re serving guests with dietary restrictions. I once made these for a friend with a soy allergy using an avocado oil-based mayonnaise, and they turned out great—just slightly greener in color, which actually added to the monster vibe.
My Personal Take: Look, I’m not a nutritionist—I’m just a person who loves food and wants to enjoy Halloween without feeling terrible afterward. These deviled eggs are a treat, and they should be enjoyed as such. One or two as a snack is fine. Eating the whole platter? Maybe save that for a special occasion. Balance, you know?
Conclusion
These Easy Monster Eyeball Deviled Eggs are proof that Halloween food doesn’t have to be complicated to be impressive. With just a few simple ingredients and about 30 minutes, you can create something that looks like it came from a professional caterer—or a haunted house, depending on your perspective. The best part? They actually taste amazing. No gimmicks, no weird flavors, just classic deviled eggs with a spooky twist that makes everyone smile.
I’ve made these for Halloween parties, potlucks, and even just for fun on a random Tuesday when I needed a pick-me-up. They never fail to get a reaction. People lean in, squint at the “eyeballs,” laugh, and then grab two. That’s the magic of this recipe—it’s equal parts delicious and delightful.
Don’t be afraid to make them your own. Add more spice, change up the colors, or experiment with different olive arrangements. The monster eyeball is your canvas—have fun with it. And if you come up with a variation that’s even creepier (or more delicious), I want to hear about it. Drop a comment below and tell me how your monster eyeballs turned out. Did your kids love them? Did your coworkers freak out? Did you accidentally make them look like they’re crying blood? Share your stories—I read every single one.
Now go boil some eggs and get creepy. Happy Halloween!
Frequently Asked Questions
Can I make these monster eyeball deviled eggs ahead of time?
Absolutely! You can boil and peel the eggs up to 3 days in advance and store them in cold water in the fridge. The filling can be made 2 days ahead and stored in a piping bag. For best results, assemble the eggs no more than 6 hours before serving, and add the olive “eyeballs” right before serving for the freshest look.
What if I can’t find large black olives?
No worries! You can use regular-sized black olives—they’ll just look like smaller eyeballs, which is honestly kind of cute. You can also use green olives stuffed with pimentos, though the flavor will be a bit more briny and tangy. For a truly creepy effect, try using kalamata olives for a deeper, darker “pupil.”
How do I get perfectly peeled hard-boiled eggs every time?
The secret is older eggs and an ice bath. Use eggs that are at least a week old. Boil them, then immediately transfer them to an ice water bath for at least 5 minutes. The temperature shock loosens the membrane from the shell. Gently crack the shell all over, then peel starting from the wider end where the air pocket is. Running them under cold water while peeling helps too.
Can I make these dairy-free or vegan?
For dairy-free, most mayonnaise is already dairy-free, but check the label to be sure. For vegan deviled eggs, you can use firm tofu instead of eggs and vegan mayonnaise. The texture won’t be exactly the same, but it’s a decent alternative. The olive “eyeballs” are naturally vegan, so that part is covered.
How long do these deviled eggs last in the fridge?
Assembled deviled eggs will keep in an airtight container in the refrigerator for up to 3 days. However, the olives may start to weep liquid after 24 hours, so they’re best eaten within the first day. Store them in a single layer with a paper towel on top to absorb excess moisture. Do not freeze deviled eggs—the texture will be ruined.
Pin This Recipe!
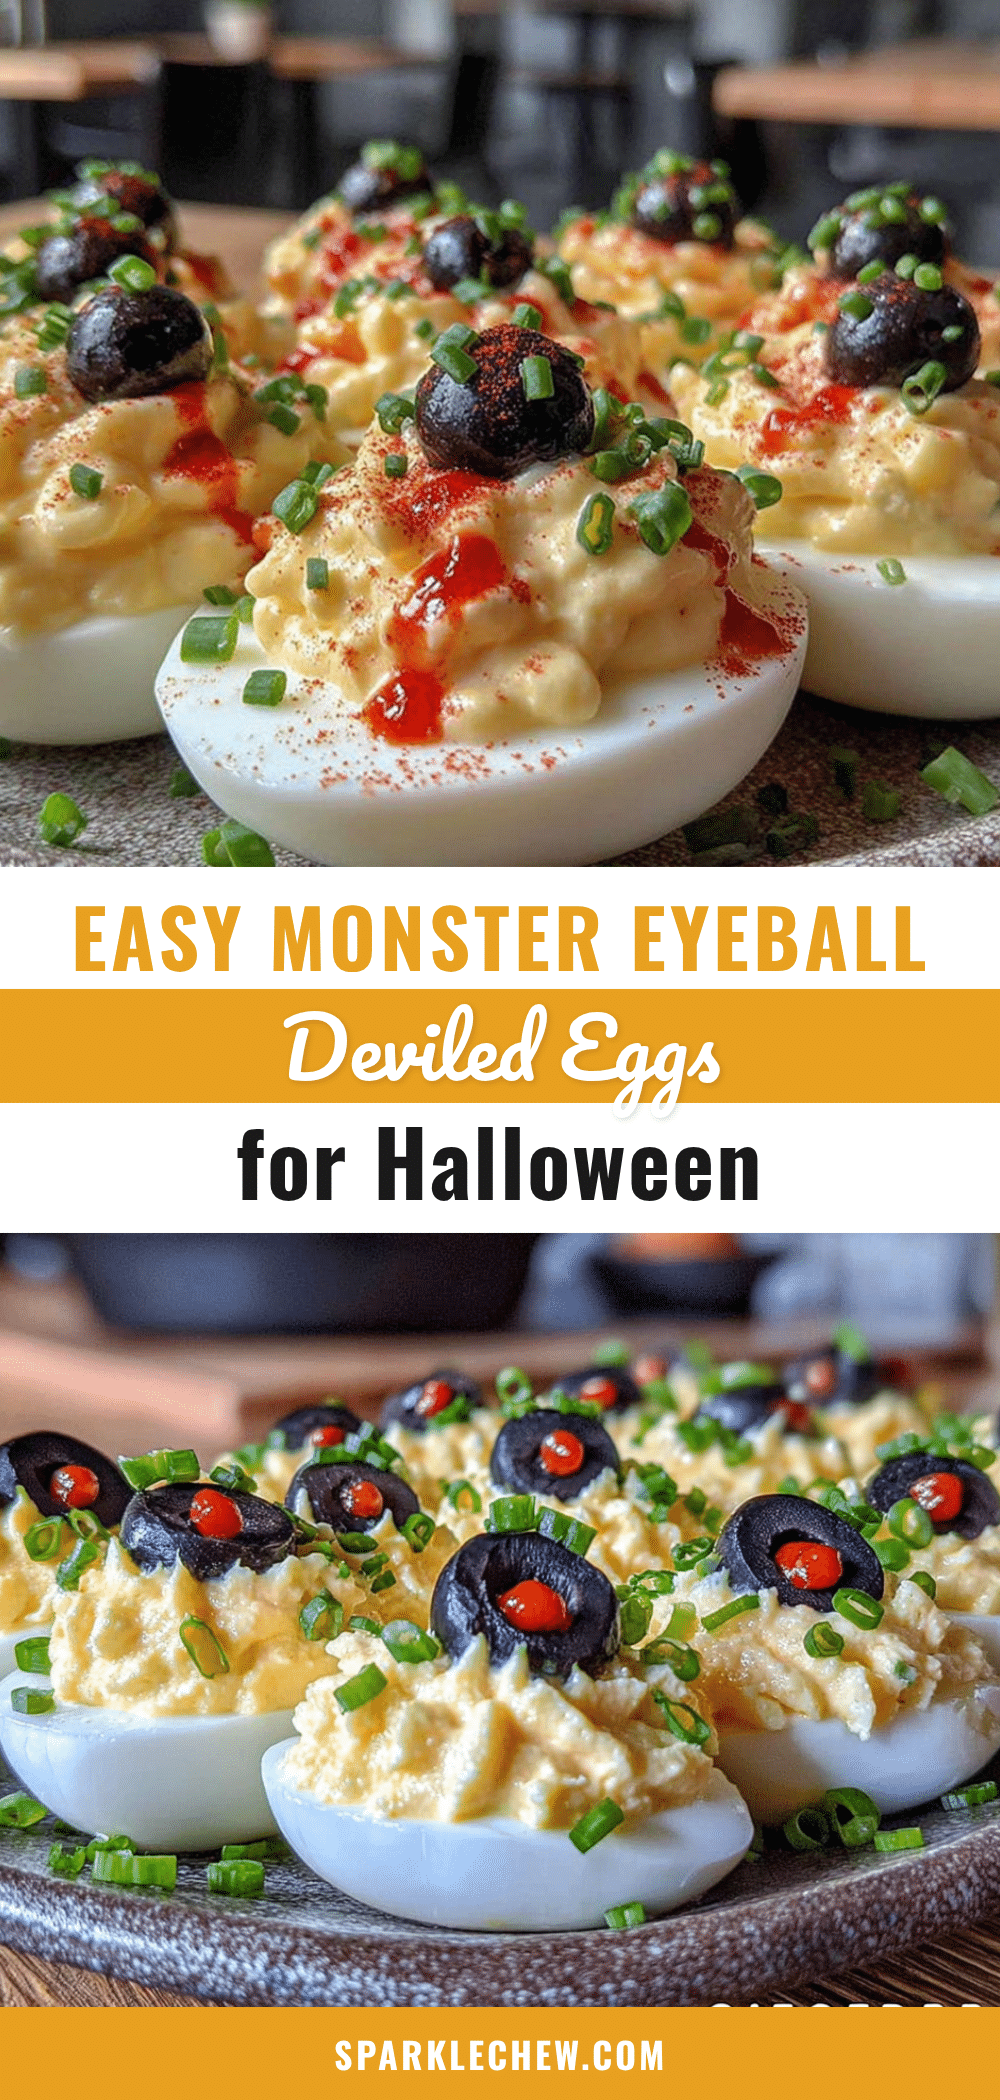
Best Easy Monster Eyeball Deviled Eggs for Halloween

These Easy Monster Eyeball Deviled Eggs are the perfect spooky Halloween appetizer—creepy, cute, and delicious. With a creamy, tangy filling and olive ‘eyeballs,’ they come together in just 30 minutes using simple ingredients.
- Prep Time: 15 minutes
- Cook Time: 12 minutes
- Total Time: 30 minutes
- Yield: 24 deviled egg halves (12 servings of 2 halves each) 1x
- Category: Appetizer
- Cuisine: American
Ingredients
- 12 large eggs (room temperature if possible)
- 1/3 cup mayonnaise (Hellmann’s or Duke’s recommended)
- 1 tablespoon yellow mustard
- 1 tablespoon white vinegar (or apple cider vinegar)
- 1/4 teaspoon salt (plus more for boiling water)
- 1/4 teaspoon black pepper (freshly ground preferred)
- 1/4 teaspoon paprika (plus extra for garnish; smoked paprika optional)
- 1 can (6 ounces) large pitted black olives (jumbo preferred)
- 1 jar (4 ounces) pimentos or roasted red peppers (for bloodshot veins)
- Red food coloring (gel works best)
- 1 tablespoon olive oil
Instructions
- Boil the eggs: Place 12 eggs in a large saucepan, cover with cold water by 1 inch, and add a generous pinch of salt. Bring to a rolling boil over high heat, then cover, turn off heat, and let sit for exactly 12 minutes. Drain and transfer to an ice water bath for at least 5 minutes.
- Peel the eggs: Gently crack each egg on the counter, roll between palms to loosen shell, and peel starting from the wider end. Rinse under cold water and pat dry.
- Slice the eggs: Cut each egg lengthwise with a sharp knife. Pop out yolks into a medium bowl. Arrange egg white halves on a serving platter, cut side up.
- Make the filling: Add mayonnaise, yellow mustard, white vinegar, salt, pepper, and paprika to the yolks. Mash with a fork until smooth. Taste and adjust seasoning as needed.
- Prepare the eyeballs: Drain black olives and pat dry. Slice each olive in half crosswise to create round slices (24 halves total). Cut pimentos or roasted red peppers into tiny, irregular strips for bloodshot veins.
- Pipe the filling: Spoon yolk mixture into a piping bag or zip-top bag. Snip off 1/4 inch from the corner. Pipe filling into each egg white half, mounding slightly.
- Add the monster eyes: Place an olive half in the center of each piped filling, cut side down. Arrange pimento strips around the olive to look like bloodshot veins.
- Add creepy finishing touches: Mix a drop of red food coloring with olive oil and lightly brush around the edges of the olive eyeballs. Dust with paprika. Optionally, add a tiny dot of red food coloring at the corner of each eye for a blood tear effect.
- Chill before serving: Refrigerate the platter for at least 15 minutes to firm up the filling and meld flavors.
Notes
For easier peeling, use eggs that are at least a week old. Shocking boiled eggs in an ice bath is essential for easy peeling. The filling can be made 2 days ahead and stored in a piping bag in the fridge. Assemble eggs no more than 6 hours before serving for best presentation. Add olive eyeballs right before serving to keep them fresh and glossy. Leftover deviled eggs keep in an airtight container in the fridge for up to 3 days; do not freeze.
Nutrition
- Serving Size: 2 deviled egg halves
- Calories: 170190
- Sodium: 360400
- Fat: 14
- Saturated Fat: 3
- Carbohydrates: 2
- Protein: 12
Keywords: Halloween deviled eggs, monster eyeball deviled eggs, spooky appetizer, easy Halloween recipe, deviled eggs with olives, creepy deviled eggs


