Love this? Save it for later!
Share the inspiration with your friends
My roommate asked why I couldn’t just throw some creepy snacks on a board instead of making a whole Halloween spread. I started to explain why that wouldn’t work — then stopped. She had a point.
I’d been planning this elaborate themed dinner for weeks, complete with spooky cocktails and a multi-course menu that would have taken all day to prepare. She just wanted to watch Hocus Pocus and snack on something fun without the fuss. Honestly, she was right. I was overcomplicating it again.
So I grabbed a small cutting board, raided the pantry, and started arranging. Black olives became spider bodies. Cheese cubes turned into little tombstones. Crackers stacked up like haunted houses. Within fifteen minutes, we had the most adorable mini Halloween charcuterie board for two, and I hadn’t even broken a sweat. Maybe you’ve been there — spending hours planning something elaborate when the simplest version would have been way more fun.
That night, sitting on the couch with a glass of wine and that little board between us, I realized something important. Halloween entertaining doesn’t need to be complicated. It just needs to feel festive and delicious. These easy mini Halloween charcuterie boards for two are proof that you can have something spooky and special without spending your whole day in the kitchen. Let me show you how simple they really are.
Why You’ll Love This Recipe
After making these boards for every Halloween gathering since that first night, I can tell you exactly why they work so well. They’re the kind of recipe that makes you look like you put in way more effort than you actually did.
- Quick & Easy : These boards come together in under 15 minutes. No cooking, no baking, no complicated steps. Just arrange and serve.
- Simple Ingredients : You probably already have most of these snacks in your pantry. A quick trip to the grocery store for a few specialty items is all you need.
- Perfect for a Cozy Night In : Whether it’s a date night, a movie marathon with a friend, or just treating yourself, these boards are made for two people who want to snack and relax.
- Crowd-Pleaser : Everyone loves a good charcuterie board. The Halloween twist just makes it more fun. Kids and adults alike will grab for those spooky treats.
- Unbelievably Delicious : The combination of salty, sweet, savory, and crunchy is pure snack heaven. Plus, you get to eat with your hands, which is always a win.
What makes this different from other Halloween snack boards is the focus on simplicity and portion control. Most Halloween charcuterie ideas feed a crowd. This one is intentionally scaled for two people, which means less waste and more of those perfect bites for you. It’s comfort food reimagined — festive, fun, but with the same satisfying snacking experience.
Perfect for impressing a date without stress, or turning a simple Friday night into something memorable. I mean, who doesn’t want to eat cheese shaped like a ghost?
What Ingredients You Will Need
This recipe uses simple, store-bought ingredients to create something that looks way more elaborate than it actually is. The key is choosing items that work well together flavor-wise while also fitting your spooky theme.
- Cheese Selection (3-4 varieties): Choose a mix of textures. Cheddar (cut into tombstone shapes), mozzarella balls (for ghost-like shapes), and a soft cheese like brie or goat cheese work great. (Pro tip: use a small cookie cutter to shape cheese into bats or pumpkins.)
- Cured Meats (2-3 options): Salami, prosciutto, or pepperoni. Roll them up to look like little logs or fold them into spider shapes. (I like using genoa salami for its rich flavor.)
- Halloween-Themed Crackers: Look for bat-shaped, pumpkin-shaped, or plain round crackers. Pretzel sticks make great “bones” or “fence posts.” (Trader Joe’s usually has great seasonal options.)
- Olives (black and green): Black olives look like little spiders. Green olives stuffed with pimento add a pop of color. (Look for large olives for easier arranging.)
- Halloween Candy: Mini candy bars, candy corn, or gummy worms. These add sweetness and visual fun. (I always include a few gummy worms crawling off the board.)
- Dips and Spreads: Pumpkin hummus (yes, it exists), spinach dip dyed green, or a simple honey for drizzling over cheese. (You can also use store-bought ranch dip and add a drop of green food coloring.)
- Fresh Fruit and Vegetables: Grapes (cut in half for eyeballs), carrot sticks (fingers), and apple slices. (Use lemon juice on apples to prevent browning.)
- Nuts and Seeds: Pumpkin seeds (pepitas) are perfect for Halloween. Almonds or cashews add crunch. (Toast them lightly for extra flavor.)
- Optional Decorations: Small plastic spiders, edible glitter, or Halloween-themed toothpicks. (These aren’t necessary but add a fun touch.)
For substitutions, you can easily swap in any cheese or meat you prefer. If you’re vegetarian, skip the meat and add more cheese and veggies. For a dairy-free option, use vegan cheese and crackers. The beauty of charcuterie is its flexibility — you really can’t mess it up.
Equipment Needed
You don’t need much for this recipe, which is part of its charm. Here’s what you’ll want to have on hand:
- Small Cutting Board or Serving Board: A 12×8 inch board is perfect for two people. Wood, slate, or ceramic all work. (I found a great little slate board at a thrift store for three dollars.)
- Small Bowls or Ramekins: For dips, olives, and small items. (Ramekins from the dollar store work perfectly.)
- Cheese Knife or Small Spreader: For soft cheeses and dips. (A butter knife works in a pinch.)
- Small Cookie Cutters (optional): Bat, pumpkin, or ghost shapes for cutting cheese. (These are fun but not essential.)
- Tongs or Small Spoons: For serving. (I always forget these and end up using my fingers, which is fine for a casual night in.)
- Parchment Paper (optional): For easy cleanup. (Lining your board makes cleanup a breeze.)
If you don’t have a proper charcuterie board, a large dinner plate or a baking sheet works just as well. Honestly, I’ve used a cutting board more times than I can count. Don’t let the lack of fancy equipment stop you.
Preparation Method
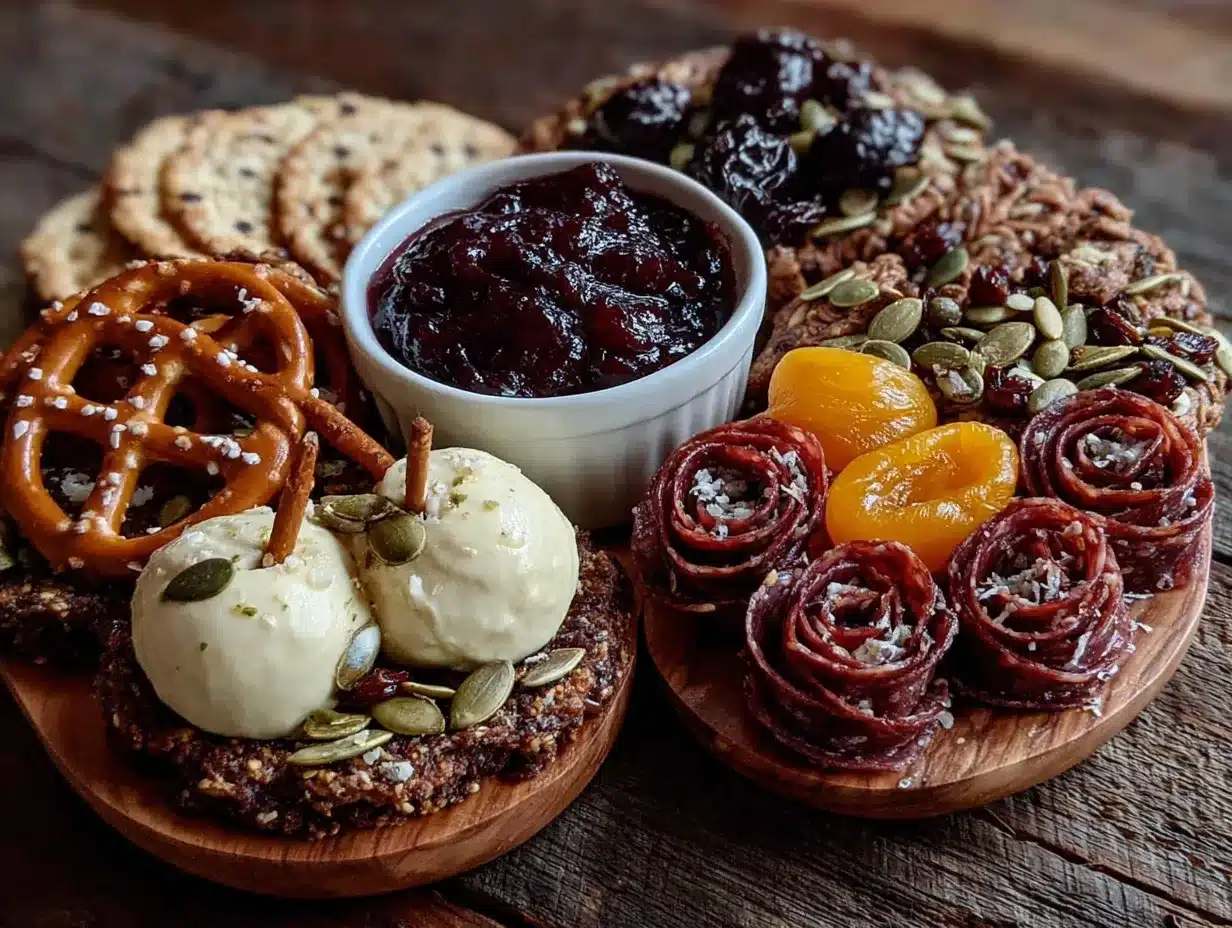
Making these mini Halloween charcuterie boards is more about arranging than actually cooking. Here’s how to do it step by step:
- Prepare Your Board (2 minutes): Start with a clean, dry board. If using parchment paper, cut a piece to fit and lay it down. Place your small bowls or ramekins where you want them — typically in the corners or center of the board.
- Add the Dips and Spreads (2 minutes): Spoon your dips into the small bowls. For pumpkin hummus, you can scoop it into a small pumpkin-shaped bowl if you have one. Place the bowls on the board first, as they take up the most space.
- Arrange the Cheese (3 minutes): Cut your cheese into shapes if using cookie cutters. Place the cheese in different areas of the board, spreading them out so there’s something cheesy near every spot. For tombstone-shaped cheddar, cut rectangles and use a knife to carve a small “RIP” on each one.
- Add the Meats (2 minutes): Roll salami slices into little logs or fold prosciutto into loose ribbons. Place them near the cheese. For spider-shaped salami, cut a slice in half, roll one half into a body, and cut the other half into thin strips for legs.
- Fill in with Crackers and Bread (2 minutes): Arrange crackers around the cheese and meat. Stack a few for height. Pretzel sticks can be arranged like a fence or broken into smaller pieces.
- Add the Produce (2 minutes): Place olives (spiders), grapes (eyeballs), and carrot sticks (fingers) in small clusters. Fill any empty spaces with these items. For grape eyeballs, cut grapes in half and add a small dot of cream cheese for the pupil.
- Finish with Candy and Decorations (2 minutes): Sprinkle candy corn or mini candy bars in small piles. Add gummy worms crawling off the edge of the board. Place any plastic spiders or Halloween decorations for extra fun.
- Final Check (1 minute): Step back and look at your board. Fill any obvious empty spots with nuts or extra crackers. Make sure everything is accessible and visually balanced. Serve immediately.
Pro Tip: Don’t overcrowd the board. Leave a little space between items so it looks intentional and easy to grab. You want it to look abundant, not messy.
Sensory Cue: When you’re done, the board should look like a tiny Halloween feast — colorful, varied, and inviting. The cheese should be at room temperature for best flavor, so let it sit out for about 15 minutes before serving if you have time.
Cooking Tips & Techniques
Over the years, I’ve learned a few tricks that make these boards even better. Here are my best tips:
Balance Your Flavors: Aim for a mix of salty (meats, olives), sweet (fruit, candy), savory (cheese, crackers), and acidic (pickles, if using). This keeps every bite interesting. I once made a board with all salty items and it was boring after three bites. Learn from my mistake.
Create Height and Depth: Don’t lay everything flat. Stack crackers, fold meats, and prop cheese slices against bowls. This makes the board look more substantial and professional. Trust me, a flat board looks sad.
Use Color Contrast: Dark olives against white cheese, orange cheddar next to green grapes, red salami beside pale crackers. The visual contrast makes the board pop. I always include something orange (cheese, candy corn) for that Halloween feel.
Prep Everything Before Arranging: Cut all your cheese, shape your meats, and portion your candy before you start placing items on the board. This prevents you from having to stop mid-arrangement and hunt for things. It sounds obvious, but I’ve definitely had to pause to find a knife while my board sat half-finished.
Don’t Stress About Perfection: The beauty of charcuterie is its rustic nature. If something falls over or looks messy, just rearrange it. No one will notice. I once dropped a whole pile of olives and just rearranged them into a different spot. It looked fine.
Keep It Cold Until Serving: If you’re making the board ahead of time, cover it with plastic wrap and refrigerate. Just remember to let the cheese come to room temperature for about 15 minutes before serving for optimal flavor. Cold cheese is sad cheese.
Variations & Adaptations
One of the best things about these boards is how easily you can customize them. Here are some variations I’ve tried:
Vegetarian Version: Skip the meat and double up on cheese, veggies, and nuts. Add marinated artichoke hearts, roasted red peppers, and hummus for extra flavor. I made this for my vegetarian friend and she said it was the best board she’d ever had.
Sweet Tooth Board: Focus on desserts. Use chocolate-covered pretzels, candy corn, mini pumpkin pies, chocolate bars, and fruit. Add a small bowl of caramel or chocolate sauce for dipping. This is perfect for a Halloween movie night.
Healthy-ish Board: Use low-fat cheese, turkey pepperoni, lots of fresh veggies, and dark chocolate for candy. Add apple slices with peanut butter and celery sticks with ranch. You still get the fun without the guilt.
Spicy Board: Add jalapeño-stuffed olives, spicy salami, pepper jack cheese, and chili-lime nuts. The heat pairs perfectly with the sweet candy elements. My husband loves this version.
Kid-Friendly Board: Use mild cheese, kid-friendly crackers, and lots of candy. Shape cheese into fun shapes with cookie cutters. Add fruit skewers and let them build their own combinations. My niece went crazy for the ghost-shaped mozzarella.
Seasonal Swap: In fall, use apple slices and pumpkin seeds. In winter, add pomegranate seeds and dark chocolate. In spring, fresh berries and edible flowers. The Halloween theme works year-round with a few tweaks.
Serving & Storage Suggestions
These boards are best served immediately at room temperature. The cheese is softer, the crackers are crispier, and everything just tastes better. If you’re serving for a party, set the board out about 15 minutes before guests arrive.
For presentation, I like to place the board on a larger table with napkins and small plates. Add a few Halloween-themed cocktail napkins for extra flair. If you’re doing a movie night, set the board on the coffee table with drinks nearby.
As for complementary dishes, these boards pair beautifully with a warm bowl of pumpkin soup or a simple salad. For drinks, try a mulled cider, a pumpkin spice latte, or a glass of red wine. The salty-sweet combo loves a good beverage pairing.
Storage: If you have leftovers (unlikely, but possible), separate the components and store them in airtight containers. Cheese and meats go in the fridge, crackers in a cool dry place, and candy in a sealed bag. The board itself can be wiped clean with a damp cloth.
Reheating: There’s nothing to reheat here, but if you refrigerated the cheese, let it sit out for 15 minutes before serving again. The crackers might lose some crunch, so you can refresh them with a quick toast in the oven at 300°F for 3 minutes.
Flavors actually develop over time with charcuterie. The cheese and meats meld together in the fridge, making leftovers taste even better the next day. Just don’t leave the board out for more than two hours at room temperature for food safety.
Nutritional Information & Benefits
While this is definitely a treat-yourself recipe, there are some nutritional benefits worth mentioning. Here’s an approximate breakdown per serving (half the board):
- Calories: 450-550 (depending on ingredients)
- Protein: 20-25 grams (from cheese and meats)
- Fat: 30-35 grams (healthy fats from cheese and nuts)
- Carbohydrates: 35-40 grams (from crackers, fruit, and candy)
- Fiber: 4-6 grams (from nuts, fruit, and veggies)
Health Benefits: Cheese provides calcium and protein for strong bones and muscles. Nuts offer healthy fats and vitamin E. Fruits and vegetables add fiber and antioxidants. Even dark chocolate (if you include it) has flavonoids that support heart health.
Dietary Considerations: This recipe can easily be made gluten-free (use gluten-free crackers), vegetarian (skip the meat), or dairy-free (use vegan cheese). It’s naturally low in added sugar if you skip the candy. Just be mindful of portion sizes if you’re watching calories.
I personally love that this recipe lets me indulge without going overboard. The portion is perfect for two people, so you get the fun without the guilt of a giant spread. It’s all about balance, right?
Conclusion
These easy mini Halloween charcuterie boards for two are proof that you don’t need a huge party or hours in the kitchen to make something special. They’re quick, fun, and completely customizable to whatever you and your snack buddy are craving.
I love that this recipe came from a moment of letting go of perfection and just having fun with food. That night on the couch with my roommate, watching a cheesy horror movie and grabbing handfuls of snacks from our little board, is one of my favorite Halloween memories. It wasn’t fancy. It wasn’t elaborate. But it was exactly what we needed.
So grab a board, raid your pantry, and get creative. Add your favorite snacks, shape your cheese into something silly, and don’t forget the gummy worms crawling off the edge. I promise you’ll love it.
Have you made your own Halloween charcuterie board? What’s your go-to spooky snack? Drop a comment below and share your creations — I’d love to see what you come up with. And if you try this recipe, tag me so I can cheer you on. Happy snacking, and Happy Halloween!
Frequently Asked Questions
Can I make these boards ahead of time?
Yes! You can prep all the ingredients up to 24 hours in advance. Just assemble the board right before serving to keep everything fresh. Store prepped items in separate containers in the fridge.
What if I don’t have Halloween-themed cookie cutters?
No problem! You can cut cheese into simple shapes with a knife, or just leave it in cubes and slices. The fun is in the arrangement, not the shapes. A small knife can create basic pumpkin or bat outlines.
How do I keep the crackers from getting soggy?
Place crackers away from moist items like fruit and dips. If you’re worried, add crackers right before serving. You can also use sturdy crackers that hold up better, like pretzel crisps or pita chips.
Can I make this for more than two people?
Absolutely! Just scale up the ingredients and use a larger board. For four people, double everything. For a party, consider making multiple small boards so guests can grab their own.
What’s the best way to clean the board after serving?
Wipe the board with a damp cloth and mild soap. Avoid soaking wooden boards. For stubborn cheese residue, use a plastic scraper or a little baking soda paste. Let it dry completely before storing.
Pin This Recipe!
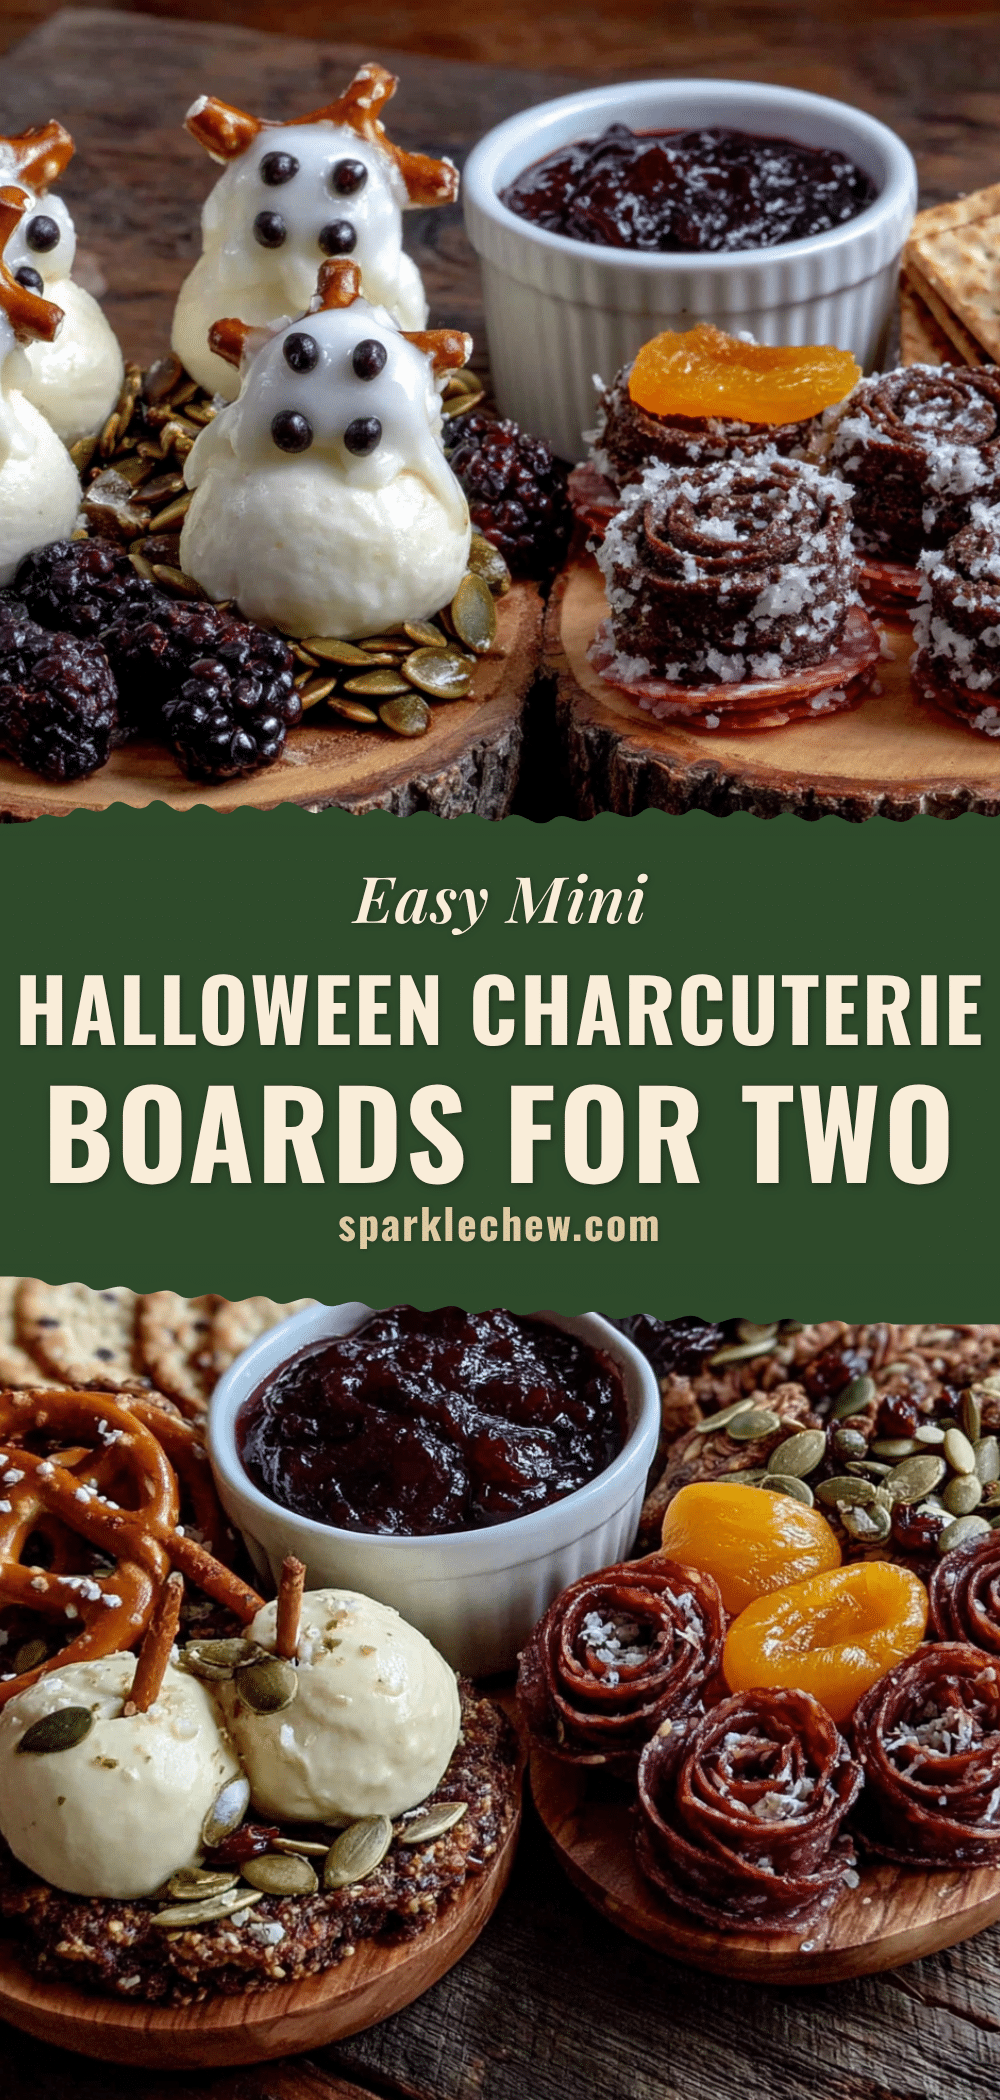
Easy Mini Halloween Charcuterie Boards for Two
These easy mini Halloween charcuterie boards for two come together in under 15 minutes with simple ingredients. Perfect for a cozy night in watching Hocus Pocus, they feature spooky snacks like spider olives, tombstone cheese, and gummy worms crawling off the edge.
- Prep Time: 15 minutes
- Cook Time: 0 minutes
- Total Time: 15 minutes
- Yield: 2 servings 1x
- Category: Appetizer
- Cuisine: American
Ingredients
- 3–4 varieties of cheese (cheddar, mozzarella balls, brie or goat cheese)
- 2–3 cured meats (salami, prosciutto, or pepperoni)
- Halloween-themed crackers (bat-shaped, pumpkin-shaped, or plain round crackers)
- Pretzel sticks
- Black and green olives
- Halloween candy (mini candy bars, candy corn, or gummy worms)
- Dips and spreads (pumpkin hummus, spinach dip, honey, or ranch dip)
- Fresh fruit and vegetables (grapes, carrot sticks, apple slices)
- Nuts and seeds (pumpkin seeds, almonds, or cashews)
- Optional decorations (small plastic spiders, edible glitter, Halloween-themed toothpicks)
Instructions
- Prepare your board: Start with a clean, dry board. If using parchment paper, cut a piece to fit and lay it down. Place small bowls or ramekins where you want them.
- Add the dips and spreads: Spoon dips into the small bowls and place them on the board first.
- Arrange the cheese: Cut cheese into shapes using cookie cutters if desired. Place cheese in different areas of the board, spreading them out.
- Add the meats: Roll salami slices into logs or fold prosciutto into ribbons. Place them near the cheese.
- Fill in with crackers and bread: Arrange crackers around the cheese and meat. Stack a few for height. Pretzel sticks can be arranged like a fence.
- Add the produce: Place olives (spiders), grapes (eyeballs), and carrot sticks (fingers) in small clusters. Fill empty spaces.
- Finish with candy and decorations: Sprinkle candy corn or mini candy bars in small piles. Add gummy worms crawling off the edge. Place any plastic spiders or decorations.
- Final check: Step back and look at your board. Fill any obvious empty spots with nuts or extra crackers. Serve immediately.
Notes
Don’t overcrowd the board. Leave space between items for an intentional look. Let cheese sit at room temperature for 15 minutes before serving for best flavor. Prep all ingredients before arranging to avoid interruptions.
Nutrition
- Serving Size: Half the board
- Calories: 450550
- Fat: 3035
- Carbohydrates: 3540
- Fiber: 46
- Protein: 2025
Keywords: Halloween charcuterie board, mini charcuterie board, Halloween snacks, easy appetizer, date night snack, movie night snack, spooky snacks


