Love this? Save it for later!
Share the inspiration with your friends
Jen wasn’t trying to impress anyone. I’d stopped by her place on a gray Tuesday afternoon in early November to drop off a casserole dish she’d lent me, and the smell of butter and vanilla hit me before I even got through the door. She was standing at her kitchen counter in an old sweater, flour dusted across her jeans, piping little leaf shapes onto sugar cookies like it was the most ordinary thing in the world. “Oh, these?” she said when I asked, not even looking up. “Just something I do every year. Keeps my hands busy while the turkey brines.”
Honestly, I stood there for a good minute just watching her work. The way her wrist moved, the steady rhythm of the piping bag, the way she didn’t second-guess a single stroke—it was hypnotic. She handed me a cookie that had cooled on the rack, and let me tell you, that first bite stopped me cold. The cookie was tender, barely sweet, with that perfect snap around the edges. And the royal icing? It had set to this glossy, matte finish that looked like stained glass. “You could sell these,” I said, mouth half-full. She just laughed and handed me a piping bag. “Here. You try.”
I messed up my first three leaves. She didn’t care. We stood there in her tiny kitchen, the afternoon light fading, making a mess and laughing about it. That’s the thing about this recipe—it’s not about perfection. It’s about the quiet joy of making something beautiful for the people you love, even if your leaves look a little wonky. Maybe you’ve been there, standing in someone else’s kitchen, watching them do something ordinary that suddenly feels extraordinary. That’s exactly what these cookies are. And now I make them every November, flour on my jeans, thinking of Jen.
Why You’ll Love This Recipe
These Thanksgiving sugar cookies have become my absolute favorite way to kick off the holiday season. And I’ve tested a lot of cookie recipes, let me tell you. Here’s why this one wins every single time:
- Perfectly Tender Texture: The dough bakes up soft in the center with just the right amount of snap at the edges. No dry, crumbly cookies here—just buttery, melt-in-your-mouth goodness that holds its shape beautifully.
- Simple Pantry Ingredients: You likely have everything you need already sitting in your kitchen. Butter, sugar, flour, eggs, vanilla—nothing fancy, nothing fussy. The royal icing uses just powdered sugar, meringue powder, and water.
- Perfect for Thanksgiving Prep: These cookies are the ideal project for the day before the big feast. The dough chills overnight, you bake them in the morning, and decorate while the turkey rests. It keeps your hands busy and your kitchen smelling incredible.
- Crowd-Pleasing Holiday Treat: Kids and adults alike go crazy for these. They’re pretty enough for the dessert table but simple enough that no one feels intimidated to grab one (or three).
- Surprisingly Forgiving: Look, I’m not a professional baker. My first royal icing leaves looked like sad little blobs. But here’s the secret—this recipe works even when you’re messy. The icing covers mistakes, and the flavor is so good nobody cares about perfection.
What makes this version different from all the other sugar cookie recipes out there? It’s the balance. The dough is sturdy enough to hold leaf shapes without spreading, but tender enough that you’re not biting into a hockey puck. And the royal icing? It sets with that gorgeous matte finish but stays soft enough to bite through without shattering. I’ve tweaked the ratios over three Thanksgivings to get it just right—this is the version I keep coming back to, year after year.
What Ingredients You Will Need
This recipe uses simple, wholesome ingredients to create cookies that taste as good as they look. Most of these are pantry staples you probably already have on hand, which makes this perfect for those “I want to bake something festive right now” moments.
For the Sugar Cookies
- Unsalted butter, 1 cup (2 sticks, 226g), softened to room temperature. I prefer using Kerrygold for its richness, but any good quality butter works. Let it sit out for about an hour before you start.
- Granulated sugar, 1 cup (200g). Regular white sugar gives these cookies their classic sweetness and helps with that tender texture.
- Large egg, 1, room temperature. Cold eggs can make the dough seize up, so let yours sit out with the butter.
- Vanilla extract, 2 teaspoons. Real vanilla makes a difference here—I use Nielsen-Massey, but any pure vanilla extract works beautifully.
- All-purpose flour, 2 and ¾ cups (345g), spooned and leveled. Don’t scoop directly from the bag—fluff it up first, then spoon it into your measuring cup. Too much flour makes tough cookies.
- Baking powder, ½ teaspoon. Just enough to give them a tiny lift without puffing up too much.
- Salt, ½ teaspoon. Balances the sweetness and brings out the buttery flavor.
For the Royal Icing
- Powdered sugar, 4 cups (480g), sifted. Lumps are the enemy of smooth icing, so sift it even if you think you don’t need to. You do.
- Meringue powder, 3 tablespoons. This gives the icing that perfect glossy, hard-set finish. You can find it in most grocery stores near the cake decorating supplies.
- Warm water, 5-6 tablespoons. Start with 5 and add more a teaspoon at a time until you reach the right consistency.
- Gel food coloring, in autumn colors—I use Wilton leaf green, warm brown, and orange. Gel is better than liquid because it doesn’t thin out the icing.
- Vanilla extract, ½ teaspoon (optional). I like adding just a touch for flavor, but it’s not necessary.
Ingredient Tips
For the best leaf shapes, use a small leaf cookie cutter (about 2 inches). I found a set of autumn leaf cutters at a craft store for under five dollars, and they’ve lasted me years. If you’re using a different shape, just adjust your baking time slightly—smaller cookies bake faster. And if you’re short on meringue powder, you can substitute with 3 large egg whites and skip the water, but the texture won’t be quite as stable for detailed piping.
Equipment Needed
- Stand mixer or hand mixer—either works fine. I’ve made this dough with both, and honestly, a hand mixer is easier to clean.
- Large mixing bowls—you’ll need at least two.
- Rolling pin with thickness guides if you have one. If not, two wooden spoons placed on either side of the dough work as makeshift guides.
- Leaf-shaped cookie cutters—a set of 3-4 different leaf shapes gives variety.
- Baking sheets—I use Nordic Ware sheet pans because they don’t warp in the oven. Parchment paper is non-negotiable here.
- Piping bags or zip-top bags with the corner snipped off. For beginners, I actually recommend zip-top bags—they’re less intimidating and easier to control.
- Small round piping tip (#2 or #3) if using piping bags. This gives you fine control for leaf veins.
- Cooling rack—cookies need to cool completely before icing, and a rack speeds that up.
- Toothpicks—lifesavers for popping air bubbles and fixing small mistakes in the icing.
If you don’t have piping bags, seriously, just use a sturdy zip-top bag. Snip a tiny corner off and you’re good to go. I’ve decorated hundreds of cookies this way, and nobody has ever complained about the results.
Preparation Method
- Make the cookie dough. In a large bowl, beat the softened butter and granulated sugar together on medium speed until light and fluffy, about 2-3 minutes. You want it to look pale and creamy—this is where the tenderness starts. Scrape down the sides of the bowl, then add the egg and vanilla extract. Beat until combined, about 30 seconds.
- Add the dry ingredients. In a separate bowl, whisk together the flour, baking powder, and salt. With the mixer on low speed, gradually add the flour mixture to the wet ingredients. Mix just until the dough comes together—stop as soon as you don’t see any more streaks of flour. Overmixing makes tough cookies, so don’t get carried away.
- Chill the dough. Divide the dough in half, flatten each half into a disk, and wrap tightly in plastic wrap. Refrigerate for at least 2 hours, or overnight. I know it’s tempting to skip this, but don’t. Chilled dough spreads less and holds its shape better. Plus, the flavors develop overnight. I always make my dough the night before Thanksgiving.
- Preheat and prep. When you’re ready to bake, preheat your oven to 350°F (175°C). Line your baking sheets with parchment paper. Take one disk of dough out of the fridge and let it sit for 5 minutes—it’ll roll out more easily if it’s not rock-hard.
- Roll and cut. On a lightly floured surface, roll the dough to about ¼-inch thickness. I use a rolling pin with thickness guides, but if you’re eyeballing it, aim for the thickness of two stacked quarters. Cut out your leaf shapes and place them on the prepared baking sheets, spacing them about 1 inch apart. Gather the scraps, re-roll, and cut again.
- Bake. Bake for 8-10 minutes, rotating the pan halfway through. You want the edges to be just barely golden—the centers should look set but not brown. They’ll continue to firm up as they cool. Let them sit on the baking sheet for 5 minutes, then transfer to a cooling rack to cool completely. This step is crucial—warm cookies will melt your royal icing into a puddle.
- Make the royal icing. While the cookies cool, make your icing. In a large bowl, combine the sifted powdered sugar and meringue powder. Add 5 tablespoons of warm water and the vanilla (if using). Beat on low speed until combined, then increase to medium-high and beat for 5-7 minutes. The icing should be thick, glossy, and form stiff peaks when you lift the beater. If it’s too thick, add water a teaspoon at a time. If it’s too thin, add more powdered sugar.
- Color and thin the icing. Divide the icing into separate bowls for each color you’re using. Add gel food coloring a tiny drop at a time until you reach your desired shade. For the “flood” consistency (the icing you’ll use to fill in the leaves), add water a few drops at a time until the icing flows like honey and smooths out within 10 seconds. Reserve some thicker icing for piping the outlines and leaf veins.
- Pipe the leaves. Fit your piping bag with a #2 tip and fill it with the thicker outline icing. Outline each leaf cookie, then let the outlines dry for about 10 minutes. Then, thin down the same color icing for flooding, and fill in each leaf. Use a toothpick to spread the icing into the corners and pop any air bubbles. Let the flooded icing dry for at least 2 hours before adding leaf veins.
- Add leaf veins. Once the base icing is completely dry (touch it gently—it should feel firm), use your thicker icing to pipe small veins down the center of each leaf. A single line down the middle with tiny diagonal lines branching off creates a beautiful, realistic look. Let the cookies dry completely, about 4-6 hours or overnight.
Cooking Tips & Techniques
Here’s the thing about royal icing—it has a mind of its own sometimes. I’ve had batches that were too runny, too thick, or just plain stubborn. But over the years, I’ve picked up a few tricks that make the process so much smoother.
Watch your dough temperature. If your dough gets too warm while you’re rolling and cutting, it’ll stick to everything. Don’t fight it—just pop the baking sheet with the cut-out cookies into the fridge for 10 minutes before baking. This little rest firms them up and prevents spreading. I learned this the hard way after a batch of leaves turned into blobs that looked more like potatoes.
The wrist flick. When you’re piping leaf veins, it’s all about the wrist. Don’t move your whole arm—just a quick, confident flick of the wrist creates that elegant curve. Practice on a piece of parchment paper first. I still do this every time, even after years of practice. It takes the pressure off.
Consistency is everything. The biggest mistake people make with royal icing is getting the consistency wrong. For outlining, you want icing that holds a stiff peak when you lift the beater. For flooding, you want it to flow like thick honey—it should smooth out on its own within 10-15 seconds. To test, lift your spatula and let the icing drizzle back into the bowl. If the ribbon disappears into the surface within 10 seconds, you’re golden.
Don’t rush the drying. I know it’s tempting to stack or package these cookies as soon as they look dry, but trust me—wait the full 4-6 hours. Royal icing needs time to set completely. If you stack them too soon, you’ll end up with smudged leaves and a lot of frustration. I once ruined an entire batch because I got impatient. Never again.
Variations & Adaptations
One of the best things about this recipe is how flexible it is. Here are some variations I’ve tried and loved:
- Gluten-Free Version: Substitute the all-purpose flour with a 1:1 gluten-free baking flour blend. I’ve had great results with King Arthur Measure for Measure. Just add an extra tablespoon of milk to the dough—gluten-free flours tend to be more absorbent. The texture is slightly more delicate, but the flavor is spot-on.
- Vegan Adaptation: Use vegan butter (I like Earth Balance) and replace the egg with a flax egg (1 tablespoon ground flaxseed mixed with 3 tablespoons water, let sit for 5 minutes). For the royal icing, substitute the meringue powder with 2 tablespoons of aquafaba (the liquid from a can of chickpeas) and skip the water. It works surprisingly well!
- Spiced Autumn Version: Add 1 teaspoon of cinnamon, ½ teaspoon of nutmeg, and ¼ teaspoon of cloves to the flour mixture. These warm spices make the cookies taste like fall in every bite. I made this version last year for a Friendsgiving, and people were asking for the recipe before they even finished their first cookie.
- Chocolate Leaf Cookies: Replace ¼ cup of the flour with ¼ cup of unsweetened cocoa powder. The chocolate version pairs beautifully with orange-colored royal icing—it looks like autumn leaves against dark soil. My kids go crazy for these.
- No-Icing Option: If royal icing feels too intimidating, just sprinkle the warm cookies with cinnamon sugar or dust them with powdered sugar. They’re still delicious and festive without the fuss.
Serving & Storage Suggestions
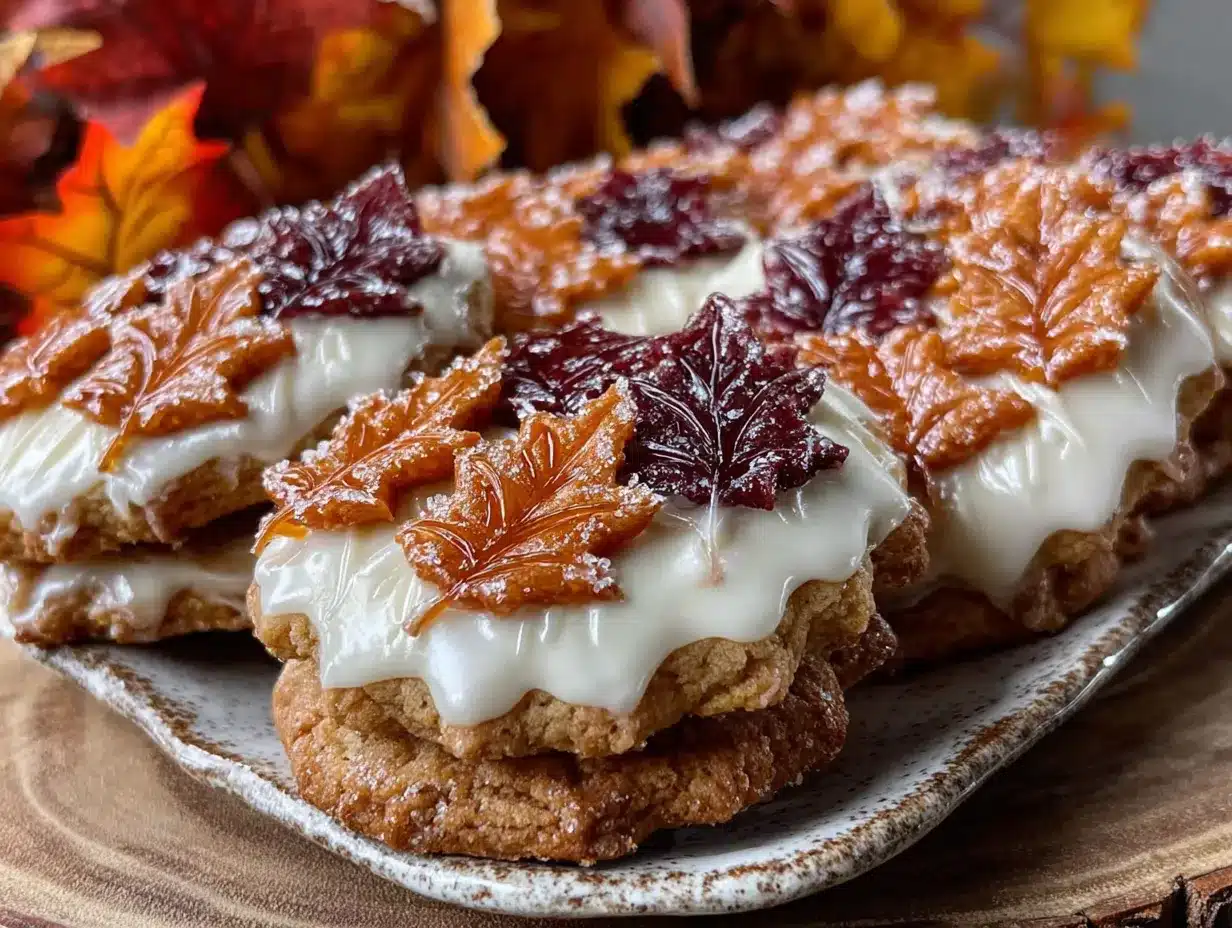
These cookies are best served at room temperature, which is perfect for Thanksgiving because they can sit out on the dessert table for hours without any issues. Arrange them on a wooden board or a white platter to let the leaf shapes and colors really pop. I like to scatter a few real autumn leaves around the platter for a natural, seasonal look—just make sure they’re clean and not from anything toxic.
For storage, place the fully decorated cookies in a single layer in an airtight container, separating layers with parchment paper. They’ll stay fresh at room temperature for up to 2 weeks. Yes, really. The royal icing actually helps preserve the cookies, keeping them soft inside while the outside stays perfectly set. I’ve kept a batch in a tin on my counter for two weeks, and they were still delicious on day fourteen.
You can also freeze these cookies for up to 3 months. Freeze them in a single layer on a baking sheet until solid, then transfer to a freezer-safe container with parchment between layers. To thaw, just let them sit at room temperature for about an hour. The icing holds up beautifully—I’ve pulled these out for Christmas cookie plates and nobody guessed they’d been frozen since November.
One thing I love about these cookies is that the flavors actually get better after a day or two. The butter and vanilla meld together, and the icing sets to that perfect texture. So don’t stress about making them at the last minute—they’re actually better when made ahead.
Nutritional Information & Benefits
Let’s be real—these are cookies, not health food. But here’s the approximate nutritional breakdown for one decorated cookie (based on a 2-inch leaf shape):
Per cookie: Calories: 145 | Fat: 6g | Carbohydrates: 22g | Protein: 2g | Sugar: 15g
That said, there are a few bright spots. The butter provides a small amount of vitamin A, and if you use the spiced variation, you’ll get some antioxidants from the cinnamon and nutmeg. Plus, there’s something to be said for the mental health benefits of baking—the rhythmic motion of rolling dough and piping icing is genuinely meditative. I’ve had some of my best ideas while standing at my kitchen counter, pipe in hand, lost in the process.
If you’re watching your sugar intake, you can reduce the sugar in the cookie dough by ¼ cup without affecting the texture too much. The royal icing is harder to adjust, but you can use a thinner layer for less overall sugar per cookie.
Conclusion
These Thanksgiving sugar cookies have become my favorite holiday tradition. They’re not just cookies—they’re a way to slow down, to make something beautiful with your hands, to fill your kitchen with the smell of butter and vanilla while the rest of the world rushes around. Whether you’re a seasoned decorator or someone who’s never held a piping bag, this recipe meets you where you are. The cookies will taste amazing either way.
I hope you give these a try. Make them with your kids, your friends, or just for yourself on a quiet November afternoon. Experiment with the colors, try different leaf shapes, and don’t stress about perfection. The wonky leaves are always the ones that make people smile the most.
If you make these, I’d love to hear about it! Drop a comment below and let me know how your leaves turned out, what color combos you tried, or if you came up with a fun variation. And if you share them on social media, tag me—I want to see your beautiful creations. Happy baking, friends. Your kitchen is about to smell incredible.
Frequently Asked Questions
Can I make the dough ahead of time?
Absolutely! The dough can be refrigerated for up to 3 days or frozen for up to 3 months. Just wrap it tightly in plastic wrap and then in foil. Thaw frozen dough in the fridge overnight before rolling.
My royal icing is too runny. Can I fix it?
Yes! Just add more sifted powdered sugar, a tablespoon at a time, until it thickens up. Beat well after each addition. If it gets too thick, add a drop of water to thin it back out. The key is to go slowly—you can always add more, but you can’t take it out.
Do I have to use meringue powder?
You can substitute with 3 large egg whites for the royal icing, but skip the water. The texture will be slightly different and it won’t be as stable for detailed piping. Meringue powder is worth buying if you plan to decorate cookies regularly—it lasts forever in the pantry.
How do I get the icing to dry faster?
Patience is your best tool here, but if you’re in a hurry, you can use a fan on low speed pointed at the cookies. Just don’t use a hair dryer—the heat will melt the icing. Also, make sure your kitchen isn’t too humid. Rainy days are not ideal for royal icing.
Can I use liquid food coloring instead of gel?
You can, but liquid food coloring will thin out your icing and you’ll need to add more powdered sugar to compensate. Gel colors give you vibrant shades without changing the consistency, and they’re much more concentrated. A tiny dot goes a long way.
Pin This Recipe!

Cozy Thanksgiving Sugar Cookies with Easy Royal Icing Leaves

These tender, buttery sugar cookies are decorated with glossy royal icing leaves, making them the perfect Thanksgiving treat. The recipe is forgiving and fun, ideal for bakers of all skill levels.
- Prep Time: 30 minutes
- Cook Time: 10 minutes
- Total Time: 2 hours 40 minutes (plus chilling and drying time)
- Yield: 24 servings 1x
- Category: Dessert
- Cuisine: American
Ingredients
- 1 cup (2 sticks, 226g) unsalted butter, softened to room temperature
- 1 cup (200g) granulated sugar
- 1 large egg, room temperature
- 2 teaspoons vanilla extract
- 2 and ¾ cups (345g) all-purpose flour, spooned and leveled
- ½ teaspoon baking powder
- ½ teaspoon salt
- 4 cups (480g) powdered sugar, sifted
- 3 tablespoons meringue powder
- 5–6 tablespoons warm water
- Gel food coloring in autumn colors (leaf green, warm brown, orange)
- ½ teaspoon vanilla extract (optional)
Instructions
- Make the cookie dough. In a large bowl, beat the softened butter and granulated sugar together on medium speed until light and fluffy, about 2-3 minutes. Scrape down the sides, then add the egg and vanilla extract. Beat until combined, about 30 seconds.
- Add the dry ingredients. In a separate bowl, whisk together the flour, baking powder, and salt. With the mixer on low speed, gradually add the flour mixture to the wet ingredients. Mix just until the dough comes together.
- Chill the dough. Divide the dough in half, flatten each half into a disk, and wrap tightly in plastic wrap. Refrigerate for at least 2 hours, or overnight.
- Preheat and prep. When ready to bake, preheat oven to 350°F (175°C). Line baking sheets with parchment paper. Take one disk of dough out of the fridge and let it sit for 5 minutes.
- Roll and cut. On a lightly floured surface, roll the dough to about ¼-inch thickness. Cut out leaf shapes and place on prepared baking sheets, spacing about 1 inch apart. Gather scraps, re-roll, and cut again.
- Bake. Bake for 8-10 minutes, rotating the pan halfway through. Edges should be just barely golden. Let cookies sit on baking sheet for 5 minutes, then transfer to a cooling rack to cool completely.
- Make the royal icing. In a large bowl, combine sifted powdered sugar and meringue powder. Add 5 tablespoons warm water and vanilla (if using). Beat on low speed until combined, then increase to medium-high and beat for 5-7 minutes until thick, glossy, and forming stiff peaks.
- Color and thin the icing. Divide icing into separate bowls for each color. Add gel food coloring a tiny drop at a time. For flood consistency, add water a few drops at a time until icing flows like honey and smooths out within 10 seconds. Reserve thicker icing for outlines and veins.
- Pipe the leaves. Fit piping bag with #2 tip and fill with thicker outline icing. Outline each leaf cookie, let outlines dry for 10 minutes. Then thin same color icing for flooding and fill in each leaf. Use a toothpick to spread icing into corners and pop air bubbles. Let flooded icing dry for at least 2 hours.
- Add leaf veins. Once base icing is completely dry, use thicker icing to pipe small veins down the center of each leaf. Let cookies dry completely, about 4-6 hours or overnight.
Notes
For best results, chill the dough overnight. Royal icing needs 4-6 hours to dry completely. If you don’t have meringue powder, you can substitute with 3 large egg whites and skip the water, but the texture won’t be as stable for detailed piping. The cookies can be stored in an airtight container at room temperature for up to 2 weeks, or frozen for up to 3 months.
Nutrition
- Serving Size: 1 cookie
- Calories: 145
- Sugar: 15
- Sodium: 55
- Fat: 6
- Saturated Fat: 3.5
- Carbohydrates: 22
- Protein: 2
Keywords: Thanksgiving cookies, sugar cookies, royal icing, leaf cookies, fall baking, holiday cookies