Love this? Save it for later!
Share the inspiration with your friends
My teenager asked why I couldn’t just use puff pastry on top of the chicken pot pie instead of going through the whole homemade crust routine. I started to explain why that wouldn’t work — then stopped. I honestly had no good reason. I’d been making pot pie the same way for years because that’s how my mom did it, and her mom before her. But my kid was just looking at me with that “well, why not?” face, and I couldn’t come up with a single solid answer.
So I tried it. And let me tell you, the first time that golden, flaky puff pastry came out of the oven, I felt a little silly for all those years of wrestling with cold butter and flour. The filling underneath was the same creamy, comforting chicken pot pie I always made, but that top? It was something else entirely. Crispy, buttery layers that shattered when you cut into them. My family actually cheered. I mean, literally cheered at the dinner table on a random Tuesday night.
That was three months ago, and I haven’t made pot pie any other way since. This quick crispy chicken pot pie with puff pastry top has become our go-to weeknight comfort meal. It comes together fast, uses ingredients I usually have on hand, and honestly tastes like I spent hours in the kitchen. Maybe you’ve been there — stuck in a cooking rut, doing things a certain way just because that’s how you learned. Sometimes the best kitchen wisdom comes from the people we’re trying to teach.
Why You’ll Love This Recipe
This isn’t just another chicken pot pie recipe. After testing this dish about seven times (my family was very patient), I can confidently say this version hits all the right notes for busy weeknights. Here is why this one is different:
- Quick & Easy: From start to table in under 40 minutes. The puff pastry does all the heavy lifting for that impressive golden top.
- Simple Ingredients: No fancy grocery trips needed. Frozen puff pastry, rotisserie chicken, and basic pantry staples come together beautifully.
- Perfect for Weeknights: This is the definition of a 30-minute meal that feels like Sunday dinner. It’s comfort food on a Tuesday schedule.
- Crowd-Pleaser: My picky eater cleaned her plate. My husband asked for seconds. Even the neighbor who stopped by ended up taking a container home.
- Minimal Cleanup: One pot for the filling, one baking dish for the pie. That is my kind of night.
What makes this recipe special is the contrast between the creamy, savory filling and that impossibly flaky puff pastry crust. The pastry bakes up tall and golden while the filling stays rich and bubbly underneath. I’ve tried this with homemade pie dough, biscuit toppings, even crescent roll dough — but nothing beats the texture of real puff pastry here. It is the kind of meal that makes you close your eyes after the first bite, even on a chaotic Wednesday when you’re eating at 8 PM.
What Ingredients You Will Need
This recipe keeps things straightforward with ingredients that work together to create maximum flavor without maximum effort. Most of these are pantry or freezer staples, which makes this perfect for those nights when you need dinner on the table fast.
For the Filling:
- 3 tablespoons unsalted butter (adds richness and helps create that silky base)
- 1 medium yellow onion, diced (about 1 cup) (sweetens as it cooks and builds the savory foundation)
- 2 medium carrots, peeled and diced (about 1 cup) (adds color and natural sweetness)
- 2 celery stalks, diced (about 1/2 cup) (that classic pot pie flavor component)
- 3 cloves garlic, minced (I use fresh here, not jarred, for better flavor)
- 1/3 cup all-purpose flour (thickens the sauce without making it pasty)
- 2 cups low-sodium chicken broth (I prefer Swanson or Kitchen Basics for consistent results)
- 1 cup whole milk or half-and-half (whole milk works fine, half-and-half makes it extra luxurious)
- 3 cups cooked shredded chicken (rotisserie chicken is my shortcut here — saves so much time)
- 1 cup frozen peas (add them straight from the freezer, no need to thaw)
- 1/2 teaspoon dried thyme (or 1 teaspoon fresh if you have it)
- 1/2 teaspoon dried rosemary (crush it between your fingers before adding to release the oils)
- Salt and black pepper to taste (I use about 1 teaspoon salt and 1/2 teaspoon pepper)
For the Topping:
- 1 sheet frozen puff pastry, thawed (Pepperidge Farm is my go-to brand, found in the freezer section)
- 1 large egg, beaten with 1 tablespoon water (for that beautiful golden egg wash)
- Flaky sea salt for sprinkling (optional but highly recommended for that bakery look)
A few ingredient notes from my testing: Look for puff pastry that is all-butter if you can find it — the flavor difference is noticeable. For the chicken, a store-bought rotisserie chicken gives you about 3 cups of meat and saves a ton of prep time. If you have leftover roasted chicken or turkey, that works beautifully too. I have also made this with leftover Thanksgiving turkey and it was fantastic.
The vegetables here are flexible. Swap in corn, green beans, or even small broccoli florets if that is what you have. Frozen mixed vegetables work in a pinch, though I prefer the texture of fresh carrots and celery. Just keep the total vegetable amount around 2 1/2 cups so the filling stays properly balanced.
Equipment Needed
You do not need anything fancy for this recipe, which is part of why I love it for busy nights. Here is what you will need:
- Large skillet or Dutch oven: A 12-inch skillet with high sides works perfectly. I use my trusty Lodge cast iron Dutch oven because it holds heat evenly and goes straight into the oven if needed.
- 8×8 or 9×9 baking dish: A square dish works best for fitting the puff pastry sheet. A 9-inch pie plate also works if that is what you have.
- Sharp knife and cutting board: For dicing those vegetables. A good chef’s knife makes prep go faster.
- Whisk: For smoothing out the flour mixture and preventing lumps in your sauce.
- Pastry brush: For applying the egg wash. A silicone brush works great and is easy to clean. No pastry brush? Use a paper towel dabbed in the egg wash.
- Baking sheet: Place your baking dish on a sheet pan to catch any drips as the puff pastry bakes and bubbles over.
The puff pastry needs to be thawed before using. Take it out of the freezer and let it sit in the refrigerator overnight, or leave it on the counter for about 30 minutes. It should be cold but pliable — if it gets too warm and sticky, pop it back in the fridge for a few minutes.
Preparation Method

Let me walk you through this step by step. I have made this so many times that I have the rhythm down, and I will share every little trick I have picked up along the way.
- Preheat your oven to 400°F (200°C). Place a rack in the center position. Take your thawed puff pastry sheet out of the fridge and let it sit on the counter while you make the filling.
- Melt the butter in your large skillet or Dutch oven over medium heat. Let it foam up and then settle down. Add the diced onion, carrots, and celery. Cook for about 5 to 7 minutes, stirring occasionally, until the vegetables start to soften. The onions should look translucent, not brown. If they start browning, your heat is too high — turn it down a notch.
- Add the minced garlic and cook for one more minute. Garlic burns fast, so keep stirring. Your kitchen should smell amazing at this point. If it smells like burnt garlic, you waited too long — start that part over if you need to.
- Sprinkle the flour over the vegetables and stir constantly for 1 to 2 minutes. This cooks the raw flour taste out and starts the thickening process. The mixture will look pasty and stick to the vegetables — that is exactly what you want. I once skipped this step because I was in a hurry, and the sauce came out thin and chalky. Don’t be like me.
- Slowly pour in the chicken broth while whisking continuously. Pour in a steady stream and keep whisking to prevent lumps. The mixture will start to thicken almost immediately. Switch to a wooden spoon once the broth is incorporated.
- Pour in the milk or half-and-half and stir until combined. Bring the mixture to a gentle simmer — you should see small bubbles around the edges, not a full rolling boil. Let it cook for 2 to 3 minutes, stirring occasionally, until it thickens enough to coat the back of a spoon.
- Stir in the shredded chicken, frozen peas, thyme, rosemary, salt, and pepper. The peas will thaw quickly in the hot sauce. Taste the filling and adjust the seasoning. I usually add a bit more pepper than I think I need because the puff pastry is neutral and balances it out. Remove the skillet from the heat.
- Pour the filling into your 8×8 baking dish. Spread it into an even layer. The dish will be full, but that is fine — the puff pastry will puff up and create room.
- Unfold the thawed puff pastry sheet on a lightly floured surface. If it has cracks along the folds, gently press them back together with your fingers. Trim the pastry to fit your baking dish, leaving about a 1/2-inch overhang on all sides. I just cut it to size with a sharp knife — no need to be precise here.
- Place the pastry over the filling. Tuck the overhang under itself slightly so it fits snugly against the edges of the dish. Cut 3 to 4 slits in the top of the pastry with a sharp knife to let steam escape. This prevents the pastry from getting soggy.
- Brush the pastry with the beaten egg wash. Be generous but don’t let it pool in the corners. Sprinkle with flaky sea salt if using. Place the baking dish on a sheet pan to catch any drips.
- Bake for 20 to 25 minutes, until the pastry is puffed up and deep golden brown. The filling should be bubbling up through the slits. Let it rest for 5 minutes before serving — this lets the filling set up so it doesn’t run all over the plate.
Cooking Tips & Techniques
After making this quick crispy chicken pot pie more times than I care to count, I have learned a few things the hard way. Here are the tips that actually make a difference:
Don’t overwork the puff pastry. Puff pastry gets tough if you handle it too much. Unfold it gently, cut it to size, and get it onto the filling quickly. If it warms up too much and becomes sticky, slide it onto a parchment-lined baking sheet and pop it in the freezer for 5 minutes.
Make sure your filling is hot before adding the pastry. This is crucial. If you pour cold filling into the dish and then bake it, the pastry will cook before the filling heats through. You will end up with a burnt top and cold middle. The filling should be steaming hot when it goes into the dish.
Watch your liquid ratio. The first time I made this, I added too much broth because I wanted extra sauce. Big mistake. The filling was soupy and made the bottom of the pastry soggy. Stick to the measurements here — the sauce should be thick enough to coat the back of a spoon before you add the chicken.
Let it rest. I know it is hard to wait when the kitchen smells this good, but those 5 minutes of resting time make a real difference. The filling continues to thicken as it sits, and the pastry stays crispier. Cut into it too soon and you will have a soupy mess.
Use a sharp knife to cut the slits. A dull knife will drag and tear the delicate pastry layers. A sharp, clean cut helps the pastry puff up evenly and creates those beautiful defined layers.
Variations & Adaptations
This recipe is wonderfully adaptable. Here are some ways I have changed it up depending on what I had in the kitchen or who I was feeding:
Vegetarian Version: Skip the chicken and double up on vegetables. I add mushrooms, extra carrots, and a can of drained chickpeas for protein. Use vegetable broth instead of chicken broth. The filling is still creamy and satisfying — my vegetarian friend actually prefers this version.
Gluten-Free Adaptation: Use a gluten-free all-purpose flour blend (I like Bob’s Red Mill 1-to-1) for the roux. Check your puff pastry — there are gluten-free puff pastry options available, though they can be harder to find. Dufour makes a good one if you can get it.
Dairy-Free Option: Swap the butter for olive oil or a plant-based butter. Use unsweetened oat milk or canned coconut milk instead of regular milk. The sauce will be slightly thinner but still delicious. I have made this for dairy-free guests and they went back for seconds.
Individual Pot Pies: Divide the filling among 4 to 6 small ramekins or oven-safe bowls. Cut the puff pastry into circles slightly larger than the ramekins and place one on top. Bake for about 15 to 18 minutes. These are perfect for portion control and look adorable on the table.
Herb Swap: I have made this with fresh dill and lemon zest instead of the rosemary and thyme, and it was bright and completely different but just as good. Tarragon also works beautifully with chicken. Use whatever herbs you have on hand.
Serving & Storage Suggestions
This pot pie is best served warm, straight from the oven. The contrast between the hot, creamy filling and the crisp, flaky pastry is at its peak within the first 15 minutes. I like to serve it in shallow bowls so the filling stays contained and the pastry stays on top.
What to serve with it: A simple green salad with lemon vinaigrette cuts through the richness perfectly. Steamed green beans or roasted asparagus also work well. If you want something more substantial, mashed potatoes are never a bad idea — though honestly, this pot pie is filling enough on its own.
Storage: Leftovers keep in the refrigerator for up to 3 days in an airtight container. The puff pastry will soften as it sits, but it still tastes great. I actually like the leftovers the next day because the flavors have melded together.
Reheating: The best way to reheat is in a 350°F oven for about 10 to 15 minutes. This helps crisp the pastry back up. The microwave works in a pinch but will make the pastry soggy. If you are in a hurry, remove the pastry top, microwave the filling, and then put the pastry back on top.
Freezing: You can freeze the assembled but unbaked pot pie for up to 3 months. Wrap the dish tightly in plastic wrap and then foil. Bake directly from frozen, adding about 15 minutes to the baking time. I have done this for busy weeks and it works like a charm.
Nutritional Information & Benefits
Here is the approximate nutritional breakdown for one serving of this quick crispy chicken pot pie (based on 6 servings):
- Calories: 475
- Protein: 28g
- Fat: 24g
- Carbohydrates: 35g
- Fiber: 4g
- Sugar: 6g
- Sodium: 680mg
This meal offers a good balance of protein from the chicken, carbohydrates for energy, and vegetables for fiber and vitamins. The carrots provide vitamin A for eye health, while the celery adds a bit of vitamin K. Using rotisserie chicken keeps the prep quick while still giving you a solid protein source.
If you are watching your sodium, use low-sodium broth and skip the added salt at the end. The puff pastry does contain butter, so this is not a low-fat meal — but as a once-a-week comfort food, it fits well into a balanced diet. I personally love that this feels indulgent without requiring heavy cream or excessive butter in the filling.
Conclusion
This quick crispy chicken pot pie with puff pastry top has honestly changed the way I think about weeknight dinners. It started with my kid asking a simple question, and now it is the meal I turn to when I need something that feels special but doesn’t take all evening. The flaky pastry, the creamy filling, the way it makes the whole kitchen smell like comfort — it is hard to beat.
I hope you give this one a try, especially on a night when you are tired and hungry and need dinner to work out perfectly. Customize it with whatever vegetables you have, swap in different herbs, make it your own. That is the beauty of a recipe like this — it is forgiving and flexible, just like good comfort food should be.
When you make it, I would love to hear how it turned out. Drop a comment below and let me know if your family cheered too. And if you have your own kitchen shortcut that changed the way you cook, share that too. We are all learning from each other here.
Frequently Asked Questions
Can I use homemade puff pastry instead of store-bought?
Absolutely. If you have the time and skill for homemade puff pastry, go for it. Just make sure it is rolled to about 1/8-inch thickness and keep it cold before baking. Store-bought works perfectly here and saves a ton of time on busy nights.
Can I make this ahead of time?
Yes, with one caveat. You can make the filling up to 2 days ahead and keep it in the refrigerator. When you are ready to bake, reheat the filling on the stove until it is hot, then pour it into the baking dish, add the pastry, and bake. Do not assemble the whole thing ahead of time or the pastry will get soggy.
My puff pastry didn’t puff up. What went wrong?
A few things could cause this. The pastry might have been too warm when it went into the oven, or the oven might not have been hot enough. Make sure your oven is fully preheated to 400°F. Also, check that your puff pastry is not expired — old pastry loses its leavening power.
Can I use chicken thighs instead of breast meat?
Definitely. Chicken thighs add more flavor and stay moist during cooking. Use about 3 cups of cooked, shredded thigh meat. Rotisserie chicken is usually a mix of white and dark meat, which works great.
How do I prevent the bottom of the pastry from getting soggy?
Make sure your filling is thick enough before baking — it should coat the back of a spoon. Also, let the pot pie rest for 5 minutes after baking so the filling can set. Cutting into it too soon lets steam escape and can make the pastry soggy.
Pin This Recipe!
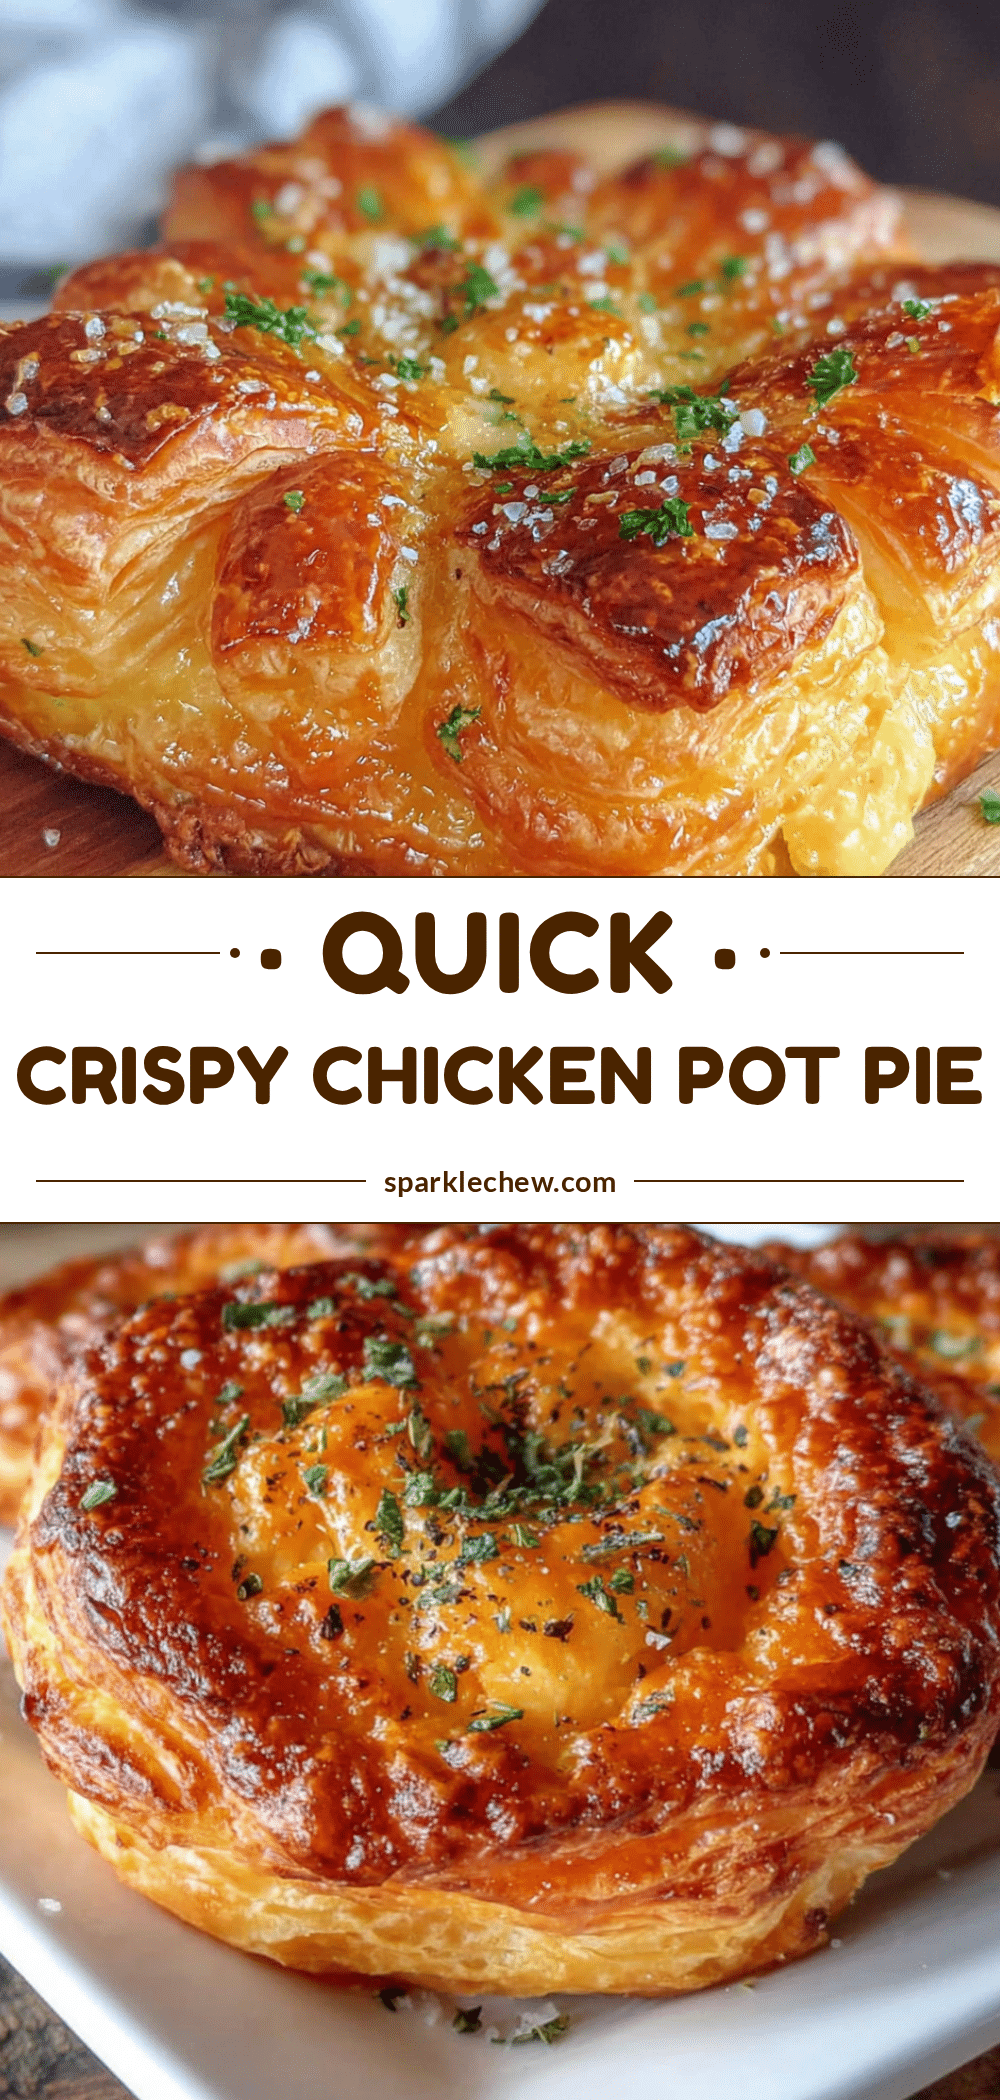
Quick Crispy Chicken Pot Pie with Easy Puff Pastry Top

A quick and easy weeknight chicken pot pie topped with golden, flaky puff pastry instead of traditional homemade crust. Creamy filling with rotisserie chicken and vegetables comes together in under 40 minutes for a comforting meal that feels like Sunday dinner on a Tuesday schedule.
- Prep Time: 15 minutes
- Cook Time: 25 minutes
- Total Time: 40 minutes
- Yield: 6 servings 1x
- Category: Main Course
- Cuisine: American
Ingredients
- 3 tablespoons unsalted butter
- 1 medium yellow onion, diced (about 1 cup)
- 2 medium carrots, peeled and diced (about 1 cup)
- 2 celery stalks, diced (about 1/2 cup)
- 3 cloves garlic, minced
- 1/3 cup all-purpose flour
- 2 cups low-sodium chicken broth
- 1 cup whole milk or half-and-half
- 3 cups cooked shredded chicken (rotisserie chicken recommended)
- 1 cup frozen peas
- 1/2 teaspoon dried thyme
- 1/2 teaspoon dried rosemary
- Salt and black pepper to taste (about 1 teaspoon salt and 1/2 teaspoon pepper)
- 1 sheet frozen puff pastry, thawed
- 1 large egg, beaten with 1 tablespoon water
- Flaky sea salt for sprinkling (optional)
Instructions
- Preheat your oven to 400°F (200°C). Place a rack in the center position. Take your thawed puff pastry sheet out of the fridge and let it sit on the counter while you make the filling.
- Melt the butter in your large skillet or Dutch oven over medium heat. Let it foam up and then settle down. Add the diced onion, carrots, and celery. Cook for about 5 to 7 minutes, stirring occasionally, until the vegetables start to soften. The onions should look translucent, not brown.
- Add the minced garlic and cook for one more minute, stirring constantly.
- Sprinkle the flour over the vegetables and stir constantly for 1 to 2 minutes. The mixture will look pasty and stick to the vegetables.
- Slowly pour in the chicken broth while whisking continuously to prevent lumps. The mixture will start to thicken almost immediately. Switch to a wooden spoon once the broth is incorporated.
- Pour in the milk or half-and-half and stir until combined. Bring the mixture to a gentle simmer and let it cook for 2 to 3 minutes, stirring occasionally, until it thickens enough to coat the back of a spoon.
- Stir in the shredded chicken, frozen peas, thyme, rosemary, salt, and pepper. Taste and adjust seasoning. Remove the skillet from the heat.
- Pour the filling into your 8×8 baking dish and spread it into an even layer.
- Unfold the thawed puff pastry sheet on a lightly floured surface. If it has cracks along the folds, gently press them back together with your fingers. Trim the pastry to fit your baking dish, leaving about a 1/2-inch overhang on all sides.
- Place the pastry over the filling. Tuck the overhang under itself slightly so it fits snugly against the edges of the dish. Cut 3 to 4 slits in the top of the pastry with a sharp knife to let steam escape.
- Brush the pastry with the beaten egg wash. Be generous but don’t let it pool in the corners. Sprinkle with flaky sea salt if using. Place the baking dish on a sheet pan to catch any drips.
- Bake for 20 to 25 minutes, until the pastry is puffed up and deep golden brown and the filling is bubbling up through the slits. Let it rest for 5 minutes before serving.
Notes
Don’t overwork the puff pastry. Make sure your filling is hot before adding the pastry. Watch your liquid ratio – the sauce should be thick enough to coat the back of a spoon before adding chicken. Let it rest for 5 minutes after baking. Use a sharp knife to cut slits in the pastry. For vegetarian version, skip chicken and double vegetables with mushrooms and chickpeas. For gluten-free, use gluten-free flour blend and gluten-free puff pastry. For dairy-free, swap butter for olive oil and use unsweetened oat milk or canned coconut milk.
Nutrition
- Serving Size: 1 serving
- Calories: 475
- Sugar: 6
- Sodium: 680
- Fat: 24
- Carbohydrates: 35
- Fiber: 4
- Protein: 28
Keywords: chicken pot pie, puff pastry, quick dinner, weeknight meal, comfort food, rotisserie chicken, easy recipe


