Love this? Save it for later!
Share the inspiration with your friends
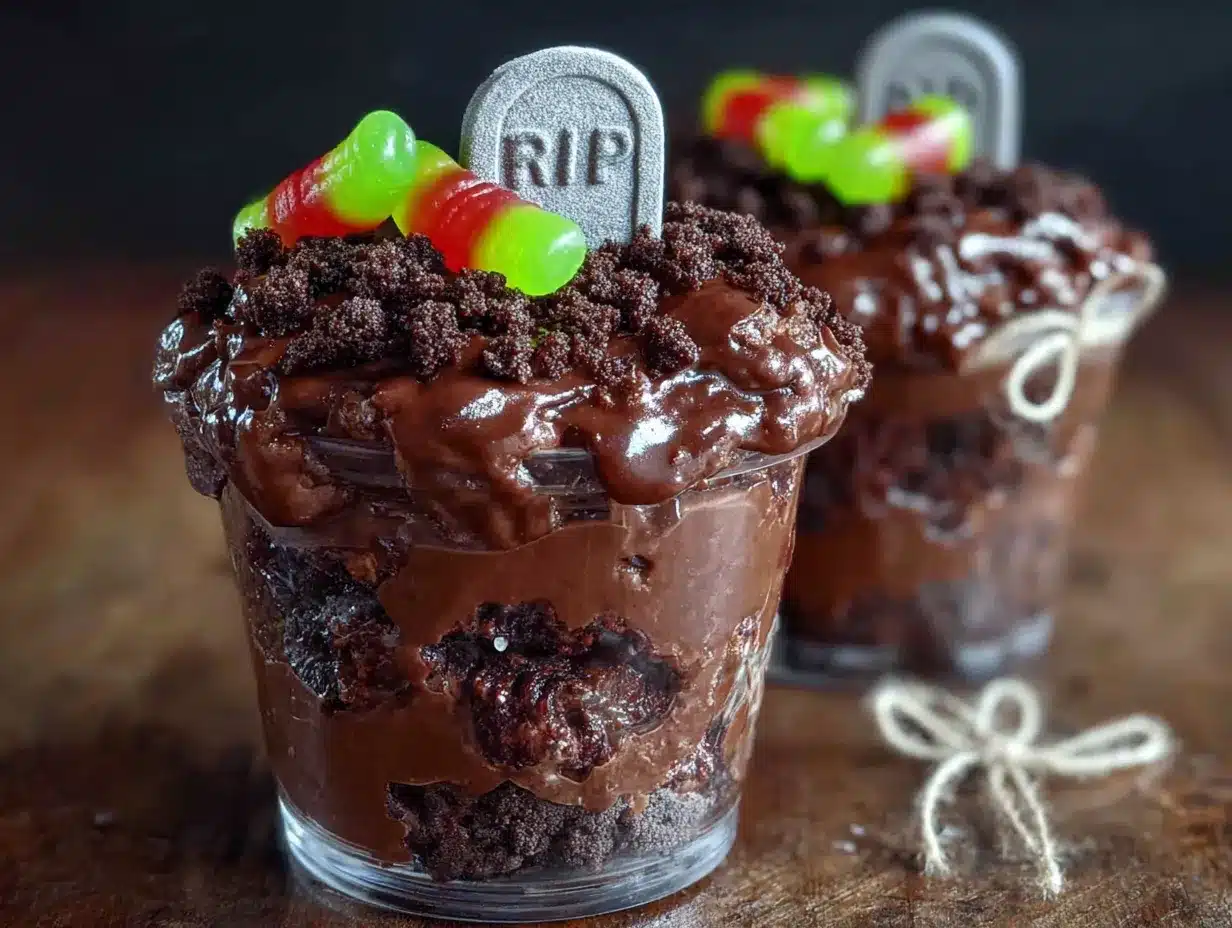
My neighbor Karen wasn’t trying to impress anyone. I’d stopped by to borrow a corkscrew for a party I was already running late for, and this strange, wonderful smell hit me before I even knocked. It wasn’t cookies or bread—it was something sweet and a little bit… earthy? She opened the door holding a plastic cup that looked like a miniature graveyard. Dirt. Worms. Little tombstone cookies.
“Oh, this?” she said, catching me staring. “It’s just something stupid for my nephew’s birthday. Takes ten minutes.” She shrugged like she’d handed me a glass of tap water. But I couldn’t stop looking at it. There was something so perfectly weird and charming about it. I mean, who thinks to turn chocolate pudding into dirt and then shove gummy worms in it? A genius, that’s who.
I ended up being twenty minutes late to that party because I made her write down the recipe on a napkin. The corkscrew sat forgotten in my bag. I made these graveyard dirt cake cups for Halloween that year, and honestly, they stole the show. Kids went nuts. Adults pretended to be grossed out while sneaking seconds. And the best part? Karen was right. It really does take ten minutes.
Maybe you’ve been there—needing a dessert that looks like you spent hours on it but actually comes together while you’re still in your work clothes. That’s this recipe. It’s silly, it’s spooky, and it’s so ridiculously easy that you’ll feel like you’re cheating. Let me show you how it’s done.
Why You’ll Love This Recipe
Let’s be honest—most Halloween desserts are a pain. You’re either wrestling with fondant or burning your fingers on caramel. These Easy Graveyard Dirt Cake Cups with Gummy Worms are the opposite. They’re the dessert equivalent of a shortcut that actually works.
- Ready in 20 Minutes: From start to finish, you’re looking at about twenty minutes of active work. The hardest part is waiting for the pudding to set in the fridge, and that’s just sitting around doing nothing.
- Five Ingredients: Chocolate pudding, Oreos, cream cheese, Cool Whip, and gummy worms. That’s it. No weird specialty items, no trips to three different stores. You probably already have most of this stuff.
- No-Bake Perfection: The oven stays off. No preheating, no baking times to watch, no worrying about burning anything. This is the kind of recipe you can make with kids without losing your mind.
- Perfect for Halloween Parties: These little cups are grab-and-go, which means no slicing, no plating, no mess. Hand them out at a party, and everyone gets their own personal graveyard.
- Total Crowd-Pleaser: I’ve served these to kids, adults, and even picky relatives who “don’t do sweets.” They always disappear. There’s something about digging into a cup of “dirt” that makes everyone smile.
What makes this version different from the other recipes floating around? I’ve tested the ratios until the pudding is perfectly creamy without being soupy, and the “dirt” layer stays crunchy even after a day in the fridge. No soggy graveyards here. Plus, I’ve figured out the trick to making the gummy worms look like they’re actually wriggling out of the dirt—it’s a small detail, but it makes the whole thing feel alive. Well, you know what I mean.
This is comfort food with a spooky twist. It’s nostalgic, it’s fun, and it’s the kind of dessert that makes people stop and take pictures before they take a bite. And honestly? That’s the whole point.
What Ingredients You Will Need
This recipe uses simple, everyday ingredients to create something that looks way more complicated than it is. Everything here is a pantry staple or an easy grab from the grocery store. Here’s what you’ll need:
For the Pudding Layer
- 1 (3.9-ounce) box instant chocolate pudding mix (I like Jell-O brand for consistent results, but store brands work fine too)
- 2 cups cold whole milk (2% works in a pinch, but whole milk gives the creamiest texture—don’t use skim, it gets too thin)
For the “Dirt” Layer
- 1 (14.3-ounce) package Oreo cookies (regular or Double Stuf—both work, but Double Stuf makes the dirt a little sweeter and more crumbly)
For the Cream Layer
- 4 ounces cream cheese, softened to room temperature (this is important—cold cream cheese will leave lumps in your cream layer)
- 1/4 cup granulated sugar
- 1/2 teaspoon vanilla extract
- 1 (8-ounce) container Cool Whip, thawed (or homemade whipped cream if you’re feeling fancy, but Cool Whip keeps the texture stable for longer)
For Decoration
- 1 (4-ounce) bag gummy worms (the sour or regular kind both work—I prefer the bright green and red ones for contrast against the dark dirt)
- Optional: 6-8 Milano cookies or rectangular shortbread cookies (for tombstones—write “RIP” on them with black icing for extra effect)
- Optional: Candy pumpkins or candy corn (for a fall harvest look)
Ingredient Selection Tip: When you’re buying Oreos for the dirt, look for a package that’s not too crushed already. You want whole cookies so you can control the crumb size. If you’re using a food processor to crush them, pulse in short bursts—you want a mix of fine crumbs and small pebbly pieces, not dust. That texture is what makes it look like real dirt.
Substitution Guidance: If you need a dairy-free version, use a plant-based cream cheese (I’ve had good luck with Kite Hill), coconut cream whipped topping, and almond milk with a dairy-free chocolate pudding mix. The texture will be slightly different, but it still works. For a gluten-free option, use gluten-free chocolate sandwich cookies—they’re available at most major grocery stores now.
Personal Note: I’ve tried making this with homemade chocolate pudding from scratch, and honestly? It wasn’t worth it. The instant pudding sets up firmer, which is exactly what you want when you’re layering it in cups. Save the scratch-made pudding for another day. This recipe is about convenience, and the box mix delivers.
Equipment Needed
You don’t need a fancy kitchen for this recipe. Here’s what you’ll actually use:
- 6 to 8 clear plastic or glass cups (8-ounce size works perfectly—I use plastic party cups for Halloween, but small mason jars or glass tumblers work great too. The key is that they’re clear so you can see the layers)
- Food processor or zip-top bag and rolling pin (for crushing Oreos. A food processor makes it faster, but the bag-and-rolling-pin method is honestly more fun and gives you better control over the texture)
- Medium mixing bowl (for the pudding)
- Large mixing bowl (for the cream cheese mixture)
- Whisk (or electric hand mixer—the hand mixer makes the cream layer smoother, but a whisk works if you’ve got arm strength)
- Spatula (for scraping every last bit of cream into the cups—waste not, want not)
- Measuring cups and spoons
- Small spoon or offset spatula (for layering—a regular spoon works fine, but the offset spatula makes those clean layers Instagram-worthy)
Budget-Friendly Tip: You don’t need to buy specialty cups. I’ve used washed-out yogurt containers, solo cups, and even small takeout containers. The kids don’t care what it’s in as long as there are gummy worms involved. If you want to make it look a little nicer, dollar stores usually have small clear plastic cups for cheap.
Preparation Method
Here’s where the magic happens. Follow these steps, and you’ll have a graveyard’s worth of dirt cake cups in no time. I’ve included time estimates and sensory cues so you know exactly what you’re looking for at each stage.
Step 1: Make the Pudding (5 minutes)
In a medium mixing bowl, whisk together the instant chocolate pudding mix and 2 cups of cold whole milk. Whisk vigorously for about 2 minutes until it starts to thicken. You’ll feel it getting heavier in the bowl, and it should look smooth and glossy with no lumps. Set it aside to set up while you work on the other layers. It needs about 5 minutes to firm up properly.
Pro Tip: Don’t let the pudding sit for more than 10 minutes before layering, or it’ll get too thick to spread evenly. You want it at a consistency where it holds its shape but still spreads easily, like a thick yogurt.
Step 2: Crush the Oreos (5 minutes)
Place the entire package of Oreos—cream filling and all—into your food processor. Pulse in short bursts until you get a mixture of fine crumbs and small pebbly pieces. You don’t want it to turn into dust. If you’re using the bag method, put the cookies in a large zip-top bag, seal it, and go to town with a rolling pin. This is a great step for kids to help with—just be prepared for flying cookie crumbs.
Sensory Cue: The Oreo crumbs should look like dark, rich soil. You want some texture, not a uniform powder. If you see large chunks of cookie, keep crushing. If you see dust, you’ve gone too far. Aim for the texture of coarse sand.
Step 3: Make the Cream Layer (5 minutes)
In a large mixing bowl, beat the softened cream cheese with an electric hand mixer until it’s smooth and fluffy—about 1 minute. Add the granulated sugar and vanilla extract, and beat for another minute until everything is combined and there are no lumps. You’re looking for a texture like thick frosting.
Gently fold in the thawed Cool Whip with a spatula. Don’t beat it—just fold until there are no white streaks. The mixture should be light, airy, and pale. If it looks curdled or lumpy, your cream cheese wasn’t soft enough. Next time, let it sit on the counter for 30 minutes before starting.
Step 4: Layer the Cups (10 minutes)
Now comes the fun part. Grab your clear cups and start layering. Here’s the order I use:
- First layer: Spoon about 2 tablespoons of the Oreo “dirt” into the bottom of each cup. Pat it down gently with the back of your spoon.
- Second layer: Add about 1/4 cup of the chocolate pudding. Spread it evenly over the Oreo layer.
- Third layer: Add about 1/4 cup of the cream cheese mixture. Spread it gently over the pudding.
- Fourth layer: Add another 2 tablespoons of Oreo “dirt” on top. This is the surface of your graveyard, so make it look like soil.
Repeat this process for all 6 to 8 cups. You should end up with distinct, visible layers when you look at the sides of the cups. If the layers are mixing together, you’re spooning too aggressively. Be gentle.
Step 5: Decorate (5 minutes)
Now for the creepy fun. Take your gummy worms and push them into the top Oreo layer so they look like they’re crawling out of the dirt. I like to place them at different angles—some fully buried except for a head, some halfway out, some lying on top. It looks more natural that way.
If you’re using tombstone cookies, press them into the dirt layer at the back of each cup. You can write “RIP” or “BOO” on them with black icing for extra spooky points. Add a few candy pumpkins around the base if you want a fall graveyard vibe.
Step 6: Chill (2 hours minimum)
Place the cups in the refrigerator for at least 2 hours before serving. This allows the layers to set and the flavors to meld together. The pudding will firm up, the cream layer will stabilize, and the Oreo crumbs will soften just slightly—but not get soggy, thanks to the cream layer acting as a barrier.
Warning: Don’t skip the chilling time. If you serve these right away, the layers will be runny and the gummy worms will slide right off. Patience pays off here.
Cooking Tips & Techniques
I’ve made these Easy Graveyard Dirt Cake Cups with Gummy Worms about a dozen times now, and I’ve learned a few things the hard way. Here’s what I wish someone had told me the first time:
The Oreo Texture Trap: The first time I made these, I crushed the Oreos into fine dust in my food processor. Big mistake. The dirt layer turned into mud when it touched the pudding. Now I leave some pebbly pieces—they stay crunchy even after a day in the fridge. Think of it like gravel versus sand. You want gravel.
The Cream Cheese Temperature Rule: I cannot stress this enough—your cream cheese needs to be at room temperature. I once tried to rush this by microwaving it, and it melted in patches. The cream layer came out lumpy and weird. Let it sit on the counter for 30 minutes. Set a timer if you have to.
The Layering Order Secret: Some recipes put the pudding on top, but I’ve found that putting the cream layer between the pudding and the top Oreo layer creates a better barrier. The cream cheese mixture is thicker than the pudding, so it prevents the Oreo crumbs from sinking and getting soggy. Trust me on this one.
Timing Strategy: Make the pudding first and let it set while you crush the Oreos and mix the cream layer. This way, you’re not waiting around. The whole active prep takes about 20 minutes if you work efficiently. Multitasking is your friend here.
Common Mistake to Avoid: Don’t overfill the cups. Leave about half an inch of space at the top so the gummy worms have room to “crawl” out. Overfilled cups look messy and the worms just slide off. Leave breathing room.
Variations & Adaptations
One of the best things about this recipe is how easy it is to change up. Here are a few ways I’ve adapted it over the years:
The Pumpkin Patch Version
Swap the gummy worms for candy pumpkins and add a layer of orange-colored cream cheese mixture. Use green sprinkles on top to look like grass. It’s perfect for fall parties that aren’t Halloween-specific. I made these for a Thanksgiving potluck once, and they were gone before the turkey came out.
The Spooky Spider Version
Instead of gummy worms, use black licorice strings to create spider legs sticking out of the dirt. Place a chocolate truffle or a large chocolate-covered raisin in the center as the spider body. It looks terrifyingly cute. My niece screamed when she saw it—then ate three of them.
The Dairy-Free Adaptation
Use dairy-free chocolate pudding mix with oat milk, plant-based cream cheese, and coconut whipped topping. The texture is slightly lighter, but the flavor is still rich and chocolatey. I’ve tested this with my lactose-intolerant friend, and she gave it a thumbs up. Just make sure your Oreos are dairy-free—the original recipe is, but some specialty flavors aren’t.
The Individual Serving Size
For parties, I sometimes make these in shot glasses for bite-sized versions. Use the same layering method but with smaller portions. They’re perfect for adult Halloween parties where people want a tiny sweet treat without committing to a full cup.
Serving & Storage Suggestions
These Easy Graveyard Dirt Cake Cups with Gummy Worms are best served cold, straight from the refrigerator. The contrast between the cool, creamy layers and the slightly crunchy Oreo dirt is what makes them so satisfying. I like to take them out about 5 minutes before serving so they’re not ice-cold, but that’s a personal preference.
Presentation Idea: Arrange the cups on a black or orange tray for Halloween. Add some fake spiderwebs around the base and scatter a few extra gummy worms on the tray. It makes the whole display look like a miniature graveyard scene. If you’re serving these at a party, label them with a little sign that says “Graveyard Dirt” for maximum effect.
Complementary Dishes: These pair well with other Halloween treats like pumpkin spice cookies or caramel apples. For drinks, serve with apple cider or a warm spiced punch. The sweetness of the dirt cake balances nicely with something tart or spicy.
Storage Instructions: Cover each cup with plastic wrap or transfer them to an airtight container. They’ll keep in the refrigerator for up to 3 days. The layers will soften slightly over time, but they’ll still taste great. Do not freeze them—the cream layer gets watery and the texture falls apart.
Flavor Development Note: These actually taste better on day two. The flavors meld together overnight, and the Oreo crumbs soften just enough to create a texture that’s almost like a trifle. If you’re making these for a party, I recommend making them the day before and letting them chill overnight. Your future self will thank you.
Nutritional Information & Benefits
Let’s be real—this is a dessert, not a health food. But here’s the estimated nutritional breakdown per serving (based on 8 servings):
- Calories: Approximately 380-420 per cup
- Fat: 18-22 grams
- Carbohydrates: 48-52 grams
- Protein: 5-7 grams
- Sugar: 32-36 grams
Dietary Considerations: This recipe contains dairy, gluten, and soy (from the Oreos). For a gluten-free version, use gluten-free chocolate sandwich cookies. For a dairy-free version, use the substitutions listed in the variations section. The recipe is nut-free as written, which makes it a safe option for school parties.
Health Perspective: Look, I’m not going to pretend these are good for you. But here’s what I will say—they’re made with real ingredients, and they’re portion-controlled in individual cups. One cup is a reasonable serving size, unlike a whole cake where you’re guessing how much you ate. Plus, there’s something to be said for the joy of eating something that makes you smile. Mental health matters too.
Conclusion
These Easy Graveyard Dirt Cake Cups with Gummy Worms are the kind of recipe that reminds me why I love cooking. They’re simple, they’re fun, and they bring people together. I’ve made them for Halloween parties, birthday parties, and even just a random Tuesday when I needed a pick-me-up. Every single time, they’ve been a hit.
The best part? You can make them your own. Add different candies, change up the layers, or experiment with different flavors. The base recipe is just a starting point. I’d love to hear how yours turn out—leave a comment below and tell me what variations you tried. Did you add candy corn? Use different gummy shapes? Make them into a full-sized cake instead of individual cups? I want to know.
Thanks for sticking with me through this recipe. Now go make some dirt—and don’t forget to hide a few gummy worms for yourself before the kids find them. Happy Halloween, and happy cooking!
Frequently Asked Questions
Can I make these graveyard dirt cake cups ahead of time?
Absolutely. In fact, I recommend it. Make them up to 2 days in advance and keep them covered in the refrigerator. The flavors actually get better as they meld together. Just wait to add the gummy worms until right before serving, or they’ll get soft and lose their chewiness.
Can I use homemade whipped cream instead of Cool Whip?
Yes, you can. Whip 1 cup of heavy cream with 2 tablespoons of powdered sugar until stiff peaks form, then fold it into the cream cheese mixture. The texture will be lighter and less stable than Cool Whip, so the cups won’t hold their shape as well after a day in the fridge. For best results, serve homemade whipped cream versions within 24 hours.
How do I keep the Oreo crumbs from getting soggy?
The key is the cream layer. By placing the cream cheese mixture between the pudding and the top Oreo layer, you create a barrier that prevents moisture from seeping into the crumbs. Also, don’t crush the Oreos too fine—leave some pebbly pieces that stay crunchy longer. And always chill the cups before serving to let everything set properly.
Can I use a different type of cookie for the dirt?
Definitely. Chocolate wafer cookies, crushed chocolate graham crackers, or even brownie crumbs work well. If you use something less sweet than Oreos, you might want to add a tablespoon of sugar to the pudding mix. I’ve tried crushed chocolate graham crackers before, and they give a slightly lighter, more crumbly texture that some people prefer.
How many cups does this recipe make?
This recipe makes 6 to 8 cups, depending on the size of your cups. If you’re using standard 8-ounce cups, you’ll get about 6 generous servings. If you’re using smaller 6-ounce cups, you’ll get 8 servings. For a party, I usually aim for 8 smaller cups so everyone gets their own without feeling overwhelmed by a huge dessert.
Pin This Recipe!
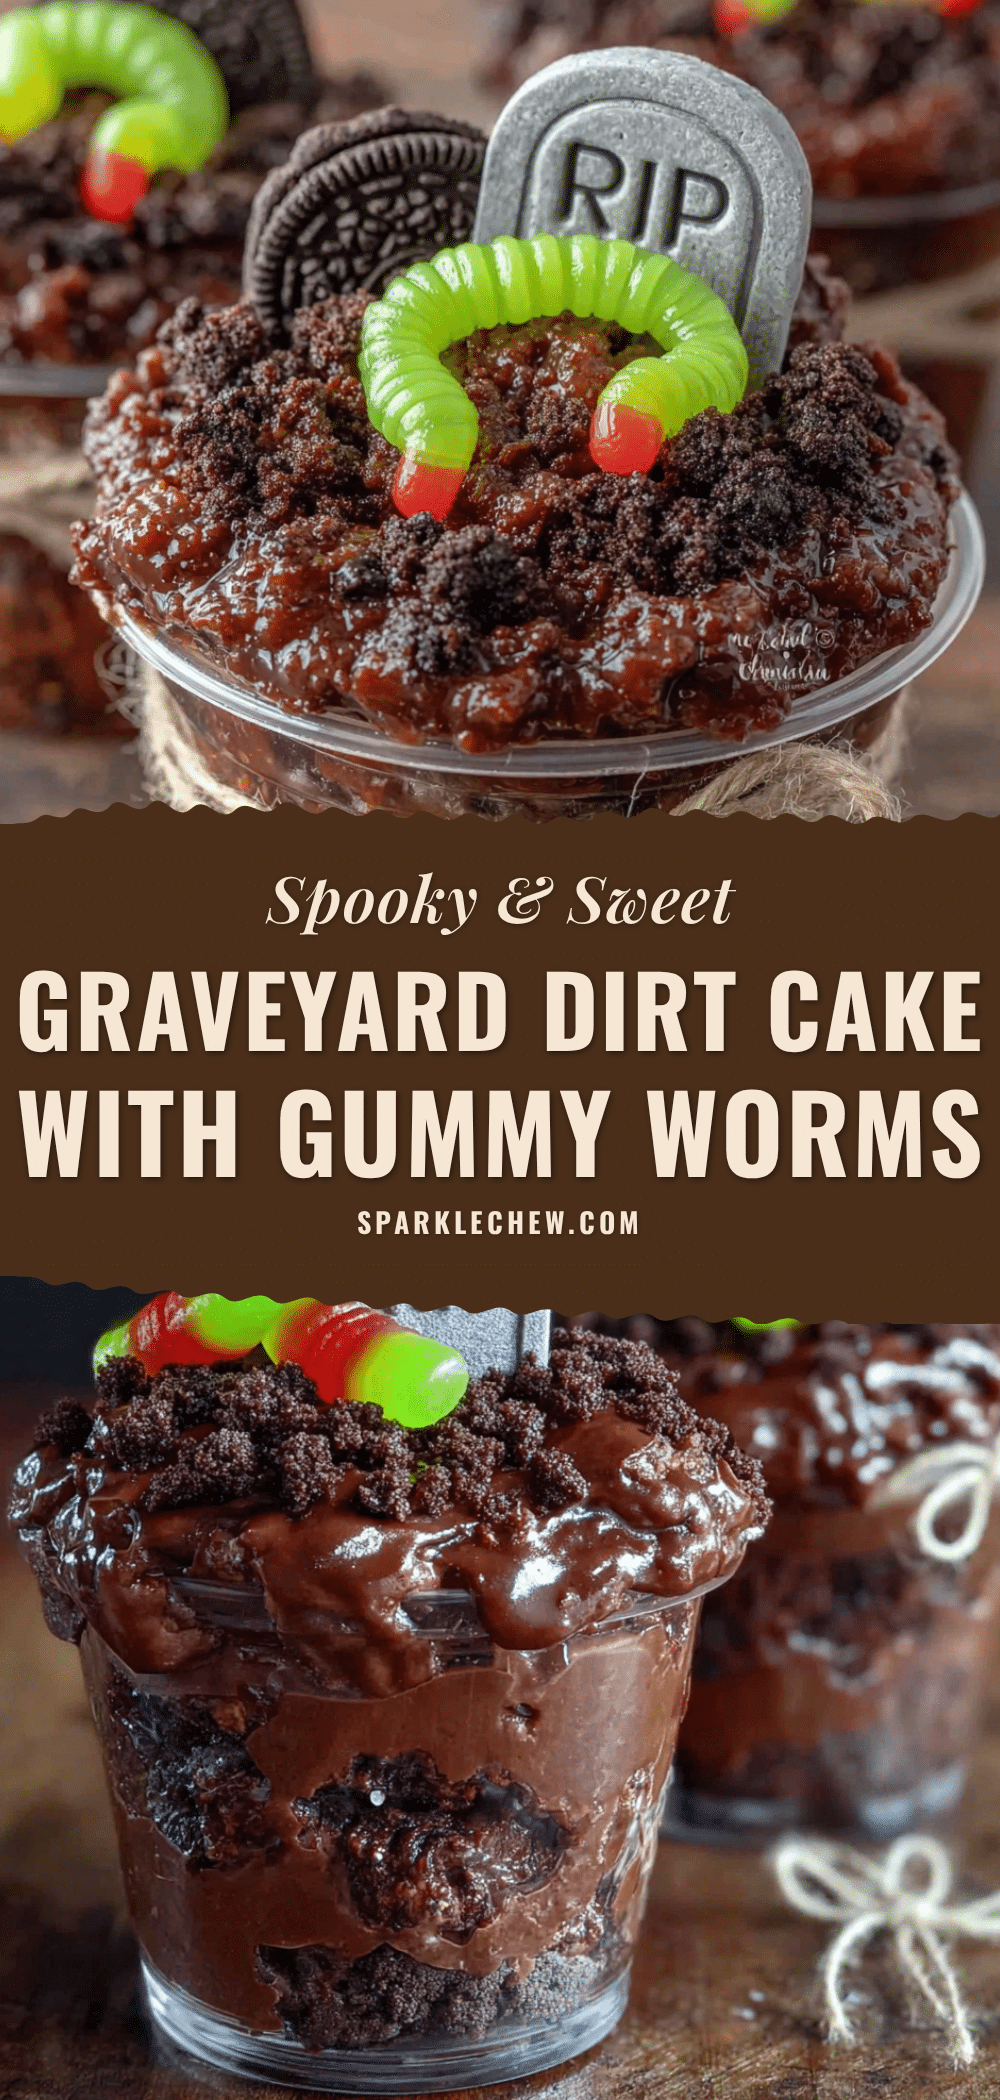
Easy Graveyard Dirt Cake Cups with Gummy Worms

These no-bake graveyard dirt cake cups are a fun and spooky Halloween dessert made with layers of chocolate pudding, creamy filling, and crushed Oreo ‘dirt,’ topped with gummy worms crawling out. Ready in just 20 minutes of active prep, they’re a crowd-pleaser for kids and adults alike.
- Prep Time: 20 minutes
- Cook Time: 0 minutes
- Total Time: 2 hours 20 minutes (includes chilling)
- Yield: 6 to 8 servings 1x
- Category: Dessert
- Cuisine: American
Ingredients
- 1 (3.9-ounce) box instant chocolate pudding mix
- 2 cups cold whole milk
- 1 (14.3-ounce) package Oreo cookies
- 4 ounces cream cheese, softened to room temperature
- 1/4 cup granulated sugar
- 1/2 teaspoon vanilla extract
- 1 (8-ounce) container Cool Whip, thawed
- 1 (4-ounce) bag gummy worms
- Optional: 6-8 Milano cookies or rectangular shortbread cookies (for tombstones)
- Optional: Black icing (for writing on tombstones)
- Optional: Candy pumpkins or candy corn
Instructions
- In a medium mixing bowl, whisk together the instant chocolate pudding mix and 2 cups of cold whole milk. Whisk vigorously for about 2 minutes until it starts to thicken. Set aside to set up for about 5 minutes.
- Place the entire package of Oreos into a food processor. Pulse in short bursts until you get a mixture of fine crumbs and small pebbly pieces. Alternatively, place cookies in a large zip-top bag and crush with a rolling pin.
- In a large mixing bowl, beat the softened cream cheese with an electric hand mixer until smooth and fluffy, about 1 minute. Add the granulated sugar and vanilla extract, and beat for another minute until combined. Gently fold in the thawed Cool Whip with a spatula until no white streaks remain.
- Layer the cups: Spoon about 2 tablespoons of Oreo ‘dirt’ into the bottom of each cup. Add about 1/4 cup of chocolate pudding. Add about 1/4 cup of the cream cheese mixture. Top with another 2 tablespoons of Oreo ‘dirt.’ Repeat for all 6 to 8 cups.
- Decorate: Push gummy worms into the top Oreo layer at different angles so they look like they’re crawling out. If using tombstone cookies, press them into the dirt layer. Add candy pumpkins if desired.
- Chill in the refrigerator for at least 2 hours before serving. The layers will set and flavors will meld.
Notes
Make sure cream cheese is at room temperature to avoid lumps. Don’t crush Oreos too fine—leave some pebbly pieces for crunch. The cream layer acts as a barrier to prevent soggy crumbs. For best results, make a day ahead and chill overnight. Add gummy worms just before serving to keep them chewy.
Nutrition
- Serving Size: 1 cup
- Calories: 400
- Sugar: 34
- Sodium: 350
- Fat: 20
- Saturated Fat: 10
- Carbohydrates: 50
- Fiber: 1
- Protein: 6
Keywords: Halloween dessert, dirt cake, graveyard cups, no-bake dessert, gummy worms, Oreo dirt, chocolate pudding, easy Halloween recipe, spooky dessert, kid-friendly