Love this? Save it for later!
Share the inspiration with your friends
It was 11:47 PM on a random Thursday, and I was hit with a craving so specific it almost hurt. I wanted that salty, buttery, crispy-on-the-outside, melty-on-the-inside grilled cheese situation. But here’s the thing—I didn’t have the usual boring bread and single slice of American cheese. What I did have was a loaf of slightly stale sourdough, a block of sharp cheddar that was begging to be used, and a single Honeycrisp apple rolling around in the bottom of the fridge. And then, like a tiny culinary lightning bolt, the idea arrived: apple and cheddar. Sweet and sharp. Crisp and gooey. Honestly, I almost talked myself out of it. I mean, who puts fruit in a grilled cheese? But at nearly midnight, with nobody watching, I figured—why the heck not? Let me tell you, that first bite had me pacing the kitchen, muttering to myself about how this was the best accident I’d ever had. The apple added this fresh crunch that cut through the richness of the cheese, and the sourdough got perfectly golden and shatteringly crisp. I’ve been making this for my family ever since, and it’s become our go-to for those nights when we need something fast, satisfying, and just a little bit special. Maybe you’ve been there—standing in front of an open fridge, tired and hungry, wishing for something that feels like a hug. This is that sandwich.
Why You’ll Love This Recipe
Listen, I’ve tested a lot of grilled cheese sandwiches in my day. Some were burnt, some were soggy, and some were just plain sad. This one? It’s different. It’s the kind of sandwich that makes you feel like you’ve discovered a secret. Here’s why it works so well for busy families:
- Quick & Easy: From start to finish, you’re looking at about 10 minutes. That’s less time than it takes to argue about what’s for dinner.
- Simple Ingredients: No fancy grocery trips needed. You probably have bread, butter, and cheese in your kitchen right now. The apple is the star, and Honeycrisps are easy to find almost anywhere.
- Perfect for Picky Eaters: My kids were skeptical at first—fruit in a sandwich? But the sweetness of the apple paired with the salty cheddar won them over instantly. It’s a crowd-pleaser that even the most stubborn little eaters will devour.
- Unbelievably Delicious: The texture combo is next-level. You’ve got the crunchy, buttery bread, the gooey melted cheddar, and the crisp, juicy apple slices. Every bite is a little party.
- Budget-Friendly: This isn’t some fancy restaurant creation. It’s smart cooking that uses affordable ingredients and makes them shine. Leftovers (if there are any) reheat beautifully in a skillet.
What makes this recipe different from every other grilled cheese out there is the balance. The sharpness of the cheddar doesn’t overpower the sweet apple, and the apple doesn’t make the bread soggy. It’s a match made in comfort food heaven. And honestly? It’s the kind of sandwich that makes you close your eyes after the first bite. It’s comfort food reimagined—faster, fresher, but with the same soul-soothing satisfaction. Perfect for a Tuesday night when you’re tired, or for impressing the kids without any stress.
What Ingredients You Will Need
This recipe uses simple, wholesome ingredients to deliver big flavor without the fuss. Most of these are pantry staples, but the apple is the real hero here. Let’s break it down:
- For the Sandwich:
- 8 slices of sourdough bread (or any sturdy bread you like—I prefer sourdough for its tangy crunch)
- 4 tablespoons unsalted butter, softened (this is key for even browning)
- 8 slices sharp cheddar cheese (I recommend Cabot or Tillamook for that perfect melt)
- 1 large Honeycrisp apple, cored and thinly sliced (about 1/8-inch thick—you want them thin enough to heat through but thick enough to give a crunch)
- Optional: a pinch of flaky sea salt for sprinkling on top (trust me on this one)
Ingredient Tips & Substitutions:
- Bread: Sourdough is my go-to because it holds up well and gets beautifully crispy. But brioche or whole wheat work great too. If you’re gluten-free, use your favorite sturdy GF bread.
- Cheese: Sharp cheddar is non-negotiable for that bold flavor. But you can mix it up—try gouda for a smokier taste or havarti for extra creaminess. Just make sure it’s a good melting cheese.
- Apple: Honeycrisp is perfect because it’s sweet, crisp, and doesn’t turn to mush when heated. Fuji or Gala are good alternatives. In the fall, try a Granny Smith for a tarter kick.
- Butter: Use salted or unsalted, just make sure it’s softened so it spreads evenly. If you’re dairy-free, vegan butter works perfectly here.
I always keep a couple of Honeycrisps in the fridge during apple season. They’re great for snacking, but they really shine in this sandwich. And don’t skip the sea salt at the end—it sounds fancy, but it just makes the flavors pop.
Equipment Needed
You don’t need much for this recipe, and that’s part of the beauty. Here’s what you’ll need:
- Large Non-Stick Skillet or Cast Iron Pan: I use a 12-inch cast iron for the best even browning. If you don’t have one, a non-stick skillet works just fine.
- Spatula: A thin metal spatula is my favorite for flipping these sandwiches without losing the filling.
- Butter Knife: For spreading the softened butter on the bread. Nothing fancy.
- Cutting Board and Sharp Knife: For slicing the apple. A mandoline works too if you want super even slices.
- Paper Towels: For blotting the apple slices if they’re really juicy—this helps prevent a soggy sandwich.
If you don’t have a cast iron pan, don’t sweat it. I’ve made these in a regular non-stick skillet plenty of times, and they come out just as good. The key is medium-low heat and patience. Oh, and if you’re making a big batch for the family, a griddle is a game-changer—you can cook four sandwiches at once.
Preparation Method

Alright, let’s get cooking. This is the easy part, and I promise you’ll have a hot, melty sandwich in about 10 minutes flat.
- Prep the Apple: Core your Honeycrisp apple and slice it into thin rounds, about 1/8-inch thick. You want them thin enough to warm through but thick enough to give a nice crunch. If the slices are really wet, pat them dry with a paper towel. This step matters—it keeps your bread from getting soggy.
- Butter the Bread: Lay out your 8 slices of sourdough on a clean work surface. Using a butter knife, spread about 1/2 tablespoon of softened butter on one side of each slice. Don’t skimp here—the butter is what gives you that golden, crispy crust. I’ve learned the hard way that cold butter tears the bread, so make sure it’s truly softened.
- Assemble the Sandwiches: Flip four of the bread slices over so the buttered side is facing down. Place one slice of cheddar on each, then layer on a handful of apple slices (about 5-6 slices per sandwich). Top with another slice of cheddar. Place the remaining four bread slices on top, buttered side up. The cheese on both sides of the apple helps everything stick together.
- Heat the Pan: Place your skillet over medium-low heat. Let it warm up for about 1 minute. You don’t want it screaming hot—medium-low is your friend here. Too high and the bread will burn before the cheese melts.
- Cook the Sandwiches: Carefully place two sandwiches in the skillet (or as many as fit without crowding). Cook for 3-4 minutes, until the bottom is golden brown and crispy. Use your spatula to peek underneath—if it’s not golden, give it another minute.
- Flip and Finish: Flip the sandwiches carefully. Cook for another 3-4 minutes, pressing down gently with the spatula halfway through. You want the cheese fully melted and the bread deeply golden. If the cheese isn’t melting fast enough, cover the pan with a lid for the last minute—it traps the heat and works like a charm.
- Rest and Serve: Transfer the sandwiches to a cutting board and let them rest for 1 minute. This helps the cheese set just a little so it doesn’t all ooze out when you cut. Slice diagonally (it just tastes better that way), sprinkle with a tiny pinch of flaky sea salt if you’re feeling fancy, and serve immediately.
Pro Tip: If you’re making a big batch, keep the cooked sandwiches warm on a baking sheet in a 200°F oven while you finish the rest. They’ll stay crispy for up to 20 minutes.
Cooking Tips & Techniques
I’ve made this sandwich more times than I can count, and I’ve definitely learned a few things the hard way. Here are my best tips for grilled cheese perfection:
- Low and Slow is the Way to Go: I know it’s tempting to crank up the heat to speed things up, but don’t do it. Medium-low heat gives the bread time to turn golden and crispy while the cheese melts all the way through. I’ve burned more sandwiches than I’d like to admit by getting impatient.
- Don’t Overstuff: It’s easy to go overboard with the apple slices, but too many will make the sandwich bulky and hard to flip. Stick to 5-6 thin slices per sandwich. You want a balanced bite every time.
- Use a Lid for Stubborn Cheese: If your cheese isn’t melting as fast as you’d like, pop a lid on the pan for the last minute of cooking. It traps the steam and helps everything get gooey without burning the bread.
- Let the Sandwich Rest: I know you want to dive in immediately, but letting it sit for a minute on the cutting board is crucial. The cheese firms up just enough that it doesn’t all slide out when you cut it. Trust me, I’ve learned this lesson the messy way.
- Double Up on Cheese: One slice on each side of the apple isn’t just for flavor—it acts like glue, holding the apple slices in place so they don’t fall out when you flip the sandwich.
Honestly, the biggest mistake people make is rushing. Grilled cheese is a simple thing, but it rewards patience. Take your time, watch the color of the bread, and you’ll be rewarded with the perfect crispy, melty bite.
Variations & Adaptations
One of the best things about this recipe is how easy it is to switch things up. Here are a few variations I’ve tried and loved:
- Savory Twist: Add a few slices of crispy bacon and a drizzle of honey before closing the sandwich. The salty bacon with the sweet apple and sharp cheddar is absolutely killer. My husband requests this version every time.
- Fall Spice Version: Sprinkle a tiny pinch of cinnamon on the apple slices before assembling. It adds a warm, cozy flavor that’s perfect for crisp autumn days. My kids think it tastes like a dessert sandwich.
- Dietary Adaptations: Use gluten-free bread and dairy-free cheddar-style shreds for a version that works for most dietary needs. Just be careful with the melting time—dairy-free cheese can take a minute longer to get gooey.
- Turkey Apple Melt: Add a few thin slices of roasted turkey breast for a heartier sandwich that works great for lunch or a light dinner. It’s like a fancy deli sandwich but way better.
- Sweet & Spicy: Spread a thin layer of fig jam on the inside of the bread before adding the cheese and apple. The sweetness of the fig pairs beautifully with the sharp cheddar. I tried this on a whim one night, and it’s become a regular in our rotation.
Don’t be afraid to experiment. This sandwich is forgiving, and every variation I’ve tried has been delicious in its own way. The base recipe is solid, but it loves a little creativity.
Serving & Storage Suggestions
These sandwiches are best served hot and fresh, but I’ve got a few tips for making the most of them:
Serving: Serve immediately after cooking, sliced diagonally (it really does taste better that way). I like to pair it with a simple tomato soup or a side of mixed greens with a tangy vinaigrette. For the kids, a handful of apple slices on the side is always a hit. The sandwich is warm and satisfying on its own, but the soup takes it to the next level.
Storage: If you have leftovers (unlikely, but possible), let them cool completely, then wrap them tightly in foil or plastic wrap. Store in the refrigerator for up to 2 days. The apple slices will soften a bit, but the flavor is still great.
Reheating: The best way to reheat is in a skillet over medium-low heat for 2-3 minutes per side. This brings back the crispy crust. The microwave will make the bread soggy, so avoid it if you can. If you’re in a rush, an air fryer at 350°F for 3-4 minutes works beautifully too.
Flavor Development: Honestly, these are best eaten fresh. The apple loses its crunch after a day in the fridge, so I don’t recommend making them ahead. But the flavors meld together nicely if you do have leftovers—the apple gets softer and almost jammy, which is a different but still delicious experience.
Nutritional Information & Benefits
Here’s the nutritional breakdown for one sandwich (using sourdough, sharp cheddar, and one tablespoon of butter):
- Calories: Approximately 480
- Protein: 18g
- Fat: 28g
- Carbohydrates: 42g
- Fiber: 4g
- Sugar: 12g (natural from the apple)
Health Benefits: This sandwich isn’t just delicious—it’s got some surprising perks. The Honeycrisp apple adds fiber and vitamin C, plus a good dose of antioxidants. Cheddar cheese is rich in calcium and protein, which helps keep you full and satisfied. Sourdough bread is easier to digest than some other breads thanks to its natural fermentation process. So while this is definitely a comfort food, it’s not without its redeeming qualities!
Dietary Considerations: This recipe is vegetarian. For a gluten-free version, use your favorite GF bread. For a lower-calorie option, use light cheese and reduce the butter to 1/2 tablespoon per sandwich. The apple adds natural sweetness, so you don’t miss the extra sugar.
I’m not a nutritionist, but I’ve always believed that food should make you feel good—both while you’re eating it and after. This sandwich hits that sweet spot for me. It’s indulgent but not heavy, and the apple adds a fresh element that keeps it from feeling too rich.
Conclusion
If you’ve never tried apple in a grilled cheese, I get the hesitation. It sounds a little weird, I know. But trust me on this one—the sweet, crisp Honeycrisp paired with sharp, melty cheddar is a combination that just works. It’s quick enough for a busy weeknight, special enough to feel like a treat, and simple enough that even the kids can help make it. I’ve been making this sandwich for years now, and it never gets old. Every time I take that first bite, I’m transported back to that late-night kitchen experiment that turned into a family favorite.
I’d love to hear how yours turns out! Did you try any fun variations? Did your kids gobble it up? Drop a comment below and let me know—I read every single one. And if you loved this recipe, please share it with a friend who needs a quick dinner win. Happy cooking, friends!
Frequently Asked Questions
Can I use a different type of apple?
Absolutely! Honeycrisp is my favorite for its sweetness and crunch, but Fuji, Gala, or even Granny Smith work great. Just keep in mind that tart apples like Granny Smith will give a tangier flavor, which is also delicious.
How do I keep the sandwich from getting soggy?
The key is to pat your apple slices dry with a paper towel before assembling. Also, make sure your cheese slices cover the bread well—they act as a barrier between the moist apple and the bread.
Can I make this ahead of time?
These sandwiches are best enjoyed fresh, right off the skillet. If you need to prep ahead, slice the apple and store it in a bowl of lemon water to prevent browning. Assemble and cook just before serving for the best texture.
What cheese melts best for this recipe?
Sharp cheddar is my top pick because it melts beautifully and has a strong flavor that stands up to the sweet apple. Gouda, havarti, or even a good Monterey Jack would also work well. Avoid pre-shredded cheese—it doesn’t melt as smoothly.
Can I make this in an air fryer?
Yes! Preheat your air fryer to 370°F. Assemble the sandwiches as directed, then cook for 4-5 minutes, flipping halfway through. The bread gets extra crispy, and the cheese melts perfectly. Just watch it closely—air fryers run hot!
Pin This Recipe!
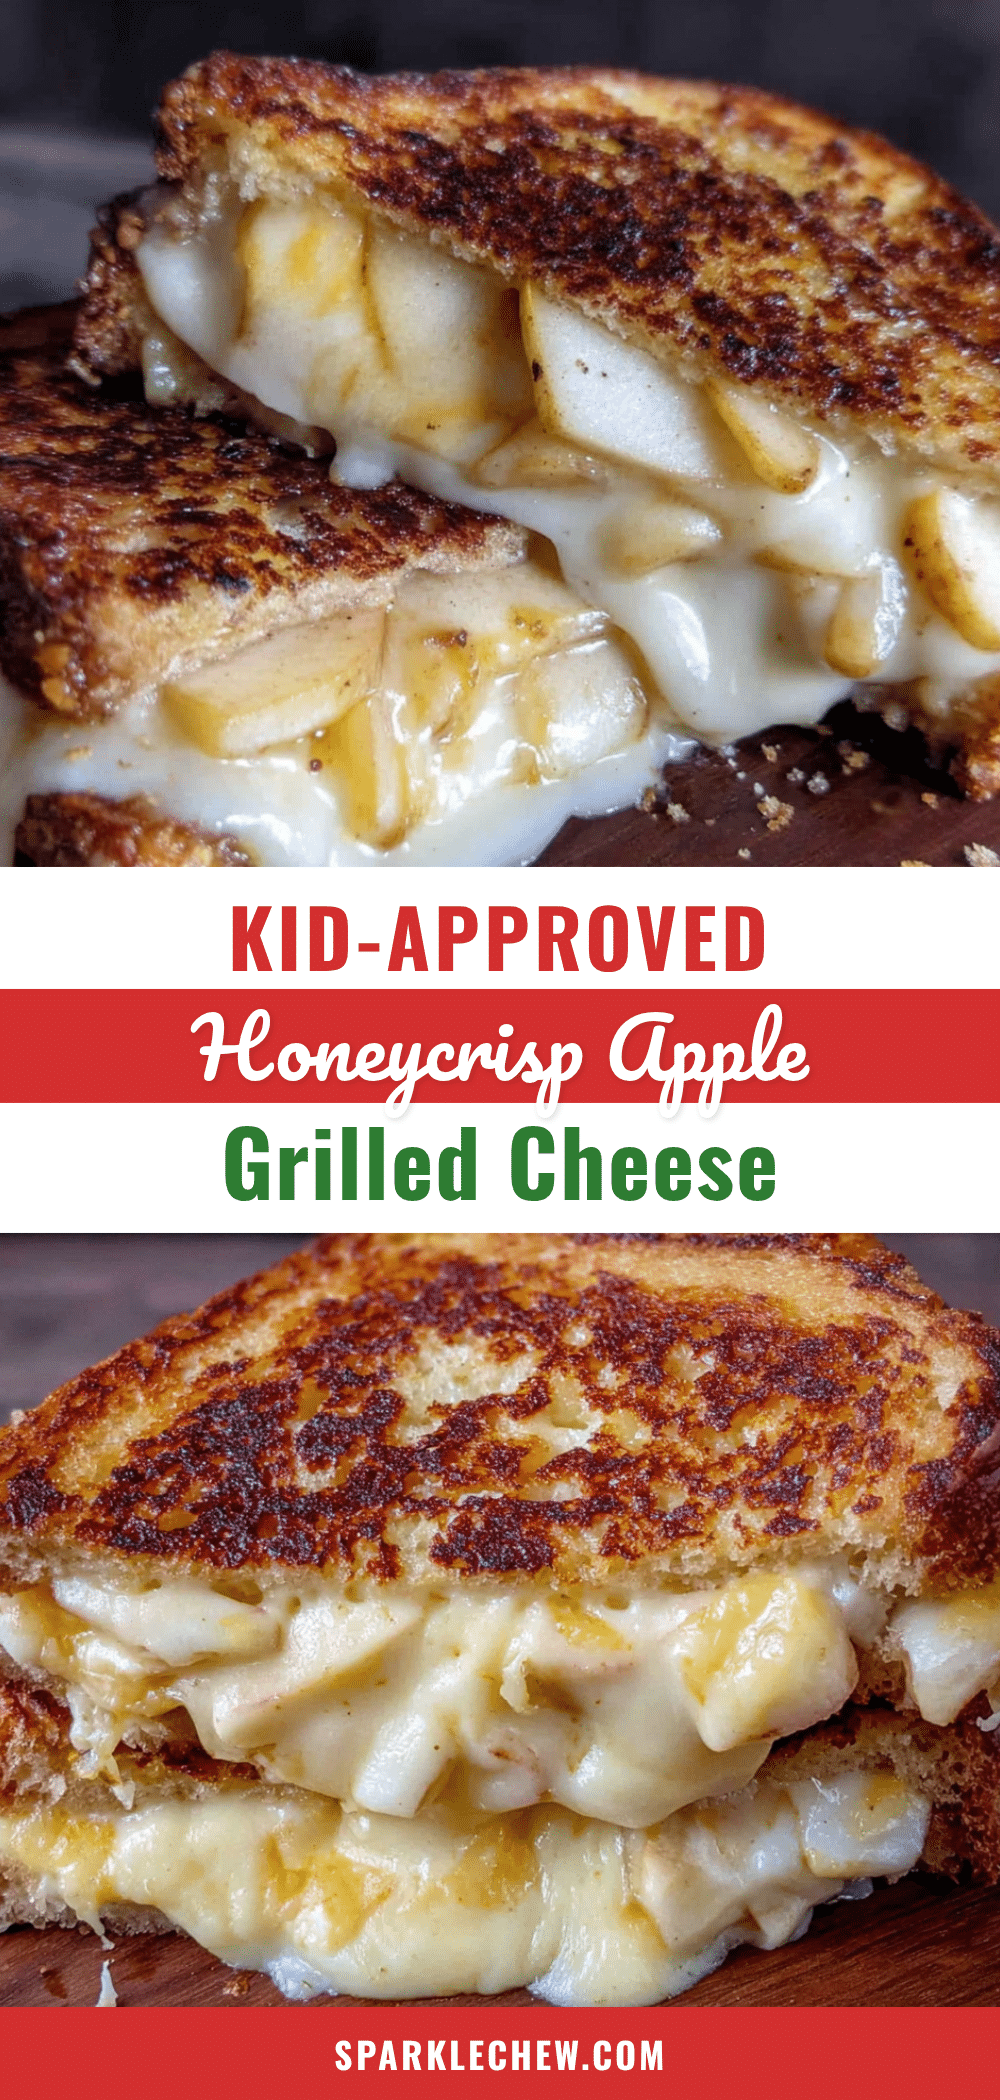
10-Minute Kid-Approved Honeycrisp Apple Cheddar Grilled Cheese

A quick and easy grilled cheese sandwich featuring sweet Honeycrisp apple slices and sharp cheddar cheese on crispy sourdough bread. Perfect for busy weeknights and picky eaters.
- Prep Time: 5 minutes
- Cook Time: 8 minutes
- Total Time: 13 minutes
- Yield: 4 servings 1x
- Category: Main Course
- Cuisine: American
Ingredients
- 8 slices sourdough bread
- 4 tablespoons unsalted butter, softened
- 8 slices sharp cheddar cheese
- 1 large Honeycrisp apple, cored and thinly sliced (about 1/8-inch thick)
- Optional: flaky sea salt for sprinkling
Instructions
- Core the Honeycrisp apple and slice into thin rounds, about 1/8-inch thick. Pat dry with a paper towel if very juicy.
- Lay out 8 slices of sourdough bread. Spread about 1/2 tablespoon of softened butter on one side of each slice.
- Flip four slices so the buttered side is down. Place one slice of cheddar on each, then layer with about 5-6 apple slices. Top with another slice of cheddar. Place remaining bread slices on top, buttered side up.
- Heat a large non-stick skillet or cast iron pan over medium-low heat for about 1 minute.
- Place two sandwiches in the skillet (or as many as fit without crowding). Cook for 3-4 minutes until the bottom is golden brown and crispy.
- Flip carefully and cook for another 3-4 minutes, pressing down gently with a spatula halfway through. If cheese isn’t melting, cover the pan with a lid for the last minute.
- Transfer sandwiches to a cutting board and let rest for 1 minute. Slice diagonally, sprinkle with flaky sea salt if desired, and serve immediately.
Notes
For best results, use medium-low heat and don’t rush. Pat apple slices dry to prevent soggy bread. Let sandwiches rest for 1 minute before slicing to keep cheese from oozing out. For a big batch, keep cooked sandwiches warm in a 200°F oven.
Nutrition
- Serving Size: 1 sandwich
- Calories: 480
- Sugar: 12
- Sodium: 680
- Fat: 28
- Saturated Fat: 16
- Carbohydrates: 42
- Fiber: 4
- Protein: 18
Keywords: grilled cheese, apple cheddar, honeycrisp, quick dinner, kid-friendly, comfort food