Love this? Save it for later!
Share the inspiration with your friends
Introduction
“You won’t believe what I whipped up last Fourth of July,” my friend Jenna said, waving a container of this stunning dessert across the picnic table. I was half-distracted, trying to keep my toddler from grabbing the potato salad, but the vibrant layers of red, white, and blue caught my eye immediately. Honestly, I thought it would be complicated to make, but Jenna swore it was the easiest thing she’d done all summer. She’d grabbed a few simple ingredients from the grocery store earlier that day — Oreos, strawberries, whipped cream — and layered them in a loaf pan. No baking, no fuss, just pure crowd-pleasing magic.
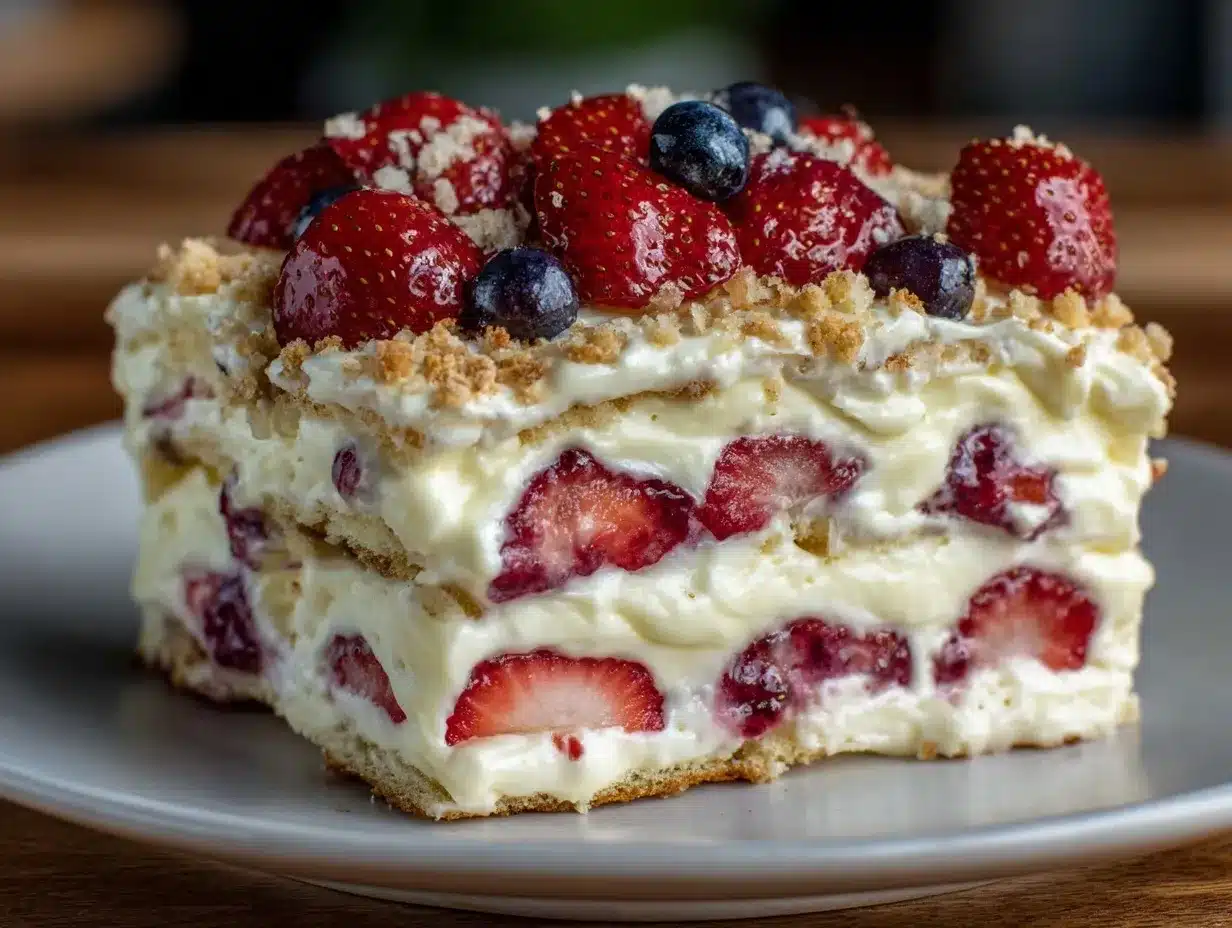
That moment stuck with me, especially since summer parties can get hectic. You want something festive, impressive, but not a kitchen marathon. So when I finally tried making my own version of the Easy No-Bake Red White Blue Oreo Icebox Cake with Strawberries, it felt like a win on all fronts. The cookies softened just right overnight, the fresh berries added a juicy pop, and the whipped cream held it all together with a dreamy creaminess that made every bite feel like a celebration. You know that feeling when a dessert is so good you catch yourself sneaking extra spoonfuls? Yep, that happened.
Maybe you’ve been there — scrambling for a last-minute dessert that looks festive but doesn’t require hours of work or complicated steps. This cake is exactly that, and honestly, it’s become my go-to for summer get-togethers ever since. Whether you’re hosting a barbecue, a neighborhood potluck, or just want to treat yourself on a warm afternoon, this no-bake icebox cake is ready to impress without the stress.
Why You’ll Love This Recipe
After a handful of attempts (okay, more like a dozen), this Easy No-Bake Red White Blue Oreo Icebox Cake with Strawberries recipe has earned its spot as a summer staple in my kitchen. It’s simple enough for even the most distracted cooks, yet delivers a flavor and texture combo that makes it feel special. Let me tell you why this recipe keeps getting rave reviews:
- Quick & Easy: You’ll have it assembled in under 20 minutes — perfect for busy summer days or last-minute celebrations.
- Simple Ingredients: No fancy or hard-to-find items here. Just Oreos, fresh strawberries, and whipped cream, things you probably already have on hand or can grab easily.
- Perfect for Summer Parties: The patriotic colors make it an instant hit for Fourth of July, Memorial Day, or any warm-weather gathering.
- Crowd-Pleaser: Kids and adults alike adore the creamy layers and the familiar Oreo crunch softened to perfection.
- Unbelievably Delicious: The texture is just right — soft cookies, fresh fruit, and fluffy cream all in one bite.
What makes this recipe stand out? It’s the layering technique combined with a simple chilling process that lets the Oreos soak up just enough cream to become tender but not soggy. Also, swapping in fresh strawberries adds a juicy brightness that cuts through the sweetness without overpowering it. I’ve tried other icebox cakes before, but this balance of flavors and ease of assembly is what keeps me coming back. Honestly, it’s the kind of dessert that makes you close your eyes and smile after the first bite — that comforting, nostalgic feeling with a festive twist.
What Ingredients You Will Need
This recipe uses simple, wholesome ingredients to create a dessert that’s both visually stunning and satisfying. Most ingredients are pantry staples or easy to find at your local grocery store, and you can swap a few out to suit your preferences or dietary needs.
- Oreo Cookies (about 24 cookies) – the classic sandwich cookies are the star here; I prefer regular Oreos for the right balance of sweetness and crunch.
- Fresh Strawberries (1 pint, sliced) – ripe and juicy berries add the bright red layer; in summer, the fresher, the better.
- Whipped Cream (2 cups, chilled) – either homemade whipped cream or store-bought, whipped to soft peaks; I usually use heavy cream and a touch of vanilla extract.
- Blueberries (1 cup) – fresh blueberries create the blue layer; feel free to use frozen if fresh aren’t available, just thaw and drain.
- Powdered Sugar (2 tablespoons) – to sweeten the whipped cream gently without overpowering.
- Vanilla Extract (1 teaspoon) – adds depth and warmth to the whipped cream.
If you’re looking to make this gluten-free, there are gluten-free Oreo-style cookies available that work great. For a dairy-free version, I’ve had success with coconut whipped cream, though the flavor changes a bit. Just keep the layering proportions the same. And hey, if you want to get creative, mixing in some crushed pistachios or toasted coconut flakes on top adds a nice crunch contrast.
Equipment Needed
One of the best parts about this Easy No-Bake Red White Blue Oreo Icebox Cake is the minimal equipment required — no fancy gadgets, just basics you likely already own.
- Loaf Pan (8×4 inches recommended) – perfect for layering and easy slicing; if you don’t have a loaf pan, a small rectangular baking dish works too.
- Mixing Bowl – for whipping the cream; a chilled metal bowl is best for whipping cream faster.
- Electric Mixer or Whisk – I prefer an electric hand mixer for quick whipping, but a sturdy whisk works if you have patience!
- Spatula – for folding and spreading whipped cream evenly between layers.
- Knife – to slice strawberries and cut the finished cake.
Honestly, I’ve made this in everything from glass loaf pans to disposable aluminum pans when hosting potlucks. The only must is that the pan has straight sides to keep the layers neat. If you want to keep things budget-friendly, loaf pans can often be found cheaply at thrift stores or online. Just make sure to line it with parchment paper or plastic wrap so you can lift the cake out easily.
Preparation Method
- Prepare the Whipped Cream: Pour 2 cups (480 ml) of chilled heavy cream into a cold mixing bowl. Add 2 tablespoons (16 g) powdered sugar and 1 teaspoon (5 ml) vanilla extract. Using an electric mixer, whip on medium-high speed until soft peaks form — about 3 to 4 minutes. Be careful not to overwhip; you want it fluffy but not grainy.
- Slice the Strawberries: Rinse and hull 1 pint (about 300 g) of strawberries. Slice them thinly so they layer nicely and spread evenly.
- Layer the Cake: Line your 8×4-inch (20×10 cm) loaf pan with plastic wrap or parchment paper, leaving some overhang to lift the cake out later. Start with a single layer of Oreo cookies, standing them upright or laying flat based on your preference. Spread a generous layer (about 1/3 of the whipped cream) over the cookies, smoothing with a spatula.
- Add the Red Layer: Arrange a layer of sliced strawberries evenly on top of the whipped cream. Then spread another 1/3 of the whipped cream over the berries, covering completely.
- Add the White Layer: Place another layer of Oreos on top of the cream. Follow with the remaining whipped cream, spreading evenly.
- Add the Blue Layer: Scatter fresh blueberries (about 1 cup or 150 g) evenly over the final cream layer.
- Chill the Cake: Cover the pan tightly with plastic wrap and refrigerate for at least 6 hours, ideally overnight. This allows the cookies to soften and the flavors to meld. You’ll notice the Oreos take on a cakey, tender texture that’s utterly delicious.
- Serve: Use the plastic wrap overhang to lift the cake out of the pan. Slice into 1-inch (2.5 cm) pieces with a sharp knife, wiping between cuts for clean slices. Serve chilled and enjoy!
If you’re pressed for time, a 4-hour chill can work, but the texture improves the longer it rests. And if your whipped cream starts to separate while chilling, just give the top a gentle stir before slicing. I learned that the hard way after a potluck mishap!
Cooking Tips & Techniques
Here are some pointers I’ve picked up making this Easy No-Bake Red White Blue Oreo Icebox Cake, which really help make it foolproof and delicious every time:
- Whip Cream Just Right: Soft peaks are key — if you go too far, the cream can become grainy or turn into butter. I recommend chilling your bowl and beaters beforehand for faster whipping.
- Cookie Layering: You can stand Oreos up or lay them flat depending on your pan shape and look you want. Standing them gives a striking vertical stripe effect, but laying flat creates a smoother texture.
- Fruit Prep: Slice strawberries evenly to avoid thick bites of fruit. Also, drain blueberries if using frozen to avoid excess moisture.
- Chilling Time: Don’t rush! The chilling transforms the cookies’ texture to soft, cake-like layers that meld beautifully with the whipped cream.
- Serving Tips: Use a serrated knife and wipe it clean between cuts to get neat slices, especially since the cake can be a little delicate.
One time, I forgot to line my pan, and the cake stuck badly, making it a challenge to serve. Lesson learned: always line your pan! Also, if you want to multitask, whip your cream while slicing fruit to save time.
Variations & Adaptations
Feel free to customize this icebox cake to suit your taste or dietary needs. Here are a few ideas I’ve enjoyed or want to try:
- Chocolate Lover’s Version: Swap regular Oreos for Double Stuf or chocolate-filled sandwich cookies for extra indulgence.
- Vegan/Dairy-Free: Use coconut whipped cream and gluten-free vegan sandwich cookies. The texture will differ slightly but still tastes great.
- Seasonal Fruit Swap: In other seasons, swap strawberries and blueberries for raspberries and blackberries or even mango slices for a tropical twist.
- Mini Icebox Cakes: Make single-serving versions in mason jars for easy portability and party-friendly presentation.
Personally, I once added a thin layer of cream cheese frosting mixed into the whipped cream for a tangier flavor. It was a hit with friends who prefer less sweetness. Don’t be afraid to experiment with the layers; sometimes a little extra vanilla or a sprinkle of cinnamon in the cream adds wonderful warmth.
Serving & Storage Suggestions
This Easy No-Bake Red White Blue Oreo Icebox Cake should be served chilled for the best texture and flavor. I like to slice it into neat bars and serve on a pretty platter garnished with a few fresh berries on the side.
It pairs wonderfully with iced tea, lemonade, or even a light sparkling rosé to keep the festive vibe going. If you’re serving at a picnic or barbecue, it holds up well in a cooler for a couple of hours.
To store, cover tightly with plastic wrap and refrigerate. It’s best eaten within 2-3 days, as the cookies continue to soften. You can freeze the cake wrapped in foil and plastic wrap for up to one month. Thaw overnight in the fridge before serving.
Reheating isn’t recommended since this is a chilled dessert, but bringing it to room temperature for 10-15 minutes before serving can help flavors open up. Over time, the fruit juices meld into the cream, deepening the overall flavor, so leftovers can actually taste better the next day.
Nutritional Information & Benefits
This dessert is a fun treat that balances indulgence with fresh fruit goodness. Here’s an estimated nutritional breakdown per serving (based on 8 servings):
| Nutrient | Amount |
|---|---|
| Calories | 280 |
| Fat | 15g |
| Saturated Fat | 9g |
| Carbohydrates | 33g |
| Sugar | 25g |
| Protein | 3g |
The fresh strawberries and blueberries add vitamin C, antioxidants, and fiber to balance the treat’s sweetness. Using fresh fruit also helps keep this dessert feeling light and refreshing. If you’re mindful of sugar, you can reduce powdered sugar in the whipped cream or try a sugar-free whipped topping alternative.
For those with gluten sensitivities, substitute gluten-free sandwich cookies to enjoy this recipe safely. This dessert is vegetarian-friendly but contains dairy, so adapt accordingly if needed.
Conclusion
If you’re looking for a dessert that’s festive, easy to make, and guaranteed to impress, this Easy No-Bake Red White Blue Oreo Icebox Cake with Strawberries is it. It’s one of those recipes that feels like a little party every time you slice into it — creamy, crunchy, sweet, and fresh all at once.
Don’t hesitate to tweak the fruit layers or cookie choices based on what you like or have on hand. Honestly, that’s part of the fun! This recipe has become a summer tradition for me, and I hope it brings a little joy and ease to your celebrations too.
Go ahead, try it out, and let me know how your version turns out — I love hearing about your twists and tweaks! Whether you’re planning a big bash or a quiet family dinner, this icebox cake will make the moment just a bit sweeter.
FAQs
Can I make this icebox cake ahead of time?
Absolutely! In fact, it’s best chilled overnight to let the cookies soften and flavors meld perfectly.
What can I use if I don’t have Oreos?
You can substitute any sandwich cookies you like, such as chocolate wafer cookies or gluten-free versions for dietary needs.
Can I freeze the icebox cake?
Yes, wrap it tightly in foil and plastic wrap and freeze for up to one month. Thaw in the fridge overnight before serving.
Is it possible to make this dairy-free?
Definitely. Use coconut whipped cream or another non-dairy whipped topping and choose dairy-free sandwich cookies.
How should I serve this cake?
Serve chilled or slightly softened at room temperature with fresh berries and a cold beverage for a refreshing summer treat.
Pin This Recipe!
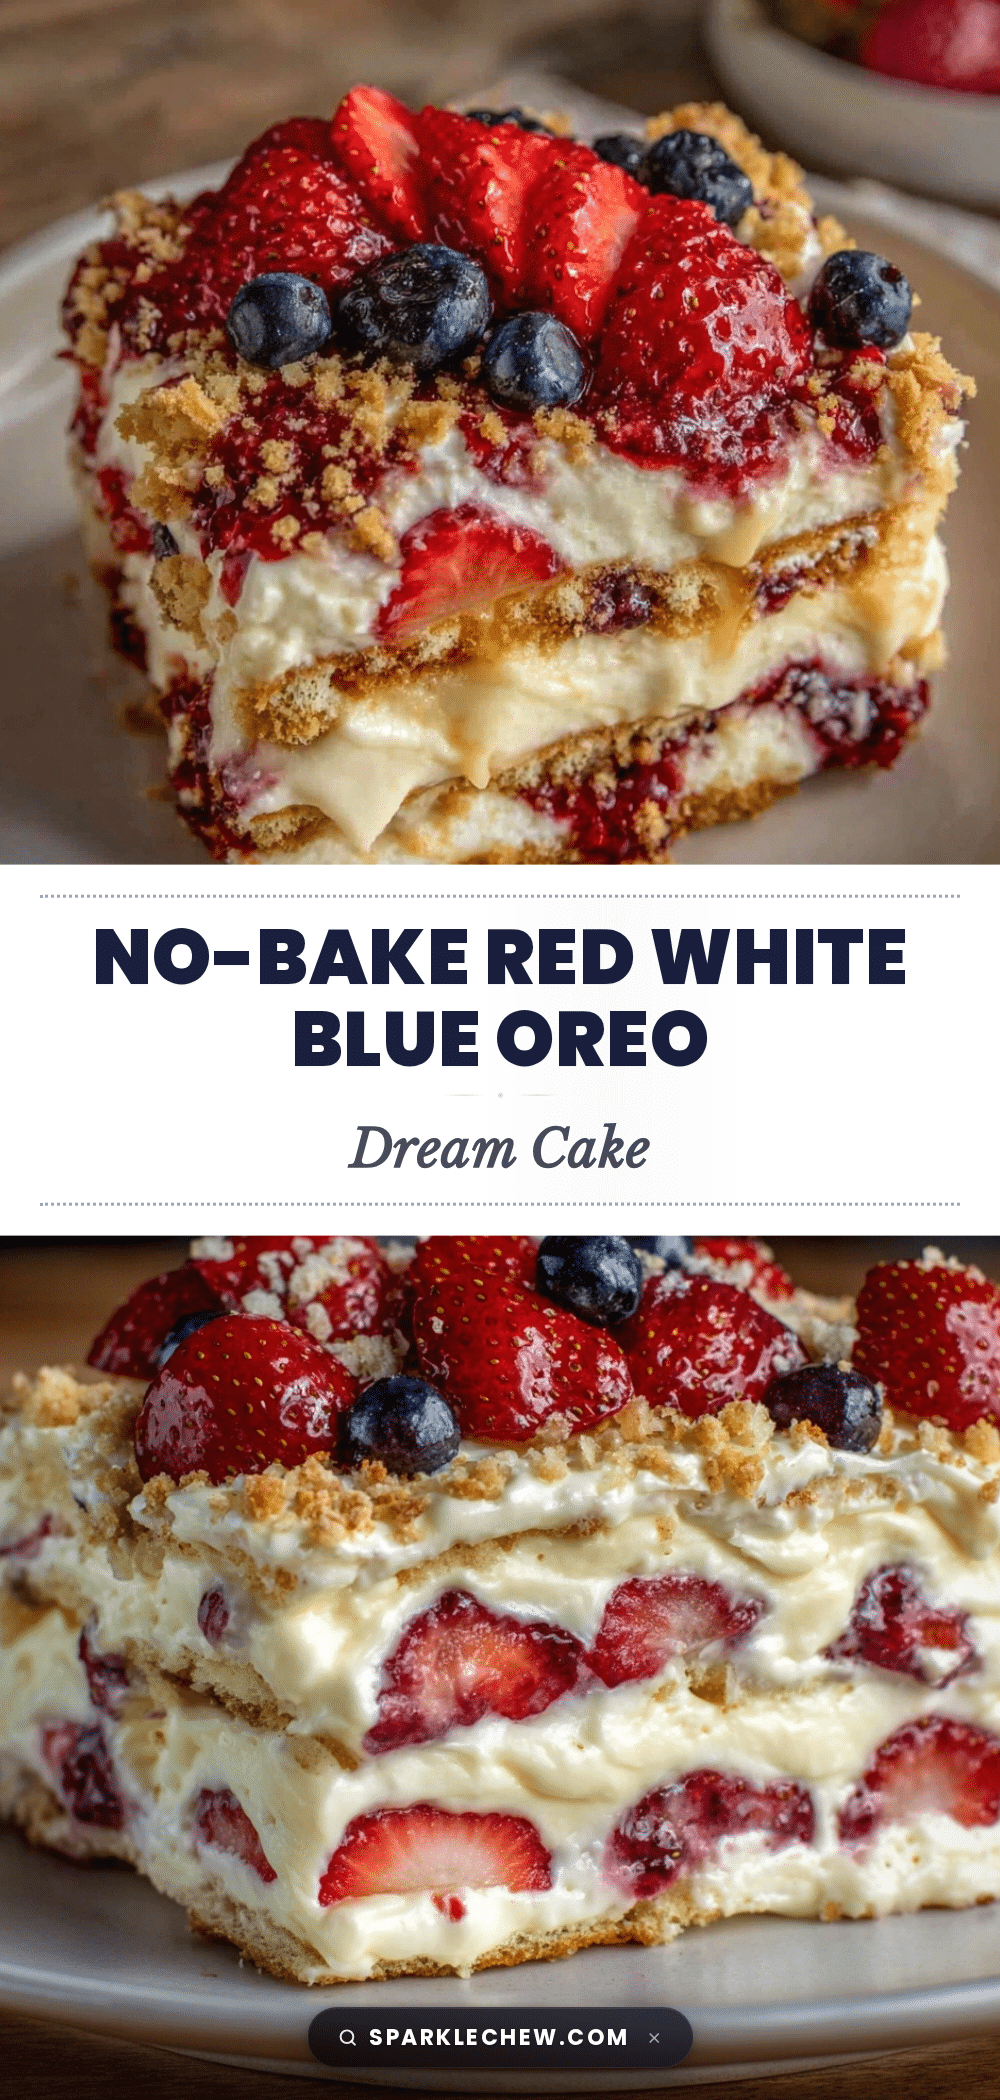
Easy No-Bake Red White Blue Oreo Icebox Cake Recipe for Summer Parties

A festive, no-bake icebox cake layered with Oreos, fresh strawberries, blueberries, and whipped cream, perfect for summer parties and patriotic celebrations.
- Prep Time: 15 minutes
- Cook Time: 0 minutes
- Total Time: 6 hours 15 minutes
- Yield: 8 servings 1x
- Category: Dessert
- Cuisine: American
Ingredients
- 24 Oreo Cookies
- 1 pint fresh strawberries, sliced
- 2 cups whipped cream, chilled
- 1 cup fresh blueberries
- 2 tablespoons powdered sugar
- 1 teaspoon vanilla extract
Instructions
- Pour 2 cups (480 ml) of chilled heavy cream into a cold mixing bowl. Add 2 tablespoons (16 g) powdered sugar and 1 teaspoon (5 ml) vanilla extract. Using an electric mixer, whip on medium-high speed until soft peaks form, about 3 to 4 minutes. Be careful not to overwhip.
- Rinse and hull 1 pint (about 300 g) of strawberries. Slice them thinly.
- Line an 8×4-inch loaf pan with plastic wrap or parchment paper, leaving some overhang.
- Start with a single layer of Oreo cookies, standing upright or laying flat.
- Spread about one-third of the whipped cream over the cookies, smoothing with a spatula.
- Arrange a layer of sliced strawberries evenly on top of the whipped cream.
- Spread another one-third of the whipped cream over the strawberries.
- Place another layer of Oreos on top of the cream.
- Spread the remaining whipped cream evenly over the Oreos.
- Scatter fresh blueberries evenly over the final cream layer.
- Cover the pan tightly with plastic wrap and refrigerate for at least 6 hours, ideally overnight.
- Use the plastic wrap overhang to lift the cake out of the pan. Slice into 1-inch pieces with a sharp knife, wiping between cuts for clean slices. Serve chilled.
Notes
Chill the cake overnight for best texture. Use a serrated knife and wipe clean between cuts for neat slices. Line the pan with parchment or plastic wrap to easily lift the cake out. For gluten-free, use gluten-free sandwich cookies. For dairy-free, use coconut whipped cream and dairy-free cookies.
Nutrition
- Serving Size: 1 slice (1/8 of cake
- Calories: 280
- Sugar: 25
- Fat: 15
- Saturated Fat: 9
- Carbohydrates: 33
- Protein: 3
Keywords: no-bake, icebox cake, Oreo, strawberries, blueberries, summer dessert, patriotic dessert, easy dessert, Fourth of July