Love this? Save it for later!
Share the inspiration with your friends
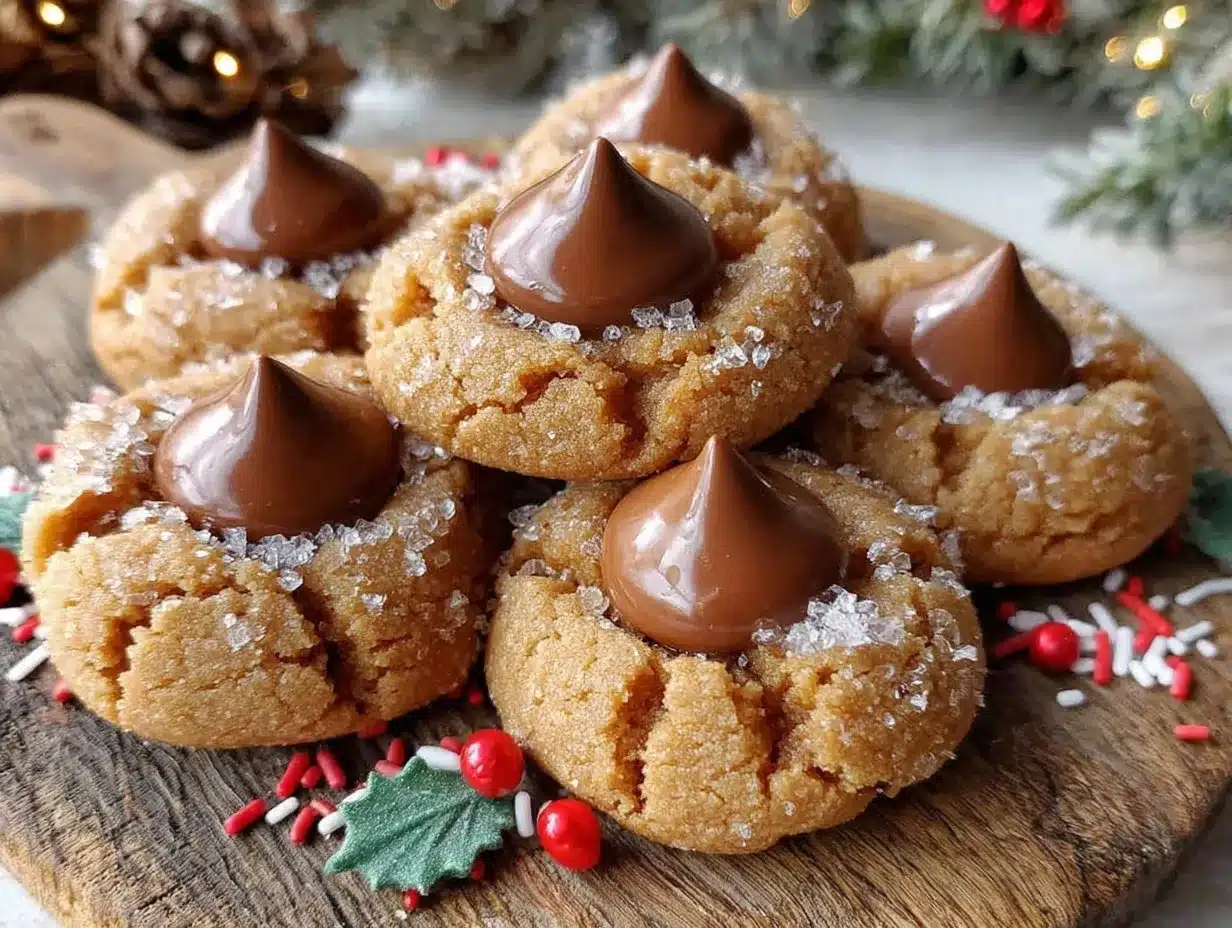
“You’ve got flour all over your sweater,” my neighbor chuckled as I fumbled with the cookie dough, trying to get it just right for our annual holiday cookie swap. It was the first chilly December Saturday in years that I actually felt like baking, and honestly, I wasn’t sure if my old peanut butter blossom recipe would pass the test. She wasn’t a baker by any stretch, but she swore by these cookies—said they reminded her of Christmas mornings as a kid, with the warm peanut butter scent drifting through the house and the chocolate kiss on top sealing the deal.
I wasn’t expecting much, especially since the recipe was scribbled on a stained index card I found tucked inside a used cookbook at the local thrift store. But as soon as I pulled those golden cookies from the oven, and pressed in the chocolate kisses, something clicked. The aroma was like a cozy holiday hug, the perfect blend of sweet and salty. Maybe you know that feeling when a recipe just feels right? Like it’s meant to be part of your own holiday tradition? Yeah, that’s what happened here.
Sure, I made a mess (who doesn’t?), and I forgot to set a timer the first round, burning a dozen cookies—lesson learned! But these peanut butter blossoms have stuck with me ever since. They’re the kind of cookie that brings everyone to the kitchen, even the ones who claim they’re “not really into sweets.” Maybe you’ve been there, too: looking for a simple, crowd-pleasing holiday treat that feels homemade but isn’t a pain to make. That’s exactly why I keep coming back to this classic peanut butter blossoms recipe every year.
Why You’ll Love This Recipe
This classic peanut butter blossoms recipe is one I’ve tested dozens of times (and let me tell you, some batches were better than others). I’ve tweaked and retweaked it to get the texture and flavor just right—chewy edges, soft centers, with that unmistakable peanut butter richness and the perfect chocolate kiss finish. It’s a holiday cookie that feels special but won’t take over your day.
- Quick & Easy: Comes together in under 30 minutes, perfect for busy holiday mornings or last-minute cookie swaps.
- Simple Ingredients: No fancy or hard-to-find items here; you probably have everything in your pantry right now.
- Perfect for Holiday Gatherings: These cookies are a festive staple that always sparks nostalgia and smiles.
- Crowd-Pleaser: Kids love them, adults adore them, and they disappear fast—trust me, I’ve watched it happen.
- Unbelievably Delicious: The chewy peanut butter base paired with the melty chocolate kiss is comfort food at its finest.
What sets this recipe apart? The secret is in the slightly cracked edges and the subtle hint of vanilla that rounds out the peanut butter flavor without overpowering it. Plus, I always chill the dough briefly before baking, which keeps the cookies from spreading too much and gives them that perfect soft chew. Honestly, this isn’t just any peanut butter blossom recipe—it’s my go-to holiday cookie pick that never fails to impress, whether I’m packing a batch for the office or setting out a plate for unexpected guests.
What Ingredients You Will Need
This recipe uses simple, wholesome ingredients to deliver bold flavor and that satisfying peanut butter cookie texture without any fuss. Almost all of these are likely pantry staples, and if you don’t have something, I’ve got some easy swaps for you.
- Peanut Butter: Creamy peanut butter (smooth, unsalted if possible) – the star of the show. I prefer Skippy for consistent texture.
- Granulated Sugar: For sweetness and that slight crisp on the edges.
- Brown Sugar: Light or dark, packed – adds moisture and a deeper flavor.
- Unsalted Butter: Softened to room temperature – adds richness and tenderness.
- Egg: Large, room temperature – helps bind everything together.
- Vanilla Extract: Pure vanilla – just a splash brightens the whole cookie.
- All-Purpose Flour: For structure (about 2 cups / 240 grams).
- Baking Soda: 1 teaspoon – for lift and lightness.
- Salt: Just a pinch – balances the sweetness.
- Chocolate Kisses: Hershey’s milk chocolate kisses, unwrapped (about 36 pieces) – the iconic finishing touch.
Substitution tips: Use natural peanut butter if you want a more intense peanut flavor, but expect a slightly different texture. For a gluten-free option, almond or oat flour works well but may require slight adjustments in dough consistency. If dairy is a concern, swap butter for coconut oil and choose dairy-free chocolate kisses.
Equipment Needed
- Large mixing bowl – I usually grab my trusty glass bowl because it’s easy to see all the ingredients coming together.
- Electric mixer or sturdy whisk – makes creaming the butter and sugars painless. Hand mixing is possible but takes a bit more elbow grease.
- Measuring cups and spoons – accurate measurements keep these cookies consistent every time.
- Baking sheet – preferably non-stick or lined with parchment paper to prevent sticking and ease cleanup.
- Wire cooling rack – helps cookies cool evenly and stay crisp around the edges.
- Spoon or cookie scoop – for shaping uniform balls; I swear by a small cookie scoop to get the size just right.
If you don’t have a mixer, a wooden spoon works in a pinch, just be prepared for a workout. And if you’re missing parchment paper, a silicone baking mat is a great alternative that I use often.
Preparation Method
- Preheat your oven to 375°F (190°C). Line your baking sheet with parchment paper or a silicone mat. This helps prevent sticking and keeps your cookies looking picture perfect.
- Cream together the butter, peanut butter, granulated sugar, and brown sugar. Use an electric mixer or whisk for about 2-3 minutes until the mixture is light and fluffy. This step is key for that tender yet chewy texture.
- Add the egg and vanilla extract. Beat just until combined. The batter might look a little loose here, but don’t worry—it firms up once you add the dry ingredients.
- In a separate bowl, whisk the flour, baking soda, and salt. Gradually add this dry mix to the wet ingredients, stirring until just combined. Overmixing can toughen your cookies, so stop as soon as you don’t see flour.
- Shape the dough into 1-inch (2.5 cm) balls. Roll them in extra granulated sugar for a sparkly coating. Arrange the balls about 2 inches apart on your baking sheet.
- Bake for 8-10 minutes. Watch for the edges to set and crack slightly but keep the centers soft. This is the perfect window for soft, chewy cookies.
- Immediately press a chocolate kiss into the center of each cookie. The warmth softens the chocolate just right without melting it completely.
- Cool the cookies on the baking sheet for 5 minutes, then transfer to a wire rack to cool completely.
If you forget to press the chocolate in right away (been there!), pop the cookies back in the oven for 30 seconds to gently soften the centers. Keep an eye on them so they don’t overbake.
Cooking Tips & Techniques
One of the trickiest parts of making peanut butter blossoms is getting the cookies to have that perfect soft center with just enough chew around the edges. Here’s what I’ve learned over countless holiday baking sessions:
- Chill the dough briefly: If your kitchen is warm, refrigerate the dough for 15-20 minutes before rolling. This stops the cookies from spreading too much and helps keep the shape nice.
- Don’t skip the sugar coating: Rolling the dough balls in granulated sugar adds a subtle crunch and a pretty sparkle that makes the cookies look festive and inviting.
- Watch the bake time carefully: Pull the cookies out when edges are just set and cracks appear on top; the centers will still look soft but firm up as they cool.
- Press the chocolate kisses in right away: Doing this while the cookies are hot ensures the chocolate softens nicely but doesn’t melt away into a mess.
- Use room temperature ingredients: Butter and eggs at room temp blend more easily, giving you a smoother dough and even baking.
Avoid overmixing the dough once the flour is added. I made that mistake once and ended up with tough cookies—lesson learned the hard way! Also, if your peanut butter is on the oily side, give it a quick stir before measuring to keep the texture consistent.
Variations & Adaptations
This classic peanut butter blossoms recipe is super adaptable, which makes it great for holiday baking when you want to mix things up or accommodate different diets.
- Chocolate lovers’ twist: Swap milk chocolate kisses for dark chocolate or even white chocolate for a different flavor profile.
- Nut-free version: Use sunflower seed butter instead of peanut butter to avoid allergens, and swap kisses with allergy-friendly chocolate buttons.
- Gluten-free option: Replace all-purpose flour with a 1:1 gluten-free baking flour. The cookies come out just as chewy and delicious.
- Spiced peanut butter blossoms: Add ½ teaspoon cinnamon or a pinch of nutmeg to the dry ingredients for a cozy holiday spice note.
- Mini cookie version: Use a smaller cookie scoop to make bite-sized blossoms perfect for parties or gifting.
One year, I even tried adding chopped roasted peanuts into the dough for extra crunch—totally worth it if you like a bit of texture contrast.
Serving & Storage Suggestions
These cookies are best enjoyed at room temperature, when the chocolate kiss is soft but not melty. They look charming arranged on a festive plate or in a holiday tin lined with parchment paper.
Serve alongside a glass of cold milk, a cup of hot cocoa, or even your favorite holiday coffee blend. They also make a fun addition to a cookie exchange or a thoughtful homemade gift.
Store peanut butter blossoms in an airtight container at room temperature for up to 5 days. If you want to keep them longer, they freeze beautifully—just pop them in a sealed freezer bag for up to 3 months. To thaw, leave at room temp for an hour or warm gently in a low oven.
Pro tip: Flavors deepen and the chocolate kiss firms up a bit after a day, so if you can wait, the next day’s cookies taste even better.
Nutritional Information & Benefits
One peanut butter blossom cookie (approx. 30g) contains about:
| Calories | 140 kcal |
|---|---|
| Fat | 7 g |
| Carbohydrates | 17 g |
| Protein | 3 g |
| Fiber | 1 g |
Peanut butter provides heart-healthy fats and protein, making these cookies a more satisfying treat compared to many other holiday sweets. Of course, they’re still a dessert, so I recommend enjoying them in moderation.
This recipe is naturally gluten-free if you switch to an appropriate flour, and you can make it dairy-free with simple substitutions. Just watch out for nut allergies if you’re baking for a crowd!
Conclusion
Classic peanut butter blossoms are one of those holiday treats that feel both nostalgic and fresh every time you make them. The mix of chewy peanut butter cookie and melty chocolate kiss is just irresistible. Whether you’re a seasoned baker or just looking for a straightforward, crowd-pleasing cookie recipe, this one’s a winner.
Feel free to make it your own—try the variations, swap ingredients, and most importantly, enjoy the process as much as the cookies themselves. I keep making these year after year because they bring a little joy and sweetness to the hectic holiday season, and I hope they do the same for you.
Let me know how your batch turns out or if you’ve added your own twist—I love hearing from fellow peanut butter blossom fans!
FAQs About Classic Peanut Butter Blossoms
How do I prevent my peanut butter blossoms from spreading too much?
Chill the dough for 15-20 minutes before baking and roll the balls tight. Also, avoid over-greasing your baking sheet—parchment paper or silicone mats work best.
Can I use natural peanut butter in this recipe?
Yes, but natural peanut butter tends to be oilier and may change the dough texture slightly. Stir it well before measuring, and you might need to chill the dough a bit longer.
What’s the best way to press the chocolate kisses into the cookies?
Press the chocolate kisses into the cookies immediately after they come out of the oven while the cookies are hot. This softens the chocolate just enough without melting it completely.
Can I make these cookies ahead of time?
Absolutely! You can make the dough and freeze it in balls, then bake fresh when ready. Baked cookies also freeze well—just thaw at room temperature.
Are there any good substitutions for the chocolate kisses?
You can use mini chocolate chips, chocolate chunks, or even white chocolate buttons. Just add them after baking the same way you would with kisses.
Pin This Recipe!
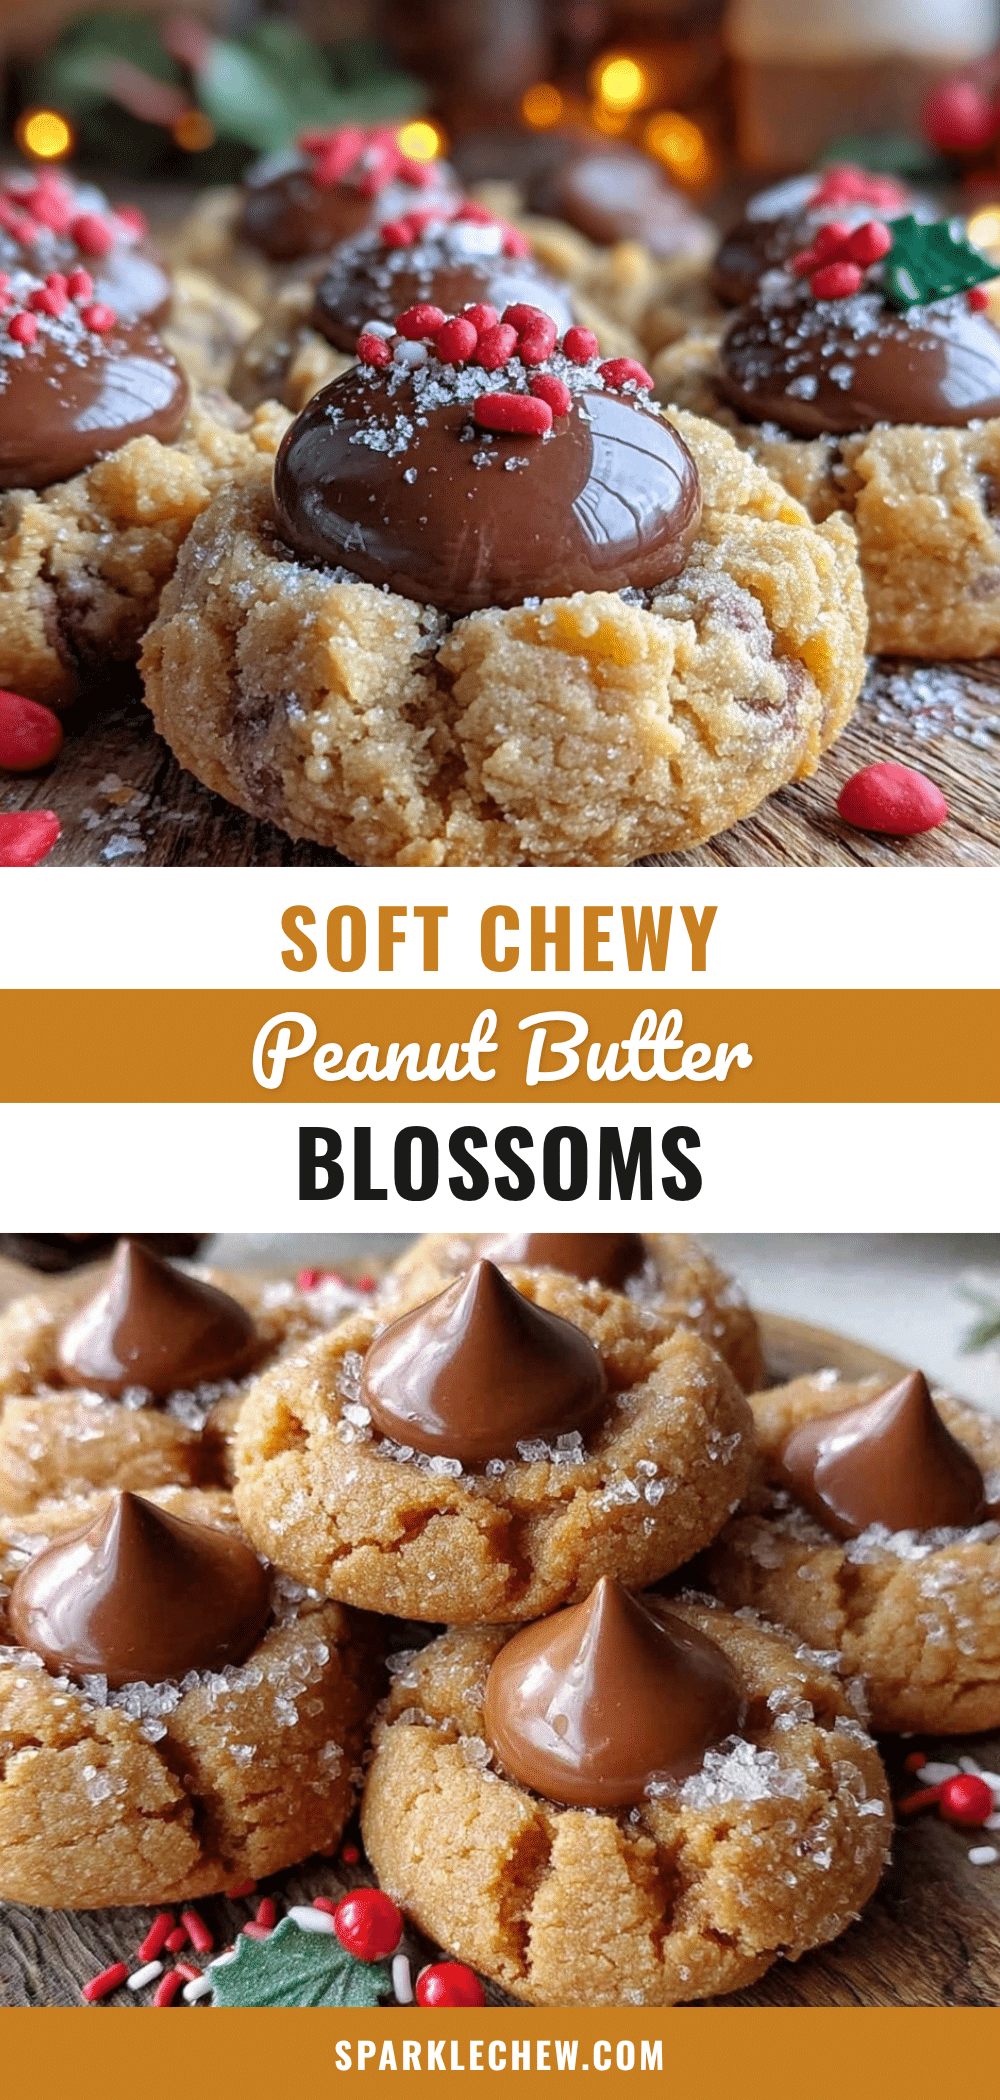
Classic Peanut Butter Blossoms

A nostalgic holiday cookie featuring chewy peanut butter bases topped with melty chocolate kisses, perfect for festive gatherings and easy to make.
- Prep Time: 15 minutes
- Cook Time: 10 minutes
- Total Time: 25 minutes
- Yield: 36 cookies 1x
- Category: Dessert
- Cuisine: American
Ingredients
- 1 cup creamy peanut butter (smooth, unsalted if possible)
- 1/2 cup granulated sugar, plus extra for rolling
- 1/2 cup packed light or dark brown sugar
- 1/2 cup unsalted butter, softened to room temperature
- 1 large egg, room temperature
- 1 teaspoon pure vanilla extract
- 2 cups all-purpose flour (about 240 grams)
- 1 teaspoon baking soda
- Pinch of salt
- 36 Hershey’s milk chocolate kisses, unwrapped
Instructions
- Preheat your oven to 375°F (190°C). Line a baking sheet with parchment paper or a silicone mat.
- Cream together the butter, peanut butter, granulated sugar, and brown sugar using an electric mixer or whisk for 2-3 minutes until light and fluffy.
- Add the egg and vanilla extract; beat just until combined.
- In a separate bowl, whisk the flour, baking soda, and salt. Gradually add this dry mix to the wet ingredients, stirring until just combined. Avoid overmixing.
- Shape the dough into 1-inch (2.5 cm) balls. Roll them in extra granulated sugar and arrange about 2 inches apart on the baking sheet.
- Bake for 8-10 minutes until edges are set and slightly cracked but centers remain soft.
- Immediately press a chocolate kiss into the center of each cookie while still warm.
- Cool the cookies on the baking sheet for 5 minutes, then transfer to a wire rack to cool completely.
Notes
Chill the dough for 15-20 minutes before rolling to prevent spreading. Roll dough balls in granulated sugar for a sparkly coating. Press chocolate kisses into cookies immediately after baking while warm. Use room temperature ingredients for best texture. Avoid overmixing once flour is added to prevent tough cookies. Natural peanut butter can be used but may require longer chilling and stirring before measuring. For gluten-free, substitute flour with 1:1 gluten-free baking flour. Dairy-free substitutions include coconut oil for butter and dairy-free chocolate kisses.
Nutrition
- Serving Size: 1 cookie (approx. 30
- Calories: 140
- Fat: 7
- Carbohydrates: 17
- Fiber: 1
- Protein: 3
Keywords: peanut butter blossoms, holiday cookies, peanut butter cookies, chocolate kiss cookies, easy holiday treats, classic cookies