Love this? Save it for later!
Share the inspiration with your friends
My sister asked why I couldn’t just use less sugar in my jam. I started to explain the science of pectin and preservation, the delicate balance of sugar to fruit that ensures a proper set and safe canning. I stopped. Honestly, I had no good answer except “that’s how the recipe is written.” I’d been making jam for years, following rules I’d never thought to question. So we tried it her way — a full third less sugar than the standard recipe called for — and I stood there, wooden spoon in hand, fully prepared to say “I told you so” when the jam refused to set.
It set beautifully. Better than my usual batches, actually. The pears held their shape just enough, the vanilla was more pronounced without all that sugar masking it, and the color was this gorgeous, translucent golden-amber that looked like liquid autumn in a jar. I had to laugh at myself. Here I was, the “experienced” canner, getting schooled by someone who just thought the jam tasted too sweet. She was right. And that little batch — just four half-pint jars — disappeared faster than any jam I’d ever made. My neighbor Karen even asked if I’d switched brands.
That moment changed how I think about small-batch canning. When you’re working with just a few pounds of fruit, you have room to experiment, to adjust, to actually taste as you go. You’re not committing to forty jars of something that might not work. This Perfect Small-Batch Pear Vanilla Jam for Canning is the direct result of being wrong in the best possible way. It’s proof that sometimes the best recipes come from breaking the rules — even the ones you thought were written in stone.
Why You’ll Love This Recipe
This isn’t your grandmother’s pear jam. I mean, it could be — if your grandmother had a thing for vanilla beans and was willing to cut back on the sugar. This small-batch recipe makes exactly four half-pint jars, which is the sweet spot for trying something new without ending up with a pantry full of jam you’re not sure about.
- Small-Batch Magic : Only uses about 2 pounds of pears, perfect for when you find a few ripe ones at the market or have a tree that’s not producing enough for a full canning load.
- Less Sugar, More Flavor : Uses about 30% less sugar than traditional jam recipes, letting the pear and vanilla flavors shine through without that cloying sweetness.
- Beginner-Friendly Canning : No special pectin calculations or tricky timing — this recipe uses natural pectin from the pears and a bit of lemon juice to help it set.
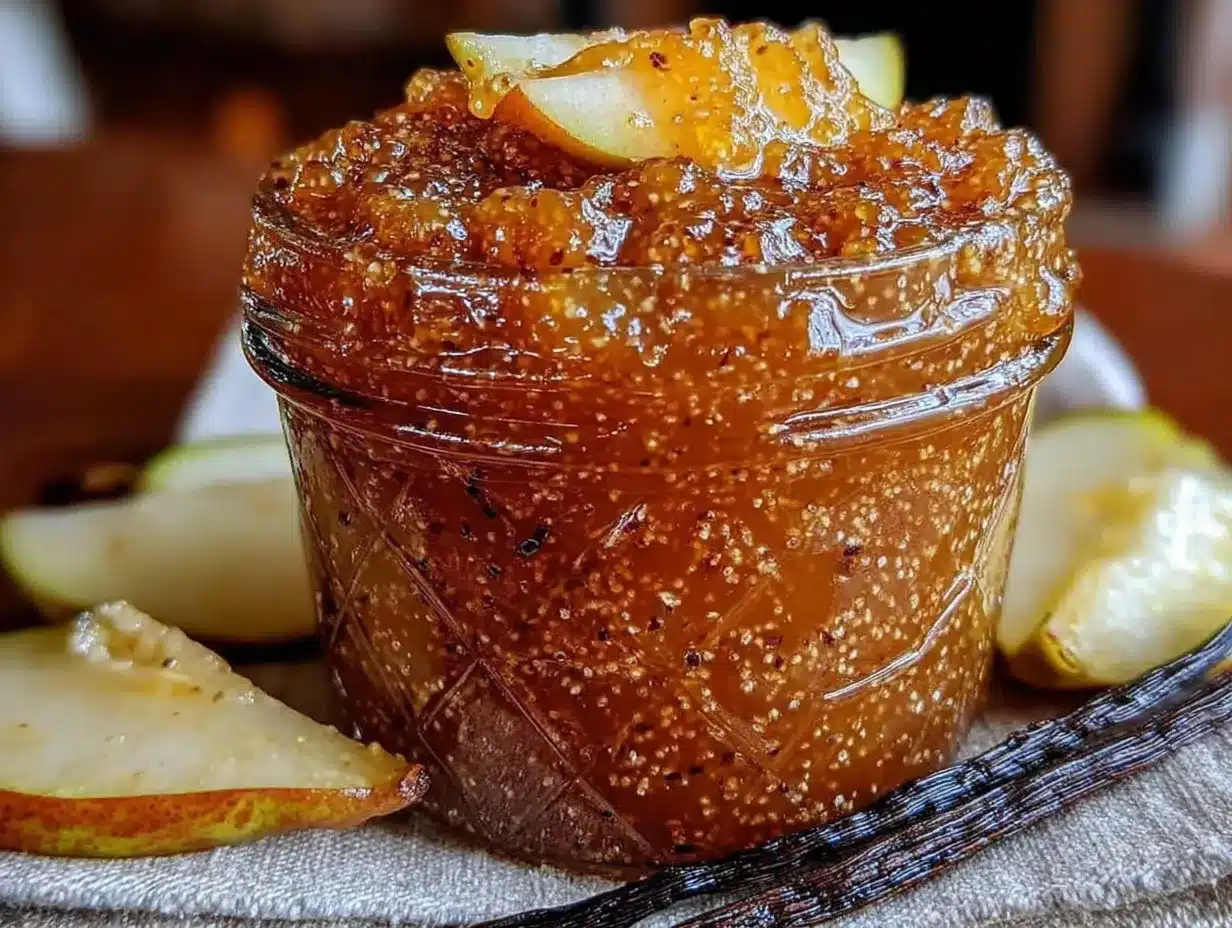
- Absolutely Gorgeous : The vanilla specks suspended in golden pear jam make this look like something from a fancy boutique. It’s seriously beautiful in the jar.
- Perfect for Gifting : Four jars is exactly the right amount to keep two and give two away. Everyone who tries this asks for the recipe.
What makes this different from every other pear jam recipe out there? It’s the vanilla. Not extract, not imitation — a real vanilla bean, split and scraped, then simmered right in with the fruit. The flavor is nuanced and floral, not artificial at all. And the reduced sugar means you can actually taste the pear variety you’re using. Bartlett pears give a different jam than Bosc or Anjou, and that’s a good thing. This recipe lets those differences shine.
This is the kind of jam that makes you want to eat it straight from the jar with a spoon. It’s not just good for toast — it’s incredible on scones, swirled into yogurt, spooned over pound cake, or even used as a glaze for roasted pork. It’s the recipe I turn to when I want to preserve a little bit of fall and have it last all year long.
What Ingredients You Will Need
This recipe uses simple, honest ingredients that work together to create something truly special. The key is using good-quality pears and a real vanilla bean — those two things make all the difference.
- 2 pounds ripe but firm pears (about 4-5 medium pears) — Bartlett, Bosc, or Anjou all work well. You want them ripe enough to be fragrant but still firm enough to hold their shape during cooking. Overripe pears will turn to mush. I prefer Bartlett for their classic pear flavor and beautiful golden color.
- 1 ½ cups granulated sugar — This is less than traditional jam recipes, but it’s enough for proper preservation and a good set. Do not reduce further unless you plan to freeze the jam instead of canning it.
- 1 vanilla bean — Splurge on a good one here. Madagascar or Tahitian vanilla beans have the best flavor. You’ll use the seeds and the pod, so nothing goes to waste. I buy mine in bulk from Simply Organic or a local spice shop.
- 2 tablespoons fresh lemon juice — This adds acidity, which helps with both flavor and preservation. Use bottled lemon juice only if fresh isn’t available — the flavor really does make a difference.
- 1 tablespoon unsalted butter (optional) — This is my secret trick. A small pat of butter added near the end of cooking reduces foaming and gives the jam a beautiful, clear appearance. It’s not strictly necessary, but I never skip it.
For canning, you’ll also need:
- 4 half-pint canning jars with new lids and rings
- A water bath canner or a large, deep pot with a rack
- A jar lifter and magnetic lid wand (or just tongs and patience)
Ingredient Selection Tips: Look for pears that yield slightly at the neck when pressed gently. If they’re rock hard, let them ripen at room temperature for a day or two. If they’re already soft and bruised, they’re past their prime for jam-making. The vanilla bean should be pliable and fragrant — if it’s dry and brittle, it’s too old. And please, please use real butter, not margarine. It’s such a small amount, but the flavor difference matters.
Substitution Guidance: If you don’t have a vanilla bean, you can use 1 tablespoon of high-quality vanilla extract added after the jam has finished cooking and cooled slightly. The flavor won’t be quite as deep, and you’ll miss those beautiful vanilla specks, but it still makes a lovely jam. For a lower-sugar version, you can use a low-sugar pectin following the package directions — just be aware this will change the texture slightly.
Equipment Needed
You don’t need a fancy kitchen to make this jam, but having the right tools makes the process smoother and safer. Here’s what you’ll need:
- Water bath canner or large stockpot — A dedicated water bath canner with a rack is ideal, but a deep stockpot works fine as long as it’s deep enough to cover the jars by at least 1-2 inches of water. I used an old spaghetti pot for years before upgrading.
- 4 half-pint canning jars with new lids and bands — Half-pint jars are perfect for this small batch. Always use new lids for a proper seal, but the bands can be reused.
- Jar lifter — This is non-negotiable for safety. Trying to lift hot jars with tongs is a recipe for burns and broken glass. They’re cheap and worth every penny.
- Magnetic lid wand — Not essential, but makes handling hot lids much easier. I’ve used clean tongs in a pinch.
- Large, heavy-bottomed pot or Dutch oven — For cooking the jam. A wide pot allows for faster evaporation, which means a shorter cooking time. I love my enameled cast iron Dutch oven for this.
- Wooden spoon or heatproof spatula — For stirring. Metal can react with the acid in the jam, so wood or silicone is best.
- Kitchen scale — Optional but helpful for measuring pears accurately. Two pounds is about 4-5 medium pears, but scales are more precise.
- Small plate in the freezer — For testing the jam set. This is an old-fashioned trick that works perfectly.
Budget-Friendly Tip: If you don’t have a canner, you can absolutely use a large stockpot with a folded kitchen towel in the bottom to keep jars off the direct heat. Just make sure the pot is deep enough. I did this for my first three years of canning, and it worked perfectly.
Preparation Method
Making this jam is a process, but it’s a rewarding one. Take your time, and enjoy the transformation from simple fruit to something truly special.
- Prepare your canner and jars. Fill your water bath canner with water and bring it to a simmer. Wash your jars, lids, and bands in hot, soapy water, then rinse well. Place the jars in the canner to keep them hot until you’re ready to fill them. Keep the lids in a small saucepan of hot water — not boiling, just hot enough to soften the sealing compound.
- Prepare the pears. Wash, peel, and core your pears. Cut them into ½-inch chunks. You should have about 5-6 cups of prepared fruit. Don’t stress about uniform pieces, but try to keep them similar in size for even cooking. I usually end up with a few smaller pieces that break down and help thicken the jam naturally.
- Split and scrape the vanilla bean. Using a sharp paring knife, split the vanilla bean lengthwise. Use the back of the knife to scrape out the tiny black seeds. Don’t throw away the pod — it goes into the pot too and adds incredible flavor.
- Combine everything in the pot. In your large, heavy-bottomed pot, combine the pears, sugar, lemon juice, vanilla seeds, and the empty vanilla pod. Stir gently to coat the pears with sugar. Let this sit for about 15-20 minutes while the sugar starts drawing out the pear juices. This maceration step helps the pears soften and release their natural pectin.
- Bring to a boil. Place the pot over medium-high heat and bring the mixture to a full, rolling boil that you can’t stir down. This usually takes about 10-12 minutes. Stir occasionally to prevent sticking, especially around the edges.
- Cook the jam. Once boiling, reduce the heat to medium and continue cooking, stirring frequently. The jam will foam and bubble — this is normal. Cook for about 15-20 minutes, or until the jam has thickened and the pears are translucent. The mixture should reduce by about a third in volume.
- Test for the set. Place a small plate in the freezer before you start cooking. When you think the jam might be ready, drop a small spoonful onto the cold plate. Let it sit for 30 seconds, then push it with your finger. If it wrinkles and holds its shape, it’s done. If it’s still runny, cook for another 2-3 minutes and test again.
- Add the butter. Once the jam has reached the set point, remove the vanilla pod (rinse it and let it dry — you can use it to make vanilla sugar later). Stir in the butter if using. This will help reduce foaming and give the jam a beautiful clarity.
- Fill the jars. Remove the hot jars from the canner using your jar lifter. Place them on a clean kitchen towel. Using a ladle and a wide-mouth funnel, fill each jar with hot jam, leaving ¼-inch headspace. Run a clean chopstick or bubble remover around the inside of each jar to release any air bubbles. Wipe the rims with a clean, damp paper towel. Center the lids and screw on the bands until fingertip-tight.
- Process in the water bath. Using your jar lifter, place the filled jars back into the canner. Make sure they’re covered by at least 1-2 inches of water. Bring to a full rolling boil, then process for 10 minutes (adjust for altitude if necessary). Turn off the heat and let the jars sit in the water for 5 minutes before removing them.
- Cool and check seals. Remove the jars and place them on a clean towel, leaving at least an inch between them. Let them cool undisturbed for 12-24 hours. You should hear the satisfying “pop” of the lids sealing as they cool. After they’re completely cool, press the center of each lid — it should not flex. Remove the bands and test the seals by gently lifting the jars by the lids.
Sensory Cues: The jam is ready when it looks like liquid gold — translucent, with the vanilla seeds suspended throughout like tiny black flecks. It should smell intensely of pears and vanilla, with a slight caramelization from the sugar. When you stir it, the jam should fall from the spoon in thick sheets, not thin drips.
Cooking Tips & Techniques
I’ve made this jam more times than I can count, and I’ve learned a few things along the way. Some of these lessons came from spectacular failures — like the time I walked away and the jam scorched, filling my kitchen with the smell of burnt sugar for days.
Don’t rush the maceration. Letting the pears sit with the sugar for a full 15-20 minutes before cooking is crucial. This draws out the natural juices and helps the pears soften more evenly. I’ve skipped this step when I was in a hurry, and the jam was never as good. The pears didn’t break down as nicely, and the texture was more chunky than silky.
Watch the heat. Pear jam can go from perfectly set to scorched in about 30 seconds. Keep the heat at medium once you’ve reached a boil, and stir frequently, especially around the edges and bottom of the pot. I use a wooden spoon and scrape the bottom with every stir. It’s meditative, honestly — the rhythm of stirring, the steam rising, the smell filling the kitchen.
Trust the plate test, not the timer. Cooking times can vary wildly depending on your pears, your pot, your stove, even the humidity in your kitchen. The first few times I made this, I set a timer and ended up with jam that was either too runny or too stiff. Now I start testing after about 15 minutes and check every 2 minutes after that. The cold plate test never lies.
Don’t double the recipe. I know it’s tempting, especially if you have a lot of pears. But this small-batch recipe doesn’t scale well. Doubling it changes the cooking time dramatically, and you’ll likely end up with jam that’s either overcooked or doesn’t set properly. Make two separate batches instead. I learned this the hard way when I ended up with twelve jars of what I can only describe as pear syrup.
Label your jars. I know, it seems obvious. But I have a pantry full of unlabeled jars from last summer, and I honestly can’t tell the pear vanilla from the peach ginger. Use a permanent marker or pretty labels — your future self will thank you.
Variations & Adaptations
This recipe is a wonderful base for experimentation. Here are a few variations I’ve tried and loved:
Spiced Pear Vanilla Jam: Add one cinnamon stick and two whole cloves to the pot along with the pears. Remove them before filling the jars. The spices add warmth and depth, making this taste like holiday baking in a jar. I made this for Christmas gifts last year, and it was the most requested recipe of the season.
Pear Vanilla Ginger Jam: Add 2 tablespoons of finely grated fresh ginger to the pot along with the pears. The ginger adds a bright, zippy kick that cuts through the sweetness beautifully. This is amazing on buttermilk biscuits or stirred into hot tea for a cold winter morning.
Low-Sugar Pear Vanilla Jam: If you’re watching your sugar intake, you can reduce the sugar to 1 cup and use a low-sugar pectin following the package directions. The texture will be slightly softer, and the flavor will be more tart, but it’s still delicious. Just be aware that this version is best stored in the refrigerator or freezer, as the reduced sugar affects long-term preservation.
Pear Vanilla Lavender Jam: Add 1 teaspoon of dried culinary lavender buds along with the pears. The floral notes of the lavender pair surprisingly well with the pear and vanilla. Use a light hand, though — too much lavender can make the jam taste like soap. I learned this the hard way with a batch that was, uh, aggressively floral.
Honey-Sweetened Version: Replace the granulated sugar with 1 ½ cups of mild honey, like clover or orange blossom. The flavor will be more complex, and the jam will have a slightly different texture. This version is wonderful, but it does require longer processing time — add 5 minutes to the water bath to account for the honey’s different preservation properties.
Serving & Storage Suggestions
This jam is versatile in ways that still surprise me. Of course, it’s incredible on toast or buttered biscuits — that’s the classic use, and it never gets old. But let me tell you about some of my favorite ways to use it.
On a Cheese Board: This jam is spectacular with aged cheddar, brie, or manchego. The sweetness of the pears and the floral notes of the vanilla complement the savory, salty cheese perfectly. I’ve brought this to dinner parties and watched people hover around the cheese board, going back for “just one more bite.”
Over Yogurt or Oatmeal: Swirl a spoonful into plain Greek yogurt or warm oatmeal for an instant upgrade. The vanilla in the jam means you don’t need to add any additional sweetener or flavoring. It’s my go-to breakfast on cold winter mornings.
As a Glaze: Warm a few tablespoons of the jam with a splash of balsamic vinegar and brush it over roasted pork tenderloin or chicken thighs near the end of cooking. The combination of sweet, tangy, and savory is absolutely addictive. I discovered this by accident when I was out of my usual glaze and desperate — now I do it on purpose.
In Baking: Use this jam as a filling for thumbprint cookies, layer cakes, or danishes. The vanilla flavor adds depth to baked goods that plain fruit jam just can’t match.
Storage: Properly canned and sealed jars will keep in a cool, dark pantry for up to 18 months. Once opened, store the jam in the refrigerator and use within 3 months. If any jars don’t seal, don’t worry — just store them in the fridge and use them first. The flavor actually deepens over the first few weeks, so even the unsealed jars will be delicious.
Reheating: If the jam crystallizes or becomes too thick over time, simply warm the jar in a pot of simmering water for a few minutes, then stir. It will return to its original silky texture.
Nutritional Information & Benefits
Let’s be honest — jam is a treat, not a health food. But this version is better for you than most, thanks to the reduced sugar and real fruit.
Per 1-tablespoon serving (approximate):
- Calories: 35
- Total Fat: 0g
- Sodium: 0mg
- Total Carbohydrates: 9g
- Sugars: 8g
- Fiber: 0.5g
- Protein: 0g
Health Benefits: Pears are a good source of dietary fiber, vitamin C, and copper. They also contain antioxidants that help fight inflammation. The vanilla bean adds a small amount of vanillin, which has been studied for its potential calming and antioxidant properties. Of course, the amounts in a tablespoon of jam are minimal, but every little bit counts.
Dietary Considerations: This recipe is naturally gluten-free, dairy-free (if you skip the optional butter), and vegan. It contains no nuts, eggs, or soy. The reduced sugar version makes it suitable for those watching their sugar intake, though it’s still a sweet treat and should be enjoyed in moderation.
Allergen Note: The only potential allergen is the optional butter, which contains dairy. Omit it for a completely dairy-free version.
I don’t pretend that jam is a superfood. But I do believe that food made with real ingredients, preserved with care, and enjoyed in moderation is part of a healthy, balanced life. This jam brings me joy, and that counts for something.
Conclusion
This Perfect Small-Batch Pear Vanilla Jam for Canning is more than just a recipe — it’s a reminder that sometimes the best things come from questioning the rules. My sister’s simple question about sugar led me to a jam that’s more flavorful, more beautiful, and honestly more satisfying than anything I’d been making for years.
I hope you’ll try this recipe, whether you’re a seasoned canner or someone who’s never preserved anything before. The small batch size makes it low-pressure and forgiving. And the result — those four little jars of golden, vanilla-speckled perfection — is worth every minute of effort.
Customize it, experiment with it, make it your own. Add spices, try different pear varieties, swap in honey. That’s the beauty of small-batch canning — you have room to play. And if you come up with a variation you love, I’d be thrilled to hear about it. Drop a comment below or tag me in your photos. Nothing makes me happier than seeing someone else fall in love with this jam the way I have.
Happy canning, friends. Your pantry is about to get a whole lot more delicious.
Frequently Asked Questions
Can I use frozen pears instead of fresh?
Yes, you can use frozen pears, but there are a few things to keep in mind. Thaw them completely first, and drain off any excess liquid before using. The texture will be softer, and the jam may take slightly longer to cook because of the extra moisture. The flavor will still be wonderful, though — I’ve done it in a pinch when fresh pears weren’t available.
Why did my jam not set?
There are a few common reasons. Your pears might not have been ripe enough — underripe pears have less natural pectin. You might have undercooked the jam, or the sugar-to-fruit ratio might have been off. If you’re sure you followed the recipe, try cooking it a bit longer next time and always use the cold plate test rather than relying on time alone. If your jam is already made and didn’t set, you can re-cook it or use it as a delicious syrup over pancakes.
Can I reduce the sugar even more?
You can reduce the sugar to 1 cup, but any less than that and you’ll need to use a low-sugar pectin for proper setting and preservation. Without enough sugar, the jam might not set properly, and it won’t have the same shelf stability. If you want a truly low-sugar jam, I recommend using a low-sugar pectin and following the package directions carefully.
How long does homemade jam last?
Properly canned and sealed jars of this jam will last up to 18 months in a cool, dark pantry. Once opened, refrigerate and use within 3 months. If a jar didn’t seal properly (the lid flexes when you press it), store it in the refrigerator and use it within 3 weeks. The flavor actually improves over the first month or two, so don’t be afraid to let it age a bit.
Do I really need a vanilla bean, or can I use extract?
You can absolutely use vanilla extract — use 1 tablespoon added after the jam has finished cooking and cooled slightly. The flavor won’t be as deep or complex, and you’ll miss those beautiful vanilla bean specks, but it still makes a lovely jam. However, if you’ve never used a real vanilla bean before, I encourage you to try it at least once. The difference is remarkable, and the experience of scraping those tiny seeds into the pot is deeply satisfying.
Pin This Recipe!
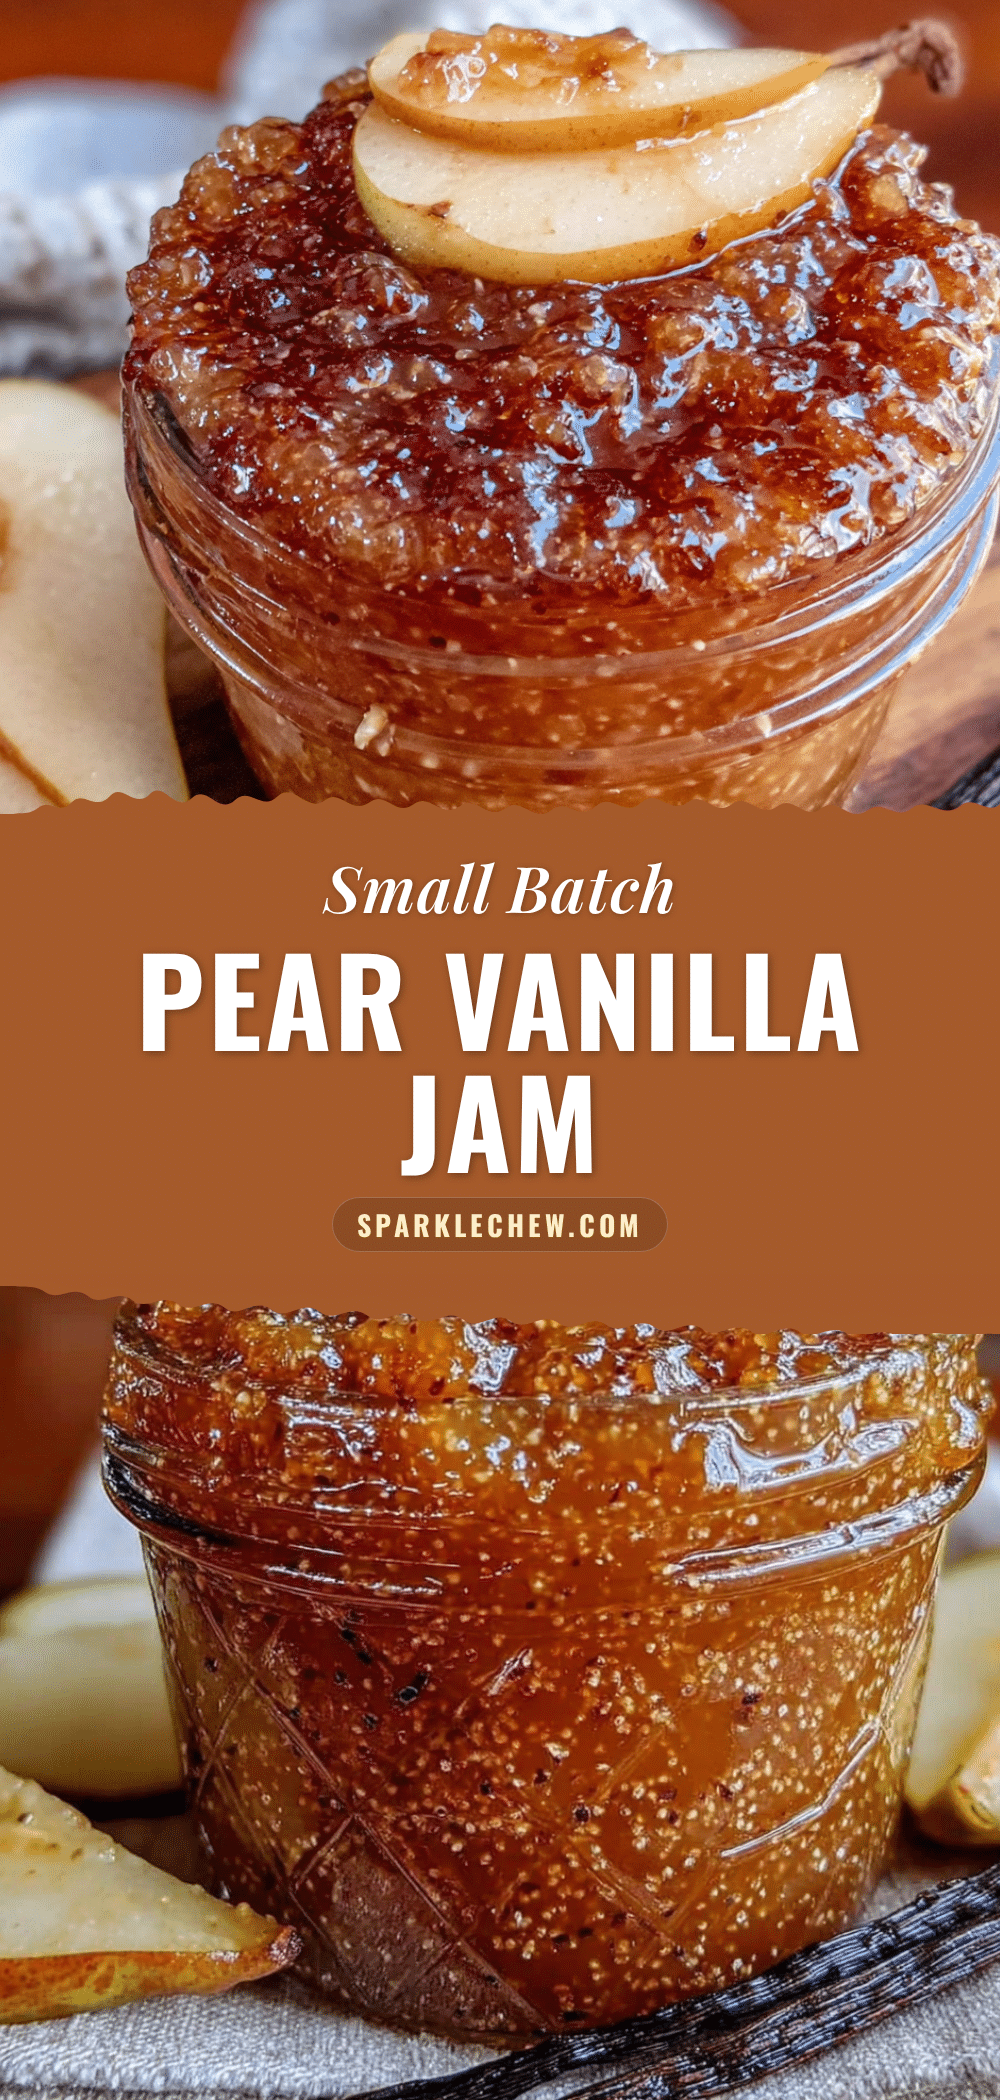
Perfect Small-Batch Pear Vanilla Jam for Easy Canning
This small-batch pear vanilla jam uses 30% less sugar than traditional recipes, letting the pear and vanilla flavors shine. It makes exactly four half-pint jars and is perfect for beginners and experienced canners alike.
- Prep Time: 20 minutes
- Cook Time: 30 minutes
- Total Time: 50 minutes
- Yield: 4 half-pint jars (about 4 cups) 1x
- Category: Preserves
- Cuisine: American
Ingredients
- 2 pounds ripe but firm pears (about 4–5 medium pears), peeled, cored, and cut into ½-inch chunks
- 1 ½ cups granulated sugar
- 1 vanilla bean, split and scraped
- 2 tablespoons fresh lemon juice
- 1 tablespoon unsalted butter (optional, to reduce foaming)
Instructions
- Prepare your canner and jars: Fill your water bath canner with water and bring to a simmer. Wash jars, lids, and bands in hot, soapy water, then rinse well. Place jars in the canner to keep hot. Keep lids in a small saucepan of hot water (not boiling).
- Prepare the pears: Wash, peel, and core pears. Cut into ½-inch chunks (about 5-6 cups).
- Split and scrape the vanilla bean: Using a sharp paring knife, split the vanilla bean lengthwise. Scrape out the seeds with the back of the knife. Reserve the pod.
- Combine everything in the pot: In a large, heavy-bottomed pot, combine pears, sugar, lemon juice, vanilla seeds, and the empty vanilla pod. Stir gently to coat. Let sit for 15-20 minutes to macerate.
- Bring to a boil: Place pot over medium-high heat and bring to a full, rolling boil (about 10-12 minutes), stirring occasionally.
- Cook the jam: Reduce heat to medium and continue cooking, stirring frequently, for about 15-20 minutes, until jam has thickened and pears are translucent. The mixture should reduce by about a third.
- Test for the set: Place a small plate in the freezer before starting. Drop a small spoonful of jam onto the cold plate. Let sit for 30 seconds, then push with your finger. If it wrinkles and holds its shape, it’s done. If runny, cook 2-3 more minutes and test again.
- Add the butter: Once set, remove the vanilla pod (rinse and dry for vanilla sugar). Stir in the butter if using.
- Fill the jars: Remove hot jars from canner using a jar lifter. Place on a clean towel. Ladle hot jam into jars, leaving ¼-inch headspace. Remove air bubbles with a chopstick. Wipe rims with a damp paper towel. Center lids and screw on bands until fingertip-tight.
- Process in the water bath: Place filled jars back into canner, ensuring they are covered by 1-2 inches of water. Bring to a full rolling boil, then process for 10 minutes (adjust for altitude). Turn off heat and let jars sit in water for 5 minutes before removing.
- Cool and check seals: Remove jars and place on a clean towel, leaving space between them. Cool undisturbed for 12-24 hours. Listen for the ‘pop’ of lids sealing. After cooling, press the center of each lid—it should not flex. Remove bands and test seals by gently lifting jars by the lids.
Notes
Don’t double the recipe; make two separate batches instead. Use the cold plate test to determine doneness rather than relying solely on time. If jars don’t seal, store in the refrigerator and use within 3 weeks. The flavor deepens over the first few weeks.
Nutrition
- Serving Size: 1 tablespoon
- Calories: 35
- Sugar: 8
- Carbohydrates: 9
- Fiber: 0.5
Keywords: pear jam, vanilla jam, small-batch canning, homemade jam, pear vanilla jam, easy canning, low sugar jam


