Perfect Small-Batch Pear Vanilla Jam for Easy Canning
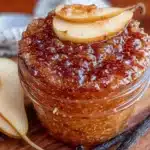
This small-batch pear vanilla jam uses 30% less sugar than traditional recipes, letting the pear and vanilla flavors shine. It makes exactly four half-pint jars and is perfect for beginners and experienced canners alike.
- Prep Time: 20 minutes
- Cook Time: 30 minutes
- Total Time: 50 minutes
- Yield: 4 half-pint jars (about 4 cups) 1x
- Category: Preserves
- Cuisine: American
Ingredients
Scale
- 2 pounds ripe but firm pears (about 4–5 medium pears), peeled, cored, and cut into ½-inch chunks
- 1 ½ cups granulated sugar
- 1 vanilla bean, split and scraped
- 2 tablespoons fresh lemon juice
- 1 tablespoon unsalted butter (optional, to reduce foaming)
Instructions
- Prepare your canner and jars: Fill your water bath canner with water and bring to a simmer. Wash jars, lids, and bands in hot, soapy water, then rinse well. Place jars in the canner to keep hot. Keep lids in a small saucepan of hot water (not boiling).
- Prepare the pears: Wash, peel, and core pears. Cut into ½-inch chunks (about 5-6 cups).
- Split and scrape the vanilla bean: Using a sharp paring knife, split the vanilla bean lengthwise. Scrape out the seeds with the back of the knife. Reserve the pod.
- Combine everything in the pot: In a large, heavy-bottomed pot, combine pears, sugar, lemon juice, vanilla seeds, and the empty vanilla pod. Stir gently to coat. Let sit for 15-20 minutes to macerate.
- Bring to a boil: Place pot over medium-high heat and bring to a full, rolling boil (about 10-12 minutes), stirring occasionally.
- Cook the jam: Reduce heat to medium and continue cooking, stirring frequently, for about 15-20 minutes, until jam has thickened and pears are translucent. The mixture should reduce by about a third.
- Test for the set: Place a small plate in the freezer before starting. Drop a small spoonful of jam onto the cold plate. Let sit for 30 seconds, then push with your finger. If it wrinkles and holds its shape, it’s done. If runny, cook 2-3 more minutes and test again.
- Add the butter: Once set, remove the vanilla pod (rinse and dry for vanilla sugar). Stir in the butter if using.
- Fill the jars: Remove hot jars from canner using a jar lifter. Place on a clean towel. Ladle hot jam into jars, leaving ¼-inch headspace. Remove air bubbles with a chopstick. Wipe rims with a damp paper towel. Center lids and screw on bands until fingertip-tight.
- Process in the water bath: Place filled jars back into canner, ensuring they are covered by 1-2 inches of water. Bring to a full rolling boil, then process for 10 minutes (adjust for altitude). Turn off heat and let jars sit in water for 5 minutes before removing.
- Cool and check seals: Remove jars and place on a clean towel, leaving space between them. Cool undisturbed for 12-24 hours. Listen for the ‘pop’ of lids sealing. After cooling, press the center of each lid—it should not flex. Remove bands and test seals by gently lifting jars by the lids.
Notes
Don’t double the recipe; make two separate batches instead. Use the cold plate test to determine doneness rather than relying solely on time. If jars don’t seal, store in the refrigerator and use within 3 weeks. The flavor deepens over the first few weeks.
Nutrition
- Serving Size: 1 tablespoon
- Calories: 35
- Sugar: 8
- Carbohydrates: 9
- Fiber: 0.5
Keywords: pear jam, vanilla jam, small-batch canning, homemade jam, pear vanilla jam, easy canning, low sugar jam