Love this? Save it for later!
Share the inspiration with your friends
There used to be a tiny bakery tucked between a dry cleaner and a vintage shop on Main Street in my old neighborhood that made the most incredible brown sugar apple cake I have ever tasted. When they closed unexpectedly two summers ago—a “For Lease” sign appeared overnight—I genuinely mourned that cake. I mean, I actually stood outside the empty storefront, peering through the dusty windows, wondering if maybe they’d left a recipe card behind on the counter. Pathetic, I know. But that cake was something else entirely.
After nine attempts—nine!—I finally got it. The first try was dry and sad. The third one collapsed in the middle like a deflated balloon. The fifth one was so dense I could have used it as a doorstop. But the ninth? The ninth was the one. That perfect balance of tender crumb, deep caramel notes from the brown sugar, and those soft, jammy apples throughout. And then I drizzled that vanilla glaze over the top, and let me tell you, I actually teared up a little. It tasted like coming home to a kitchen that smelled like my grandmother’s house and that little bakery all at once.
Maybe you’ve been there—chasing a flavor from a place that no longer exists, trying to convince yourself that store-bought will do, knowing full well it won’t. This brown sugar apple cake is that recipe. The one you’ll make for every fall gathering, every Sunday brunch, every time you need something that feels like a warm hug. It’s not complicated, and honestly, that’s the beauty of it. Simple ingredients doing exactly what they’re supposed to do.
Why You’ll Love This Recipe
Let’s be real for a second—there are about a million apple cake recipes floating around the internet. So why should this one earn a permanent spot in your recipe binder? Because I’ve tested this thing into the ground, and it keeps winning. Every single time.
- Bakery-Quality at Home : This cake has that perfect texture—tender, moist, and dense enough to feel substantial but light enough that you’ll go back for a second slice before you realize what happened.
- Simple Pantry Ingredients : No chasing down obscure ingredients at three different stores. Apples, butter, brown sugar, flour, eggs—you probably have most of this already.
- Perfect for Fall (and Honestly, Any Season) : Sure, it screams autumn with those apples and that warm brown sugar flavor, but I’ve made this in July and nobody complained. Trust me.
- That Vanilla Glaze : The glaze isn’t an afterthought—it’s the finishing touch that takes this from “good cake” to “can I have the recipe?” territory. It seeps into the warm cake just enough to make every bite extra special.
- Forgiving Recipe : Overmixed the batter a little? Forgot to bring the eggs to room temperature? This cake is remarkably forgiving. I’ve messed up almost every step at some point, and it still turned out delicious.
What makes this brown sugar apple cake different from the rest is the technique. Most recipes dump all the wet ingredients together and call it a day. But I discovered that creaming the butter and brown sugar until it’s genuinely light and fluffy—like, set a timer for five minutes fluffy—makes a massive difference. That extra step builds structure and traps air, giving you a cake that rises beautifully and has that melt-in-your-mouth texture.
This is the kind of cake that makes people close their eyes after the first bite. I’ve seen it happen at least a dozen times. It’s comfort food reimagined—familiar but somehow better than you remembered. Perfect for impressing guests without stress, or turning a rainy Tuesday into something memorable.
What Ingredients You Will Need
This brown sugar apple cake uses simple, wholesome ingredients that work together to create something genuinely special. Most of these are pantry staples, which means you’re probably only a trip to the apple bin away from baking this beauty.
For the Cake
- 2 cups all-purpose flour (spooned and leveled—don’t scoop directly from the bag or you’ll end up with too much flour)
- 1 teaspoon baking soda
- 1 teaspoon baking powder
- 1/2 teaspoon salt
- 1 1/2 teaspoons ground cinnamon
- 1/2 teaspoon ground nutmeg (freshly grated if you have it—it makes a difference)
- 1/4 teaspoon ground cloves
- 3/4 cup unsalted butter, softened to room temperature (I use Kerrygold—the higher fat content gives a better crumb)
- 1 1/2 cups packed light brown sugar (dark brown sugar works too, but light keeps the apple flavor front and center)
- 2 large eggs, room temperature (cold eggs will seize the butter mixture)
- 1 teaspoon vanilla extract
- 1/2 cup buttermilk, room temperature (no buttermilk? Add 1 tablespoon lemon juice to regular milk and let it sit 5 minutes)
- 2 cups peeled and chopped apples (about 2 medium apples—I recommend Honeycrisp or Granny Smith)
For the Vanilla Glaze
- 1 1/2 cups powdered sugar, sifted (sifting prevents lumps—learned that the hard way)
- 3 tablespoons whole milk (cream works too for a richer glaze)
- 1 teaspoon vanilla extract
- Pinch of salt (trust me on this—it balances the sweetness)
Ingredient Selection Tips: For the apples, I’ve tested this with Honeycrisp, Granny Smith, Fuji, and Braeburn. Honeycrisp gives the best balance of sweetness and structure—they hold their shape during baking without turning into mush. Granny Smith works beautifully if you prefer a tangier contrast to the sweet brown sugar. Whatever you choose, avoid Red Delicious or Gala—they break down too quickly and you’ll end up with apple sauce pockets instead of apple pieces.
Substitution Guidance: Need this dairy-free? Use vegan butter and substitute the buttermilk with almond milk mixed with a teaspoon of apple cider vinegar. For a gluten-free version, swap the all-purpose flour with a good 1:1 gluten-free baking blend (I like King Arthur’s). The texture will be slightly different—a bit more delicate—but still delicious. And if you’re out of brown sugar? You can make your own by mixing 1 cup white sugar with 2 tablespoons molasses. Just make sure it’s well combined.
Equipment Needed
Nothing too fancy here—if you’ve baked a cake before, you probably have everything you need. But let’s talk about a few things that make this process smoother.
- 9-inch round cake pan (or an 8-inch square pan works too—just adjust the baking time by about 5 minutes)
- Parchment paper (cut a circle for the bottom of the pan—this is non-negotiable if you want the cake to come out cleanly)
- Stand mixer or hand mixer (you can mix by hand, but your arm will get a workout during the creaming step)
- Large mixing bowls (at least two—one for dry ingredients, one for wet)
- Whisk (for combining dry ingredients evenly)
- Spatula (a rubber spatula for scraping the bowl—don’t waste a single bit of that batter)
- Cooling rack (essential for even cooling—placing a hot pan on a flat surface traps steam and makes the bottom soggy)
- Small saucepan or microwave-safe bowl (for making the glaze)
I used a hand mixer for years before upgrading to a stand mixer, and honestly, both work fine. The stand mixer just means you can walk away while it creams. If you’re using a hand mixer, just hold the bowl steady with a damp paper towel underneath to stop it from sliding around. Budget-friendly tip: dollar store cooling racks work perfectly—no need to spend twenty bucks.
Preparation Method
- Preheat and Prep : Preheat your oven to 350°F (175°C). Grease your 9-inch round cake pan thoroughly with butter or cooking spray, then line the bottom with a circle of parchment paper. Lightly flour the sides of the pan and tap out any excess. This step seems fussy, but I promise it’s worth it when the cake comes out in one perfect piece.
- Mix Dry Ingredients : In a medium bowl, whisk together the flour, baking soda, baking powder, salt, cinnamon, nutmeg, and cloves. Whisk for about 20 seconds—this aerates the flour and distributes the leaveners evenly. Set this aside.
- Cream Butter and Sugar : In a large bowl (or the bowl of your stand mixer), beat the softened butter and brown sugar together on medium-high speed until light and fluffy. This should take about 4-5 minutes. You’re looking for a color change—it should go from pale tan to a noticeably lighter, almost beige shade. Scrape down the sides and bottom of the bowl at least once. I cannot stress this enough—don’t rush this step. Proper creaming is what gives this brown sugar apple cake its tender, bakery-style crumb.
- Add Eggs and Vanilla : Add the eggs one at a time, beating well after each addition (about 30 seconds each). Scrape the bowl again. Add the vanilla extract and beat until combined. The mixture might look slightly curdled at this point—that’s normal, especially if your eggs were a little cold. Don’t panic.
- Alternate Dry and Wet Ingredients : With the mixer on low speed, add about one-third of the dry ingredients. Mix until just combined—a few streaks of flour are fine. Add half the buttermilk and mix until incorporated. Repeat with another third of the dry ingredients, the remaining buttermilk, and finally the last of the dry ingredients. Stop mixing as soon as the flour disappears. Overmixing at this stage develops gluten and makes the cake tough.
- Fold in the Apples : Using a rubber spatula, gently fold the chopped apples into the batter. Fold until they’re evenly distributed—about 8-10 folds. Don’t overmix. The batter will be thick, almost like a very soft cookie dough. That’s exactly what you want.
- Bake : Scrape the batter into your prepared pan and spread it evenly. Give the pan a gentle tap on the counter to release any air bubbles. Bake for 45-55 minutes, or until a toothpick inserted in the center comes out clean or with just a few moist crumbs. The top should be deep golden brown and the edges should be pulling away slightly from the pan. If the top is browning too quickly (around the 35-minute mark), tent loosely with aluminum foil.
- Cool : Let the cake cool in the pan on a wire rack for 15 minutes. Then run a knife around the edges, invert onto the rack, remove the parchment paper, and let it cool completely—at least 1 hour. I know it’s tempting to glaze a warm cake, but the glaze will just slide right off and pool at the bottom. Patience, friend.
- Make the Glaze : While the cake is cooling, make the vanilla glaze. In a small bowl, whisk together the sifted powdered sugar, milk, vanilla extract, and a pinch of salt. Whisk until smooth and pourable. If it’s too thick, add milk one teaspoon at a time. Too thin? Add a tablespoon more powdered sugar. The consistency should be like thick honey—it should drizzle off the whisk in a steady ribbon.
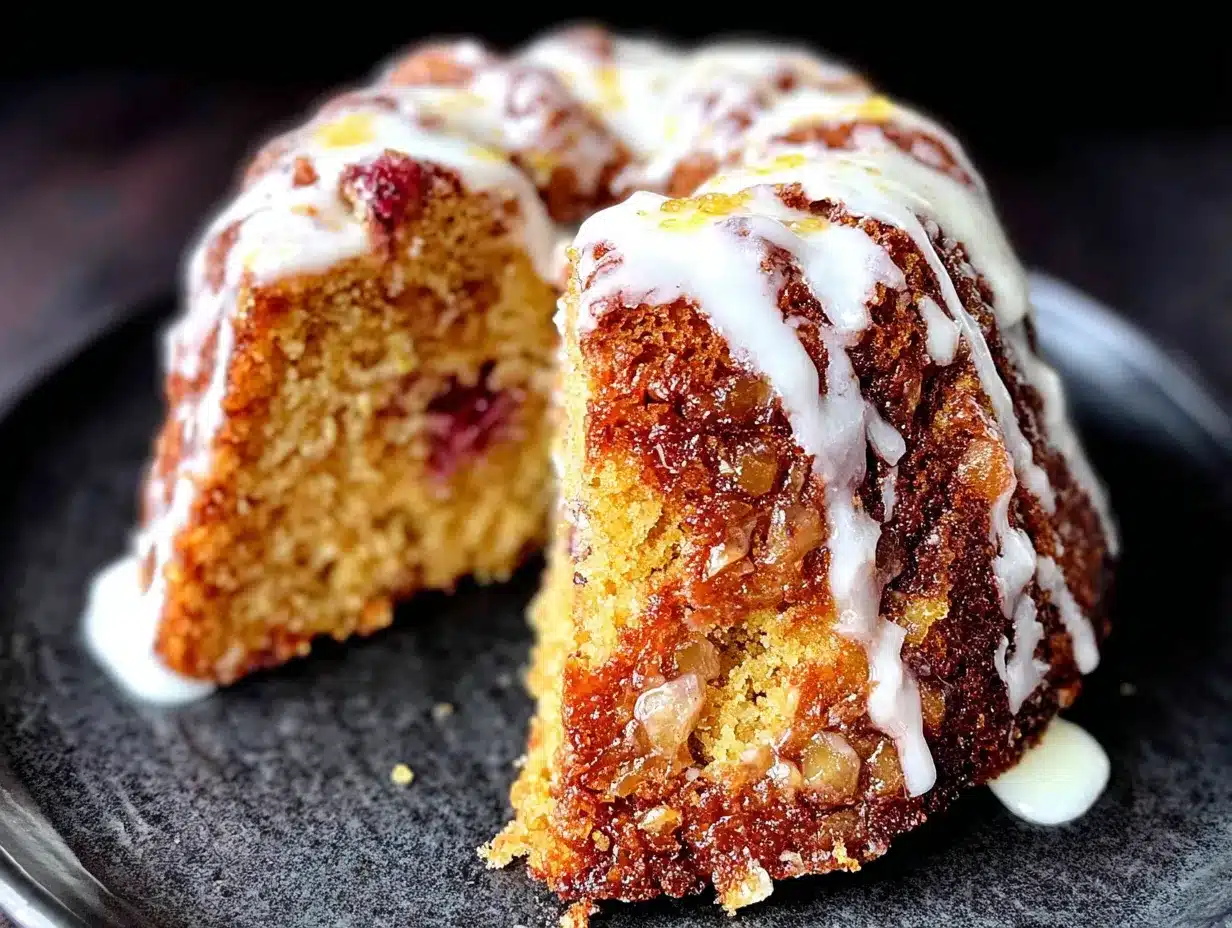
- Glaze and Serve : Once the cake is completely cool, place it on your serving plate. Drizzle the glaze over the top, letting it cascade down the sides naturally. Let the glaze set for about 15 minutes before slicing. Or don’t—I won’t judge if you can’t wait.
Cooking Tips & Techniques
After nine attempts and countless variations, here’s what I’ve learned about making this brown sugar apple cake absolutely perfect.
The Creaming Mistake I Made Three Times: The first few times I made this, I didn’t cream the butter and sugar long enough. I was impatient—I wanted to get to the good part. But under-creamed butter and sugar means the cake doesn’t rise properly and ends up dense and greasy. Set a timer for five minutes. The mixture should look noticeably lighter in color and almost fluffy in texture. If it still looks like wet sand, keep going.
Apple Size Matters: I tried chunking the apples into big, rustic pieces once. They sank to the bottom and created a soggy layer. Small dice—about 1/4 inch—is the sweet spot. They distribute evenly throughout the batter and soften perfectly during baking without disappearing entirely. You want little pockets of apple in every bite, not a sad layer at the bottom.
The Room Temperature Rule: I know, I know—every recipe says this and it feels like a hassle. But here’s the thing: cold eggs and cold buttermilk will seize the butter in your creamed mixture, leaving you with a lumpy, curdled mess. The cake will still bake, but the texture won’t be as tender. Leave your eggs and buttermilk on the counter for 30 minutes before you start. Or, if you forgot (I do this all the time), place the eggs in a bowl of warm water for 5 minutes and microwave the buttermilk for 10-15 seconds.
Multitasking Strategy: While the cake bakes, wash your dishes. Seriously. There’s nothing worse than a beautiful cake and a mountain of dirty bowls. Plus, the kitchen will smell amazing and you’ll feel like a professional baker with your clean counter and cooling cake.
The Toothpick Test: I always test at the 45-minute mark. If the toothpick comes out with wet batter, give it 5 more minutes. If it comes out with a few moist crumbs, it’s done. If it comes out clean and dry, you’ve gone one minute too far. The perfect brown sugar apple cake should be moist but not underdone—that sweet spot where the crumb is tender and the apples are soft.
Variations & Adaptations
One of the best things about this recipe is how adaptable it is. I’ve played around with it more times than I can count, and here are my favorite variations.
Apple Cider Caramel Version: Replace the buttermilk with apple cider and add an extra tablespoon of flour to compensate for the liquid. Then, instead of the vanilla glaze, make a quick caramel sauce by melting 1/2 cup brown sugar with 4 tablespoons butter and 1/4 cup heavy cream. Drizzle it over the warm cake and watch it disappear.
Spiced Walnut Crunch: Toast 1/2 cup chopped walnuts and fold them in with the apples. Then, before baking, sprinkle the top of the batter with a mixture of 2 tablespoons brown sugar, 1 tablespoon melted butter, and 1/2 teaspoon cinnamon. It creates this gorgeous, crackly top that adds texture and nutty flavor.
Gluten-Free Adaptation: I made this for a friend with celiac disease, and honestly, it was one of my better experiments. Use 2 cups of a good 1:1 gluten-free flour blend (I like Bob’s Red Mill). Add an extra tablespoon of buttermilk because gluten-free flours tend to absorb more liquid. The texture is slightly more delicate, but the flavor is identical. Just be gentle when folding—gluten-free batters are more fragile.
Dairy-Free Version: Substitute the butter with vegan butter (I use Miyoko’s—it has the best fat content for baking), use oat milk mixed with a teaspoon of apple cider vinegar for the buttermilk, and swap the whole milk in the glaze for coconut cream. The coconut flavor is subtle enough that it complements the apples rather than competing with them.
Apple Variety Swap: In the summer, I use a mix of peaches and apples for a stone fruit twist. In the fall, I add a handful of fresh cranberries for tartness. And if you have a bumper crop of pears from your neighbor’s tree (lucky you!), pears work beautifully in place of apples—just use slightly firmer ones so they hold their shape.
Serving & Storage Suggestions
This brown sugar apple cake is at its absolute best served slightly warm—not hot, just barely warm—with the vanilla glaze still soft and glossy. The contrast between the tender cake and the sweet glaze is pure magic.
Serving Ideas: A slice of this cake is perfect on its own, but if you want to go next level, serve it with a dollop of lightly sweetened whipped cream or a scoop of vanilla bean ice cream. The cold creaminess against the warm spiced cake is a combination I think about more than is probably normal. For a brunch spread, cut it into smaller squares and arrange them on a platter with fresh apple slices and a dusting of cinnamon.
Storage: Store leftover cake in an airtight container at room temperature for up to 3 days. The glaze will soften slightly, which honestly just makes it better—it soaks into the top layer of the cake like a gentle hug. If your kitchen is particularly warm or humid, store it in the refrigerator to prevent the glaze from getting too sticky. Just bring slices to room temperature before serving for the best texture.
Freezing Instructions: This cake freezes beautifully. Here’s the trick: freeze the cake without the glaze. Wrap the completely cooled cake tightly in plastic wrap, then a layer of aluminum foil. Freeze for up to 3 months. When you’re ready to serve, thaw overnight in the refrigerator, bring to room temperature, and then make the glaze fresh. The glaze is so quick to make that there’s no reason to freeze it—fresh is always better.
Flavor Development: Here’s something interesting—this cake actually tastes better the day after baking. The flavors meld together overnight, the apples soften a bit more, and the brown sugar flavor deepens. So if you’re making this for a gathering, bake it a day ahead, store it unfrosted, and glaze it just before serving. Your future self will thank you.
Nutritional Information & Benefits
Let’s be honest—this is a treat, not a health food. But that doesn’t mean it can’t have some redeeming qualities. One slice of this brown sugar apple cake (with glaze, because why wouldn’t you?) contains approximately:
- Calories: 380-420
- Fat: 16g
- Carbohydrates: 58g
- Protein: 5g
- Fiber: 2g
- Sugar: 38g
The apples provide a modest amount of fiber and vitamin C, plus antioxidants in the form of quercetin (found in apple skins—so if you’re feeling ambitious, leave the peels on for extra nutrition). Cinnamon has anti-inflammatory properties and may help regulate blood sugar. And the brown sugar? Well, it makes life worth living, doesn’t it?
For those watching their intake, you can reduce the sugar in the cake to 1 cup instead of 1 1/2 cups—the glaze will still provide plenty of sweetness. Or use a sugar substitute like monk fruit sweetener, though I haven’t tested that myself so proceed with caution.
This recipe contains gluten, dairy, and eggs. For allergen-friendly adaptations, see the variations section above.
Conclusion
This brown sugar apple cake with vanilla glaze is more than just a recipe—it’s the one I kept chasing, the one I finally caught, and the one I’ll make for the rest of my life. It’s the cake that made me believe that recreating a lost flavor is possible, even when it feels hopeless after the fifth failed attempt.
I hope you make this your own. Add extra cinnamon if that’s your thing. Swap the glaze for cream cheese frosting if you’re feeling wild. Use pears instead of apples. Bake it in a loaf pan. The beauty of a good recipe is that it’s a starting point, not a rulebook.
When you make it—and I hope you do—tag me or leave a comment telling me how it turned out. Did you use Honeycrisp or Granny Smith? Did you double the glaze like I always do? Did someone close their eyes after the first bite? I want to hear about it.
Now go preheat that oven. Your kitchen is about to smell incredible.
Frequently Asked Questions
Can I use pre-shredded apples instead of chopped?
You can, but I wouldn’t recommend it. Shredded apples release more moisture during baking, which can make the cake soggy and dense. Chopped apples hold their shape better and create those lovely pockets of fruit throughout the cake. If you’re in a hurry and only have shredded apples, squeeze out the excess liquid with a clean kitchen towel before folding them in.
Why did my cake sink in the middle?
This usually happens for one of three reasons: the oven door was opened too early (don’t peek for the first 35 minutes), the batter was overmixed (develops too much gluten and then collapses), or the leaveners were expired (check your baking soda and powder—they lose potency after about 6 months). Also, make sure your oven temperature is accurate—an oven thermometer is a cheap investment that saves a lot of heartache.
Can I make this in a bundt pan?
Absolutely! Grease and flour the bundt pan thoroughly—those nooks and crannies are notorious for sticking. Bake at 350°F for 50-60 minutes. You may need to reduce the glaze recipe slightly since bundt cakes have less surface area on top. The presentation is gorgeous, especially if you dust it with powdered sugar instead of glazing it.
How do I know when the apples are perfectly ripe for this recipe?
You want apples that are firm and crisp, not mealy or soft. They should yield slightly when you press them with your thumb but not feel mushy. For Honeycrisp, look for a bright, even color without soft spots. For Granny Smith, the greener the better—they should be almost tart when you bite into them raw. Overripe apples will disintegrate during baking, so err on the side of firmer fruit.
Can I skip the glaze or use something else?
You can absolutely skip the glaze—the cake is delicious on its own, especially dusted with powdered sugar. Other topping options include a cream cheese frosting (beat 4 oz cream cheese with 2 tablespoons butter, 1 cup powdered sugar, and a splash of vanilla), a simple caramel sauce, or even just a drizzle of honey and a sprinkle of flaky sea salt. But honestly? The vanilla glaze is so simple and so perfect that I’d give it a try at least once before you swap it out.
Pin This Recipe!
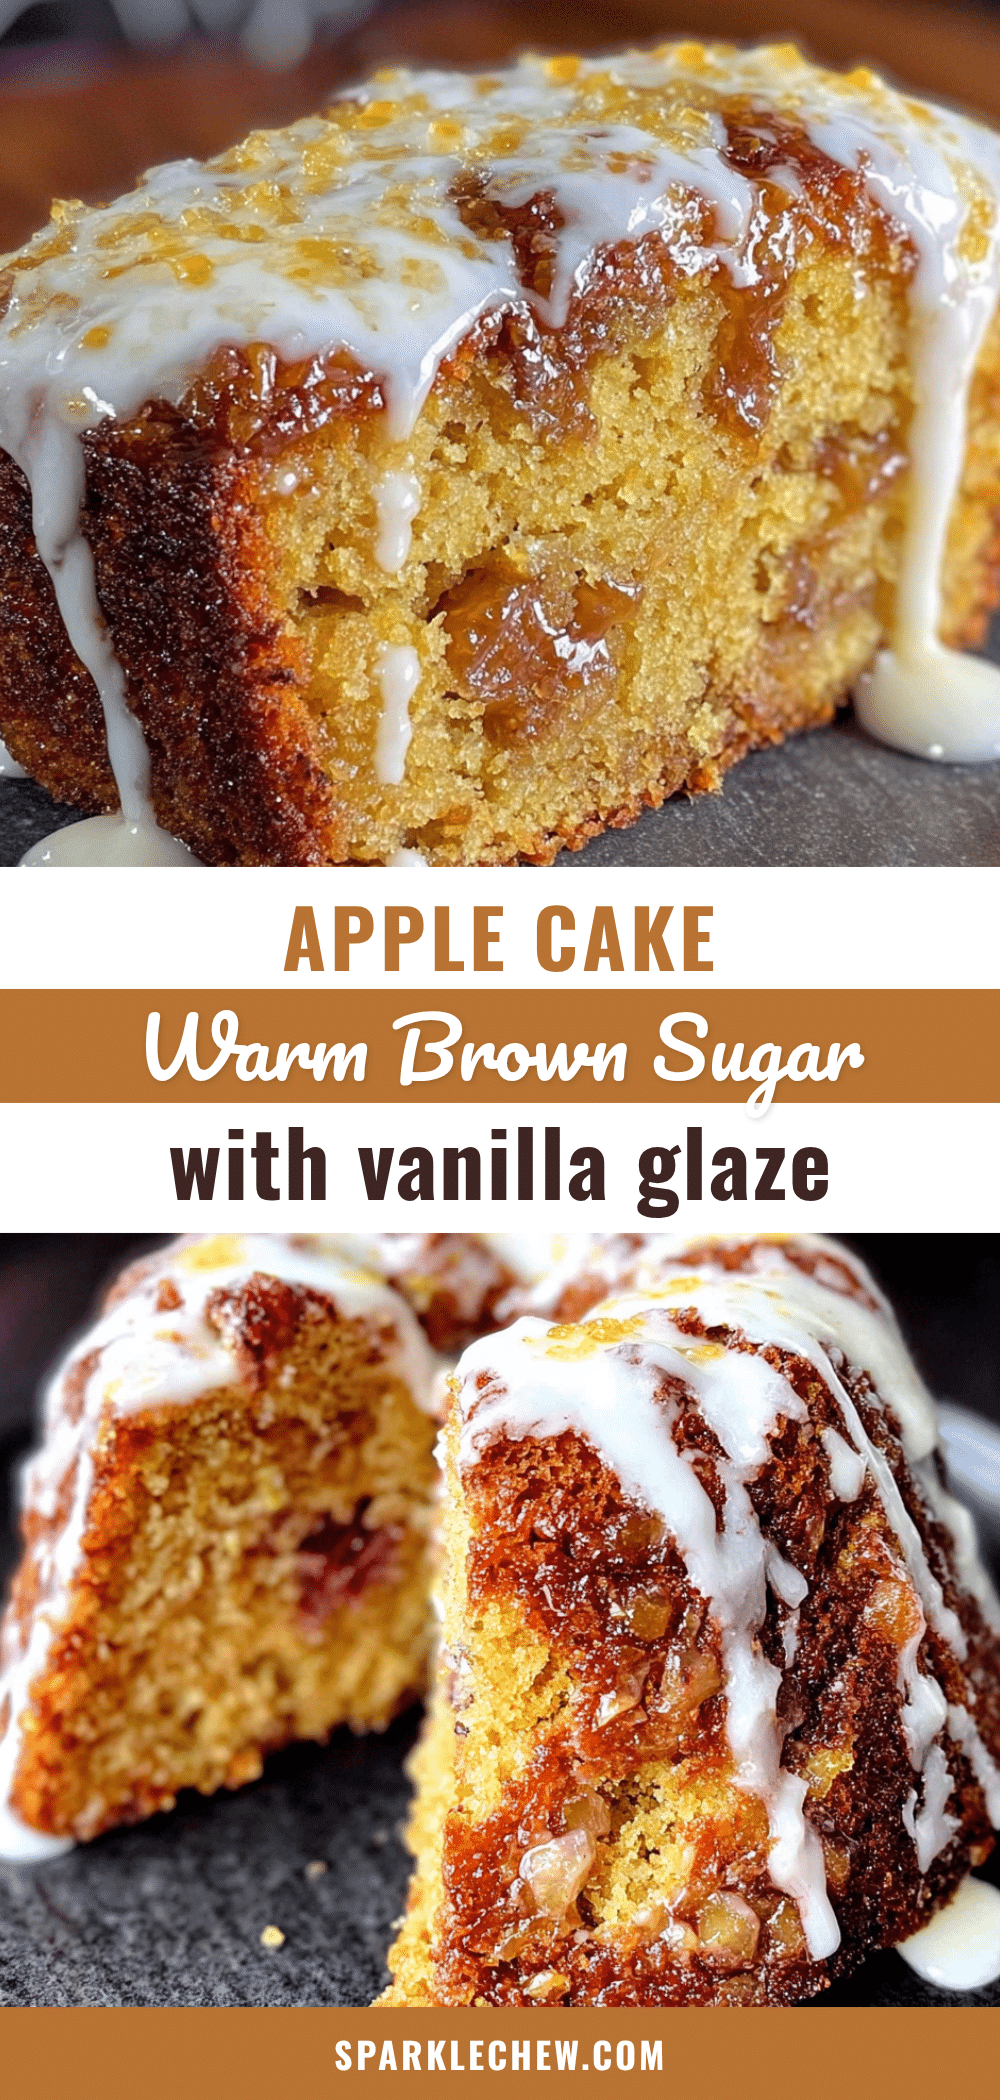
Perfect Brown Sugar Apple Cake with Vanilla Glaze
A tender, moist apple cake with deep caramel notes from brown sugar and soft, jammy apples throughout, topped with a vanilla glaze. This bakery-quality recipe is simple to make and perfect for fall gatherings or any time you need a warm, comforting dessert.
- Prep Time: 20 minutes
- Cook Time: 50 minutes
- Total Time: 1 hour 10 minutes (plus cooling time)
- Yield: 8 servings 1x
- Category: Dessert
- Cuisine: American
Ingredients
- 2 cups all-purpose flour (spooned and leveled)
- 1 teaspoon baking soda
- 1 teaspoon baking powder
- 1/2 teaspoon salt
- 1 1/2 teaspoons ground cinnamon
- 1/2 teaspoon ground nutmeg (freshly grated preferred)
- 1/4 teaspoon ground cloves
- 3/4 cup unsalted butter, softened to room temperature
- 1 1/2 cups packed light brown sugar
- 2 large eggs, room temperature
- 1 teaspoon vanilla extract
- 1/2 cup buttermilk, room temperature
- 2 cups peeled and chopped apples (about 2 medium apples, Honeycrisp or Granny Smith recommended)
- 1 1/2 cups powdered sugar, sifted
- 3 tablespoons whole milk
- 1 teaspoon vanilla extract
- Pinch of salt
Instructions
- Preheat your oven to 350°F (175°C). Grease a 9-inch round cake pan thoroughly with butter or cooking spray, then line the bottom with a circle of parchment paper. Lightly flour the sides of the pan and tap out any excess.
- In a medium bowl, whisk together the flour, baking soda, baking powder, salt, cinnamon, nutmeg, and cloves. Whisk for about 20 seconds to aerate and distribute evenly. Set aside.
- In a large bowl (or the bowl of a stand mixer), beat the softened butter and brown sugar together on medium-high speed until light and fluffy, about 4-5 minutes. Scrape down the sides and bottom of the bowl at least once.
- Add the eggs one at a time, beating well after each addition (about 30 seconds each). Scrape the bowl again. Add the vanilla extract and beat until combined.
- With the mixer on low speed, add about one-third of the dry ingredients and mix until just combined. Add half the buttermilk and mix until incorporated. Repeat with another third of the dry ingredients, the remaining buttermilk, and finally the last of the dry ingredients. Stop mixing as soon as the flour disappears.
- Using a rubber spatula, gently fold the chopped apples into the batter until evenly distributed, about 8-10 folds. Do not overmix.
- Scrape the batter into the prepared pan and spread it evenly. Give the pan a gentle tap on the counter to release air bubbles. Bake for 45-55 minutes, or until a toothpick inserted in the center comes out clean or with just a few moist crumbs. If the top is browning too quickly (around the 35-minute mark), tent loosely with aluminum foil.
- Let the cake cool in the pan on a wire rack for 15 minutes. Then run a knife around the edges, invert onto the rack, remove the parchment paper, and let it cool completely—at least 1 hour.
- While the cake is cooling, make the vanilla glaze. In a small bowl, whisk together the sifted powdered sugar, milk, vanilla extract, and a pinch of salt. Whisk until smooth and pourable. If too thick, add milk one teaspoon at a time; if too thin, add a tablespoon more powdered sugar.
- Once the cake is completely cool, place it on a serving plate. Drizzle the glaze over the top, letting it cascade down the sides naturally. Let the glaze set for about 15 minutes before slicing.
Notes
For best results, cream the butter and sugar for a full 5 minutes. Use room temperature eggs and buttermilk to prevent the batter from curdling. The cake tastes even better the day after baking—make it a day ahead, store unfrosted, and glaze just before serving. For a dairy-free version, use vegan butter and substitute buttermilk with almond milk mixed with apple cider vinegar. For gluten-free, use a 1:1 gluten-free baking blend.
Nutrition
- Serving Size: 1 slice (with glaze)
- Calories: 400
- Sugar: 38
- Sodium: 320
- Fat: 16
- Saturated Fat: 10
- Carbohydrates: 58
- Fiber: 2
- Protein: 5
Keywords: brown sugar apple cake, apple cake, vanilla glaze, fall dessert, apple dessert, easy cake recipe, homemade cake


