Love this? Save it for later!
Share the inspiration with your friends
There used to be a little bakery tucked between a laundromat and a vintage shop on Grand Avenue called Sprinkle & Shout. They made a funfetti birthday cake that was so light it practically floated off the plate. When they closed suddenly two summers ago—just a handwritten sign in the window saying “Thank you for the sweet years”—I honestly felt a little panicked. That cake was my go-to for every birthday, every celebration, every Tuesday that needed a pick-me-up. After twelve tries—some so dense they could double as doorstops, others so dry they crumbled into sad little confetti piles—I finally cracked it.
The secret, let me tell you, wasn’t some fancy technique I picked up in a pastry class. It was a happy accident involving buttermilk that had been sitting in my fridge a day past its date and a whisk I grabbed instead of my mixer because my toddler was napping and I didn’t want to wake her. The batter looked wrong at first—too thin, I thought—but I poured it in anyway, crossed my fingers, and hoped for the best. What came out of that oven was pure magic: a cake so tender it practically whispered when you cut into it, with those little rainbow sprinkles suspended like tiny treasures in every slice. I mean, I actually teared up a little. Maybe you’ve been there, chasing a flavor memory that feels just out of reach until one day, it’s right there in your own kitchen.
This funfetti birthday cake isn’t just a recipe—it’s a resurrection of something I thought I’d lost. And now I get to share it with you.
Why You’ll Love This Recipe
Listen, I’ve tested a lot of funfetti cakes over the years. Some were too sweet, some were too dense, and some just didn’t have that nostalgic birthday magic. This one? It’s the real deal. Here’s why it’s earned a permanent spot in my recipe box:
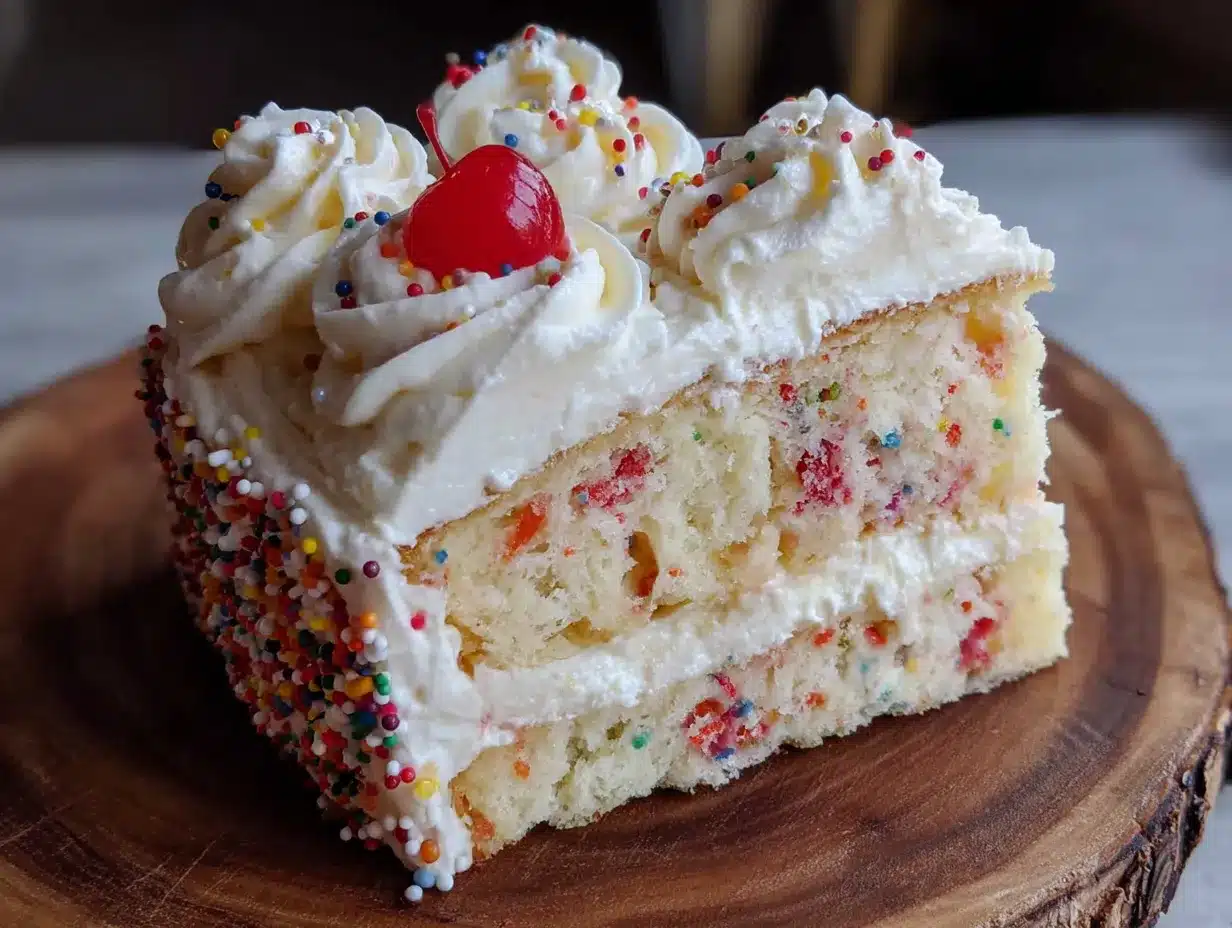
- Perfectly Light & Fluffy: The texture is what dreams are made of—soft, airy, and tender without being fragile. It holds up to frosting beautifully but melts in your mouth.
- Simple Ingredients: No weird stabilizers or hard-to-find extracts. You probably have most of this in your pantry right now, minus maybe the sprinkles.
- Quick & Easy: From start to finish, you’re looking at about an hour. The batter comes together in one bowl with just a whisk—no stand mixer required, which means less cleanup.
- Perfect for Celebrations: Birthdays, obviously, but also graduations, baby showers, or just a Tuesday that needs rainbow sprinkles. It’s a guaranteed crowd-pleaser.
- Unbelievably Delicious: The balance of vanilla, butter, and those little bursts of sweetness from the sprinkles is just spot-on. It’s comfort food in cake form.
What makes this version different from the box mixes or other recipes out there is the technique. Using room-temperature ingredients and a specific mixing method creates that ultra-fine crumb that professional bakeries achieve. Plus, I figured out the trick to keeping sprinkles from bleeding their color into the batter—because nobody wants a grey cake with sad rainbow streaks. Trust me, I learned that lesson the hard way.
This cake isn’t just good—it’s the kind that makes people close their eyes after the first bite and go quiet for a second. That’s the reaction you want, right?
What Ingredients You Will Need
This funfetti birthday cake uses simple, wholesome ingredients to deliver that light, fluffy texture and nostalgic birthday flavor. Most of these are pantry staples, which means you can whip this up on a whim without a special grocery trip.
For the Cake
- 2 ½ cups (315g) all-purpose flour – Spoon and level for accuracy. I prefer Gold Medal for consistent results, but any brand works.
- 2 ½ teaspoons baking powder – Make sure it’s fresh! Old baking powder won’t give you that lift.
- ½ teaspoon salt – Fine sea salt dissolves best. It balances the sweetness without making the cake taste salty.
- ¾ cup (170g) unsalted butter, softened to room temperature – This is crucial. Cold butter won’t cream properly, and melted butter changes the texture. Leave it out for about an hour before starting.
- 1 ½ cups (300g) granulated sugar – Regular white sugar works perfectly. It dissolves into the butter for that light, airy crumb.
- 3 large eggs, room temperature – If you forgot to take them out, place them in a bowl of warm water for 5 minutes. Works like a charm.
- 1 tablespoon vanilla extract – Pure vanilla, not imitation. It makes a real difference in flavor depth.
- 1 cup (240ml) buttermilk, room temperature – This is the secret to the tender crumb. The acidity reacts with the baking powder for extra lift. No buttermilk? Add 1 tablespoon lemon juice to regular milk and let it sit for 5 minutes.
- ½ cup (80g) rainbow sprinkles – Use jimmies, not nonpareils or sanding sugar. Jimmies hold their color and shape best during baking. I like the brand Wilton for vibrant colors that don’t bleed.
For the Vanilla Buttercream Frosting
- 1 cup (226g) unsalted butter, softened – Same room temperature rule applies. It should be soft but not melty.
- 4 cups (480g) powdered sugar, sifted – Sifting prevents lumps. I know it’s an extra step, but trust me on this one.
- 3 tablespoons heavy cream – Or whole milk if that’s what you have. Heavy cream makes it extra luxurious.
- 2 teaspoons vanilla extract – Again, pure vanilla for that classic birthday cake flavor.
- Pinch of salt – Just enough to cut the sweetness and make the flavors pop.
- Extra sprinkles for decorating – Because more is more when it comes to funfetti.
Equipment Needed
You don’t need a professional bakery setup for this funfetti birthday cake. Here’s what you’ll need:
- Two 9-inch round cake pans – I use Fat Daddio’s anodized aluminum pans. They conduct heat evenly and give you clean edges. If you only have dark nonstick pans, reduce the oven temperature by 25°F to prevent over-browning.
- Parchment paper – Cut rounds for the bottom of the pans. This guarantees zero sticking. You can find pre-cut rounds at most grocery stores, which saves time.
- Large mixing bowl – Any bowl works, but a wide one makes whisking easier.
- Whisk – For combining dry ingredients and for the batter itself. A balloon whisk is ideal.
- Rubber spatula – For folding in sprinkles and scraping every last bit of batter into the pans.
- Electric hand mixer or stand mixer – Either works. I actually prefer my hand mixer for this recipe because it’s less cleanup. A sturdy wooden spoon works too, but your arm will get a workout.
- Cooling rack – Wire racks allow air to circulate so your cakes cool evenly without getting soggy bottoms.
- Offset spatula – For frosting. Not strictly necessary, but it makes getting smooth sides way easier. A butter knife works in a pinch.
- Toothpicks or cake tester – For checking doneness. The old-fashioned method is still the best.
If you don’t have parchment paper, you can grease and flour the pans thoroughly. I’ve done it both ways, and parchment is just less stressful—especially when you’re making a cake for a special occasion and can’t afford any mishaps.
Preparation Method
Ready to make the best funfetti birthday cake of your life? Let’s do this step by step. I’ll walk you through every detail so you get that perfectly light, fluffy texture every single time.
Step 1: Prep Your Pans and Oven
Preheat your oven to 350°F (175°C). While it’s heating, grease two 9-inch round cake pans with butter or non-stick spray. Cut parchment paper rounds for the bottoms and place them inside. Grease the parchment too, then dust the pans with a little flour, tapping out the excess. This double-layer protection means your cakes will release perfectly. Trust me, there’s nothing sadder than a cake that sticks after you’ve done all the work.
Step 2: Whisk the Dry Ingredients
In a large mixing bowl, whisk together the flour, baking powder, and salt. Do this for about 30 seconds—it aerates the flour and distributes the leavening evenly. You’ll see little bubbles form. That’s good. Set this bowl aside for now.
Step 3: Cream the Butter and Sugar
In another large bowl (or your stand mixer bowl), beat the softened butter and granulated sugar together until light and fluffy. This takes about 3 to 4 minutes with an electric mixer on medium speed. You’re looking for a pale, creamy texture that’s almost doubled in volume. Scrape down the sides and bottom of the bowl halfway through. Don’t rush this step—proper creaming is what gives the cake its light texture.
Step 4: Add the Eggs and Vanilla
Add the eggs one at a time, beating well after each addition until fully incorporated. The batter might look slightly curdled at this point—that’s normal, especially if your eggs were a little cooler than the butter. Add the vanilla extract and beat just until combined. If the batter looks separated, don’t panic. The flour mixture will bring it all together.
Step 5: Alternate the Dry and Wet Ingredients
With the mixer on low speed, add about one-third of the flour mixture to the butter mixture. Mix until just combined—a few streaks of flour are fine. Pour in half of the buttermilk and mix again. Repeat with another third of the flour, then the remaining buttermilk, and finally the last of the flour. Stop mixing as soon as the flour disappears. Overmixing develops gluten, which makes the cake tough. We want tender, not tough.
Step 6: Fold in the Sprinkles
Here’s the trick that took me way too many failed cakes to figure out: toss the sprinkles with about 1 tablespoon of the flour mixture before adding them to the batter. This coating prevents the sprinkles from sinking to the bottom or bleeding their color into the batter. Gently fold them in with a rubber spatula using just a few strokes. You want them distributed evenly, not stirred into submission.
Step 7: Divide and Bake
Divide the batter evenly between the two prepared pans. I use a kitchen scale for accuracy—about 650 grams per pan—but you can eyeball it too. Smooth the tops with your spatula. Bake for 25 to 30 minutes, rotating the pans halfway through. The cakes are done when a toothpick inserted in the center comes out clean or with a few moist crumbs. The tops should be golden and spring back when lightly touched.
Step 8: Cool Completely
Let the cakes cool in the pans for 10 minutes. Run a thin knife around the edges to loosen them, then invert onto a wire rack. Peel off the parchment paper and let them cool completely—and I mean completely. If you frost a warm cake, you’ll end up with a melty, slippery mess. Give it at least an hour, maybe two if you’re patient.
Step 9: Make the Buttercream
While the cakes cool, make the frosting. Beat the softened butter on medium speed until smooth and creamy, about 2 minutes. Gradually add the sifted powdered sugar, one cup at a time, beating on low speed to avoid a sugar cloud. Add the heavy cream and vanilla extract, then increase the speed to medium-high and beat for 3 to 4 minutes until light and fluffy. Add the pinch of salt and beat one more minute. If the frosting is too thick, add another tablespoon of cream. Too thin? Add a little more powdered sugar.
Step 10: Assemble and Frost
Place one cake layer on your serving plate or cake stand. Spread about ¾ cup of frosting evenly on top. Place the second layer on top, then apply a thin crumb coat—a thin layer of frosting that traps any loose crumbs. Refrigerate for 20 minutes to set the crumb coat, then apply the final layer of frosting. Decorate with extra sprinkles on top and around the sides. I like to press them gently into the frosting so they stick.
Cooking Tips & Techniques
I’ve made this funfetti birthday cake more times than I care to count, and I’ve learned a few things along the way. Here are my best tips to help you nail it on the first try:
The Room Temperature Rule Is Non-Negotiable
I know it’s tempting to use cold butter straight from the fridge, but please don’t. Room temperature ingredients—butter, eggs, buttermilk—emulsify properly, creating a smooth batter that bakes into an even crumb. Cold ingredients can cause the batter to separate or result in a dense, heavy cake. Set everything out on the counter an hour before you start baking. Set a timer if you’re forgetful like me.
Don’t Overmix the Batter
This is probably the most common mistake I see. Once you add the flour, mix only until it disappears. Overmixing develops gluten, and too much gluten means a tough, rubbery cake. You want a tender, delicate crumb. A few lumps in the batter are perfectly fine—they’ll bake out. I actually stopped using my stand mixer for this step and switched to folding by hand with a spatula. The results were noticeably better.
Choose the Right Sprinkles
Not all sprinkles are created equal. Jimmies—those little rod-shaped sprinkles—hold their shape and color best during baking. Nonpareils (the tiny round ones) tend to bleed and turn the batter grey. I learned this the hard way when I made a cake for my niece’s birthday that looked more like a storm cloud than a celebration. Stick with jimmies, and toss them in a little flour before folding them in.
Rotate Your Pans Halfway Through
Most ovens have hot spots, which means one side of your cake might brown faster than the other. Rotating the pans halfway through baking ensures even cooking and consistent color. I set a timer for 13 minutes and rotate then. It’s a small step that makes a big difference.
Check for Doneness Early
Ovens vary, so start checking your cakes at 25 minutes. Insert a toothpick into the center—if it comes out clean or with a few moist crumbs, it’s done. If there’s wet batter on the toothpick, give it another 3 to 5 minutes. Overbaking dries out the cake, so better to check early than late.
Variations & Adaptations
This funfetti birthday cake is pretty perfect as-is, but I love experimenting with different variations. Here are some ways to switch it up:
Chocolate Funfetti Cake
Replace ⅓ cup of the flour with unsweetened cocoa powder. Use chocolate sprinkles instead of rainbow for a double chocolate experience. The cake takes on a rich, fudgy flavor while staying light and fluffy. I made this for a friend who “doesn’t like vanilla cake,” and she ate three slices.
Lemon Funfetti Cake
Add the zest of two lemons to the sugar and rub it in with your fingers before creaming with the butter. Replace 2 tablespoons of the buttermilk with fresh lemon juice. The bright citrus cuts through the sweetness beautifully and adds a fresh, summery twist. This version is perfect for spring birthdays or bridal showers.
Gluten-Free Funfetti Cake
Substitute the all-purpose flour with a 1:1 gluten-free baking flour blend that contains xanthan gum. I’ve had great results with King Arthur Measure for Measure. The texture is slightly more delicate, so handle the batter gently. Everything else stays the same, including the baking time. Just make sure your sprinkles are certified gluten-free if that’s a concern.
Dairy-Free Funfetti Cake
Use vegan butter sticks (like Earth Balance) and replace the buttermilk with 1 cup of unsweetened almond or oat milk mixed with 1 tablespoon of apple cider vinegar. Let it sit for 5 minutes to curdle. For the frosting, use vegan butter and canned coconut cream instead of heavy cream. The cake is still tender and delicious—I promise.
Cupcake Version
This batter makes about 24 cupcakes. Fill lined muffin tins about two-thirds full and bake at 350°F for 18 to 20 minutes. The baking time is shorter, so start checking at 16 minutes. The cupcakes are perfectly domed and incredibly moist. My kids’ teachers have become very fond of this variation.
Serving & Storage Suggestions
This funfetti birthday cake is best served at room temperature, which lets the buttercream soften to that perfect creamy consistency. If you’ve refrigerated the cake, let it sit out for about 30 minutes before slicing. Use a sharp, thin-bladed knife dipped in hot water and wiped dry between cuts for clean, professional-looking slices.
For a truly show-stopping presentation, I like to add a few extra sprinkles on the plate and maybe a dollop of whipped cream on the side. It pairs beautifully with a tall glass of cold milk, a hot cup of coffee, or even a glass of bubbly for grown-up celebrations. Fresh berries on the side add a nice tart contrast to the sweet cake.
Storing Leftovers
Cover any leftover cake with plastic wrap or place it in an airtight container. It will keep at room temperature for up to 3 days. If your kitchen is warm, refrigerate it—the frosting will firm up, but the cake stays moist. I actually think this cake tastes even better on day two, after the flavors have had time to meld together. The texture becomes somehow even more tender.
Freezing Instructions
You can freeze this cake for up to 3 months. Wrap unfrosted cake layers tightly in plastic wrap, then in aluminum foil. When you’re ready to serve, thaw them overnight in the refrigerator, bring to room temperature, then frost as usual. Frosted cake can also be frozen—just place it in the freezer unwrapped for an hour to harden the frosting, then wrap it well. Thaw in the refrigerator overnight. The sprinkles might lose a little of their crunch, but the cake itself stays delicious.
Nutritional Information & Benefits
Let’s be real—this is a celebration cake, not a health food. But I do love that it uses real, recognizable ingredients without any artificial preservatives or weird additives. Here’s the approximate nutritional breakdown per slice (based on 12 servings):
| Nutrient | Amount per Serving |
|---|---|
| Calories | 485 |
| Total Fat | 24g |
| Saturated Fat | 15g |
| Cholesterol | 105mg |
| Sodium | 280mg |
| Total Carbohydrates | 64g |
| Sugars | 48g |
| Protein | 5g |
This cake contains dairy, eggs, and gluten. For allergen-friendly options, check out the variations section above. While I wouldn’t call this a “healthy” recipe, I do believe in the importance of celebrating with real food made from scratch. There’s something nourishing about knowing exactly what went into your cake—and sharing it with the people you love. Plus, a slice of cake shared with good company is good for the soul, and that counts for something.
Conclusion
This funfetti birthday cake is more than just a recipe—it’s a little piece of joy that you can bake in your own kitchen. It’s the cake that made me tear up in my kitchen that first successful time, the one that brought back the memory of Sprinkle & Shout and turned it into something I could hold onto. It’s light, it’s fluffy, and it’s absolutely covered in rainbow sprinkles, which is exactly how birthday cake should be.
I hope you give this recipe a try, whether it’s for a birthday, a celebration, or just because you need a little extra color in your day. Feel free to customize it however you like—swap in different extracts, try a different frosting, or add your own twist. That’s the beauty of baking from scratch. And when you make it, I’d love to hear how it turned out. Drop a comment below, share a photo, or tag me on social media. Nothing makes my day like seeing someone else enjoy this cake as much as I do.
Now go preheat that oven. Your celebration is waiting.
Frequently Asked Questions
Can I use a boxed cake mix instead of making it from scratch?
You can, but the texture won’t be the same. This homemade version is noticeably lighter and fluffier because of the creaming method and buttermilk. If you’re short on time, a doctored box mix (add an extra egg, use milk instead of water, and substitute melted butter for oil) can work in a pinch, but I promise the scratch version is worth the extra 10 minutes.
Why did my sprinkles bleed into the batter?
This usually happens when you use the wrong type of sprinkles. Nonpareils and sanding sugar are more likely to bleed their color. Stick with jimmies (the rod-shaped sprinkles) and toss them in a little flour before folding them into the batter. That coating acts as a barrier and keeps the colors bright and distinct.
Can I make this cake ahead of time?
Absolutely. You can bake the cake layers up to 2 days in advance. Wrap them tightly in plastic wrap once they’re completely cool and store them at room temperature. You can also make the frosting ahead and refrigerate it for up to a week—just bring it back to room temperature and re-whip it before using.
How do I get my cake layers to bake flat on top?
If your cakes dome in the center, you can level them with a serrated knife once they’re cool. To prevent doming, try wrapping the outside of your cake pans with damp baking strips (you can find them at craft stores). They insulate the pans and promote even baking. Also, make sure your oven temperature is accurate—an oven that’s too hot can cause doming.
Can I use this recipe for a tiered cake?
Yes, but I recommend using a slightly sturdier recipe for tiered cakes, as this one is quite delicate. If you want to try it, make sure the cake is completely chilled before stacking, and use dowels for support. The light, fluffy texture is beautiful but doesn’t hold up as well under the weight of multiple tiers as a denser cake would.
Pin This Recipe!
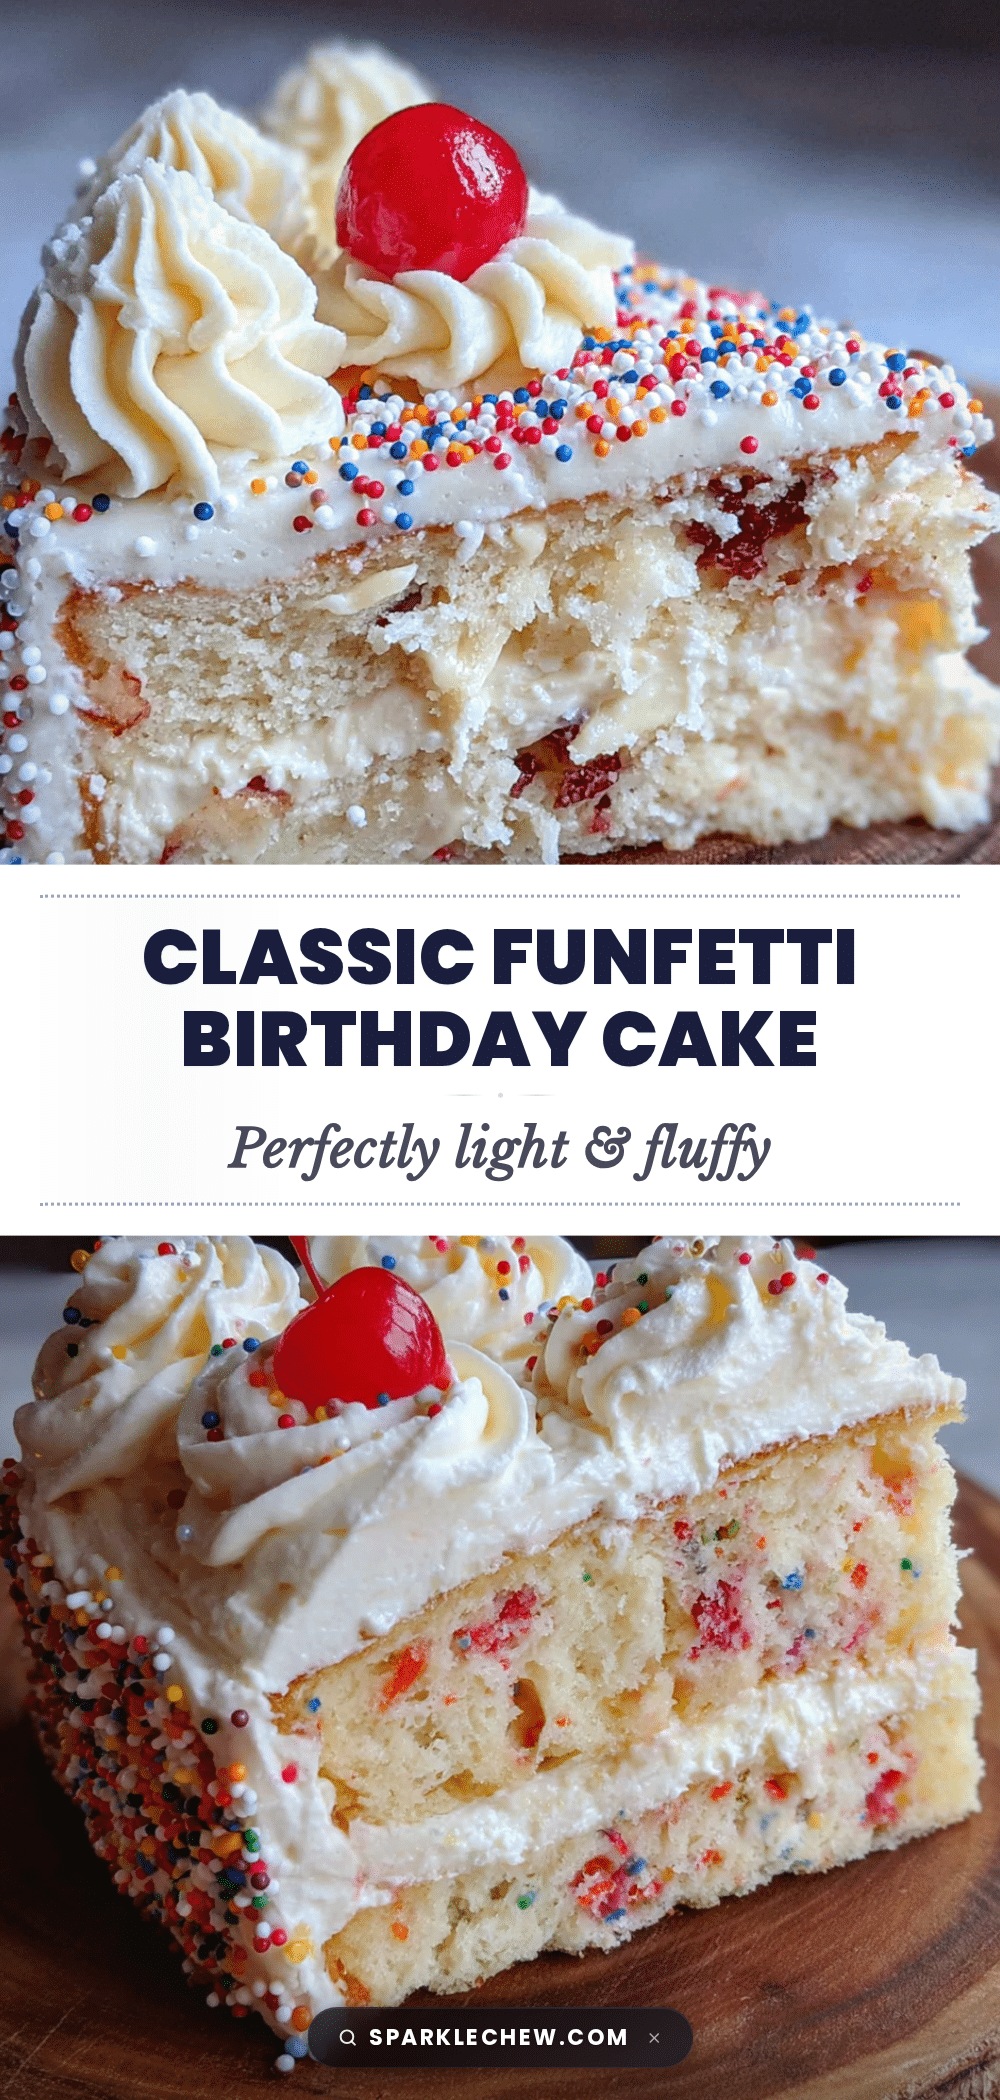
Best Funfetti Birthday Cake Recipe – Easy & Fluffy
This funfetti birthday cake is incredibly light, fluffy, and tender, with rainbow sprinkles suspended in every slice. Made with simple ingredients and a one-bowl whisk method, it’s the perfect celebration cake that brings nostalgic birthday magic to any occasion.
- Prep Time: 20 minutes
- Cook Time: 30 minutes
- Total Time: 1 hour 50 minutes (includes cooling)
- Yield: 12 servings 1x
- Category: Dessert
- Cuisine: American
Ingredients
- 2 ½ cups (315g) all-purpose flour
- 2 ½ teaspoons baking powder
- ½ teaspoon fine sea salt
- ¾ cup (170g) unsalted butter, softened to room temperature
- 1 ½ cups (300g) granulated sugar
- 3 large eggs, room temperature
- 1 tablespoon pure vanilla extract
- 1 cup (240ml) buttermilk, room temperature
- ½ cup (80g) rainbow sprinkles (jimmies)
- 1 cup (226g) unsalted butter, softened (for frosting)
- 4 cups (480g) powdered sugar, sifted (for frosting)
- 3 tablespoons heavy cream (for frosting)
- 2 teaspoons pure vanilla extract (for frosting)
- Pinch of salt (for frosting)
- Extra sprinkles for decorating
Instructions
- Preheat oven to 350°F (175°C). Grease two 9-inch round cake pans, line bottoms with parchment paper, grease parchment, and dust with flour.
- In a large bowl, whisk together flour, baking powder, and salt for 30 seconds to aerate.
- In another large bowl, beat softened butter and sugar with an electric mixer on medium speed until light and fluffy, about 3-4 minutes. Scrape down sides.
- Add eggs one at a time, beating well after each. Add vanilla and beat until combined.
- With mixer on low, add one-third of flour mixture, mixing until just combined. Add half the buttermilk, mix. Repeat with another third of flour, remaining buttermilk, and final flour. Stop mixing when flour disappears.
- Toss sprinkles with 1 tablespoon flour, then gently fold into batter with a rubber spatula.
- Divide batter evenly between prepared pans (about 650g each). Smooth tops. Bake 25-30 minutes, rotating pans halfway, until toothpick inserted in center comes out clean or with moist crumbs.
- Cool in pans 10 minutes, then run a knife around edges and invert onto wire rack. Remove parchment and cool completely (at least 1-2 hours).
- For frosting: Beat softened butter on medium speed until smooth, about 2 minutes. Gradually add sifted powdered sugar, one cup at a time, on low speed. Add heavy cream and vanilla, then beat on medium-high 3-4 minutes until light and fluffy. Add salt and beat 1 more minute.
- Place one cake layer on serving plate. Spread about ¾ cup frosting on top. Add second layer. Apply thin crumb coat, refrigerate 20 minutes, then apply final frosting layer. Decorate with extra sprinkles.
Notes
Room temperature ingredients are crucial for proper emulsification. Use jimmies (rod-shaped sprinkles) to prevent color bleeding. Toss sprinkles in flour before folding in. Do not overmix batter. Rotate pans halfway through baking. Check for doneness at 25 minutes. Cool cakes completely before frosting.
Nutrition
- Serving Size: 1 slice
- Calories: 485
- Sugar: 48
- Sodium: 280
- Fat: 24
- Saturated Fat: 15
- Carbohydrates: 64
- Protein: 5
Keywords: funfetti cake, birthday cake, sprinkle cake, vanilla cake, homemade cake, celebration cake, easy cake recipe


