Love this? Save it for later!
Share the inspiration with your friends
I was at a hardware store, of all places, buying a new paint scraper, when the woman in line behind me started talking about Halloween cupcakes. She was probably in her seventies, wearing a cardigan with little bats embroidered on it, and she had this no-nonsense way of speaking that made you listen. “The secret,” she said, pointing her cane at my shopping basket, “is the vinegar. Don’t you dare skip it.” I wasn’t planning on making cupcakes that day. I was planning on scraping old paint off my porch. But there I was, in the checkout line, getting a full lecture on the chemistry of black velvet cake from a complete stranger. She told me her granddaughter called them “vampire cupcakes” and that she’d been making them for thirty years. I mean, you don’t get that kind of intel from a cookbook, right? I scribbled her instructions on the back of a receipt, bought my paint scraper, and went home to make the best black velvet cupcakes I have ever had. Honestly, it was the last place I expected to find a recipe that would become my go-to for every Halloween party. Maybe you’ve been there—getting life-changing advice from the most random person at the most random moment. This is that story, and that recipe. Let me tell you, the batter is so dark it almost looks black, and the cream cheese frosting is the perfect tangy contrast. It’s the kind of recipe that makes you wonder why you ever bought a mix.
Why You’ll Love This Recipe
These aren’t just any Halloween cupcakes. They are the ones people remember. I’ve tested this recipe more times than I can count, and it always delivers. The texture is incredibly moist, the color is a deep, dramatic black, and that cream cheese frosting is just the right amount of sweet and tangy.
- Quick & Easy: From start to finish, you’re looking at about 45 minutes. Perfect for a last-minute Halloween treat or a classroom party.
- Simple Ingredients: No weird food coloring pastes or specialty flours. You probably have most of this in your pantry right now.
- Perfect for Halloween: The dramatic black color is a showstopper. It’s spooky, elegant, and totally kid-approved.
- Crowd-Pleaser: I have yet to meet someone who doesn’t love these. The flavor is classic chocolatey goodness with a secret tang that keeps people guessing.
- Unbelievably Delicious: The combination of the moist, dark cake and the rich, creamy frosting is pure comfort food magic.
What makes this recipe different from the rest is the balance. It’s not just black food coloring dumped into a white cake mix. The cocoa powder and the vinegar work together to create a deep flavor profile that complements the color. It’s a true red velvet recipe, just with black coloring. It’s the kind of cupcake that makes you close your eyes after the first bite—comfort food reimagined for the spookiest time of year.
What Ingredients You Will Need
This recipe uses simple, everyday ingredients to create something truly special. The magic is in how they work together.
- All-purpose flour: 1 ½ cups (180g). The structure of the cake. Spoon and level it for the best results.
- Unsweetened cocoa powder: ¼ cup (20g). I prefer Hershey’s Special Dark for a richer flavor, but regular works fine. It gives the cake its chocolate base.
- Baking soda: 1 teaspoon. The leavening agent that makes them rise.
- Salt: ½ teaspoon. Balances the sweetness.
- Granulated sugar: 1 cup (200g). Sweetens the cake.
- Vegetable oil: ½ cup (120ml). Keeps the cake incredibly moist. You can use canola or melted coconut oil too.
- Buttermilk: ½ cup (120ml), room temperature. This is key for the tender crumb. If you don’t have it, make a quick version by adding 1 ½ teaspoons of lemon juice or vinegar to ½ cup of milk and letting it sit for 5 minutes.
- Large eggs: 2, room temperature. They bind everything together.
- White vinegar: 1 teaspoon. This reacts with the baking soda and the cocoa to create that classic velvet texture. Don’t skip it!
- Vanilla extract: 1 teaspoon. For flavor depth.
- Black gel food coloring: 1 to 2 tablespoons. Liquid coloring won’t give you the same deep shade. I use Wilton Black or Americolor Super Black.
For the Cream Cheese Frosting:
- Cream cheese: 8 ounces (226g), softened. Full-fat is best for stability and flavor.
- Unsalted butter: ½ cup (113g), softened. Adds richness.
- Powdered sugar: 3 to 4 cups (360g to 480g). Adjust for your preferred sweetness and consistency.
- Vanilla extract: 1 teaspoon.
- Pinch of salt: To cut the sweetness.
Optional Decorations: Halloween sprinkles, candy eyeballs, or a dusting of black cocoa powder.
Equipment Needed
You don’t need a professional bakery setup for these. Most of this you probably already have.
- Standard 12-cup muffin tin: The base for your cupcakes.
- Paper cupcake liners: I like using black or orange ones for the holiday.
- Large mixing bowls: Two of them—one for dry ingredients, one for wet.
- Whisk: For combining the dry ingredients.
- Electric hand mixer or stand mixer: For the frosting. You can whisk it by hand, but it takes some elbow grease.
- Rubber spatula: For scraping down the bowl and folding in the food coloring.
- Cooling rack: So your cupcakes don’t get soggy bottoms.
- Piping bag and star tip: For that beautiful frosting swirl. A zip-top bag with a corner snipped off works in a pinch.
I once tried to make these with just a fork and a bowl. Do not recommend. The hand mixer for the frosting is non-negotiable if you want it fluffy.
Preparation Method
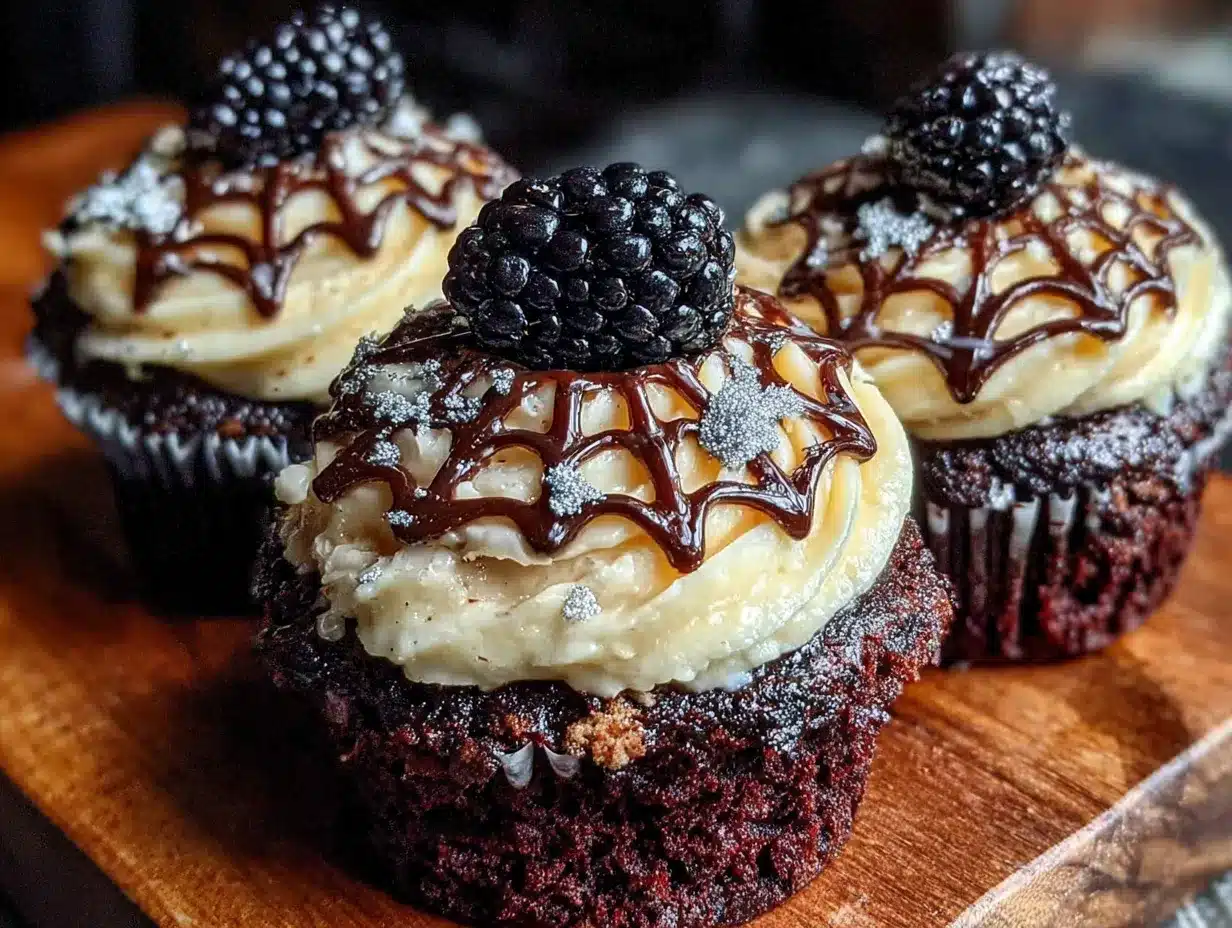
Let’s get baking. This is the fun part.
- Preheat and Prep: Preheat your oven to 350°F (175°C). Line your muffin tin with 12 paper liners. This makes cleanup a breeze.
- Mix Dry Ingredients: In a large bowl, whisk together the flour, cocoa powder, baking soda, and salt. Make sure there are no lumps. The cocoa can be stubborn.
- Mix Wet Ingredients: In a separate, larger bowl, whisk together the sugar and vegetable oil until well combined. Add the buttermilk, eggs, vinegar, and vanilla extract. Whisk until smooth and slightly frothy.
- Add the Color: This is where the magic happens. Add the black gel food coloring to the wet ingredients. Start with 1 tablespoon and whisk it in. The batter will look grey. Add more, a teaspoon at a time, until you reach a deep, dark black. I usually use about 1 ½ tablespoons. Don’t be shy—it bakes up darker than it looks.
- Combine Wet and Dry: Pour the dry ingredients into the wet ingredients. Stir with a rubber spatula until just combined. Do not overmix! A few small lumps are okay. Overmixing will make the cupcakes tough.
- Fill the Liners: Divide the batter evenly among the 12 liners. I use a large cookie scoop for this. Each liner should be about ⅔ full.
- Bake: Place the pan in the preheated oven. Bake for 18 to 22 minutes. The tops should spring back when you lightly touch them. A toothpick inserted into the center should come out with a few moist crumbs, not wet batter.
- Cool Completely: Let the cupcakes cool in the pan for 5 minutes. Then, transfer them to a wire rack to cool completely. This is crucial. If the cupcakes are even a little warm, your frosting will melt into a sad puddle.
- Make the Frosting: While the cupcakes cool, make the frosting. In a large bowl, beat the softened cream cheese and butter together with an electric mixer until smooth and creamy, about 2 minutes. Scrape down the sides of the bowl.
- Add Sugar and Flavor: Add the powdered sugar, one cup at a time, beating on low speed to start so you don’t get a sugar cloud. Add the vanilla extract and the pinch of salt. Increase the speed to medium-high and beat for 2 to 3 minutes until the frosting is light, fluffy, and spreadable.
- Frost and Decorate: Once the cupcakes are completely cool, spoon the frosting into a piping bag fitted with a star tip. Pipe a generous swirl on each cupcake. Top with Halloween sprinkles or candy eyeballs immediately.
Cooking Tips & Techniques
I have made every mistake in the book with these cupcakes. Let me save you the trouble.
The Food Coloring Trap: The first time I made these, I used liquid food coloring. The batter looked like a swamp, and the cupcakes came out a sad, muddy grey. Gel coloring is the only way to get that true, deep black. It’s more concentrated, so you use less, and it doesn’t mess with the liquid balance of the batter. Trust me on this one.
Room Temperature is Real: I know it’s annoying to wait for eggs and cream cheese to come to room temperature. But it matters. Cold eggs can seize the batter, and cold cream cheese will leave you with lumpy frosting. If you’re in a rush, place the eggs in a bowl of warm water for 5 minutes, and cut the cream cheese into small cubes to speed up the softening process.
The Overmixing Panic: I once got distracted by my dog and overmixed the batter. The cupcakes were dense and almost rubbery. Mix just until you don’t see any more streaks of flour. A few lumps are your friend.
Don’t Overbake: A dry cupcake is a sad cupcake. Start checking at the 18-minute mark. The edges should be set, but the center should still look slightly soft. They will continue to cook in the hot pan for the first few minutes out of the oven.
Frosting Consistency: If your frosting is too runny, your cream cheese or butter was too soft. Pop the bowl in the fridge for 15 minutes, then beat it again. If it’s too stiff, add a tablespoon of milk or cream.
Variations & Adaptations
This recipe is a great base for getting creative. Here are a few ways I have played with it.
- Gluten-Free Version: Substitute the all-purpose flour with a 1:1 gluten-free baking blend. Look for one that contains xanthan gum. The texture will be slightly more tender, but still delicious.
- Dairy-Free Adaptation: Use a plant-based buttermilk (like almond milk with a splash of lemon juice) and a dairy-free cream cheese alternative for the frosting. Miyoko’s brand works beautifully.
- Peppermint Twist: Add ½ teaspoon of peppermint extract to the batter along with the vanilla. Top the frosted cupcakes with a crushed candy cane for a wintery, “zombie peppermint” vibe.
- Spider Web Design: Instead of a simple swirl, pipe a plain circle of frosting on top of the cupcake. Then, using a toothpick, drag lines from the center outward to create a web. Place a plastic spider on top for a creepy effect.
- Bloody Drip: Make a simple red “blood” drip by mixing ½ cup of powdered sugar with 1 to 2 tablespoons of milk and red food coloring. Drizzle it over the frosted cupcakes for a gory, Halloween look.
Serving & Storage Suggestions
These cupcakes are best served at room temperature. The cake is soft, and the frosting is perfectly creamy. If you’ve refrigerated them, let them sit out for about 20 minutes before serving.
They pair wonderfully with a cold glass of milk or a hot cup of black coffee. The bitterness of the coffee is a great contrast to the sweet, tangy frosting. For a party, arrange them on a black cake stand with some fake cobwebs and plastic spiders around the base.
Storage: Because of the cream cheese frosting, these cupcakes need to be stored in the refrigerator. Place them in an airtight container. They will stay fresh for up to 4 days. The cake actually gets even more moist on the second day.
Freezing: You can freeze the unfrosted cupcakes for up to 3 months. Wrap them individually in plastic wrap, then place them in a freezer bag. Thaw at room temperature before frosting. The frosting itself does not freeze well, so always make it fresh.
Nutritional Information & Benefits
Let’s be honest, these are a treat. But here’s a rough estimate for one cupcake with frosting.
| Nutrient | Amount per Cupcake |
|---|---|
| Calories | ~410 kcal |
| Fat | 22g |
| Carbohydrates | 52g |
| Protein | 5g |
| Sugar | 40g |
On the bright side, the cocoa powder is rich in antioxidants. The cream cheese provides a small amount of calcium and protein. And honestly, sometimes you just need a little happiness in cupcake form. These are not an everyday snack, but they are the perfect indulgence for a Halloween celebration.
This recipe contains gluten, dairy, and eggs. For those with allergies, please check the variations section for suitable substitutions.
Conclusion
These Best Black Velvet Halloween Cupcakes are more than just a dessert. They are a conversation starter, a bit of baking magic, and a way to make Halloween a little more special. The story of how I got the recipe from a stranger in a hardware store feels fitting—it’s a recipe that deserves to be shared. The deep black cake, the tangy cream cheese frosting, the look on people’s faces when they take a bite—it’s all worth it. I honestly love making these every year. They mark the start of the spooky season for me.
Now it’s your turn. Go make a mess in your kitchen. Get that black food coloring on your fingers. And when you pull that first perfect cupcake out of the oven, you’ll know exactly what I mean. I would love to hear how they turn out for you. Did you add a special decoration? Did you use a different frosting? Drop a comment below and share your Halloween baking story. Happy baking, and have a wonderfully spooky Halloween!
Frequently Asked Questions
Can I use liquid food coloring instead of gel?
You can, but I don’t recommend it. Liquid food coloring will thin out your batter and you will need to use a lot of it to get a dark color. This can affect the texture of the cake, making it gummy. Gel or paste food coloring is much more concentrated and gives you a true black without changing the liquid balance of the recipe.
Why did my cupcakes turn out grey instead of black?
This usually happens for two reasons. First, you might not have used enough gel food coloring. Don’t be shy with it. Second, the type of cocoa powder matters. Natural unsweetened cocoa powder is lighter. Using a “dark” or “black” cocoa powder will give you a much deeper color naturally, so you need less food coloring.
Can I make this recipe into a cake?
Absolutely. This batter works perfectly as a two-layer 8-inch round cake. Simply pour the batter evenly into two greased and floured 8-inch cake pans. Bake at 350°F (175°C) for 25 to 30 minutes, or until a toothpick inserted in the center comes out clean. The frosting recipe can be doubled to fill and cover the cake.
My cream cheese frosting is too runny. How do I fix it?
Runny cream cheese frosting is almost always because the cream cheese or butter was too warm. The best fix is to place the bowl of frosting in the refrigerator for 15 to 20 minutes. Then, beat it again on medium-high speed for a minute. It should firm up. If it’s still too soft, you can beat in a little more powdered sugar, one tablespoon at a time, until it reaches the right consistency.
How far in advance can I make these cupcakes?
You can bake the cupcakes up to 2 days in advance. Store them, unfrosted, in an airtight container at room temperature. The frosting can be made up to 3 days in advance and stored in the refrigerator in an airtight container. When you are ready to serve, let the frosting come to room temperature, give it a quick whip with the mixer to fluff it up, and then frost the cupcakes. Do not frost them more than 24 hours ahead of time, as the frosting can start to absorb moisture from the cake and become less stable.
Pin This Recipe!
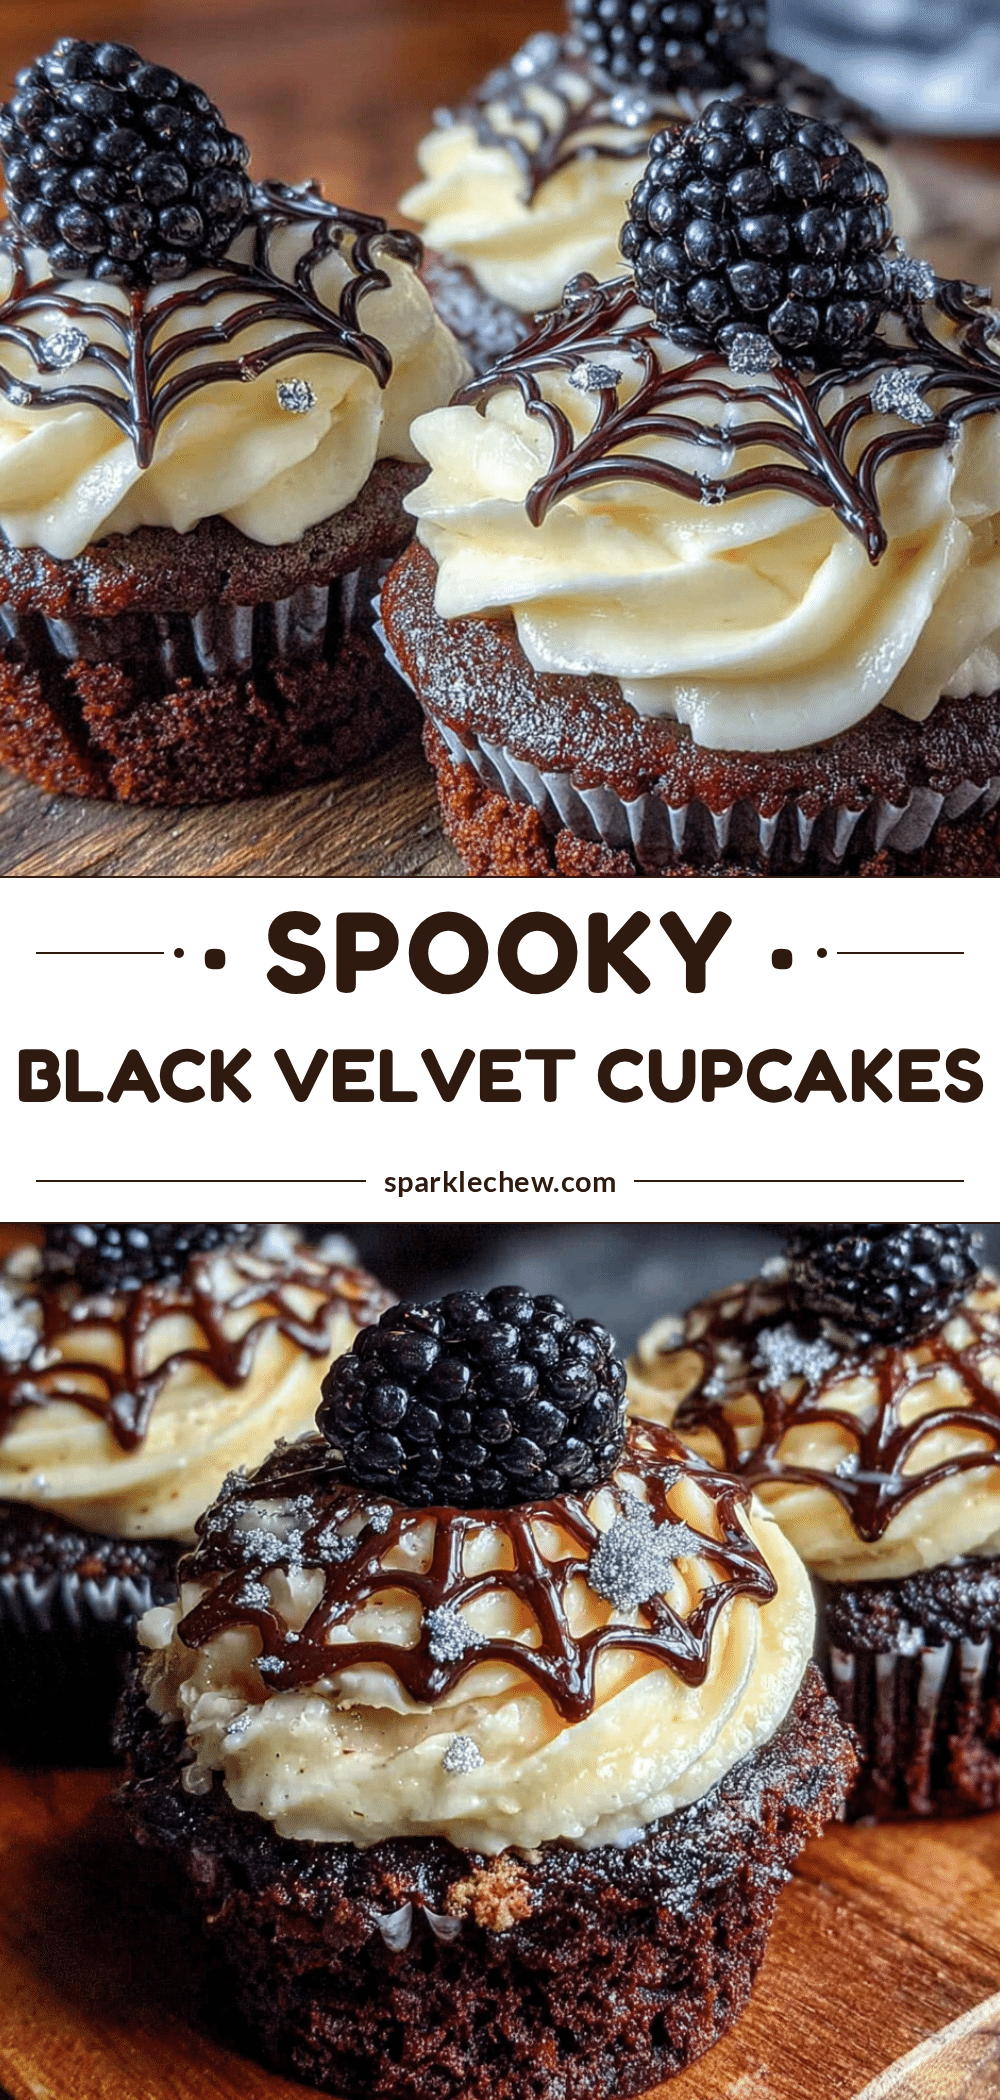
Best Black Velvet Cupcakes with Cream Cheese Frosting
These incredibly moist, deep black velvet cupcakes are topped with a tangy cream cheese frosting, making them the perfect showstopper for Halloween parties. The secret is in the balance of cocoa, vinegar, and black gel food coloring.
- Prep Time: 15 minutes
- Cook Time: 20 minutes
- Total Time: 45 minutes
- Yield: 12 cupcakes 1x
- Category: Dessert
- Cuisine: American
Ingredients
- 1 ½ cups (180g) all-purpose flour
- ¼ cup (20g) unsweetened cocoa powder (preferably Hershey’s Special Dark)
- 1 teaspoon baking soda
- ½ teaspoon salt
- 1 cup (200g) granulated sugar
- ½ cup (120ml) vegetable oil
- ½ cup (120ml) buttermilk, room temperature
- 2 large eggs, room temperature
- 1 teaspoon white vinegar
- 1 teaspoon vanilla extract
- 1 to 2 tablespoons black gel food coloring
- 8 ounces (226g) cream cheese, softened
- ½ cup (113g) unsalted butter, softened
- 3 to 4 cups (360g to 480g) powdered sugar
- 1 teaspoon vanilla extract
- Pinch of salt
Instructions
- Preheat oven to 350°F (175°C). Line a 12-cup muffin tin with paper liners.
- In a large bowl, whisk together flour, cocoa powder, baking soda, and salt.
- In a separate larger bowl, whisk together sugar and vegetable oil until well combined. Add buttermilk, eggs, vinegar, and vanilla extract; whisk until smooth and slightly frothy.
- Add black gel food coloring to the wet ingredients, starting with 1 tablespoon and adding more until the batter is deep black (about 1 ½ tablespoons).
- Pour dry ingredients into wet ingredients and stir with a rubber spatula until just combined. Do not overmix.
- Divide batter evenly among the 12 liners, filling each about ⅔ full.
- Bake for 18 to 22 minutes, until tops spring back and a toothpick inserted in the center comes out with a few moist crumbs.
- Let cupcakes cool in the pan for 5 minutes, then transfer to a wire rack to cool completely.
- For the frosting: In a large bowl, beat cream cheese and butter together with an electric mixer until smooth and creamy, about 2 minutes.
- Add powdered sugar one cup at a time, beating on low speed. Add vanilla extract and salt. Increase speed to medium-high and beat for 2 to 3 minutes until light and fluffy.
- Once cupcakes are completely cool, pipe frosting onto each cupcake using a piping bag fitted with a star tip. Decorate as desired.
Notes
Use gel food coloring for the deepest black color. Ensure all ingredients are at room temperature for best results. Do not overmix the batter. Store frosted cupcakes in the refrigerator for up to 4 days.
Nutrition
- Serving Size: 1 cupcake
- Calories: 410
- Sugar: 40
- Fat: 22
- Carbohydrates: 52
- Protein: 5
Keywords: black velvet cupcakes, Halloween cupcakes, cream cheese frosting, black velvet cake, vampire cupcakes, spooky cupcakes


