Love this? Save it for later!
Share the inspiration with your friends
I was digging through my freezer last Tuesday, looking for a bag of frozen peas I knew was in there somewhere, when the cold air hit me with a smell I hadn’t caught in years. It was faint—just a ghost of something—but it was enough. Suddenly I was seven years old, standing in my Aunt Carol’s tiny kitchen in Wichita, watching her brown ground beef in that same dented cast iron skillet she refused to replace. The onions were hitting the pan, and she was humming something off-key under her breath. I didn’t even know I remembered that sound. But there it was, clear as day: the sizzle, the steam fogging up her glasses, the way she’d toss in a handful of rice without measuring. Just like that, I was back. And I knew exactly what I was cooking that night.
Honestly, I hadn’t thought about that skillet dinner in years. But the craving hit me hard—the kind of craving that doesn’t let up until you do something about it. So I grabbed the beef from the fridge, the rice from the pantry, and started recreating something I’d only ever watched, never written down. I burned the first batch. The second one was too salty. But the third? That was the one. The one that made me close my eyes and remember exactly how Aunt Carol’s kitchen smelled on a Tuesday night. Maybe you’ve had that feeling—the one where a single bite takes you somewhere you didn’t know you were missing.
This isn’t just any beef and rice skillet. It’s the one that steals the show at dinner parties, the one guests ask for by name. It’s the dish that makes you look like you spent hours in the kitchen when really, it all comes together in one pan in under forty minutes. And let me tell you—there’s nothing quite like watching someone take that first bite and seeing their eyes go wide. That’s why I keep making it. That’s why I’m sharing it with you today.
Why You’ll Love This Recipe
Let’s be real for a second—there are a thousand beef and rice recipes out there. But this one? It’s different. And I don’t say that lightly. After testing this recipe about six times (and subjecting my neighbors to way too many leftovers), I can tell you exactly why this version wins every time.
- One-Pan Wonder: Everything cooks in a single skillet. That means less cleanup, less stress, and more time actually enjoying your meal with the people around your table.
- Simple Ingredients: You probably have most of this in your kitchen right now. No fancy grocery runs, no weird specialty items you’ll never use again. Just real food that works.
- Perfect for Hosting: This dish was made for dinner parties. It scales beautifully for a crowd, holds up well if guests are running late, and looks impressive on the table without requiring you to be a professional chef.
- Crowd-Pleaser Guaranteed: I’ve served this to picky kids, foodie friends, and my dad who “doesn’t do rice.” Every single plate came back clean. Every single time.
- Unbelievably Delicious: The secret is in how the rice absorbs all that beefy, savory goodness as it cooks. Each bite is packed with flavor—comforting, satisfying, and just a little bit show-offy.
This recipe came together after I realized most skillet dinners are either mushy or dry. There’s no in-between. So I played around with the liquid ratio, the cooking time, and the heat levels until I found that sweet spot where the rice is tender but not sticky, the beef is browned but not tough, and every single grain is coated in flavor. It’s comfort food reimagined—faster, easier, but with the same soul-soothing satisfaction that makes you want seconds.
Perfect for impressing guests without stress. Perfect for turning a regular Tuesday into something worth remembering.
What Ingredients You Will Need
This recipe uses simple, honest ingredients to build big flavor without any fuss. Most of these are pantry staples, which means you’re probably already halfway there.
For the Skillet Base
- 1 pound ground beef (80/20 works best—enough fat for flavor, not so much that it gets greasy)
- 1 medium yellow onion, diced (about 1 cup—adds sweetness and depth)
- 3 cloves garlic, minced (fresh is non-negotiable here, trust me)
- 1 cup long-grain white rice, uncooked (I prefer Jasmine or Basmati for the best texture)
- 2 cups beef broth (low-sodium so you can control the salt—I like Swanson or Better Than Bouillon)
- 1 can (14.5 oz) diced tomatoes, undrained (fire-roasted if you can find them—adds a subtle smokiness)
- 1 teaspoon smoked paprika (regular works too, but smoked gives it that extra something)
- 1 teaspoon dried oregano (or Italian seasoning in a pinch)
- ½ teaspoon salt (plus more to taste)
- ¼ teaspoon black pepper (freshly ground is best)
- 2 tablespoons olive oil (for browning)
For the Garnish (Optional but Recommended)
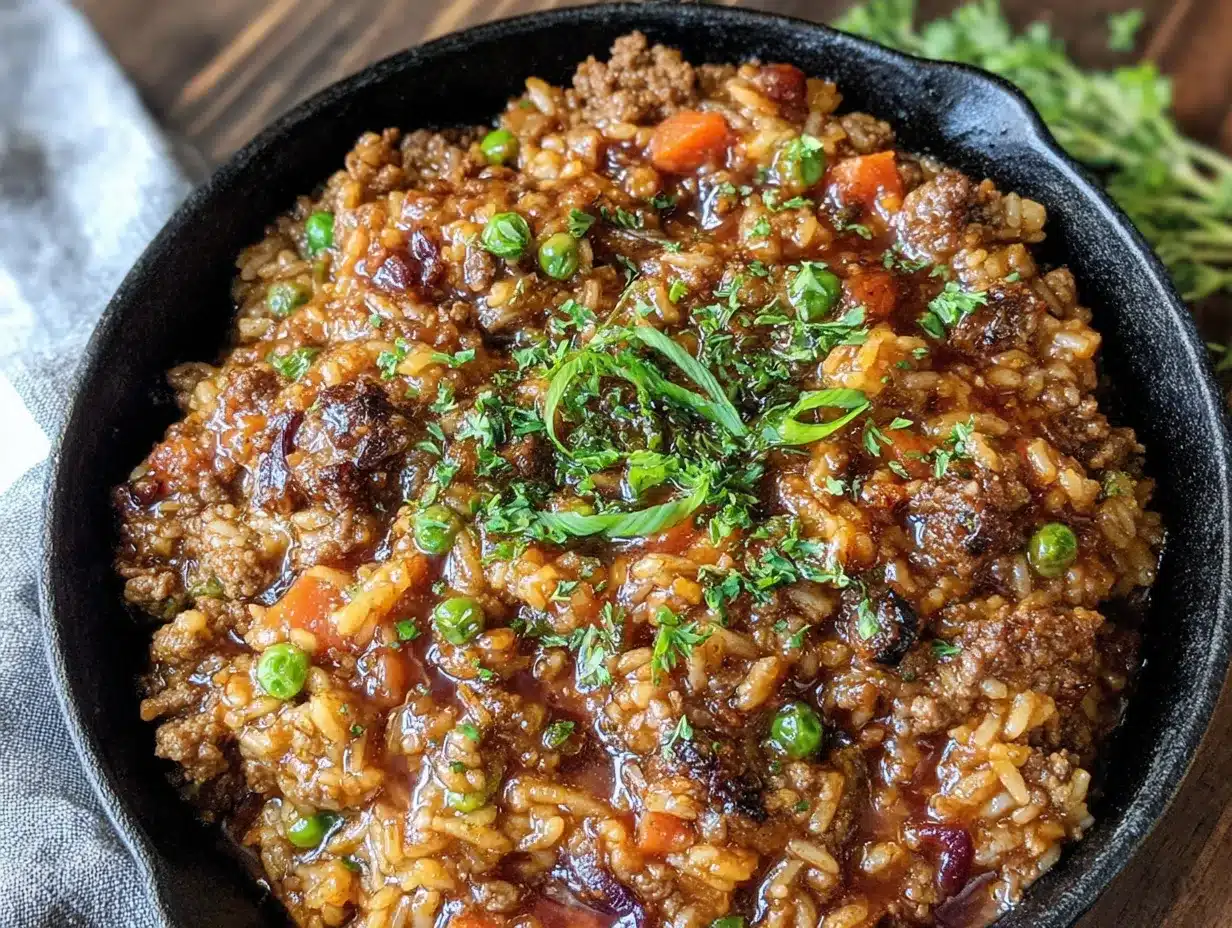
- ¼ cup fresh parsley, chopped (adds color and freshness)
- ½ cup shredded cheddar cheese (for that melty, gooey finish)
- Optional: red pepper flakes (for a little heat—I always offer this on the side)
A quick note on the rice: don’t use instant rice or minute rice here. It’ll turn to mush. You want regular long-grain rice that holds its shape and soaks up all that beefy broth as it cooks. I’ve tried this with brown rice too, and while it works, you’ll need to add about 10-15 minutes more cooking time and an extra ¼ cup of liquid. Just something to keep in mind.
For the tomatoes, I really do recommend fire-roasted if you can grab them. The difference is subtle but noticeable—like the difference between a good meal and one people ask about later. If you only have regular diced tomatoes, add a pinch of smoked paprika to make up for it.
Equipment Needed
The beauty of this recipe is that it doesn’t require a lot of fancy gear. Here’s what you’ll actually need:
- A large skillet with a lid (12-inch is ideal—cast iron works great, but any heavy-bottomed skillet will do. I use my grandmother’s old cast iron, and honestly, it just gets better with age)
- A wooden spoon or spatula (for breaking up the beef—metal can scratch non-stick pans)
- A sharp knife and cutting board (for the onion and garlic)
- Measuring cups and spoons (or just get good at eyeballing—I won’t tell)
- A can opener (unless you’re strong enough to pop that tab yourself)
If you don’t have a lid that fits your skillet, don’t sweat it. A sheet of aluminum foil crimped tightly around the edges works like a charm. I’ve done it more times than I’d like to admit, and it gets the job done every single time.
One tip: if you’re using a non-stick skillet, keep the heat at medium or medium-high. Crank it too high and you risk damaging the coating. Cast iron or stainless steel can take more heat, which means better browning on that beef.
Preparation Method
Alright, let’s get cooking. This whole thing comes together in about 35 minutes, and most of that is hands-off simmering time. Perfect for when you want to look like a hero without actually working that hard.
- Heat the oil over medium-high heat. Give it about a minute to get hot—you want it shimmering but not smoking. Drop a tiny piece of onion in there; if it sizzles, you’re good to go.
- Add the ground beef. Break it up with your wooden spoon as it cooks. Let it brown for about 5-6 minutes, stirring occasionally. Don’t rush this step—you want real browning, not just gray meat. That browning is where the flavor lives.
- Remove the beef and set it aside. Use a slotted spoon so most of the fat stays in the pan. Leave about 1 tablespoon of drippings in there—it’s liquid gold for flavor.
- Sauté the onion. Add the diced onion to the hot pan and cook for 3-4 minutes until it’s soft and translucent. It should smell sweet, not sharp. If it starts to brown too fast, turn the heat down a notch.
- Add the garlic. Stir it in and cook for just 30 seconds. Garlic burns fast, and burnt garlic is bitter. You’ve been warned.
- Stir in the rice, smoked paprika, oregano, salt, and pepper. Let it toast in the pan for about a minute, stirring constantly. You’ll smell it become nutty and fragrant. This is a game-changer for flavor.
- Pour in the beef broth and diced tomatoes (with their juices). Stir everything together, scraping up any browned bits from the bottom of the pan. Those bits? That’s concentrated flavor right there.
- Return the beef to the skillet. Stir it all together until everything is evenly distributed. Bring the liquid to a gentle boil.
- Reduce the heat to low, cover, and simmer. Set your timer for 18 minutes. Do not lift the lid to peek—I know it’s tempting, but you’re letting out steam that the rice needs to cook properly. Trust the process.
- After 18 minutes, turn off the heat. Let it sit, covered, for another 5 minutes. This resting time lets the rice finish absorbing any remaining liquid and steams it to perfection.
- Fluff with a fork. Give it a gentle stir to redistribute everything. Taste and adjust salt if needed. Sprinkle with fresh parsley and cheese if you’re using it.
One thing I learned the hard way: if your rice still seems a little firm after the 18 minutes, add 2 tablespoons of water, re-cover, and let it sit for another 5 minutes on low heat. Every stovetop runs a little differently, and sometimes the rice just needs a bit more time. No shame in that.
Cooking Tips & Techniques
I’ve made this recipe enough times to know exactly where things can go wrong—and how to fix them before they do. Here are the lessons I learned so you don’t have to learn them yourself.
Don’t skip browning the beef properly. I know it’s tempting to just cook it until it’s no longer pink and move on. But that deep, caramelized crust on the beef is what gives this dish its soul. Let it sit in the pan for a minute or two before stirring. You want color, not just doneness.
Toast the rice. This is the step most people skip, and it makes a huge difference. That minute you spend stirring the rice in the hot pan with the spices? It changes everything. The rice becomes nutty and aromatic, and it absorbs the broth better later on. Don’t rush it.
Resist the urge to stir while it simmers. I messed up my first three batches because I kept lifting the lid and poking at it. Every time you lift that lid, steam escapes, and that steam is what cooks the rice. Set the timer, walk away, and let the pan do its thing.
If you’re making this for a crowd, double everything. Use a larger skillet or a Dutch oven. The cooking time stays the same, but you might need an extra 2-3 minutes for the liquid to come back to a boil before you cover it. I’ve served this to twelve people before, and it disappeared in minutes.
One mistake I still make: forgetting to check the salt level before serving. The beef broth and tomatoes both have salt, so it’s easy to overdo it. Always taste before you add more salt. You can always add, but you can’t take away.
Variations & Adaptations
This recipe is forgiving. I’ve tweaked it a dozen different ways depending on what I had in the fridge, and it’s never let me down.
Cheesy Beef and Rice Skillet: Stir in 1 cup of shredded cheddar or Monterey Jack after the rice is done cooking. Cover for 2 minutes until melted, then serve. It’s indulgent, but sometimes that’s exactly what you need.
Mexican-Style Version: Swap the oregano for cumin, add ½ teaspoon of chili powder, and use fire-roasted tomatoes with green chiles. Top with cilantro, avocado, and a squeeze of lime. I made this for a taco night once and it stole the show from the actual tacos.
Vegetarian Adaptation: Replace the beef with 1½ cups of cooked black beans or lentils. Use vegetable broth instead of beef broth. Add a can of corn for texture. It’s heartier than you’d expect and still packed with protein.
Low-Carb Option: Swap the rice for cauliflower rice. You’ll need to reduce the liquid to about 1 cup and cook for only 5-7 minutes covered. It’s not the same, but it scratches the itch if you’re watching carbs.
Spicy Kick: Add ½ teaspoon of cayenne pepper or a chopped jalapeño with the onions. I tried this once when I had a cold, and honestly, it cleared me right up. Plus, it adds a nice layer of heat that builds as you eat.
My personal favorite variation? I add a handful of frozen peas and corn about 5 minutes before the rice is done. It adds color, sweetness, and makes it feel like a complete meal in one pan. My Aunt Carol would probably roll her eyes at the addition, but I think she’d secretly approve.
Serving & Storage Suggestions
This dish is best served hot, straight from the skillet. I like to bring the whole pan to the table—it’s rustic, it’s impressive, and it keeps everything warm while people serve themselves. Sprinkle the parsley and cheese on top right before you set it down for maximum visual impact.
For a dinner party, I serve this with a simple side salad dressed with lemon and olive oil, and maybe some crusty bread to soak up any extra juices. It also pairs beautifully with roasted vegetables—broccoli or green beans work especially well. If you’re feeling fancy, a dollop of sour cream or Greek yogurt on top adds a nice tangy contrast.
Storage: Leftovers keep in an airtight container in the fridge for up to 4 days. The flavors actually get better overnight as the rice continues to absorb the broth. It’s one of those rare dishes that tastes even better the next day.
Reheating: The microwave works fine, but the texture is better if you reheat it in a skillet with a splash of water or broth. Cover and heat over medium-low for about 5 minutes, stirring once. The steam will bring the rice back to life without drying it out.
Freezing: This freezes well for up to 3 months. Let it cool completely, then transfer to a freezer-safe container. To thaw, leave it in the fridge overnight, then reheat as above. I’ve frozen individual portions for quick lunches, and it’s been a lifesaver on busy days.
One thing to note: the rice will soften a bit more when reheated, so if you’re planning to freeze it, cook it for about 2 minutes less than the recipe says. That way it stays perfectly textured after reheating.
Nutritional Information & Benefits
Here’s the approximate nutritional breakdown for one serving (based on 6 servings):
| Nutrient | Amount per Serving |
|---|---|
| Calories | 385 |
| Protein | 24g |
| Carbohydrates | 35g |
| Fat | 16g |
| Saturated Fat | 6g |
| Fiber | 3g |
| Sodium | 680mg |
This dish is a solid source of protein and iron from the beef, plus fiber and vitamins from the tomatoes and onions. The rice provides steady energy, making it a satisfying meal that keeps you full without weighing you down.
If you’re watching your sodium, use low-sodium broth and skip the added salt until you taste it at the end. You can also swap the beef for ground turkey to reduce the fat content—just add a tablespoon of olive oil to keep it from drying out.
For a gluten-free option, this recipe is naturally gluten-free as long as you check your broth and tomato labels. Most are, but it’s always worth a quick look.
I’m not a nutritionist, but I’ve learned to listen to my body. This meal hits that sweet spot between comfort and fuel—it feels indulgent but leaves you feeling satisfied, not sluggish. That’s the kind of balance I look for in a weeknight dinner.
Conclusion
This beef and rice skillet isn’t just a recipe—it’s the one I turn to when I want to feed people well without stressing myself out. It’s the dish that makes guests hover around the kitchen asking what smells so good. It’s the meal that brings back a memory every single time I make it, and now it’s become one of those memories for the people I’ve served it to.
I hope you make this your own. Add your own twist, serve it with whatever sides your family loves, and don’t be afraid to mess it up the first time. That’s how you learn. That’s how you make it yours.
When you do make it—and I know you will—come back and tell me how it went. Did you add something unexpected? Did your guests ask for the recipe? Did you burn the garlic like I did the first time? I want to hear it all. Drop a comment below, share a photo, or just tell me what you thought. This recipe was meant to be shared, and I can’t wait to hear your version of the story.
Now go preheat that skillet. Your guests are waiting.
Frequently Asked Questions
Can I use ground turkey or chicken instead of beef?
Absolutely. Ground turkey or chicken works well, but since they’re leaner, add an extra tablespoon of olive oil to keep everything moist. You might also want to bump up the seasonings a bit since poultry is milder than beef.
Why is my rice still hard after 18 minutes?
This usually happens if the heat was too low or the lid wasn’t sealed properly. Add 2 tablespoons of water, cover tightly, and let it simmer for another 5 minutes. If you’re at high altitude, you may need to add an extra ¼ cup of liquid and cook for 5-7 minutes longer.
Can I make this ahead of time for a party?
Yes! You can make it a day ahead and reheat it in the skillet with a splash of broth. The flavors actually get better overnight. Just be aware that the rice will soften slightly, so cook it for about 2 minutes less if you’re planning to reheat it later.
What’s the best rice to use for this recipe?
Long-grain white rice like Jasmine or Basmati is ideal. They hold their shape well and absorb liquid evenly. Avoid short-grain rice (it gets sticky) and instant rice (it turns mushy). Brown rice works too, but you’ll need to adjust the cooking time and liquid.
Can I freeze leftovers?
Yes, this freezes beautifully for up to 3 months. Let it cool completely, then store in an airtight container. Thaw overnight in the fridge and reheat in a skillet with a splash of water or broth to bring back the moisture. I like to freeze individual portions for easy lunches.
Pin This Recipe!
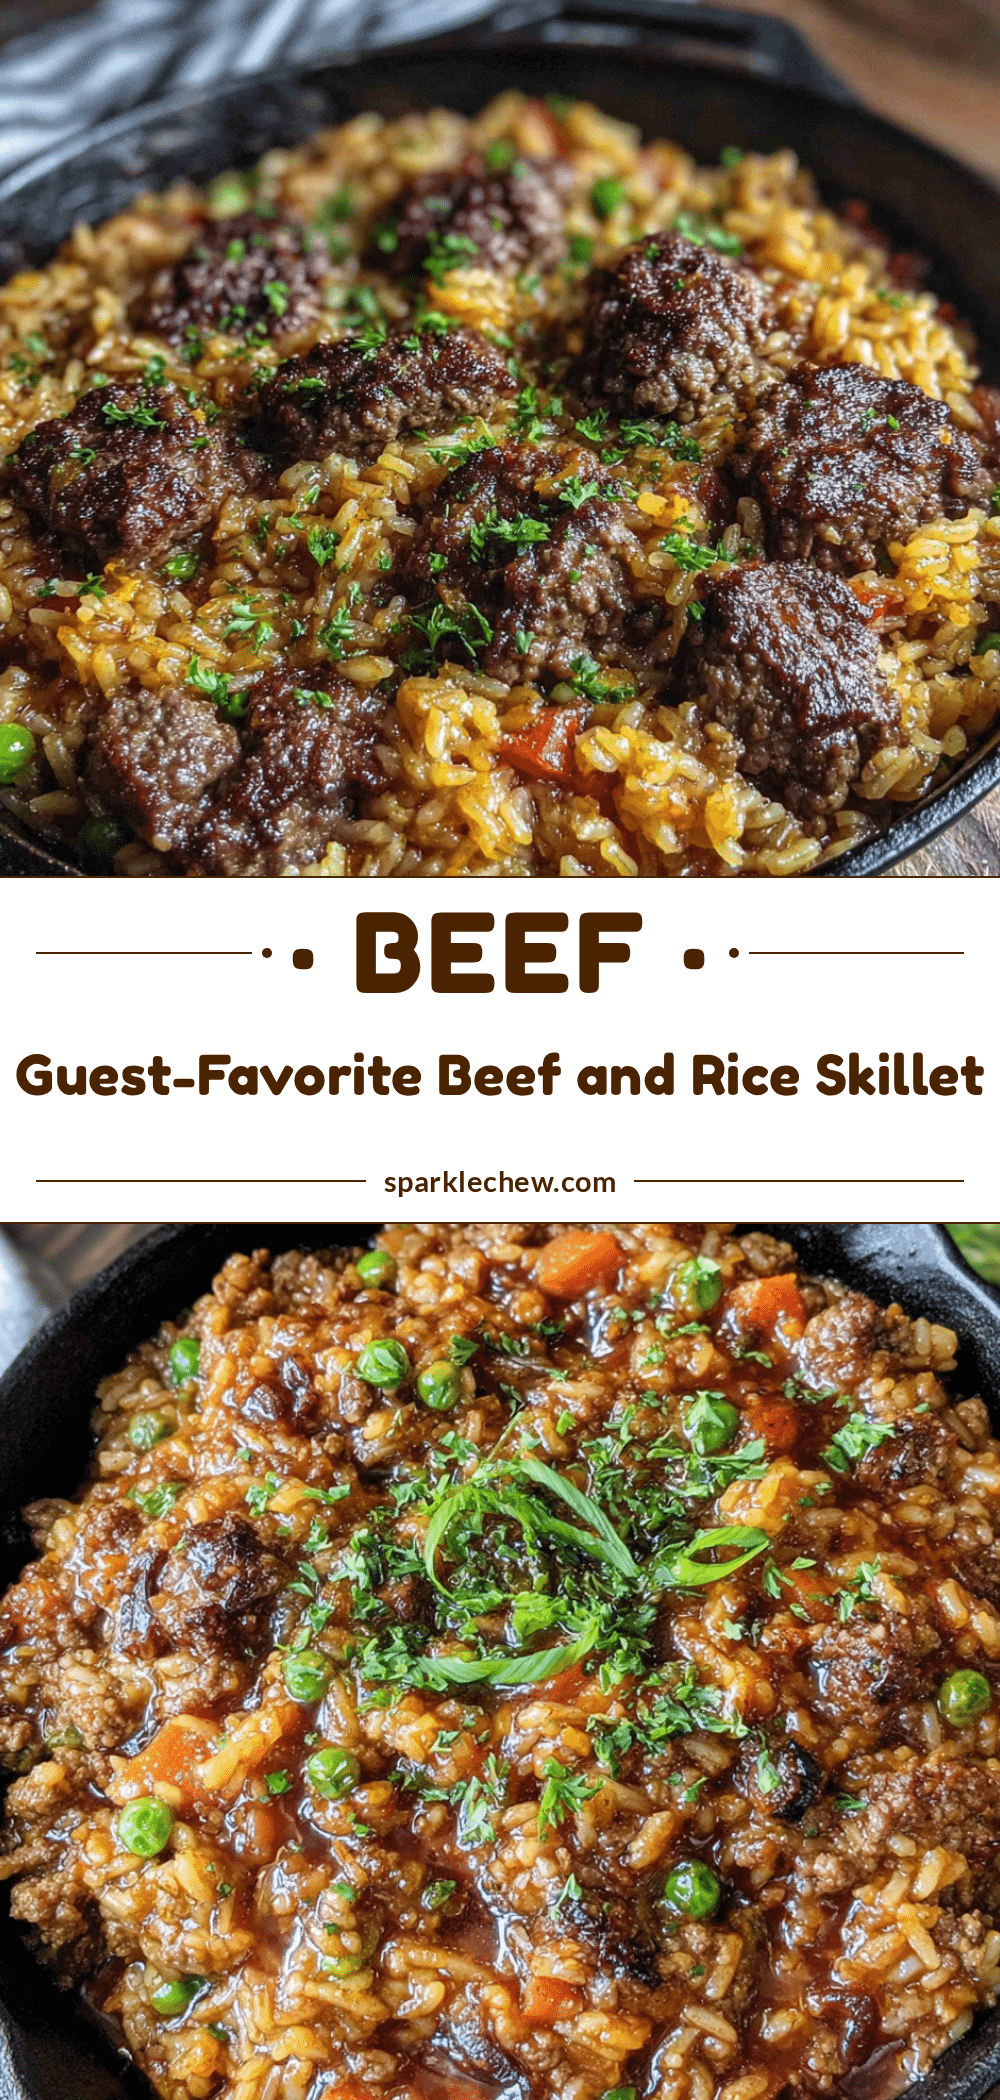
Best Easy Beef and Rice Skillet Recipe

This one-pan beef and rice skillet is a comforting, flavorful dinner that comes together in under 40 minutes. Made with simple ingredients, it’s perfect for busy weeknights or impressing guests without the stress.
- Prep Time: 10 minutes
- Cook Time: 25 minutes
- Total Time: 35 minutes
- Yield: 6 servings 1x
- Category: Main Course
- Cuisine: American
Ingredients
- 1 pound ground beef (80/20 works best)
- 1 medium yellow onion, diced (about 1 cup)
- 3 cloves garlic, minced
- 1 cup long-grain white rice, uncooked (Jasmine or Basmati preferred)
- 2 cups low-sodium beef broth
- 1 can (14.5 oz) diced tomatoes, undrained (fire-roasted preferred)
- 1 teaspoon smoked paprika
- 1 teaspoon dried oregano
- ½ teaspoon salt (plus more to taste)
- ¼ teaspoon black pepper (freshly ground)
- 2 tablespoons olive oil
- ¼ cup fresh parsley, chopped (optional garnish)
- ½ cup shredded cheddar cheese (optional garnish)
- Red pepper flakes (optional, for serving)
Instructions
- Heat the olive oil over medium-high heat in a large skillet until shimmering.
- Add the ground beef and break it up with a wooden spoon. Cook for 5-6 minutes until well browned.
- Remove the beef with a slotted spoon and set aside, leaving about 1 tablespoon of drippings in the pan.
- Add the diced onion to the hot pan and sauté for 3-4 minutes until soft and translucent.
- Add the minced garlic and cook for 30 seconds, stirring constantly.
- Stir in the rice, smoked paprika, oregano, salt, and pepper. Toast for about 1 minute, stirring constantly, until fragrant.
- Pour in the beef broth and diced tomatoes (with their juices). Stir, scraping up any browned bits from the bottom of the pan.
- Return the beef to the skillet and stir to combine. Bring the liquid to a gentle boil.
- Reduce heat to low, cover, and simmer for 18 minutes. Do not lift the lid.
- After 18 minutes, turn off the heat and let the skillet sit, covered, for another 5 minutes.
- Fluff the rice with a fork, taste and adjust salt if needed. Sprinkle with fresh parsley and cheese if desired.
Notes
Don’t use instant rice; it will turn mushy. For brown rice, add 10-15 minutes more cooking time and an extra ¼ cup of liquid. If rice is still firm after 18 minutes, add 2 tablespoons of water, cover, and cook for 5 more minutes. For a crowd, double the recipe and use a larger skillet or Dutch oven. Leftovers keep in the fridge for up to 4 days and freeze well for up to 3 months.
Nutrition
- Serving Size: 1 serving (about 1.5
- Calories: 385
- Sugar: 4
- Sodium: 680
- Fat: 16
- Saturated Fat: 6
- Carbohydrates: 35
- Fiber: 3
- Protein: 24
Keywords: beef and rice skillet, one-pan dinner, easy weeknight meal, ground beef recipe, comfort food


