Love this? Save it for later!
Share the inspiration with your friends
It was 10:47 PM on a particularly damp Wednesday in February, and my youngest had just coughed for the 47th time that day. I was standing in my kitchen, bleary-eyed, staring into the pantry like it held the answers to life itself. I didn’t have a bottle of the fancy immune-support syrup from the health food store, but I had a bag of dried elderberries I’d impulse-bought last fall and a vague memory of a recipe I’d seen on a forum. Honestly, I was tired of the constant sniffles, tired of the little bottles of sticky purple syrup that stained everything they touched, and frankly, too tired to make a complicated concoction. So, I grabbed a saucepan, a jar of honey, and that bag of elderberries, and I just started winging it.
The idea hit me as I watched the deep purple liquid simmer: gummies. Not the sticky, messy syrup, but little, squishy, fun-shaped gummies. The kind my kids think are a treat, not a chore. It was a “why didn’t I think of this sooner?” moment. I poured the elderberry tea into a bowl with gelatin, whisked it with a kind of desperate hope, and poured it into a silicone mold shaped like little bears. By midnight, I had a tray of wobbly, dark purple gummies in the fridge. The next morning, my kids gobbled them up thinking they were candy. Maybe you’ve been there—spending an hour convincing a toddler to take a spoonful of something “healthy” only for it to end up on the floor. These homemade elderberry gummies changed the game for us. They are the recipe that stayed because they actually work, and the kids actually ask for them. It’s not a miracle cure, but it’s a delicious, comforting little ritual that makes cold season feel a little less daunting.
Why You’ll Love This Recipe
Let’s be real for a second—getting kids to take anything that’s good for them is a battle. But these gummies? They feel like a win for everyone. I’ve tested this recipe through three cold and flu seasons, tweaked the sweetness, and even had a friend’s picky six-year-old ask for seconds. It’s not just another recipe; it’s the one I trust.
- Quick & Easy: You can have these ready and setting in the fridge in under 20 minutes. No complicated steps, just simmer, stir, and pour.
- Simple Ingredients: You likely already have the gelatin and honey in your pantry. The main star, dried elderberries, is easy to find online or at a health food store.
- Perfect for Cold Season: This is my go-to for boosting our immune systems naturally when the weather turns. It’s a proactive, tasty way to support the family.
- Crowd-Pleaser: My kids think these are fruit snacks. I’ve hidden them in lunchboxes, used them as a “treat” after homework, and even given them to skeptical adults who came back for more.
- Unbelievably Delicious: The flavor is a gentle, sweet-tart berry taste with a hint of honey. It’s not medicinal at all. The texture is perfectly soft and bouncy, just like the store-bought kind.
What makes this recipe different is the simple technique of concentrating the elderberry tea. Instead of using a weak brew, I simmer the berries down to create a deeply flavorful and potent base. This isn’t just another version of a gummy; it’s the best version because it maximizes the benefits without adding unnecessary sugar or artificial junk. It’s the kind of recipe that makes you feel good about giving your kids a “snack.” It’s comfort food for the immune system—wholesome, fast, and with the same soul-soothing satisfaction of a warm cup of tea, but in a fun, chewy package.
What Ingredients You Will Need
This recipe uses a handful of simple, wholesome ingredients to deliver a powerful immune boost without any of the artificial stuff. You can find most of these in your pantry or a standard grocery store.
- Dried Elderberries (½ cup): These are the star of the show. They are packed with antioxidants and vitamins. I prefer buying organic dried elderberries from a bulk store or a trusted brand like Starwest Botanicals. Look for deep purple, almost black berries that are plump and not too dusty.
- Water (2 cups): Just plain tap water or filtered water. This is used to extract all the goodness from the elderberries.
- Raw Honey (3-4 tablespoons): This adds natural sweetness and has its own immune-soothing properties. The amount depends on how sweet you like it. I use 3 tablespoons for a milder sweetness. If your honey is very thick, you can warm it slightly to help it mix.
- Gelatin (4 tablespoons): This is what gives the gummies their signature bouncy texture. I use beef gelatin (like the brand Vital Proteins) because it’s flavorless and sets up perfectly. You can also use pork gelatin. Avoid “gelatin desserts” like Jell-O—they have added sugar and artificial flavors.
- Optional: Lemon Juice (1 tablespoon): A little splash of lemon juice brightens up the berry flavor and helps preserve the gummies. It also adds a tiny bit of vitamin C.
- Optional: Tincture or Vitamin C Powder (to taste): For an extra immune boost, you can stir in a few drops of an elderberry tincture or a pinch of vitamin C powder after you’ve dissolved the gelatin. Just make sure the mixture isn’t too hot.
Substitution Guidance: If you don’t have honey, you can use maple syrup or agave nectar. For a vegan version, this recipe won’t work as-is because gelatin is an animal product. You can try using agar-agar powder, but the texture will be much firmer and less gummy-like. I’ve tried it, and it’s just not the same. For a low-sugar option, use a monk fruit-based sweetener that dissolves well, but start with less and taste as you go.
Equipment Needed
You don’t need a fancy kitchen to make these. Here’s what you’ll need:
- Small Saucepan: For simmering the elderberries and water.
- Fine-Mesh Strainer or Cheesecloth: To separate the concentrated tea from the spent berries. A nut milk bag works great too.
- Mixing Bowl: A medium-sized bowl for mixing the gelatin and tea.
- Whisk or Fork: For stirring the gelatin until it’s completely dissolved.
- Silicone Gummy Molds: This is the most important tool. I use a bear-shaped mold, but you can find stars, dinosaurs, or any fun shape. Silicone is essential because the gummies pop right out.
- Liquid Measuring Cup: A glass one with a spout makes pouring the mixture into the molds much less messy.
- Dropper or Small Spoon: Helpful for filling the tiny mold cavities without spilling.
If you don’t have a silicone mold, you can pour the mixture into a small, square glass dish (greased lightly with coconut oil) and cut them into cubes after they set. It’s not as fun, but it works! I’ve used a cheap set of molds from Amazon for years, and they still work perfectly. Just make sure to wash them by hand, as the heat from the dishwasher can warp them over time.
Preparation Method
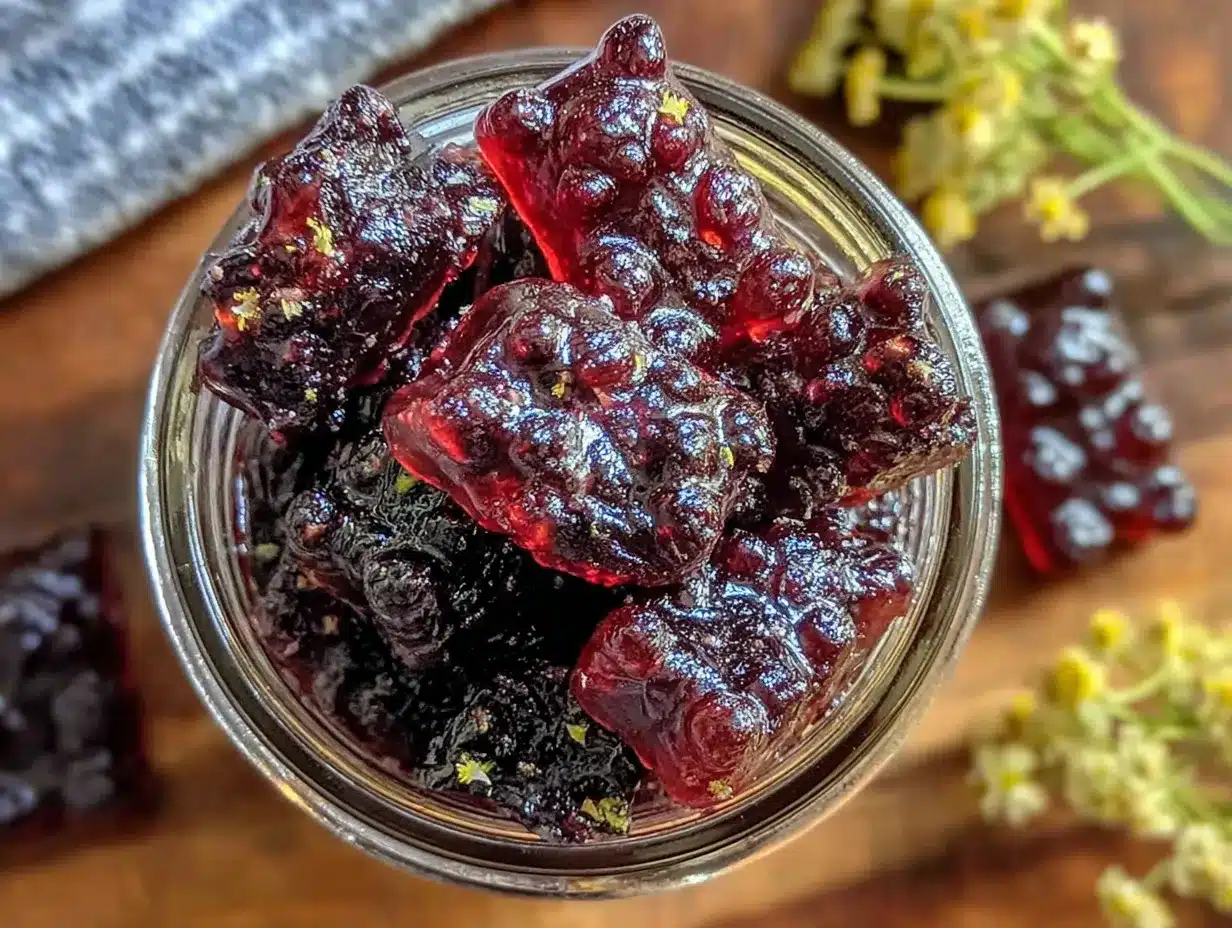
Alright, let’s get into the nitty-gritty. This process is so simple, you’ll memorize it after the first batch.
- Make the Concentrated Elderberry Tea (5 minutes): In your small saucepan, combine the ½ cup of dried elderberries and 2 cups of water. Bring it to a boil over medium-high heat. Once it’s boiling, reduce the heat to low and let it simmer, uncovered, for about 15-20 minutes. You’ll see the liquid reduce by about half, turning a deep, inky purple. The smell is amazing—like a cozy, fruity tea.
- Strain the Berries (2 minutes): Place your fine-mesh strainer over the mixing bowl. Carefully pour the hot liquid and berries through the strainer. Use the back of a spoon to press down on the berries to extract every last drop of that potent juice. You want about 1 cup of concentrated liquid. Discard the spent berries (they go in the compost!).
- Add the Honey and Lemon (1 minute): While the tea is still warm (but not boiling hot), add the 3 tablespoons of raw honey and 1 tablespoon of lemon juice. Whisk until the honey is completely dissolved. Taste it here—it should be pleasantly sweet and a little tart. If you want it sweeter, add another tablespoon of honey.
- Bloom the Gelatin (2 minutes): This is the most important step. Sprinkle the 4 tablespoons of gelatin evenly over the surface of the warm elderberry mixture. Do not dump it all in one spot! Let it sit for 1-2 minutes without stirring. It will look like a weird, clumpy, spongy layer on top. Don’t panic—this is exactly what you want. It’s called “blooming.”
- Dissolve the Gelatin (2 minutes): Now, whisk the mixture vigorously. Start slowly so you don’t splash, then increase your speed. The clumps will break up, and the liquid will become smooth, glossy, and slightly thicker. If you see a few tiny lumps, that’s okay—they’ll dissolve as you whisk. If you have stubborn lumps, you can place the bowl over a pot of simmering water (a double boiler) and whisk until smooth.
- Pour into Molds (5 minutes): Place your silicone molds on a small baking sheet (this makes them easier to move). Carefully pour the liquid mixture into your glass measuring cup with a spout. Then, slowly pour the liquid into the molds. Fill them almost to the top. A dropper is great for the tiny details, like the ears on a bear mold. Don’t worry about a few bubbles on the surface—they usually pop on their own.
- Set in the Fridge (2-3 hours): Carefully transfer the baking sheet with the molds to the refrigerator. Let them set for at least 2 hours, but 3 is better for a firmer texture. Resist the urge to poke them! The waiting is the hardest part.
- Pop Them Out (2 minutes): Once they are firm and bouncy to the touch, gently flex the silicone mold. The gummies should pop right out. If they stick, you can place the mold in the freezer for 5 minutes. Store them in an airtight container in the fridge.
Cooking Tips & Techniques
I’ve made a lot of batches of these gummies, and I’ve definitely learned a few things the hard way. Here are my best tips to make your first batch perfect.
- Don’t Boil the Honey: Raw honey has amazing enzymes and benefits, but heat destroys them. Make sure your elderberry tea has cooled down a bit before you add the honey. If it’s still steaming hot, let it sit for 5 minutes.
- The “Sprinkle” Technique is Key: I cannot stress this enough. If you dump all the gelatin in at once, you’ll get a giant, impossible-to-dissolve clump. Sprinkling it evenly over the surface gives each granule a chance to hydrate individually, which leads to a smooth, lump-free mixture.
- Low Heat for Stubborn Lumps: If your mixture looks a little grainy after whisking, don’t panic. Place the bowl over a pot of barely simmering water (make sure the bowl isn’t touching the water) and whisk gently. The gentle heat will melt any remaining gelatin crystals.
- Deal with Foam: Sometimes, when you whisk, you get a layer of foam on top. If you pour this into the molds, it will set into a cloudy, less pretty top on your gummies. You can skim the foam off with a spoon before pouring, or you can spray the mixture very lightly with a cooking spray (like avocado oil spray) to break the surface tension and pop the bubbles.
- Timing is Everything: Work quickly once the gelatin is dissolved. The mixture will start to set as it cools. If it gets too thick to pour, just place the bowl back over the warm water for a minute to loosen it up again.
Variations & Adaptations
One of the best things about this recipe is how easy it is to change up. Here are a few of my favorite ways to make it my own.
- The “Immune Bomb” Version: After you’ve dissolved the gelatin, stir in a ½ teaspoon of powdered vitamin C (the kind that dissolves easily) and a few drops of a high-quality echinacea or propolis tincture. It makes the gummies a little more tart, but the immune boost is incredible. I do this when I feel like we’ve been exposed to something.
- The Berry Blend: Swap out half the water for a strong, unsweetened hibiscus or rosehip tea. Hibiscus adds a beautiful bright red color and a tangy flavor that pairs perfectly with the elderberry. Rosehip adds another layer of vitamin C. You can also add a handful of dried goji berries to the simmering pot for an extra antioxidant punch.
- The “Grown-Up” Gummy: For the adults, reduce the honey to 2 tablespoons and add a ¼ teaspoon of ground ginger and a pinch of cayenne pepper to the simmering tea. It creates a warming, spicy gummy that is fantastic for soothing a scratchy throat. The heat from the cayenne is a nice kick!
- The Fruit Juice Swap: If your kids are really resistant to the earthy flavor of elderberries, you can use ½ cup of elderberry concentrate and ½ cup of a clear fruit juice like apple or white grape juice. This makes a milder, sweeter gummy that is still packed with goodness.
Serving & Storage Suggestions
These gummies are best enjoyed cold, straight from the fridge. The texture is perfectly firm and chewy at that temperature. I like to serve them in a little bowl as a “treat” after breakfast or pack them in a small container for a school lunch.
They pair beautifully with a warm cup of herbal tea on a chilly afternoon, or you can even pop a few in your mouth before heading out the door in the morning for a quick immune boost. For a fun snack board, arrange them on a plate with some cheese cubes, apple slices, and a few nuts (for the adults).
Storage Instructions: Store the gummies in an airtight container in the refrigerator. They will stay fresh and bouncy for up to 2 weeks. I usually make a double batch and keep them in a glass jar in the fridge. They never last that long in my house!
Freezing Instructions: You can absolutely freeze these gummies! Place them in a single layer on a parchment-lined baking sheet and freeze for 1-2 hours, or until solid. Then, transfer them to a freezer-safe bag or container. They will keep for up to 3 months. You can eat them frozen (they are like a little fruity ice cube), or let them thaw in the fridge for a few minutes. The texture is slightly softer after freezing, but they are still delicious.
Nutritional Information & Benefits
This recipe is a powerhouse of natural immune support. While I’m not a doctor, I love knowing exactly what’s going into my family’s bodies.
Estimated Nutritional Information (per serving of 5-6 gummies):
- Calories: ~45
- Carbohydrates: ~10g
- Sugar: ~8g (from honey and berries)
- Protein: ~4g (from the gelatin)
- Fat: 0g
Key Benefits:
- Elderberries: Are packed with antioxidants called anthocyanins, which help support a healthy immune system. They are also a good source of vitamin C and dietary fiber.
- Gelatin: Is excellent for gut health, skin, hair, and nails. It’s a great source of protein and glycine, which supports healthy sleep.
- Raw Honey: Has natural antibacterial and antiviral properties. It can also help soothe a sore throat.
Dietary Considerations: This recipe is naturally gluten-free, dairy-free, and refined sugar-free. If you are using a strict vegan diet, this recipe is not suitable due to the gelatin.
Conclusion
Honestly, this recipe is a little bit of kitchen magic. It turns a simple, powerful berry into something my kids actually look forward to eating. It’s a small, tangible way to take control of our family’s wellness during the sniffle season, and it makes me feel like a superhero mom—even if it’s just for a few minutes in the morning while they happily chew their “candy.”
I really hope you give these a try. Don’t be afraid to mess with the flavors a little—add more lemon, use a different kind of honey, or try a different mold shape. The best recipe is the one that works for your family. If you make a batch, I’d love to hear about it! Drop a comment below and tell me what shapes you used or if your kids gave them a thumbs up. Happy cooking, and here’s to a healthy, happy season!
Frequently Asked Questions
Can I use elderberry syrup instead of dried berries?
Yes, you can! If you have a bottle of high-quality elderberry syrup, you can use 1 cup of it in place of the tea. Just skip the simmering and straining steps. Warm the syrup gently, add the honey (you might need less), and then bloom the gelatin in the warm syrup. The flavor will be a bit milder and sweeter.
My gummies came out too hard. What did I do wrong?
This usually happens if you used too much gelatin or if you simmered the tea for too long, making it too concentrated. Make sure you are measuring your gelatin carefully (spooning it into the spoon, not scooping). Also, ensure you have exactly 1 cup of liquid after straining the berries. If you have less, add a little water to make up the difference.
Can I make these without a silicone mold?
Absolutely! The easiest alternative is to pour the mixture into a small, greased glass baking dish (like an 8×4 inch loaf pan). Let it set in the fridge, then turn it out onto a cutting board and cut it into small squares with a sharp knife or a pizza cutter. You can even use small cookie cutters to make fun shapes.
How many gummies should I give my child per day?
This is a great question, and it’s always best to consult with your pediatrician for specific advice. Generally, for immune support, 2-3 gummies per day for a child under 5, and 3-5 gummies for older kids and adults is a good guideline. They are a supplement, not a candy, so moderation is key.
Why did my gummies get a weird, rubbery skin on top?
That’s usually just a skin that forms if the mixture was a little too hot when you poured it, or if it wasn’t covered while setting. The skin is perfectly safe to eat. To prevent it next time, make sure your mixture isn’t boiling hot when you pour it, and cover the molds loosely with a piece of plastic wrap or a lid while they set in the fridge.
Pin This Recipe!
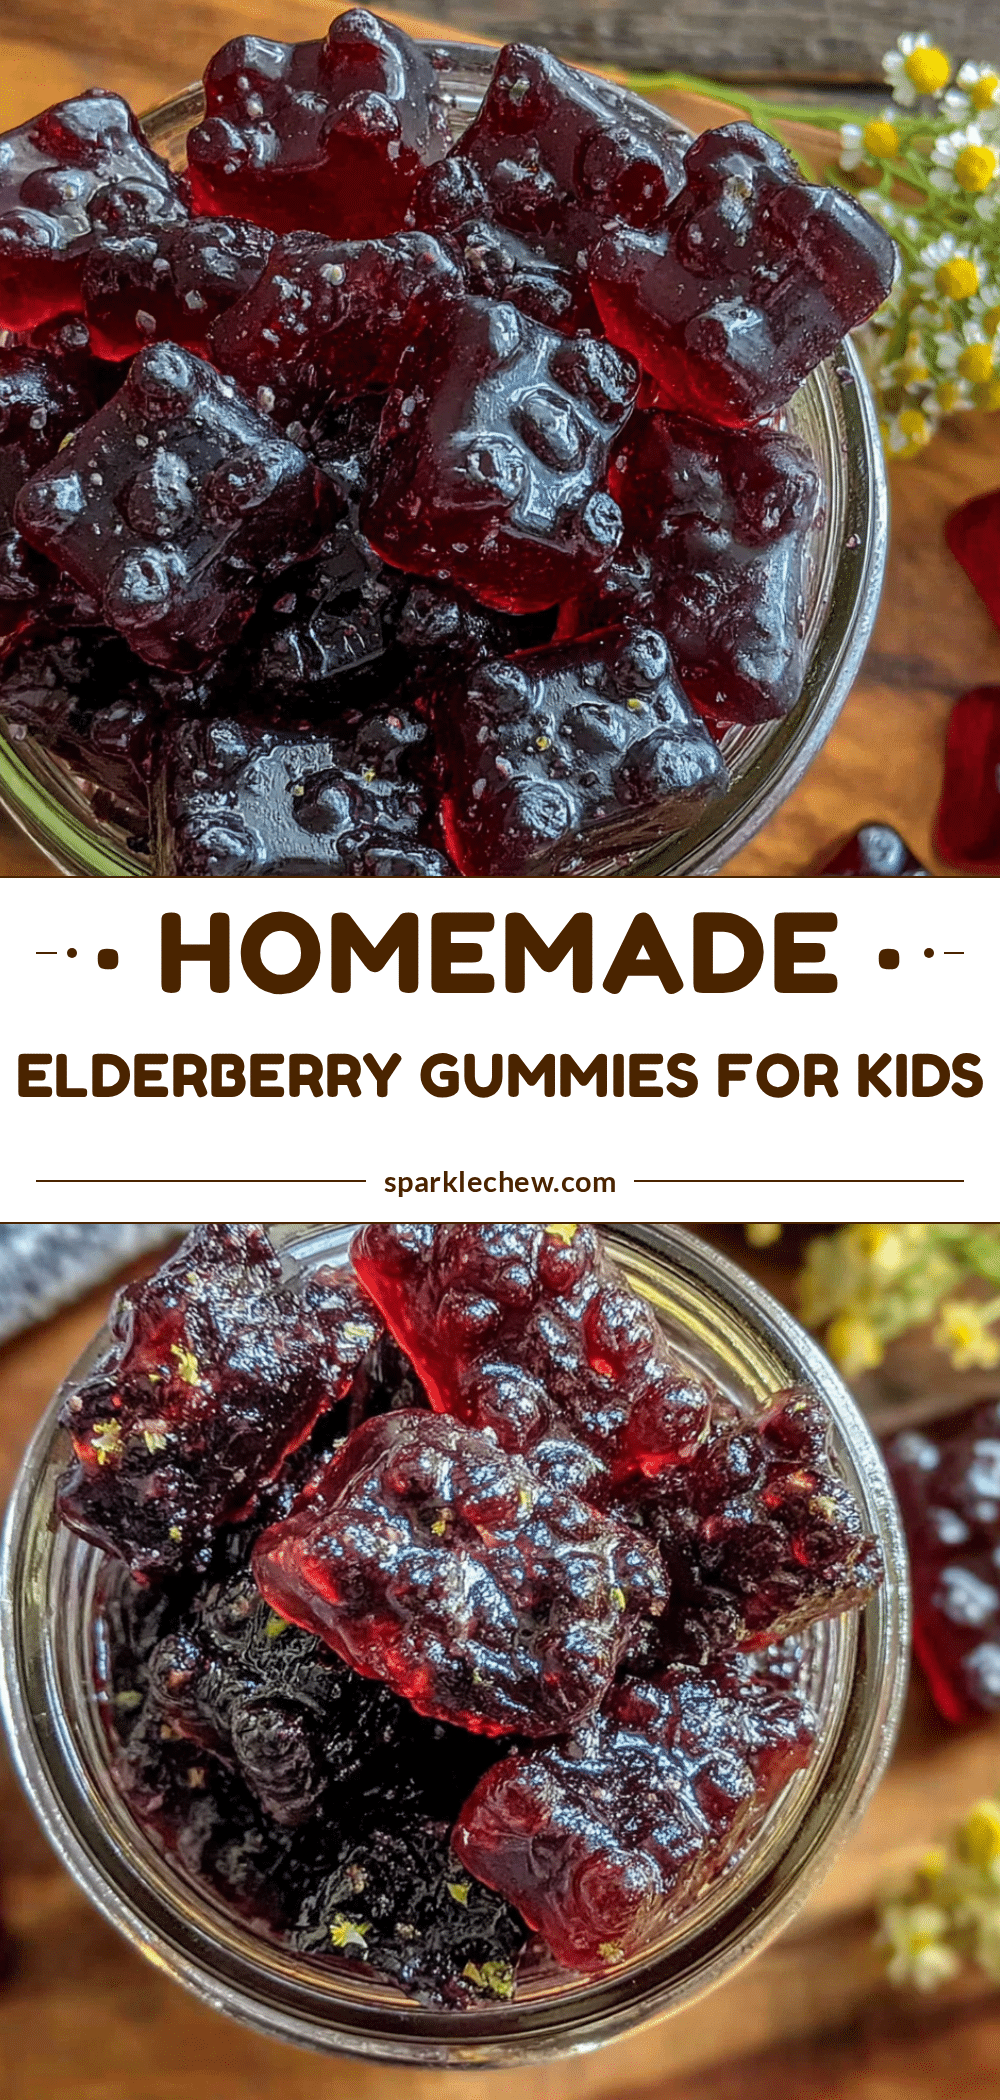
Best Homemade Elderberry Gummies for Kids
These homemade elderberry gummies are a fun, tasty way to support your family’s immune system during cold season. Made with simple ingredients like dried elderberries, honey, and gelatin, they are a quick and easy treat that kids love.
- Prep Time: 10 minutes
- Cook Time: 20 minutes
- Total Time: 2 hours 30 minutes (including setting time)
- Yield: 4 servings 1x
- Category: Snack
- Cuisine: American
Ingredients
- ½ cup dried elderberries
- 2 cups water
- 3–4 tablespoons raw honey
- 4 tablespoons gelatin (beef or pork)
- 1 tablespoon lemon juice (optional)
- Tincture or vitamin C powder (optional)
Instructions
- Make the concentrated elderberry tea: In a small saucepan, combine ½ cup dried elderberries and 2 cups water. Bring to a boil over medium-high heat, then reduce heat to low and simmer uncovered for 15-20 minutes until liquid reduces by half.
- Strain the berries: Place a fine-mesh strainer over a mixing bowl. Pour the hot liquid and berries through the strainer, pressing on the berries with a spoon to extract all the juice. You should have about 1 cup of concentrated liquid. Discard the spent berries.
- Add honey and lemon: While the tea is still warm (not boiling), add 3 tablespoons raw honey and 1 tablespoon lemon juice. Whisk until honey is dissolved. Taste and add more honey if desired.
- Bloom the gelatin: Sprinkle 4 tablespoons gelatin evenly over the surface of the warm elderberry mixture. Let it sit for 1-2 minutes without stirring. It will look clumpy and spongy.
- Dissolve the gelatin: Whisk vigorously until the mixture is smooth, glossy, and slightly thicker. If lumps remain, place the bowl over a pot of simmering water (double boiler) and whisk until smooth.
- Pour into molds: Place silicone molds on a small baking sheet. Pour the mixture into a glass measuring cup with a spout, then carefully pour into the molds, filling almost to the top. Use a dropper for small details.
- Set in the fridge: Transfer the baking sheet to the refrigerator and let set for at least 2-3 hours until firm and bouncy.
- Pop them out: Gently flex the silicone molds to release the gummies. If they stick, place the mold in the freezer for 5 minutes. Store in an airtight container in the fridge.
Notes
Do not boil the honey to preserve its enzymes. Sprinkle gelatin evenly to avoid clumps. Work quickly once gelatin is dissolved as mixture will start to set. For stubborn lumps, use a double boiler. Skim foam off before pouring for clearer gummies.
Nutrition
- Serving Size: 5-6 gummies
- Calories: 45
- Sugar: 8
- Carbohydrates: 10
- Protein: 4
Keywords: elderberry gummies, homemade gummies, immune support, kids snacks, elderberry recipe, healthy gummies, natural remedy


