Love this? Save it for later!
Share the inspiration with your friends
My husband had claimed to hate pumpkin desserts for eleven years. Eleven. He’d make a face at the pumpkin pie every Thanksgiving, push the pumpkin bread to the side of his plate, and politely decline anything that even whispered of pumpkin spice. Then last October, I made these mini pumpkin cheesecake bites “just for the kids” and found him standing at the counter, three of them gone, with that guilty look of someone caught red-handed. “These aren’t really pumpkin,” he mumbled, crumbs on his shirt. “They’re cheesecake.” And that, my friends, is how a skeptic becomes a convert.
I mean, I get it. Pumpkin desserts can be tricky. They can be too spicy, too mushy, or just too much. But these little bites? They’re different. The cream cheese mellows everything out, and the graham cracker crust gives that buttery crunch that just works. Honestly, I made them for a school bake sale first, and they disappeared before the cupcakes did. That’s when I knew this wasn’t just another recipe—it was the recipe.
Let me tell you, there’s something about the size that wins people over. Maybe you’ve been there—you want a little something sweet, but not a whole slice of cake. These mini cheesecake bites are exactly that. Two bites, maybe three, and you’re satisfied. Plus, they’re the kind of thing kids can help make without it turning into a disaster zone. My youngest crushed the graham crackers with a rolling pin, and yes, there were crumbs everywhere, but that’s part of the memory, right?
So whether you’re feeding picky eaters, looking for a budget-friendly fall dessert, or just trying to prove to your husband that pumpkin can actually be good—this one’s for you. These little bites changed my kitchen, and I think they’ll change yours too.
Why You’ll Love This Recipe
Look, I’ve tested a lot of pumpkin recipes over the years. Some were too dry, some were too sweet, and some just didn’t deliver on flavor. These mini pumpkin cheesecake bites are different. They’ve been tested by my family (including that skeptical husband), approved by my kids’ friends, and honestly, they’re the one dessert I can make for any fall gathering without worrying about leftovers.
- Budget-Friendly Ingredients: You probably have most of these in your pantry right now. Canned pumpkin, cream cheese, graham crackers—none of it breaks the bank. For a family feeding multiple mouths, that matters.
- Kid-Approved and Picky-Eater Tested: My kids devour these, and they’re not always on board with pumpkin. The cheesecake base makes it creamy and familiar, so even the skeptics come around.
- Simple Preparation: No water bath, no complicated techniques. If you can mix ingredients and press crumbs into a pan, you can make these. I’ve made them with a toddler “helping” and they still turned out perfect.
- Perfect for Busy Weeknights: These come together in about 20 minutes of hands-on time. The oven does the rest. While they’re baking, you can get dinner on the table or help with homework.
- Great for Leftovers: They actually taste better the next day. The flavors meld together, and the texture gets even creamier. Make them ahead for school lunches or after-school snacks.
What really sets this recipe apart is the ratio. I’ve seen versions that are too heavy on the pumpkin, making them taste like pumpkin pie filling in a crust. Not these. The cream cheese keeps things light and tangy, while the pumpkin adds just the right amount of fall flavor. It’s balanced, it’s satisfying, and it’s the kind of dessert that makes you close your eyes after the first bite.
And let’s be honest—when you’re feeding a family on a sensible budget, you need recipes that work. No fancy equipment, no expensive ingredients, just good food that everyone actually eats. These mini pumpkin cheesecake bites deliver on all fronts.
What Ingredients You Will Need
This recipe uses simple, wholesome ingredients that you can find at any grocery store. I’ve tested it with different brands and substitutions, so I’ll share what works best. The key is using quality ingredients where it counts—like real butter and full-fat cream cheese—because that’s where the flavor lives.
For the Crust
- 1 ½ cups graham cracker crumbs (about 12 full sheets, crushed finely) — I prefer Nabisco brand for consistent texture, but any brand works. You can also use vanilla wafer crumbs for a different twist.
- ¼ cup granulated sugar — Just regular white sugar. It helps the crust hold together and adds a touch of sweetness.
- 6 tablespoons unsalted butter, melted — Use real butter here, not margarine. It makes the crust richer and helps it set properly. If you’re dairy-free, you can use melted coconut oil, but the texture will be slightly different.
- Pinch of salt — Don’t skip this. It balances the sweetness and makes the crust taste more like a bakery version.
For the Cheesecake Filling
- 16 ounces cream cheese, softened to room temperature — This is non-negotiable. Cold cream cheese creates lumps. I use Philadelphia brand because it’s consistently creamy, but store brands work fine too. Let it sit on the counter for at least 30 minutes before starting.
- ¾ cup granulated sugar — Enough to sweeten without being cloying. If you prefer a less sweet version, you can reduce it to ½ cup.
- 2 large eggs, room temperature — Room temperature eggs blend more smoothly into the batter. If you forgot to take them out, place them in a bowl of warm water for 5 minutes.
- 1 cup canned pumpkin puree — Not pumpkin pie filling! Look for 100% pure pumpkin. I like Libby’s brand for its consistent thickness and flavor.
- 1 teaspoon vanilla extract — Pure vanilla extract makes a difference, but imitation works fine if that’s what you have.
- 1 teaspoon pumpkin pie spice — You can buy it pre-mixed or make your own: ½ teaspoon cinnamon, ¼ teaspoon nutmeg, ¼ teaspoon ginger, and a pinch of cloves.
- ½ teaspoon ground cinnamon — Extra cinnamon because, well, it’s fall.
- ¼ teaspoon salt — Salt enhances all the other flavors. Don’t skip it.
For the Topping (Optional)
- ½ cup sour cream — This creates a simple tangy topping that complements the sweetness. You can use Greek yogurt as a lighter alternative.
- 1 tablespoon powdered sugar — Just enough to sweeten the topping without making it heavy.
- Whipped cream and a sprinkle of cinnamon — For serving. This makes them look fancy with almost zero effort.
One thing I’ve learned—if you’re buying graham crackers, get the regular honey kind, not the chocolate or cinnamon versions. The plain flavor lets the pumpkin and cheesecake shine. And for the pumpkin puree, I always buy an extra can because nothing’s worse than realizing you’re short halfway through.
Equipment Needed
You don’t need a fancy kitchen to make these mini pumpkin cheesecake bites. Here’s what I use:
- Mini muffin pan — The 24-cup size works perfectly. If you only have a 12-cup pan, just bake in batches. I bought mine at a thrift store for $3, so don’t feel like you need anything expensive.
- Mixing bowls — You’ll need a medium bowl for the crust and a large bowl for the filling. I use glass bowls because they’re easy to clean and don’t retain smells.
- Electric hand mixer or stand mixer — A hand mixer works great. You can mix by hand if you’re patient, but the cream cheese needs to be really smooth, and that’s easier with a mixer.
- Food processor or zip-top bag and rolling pin — For crushing graham crackers. I prefer the bag-and-rolling-pin method because my kids love helping with it, and there’s less cleanup.
- Measuring cups and spoons — Standard set. Nothing fancy.
- Rubber spatula — For scraping every last bit of filling into the pan. Waste not, want not.
- Cooking spray or paper liners — I use mini muffin liners because they make cleanup a breeze. If you don’t have liners, spray the pan generously with non-stick spray.
If you don’t have a mini muffin pan, you can use a regular muffin pan and adjust the baking time. They’ll be more like mini cheesecakes than bites, but they’ll still taste amazing. I’ve also used silicone mini muffin molds with great results—they pop right out without any greasing.
Preparation Method
Let me walk you through this step by step. I’ve made these so many times that I’ve got the rhythm down, and I’ll share all the little tricks I’ve learned along the way.
- Preheat your oven to 325°F (160°C). Line your mini muffin pan with paper liners or spray generously with non-stick cooking spray. Set aside.
- Make the crust. In a medium bowl, combine the graham cracker crumbs, sugar, and salt. Pour the melted butter over the top and stir with a fork until every crumb is moistened. It should look like wet sand. If it seems too dry, add another tablespoon of melted butter. If it seems too wet, add a tablespoon more crumbs. You want it to hold together when you squeeze a bit in your hand.
- Press the crust into the pan. Drop about 1 tablespoon of the crust mixture into each mini muffin cup. Use the bottom of a shot glass or a small measuring cup to press it down firmly. Really press it—this keeps the crust from falling apart when you eat them. I press until the crumbs are about ¼ inch thick and tightly packed. Work quickly while the butter is still warm.
- Bake the crust for 5 minutes. This step is optional but recommended. It helps the crust set and prevents it from getting soggy when you add the filling. While it bakes, start on the filling.
- Beat the cream cheese. In a large bowl, beat the softened cream cheese with an electric mixer on medium speed until smooth and creamy, about 2 minutes. Scrape down the sides of the bowl with a rubber spatula. There should be no lumps at this point. If there are, keep beating.
- Add the sugar. Gradually add the sugar and beat until combined, about 1 minute. Scrape the bowl again.
- Add the eggs one at a time. Beat in the first egg on low speed until just combined. Then add the second egg and beat until smooth. Don’t overmix—overbeating adds too much air and can cause cracks later. You just want it incorporated.
- Add the pumpkin and flavorings. Add the pumpkin puree, vanilla extract, pumpkin pie spice, cinnamon, and salt. Mix on low speed until everything is combined and the batter is a uniform orange color. Scrape the bowl one more time to make sure there are no streaks of cream cheese hiding at the bottom.
- Fill the crusts. Remove the pan from the oven (carefully—it’s hot). Spoon about 1 tablespoon of the cheesecake filling into each cup, filling them almost to the top. The filling will rise a little, but it won’t overflow if you leave a tiny bit of room. I use a small cookie scoop for this—it makes the process so much faster and keeps the portions even.
- Bake for 15-18 minutes. The edges should look set, but the centers will still jiggle slightly when you gently shake the pan. That’s perfect. They’ll continue to set as they cool. If you overbake them, they can crack, so keep an eye on them starting at the 15-minute mark.
- Cool completely in the pan. Place the pan on a wire rack and let the cheesecake bites cool for at least 30 minutes. Don’t try to remove them while they’re warm—they’re too delicate and will fall apart. Once they’re completely cool, you can pop them out of the pan.
- Make the topping (optional). In a small bowl, whisk together the sour cream and powdered sugar until smooth. Spoon a tiny dollop onto each cooled cheesecake bite and spread it gently. This adds a lovely tangy finish that balances the sweetness.
- Chill for at least 2 hours. This is the hardest part, I know. But trust me—chilling sets the texture and makes them taste even better. Cover the pan with plastic wrap and refrigerate. Overnight is even better.
A few things I’ve learned the hard way: If your cream cheese isn’t fully softened, you’ll end up with lumps that are impossible to get out. Give it the full 30 minutes on the counter. Also, if you’re using paper liners, they might peel away from the cheesecake slightly as they cool. That’s normal—just press them back gently. And if you get cracks? No worries. The topping covers them, and honestly, they still taste amazing.
Cooking Tips & Techniques
I’ve made these mini pumpkin cheesecake bites probably two dozen times now, and I’ve picked up some tricks that make the process smoother and the results more consistent. Let me share what I’ve learned.
Room temperature ingredients matter. I know, I know—every recipe says this. But here’s the thing: cold cream cheese creates lumps that no amount of beating will fully remove. Cold eggs can make the batter seize up. Take the time to let everything come to room temperature. I set my cream cheese, eggs, and sour cream on the counter an hour before I start. Set a timer so you don’t forget.
Don’t overmix the batter. Once you add the eggs, mix just until they’re incorporated. Overmixing incorporates too much air, which can cause the cheesecake to puff up and then collapse, creating cracks. You want a dense, creamy texture, not a fluffy one. If you see bubbles in your batter, you’ve mixed too much.
Use a water bath alternative. Traditional cheesecakes use a water bath to prevent cracking. For these mini bites, I’ve found that simply placing a small oven-safe dish of water on the rack below the muffin pan works just as well. The steam keeps the oven humid and prevents the tops from drying out. I always forget to do this, but when I remember, the results are noticeably better.
Watch the baking time closely. Every oven is different. My first batch came out overbaked because I trusted the timer blindly. Start checking at 15 minutes. The edges should be set and slightly puffed, but the centers should still jiggle when you shake the pan. They’ll firm up as they cool. If the tops are browning, your oven runs hot—reduce the temperature to 300°F next time.
Let them cool gradually. I made the mistake of moving the pan to a cold counter once, and the sudden temperature change caused cracks. Now I let them cool in the pan on a wire rack for 30 minutes, then transfer the pan to the refrigerator. Slow and steady wins the race.
Make ahead for best results. These truly taste better the next day. The flavors meld together, the texture becomes creamier, and the crust softens just slightly. I often make them on a Sunday afternoon for school lunches during the week. They keep beautifully in the fridge for up to 5 days.
Double the recipe for crowds. These disappear fast. For a bake sale or family gathering, I always make a double batch. The recipe scales perfectly, and you can bake them in batches if you only have one pan.
Variations & Adaptations
One of the things I love about this recipe is how flexible it is. I’ve tried several variations over the years, and they’ve all been hits. Here are some ideas to make these mini pumpkin cheesecake bites your own.
Gluten-Free Version: Swap the graham cracker crumbs for gluten-free graham crackers or use crushed gluten-free shortbread cookies. I’ve used Pamela’s gluten-free graham crackers with great results. The texture is slightly different—a bit more crumbly—but the flavor is spot on. You can also use almond flour mixed with a bit of sugar and butter for a naturally gluten-free crust.
Dairy-Free Adaptation: Use dairy-free cream cheese (I like Kite Hill or Violife) and coconut oil instead of butter in the crust. The texture will be slightly less creamy, but the flavor is still delicious. For the topping, use a dairy-free sour cream alternative or simply skip it. I’ve made this version for a friend with dairy allergies, and she couldn’t tell the difference.
Low-Sugar Option: Reduce the sugar in the filling to ½ cup and use a sugar substitute like Swerve or monk fruit sweetener. The crust can be made with a sugar substitute as well, though the texture might be slightly different. I’ve made these for a diabetic relative, and they were a hit. The pumpkin adds natural sweetness, so you don’t miss the sugar as much as you’d think.
Pumpkin Chocolate Chip Bites: Fold ½ cup of mini chocolate chips into the filling before spooning it into the crusts. The chocolate pairs beautifully with the pumpkin and spices. My kids beg for this version every time. Use dark chocolate chips for a less sweet option.
Gingersnap Crust: Replace the graham cracker crumbs with crushed gingersnap cookies. The spicy ginger flavor complements the pumpkin perfectly. I tried this for Thanksgiving one year, and it was the first thing to disappear from the dessert table. Just reduce the sugar in the crust to 2 tablespoons since gingersnaps are already sweet.
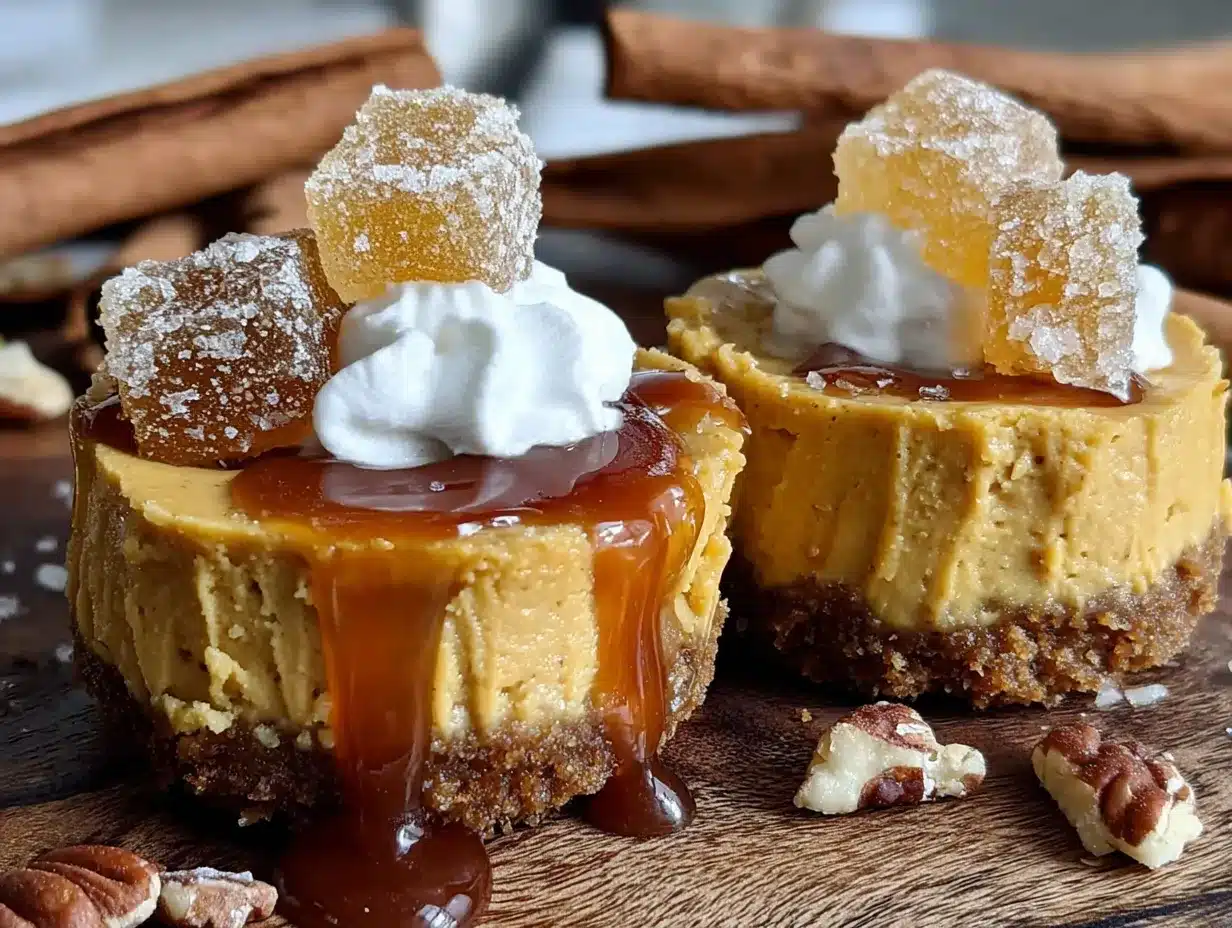
Pecan Praline Topping: After baking and cooling, top each bite with a small pecan half and a drizzle of caramel sauce. It makes them feel fancy for holiday parties. I’ve done this for Christmas gatherings, and they look like they came from a bakery.
Savory-Sweet Twist: Add a pinch of black pepper to the filling. It sounds strange, but black pepper enhances the pumpkin flavor and adds a subtle warmth. I learned this trick from a chef friend, and it’s become my secret ingredient.
Serving & Storage Suggestions
These mini pumpkin cheesecake bites are versatile little things. Here’s how I serve and store them for the best results.
Serving Temperature: I prefer them cold, straight from the refrigerator. The texture is firmer, and the flavors are more pronounced. But they’re also delicious at room temperature—just let them sit out for 10-15 minutes before serving. For a special treat, I sometimes serve them with a dollop of freshly whipped cream and a sprinkle of cinnamon.
Presentation Ideas: Arrange them on a white platter or cake stand for a beautiful display. Dust the tops with a little cinnamon or pumpkin pie spice just before serving. For parties, I place them in mini paper liners (the decorative ones) so guests can grab them easily. They look especially pretty on a fall-themed table with mini pumpkins and leaves as decorations.
Complementary Dishes: These pair beautifully with coffee, hot apple cider, or a warm cup of chai tea. For a dessert spread, serve them alongside apple crisp or pumpkin bread for a full fall experience. They’re also great on a brunch table with baked oatmeal and fresh fruit.
Storage Instructions: Store the cheesecake bites in an airtight container in the refrigerator for up to 5 days. Layer them between sheets of wax paper to prevent sticking. I use a glass container with a tight-fitting lid, and they stay fresh and creamy. Do not leave them at room temperature for more than 2 hours, especially if you’re serving them at a party.
Freezing Instructions: These freeze beautifully. Place the cooled, unfrosted cheesecake bites on a baking sheet and freeze until solid, about 2 hours. Transfer them to a freezer-safe bag or container, separating layers with wax paper. They’ll keep for up to 3 months. To thaw, transfer them to the refrigerator overnight. Add the topping after thawing, just before serving.
Reheating: I don’t recommend reheating these—they’re meant to be served cold or at room temperature. If you prefer them slightly warm, let them sit out for 20 minutes after removing from the fridge. The texture will soften without becoming mushy.
How Flavors Develop: Honestly, these get better with time. The first day, they’re good. The second day, they’re great. By the third day, the flavors have melded together perfectly, and the texture is at its creamiest. So don’t feel like you have to serve them right away. Make them a day or two ahead for the best results.
Nutritional Information & Benefits
I’m not a nutritionist, but I’ve done my research to give you a general idea of what’s in these mini pumpkin cheesecake bites. Remember, these are a treat—enjoy them in moderation.
| Nutrient | Per Bite (1 piece) |
|---|---|
| Calories | 145 |
| Total Fat | 9g |
| Saturated Fat | 5g |
| Cholesterol | 35mg |
| Sodium | 115mg |
| Total Carbohydrates | 14g |
| Dietary Fiber | 1g |
| Sugars | 10g |
| Protein | 3g |
| Vitamin A | 35% DV |
| Calcium | 4% DV |
| Iron | 3% DV |
Health Benefits of Key Ingredients: Pumpkin is packed with vitamin A, which supports eye health and immune function. It’s also rich in fiber, which aids digestion. Cream cheese provides calcium for bone health, and the eggs add protein. The cinnamon in the spice blend has anti-inflammatory properties and may help regulate blood sugar. So while these are definitely a dessert, they’re not empty calories.
Dietary Considerations: This recipe contains dairy (cream cheese, butter, sour cream), eggs, and gluten (graham crackers). It can be adapted for gluten-free and dairy-free diets as noted in the variations section. It’s not suitable for a vegan diet without significant modifications. For nut-free diets, ensure your graham crackers are processed in a nut-free facility.
Potential Allergens: This recipe contains wheat (graham crackers), dairy, and eggs. If you’re serving these at a gathering, I recommend labeling them with allergen information so guests can make informed choices.
My Wellness Perspective: I believe in balance. These mini pumpkin cheesecake bites are a treat, and there’s nothing wrong with that. They’re made with real ingredients, and they bring joy to the people I feed. For me, that’s a win. I serve them alongside a balanced meal, and no one feels deprived. Food should be enjoyed, and these little bites are definitely enjoyable.
Conclusion
These mini pumpkin cheesecake bites have become a fall tradition in my house, and I think they’ll become one in yours too. They’re the kind of recipe that proves you don’t need fancy ingredients or complicated techniques to make something truly special. Just good butter, quality cream cheese, and a little bit of pumpkin magic.
What I love most about this recipe is how it brings people together. My kids help crush the graham crackers, my husband (the former pumpkin hater) sneaks them from the fridge, and our neighbors always ask for the recipe after our annual fall gathering. It’s more than just a dessert—it’s a little piece of comfort that makes the season feel complete.
I’d love to hear how these turn out for you. Did you try any of the variations? Did your picky eaters approve? Drop a comment below and let me know. And if you have a favorite fall dessert that’s won over a skeptic in your family, share that too. We’re all in this together, figuring out how to make meals that everyone actually eats.
So go ahead—preheat that oven, get out your mini muffin pan, and make some memories. These little bites are worth every minute. Happy baking, friends!
Frequently Asked Questions
Can I use fresh pumpkin instead of canned?
Yes, you can use fresh pumpkin puree. Just make sure to strain it well after blending to remove excess moisture. Canned pumpkin is more consistent in texture, which is why I recommend it for this recipe. If you use fresh, you might need to reduce the baking time slightly since fresh pumpkin has more water content.
Why did my cheesecake bites crack on top?
Cracks usually happen from overbaking or sudden temperature changes. Make sure to take them out when the centers are still slightly jiggly. Also, let them cool gradually in the pan before moving to the fridge. If they do crack, don’t worry—the sour cream topping or a dollop of whipped cream covers them perfectly.
Can I make these in a regular muffin pan?
Absolutely! Use a regular 12-cup muffin pan and increase the baking time to 20-25 minutes. You’ll get larger cheesecake cups rather than bites. The texture and flavor will be the same—they’ll just be bigger portions. Adjust the crust and filling amounts accordingly (about double per cup).
How do I know when they’re done baking?
The edges should look set and slightly puffed, but the centers should still jiggle when you gently shake the pan. Think of it like Jell-O—firm around the edges, wobbly in the middle. They’ll continue to set as they cool. If the tops are browning, they’re overdone.
Can I skip the sour cream topping?
Yes, the topping is completely optional. The cheesecake bites are delicious on their own. The sour cream topping adds a tangy contrast and makes them look fancier, but it’s not necessary. If you skip it, just dust them with a little cinnamon before serving for a pretty finish.
Pin This Recipe!
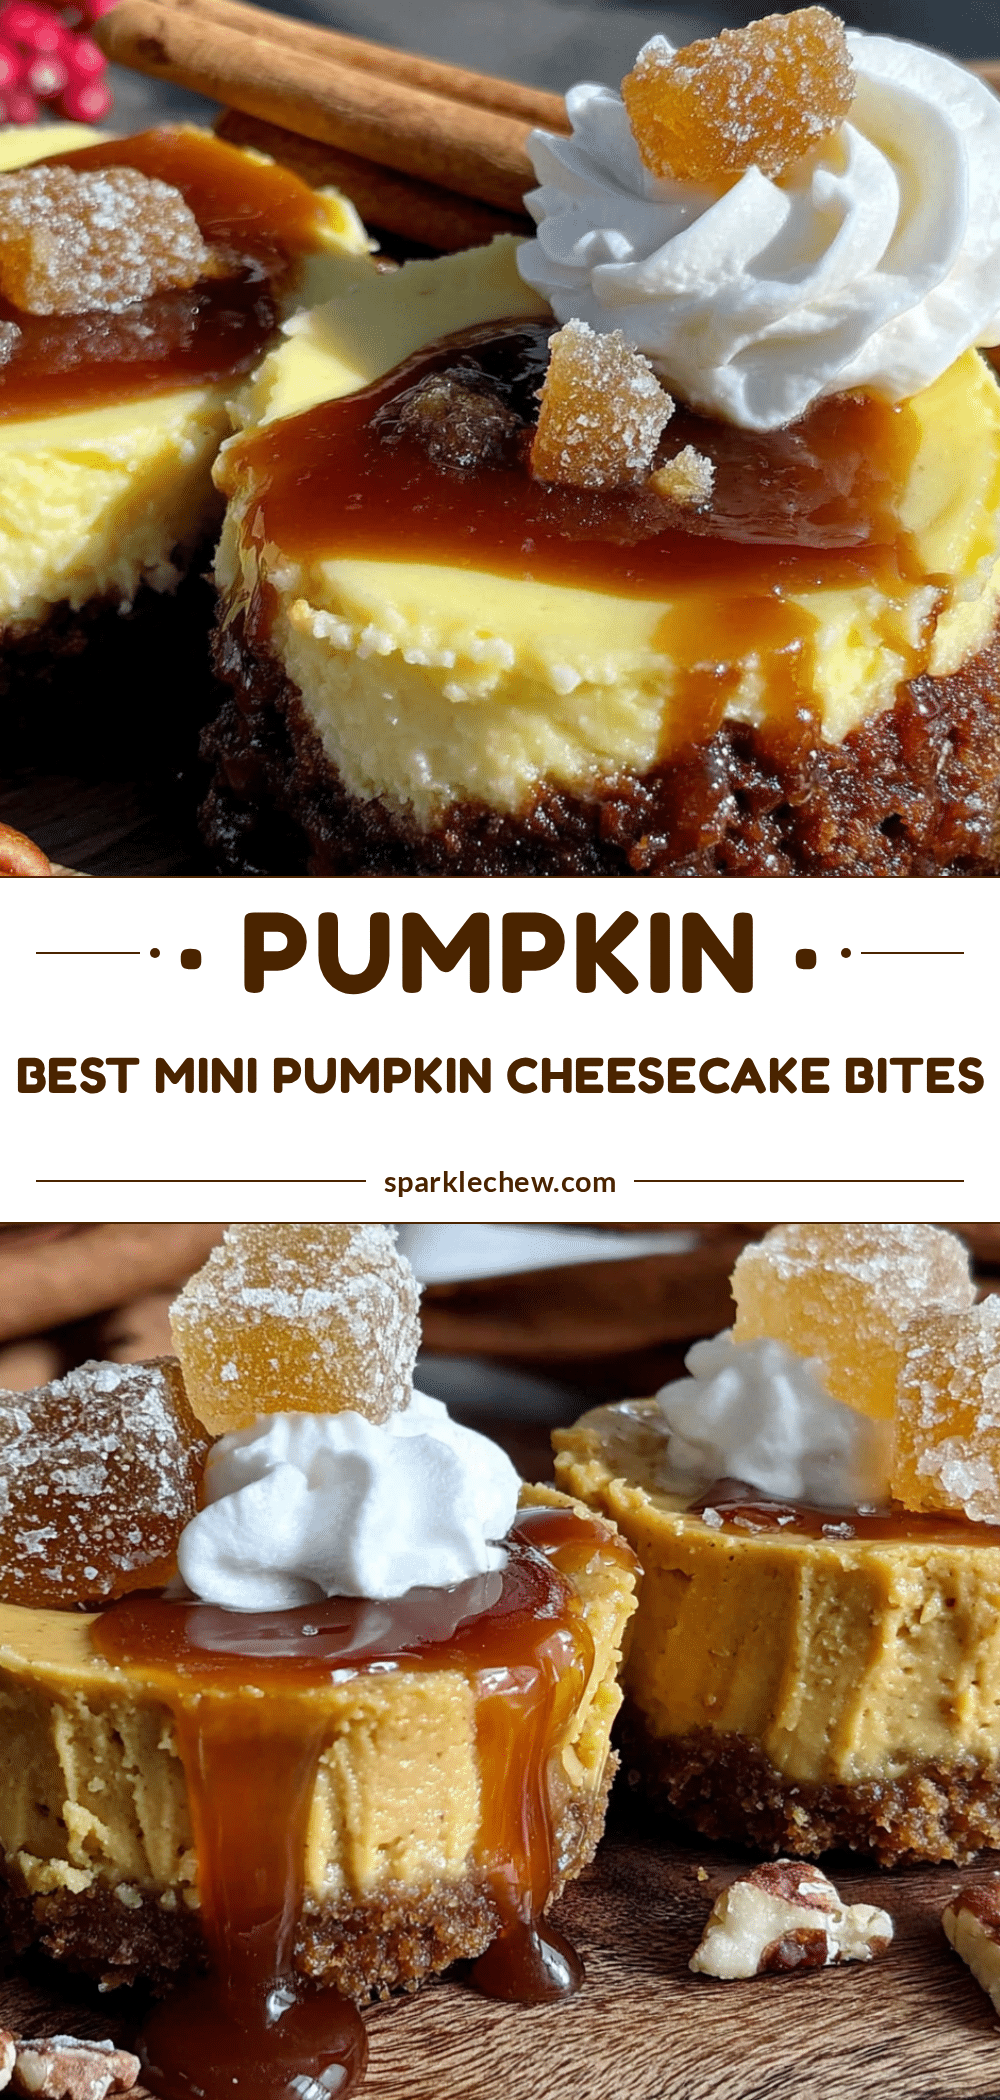
Best Mini Pumpkin Cheesecake Bites: Easy Kid-Approved Fall Dessert
These mini pumpkin cheesecake bites are a creamy, kid-approved fall dessert with a buttery graham cracker crust. Perfect for picky eaters and budget-friendly, they come together in just 20 minutes of hands-on time.
- Prep Time: 20 minutes
- Cook Time: 18 minutes
- Total Time: 2 hours 38 minutes (includes chilling)
- Yield: 24 servings 1x
- Category: Dessert
- Cuisine: American
Ingredients
- 1 ½ cups graham cracker crumbs (about 12 full sheets, crushed finely)
- ¼ cup granulated sugar
- 6 tablespoons unsalted butter, melted
- Pinch of salt
- 16 ounces cream cheese, softened to room temperature
- ¾ cup granulated sugar
- 2 large eggs, room temperature
- 1 cup canned pumpkin puree (not pumpkin pie filling)
- 1 teaspoon vanilla extract
- 1 teaspoon pumpkin pie spice
- ½ teaspoon ground cinnamon
- ¼ teaspoon salt
- ½ cup sour cream (for topping, optional)
- 1 tablespoon powdered sugar (for topping, optional)
- Whipped cream and cinnamon for serving (optional)
Instructions
- Preheat your oven to 325°F (160°C). Line your mini muffin pan with paper liners or spray generously with non-stick cooking spray. Set aside.
- Make the crust: In a medium bowl, combine the graham cracker crumbs, sugar, and salt. Pour the melted butter over the top and stir with a fork until every crumb is moistened. It should look like wet sand.
- Press the crust into the pan: Drop about 1 tablespoon of the crust mixture into each mini muffin cup. Use the bottom of a shot glass or a small measuring cup to press it down firmly until about ¼ inch thick and tightly packed.
- Bake the crust for 5 minutes (optional but recommended). While it bakes, start on the filling.
- Beat the cream cheese: In a large bowl, beat the softened cream cheese with an electric mixer on medium speed until smooth and creamy, about 2 minutes. Scrape down the sides of the bowl.
- Add the sugar: Gradually add the sugar and beat until combined, about 1 minute. Scrape the bowl again.
- Add the eggs one at a time: Beat in the first egg on low speed until just combined. Then add the second egg and beat until smooth. Do not overmix.
- Add the pumpkin and flavorings: Add the pumpkin puree, vanilla extract, pumpkin pie spice, cinnamon, and salt. Mix on low speed until everything is combined and the batter is a uniform orange color. Scrape the bowl one more time.
- Fill the crusts: Remove the pan from the oven. Spoon about 1 tablespoon of the cheesecake filling into each cup, filling them almost to the top.
- Bake for 15-18 minutes: The edges should look set, but the centers will still jiggle slightly when you gently shake the pan.
- Cool completely in the pan: Place the pan on a wire rack and let the cheesecake bites cool for at least 30 minutes. Do not remove while warm.
- Make the topping (optional): In a small bowl, whisk together the sour cream and powdered sugar until smooth. Spoon a tiny dollop onto each cooled cheesecake bite and spread gently.
- Chill for at least 2 hours: Cover the pan with plastic wrap and refrigerate. Overnight is even better.
Notes
Room temperature ingredients are crucial for a smooth batter. Do not overmix after adding eggs to prevent cracks. For a water bath alternative, place a small oven-safe dish of water on the rack below the muffin pan. These taste even better the next day. Store in an airtight container in the refrigerator for up to 5 days or freeze for up to 3 months.
Nutrition
- Serving Size: 1 bite
- Calories: 145
- Sugar: 10
- Sodium: 115
- Fat: 9
- Saturated Fat: 5
- Carbohydrates: 14
- Fiber: 1
- Protein: 3
Keywords: mini pumpkin cheesecake bites, pumpkin cheesecake, fall dessert, kid-friendly, easy cheesecake, mini cheesecake, pumpkin dessert


