Love this? Save it for later!
Share the inspiration with your friends
My sister-in-law, Jen, wasn’t trying to show off. She’d invited us over for a casual Sunday barbecue—burgers, hot dogs, the usual. I walked into her kitchen to grab a drink, and that’s when it hit me. This incredible, rich smell of chocolate and peanut butter, so thick and inviting it practically stopped me in my tracks. She was just pulling a pan out of the oven, looking at her phone, completely nonchalant. “Oh, that’s just a poke cake,” she said when I asked. “Super easy.” Just a poke cake. She acted like she’d made boxed brownies.
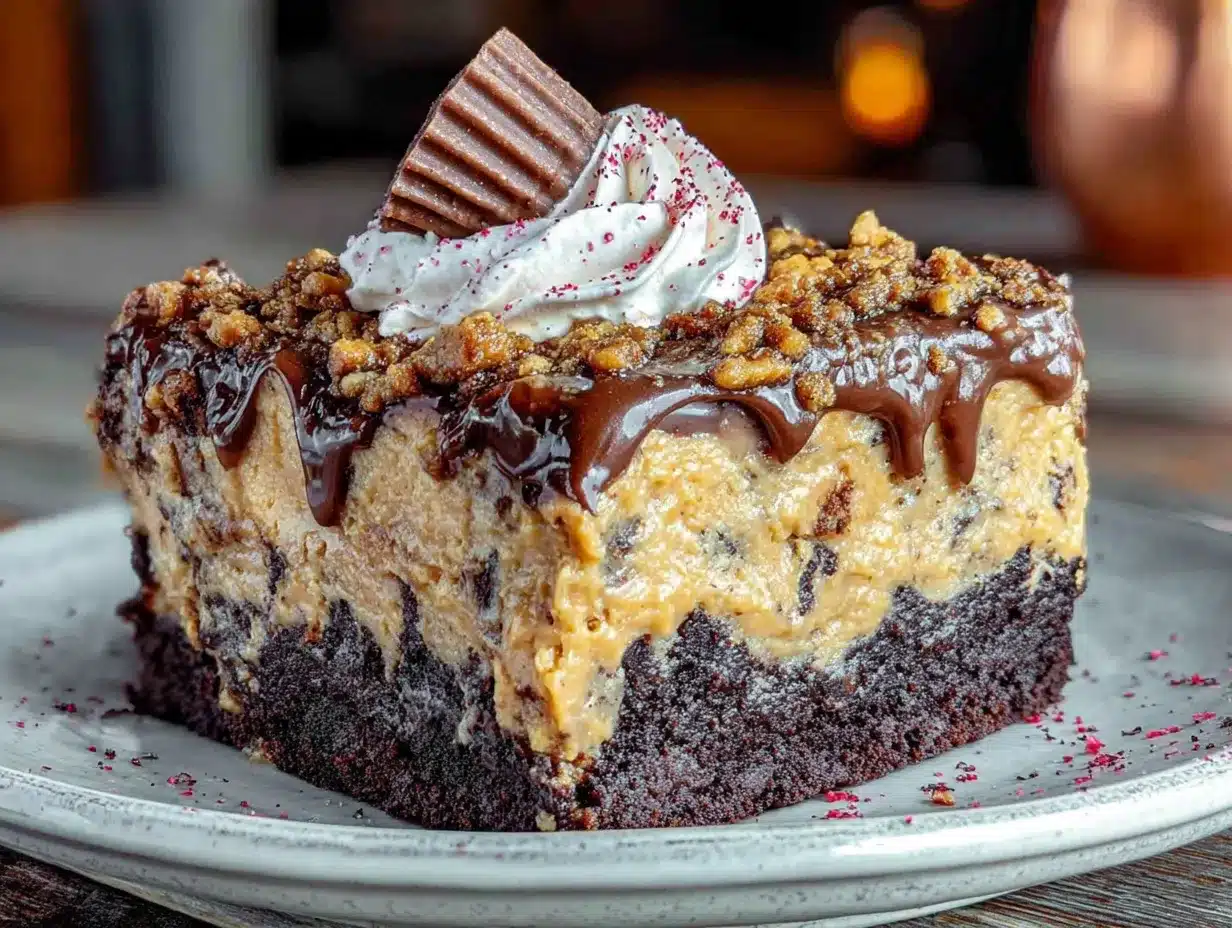
I mean, let me tell you, there was nothing “just” about it. The top was covered in what looked like melted peanut butter and chocolate, with a glossy drizzle that caught the afternoon sun. She hadn’t even bothered to put it on a fancy cake stand—it was just sitting there on the counter in a 9×13 pan, looking all kinds of perfect. I stood there for a solid minute, probably with my mouth slightly open, while she went back to texting her friend about a sale at Target. You know that feeling when you discover a recipe so good, so ridiculously indulgent, that you immediately start planning all the excuses to make it again? That was this cake for me.
That first bite was a revelation. The cake itself was incredibly moist—almost fudgy—and every single forkful had that perfect combo of smooth chocolate and salty-sweet peanut butter. It wasn’t dry or crumbly. It was the kind of dessert that makes you close your eyes for a second, just to focus on the flavor. I asked her for the recipe before I’d even finished my slice, and she just shrugged and said she’d text it to me. Honestly, her casual attitude about something so extraordinary was almost offensive. But I got the recipe, and I’ve been making it ever since. It’s become my go-to for potlucks, birthday parties, or, you know, a random Tuesday when I need a little pick-me-up. It’s the cake that gets the most compliments, and I never tell them how easy it really is.
Why You’ll Love This Recipe
This isn’t just another chocolate cake recipe. This is the Ultimate Reese’s Peanut Butter Chocolate Poke Cake, and it’s a game-changer for anyone who loves that classic, unbeatable flavor combo. I’ve tested this recipe more times than I can count, tweaking the ratios and the technique until it was absolutely perfect. It’s the kind of dessert that looks like you spent hours on it, but secretly comes together in a snap. Here’s why you’re going to absolutely love it:
- Incredibly Easy: We’re starting with a boxed cake mix, so there’s no fussing with flour and sugar. The magic is all in the “poking” and the layers of flavor. It’s perfect for beginner bakers or anyone short on time.
- Guaranteed Crowd-Pleaser: Seriously, I have never met a single person who doesn’t love this cake. The combination of rich chocolate, creamy peanut butter, and sweetened condensed milk is a universal hit. Kids and adults alike go completely crazy for it.
- Unbelievably Moist: The secret is the sweetened condensed milk that gets poured over the warm cake. It seeps into all those little holes, creating a texture that’s almost like a cross between a cake and a pudding. It stays moist for days.
- Perfect for Any Occasion: Need a dessert for a summer BBQ? A holiday party? A simple weeknight treat? This cake fits the bill. It’s easy to transport, feeds a crowd, and always looks impressive.
- Next-Level Flavor: This isn’t just chocolate cake with peanut butter on top. We’re layering flavors: a rich chocolate base, a sweet and sticky peanut butter filling, and a decadent chocolate ganache topping. Every bite is a perfect balance of sweet, salty, and rich.
This recipe is the one you’ll turn to again and again. It’s comfort food at its finest—simple, indulgent, and guaranteed to make everyone smile. It’s the kind of dessert that makes you look like a hero with almost zero effort. And honestly, who doesn’t want that?
What Ingredients You Will Need
This recipe relies on simple, pantry-friendly ingredients to create something truly spectacular. The beauty of this poke cake is that it uses a few key components to build layers of incredible flavor and texture. You likely have most of these items in your kitchen already.
- For the Cake Base:
- 1 box (15.25 oz) chocolate cake mix (I prefer Duncan Hines or Betty Crocker for consistent results)
- Ingredients called for on the cake mix box (typically eggs, oil, and water)
- Note: Using a high-quality cake mix makes a difference. I find the ones with pudding in the mix create a slightly denser, more fudge-like texture which is perfect for this recipe.
- For the Peanut Butter Filling:
- 1 can (14 oz) sweetened condensed milk
- 3/4 cup creamy peanut butter (use a standard brand like Jif or Skippy; natural peanut butter that separates can sometimes make the filling grainy)
- 1 teaspoon vanilla extract
- Tip: Make sure your sweetened condensed milk is at room temperature so it blends smoothly with the peanut butter.
- For the Chocolate Ganache Topping:
- 1 1/2 cups semi-sweet chocolate chips (I like Ghirardelli or Guittard for a smooth melt)
- 1 cup heavy cream
- Substitution: If you don’t have heavy cream, you can use full-fat coconut milk for a dairy-free ganache. It won’t be quite as rich, but it still works beautifully.
- For the Topping:
- 1 cup chopped Reese’s Peanut Butter Cups (about 10-12 miniatures or 4-5 regular cups)
- 1/4 cup chocolate shavings or sprinkles (optional, for garnish)
- Flaky sea salt (optional, but highly recommended for that sweet-salty contrast)
The ingredients are simple, but the way they come together is pure magic. The sweetened condensed milk and peanut butter create a luscious, gooey layer that soaks into the cake, while the ganache provides a rich, fudgy finish. The chopped Reese’s cups on top add that final touch of texture and visual appeal. Don’t skip the flaky sea salt if you have it—it really makes the chocolate and peanut butter flavors pop.
Equipment Needed
You don’t need a ton of fancy equipment for this recipe, which is part of its charm. Here’s what you’ll need to have on hand:
- 9×13-inch Baking Pan: A metal or glass pan works perfectly. A metal pan will give you slightly crispier edges, while glass bakes a bit more evenly. I’ve used both, and honestly, the results are always fantastic.
- Mixing Bowls: You’ll need one large bowl for the cake batter and a smaller one for the filling and ganache.
- Whisk or Electric Mixer: You can whisk the cake batter by hand, but an electric hand mixer makes it even easier to get a smooth, lump-free batter.
- Wooden Spoon or Spatula: For stirring the filling and ganache.
- Measuring Cups and Spoons: Essential for accurate measurements.
- The Handle of a Wooden Spoon (or a straw): This is the most important tool! You’ll use it to poke the holes in the warm cake. The round shape creates perfect little wells for the filling to soak into.
- Saucepan: For heating the heavy cream for the ganache.
- Knife and Cutting Board: For chopping the Reese’s cups.
- Cooling Rack: Optional, but it helps the cake cool evenly.
If you don’t have a wooden spoon handle, a clean chopstick or even a large drinking straw will work. The key is to make holes that are wide enough for the filling to seep in. Don’t overthink the equipment—this is a forgiving recipe that doesn’t require any specialized gadgets.
Preparation Method
- Preheat and Prep: Preheat your oven to 350°F (175°C). Grease a 9×13-inch baking pan generously with butter or non-stick cooking spray. You want to make sure the cake doesn’t stick, as you’ll be poking holes in it later.
- Bake the Cake: Prepare the chocolate cake mix according to the package directions. Usually, this means combining the mix with eggs, oil, and water. Pour the batter into your prepared pan and spread it evenly. Bake for 25-30 minutes, or until a toothpick inserted into the center comes out clean or with a few moist crumbs. Don’t overbake it, or the cake will be dry.
- Make the Peanut Butter Filling: While the cake is baking, make the filling. In a medium bowl, combine the sweetened condensed milk, creamy peanut butter, and vanilla extract. Whisk until completely smooth and well-combined. It should be thick and luscious. Set it aside.
- Poke the Holes: This is the crucial step! As soon as the cake comes out of the oven, let it cool for about 5 minutes. It needs to be warm, but not piping hot. Using the handle of a wooden spoon (or a straw), poke holes all over the cake, spacing them about 1 inch apart. Poke the holes all the way to the bottom of the pan. Don’t be shy—the more holes, the more filling gets absorbed.
- Pour the Filling: Immediately pour the peanut butter filling over the warm cake, making sure to get it into all the holes. Use a spatula to gently spread it around, but don’t press it down. You’ll see the filling start to soak in and create a beautiful, gooey layer.
- Cool Completely: Let the cake cool completely on a wire rack. This is important, because if you add the ganache while the cake is still warm, it will be too runny. Patience is key here—it usually takes about 1-2 hours.
- Make the Chocolate Ganache: Once the cake is completely cool, make the ganache. Place the semi-sweet chocolate chips in a heat-safe bowl. In a small saucepan, heat the heavy cream over medium heat until it just starts to simmer (small bubbles around the edges). Do not let it boil. Pour the hot cream over the chocolate chips and let it sit for 2-3 minutes. Then, whisk gently until the chocolate is completely melted and the mixture is smooth and shiny.
- Pour the Ganache: Let the ganache cool for about 5 minutes to thicken slightly. Then, pour it over the cooled cake and spread it evenly with a spatula. Make sure it covers the entire surface.
- Add the Toppings: While the ganache is still wet, sprinkle the chopped Reese’s Peanut Butter Cups evenly over the top. If you’re using chocolate shavings or flaky sea salt, add those now. The toppings will stick to the ganache as it sets.
- Chill and Serve: Place the cake in the refrigerator for at least 2-3 hours, or until the ganache is firm. This allows all the flavors to meld together and makes for cleaner slices. Serve cold or at room temperature. I personally love it straight from the fridge—it’s like a candy bar in cake form!
Pro-Tip: For the cleanest slices, use a sharp knife and wipe it clean between each cut. This will give you those picture-perfect squares that everyone will admire.
Cooking Tips & Techniques
Over the years, I’ve made a few mistakes with this cake so you don’t have to. Here are my best tips for ensuring perfect results every single time:
- Don’t Overbake: A dry cake will not absorb the filling as well. Bake it just until a toothpick comes out clean. The residual heat will continue to cook it slightly as it cools.
- Poke Deep and Wide: The size of your holes matters. If they’re too small, the filling won’t soak in properly. The handle of a wooden spoon is the perfect size. Poke all the way to the bottom of the pan for maximum absorption.
- Work Quickly: The filling needs to be poured over the cake while it’s still warm. If the cake cools too much, the holes will close up, and the filling will just sit on top. Have your filling ready to go before the cake comes out of the oven.
- Use Room Temperature Ingredients: For the smoothest filling, make sure your sweetened condensed milk and peanut butter are at room temperature. Cold ingredients can cause the mixture to seize up and become difficult to stir.
- Patience with the Ganache: Don’t rush the cooling process. If the ganache is too warm when you pour it, it will run off the cake and create a mess. Let it cool and thicken slightly before spreading.
- Make Ahead: This cake is actually better the next day! The flavors have time to meld, and the texture becomes even more incredible. It’s the perfect make-ahead dessert for a party.
I once made the mistake of using natural peanut butter in the filling, and it turned out grainy and separated. Stick with the processed stuff for this recipe—it’s one of the few times I’ll say that! The stabilizers in Jif or Skippy create a perfectly smooth, luscious filling that blends seamlessly with the sweetened condensed milk.
Variations & Adaptations
This recipe is incredibly versatile, and there are so many ways to make it your own. Here are a few of my favorite variations:
- Peanut Butter Lover’s Dream: For an even more intense peanut butter flavor, add 1/2 cup of creamy peanut butter to the cake batter itself. You can also swirl some peanut butter into the ganache before it sets. It’s pure decadence.
- Chocolate Overload: Use a dark chocolate cake mix instead of milk chocolate for a richer, less sweet base. You can also use dark chocolate chips in the ganache. Top with chocolate shavings or chocolate-covered peanuts for extra crunch.
- Gluten-Free Version: Simply use a gluten-free chocolate cake mix. The rest of the ingredients are naturally gluten-free, but always double-check your labels to be safe. I’ve made this for friends with celiac disease, and they couldn’t tell the difference.
- Add Some Crunch: Mix 1/2 cup of chopped, salted peanuts into the peanut butter filling for a delightful crunch. You can also sprinkle crushed pretzels over the ganache for a sweet-and-salty twist.
- Make It a Skillet Cake: Bake the cake in a 10-inch cast-iron skillet. The edges get wonderfully crisp, and it looks beautiful served right from the skillet. Just adjust the baking time slightly—it may take 5-10 minutes less.
I once tried a version with a layer of sliced bananas under the ganache, and it was incredible. It gave it a bit of a chocolate-peanut butter-banana vibe, like a deconstructed sundae. Don’t be afraid to experiment—this cake is very forgiving and loves a good twist.
Serving & Storage Suggestions
This cake is best served chilled, straight from the refrigerator. The cold temperature makes the ganache firm and fudge-like, while the cake stays incredibly moist and tender. It’s the perfect contrast in textures.
Serving:
- Cut the cake into 12-16 squares, wiping your knife clean between cuts for neat edges.
- Serve it on a platter or in the baking pan itself. It’s casual and inviting.
- A dollop of whipped cream or a scoop of vanilla ice cream takes it over the top. The cold, creamy ice cream paired with the rich, fudgy cake is a match made in heaven.
- For a fancy touch, drizzle a little extra warm ganache or caramel sauce over each slice before serving.
Storage:
- Store any leftover cake in an airtight container in the refrigerator for up to 5 days. The flavors actually get better as they meld together.
- This cake freezes beautifully! Wrap the entire cake (or individual slices) tightly in plastic wrap, then in a layer of aluminum foil. Freeze for up to 3 months.
- To thaw, transfer the cake to the refrigerator overnight. You can also microwave individual slices for about 20 seconds for a warm, gooey treat.
The cake will stay incredibly moist for days, thanks to the sweetened condensed milk. I’ve actually found that it’s even better on day two or three, when the flavors have had a chance to fully develop. It’s the perfect dessert to make ahead for a busy week.
Nutritional Information & Benefits
Let’s be honest—this is an indulgent dessert, and it’s meant to be enjoyed as a treat. But that doesn’t mean we can’t look at what’s in it! Here’s a rough estimate of the nutritional information per serving (based on 16 servings):
| Nutrient | Amount Per Serving |
|---|---|
| Calories | 420-480 |
| Fat | 24-28g |
| Carbohydrates | 48-54g |
| Protein | 8-10g |
| Sugar | 35-40g |
Pin This Recipe!
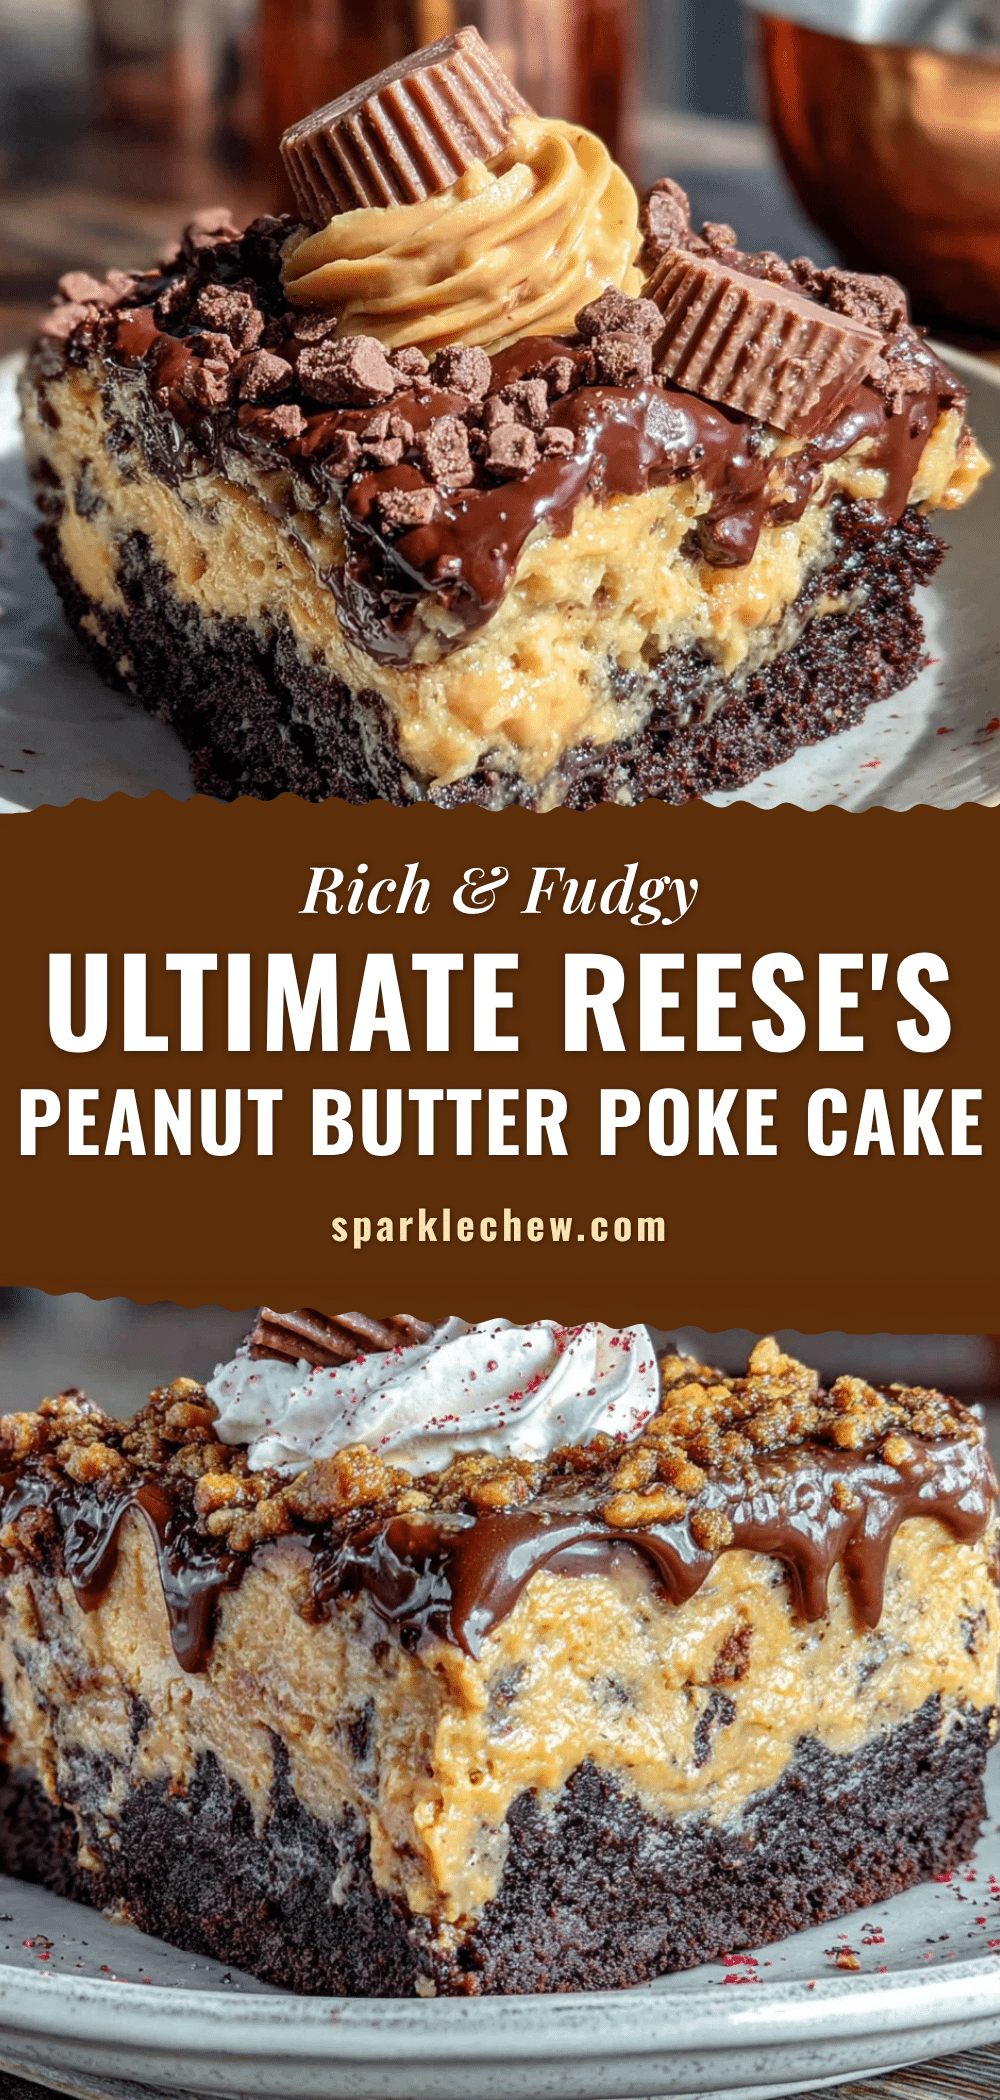
Best Reeses Peanut Butter Chocolate Poke Cake Recipe

This Ultimate Reese’s Peanut Butter Chocolate Poke Cake is incredibly moist, fudgy, and packed with layers of rich chocolate, creamy peanut butter, and sweetened condensed milk. It’s an easy, crowd-pleasing dessert that looks impressive but comes together in a snap.
- Prep Time: 15 minutes
- Cook Time: 30 minutes
- Total Time: 3 hours 45 minutes (includes cooling and chilling time)
- Yield: 12-16 servings 1x
- Category: Dessert
- Cuisine: American
Ingredients
- 1 box (15.25 oz) chocolate cake mix (preferably Duncan Hines or Betty Crocker)
- Ingredients called for on the cake mix box (typically eggs, oil, and water)
- 1 can (14 oz) sweetened condensed milk
- 3/4 cup creamy peanut butter (like Jif or Skippy)
- 1 teaspoon vanilla extract
- 1 1/2 cups semi-sweet chocolate chips (like Ghirardelli or Guittard)
- 1 cup heavy cream
- 1 cup chopped Reese’s Peanut Butter Cups (about 10–12 miniatures or 4–5 regular cups)
- 1/4 cup chocolate shavings or sprinkles (optional, for garnish)
- Flaky sea salt (optional, for garnish)
Instructions
- Preheat your oven to 350°F (175°C). Grease a 9×13-inch baking pan generously with butter or non-stick cooking spray.
- Prepare the chocolate cake mix according to the package directions (usually combining mix with eggs, oil, and water). Pour the batter into the prepared pan and spread evenly.
- Bake for 25-30 minutes, or until a toothpick inserted into the center comes out clean or with a few moist crumbs. Do not overbake.
- While the cake is baking, make the peanut butter filling: In a medium bowl, combine the sweetened condensed milk, creamy peanut butter, and vanilla extract. Whisk until completely smooth and well-combined. Set aside.
- When the cake comes out of the oven, let it cool for about 5 minutes. Using the handle of a wooden spoon (or a straw), poke holes all over the cake, spacing them about 1 inch apart and poking all the way to the bottom of the pan.
- Immediately pour the peanut butter filling over the warm cake, making sure to get it into all the holes. Use a spatula to gently spread it around, but don’t press it down.
- Let the cake cool completely on a wire rack (about 1-2 hours).
- Once the cake is completely cool, make the chocolate ganache: Place the semi-sweet chocolate chips in a heat-safe bowl. In a small saucepan, heat the heavy cream over medium heat until it just starts to simmer (small bubbles around the edges). Do not let it boil.
- Pour the hot cream over the chocolate chips and let it sit for 2-3 minutes. Then, whisk gently until the chocolate is completely melted and the mixture is smooth and shiny.
- Let the ganache cool for about 5 minutes to thicken slightly. Then, pour it over the cooled cake and spread it evenly with a spatula.
- While the ganache is still wet, sprinkle the chopped Reese’s Peanut Butter Cups evenly over the top. Add chocolate shavings or flaky sea salt if desired.
- Place the cake in the refrigerator for at least 2-3 hours, or until the ganache is firm. Serve cold or at room temperature.
Notes
For the cleanest slices, use a sharp knife and wipe it clean between each cut. This cake is actually better the next day! The flavors have time to meld, and the texture becomes even more incredible. It’s the perfect make-ahead dessert for a party. If you don’t have heavy cream for the ganache, you can use full-fat coconut milk for a dairy-free version.
Nutrition
- Serving Size: 1 slice (based on 16
- Calories: 420480
- Sugar: 3540
- Fat: 2428
- Carbohydrates: 4854
- Protein: 810
Keywords: Reese's, peanut butter, chocolate, poke cake, easy dessert, chocolate cake, peanut butter cake, poke cake recipe, chocolate peanut butter cake


