Love this? Save it for later!
Share the inspiration with your friends
I was standing in line at the post office, clutching a package that was definitely wrapped in too much tape, when the woman behind me started talking about eggs. Not just any eggs—spider eggs. She was maybe seventy, with bright purple glasses and a sweater that had a tiny pumpkin embroidered on the collar. “You have to let them chill for at least an hour after you pipe them,” she said, like we were in the middle of a conversation. I wasn’t sure if she was talking to me or the ceiling, but I was listening. She told me she’d been making them for her grandkids’ Halloween party for fifteen years, and every year, someone asked for the recipe. She pulled a crumpled index card from her purse—stained with what I hoped was paprika—and handed it to me. “Add a little extra mustard,” she said, and then she was gone, called to the next window. I stood there holding that card, thinking about how the best recipes never come from a fancy cookbook. They come from a post office line on a Tuesday afternoon.
I made those deviled eggs that weekend, and honestly, I messed them up the first time. The filling was too runny, and the olive spiders slid right off the top. But I tweaked it, tested it again for a Halloween potluck, and let me tell you—they disappeared before the punch bowl was even full. These Best Spider Deviled Eggs for Halloween are now my go-to party trick. They’re creepy, they’re cute, and they taste like the classic deviled eggs you already love, just with a spooky twist that makes everyone stop and stare. You know that feeling when a dish is so good, people forget to take a picture before they eat it? That’s these eggs.
The secret is in the balance—creamy yolks, tangy mustard, and just enough mayo to hold it all together without getting sloppy. And the spiders? Black olives, sliced just right, with little legs that curl up when you arrange them. It’s simple. It’s clever. And it’s exactly the kind of thing you want to set out when the doorbell starts ringing and the house fills with goblins and ghosts. I keep making them because they work. They’re the appetizer that gets talked about, the one people ask for year after year. And all thanks to a stranger in purple glasses and a very stained index card.
Why You’ll Love This Recipe
I’ve tested a lot of Halloween appetizers over the years—some that looked amazing but took three hours to assemble, and others that were easy but looked like a sad afterthought. These Best Spider Deviled Eggs for Halloween hit that perfect sweet spot. They’re impressive without being fussy, and they taste just as good as they look. Here’s why they’ve earned a permanent spot on my party menu:
- Quick & Easy: From start to finish, you’re looking at about 30 minutes of active work. The eggs do the hard part—they boil while you prep everything else.
- Simple Ingredients: Eggs, mayo, mustard, paprika, and a can of black olives. That’s it. No weird specialty items or trips to three different stores.
- Perfect for Halloween Gatherings: Whether it’s a spooky dinner party, a potluck, or just handing out candy to trick-or-treaters, these eggs fit right in. They’re festive without being over-the-top.
- Crowd-Pleaser: I’ve served these to kids, adults, and even that one friend who “doesn’t like eggs.” They always come back for seconds. The olive spiders are a conversation starter, and the filling is classic enough to win over anyone.
- Unbelievably Delicious: The texture is creamy and smooth, with a tangy kick from the mustard and a smoky finish from the paprika. It’s comfort food with a spooky face.
What makes this recipe different from the dozens of other deviled egg recipes out there? It’s the technique. I spent three batches getting the filling just right—not too loose, not too stiff—so the olive spiders actually stay put. I also figured out the trick to slicing olives so the legs look like real spider legs, not just sad little blobs. This isn’t just another version of deviled eggs. It’s the one you’ll pull out every October, the one your friends will text you for the morning after the party.
Honestly, this recipe is the kind that makes you close your eyes after the first bite. It’s familiar but surprising, classic but creative. And when you set them out on a platter with a little fake spider web underneath? Pure magic. Perfect for impressing guests without stress, or turning a simple appetizer into something memorable.
What Ingredients You Will Need
This recipe uses simple, everyday ingredients that work together to create something that feels special. Most of these are probably in your kitchen right now, which is exactly how I like it. Let me walk you through each one and share a few things I’ve learned from making these eggs more times than I can count.
For the Deviled Eggs
- 12 large eggs – I prefer using eggs that are about a week old for hard boiling. Fresh eggs are harder to peel, so if you can, plan ahead and let them sit in the fridge for a few days. Room temperature eggs also cook more evenly, so pull them out 15 minutes before you start.
- 1/3 cup mayonnaise – Use a good-quality mayo here. I’m partial to Duke’s for its tangy flavor, but Hellmann’s works great too. Avoid Miracle Whip—it’s too sweet and changes the whole vibe.
- 1 tablespoon yellow mustard – This gives the filling that classic yellow color and a gentle tang. You can use Dijon for a sharper flavor, but I like the mildness of yellow mustard here.
- 1 tablespoon white vinegar – A little acidity brightens everything up. Don’t skip it—it makes a difference.
- 1/2 teaspoon salt – Fine salt works best so it dissolves evenly.
- 1/4 teaspoon black pepper – Freshly ground if you have it.
- 1/2 teaspoon paprika – For color and a hint of smoky sweetness. I use smoked paprika sometimes for extra depth, but sweet paprika is the classic choice.
- Optional: 1 teaspoon pickle juice – This is my secret trick. A splash of dill pickle brine adds a little extra tang that makes people ask, “What’s in this?” Try it once, and you’ll see.
For the Spider Decorations
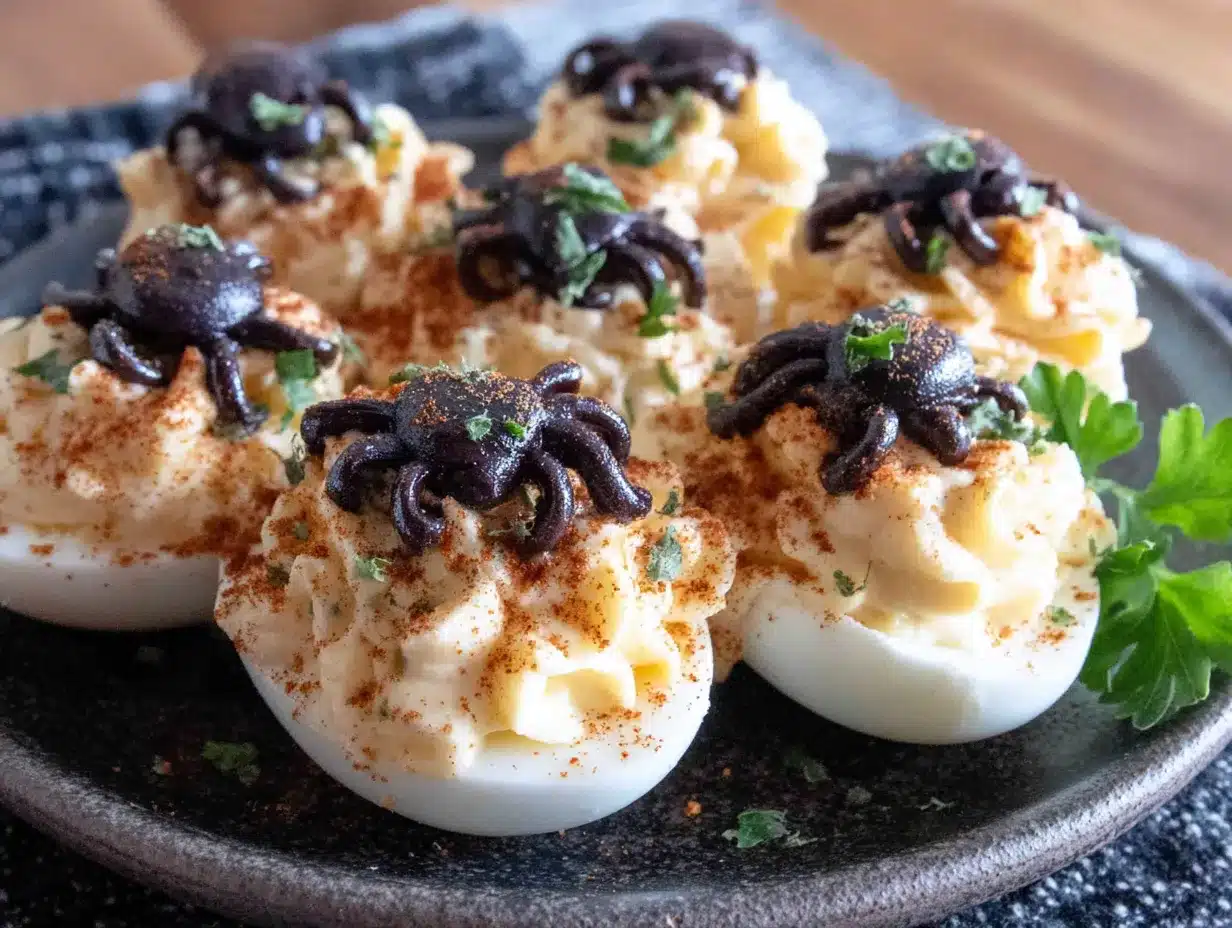
- 1 can (6 oz) large black olives – You want the biggest olives you can find. The large ones are easier to slice and look more like actual spider bodies. I recommend Early California or Pearl brands for consistent size.
- Optional: 1 tablespoon olive brine – A tiny brush of brine on the olive spiders helps them stick to the filling.
For Garnish
- Extra paprika for dusting – A light sprinkle right before serving makes them look polished.
- Fresh chives or parsley – Finely chopped, for a pop of green (optional, but pretty).
A quick note on substitutions: If you need a dairy-free option, use a vegan mayo like Just Mayo—it works perfectly. For a lower-fat version, you can swap half the mayo with plain Greek yogurt, but the texture will be slightly less creamy. And if you can’t find large black olives, jumbo pitted olives are your best bet. Just avoid the sliced olives in a can—they’re too small and fall apart.
Equipment Needed
You don’t need anything fancy to make these Best Spider Deviled Eggs for Halloween, but a few specific tools will make your life a lot easier. Here’s what I use every time:
- Large pot – Big enough to hold 12 eggs in a single layer. I use a 5-quart pot, which gives the eggs room to cook evenly.
- Slotted spoon – For gently lowering the eggs into the water and lifting them out. Trust me, dropping an egg into boiling water is a mess you don’t want.
- Bowl of ice water – An essential for stopping the cooking process and making peeling easier. I use a large mixing bowl filled with ice and cold water.
- Sharp knife – A chef’s knife or a paring knife works. You want something sharp enough to slice the olives cleanly without crushing them.
- Cutting board – For slicing olives and halving eggs.
- Small spoon or melon baller – For scooping out the yolks. A melon baller gives you perfect, clean scoops, but a small spoon works just fine.
- Mixing bowl – For mashing the yolks with the other ingredients.
- Fork or potato masher – For breaking down the yolks. A fork is fine, but a potato masher makes it faster and smoother.
- Piping bag or zip-top bag – For filling the egg whites neatly. I use a disposable piping bag with a star tip for a pretty swirl, but a zip-top bag with the corner snipped off works perfectly.
- Serving platter – A flat platter is best for arranging the eggs. I like to line mine with a little fake spider web from the dollar store for extra Halloween flair.
If you don’t have a piping bag, don’t stress. A zip-top bag is a great budget-friendly alternative, and honestly, I use it more often than my actual piping bags. Just fill the bag, squeeze the air out, snip a small corner, and pipe away. Easy cleanup too.
Preparation Method
Let me walk you through this step by step. I’ve made these eggs so many times that I’ve got the process down to a science, and I’m sharing every little trick I’ve picked up along the way. Take your time with the first batch—once you get the hang of it, you’ll be able to whip these out in no time.
Step 1: Hard Boil the Eggs
Place your 12 large eggs in a single layer in a large pot. Cover them with cold water by about an inch. Put the pot on the stove over high heat and bring the water to a rolling boil. Once it’s boiling, turn off the heat, cover the pot, and let the eggs sit in the hot water for exactly 12 minutes. This method gives you perfectly cooked yolks—no green ring around the edge, I promise. While the eggs are sitting, prepare a bowl of ice water. When the 12 minutes are up, use a slotted spoon to transfer the eggs to the ice bath. Let them chill for at least 10 minutes. This stops the cooking and makes peeling so much easier.
Step 2: Peel and Halve the Eggs
Gently tap each egg on the counter to crack the shell all over, then roll it between your palms to loosen the shell. Start peeling from the wider end—there’s usually an air pocket there that makes it easier to get under the shell. Rinse the peeled eggs under cold water to remove any tiny shell fragments. Pat them dry with a paper towel. Using a sharp knife, slice each egg in half lengthwise. Carefully pop out the yolks into a mixing bowl. Arrange the egg white halves on your serving platter, cut side up.
Step 3: Make the Filling
Add the mayonnaise, yellow mustard, white vinegar, salt, pepper, and paprika to the bowl with the yolks. If you’re using the pickle juice, add it now. Mash everything together with a fork until the mixture is smooth and creamy. Taste it and adjust the seasoning—maybe a pinch more salt or an extra dash of paprika. The filling should be thick enough to hold its shape when piped, but not stiff. If it seems too dry, add a tiny splash of mayo. Too wet? Add another yolk if you have one, or a pinch of breadcrumbs (though I’ve never needed to).
Step 4: Pipe the Filling
Spoon the yolk mixture into a piping bag fitted with a star tip, or into a zip-top bag with a corner snipped off. Pipe a generous swirl of filling into each egg white half. I like to go in a spiral from the outside in, creating a little peak in the center. This gives the spiders a nice surface to sit on. Don’t skimp on the filling—you want each egg to look full and inviting.
Step 5: Make the Spider Decorations
Drain the can of black olives and pat them dry with a paper towel. Select the largest olives for the spider bodies. For each spider, you need one whole olive for the body and one olive sliced lengthwise into thin strips for the legs. To slice the legs, cut the second olive into 4 to 5 thin slices lengthwise, then cut each slice in half crosswise. You should have 8 small leg pieces per spider. Arrange 4 leg pieces on each side of the egg, slightly angled to look like spider legs. Place the whole olive on top of the filling, pressing down gently so it sticks. Repeat for all 12 eggs.
Step 6: Garnish and Chill
Lightly dust the eggs with a sprinkle of paprika. If you’re using chives or parsley, scatter a tiny bit over the platter. Cover the platter loosely with plastic wrap and refrigerate for at least 1 hour before serving. This chilling time lets the flavors meld and helps the spiders stay put. I’ve made them a day ahead plenty of times—they hold up beautifully.
Cooking Tips & Techniques
After making these Best Spider Deviled Eggs for Halloween more times than I care to admit, I’ve collected a few tricks that make the process smoother and the results better. Here are the ones I wish I’d known from the start:
The ice bath is non-negotiable. I know it’s tempting to skip it, especially when you’re in a hurry, but that cold shock is what makes the shells slip off easily. I once forgot to prepare the ice bath and spent 20 minutes picking shell fragments out of a dozen eggs. Never again. Fill your bowl with ice and cold water before the eggs are even done boiling.
Use older eggs for easier peeling. Eggs that are a week or two old have a slightly higher pH, which makes the shell separate from the membrane more easily. If you’re planning ahead, buy your eggs a week before you need them. If not, don’t worry—the ice bath trick still works, just be patient.
Slice olives with a steady hand. The key to good spider legs is thin, even slices. I use a sharp paring knife and go slowly. If the olive starts to roll, press it flat against the cutting board with your fingers. And don’t worry if a few slices break—you’ll have plenty of olives in the can to work with.
Don’t overmix the filling. You want it smooth, but if you mix too much, the mayo can break and the texture gets greasy. Mash just until everything is combined and creamy. A few tiny lumps are fine—they add character.
Chill before serving. This is the step I see people skip most often, and it makes a difference. The filling firms up in the fridge, which means the olives stay put and the eggs look tidy. Plus, cold deviled eggs taste better. I always make these at least an hour before guests arrive.
One mistake I made early on: I used sliced olives from a can for the spider legs. They were too small and too thin, and they looked more like sad little worms than spider legs. Spend the extra dollar on whole black olives. It makes a huge difference in the final look.
Variations & Adaptations
One of the things I love about this recipe is how easy it is to tweak. Whether you’re cooking for someone with dietary restrictions or you just want to switch things up, here are a few variations I’ve tried and loved:
Spicy Spider Eggs: Add 1/2 teaspoon of cayenne pepper or a dash of hot sauce to the yolk mixture. The heat pairs surprisingly well with the creamy filling and gives the spiders a little bite. I made these for a Halloween party last year, and they were gone in minutes.
Vegan Version: Use a vegan egg substitute like Just Egg for the whites, and make the filling with vegan mayo and a pinch of kala namak (black salt) for that eggy flavor. The texture is a little different, but the flavor is spot-on. I’ve served these to vegan friends who said they couldn’t tell the difference.
Gluten-Free Option: These eggs are naturally gluten-free, so you’re good there. Just double-check your mustard and mayo labels if you’re cooking for someone with celiac disease—some brands add gluten-containing ingredients.
Different Spider Styles: Instead of whole olives, try using half a cherry tomato for the spider body and chive pieces for the legs. Or use small mozzarella balls with black olive slices on top. I’ve even seen people use candy eyeballs on the olives for an extra creepy touch—just press them on with a tiny dab of mayo.
Seasonal Twists: For fall, add a pinch of pumpkin pie spice to the filling. It sounds weird, but the warmth of the spice works with the smoky paprika. In summer, swap the paprika for a little fresh dill and lemon zest for a brighter flavor.
I once tried a version with smoked salmon mixed into the filling, and honestly, it was incredible. The salty, smoky fish played perfectly with the creamy yolks. Just top each spider with a tiny piece of salmon before adding the olive body. It’s a little extra work, but perfect for a fancy Halloween dinner party.
Serving & Storage Suggestions
These Best Spider Deviled Eggs for Halloween are at their best when served cold, straight from the fridge. I like to arrange them on a black platter or a dark slate board to make the spiders really pop. A little fake spider web from the dollar store draped underneath adds the perfect spooky touch. If you’re serving them at a party, set them out about 15 minutes before guests arrive so they lose the chill but stay firm.
For a full Halloween spread, I pair these eggs with other finger foods that don’t require forks. They go beautifully with spooky stuffed mushrooms or a bowl of creamy pumpkin soup in shot glasses. A platter of witch finger cookies on the side keeps the theme going. And for drinks? A pitcher of blood-orange punch or dark beer works perfectly with the savory eggs.
To store leftovers: Place the eggs in a single layer in an airtight container. They’ll keep in the refrigerator for up to 3 days. Don’t freeze them—the texture of the filling will separate, and the egg whites get rubbery. Trust me on this one. I learned the hard way.
To reheat: Don’t. Deviled eggs are meant to be served cold. If you’ve stored them properly, they’re ready to eat straight from the fridge. Just let them sit at room temperature for 10 minutes before serving to take the edge off the chill.
One thing I’ve noticed is that the flavors actually get better after a day in the fridge. The mustard and vinegar mellow out, and the paprika sinks into the filling. If you’re making these for a party, I highly recommend making them a day ahead. Just wait to add the olive spiders until right before serving so they stay fresh and perky.
Nutritional Information & Benefits
Here’s a rough estimate for one deviled egg (based on 24 servings from 12 eggs):
- Calories: ~70
- Protein: 5g
- Fat: 5g
- Carbohydrates: 1g
- Fiber: 0g
- Sugar: 0g
- Sodium: 180mg
Eggs are a fantastic source of high-quality protein and contain important nutrients like choline, which supports brain health. The yolks are rich in vitamin D and B12, while the whites are almost pure protein. The olive spiders add a small amount of healthy monounsaturated fats and a touch of iron.
This recipe is naturally gluten-free and low-carb, making it a great option for guests with dietary preferences. If you’re watching your sodium, you can reduce the salt in the filling and use low-sodium olives. For a lighter version, swap half the mayo with plain Greek yogurt—it cuts the calories and adds a little protein boost.
From my own wellness perspective, I love that these eggs are a satisfying, protein-rich snack that doesn’t leave you feeling heavy. They’re perfect for balancing out all the candy and sweets that tend to dominate Halloween. Plus, they’re a great way to get a little extra protein into a party menu that’s usually all carbs.
Potential allergens: Eggs (obviously), and some mayos contain eggs and soy. Check labels if you’re cooking for someone with allergies.
Conclusion
These Best Spider Deviled Eggs for Halloween are proof that a little creativity can turn a classic dish into something unforgettable. They’re simple enough for a weeknight snack, but impressive enough to steal the show at any Halloween gathering. The creamy filling, the tangy kick, and those adorable little olive spiders—honestly, what’s not to love?
I hope you give them a try, and I hope you make them your own. Maybe you add a little extra mustard like the woman at the post office told me. Maybe you swap the olives for something totally unexpected. That’s the beauty of a recipe like this—it’s a starting point, not a rulebook.
If you make these, I’d love to hear about it. Drop a comment below and tell me how they turned out, or share a photo on Pinterest and tag me. Did you add a twist? Did the spiders stay put? Did your guests gobble them up before you could even sit down? I want to know every detail. And if you’re looking for more Halloween inspiration, check out my creepy crawly appetizer collection for more ideas.
Now go boil some eggs and make some spiders. Your Halloween table is waiting.
Frequently Asked Questions
Can I make these spider deviled eggs a day ahead?
Absolutely. I actually prefer making them a day ahead because the flavors meld together beautifully. Just prepare the filling and pipe it into the egg whites, then cover and refrigerate. Wait to add the olive spiders until right before serving so they stay fresh and perky.
How do I get the olive spiders to stay on top of the filling?
The key is making sure your filling is thick enough to hold its shape. If it’s too runny, the olives will slide off. A tiny dab of mayo on the bottom of the olive helps it stick. Also, chilling the eggs for at least an hour before serving firms everything up nicely.
My egg yolks have a green ring around them. What went wrong?
That green ring happens when eggs are overcooked or cooled too slowly. To avoid it, use the method I shared—bring the water to a boil, then turn off the heat and let the eggs sit for exactly 12 minutes. Then immediately transfer them to an ice bath. This stops the cooking process and keeps the yolks bright yellow.
Can I use a different type of olive for the spiders?
You can, but I recommend sticking with large black olives. They have the right shape and color to look like spiders. Green olives work in a pinch, but they’re smaller and the flavor is more briny, which might clash with the filling. Kalamata olives are too soft and fall apart easily.
How long do these deviled eggs last in the fridge?
Stored in an airtight container, they’ll keep for up to 3 days. After that, the texture starts to change and the filling can get watery. I recommend making them no more than two days before your event for the best results. And always keep them refrigerated until just before serving.
Pin This Recipe!
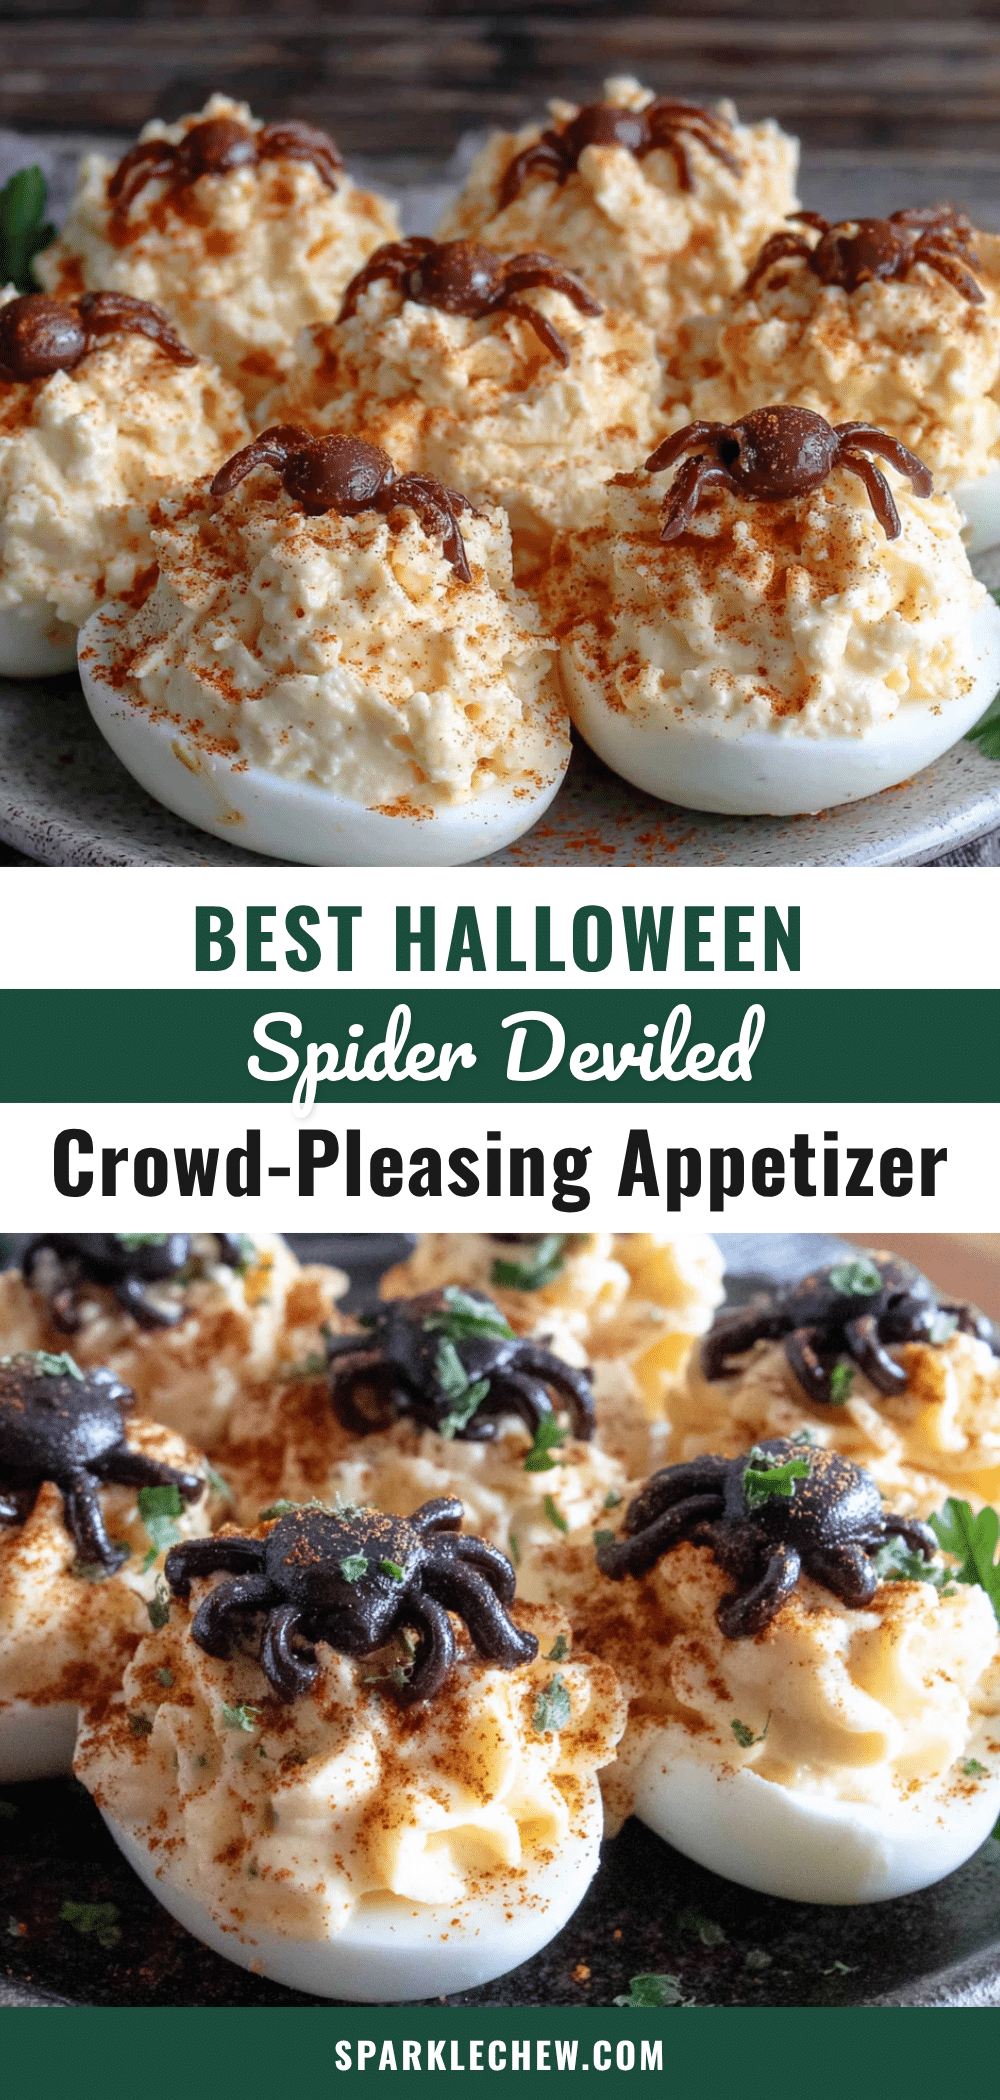
Best Spider Deviled Eggs for Halloween – Easy Crowd Pleaser
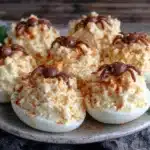
These Best Spider Deviled Eggs for Halloween are a creepy, cute, and delicious crowd-pleaser. With a creamy, tangy filling and adorable olive spiders, they’re the perfect spooky appetizer for any Halloween gathering.
- Prep Time: 30 minutes
- Cook Time: 12 minutes
- Total Time: 1 hour 42 minutes (including chilling)
- Yield: 24 deviled eggs (12 servings of 2 eggs each) 1x
- Category: Appetizer
- Cuisine: American
Ingredients
- 12 large eggs
- 1/3 cup mayonnaise (preferably Duke’s or Hellmann’s)
- 1 tablespoon yellow mustard
- 1 tablespoon white vinegar
- 1/2 teaspoon salt
- 1/4 teaspoon black pepper
- 1/2 teaspoon paprika (sweet or smoked)
- 1 teaspoon pickle juice (optional)
- 1 can (6 oz) large black olives (e.g., Early California or Pearl)
- 1 tablespoon olive brine (optional, for sticking spiders)
- Extra paprika for dusting
- Fresh chives or parsley, finely chopped (optional, for garnish)
Instructions
- Hard boil the eggs: Place 12 large eggs in a single layer in a large pot. Cover with cold water by about 1 inch. Bring to a rolling boil over high heat, then turn off the heat, cover, and let sit for exactly 12 minutes. Meanwhile, prepare a bowl of ice water. Transfer eggs to the ice bath and let chill for at least 10 minutes.
- Peel and halve the eggs: Gently crack each egg on the counter, roll to loosen the shell, and peel starting from the wider end. Rinse under cold water to remove shell fragments. Pat dry. Slice each egg in half lengthwise. Pop out yolks into a mixing bowl. Arrange egg white halves on a serving platter, cut side up.
- Make the filling: To the yolks, add mayonnaise, yellow mustard, white vinegar, salt, pepper, paprika, and pickle juice (if using). Mash with a fork until smooth and creamy. Taste and adjust seasoning. The filling should be thick enough to hold its shape when piped.
- Pipe the filling: Spoon the yolk mixture into a piping bag fitted with a star tip, or into a zip-top bag with a corner snipped off. Pipe a generous swirl into each egg white half, creating a small peak in the center.
- Make the spider decorations: Drain and pat dry the black olives. Select the largest olives for spider bodies. For each spider, use one whole olive for the body. Slice another olive lengthwise into 4-5 thin strips, then cut each strip in half crosswise to make 8 leg pieces. Arrange 4 leg pieces on each side of the egg, slightly angled. Place the whole olive on top of the filling, pressing gently to stick.
- Garnish and chill: Lightly dust the eggs with paprika. If using, scatter chopped chives or parsley over the platter. Cover loosely with plastic wrap and refrigerate for at least 1 hour before serving. The eggs can be made a day ahead; add olive spiders just before serving.
Notes
Use eggs that are about a week old for easier peeling. The ice bath is essential for easy peeling and perfect yolks. For a dairy-free option, use vegan mayo like Just Mayo. For a lighter version, swap half the mayo with plain Greek yogurt. The filling can be made a day ahead; store piped eggs in the fridge and add olive spiders just before serving. Chilling for at least 1 hour helps the spiders stay put. Do not freeze deviled eggs.
Nutrition
- Serving Size: 2 deviled eggs
- Calories: 140
- Sodium: 360
- Fat: 10
- Saturated Fat: 2.5
- Carbohydrates: 2
- Protein: 10
Keywords: spider deviled eggs, Halloween deviled eggs, deviled eggs recipe, Halloween appetizer, spooky deviled eggs, olive spiders, easy Halloween recipe, crowd pleaser