Love this? Save it for later!
Share the inspiration with your friends
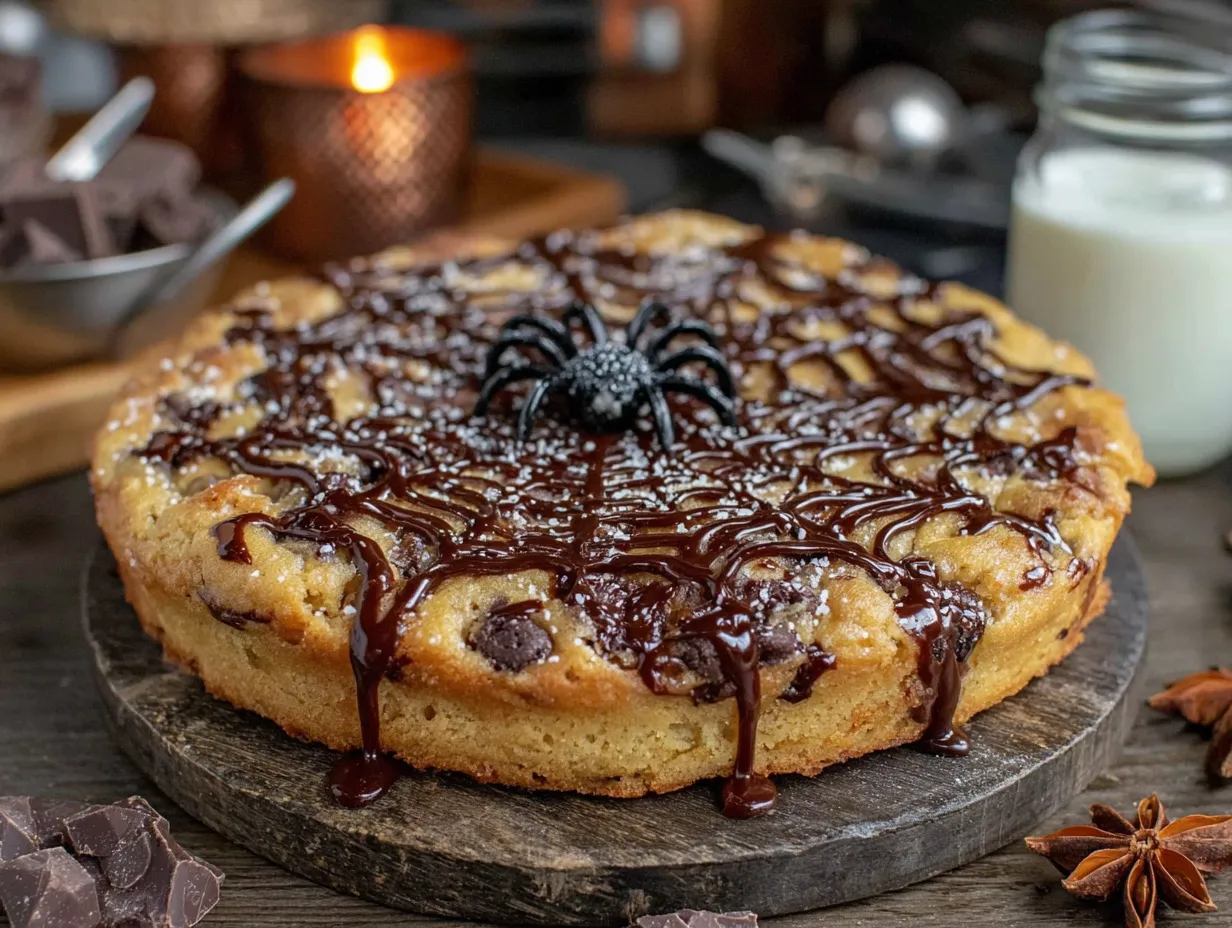
My neighbor Karen wasn’t trying to impress anyone. I’d stopped by to return her hedge clippers on a crisp October afternoon, and the smell hit me before I even got through the screen door. Warm butter, brown sugar, and something faintly spiced — like a bakery had materialized in her modest kitchen. She was standing there in her gardening gloves, pulling a giant cookie cake out of the oven, and she just shrugged when I asked what it was. “Oh, that’s just the spiderweb thing the kids wanted.” Just the spiderweb thing. She said it like it was nothing, like she hadn’t just created the most stunning Halloween dessert I’d ever seen up close. The web pattern was perfect — delicate lines of white icing radiating out from the center like real silk. I stood there holding those clippers, honestly a little speechless. She wiped her hands on her jeans and offered me a piece while it was still warm. That first bite? Let me tell you, it was the kind of moment where you forget to talk because your brain is too busy processing how good something is. The edges were slightly crisp, the center was soft and chewy, and that chocolate base was rich without being heavy. I asked for the recipe right there, standing over her kitchen counter, and she scribbled it on a scrap of envelope. I’ve made it every October since. Maybe you’ve been there — you taste something at someone else’s house and you just know it’s going to become part of your own tradition. That’s this cookie cake for me. It’s the recipe that turned me into the person who actually looks forward to Halloween baking.
Why You’ll Love This Recipe
This spiderweb Halloween cookie cake is honestly the easiest showstopper I’ve ever made. I’ve tested it six times over the past three years — twice with different butter temperatures, once with a gluten-free flour blend, and once when I accidentally used dark cocoa powder instead of regular. Every single version worked, which tells you how forgiving this recipe really is.
- Quick & Easy : From start to finish, this comes together in under 45 minutes. The dough takes maybe 15 minutes to mix, and the decorating is way simpler than it looks.
- Simple Ingredients : You probably already have everything in your pantry right now. Butter, sugar, flour, cocoa powder, eggs — nothing weird or hard to find.
- Perfect for Halloween Parties : This thing gets photographed before anyone even cuts into it. It’s the centerpiece that actually tastes as good as it looks.
- Crowd-Pleaser : I’ve brought this to three different Halloween gatherings now, and I’ve never brought home leftovers. Kids and adults both go crazy for it.
- Unbelievably Delicious : The texture is what gets me every time — crisp edges, soft center, and that chocolate flavor that hits just right without being too sweet.
What makes this different from other Halloween desserts is the technique. Instead of trying to pipe a perfect spiderweb freehand, you use a simple toothpick dragging method that creates those clean lines effortlessly. It looks professional but requires zero artistic skill. I mean that honestly — I can barely draw a stick figure, and mine come out looking like a bakery made them.
This recipe isn’t just good for a Halloween dessert. It’s the kind that makes people close their eyes after the first bite. It’s comfort food with a spooky twist — faster than making individual cookies, but with the same soul-soothing satisfaction. Perfect for impressing guests without the stress, or turning a simple October evening into something memorable.
What Ingredients You Will Need
This recipe uses simple, wholesome ingredients to deliver that perfect cookie cake texture — crisp on the outside, soft and chewy in the center. Most of these are pantry staples you probably already have on hand.
- Unsalted butter, softened (1 cup / 2 sticks) — I prefer Land O’Lakes for consistent results, but any brand works fine. Make sure it’s truly softened to room temperature, not melted.
- Granulated sugar (1 cup / 200g) — Regular white sugar gives the edges that nice crispness.
- Light brown sugar, packed (3/4 cup / 150g) — This adds moisture and that subtle molasses flavor that makes the cookie taste richer.
- Large eggs (2, room temperature) — Cold eggs can make the batter seize up, so let them sit out for 30 minutes first.
- Vanilla extract (2 teaspoons) — Pure vanilla makes a difference here. I use Nielsen-Massey when I’m feeling fancy.
- All-purpose flour (2 1/4 cups / 280g) — Spoon and level it; don’t scoop directly from the bag or you’ll end up with too much.
- Unsweetened cocoa powder (1/2 cup / 50g) — I use Hershey’s for everyday baking, but Ghirardelli gives a deeper chocolate flavor if you have it.
- Baking soda (1 teaspoon) — Make sure it’s fresh; old baking soda won’t give you that nice spread.
- Salt (1/2 teaspoon) — Don’t skip this; it balances the sweetness and brings out the chocolate.
- For the spiderweb glaze: Powdered sugar (1 cup / 120g), milk (2-3 tablespoons), and vanilla extract (1/2 teaspoon).
- Optional: Candy spiders or sprinkles for decoration — totally optional but fun.
For the cocoa powder, I’ve tested this with both natural and Dutch-processed, and both work fine. Natural cocoa gives a slightly more intense chocolate flavor, while Dutch-processed makes it a bit smoother. Pick whichever you have on hand.
Equipment Needed
You don’t need anything fancy for this recipe, which is part of why I love it so much. Here’s what you’ll need:
- 9-inch round cake pan or springform pan — A springform pan makes removal easier, but a regular cake pan lined with parchment works perfectly too.
- Electric mixer (handheld or stand) — You can mix by hand if your arm is up for it, but the mixer makes creaming the butter and sugar much easier.
- Mixing bowls — One large, one medium.
- Parchment paper — Essential for easy removal. Cut a circle for the bottom.
- Toothpick or skewer — This is your spiderweb tool. A wooden skewer works better than a toothpick for longer lines.
- Piping bag or zip-top bag — For the glaze. A zip-top bag with the corner snipped off works just as well as a real piping bag.
- Cooling rack — Let that cookie cake cool completely before decorating.
- Spatula — For smoothing the dough into the pan.
I’ve made this with both a springform pan and a regular cake pan, and honestly, the regular pan lined with parchment is easier. The springform sometimes leaks a little butter, which makes a mess in the oven. Just my experience.
Preparation Method
- Preheat your oven to 350°F (175°C). Line your 9-inch round pan with parchment paper on the bottom and lightly grease the sides. Don’t skip the parchment — trust me on this one.
- Cream the butter and sugars together in a large bowl for about 3-4 minutes until light and fluffy. You want it to look pale and airy. Scrape down the sides of the bowl halfway through. This step matters — properly creamed butter and sugar give you that perfect texture.
- Add the eggs one at a time, beating well after each addition. Then mix in the vanilla extract. The batter might look a little curdled at this point — that’s totally normal, don’t panic.
- In a separate medium bowl, whisk together the flour, cocoa powder, baking soda, and salt. Make sure there are no lumps in the cocoa powder. I usually sift mine just to be safe.
- Gradually add the dry ingredients to the wet mixture, mixing on low speed until just combined. Stop as soon as you don’t see any more streaks of flour. Overmixing will make your cookie cake tough, and nobody wants that.
- Press the dough evenly into your prepared pan. It will be thick and slightly sticky — that’s exactly right. Use a spatula or your fingers (lightly greased) to spread it out evenly. Make sure the surface is as flat as you can get it.
- Bake for 22-26 minutes. The edges should look set and slightly firm, but the center will still look a little soft. That’s what you want. A toothpick inserted in the center should come out with a few moist crumbs, not wet batter. I usually check at 22 minutes and go from there.
- Let it cool in the pan for 10 minutes, then transfer to a wire rack to cool completely. This is important — if you try to decorate while it’s warm, the glaze will melt and run everywhere. I learned this the hard way.
- Once completely cool, prepare the spiderweb glaze. Whisk together the powdered sugar, milk, and vanilla until smooth. You want it thick enough to hold its shape but thin enough to pipe. Add more milk a few drops at a time if it’s too thick.
- Pipe a spiral on top of the cookie cake. Start in the center and work your way outward in a continuous circle, leaving about 1 inch between each ring. Don’t worry about perfection — the next step fixes everything.
- Here’s the magic part: Take a toothpick or skewer and drag it from the center outward through the glaze lines, like you’re drawing spokes on a wheel. Space them about 1 inch apart around the circle. Then drag from the outside back toward the center between each spoke. This creates that classic spiderweb pattern.
- Let the glaze set for about 15-20 minutes before adding any candy spiders or sprinkles. Then serve and watch everyone lose their minds.
Cooking Tips & Techniques
The first time I made this, I got impatient and tried to decorate while the cookie cake was still warm. The glaze melted into a puddle and my spiderweb looked more like a muddy puddle. Let it cool completely — I mean completely — before you even think about decorating.
Here’s another thing I learned the hard way: if your butter is too cold, it won’t cream properly with the sugar, and your cookie cake will come out dense and flat. If your butter is too warm, the dough will spread too much in the oven. Softened butter should give slightly when you press it with your finger, but it shouldn’t feel greasy or look shiny.
For the spiderweb pattern, use a wooden skewer instead of a toothpick if you have one. The longer length gives you better control and lets you drag the glaze in one smooth motion from the center all the way to the edge. A toothpick works fine, but you’ll have to stop and reposition, which can mess up the lines.
If you’re making this ahead of time, store it in an airtight container at room temperature for up to 3 days. The glaze might soften slightly over time, but the pattern will still look great. Don’t refrigerate it — the cookie cake will dry out faster in the fridge.
One more tip: when you’re piping the glaze spiral, don’t stress about making it perfect. The dragging step is incredibly forgiving. I’ve piped some truly messy spirals, and they’ve all turned into beautiful webs after the toothpick drag. It’s almost foolproof, which is saying something coming from me.
Variations & Adaptations
Gluten-Free Version: Substitute the all-purpose flour with a 1:1 gluten-free baking flour blend. I’ve tested this with Bob’s Red Mill and King Arthur, and both worked well. Add an extra tablespoon of milk to the dough since gluten-free flour tends to be more absorbent.
White Chocolate Spiderweb: Instead of the powdered sugar glaze, use melted white chocolate for the web pattern. It sets up firmer and gives a striking contrast against the dark chocolate cookie. Just melt 1/2 cup of white chocolate chips with 1 teaspoon of coconut oil and pipe it the same way.
Peanut Butter Swirl: Before baking, drop spoonfuls of peanut butter on top of the dough and swirl it in with a knife. It creates a marbled effect that tastes incredible. Use about 1/3 cup of creamy peanut butter, warmed slightly so it spreads easily.
Spiderweb Color Variations: Add a drop of orange or purple food coloring to the glaze for a more festive look. Gel food coloring works best since it doesn’t thin out the glaze. I’ve done orange webs for a more Halloween feel, and they looked fantastic.
Individual Cookie Cakes: Press the dough into 4-inch mini cake pans or even a muffin tin. Adjust the baking time to 14-16 minutes. These are perfect for Halloween party favors or school events.
Serving & Storage Suggestions
This spiderweb cookie cake is best served at room temperature. If you’ve refrigerated it, let it sit out for about 20 minutes before serving — the texture softens up and the chocolate flavor comes through more clearly.
For presentation, I like to place the cookie cake on a black or orange cake stand. It makes the spiderweb pattern pop. Add a few candy spiders around the edges or scatter some Halloween sprinkles on the plate. A dollop of whipped cream on the side is never a bad idea.
This pairs beautifully with a cold glass of milk (obviously), but I’ve also served it with vanilla ice cream and caramel sauce for a more indulgent dessert. For Halloween parties, set it out with cups of hot apple cider or pumpkin spice lattes.
Storage: Keep the cookie cake in an airtight container at room temperature for up to 3 days. If you need to stack it, place a sheet of parchment paper between layers. Do not refrigerate — the cookie will dry out and the glaze may become sticky.
Freezing: You can freeze the undecorated cookie cake for up to 2 months. Wrap it tightly in plastic wrap, then aluminum foil. Thaw at room temperature, then make the glaze and decorate fresh. The texture holds up remarkably well.
The flavors actually develop a bit overnight. I’ve found that day-old cookie cake tastes even better — the chocolate deepens and the edges soften slightly. If you can resist eating it all on day one, you’re stronger than me.
Nutritional Information & Benefits
Per serving (based on 12 servings): Approximately 320 calories, 14g fat, 48g carbohydrates, 4g protein, 2g fiber, 28g sugar. These are estimates and will vary based on specific ingredients and portion sizes.
While this is definitely a treat, there are a few silver linings. Cocoa powder is rich in antioxidants called flavonoids, which can help reduce inflammation and support heart health. The brown sugar adds a small amount of molasses, which contains trace minerals like calcium and potassium.
This recipe is vegetarian-friendly and can be made dairy-free by using plant-based butter and milk alternatives. For a lower-sugar version, you can reduce the granulated sugar by 1/4 cup without significantly affecting the texture.
Potential allergens include wheat (gluten), dairy, and eggs. Always check your specific ingredient labels if you’re cooking for someone with allergies.
Look, this isn’t health food. But it’s the kind of dessert that makes you feel good in a different way — the way sharing something delicious with people you care about always does. Sometimes that matters just as much.
Conclusion
This spiderweb Halloween cookie cake has become my go-to for every October gathering, and I honestly can’t imagine a Halloween season without it now. It’s the recipe that proves you don’t need fancy skills or expensive equipment to create something that looks and tastes incredible.
I love how forgiving this recipe is — it works with substitutions, it tolerates my occasional measuring mistakes, and it always turns out looking like I spent hours on it when really, it took maybe 30 minutes of active work. That’s my kind of baking.
I’d love to hear how yours turns out. Did you add your own twist? Did the spiderweb pattern work on your first try? Drop a comment below and let me know — I read every single one, and I genuinely love seeing photos of your creations. Tag me on Pinterest too if you share it there!
Go ahead and give this one a try. Your Halloween party deserves a centerpiece that actually tastes as good as it looks. And honestly? You’ve got this. The hardest part is waiting for it to cool before you dig in.
Frequently Asked Questions
Can I make this spiderweb cookie cake ahead of time?
Absolutely. Bake the cookie cake up to 2 days ahead and store it in an airtight container at room temperature. Decorate it the day you plan to serve it for the best-looking spiderweb pattern. The glaze sets best on fresh cookie cake.
Why did my cookie cake spread too much in the oven?
This usually happens when the butter is too soft or the dough wasn’t chilled before baking. If your kitchen is warm, pop the pressed dough in the fridge for 15 minutes before baking. Also make sure you’re using a 9-inch pan — a smaller pan will give you a thicker cookie that holds its shape better.
Can I use a different pan size?
Yes, but you’ll need to adjust the baking time. An 8-inch pan will give you a thicker cookie cake that needs 28-32 minutes. A 10-inch pan will give you a thinner one that might be done in 18-20 minutes. Keep an eye on it and use the toothpick test to check for doneness.
My spiderweb pattern didn’t turn out — what went wrong?
Most likely the glaze was too thin or the cookie cake was still warm. Make sure the cookie is completely cool, and your glaze should be thick enough that it holds its shape when piped. If it’s runny, add more powdered sugar a tablespoon at a time until it thickens up.
Can I freeze this cookie cake?
Yes, but freeze it undecorated. Wrap the cooled cookie cake tightly in plastic wrap and then aluminum foil. It will keep for up to 2 months. When you’re ready to serve, thaw it at room temperature, then make fresh glaze and decorate. The texture after freezing is surprisingly good.
Pin This Recipe!
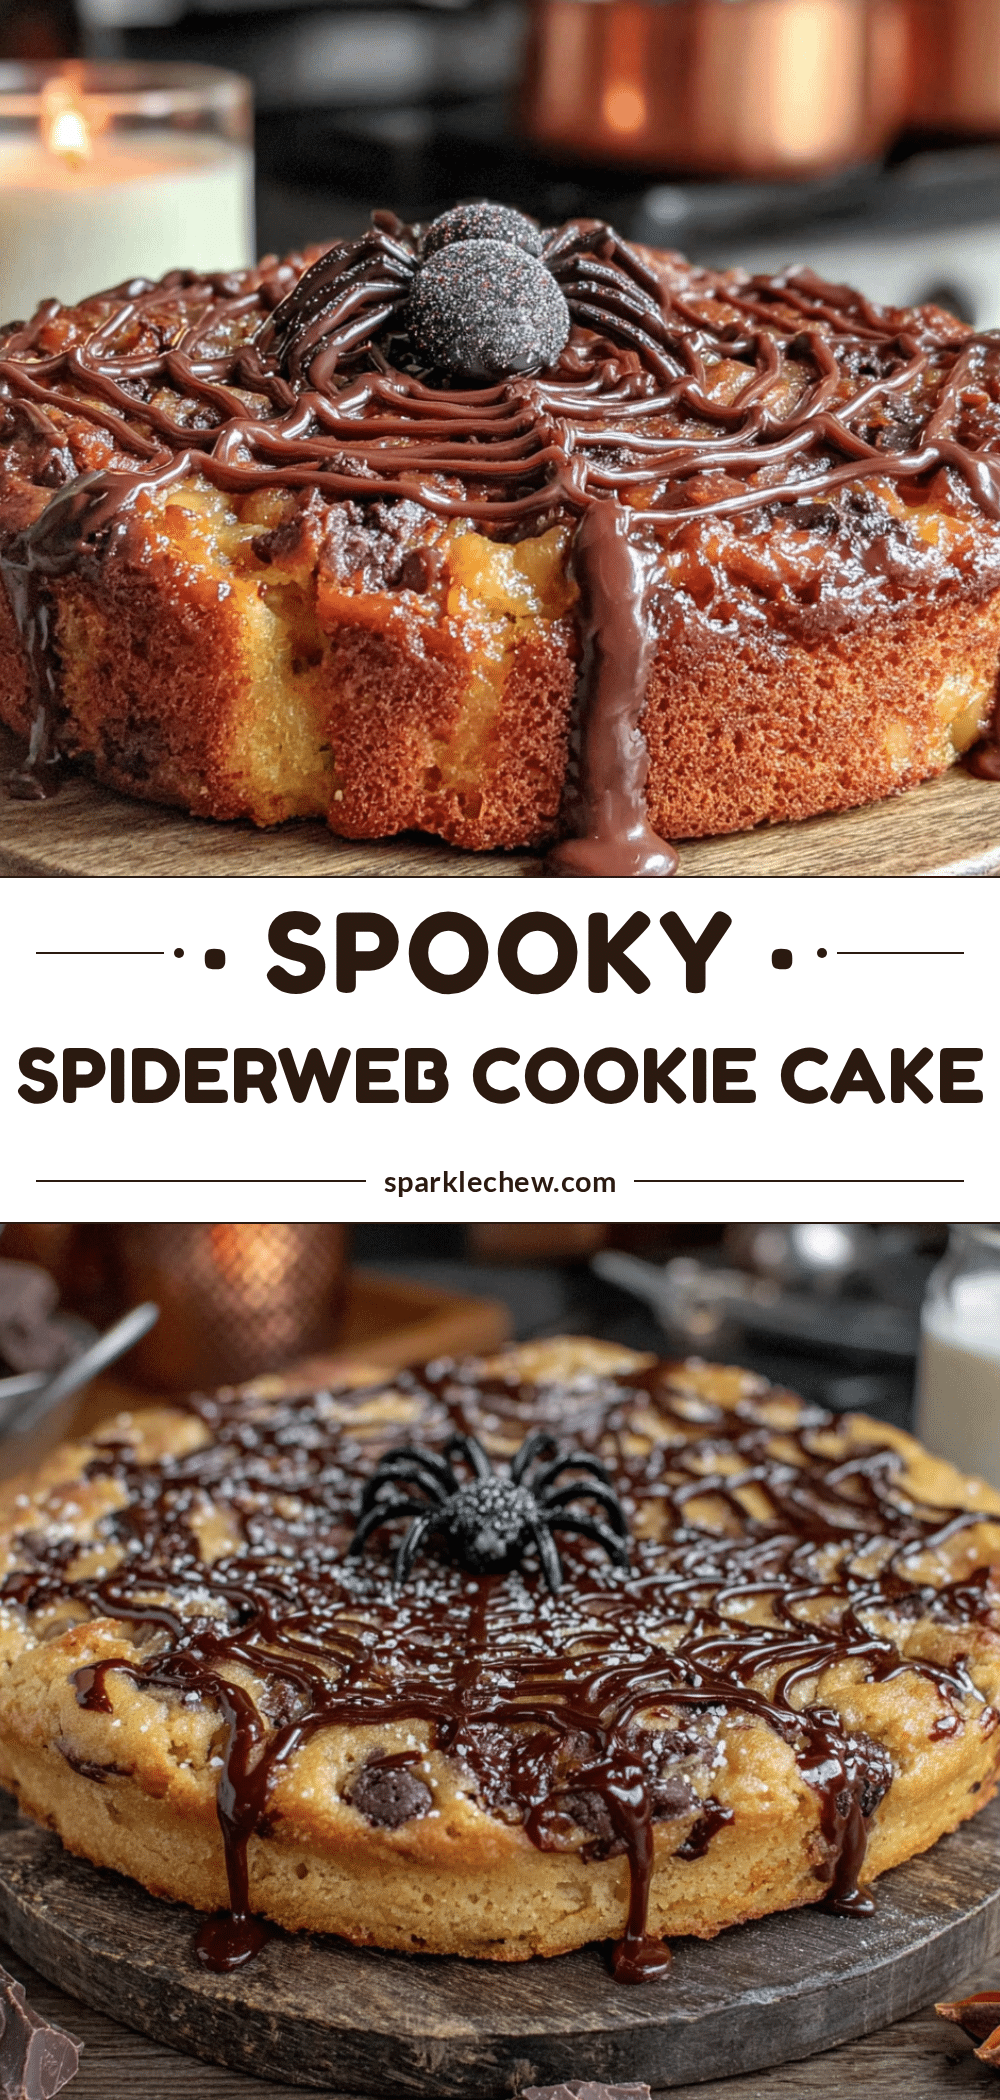
Best Spiderweb Halloween Cookie Cake – Easy Recipe
This spiderweb Halloween cookie cake is the easiest showstopper you’ll ever make. With a soft, chewy chocolate base and a stunning spiderweb glaze, it’s the perfect centerpiece for any Halloween party that tastes as good as it looks.
- Prep Time: 15 minutes
- Cook Time: 25 minutes
- Total Time: 40 minutes
- Yield: 12 servings 1x
- Category: Dessert
- Cuisine: American
Ingredients
- 1 cup (2 sticks) unsalted butter, softened
- 1 cup (200g) granulated sugar
- 3/4 cup (150g) light brown sugar, packed
- 2 large eggs, room temperature
- 2 teaspoons vanilla extract
- 2 1/4 cups (280g) all-purpose flour
- 1/2 cup (50g) unsweetened cocoa powder
- 1 teaspoon baking soda
- 1/2 teaspoon salt
- For the spiderweb glaze: 1 cup (120g) powdered sugar, 2-3 tablespoons milk, 1/2 teaspoon vanilla extract
- Optional: candy spiders or sprinkles for decoration
Instructions
- Preheat your oven to 350°F (175°C). Line a 9-inch round pan with parchment paper on the bottom and lightly grease the sides.
- Cream the butter and sugars together in a large bowl for about 3-4 minutes until light and fluffy. Scrape down the sides of the bowl halfway through.
- Add the eggs one at a time, beating well after each addition. Then mix in the vanilla extract.
- In a separate medium bowl, whisk together the flour, cocoa powder, baking soda, and salt until no lumps remain.
- Gradually add the dry ingredients to the wet mixture, mixing on low speed until just combined. Do not overmix.
- Press the dough evenly into the prepared pan. It will be thick and slightly sticky. Use a spatula or lightly greased fingers to spread it flat.
- Bake for 22-26 minutes. The edges should look set and slightly firm, but the center will still look soft. A toothpick inserted in the center should come out with a few moist crumbs.
- Let it cool in the pan for 10 minutes, then transfer to a wire rack to cool completely.
- Once completely cool, prepare the spiderweb glaze: whisk together the powdered sugar, milk, and vanilla until smooth. It should be thick enough to hold its shape but thin enough to pipe.
- Pipe a spiral on top of the cookie cake, starting in the center and working outward, leaving about 1 inch between each ring.
- Take a toothpick or skewer and drag it from the center outward through the glaze lines, spacing them about 1 inch apart. Then drag from the outside back toward the center between each spoke to create the spiderweb pattern.
- Let the glaze set for about 15-20 minutes before adding any candy spiders or sprinkles. Serve and enjoy.
Notes
Let the cookie cake cool completely before decorating, or the glaze will melt. Use a wooden skewer instead of a toothpick for longer, smoother lines. Store in an airtight container at room temperature for up to 3 days. Do not refrigerate. Freeze undecorated for up to 2 months.
Nutrition
- Serving Size: 1 slice (1/12 of cak
- Calories: 320
- Sugar: 28
- Sodium: 220
- Fat: 14
- Saturated Fat: 8
- Carbohydrates: 48
- Fiber: 2
- Protein: 4
Keywords: spiderweb cookie cake, Halloween dessert, chocolate cookie cake, easy Halloween recipe, spiderweb cake, Halloween baking


