Love this? Save it for later!
Share the inspiration with your friends
I was getting my car’s oil changed—a Tuesday, I think, or maybe a Wednesday, one of those nothing-days where you just go through the motions. The waiting room smelled like old coffee and rubber mats, and I was scrolling through my phone, not really looking at anything. That’s when the mechanic, a guy named Dave with grease permanently etched into his knuckles, walked in and sat down next to me. He wasn’t there to talk about my timing belt. “You know what I made last night?” he asked, wiping his hands on a rag. “The best cookies I’ve ever had. Brown butter. Changed my life.” I blinked. Dave the mechanic. Talking about browned butter. It was the last place on earth I expected to find a cookie revelation, but honestly, that’s how the best recipes find you, right? You’re not looking, and then someone who spends their day under a hood tells you about the secret to perfect texture.
He scribbled the base of the recipe on the back of an invoice. His handwriting was terrible, and there was a smudge of motor oil on the corner. But the idea stuck with me—brown butter in a chocolate chip cookie. I mean, I’d heard of it, sure, but Dave made it sound less like a fancy chef trick and more like a practical life upgrade. “It’s the nuttiness,” he said, tapping the paper. “And it makes ’em chewy. Not cakey. Chewy.” That’s the thing, you know that feeling when you bite into a cookie expecting that soft, dense chew and you get a crumbly mess instead? Dave got it. So I went home, stood over my stove, and watched a stick of butter turn golden brown. The smell alone was worth the experiment. And the cookies? Let me tell you, they were everything he promised and more.
This recipe for Chewy Brown Butter Chocolate Chip Cookies has been my go-to ever since. It’s the one I bring to parties, the one my family begs for, the one that makes people close their eyes after the first bite. It’s not just another cookie recipe—it’s the one that stuck. Maybe you’ve been there, chasing that perfect texture for years, trying a dozen different versions. This is the one that stops the search.
Why You’ll Love This Recipe
I’ve tested a lot of cookie recipes over the years. Some were too thin, some were too puffy, and some just didn’t have that flavor depth you crave. This one is different. It’s the result of multiple trials, a few burnt batches of butter, and one very honest conversation with a mechanic. Here’s why it works:
- Quick & Easy: The dough comes together in about 15 minutes. No fancy mixers required—just a whisk and a bowl. It’s perfect for a last-minute dessert craving or a weekend baking session.
- Simple Ingredients: You probably have everything in your pantry right now. Flour, sugar, eggs, vanilla, and chocolate chips. The only “special” ingredient is butter, and I bet you have that too.
- Perfect for Any Occasion: These cookies work for bake sales, potlucks, holiday cookie exchanges, or just a Tuesday night treat. They’re versatile and always welcome.
- Crowd-Pleaser: I’ve served these to kids, adults, and picky eaters. They disappear every single time. The brown butter adds a depth that even non-bakers notice.
- Unbelievably Delicious: That nutty, caramel-like flavor from the brown butter combined with gooey chocolate chips is next-level comfort food. It’s the kind of cookie that makes you reach for a second one before you’ve finished the first.
What makes this recipe stand out from the thousands of chocolate chip cookie recipes out there? It’s the technique. Browning the butter isn’t just a flavor trick—it changes the moisture content and creates that signature chewy texture. Plus, I’ve added a small amount of cornstarch to the flour mixture. It’s a little secret from my test kitchen that guarantees soft centers. This isn’t just another version of a classic; it’s the version I trust every single time.
Honestly, this recipe is comfort food reimagined. It’s familiar enough to feel like home but special enough to impress anyone. It’s the cookie that makes you say, “I made these from scratch,” and mean it with pride.
What Ingredients You Will Need
This recipe uses simple, wholesome ingredients to deliver that bold, nutty flavor and satisfying chew. Most of these are pantry staples, so you might not even need a trip to the store. Let’s break down each one and why it matters.
- Unsalted Butter (1 cup / 2 sticks or 226 grams): This is the star of the show. Using unsalted butter lets you control the salt level. You’ll be browning it, which brings out a deep, toasty flavor. I prefer using a good quality European-style butter like Kerrygold for browning because it has a higher fat content and less water, which means more flavor and a better texture. But honestly, any unsalted butter works.
- Brown Sugar (1 cup, packed / 200 grams): Light or dark brown sugar both work, but dark brown sugar gives a deeper molasses flavor and extra chewiness. The moisture in brown sugar is what helps keep these cookies soft.
- Granulated Sugar (1/2 cup / 100 grams): This adds sweetness and helps with spreading. The combination of brown and white sugar is key for that perfect texture.
- Large Eggs (2, room temperature): Eggs bind everything together. Room temperature eggs incorporate more easily into the brown butter, creating a smoother dough. If you forget to take them out early, place them in a bowl of warm water for 5 minutes.
- Vanilla Extract (2 teaspoons): Pure vanilla extract is best. It enhances the chocolate and the nutty notes from the brown butter. Avoid imitation vanilla if you can—it makes a difference.
- All-Purpose Flour (2 1/4 cups / 280 grams): Standard all-purpose flour gives the best structure. Don’t use bread flour here—it can make the cookies too tough. Spoon and level your flour for accuracy; scooping directly from the bag packs in too much.
- Cornstarch (2 teaspoons): This is my secret ingredient. It tenderizes the gluten and keeps the cookies pillowy soft in the center. Don’t skip it!
- Baking Soda (1 teaspoon): This helps the cookies spread just the right amount and gives them a slight lift.
- Salt (1 teaspoon): Salt balances the sweetness and enhances the brown butter flavor. I use fine sea salt for the dough and sometimes sprinkle a little flaky sea salt on top before baking.
- Semi-Sweet Chocolate Chips (2 cups / 340 grams): Semi-sweet is classic, but you can use dark chocolate, milk chocolate, or even chopped chocolate bars. I like using a mix of chips and chopped chocolate for varied texture. Ghirardelli or Guittard are my go-to brands.
- Optional: Flaky Sea Salt (for topping): A pinch of Maldon or another flaky salt on top of each cookie right out of the oven takes them to another level. It’s not necessary, but it’s highly recommended.
Ingredient Selection Tips: For the best brown butter, use a light-colored pan so you can see the color change. Look for butter that’s fresh—older butter can have off flavors when browned. If you’re using dark chocolate chips, you might want to reduce the sugar slightly, but I find the balance is perfect as written.
Substitution Guidance: Need a dairy-free option? Use a high-quality vegan butter stick (like Miyoko’s) for browning. It won’t brown exactly the same way, but it will work. For a gluten-free version, swap the all-purpose flour with a 1-to-1 gluten-free baking flour blend that contains xanthan gum. The texture will be slightly different, but still delicious.
Equipment Needed
You don’t need a lot of fancy tools for this recipe, which is part of its charm. Here’s what I use:
- Large Skillet or Saucepan: A light-colored skillet is best for browning butter so you can see the color change. A stainless steel or light non-stick pan works perfectly. Dark pans make it hard to tell when the butter is done.
- Mixing Bowls: You’ll need one large bowl for the wet ingredients and one medium bowl for the dry ingredients. Glass or stainless steel is fine.
- Whisk: A good whisk helps incorporate the eggs and sugar smoothly.
- Rubber Spatula: For scraping every last bit of that glorious brown butter into the bowl and for folding in the chocolate chips.
- Baking Sheets: Two standard half-sheet pans work well. I like using light-colored aluminum sheets because they promote even browning. Dark sheets can cause the bottoms to burn.
- Parchment Paper or Silicone Baking Mats: These prevent sticking and make cleanup a breeze. They also help the cookies bake evenly.
- Cookie Scoop (about 1.5 tablespoons): This ensures uniform cookies that bake evenly. If you don’t have one, use two spoons to portion out the dough.
- Cooling Rack: Letting the cookies cool on a rack prevents them from steaming and getting soggy on the bottom.
Personal Tip: I’ve used my grandmother’s old metal spoons for years, but I finally bought a good cookie scoop last year. Honestly, it was a game-changer. The cookies are so much more uniform, and it speeds up the process. You can find a decent one for under $10 at any kitchen supply store. If you’re on a budget, a simple ice cream scoop works too.
Preparation Method
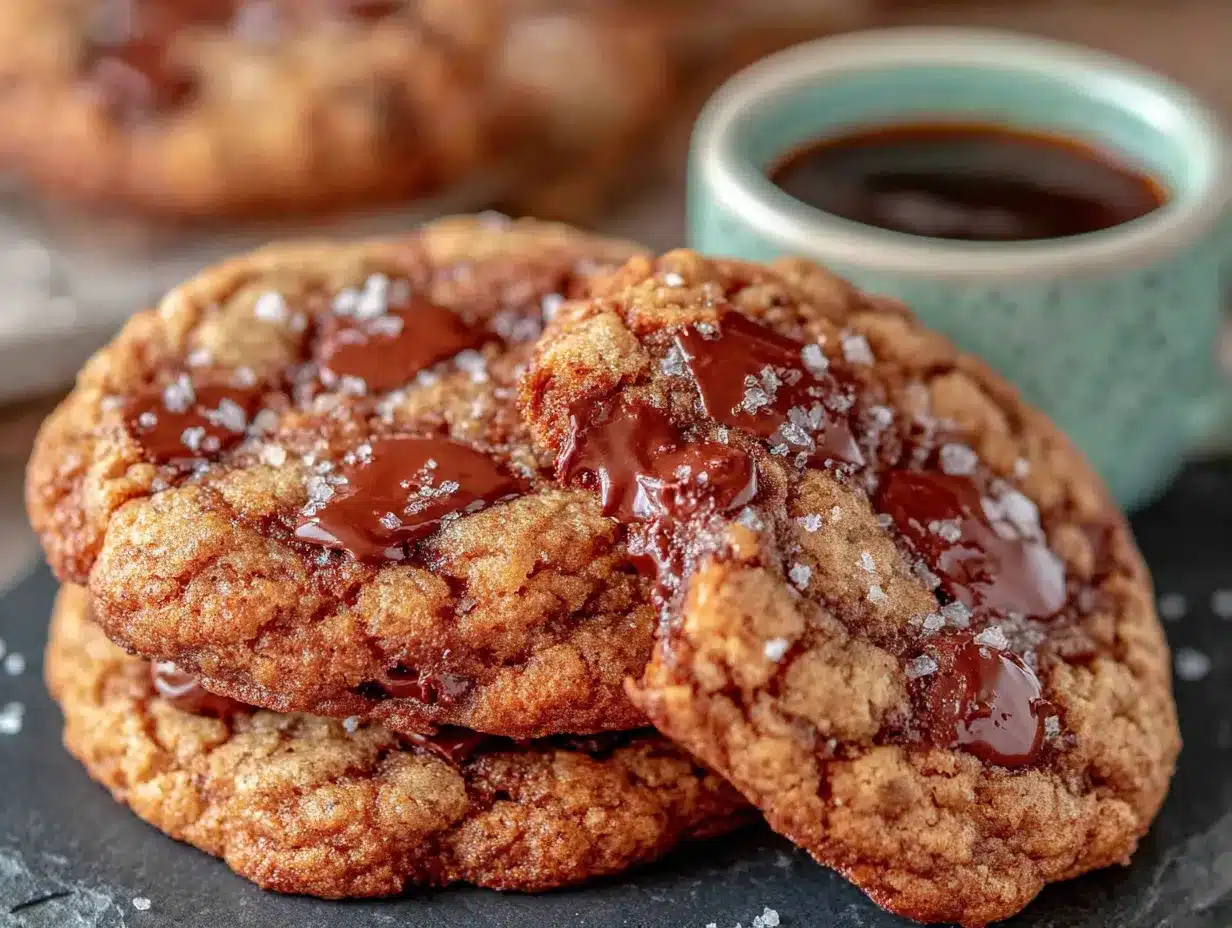
Let’s get to the fun part. This method is broken down into clear steps, and I’ve included all the little details that make the difference between a good cookie and a great one.
- Brown the Butter: Place the 1 cup (2 sticks) of unsalted butter in a light-colored skillet or saucepan over medium heat. Stir frequently with a rubber spatula or whisk. The butter will melt, then foam, and then start to bubble. Watch carefully—you’re looking for the milk solids at the bottom to turn a golden brown color and smell nutty. This usually takes about 5-7 minutes. Once it’s a deep amber color and smells like toasted nuts, immediately remove it from the heat and pour it into a large mixing bowl. Let it cool for 10-15 minutes. Don’t skip the cooling step, or you’ll end up with scrambled eggs later!
- Combine Dry Ingredients: In a medium bowl, whisk together 2 1/4 cups all-purpose flour, 2 teaspoons cornstarch, 1 teaspoon baking soda, and 1 teaspoon salt. Set aside.
- Mix Wet Ingredients: Once the brown butter has cooled slightly (it should be warm but not hot), add 1 cup packed brown sugar and 1/2 cup granulated sugar. Whisk vigorously until the mixture is smooth and looks like a thick paste. It will take a minute or two. The sugar should start to dissolve into the butter.
- Add Eggs and Vanilla: Add the 2 room-temperature eggs, one at a time, whisking well after each addition. The mixture should look glossy and smooth. Then add 2 teaspoons vanilla extract and whisk again. The mixture might look a little separated at first, but keep whisking—it will come together.
- Combine Wet and Dry: Pour the dry ingredient mixture into the wet mixture. Use a rubber spatula to fold everything together. Stir just until you no longer see streaks of flour. Overmixing at this stage will make the cookies tough. A few small lumps are fine.
- Fold in Chocolate Chips: Add the 2 cups of semi-sweet chocolate chips. Fold them in gently until they are evenly distributed throughout the dough. The dough will be thick and slightly sticky.
- Chill the Dough (Important!): Cover the bowl with plastic wrap and refrigerate for at least 30 minutes, but 1 hour is better. This step is crucial. Chilling the dough solidifies the brown butter, which prevents the cookies from spreading too thin and gives them that thick, chewy texture. I’ve made them without chilling, and they were flat and crispy—still tasty, but not what we’re going for.
- Preheat Oven: While the dough chills, preheat your oven to 350°F (175°C). Line two baking sheets with parchment paper or silicone mats.
- Scoop the Dough: Use your cookie scoop to portion out rounded tablespoons of dough (about 1.5 tablespoons each). Place them on the prepared baking sheets, spacing them about 2 inches apart. I usually fit 9-12 cookies per sheet, depending on size.
- Bake: Bake one sheet at a time for 10-12 minutes. The edges should be golden brown, but the centers will look slightly underdone and puffy. That’s exactly what you want. If you bake until the centers look fully set, they’ll be overbaked and dry. For a softer cookie, aim for 10 minutes. For a slightly crisper edge, go to 12 minutes.
- Cool on Pan: Let the cookies cool on the baking sheet for 5 minutes. This allows them to set up without breaking. Then transfer them to a wire cooling rack to cool completely. If you’re adding flaky sea salt, sprinkle it on right when they come out of the oven.
Sensory Cues: When you’re browning the butter, listen for the sizzle to die down—that’s when the browning really starts. The smell should be intoxicating, like toasted hazelnuts. When you fold in the chocolate chips, you’ll feel the dough stiffen slightly. And when the cookies come out of the oven, the edges should be a deep golden brown, while the centers are still pale and soft to the touch.
Troubleshooting Tip: If your cookies spread too much, your butter was probably too warm when you mixed it, or you didn’t chill the dough long enough. Next time, let the brown butter cool completely and chill the dough for a full hour.
Cooking Tips & Techniques
Over the years, I’ve made a few mistakes with this recipe. I’ve burnt the butter (more than once), overmixed the dough, and forgotten to chill it. Here’s what I’ve learned so you don’t have to make the same mistakes.
- Watch the Butter Like a Hawk: Browning butter happens fast. Once it starts to foam, don’t walk away. Swirl the pan constantly. The butter will go from perfect to burnt in about 30 seconds. The second you see golden brown specks forming at the bottom and smell that nutty aroma, pull it off the heat. I once got distracted by my phone, and the butter turned black. The kitchen smelled terrible, and I had to start over.
- Use Room Temperature Eggs: Cold eggs can seize the brown butter, causing it to harden into little chunks. If you forget to take them out ahead of time, place them in a bowl of warm water for 5 minutes. It works like a charm.
- Don’t Overmix the Dough: When you add the flour, stir just until it disappears. Overmixing develops gluten, which makes cookies tough and cakey. We want chewy, not bread-like. I use a gentle hand and stop as soon as the streaks are gone.
- Chill the Dough for Real: I know it’s tempting to skip this step, especially when you’re craving cookies. But trust me, it’s worth it. Chilling solidifies the fat, which means less spread and a thicker cookie. It also gives the flavors time to meld. I’ve made batches with a 30-minute chill and a 2-hour chill, and the longer chill always wins.
- Bake in Batches: Don’t overcrowd the oven. Bake one sheet at a time on the middle rack. If you bake two sheets at once, the heat distribution is uneven, and one batch might burn while the other is underdone. It takes a little longer, but the results are consistent.
- Use a Cookie Scoop for Uniformity: This is one of those small investments that pays off big. Uniform cookies bake evenly. If you have different sizes, some will be overdone while others are underdone. A #40 scoop (about 1.5 tablespoons) is perfect for this recipe.
Variations & Adaptations
This recipe is a great base, but I love playing around with it. Here are some variations I’ve tried and loved.
- Double Chocolate Brown Butter Cookies: Reduce the all-purpose flour to 2 cups and add 1/4 cup of unsweetened cocoa powder. Use white chocolate chips or a mix of dark and white chocolate. The brown butter flavor pairs beautifully with chocolate on chocolate.
- Brown Butter Oatmeal Chocolate Chip Cookies: Replace 1 cup of the all-purpose flour with 1 cup of old-fashioned rolled oats. Add 1/2 teaspoon of cinnamon to the dry ingredients. The oats add a hearty texture and a little extra chew. This is my favorite fall variation.
- Gluten-Free Version: Swap the all-purpose flour with a 1-to-1 gluten-free baking blend that contains xanthan gum. I’ve tested this with Bob’s Red Mill 1-to-1 Baking Flour, and it works perfectly. The cookies are slightly more delicate, but the flavor is identical.
- Add Nuts: Fold in 1 cup of toasted pecans or walnuts along with the chocolate chips. Toasting the nuts first brings out their flavor. Just chop them roughly and toast them in a dry pan for 3-4 minutes until fragrant.
- Spiced Brown Butter Cookies: Add 1 teaspoon of cinnamon, 1/2 teaspoon of nutmeg, and 1/4 teaspoon of cardamom to the dry ingredients. This gives the cookies a warm, holiday-like flavor that’s amazing with dark chocolate.
Personal Variation: I once made these cookies with browned butter and added a tablespoon of instant espresso powder to the dry ingredients. The coffee flavor didn’t overpower the chocolate—it just deepened it. My husband said they were the best cookies I’d ever made. So if you’re a coffee lover, give that a try.
Serving & Storage Suggestions
These cookies are best served slightly warm, when the chocolate is still a little melty and the edges are crisp. But they’re also fantastic at room temperature—if they last that long.
- Serving Temperature: I like to let them cool on the pan for 5 minutes, then transfer them to a cooling rack. If you want that warm, gooey center, pop them in the microwave for 10 seconds before serving. It’s a game-changer.
- Pairing Ideas: These cookies are perfect with a cold glass of milk, a hot cup of coffee, or a scoop of vanilla ice cream. For a dessert platter, serve them alongside fresh berries and a dollop of whipped cream.
- Storage: Store cookies in an airtight container at room temperature for up to 5 days. They’ll stay soft and chewy. If you want to keep them extra soft, add a slice of bread to the container—the cookies will absorb the moisture and stay tender. Replace the bread every couple of days.
- Freezing Instructions: You can freeze the baked cookies for up to 3 months. Place them in a single layer in a freezer-safe bag or container. Thaw at room temperature for about 30 minutes. Alternatively, freeze the cookie dough balls on a baking sheet until solid, then transfer them to a freezer bag. You can bake them straight from frozen—just add 2-3 minutes to the baking time.
- Reheating: To revive leftover cookies, place them on a baking sheet and warm them in a 300°F oven for 5 minutes. They’ll taste almost fresh out of the oven. Avoid microwaving for too long, or they’ll become tough.
Flavor Development: Honestly, these cookies taste even better the next day. The flavors meld together, and the brown butter flavor becomes more pronounced. So if you can resist eating them all on day one, you’re in for a treat on day two.
Nutritional Information & Benefits
Let’s be real—these are cookies, not health food. But knowing what’s in them can help you enjoy them mindfully. Here’s the approximate nutritional breakdown per cookie (based on a batch of 24 cookies):
- Calories: ~210
- Fat: 12g
- Saturated Fat: 7g
- Carbohydrates: 26g
- Sugar: 17g
- Protein: 3g
- Fiber: 1g
Health Benefits of Key Ingredients: The brown butter adds a rich flavor, but it’s still butter, so enjoy in moderation. Dark chocolate (especially if you use 70% or higher) contains antioxidants called flavonoids that can support heart health. The eggs provide protein and B vitamins. And the oats in the oatmeal variation add fiber, which is good for digestion.
Dietary Considerations: This recipe contains gluten, dairy, and eggs. For a dairy-free version, use vegan butter. For a gluten-free version, use a 1-to-1 gluten-free flour blend. These cookies are not low-carb or sugar-free, but they are a wonderful occasional treat. I personally believe that food should be enjoyed without guilt, and these cookies are worth every bite.
Potential Allergens: Wheat (gluten), dairy, eggs. If you’re adding nuts, they are a common allergen too. Always check your labels if you’re baking for someone with allergies.
Conclusion
So there you have it—the Chewy Brown Butter Chocolate Chip Cookies that started with a conversation in a mechanic’s waiting room. Honestly, I still think about that day sometimes. Dave probably has no idea that his offhand comment turned into my most-requested recipe. But that’s how it goes with food, isn’t it? The best things often come from the most unexpected places.
This recipe is special because it’s simple enough for a beginner but impressive enough for a seasoned baker. The brown butter adds a depth of flavor that makes people ask, “What’s in these?” and the cornstarch trick gives you that perfect chewy texture every time. Whether you’re baking for a holiday party, a family dinner, or just because it’s Tuesday, these cookies deliver.
I want you to make this recipe your own. Try the variations, add your favorite mix-ins, and don’t be afraid to experiment. Maybe you’ll discover your own secret ingredient, just like I did with Dave’s tip. And when you do, I’d love to hear about it. Leave a comment below and tell me how your cookies turned out—did you add espresso powder? Swap in white chocolate? I read every comment, and your stories inspire me to keep baking.
Go ahead, brown that butter. Your kitchen is about to smell amazing.
Frequently Asked Questions
Why do I need to chill the dough?
Chilling the dough solidifies the brown butter, which prevents the cookies from spreading too much in the oven. It also gives the flavors time to meld, resulting in a more flavorful and chewier cookie. At least 30 minutes is good, but 1 hour is even better.
Can I use salted butter instead of unsalted?
Yes, you can. If you use salted butter, reduce the added salt in the recipe to 1/2 teaspoon. The flavor might be slightly different, but it will still work. Just keep in mind that salted butter can sometimes cause the cookies to spread a little more.
Why did my cookies turn out flat?
Flat cookies usually happen for one of three reasons: the butter was too warm when you mixed it, the dough wasn’t chilled long enough, or you used too much sugar. Make sure your brown butter has cooled to room temperature and chill the dough for at least 30 minutes. Also, be precise with your measurements.
Can I freeze the cookie dough?
Absolutely! Scoop the dough into balls, place them on a baking sheet, and freeze until solid. Then transfer the frozen dough balls to a freezer bag. You can bake them straight from frozen—just add 2-3 minutes to the baking time. It’s perfect for when you need fresh cookies in a hurry.
How do I get that perfect chewy texture?
The combination of brown butter, brown sugar, and cornstarch is the secret. Brown butter has less water than regular butter, which reduces spreading. Brown sugar adds moisture, and cornstarch tenderizes the gluten. Chilling the dough and not overbaking are also key. The centers should look slightly underdone when you take them out of the oven.
Pin This Recipe!
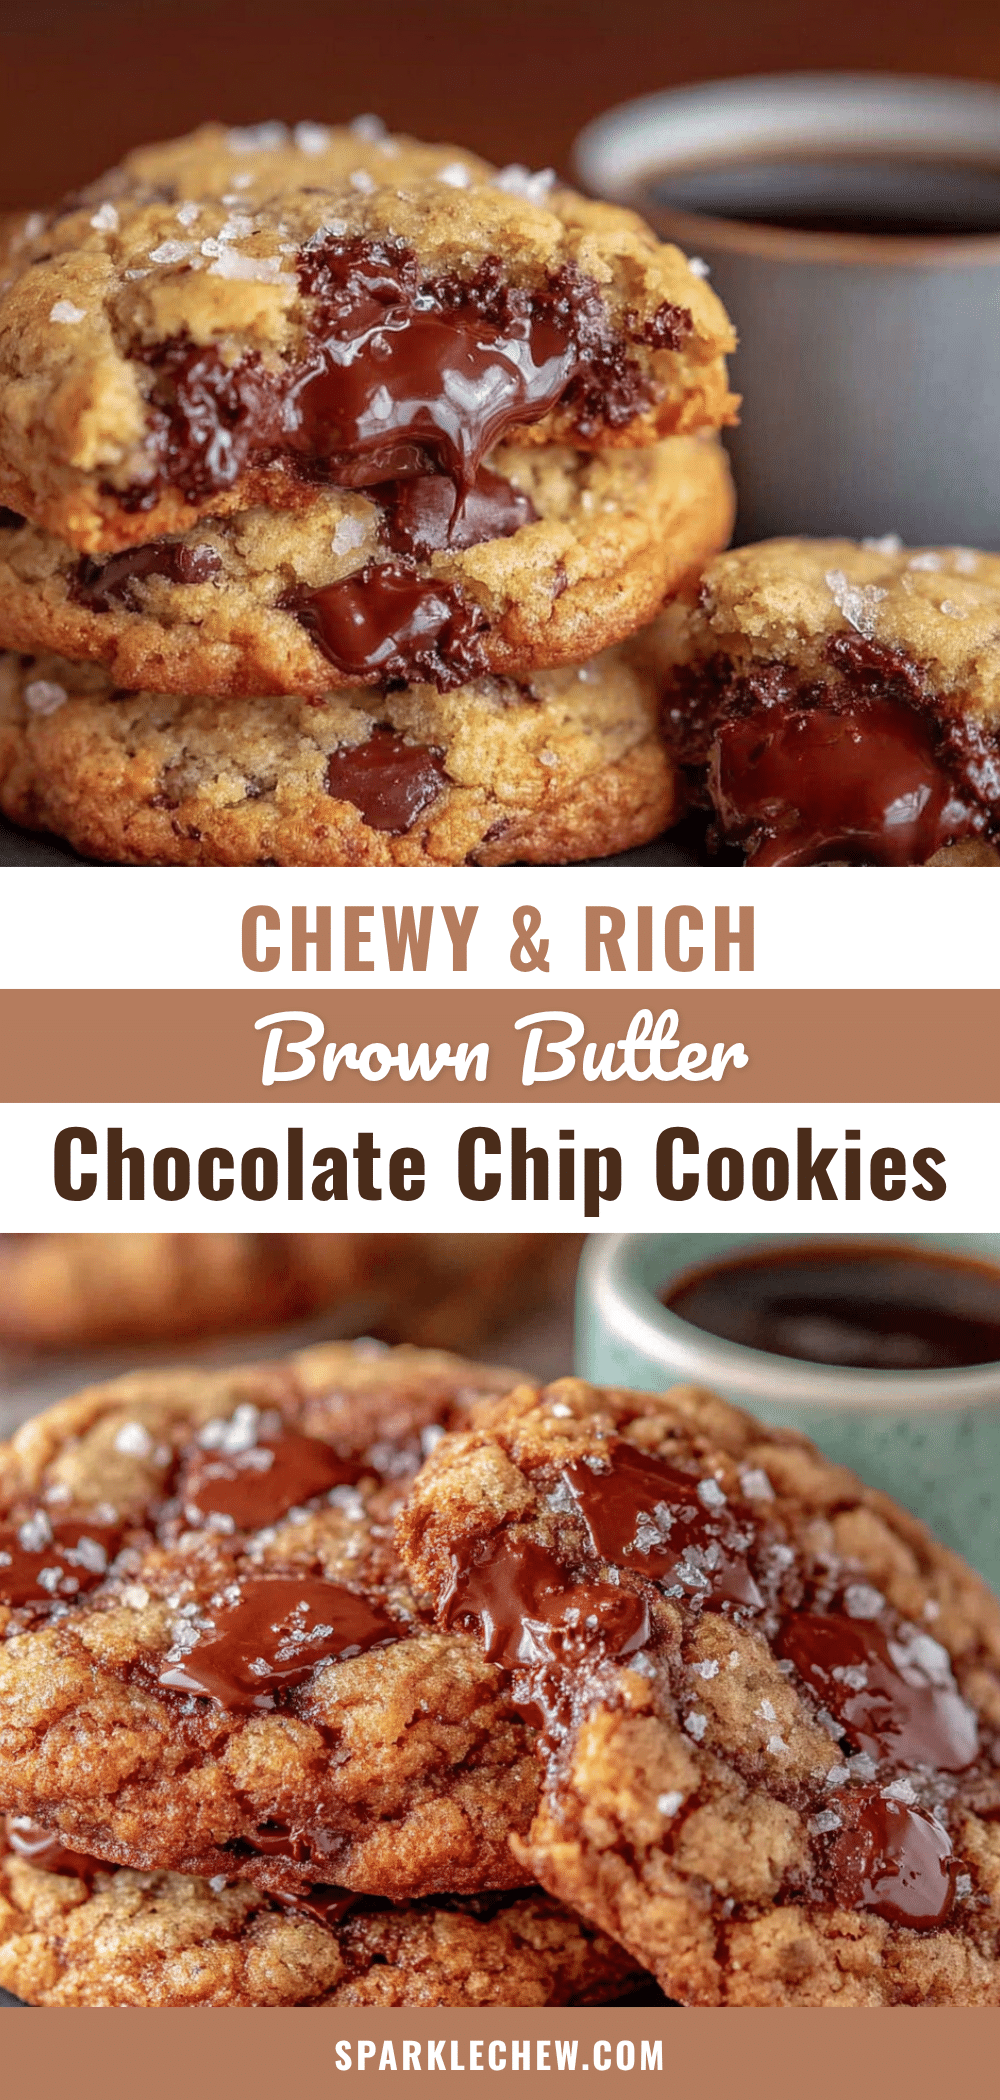
Chewy Brown Butter Chocolate Chip Cookies: Best Easy Recipe

These chewy brown butter chocolate chip cookies are the ultimate comfort food, with a nutty, caramel-like flavor from browned butter and a perfectly soft, chewy texture. This easy recipe uses simple ingredients and a secret cornstarch trick for bakery-quality results every time.
- Prep Time: 15 minutes
- Cook Time: 10-12 minutes per batch
- Total Time: 1 hour 30 minutes (including chilling)
- Yield: 24 cookies 1x
- Category: Dessert
- Cuisine: American
Ingredients
- 1 cup (2 sticks or 226 grams) unsalted butter
- 1 cup (200 grams) packed brown sugar (light or dark)
- 1/2 cup (100 grams) granulated sugar
- 2 large eggs, room temperature
- 2 teaspoons vanilla extract
- 2 1/4 cups (280 grams) all-purpose flour
- 2 teaspoons cornstarch
- 1 teaspoon baking soda
- 1 teaspoon fine sea salt
- 2 cups (340 grams) semi-sweet chocolate chips
- Optional: flaky sea salt for topping
Instructions
- Brown the butter: Place 1 cup unsalted butter in a light-colored skillet or saucepan over medium heat. Stir frequently with a rubber spatula or whisk. The butter will melt, foam, then bubble. Watch carefully until the milk solids at the bottom turn golden brown and the butter smells nutty (about 5-7 minutes). Immediately remove from heat and pour into a large mixing bowl. Let cool for 10-15 minutes.
- Combine dry ingredients: In a medium bowl, whisk together 2 1/4 cups all-purpose flour, 2 teaspoons cornstarch, 1 teaspoon baking soda, and 1 teaspoon salt. Set aside.
- Mix wet ingredients: Once the brown butter has cooled slightly (warm but not hot), add 1 cup packed brown sugar and 1/2 cup granulated sugar. Whisk vigorously until smooth and thick, about 1-2 minutes.
- Add eggs and vanilla: Add 2 room-temperature eggs, one at a time, whisking well after each addition. The mixture should look glossy and smooth. Add 2 teaspoons vanilla extract and whisk again.
- Combine wet and dry: Pour the dry ingredients into the wet mixture. Use a rubber spatula to fold together just until no streaks of flour remain. Do not overmix.
- Fold in chocolate chips: Add 2 cups semi-sweet chocolate chips and fold gently until evenly distributed. The dough will be thick and slightly sticky.
- Chill the dough: Cover the bowl with plastic wrap and refrigerate for at least 30 minutes (1 hour is better). This step is crucial for thick, chewy cookies.
- Preheat oven: While dough chills, preheat oven to 350°F (175°C). Line two baking sheets with parchment paper or silicone mats.
- Scoop the dough: Use a cookie scoop (about 1.5 tablespoons) to portion dough. Place on prepared baking sheets, spacing 2 inches apart.
- Bake: Bake one sheet at a time for 10-12 minutes. Edges should be golden brown, centers slightly underdone and puffy. For softer cookies, bake 10 minutes; for crisper edges, 12 minutes.
- Cool on pan: Let cookies cool on baking sheet for 5 minutes, then transfer to a wire cooling rack. If using flaky sea salt, sprinkle on top immediately after removing from oven.
Notes
For best results, chill the dough for at least 1 hour. Use room temperature eggs to prevent the brown butter from seizing. Do not overmix the dough. For extra flavor, add 1 tablespoon instant espresso powder to the dry ingredients. Cookies taste even better the next day.
Nutrition
- Serving Size: 1 cookie
- Calories: 210
- Sugar: 17
- Sodium: 150
- Fat: 12
- Saturated Fat: 7
- Carbohydrates: 26
- Fiber: 1
- Protein: 3
Keywords: brown butter chocolate chip cookies, chewy cookies, easy cookie recipe, homemade cookies, chocolate chip cookies


