Love this? Save it for later!
Share the inspiration with your friends
This was supposed to be a simple apple crisp. A Tuesday night sort of thing, you know? I’d peeled the apples, mixed the cinnamon, and had the oats ready to go. But somewhere between answering my phone (my sister, asking about Thanksgiving plans) and grabbing what I thought was the brown sugar, I made a critical error. I grabbed the dark brown sugar instead of the light. And then I realized I was out of rolled oats. I only had a box of quick-cooking ones, which I’d always been told were a disaster for a crisp topping. I stood there, staring at the sticky, dark sugar and the sad little oats, and honestly? I almost just ordered pizza. But the apples were already sliced, and the kitchen smelled like fall, and I just couldn’t give up. So I threw everything into a pan, pressed half of it down like a crust, and crossed my fingers. What came out of the oven was nothing like the plan—and way, way better. These caramel apple crumble bars are a happy accident I’ve been making every autumn since. They taste like a cozy sweater feels. Let me tell you, sometimes the best recipes come from the biggest messes.
Why You’ll Love This Recipe
These aren’t just another fruit bar. They’re the kind of dessert that makes you close your eyes after the first bite. I’ve tested this recipe six times (my neighbors are very happy), and each time, I tweaked the butter-to-flour ratio until the crust was just the right balance of crunchy and tender. Here’s why I think you’ll fall for them, too:
- Simple Ingredients: You probably have everything in your pantry right now. No fancy grocery trips needed—just butter, flour, oats, apples, and a few staples.
- Quick & Easy: The whole thing comes together in about 20 minutes of active work. The oven does the rest. Perfect for a busy Tuesday or a last-minute bake sale contribution.
- Perfect for Fall Baking: This is the ultimate cozy dessert for apple picking season, Thanksgiving dessert tables, or a weekend treat with a hot mug of cider.
- Crowd-Pleaser: I’ve brought these to potlucks and family dinners, and they disappear faster than anything else. Kids love the sweet, buttery crumble, and adults appreciate the not-too-sweet apple filling.
- Unbelievably Delicious: The texture is next-level. You get a firm, buttery crust, a soft, jammy apple layer, and a crunchy, caramelized oat topping. It’s comfort food reimagined—soul-soothing satisfaction in every square.
I’m not saying this to brag, but these bars are genuinely my most-requested recipe. They’re the ones I always bring to the annual block party. They’re the ones my husband hides in the back of the fridge so he can have one for breakfast (I pretend not to notice). This isn’t just another version of an apple dessert—it’s your new favorite.
What Ingredients You Will Need
This recipe uses simple, wholesome ingredients to deliver bold flavor and satisfying texture without the fuss. Most of these are pantry staples, which makes this a perfect last-minute fall bake. Here’s what you’ll need, plus a few notes from my own kitchen trials.
For the Crust & Crumble Topping
- 1 cup (2 sticks) unsalted butter, cold and cubed – This is non-negotiable for a flaky crust. I prefer using Kerrygold for its rich flavor, but any good-quality unsalted butter works. Keep it cold until the last minute.
- 1 cup granulated sugar – Adds sweetness and helps the crust brown. You can reduce this to ¾ cup if you prefer a less sweet bar.
- 1 cup packed light brown sugar – This gives the crumble that deep, caramel-like flavor. I’ve tried dark brown sugar, and it’s good, but light brown sugar lets the apple flavor shine through better.
- 2 cups all-purpose flour – Spoon and level your flour for the best texture. Too much flour makes the crust dry and crumbly.
- 2 cups old-fashioned rolled oats – Quick-cooking oats work in a pinch, but they don’t give you that same satisfying crunch. I recommend using rolled oats for the best texture.
- 1 teaspoon ground cinnamon – Use a fresh jar if you can. Old cinnamon loses its punch.
- ½ teaspoon salt – Balances the sweetness and brings out the apple flavor.
- 1 teaspoon baking powder – Helps the crumble topping stay light and crisp instead of dense.
For the Apple Filling
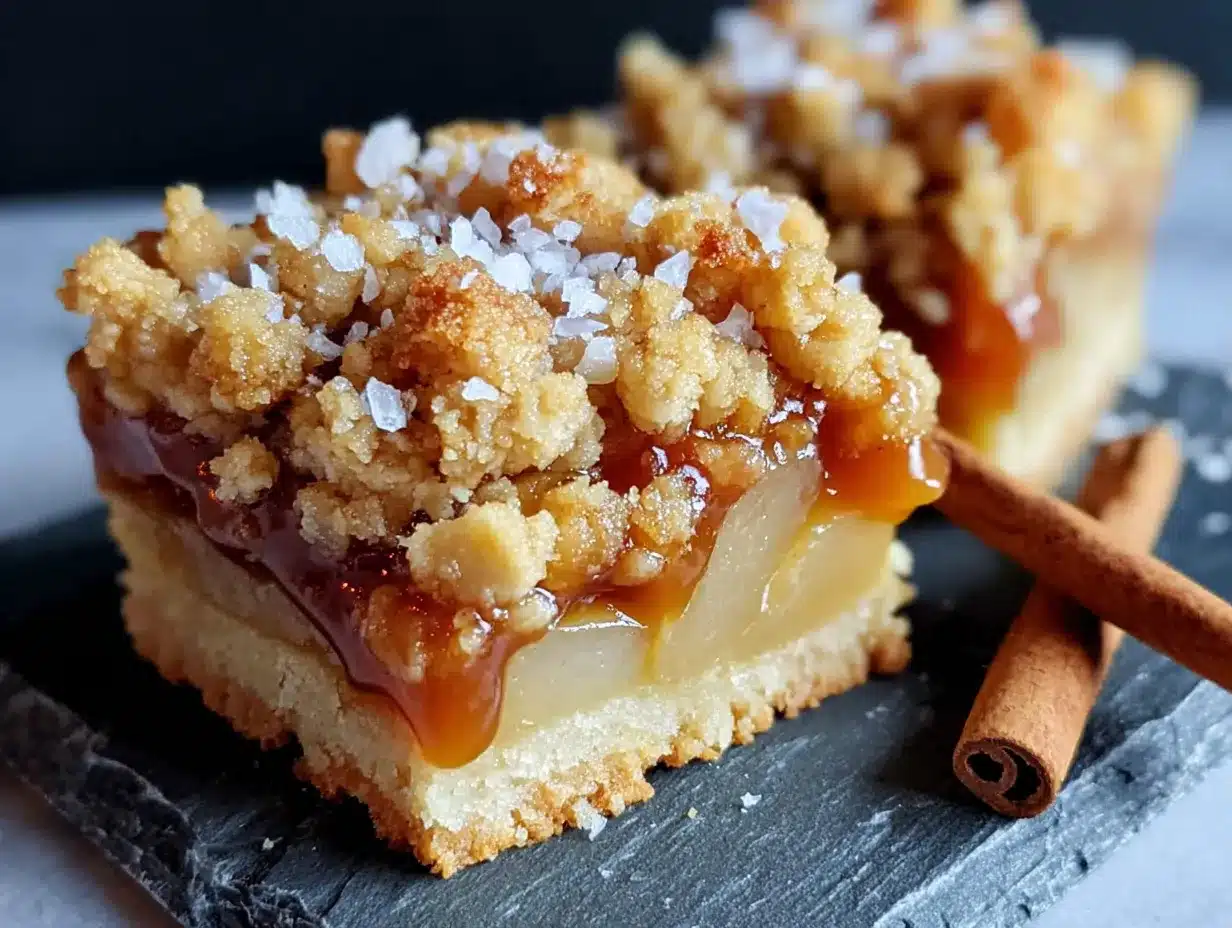
- 4 cups peeled and diced apples (about 4 medium apples) – I recommend a mix of tart and sweet apples for the best flavor. My favorite combo is 2 Granny Smith and 2 Honeycrisp. The Granny Smiths hold their shape, while the Honeycrisps break down into a soft, jammy filling.
- ¼ cup granulated sugar – Adjust based on the sweetness of your apples. If you’re using only sweet apples, you can reduce this to 2 tablespoons.
- 2 tablespoons all-purpose flour – This thickens the apple juices so the filling isn’t runny. Cornstarch works too (use 1 tablespoon).
- 1 tablespoon lemon juice – Prevents the apples from browning and adds a subtle brightness. Fresh-squeezed is best, but bottled works in a pinch.
- 1 teaspoon vanilla extract – Enhances the caramel notes. I use pure vanilla extract, not imitation.
- ½ teaspoon ground cinnamon – Because you can never have too much cinnamon in a fall dessert.
- ¼ teaspoon ground nutmeg – Optional, but it adds a lovely warmth. Freshly grated nutmeg is a game-changer if you have it.
For the Caramel Drizzle (Optional but Highly Recommended)
- ½ cup store-bought or homemade caramel sauce – I’m partial to the jarred stuff from Trader Joe’s, but any thick, buttery caramel sauce works. If you’re feeling ambitious, you can make your own using 1 cup sugar, 6 tablespoons butter, and ½ cup heavy cream.
Equipment Needed
You don’t need a fancy kitchen to make these bars. Here’s what you’ll need, plus a few alternatives if you’re missing something.
- 9×13-inch baking pan – This is the perfect size for a generous batch of bars. If you only have an 8×8 pan, you can halve the recipe, but the bars will be thicker and may need a few extra minutes in the oven.
- Parchment paper – Non-negotiable for easy removal. I learned this the hard way after a sticky mess. Cut two long strips and lay them crosswise in the pan, leaving overhang on all sides.
- Large mixing bowls – You’ll need one for the crust mixture and one for the apple filling. A set of nesting bowls is handy.
- Pastry cutter or fork – For cutting the cold butter into the flour mixture. If you don’t have a pastry cutter, two forks or even your fingertips work. Just work quickly so the butter doesn’t warm up.
- Chef’s knife and cutting board – For dicing the apples. A sharp knife makes a big difference.
- Measuring cups and spoons – For accuracy. I use dry measuring cups for dry ingredients and a liquid measuring cup for the lemon juice and vanilla.
- Spatula – For spreading the apple filling evenly and scraping down the bowl.
That’s it! No stand mixer, no food processor—just your hands and a few basic tools. Honestly, I love recipes that don’t require me to dig out the big appliances.
Preparation Method
Let’s get baking. I’ve broken this down into clear steps with a few tips I’ve picked up along the way. Trust me, follow these exactly, and you’ll have perfect bars every time.
- Preheat your oven to 350°F (175°C). Line a 9×13-inch baking pan with parchment paper, leaving about 2 inches of overhang on the long sides. This will make lifting the bars out a breeze.
- Make the crust and crumble mixture. In a large bowl, whisk together 2 cups flour, 2 cups rolled oats, 1 cup granulated sugar, 1 cup packed light brown sugar, 1 teaspoon cinnamon, ½ teaspoon salt, and 1 teaspoon baking powder. Add the 1 cup of cold, cubed butter. Use a pastry cutter or your fingers to cut the butter into the dry ingredients until the mixture resembles coarse sand with some pea-sized butter pieces. Don’t overwork it—those little butter chunks create flaky layers.
- Press the crust. Firmly press about half of the oat mixture (roughly 3 cups) into the bottom of the prepared pan. Use the bottom of a measuring cup or a glass to press it down evenly. This is your crust, so make sure it’s compact. Pop the pan and the remaining crumble mixture into the fridge while you prepare the apples.
- Prepare the apple filling. In a separate bowl, toss the 4 cups of diced apples with ¼ cup granulated sugar, 2 tablespoons flour, 1 tablespoon lemon juice, 1 teaspoon vanilla, ½ teaspoon cinnamon, and ¼ teaspoon nutmeg. Mix until every apple piece is coated. Let it sit for 5 minutes—this draws out the juices and helps the filling thicken.
- Assemble the bars. Spread the apple mixture evenly over the chilled crust. Sprinkle the remaining crumble mixture over the top, covering the apples completely. Don’t press it down—you want that crumbly texture to bake up crispy.
- Bake. Place the pan on the middle rack and bake for 45-50 minutes, or until the top is golden brown and the apple filling is bubbly around the edges. If the top is browning too quickly (after about 30 minutes), tent the pan loosely with foil. A good test: insert a toothpick into the center; it should come out with a few moist crumbs, not wet batter.
- Cool completely. This is the hardest part, I know. Let the bars cool in the pan on a wire rack for at least 2 hours. The filling needs to set, or your bars will fall apart when you cut them. For clean slices, refrigerate for another hour after cooling. I’ve made the mistake of cutting too early, and I ended up with apple soup. Learn from my failures.
- Drizzle with caramel. Once cooled, drizzle the caramel sauce over the top using a spoon or a squeeze bottle. Let the caramel set for about 10 minutes before slicing.
- Slice and serve. Lift the bars out of the pan using the parchment overhang. Use a sharp knife to cut into 12-16 squares. Wipe the knife clean between cuts for the neatest edges.
Cooking Tips & Techniques
I’ve made these bars more times than I can count, and I’ve learned a few things the hard way. Here are my best tips for success.
Keep everything cold. The key to a flaky crust is cold butter. If your kitchen is warm, pop the crust mixture in the fridge for 10 minutes before pressing it into the pan. Warm butter melts into the flour instead of creating those little steam pockets that make pastry tender.
Don’t skip the parchment paper. I know it’s tempting to just grease the pan, but trust me on this. The caramel and apple juices can stick like glue. With parchment, you just lift the whole block out and cut it cleanly. I once spent 20 minutes scraping bars out of a pan. Never again.
Use a mix of apples. All Granny Smiths can be too tart, and all Honeycrisps can turn into mush. A 50/50 blend gives you the perfect texture—tart chunks that hold their shape and sweet bits that melt into the filling. If you only have one type, add a tablespoon of lemon juice to balance the sweetness.
Let them cool completely. I can’t stress this enough. The bars need at least 2 hours to set. If you cut them warm, the filling will ooze out, and you’ll have a delicious but messy crumble. Patience pays off here.
Make ahead for better flavor. These bars actually taste better the next day. The flavors meld together overnight, and the crust softens slightly into a perfect, chewy texture. Bake them the day before you need them, and you’ll be the hero of the party with zero stress.
Watch your oven. All ovens run differently. Mine runs hot, so I start checking at the 40-minute mark. If your bars are browning unevenly, rotate the pan halfway through baking. That simple trick saved many of my bakes.
Variations & Adaptations
One of the things I love about this recipe is how adaptable it is. Here are a few ways to make it your own.
Gluten-Free Version: Substitute the all-purpose flour with a 1:1 gluten-free baking flour blend (I like Bob’s Red Mill). Make sure your oats are certified gluten-free, too. The texture will be slightly more crumbly, but still delicious. I tested this for a friend with celiac disease, and she couldn’t tell the difference.
Vegan Option: Use a plant-based butter stick (like Miyoko’s) in place of the dairy butter. For the caramel, look for a vegan caramel sauce or make your own with coconut cream. The crust will be a bit more delicate, so handle it gently when pressing it into the pan.
Spiced-Up Version: Add ½ teaspoon of ground ginger and ¼ teaspoon of ground cloves to the apple filling for a chai-inspired twist. I tried this last Thanksgiving, and it was a huge hit. The ginger adds a little warmth that pairs beautifully with the caramel.
Nutty Crumble: Swap ½ cup of the oats for ½ cup of chopped pecans or walnuts. Toast the nuts first for extra flavor. This adds a lovely crunch and makes the bars feel even more decadent.
Pear and Apple Combo: Replace half the apples with firm, ripe pears (like Bosc or Anjou). Pears have a softer texture and a delicate sweetness that pairs wonderfully with the caramel. Just dice them the same size as the apples so they cook evenly.
Individual Servings: Make these into mini bars by pressing the crust into a greased muffin tin. Fill each cup with apple mixture and top with crumble. Bake for 20-25 minutes. Perfect for portion control or parties!
Serving & Storage Suggestions
These bars are incredibly versatile. Here’s how to serve and store them for the best experience.
Serving Temperature: I like them at room temperature, but they’re also amazing warm with a scoop of vanilla ice cream. If you want to serve them warm, pop individual bars in the microwave for 15 seconds or in a 300°F oven for 5 minutes. The caramel gets all gooey and irresistible.
Presentation Tips: For a pretty presentation, cut the bars into even squares and arrange them on a wooden board or a white platter. Drizzle extra caramel on top and sprinkle with a pinch of flaky sea salt (like Maldon). The salt cuts the sweetness and makes the flavors pop. I always do this when I’m serving guests—it looks fancy but takes two seconds.
What to Serve With Them: These bars are perfect on their own, but they pair beautifully with a cup of hot apple cider, a chai latte, or a scoop of cinnamon ice cream. For a full fall dessert spread, serve them alongside a pumpkin cheesecake or a slice of apple pie.
Storing: Store the bars in an airtight container at room temperature for up to 3 days. If your kitchen is warm, refrigerate them to keep the crust from getting soggy. Layer them between sheets of parchment paper to prevent sticking.
Freezing: These freeze beautifully. Wrap individual bars tightly in plastic wrap, then place them in a freezer-safe bag or container. They’ll keep for up to 3 months. To thaw, leave them at room temperature for about an hour, or warm them in the microwave for 30 seconds. I always keep a stash in the freezer for unexpected guests or late-night cravings.
Flavor Development: Here’s a secret: these bars taste even better on day two. The apple juices soak into the crust just slightly, and the flavors meld together. If you can resist eating them all on day one, you’ll be rewarded.
Nutritional Information & Benefits
I’m not a nutritionist, but I do believe in balance. These bars are a treat, and they’re meant to be enjoyed. Here’s a rough estimate per bar (based on 16 servings) and a few health highlights.
- Calories: ~320 per bar
- Fat: 14g
- Carbohydrates: 48g
- Fiber: 3g
- Sugar: 30g
- Protein: 3g
Health Benefits: Apples are a great source of fiber and vitamin C. Oats contain beta-glucan, which can help lower cholesterol. Cinnamon has anti-inflammatory properties. So while these bars are definitely a dessert, they’re not completely empty calories. I feel good about serving them to my family because I know exactly what’s in them—no preservatives, no artificial flavors.
Dietary Considerations: This recipe contains gluten and dairy. For a gluten-free version, see the variations section. For a vegan version, use plant-based butter. The bars are nut-free as written, but check your oat label if you have a severe allergy.
My Perspective: I’m a firm believer in the 80/20 rule. Eat well most of the time, and enjoy treats like these without guilt. Life is too short to skip dessert, especially when it’s this good.
Conclusion
These caramel apple crumble bars are more than just a recipe—they’re a moment. They’re the smell of cinnamon filling your kitchen on a crisp autumn afternoon. They’re the joy of pulling a golden pan out of the oven and knowing you’ve created something special. They’re the look on your friend’s face when they take that first bite and say, “Oh, wow.”
I love this recipe because it’s forgiving. It doesn’t demand perfection. It came from a mistake, after all. And every time I make it, I’m reminded that the best things in life often come from unexpected places. You can tweak the spices, swap the apples, or add nuts—it’s your kitchen, your rules. That’s the beauty of baking.
So go ahead. Grab some apples, preheat that oven, and make a mess. I promise it’ll be worth it. And when you do, come back and tell me how it went. Drop a comment below, share a photo, or tag me on social media. I’d love to see your version of this cozy fall treat. Happy baking, friend!
Frequently Asked Questions
Can I use quick-cooking oats instead of rolled oats?
Yes, you can, but the texture will be slightly different. Quick-cooking oats are more finely chopped, so they absorb moisture faster and won’t give you the same crunchy crumble. Rolled oats are best for that classic, hearty texture. If you only have quick oats, reduce the butter by 2 tablespoons to compensate.
Can I make these bars without a 9×13 pan?
Absolutely. You can use an 8×8 pan, but you’ll need to halve the recipe. The bars will be thicker, so increase the baking time by 5-10 minutes. Alternatively, you can use a 9-inch round cake pan for a rustic, pie-like presentation. Just keep an eye on the baking time.
How do I prevent the crust from getting soggy?
The key is to chill the crust before baking. Press it firmly into the pan and pop it in the fridge for 15 minutes. This helps the butter solidify, creating a barrier that prevents the apple juices from soaking in. Also, make sure your apples are diced evenly and not too wet—pat them dry with a paper towel if they’re releasing a lot of liquid.
Can I use frozen apples?
I don’t recommend it. Frozen apples release a lot of water as they thaw, which can make the filling watery and the crust soggy. Stick with fresh apples for the best results. If you’re in a pinch, thaw the frozen apples completely, drain off the liquid, and pat them dry before using.
How long do these bars stay fresh?
Stored in an airtight container at room temperature, they’ll stay fresh for up to 3 days. In the fridge, they’ll last up to a week. You can also freeze them for up to 3 months. Just wrap them tightly and thaw at room temperature when you’re ready to enjoy them. They’re actually better the next day!
Pin This Recipe!
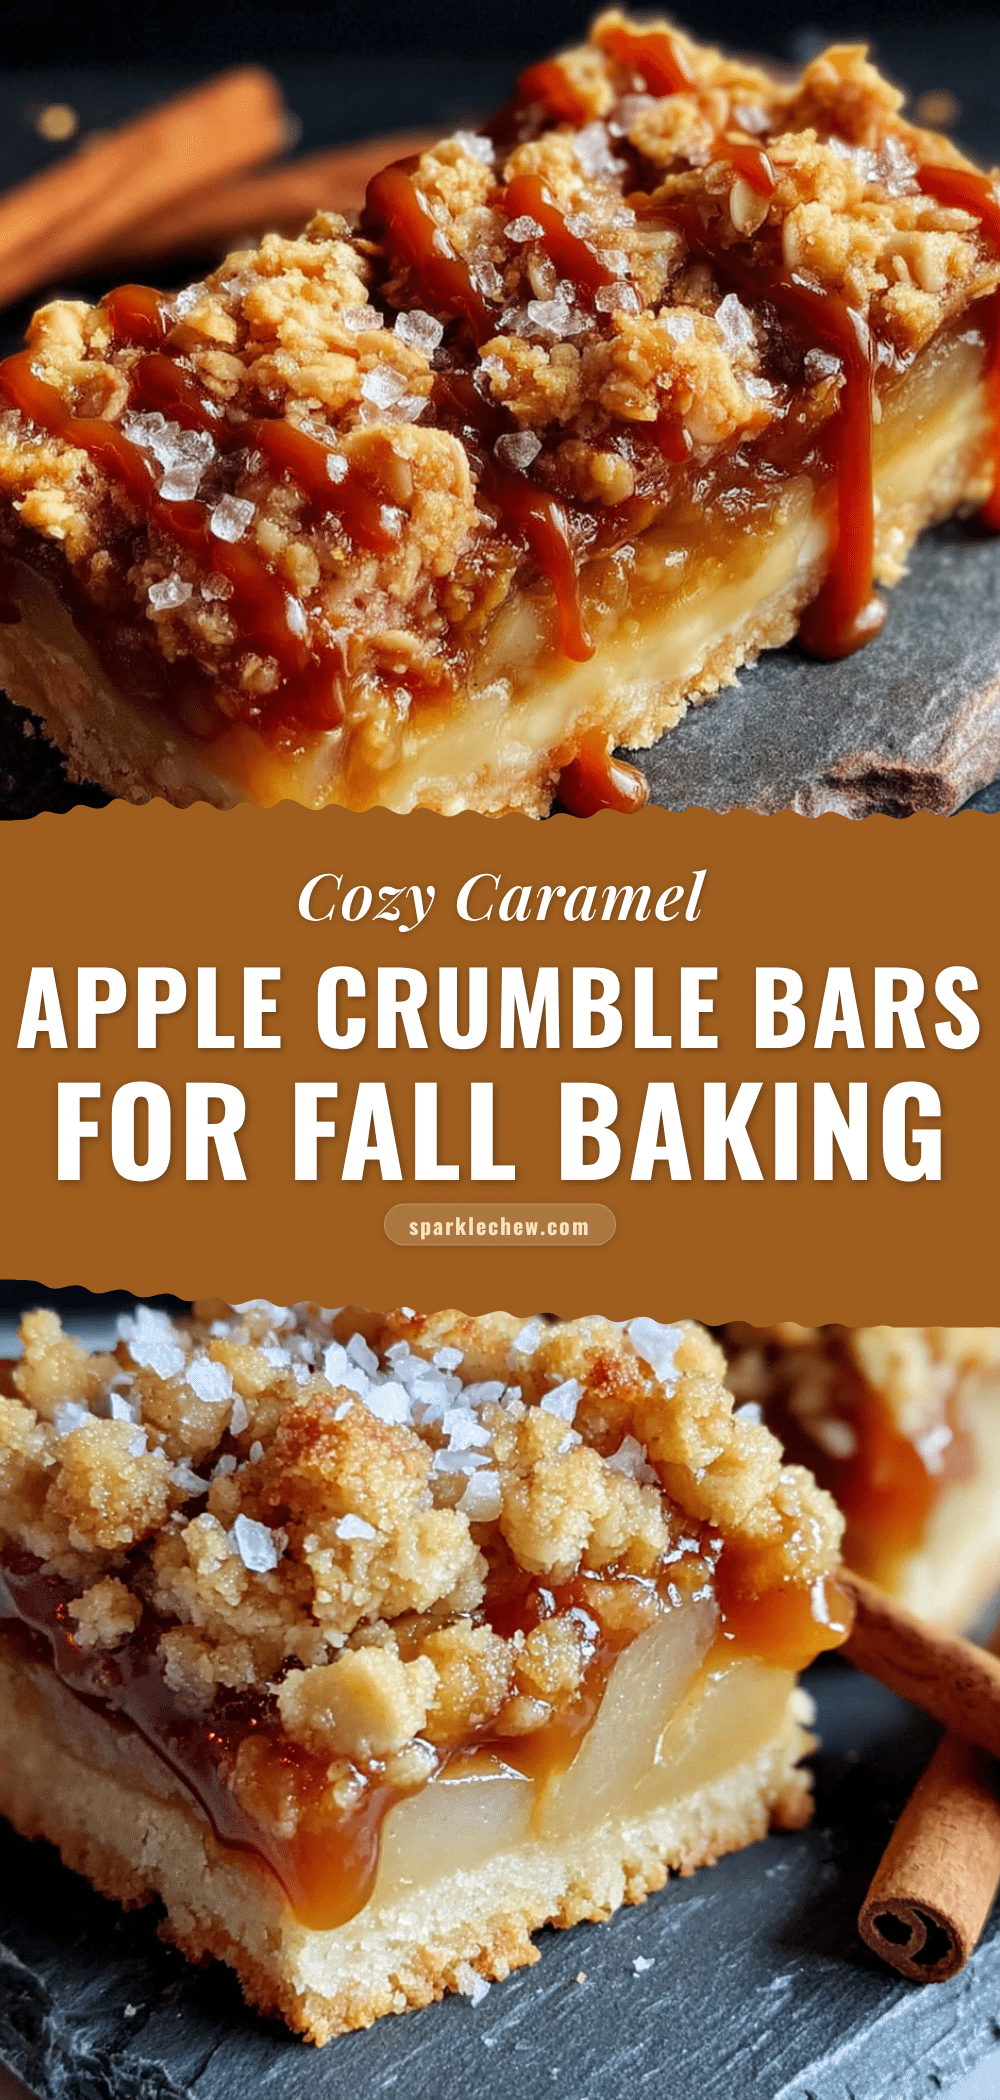
Cozy Caramel Apple Crumble Bars: Best Fall Dessert

These caramel apple crumble bars are a happy accident that turned into a beloved fall dessert. With a buttery crust, jammy apple filling, and crunchy oat topping, they’re the ultimate cozy treat.
- Prep Time: 20 minutes
- Cook Time: 45-50 minutes
- Total Time: 2 hours 5 minutes (plus cooling time)
- Yield: 12-16 servings 1x
- Category: Dessert
- Cuisine: American
Ingredients
- 1 cup (2 sticks) unsalted butter, cold and cubed
- 1 cup granulated sugar
- 1 cup packed light brown sugar
- 2 cups all-purpose flour
- 2 cups old-fashioned rolled oats
- 1 teaspoon ground cinnamon
- ½ teaspoon salt
- 1 teaspoon baking powder
- 4 cups peeled and diced apples (about 4 medium apples)
- ¼ cup granulated sugar
- 2 tablespoons all-purpose flour
- 1 tablespoon lemon juice
- 1 teaspoon vanilla extract
- ½ teaspoon ground cinnamon
- ¼ teaspoon ground nutmeg
- ½ cup store-bought or homemade caramel sauce
Instructions
- Preheat your oven to 350°F (175°C). Line a 9×13-inch baking pan with parchment paper, leaving about 2 inches of overhang on the long sides.
- Make the crust and crumble mixture: In a large bowl, whisk together 2 cups flour, 2 cups rolled oats, 1 cup granulated sugar, 1 cup packed light brown sugar, 1 teaspoon cinnamon, ½ teaspoon salt, and 1 teaspoon baking powder. Add the 1 cup of cold, cubed butter. Use a pastry cutter or your fingers to cut the butter into the dry ingredients until the mixture resembles coarse sand with some pea-sized butter pieces.
- Press the crust: Firmly press about half of the oat mixture (roughly 3 cups) into the bottom of the prepared pan. Use the bottom of a measuring cup or a glass to press it down evenly. Pop the pan and the remaining crumble mixture into the fridge while you prepare the apples.
- Prepare the apple filling: In a separate bowl, toss the 4 cups of diced apples with ¼ cup granulated sugar, 2 tablespoons flour, 1 tablespoon lemon juice, 1 teaspoon vanilla, ½ teaspoon cinnamon, and ¼ teaspoon nutmeg. Mix until every apple piece is coated. Let it sit for 5 minutes.
- Assemble the bars: Spread the apple mixture evenly over the chilled crust. Sprinkle the remaining crumble mixture over the top, covering the apples completely. Don’t press it down.
- Bake: Place the pan on the middle rack and bake for 45-50 minutes, or until the top is golden brown and the apple filling is bubbly around the edges. If the top is browning too quickly (after about 30 minutes), tent the pan loosely with foil.
- Cool completely: Let the bars cool in the pan on a wire rack for at least 2 hours. For clean slices, refrigerate for another hour after cooling.
- Drizzle with caramel: Once cooled, drizzle the caramel sauce over the top using a spoon or a squeeze bottle. Let the caramel set for about 10 minutes before slicing.
- Slice and serve: Lift the bars out of the pan using the parchment overhang. Use a sharp knife to cut into 12-16 squares. Wipe the knife clean between cuts for the neatest edges.
Notes
Keep everything cold for a flaky crust. Don’t skip the parchment paper. Use a mix of tart and sweet apples. Let the bars cool completely before cutting. These bars taste even better the next day.
Nutrition
- Serving Size: 1 bar
- Calories: 320
- Sugar: 30
- Sodium: 150
- Fat: 14
- Saturated Fat: 8
- Carbohydrates: 48
- Fiber: 3
- Protein: 3
Keywords: caramel apple crumble bars, apple crumble bars, fall dessert, apple bars, crumble bars, easy apple dessert


