Love this? Save it for later!
Share the inspiration with your friends
There used to be this tiny bakery tucked into a strip mall off Highway 101—the kind of place with a cracked bell over the door and a chalkboard menu that hadn’t been updated since 2008. They made these peanut butter blossom cookies that were unlike anything I’d ever tasted. Not dry, not crumbly, but somehow dense and tender all at once. When the bakery closed suddenly last fall—”retired,” the sign said, though I suspect the owner just got tired—I honestly felt a little lost. After seven tries (and one batch that I accidentally turned into peanut butter sand), I finally cracked the code. The secret? No flour at all.
These cozy flourless peanut butter blossom cookies are everything I missed about those bakery cookies. They’re naturally gluten-free, use just four ingredients, and come together in under 20 minutes. The chocolate kiss on top melts just slightly, creating that perfect sweet-salty moment that makes you close your eyes after the first bite. Let me tell you—I’ve made these for three holiday parties already, and every single time someone asks for the recipe. Maybe you’ve been there, standing in your kitchen at 10 PM realizing you forgot to bring dessert to tomorrow’s gathering? These cookies are your answer.
Why You’ll Love This Recipe
- Only 4 Ingredients : You probably have everything in your pantry right now. No flour, no butter, no eggs—just peanut butter, sugar, baking soda, and chocolate kisses.
- Naturally Gluten-Free : Since there’s zero flour involved, these are perfect for anyone avoiding gluten. My friend Sarah, who has celiac, nearly cried when I handed her one.
- Ready in Under 20 Minutes : From mixing bowl to cooling rack in about 15 minutes. That’s faster than driving to the store for a store-bought dessert.
- Perfect for Holiday Baking : These cozy flourless peanut butter blossom cookies are ideal for cookie exchanges, holiday platters, or last-minute hostess gifts.
- Foolproof for Beginners : I’ve had my 8-year-old niece make these by herself. They’re that forgiving.
- Unbelievably Rich and Tender : Without flour, these cookies have a melt-in-your-mouth texture that regular peanut butter cookies just can’t match.
What makes these different from every other peanut butter blossom recipe out there? It’s the texture. Traditional recipes use flour, which gives cookies structure but can also make them dry. By skipping the flour entirely, you get a cookie that’s almost fudge-like in the center with perfectly crisp edges. Plus, the ratio of peanut butter to sugar is dialed in just right—not too sweet, not too savory. I tested this recipe six times to get the balance perfect.
This is the kind of cookie that makes you feel like you’re wrapped in a warm blanket on a cold day. It’s comfort food at its simplest—no fancy techniques, no obscure ingredients, just pure peanut butter bliss with a chocolate kiss on top. Perfect for cozying up with a mug of hot cocoa or sharing with people you love.
What Ingredients You Will Need
This recipe uses simple, pantry-friendly ingredients to deliver that unforgettable texture and flavor. Because there are only four ingredients, each one plays a crucial role—no room for substitutions without understanding what they do.
- Creamy peanut butter (1 cup / 240g) — Use a standard brand like Jif or Skippy for best results. Natural peanut butter that separates will make the cookies too oily and they’ll spread into flat discs. I learned this the hard way on attempt number two! If you only have natural, stir it very well and add 2 tablespoons of powdered sugar to help stabilize it.
- Granulated sugar (1 cup / 200g) — Regular white sugar works perfectly here. It provides sweetness and helps create those crackly tops. You can reduce to ¾ cup if you prefer less sweet cookies, but don’t go lower or the texture will suffer.
- Baking soda (1 teaspoon) — This is our only leavening agent. Without flour, the baking soda reacts with the acidity in the peanut butter to create just enough rise. Make sure your baking soda is fresh—test it by dropping a pinch into vinegar; if it fizzes vigorously, you’re good.
- Chocolate candy kisses (about 36, unwrapped) — Hershey’s kisses are the classic choice. Milk chocolate, dark chocolate, or even white chocolate all work beautifully. For a fun twist, try caramel-filled or almond-flavored kisses.
- Optional: Flaky sea salt (for sprinkling) — Not required, but absolutely worth it. That tiny hit of salt against the sweet chocolate and rich peanut butter is pure magic.
Ingredient Selection Tips: For the best texture, choose a peanut butter that has sugar and oil listed on the label—not just peanuts and salt. I personally recommend Jif Creamy for its consistency. If you’re using a store brand, check that it’s not too runny. The dough should be thick enough to roll into balls without sticking to your hands.
Substitution Guidance: For a dairy-free version, use dairy-free chocolate kisses (Enjoy Life makes good ones). For a lower-sugar option, you can use a monk fruit sweetener blend in place of granulated sugar, though the texture will be slightly less tender. Almond butter works in place of peanut butter, but the flavor will be milder. Just don’t try sunflower seed butter—it turns green when baked (trust me, I’ve been there).
Equipment Needed
You don’t need much for these cozy flourless peanut butter blossom cookies. Here’s what I use every time:
- Mixing bowl — Any medium bowl works. I use a glass one so I can see if everything’s combined evenly.
- Electric mixer or sturdy wooden spoon — A hand mixer makes quick work of combining the dough, but honestly, a strong arm and a wooden spoon work just fine. The dough is thick but not stiff.
- Baking sheet — A standard half-sheet pan works perfectly. No need for fancy non-stick—just use parchment paper.
- Parchment paper or silicone baking mat — Essential for preventing sticking and ensuring even browning. Silicone mats are my preference because they’re reusable and give the cookies perfectly flat bottoms.
- Cooling rack — Important for letting the cookies cool properly so the chocolate kisses set. If you don’t have one, you can transfer cookies to a plate after 5 minutes.
- Small cookie scoop (optional) — A 1-tablespoon scoop makes uniform cookies that bake evenly. Not necessary, but helpful for consistent results.
Budget-Friendly Tip: If you don’t have an electric mixer, just use a fork to mash the ingredients together, then switch to your hands to knead the dough briefly. It comes together in under 2 minutes either way.
Preparation Method
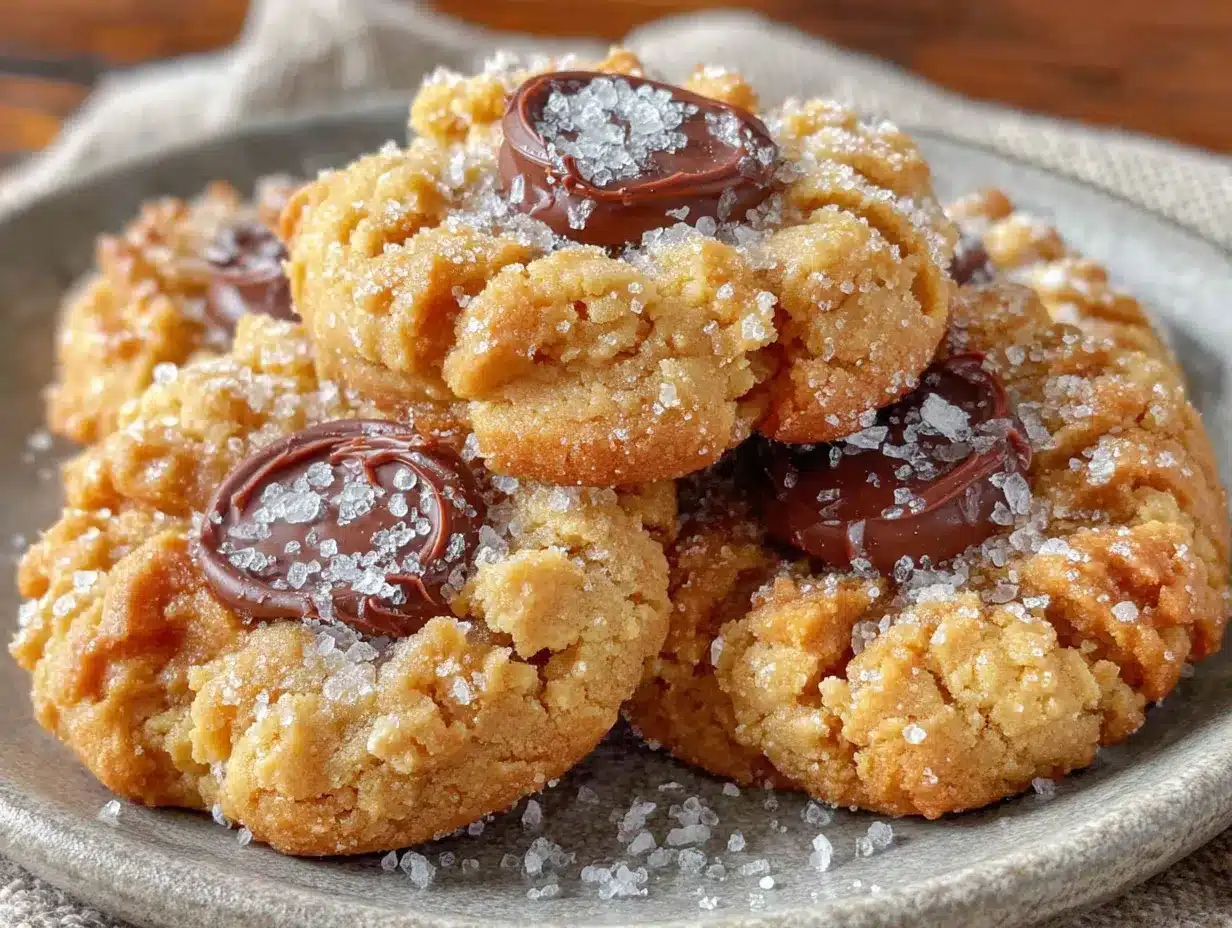
These cookies come together so fast you’ll barely believe it. Here’s exactly how to make them perfect every time.
- Preheat your oven to 350°F (175°C) and line a baking sheet with parchment paper or a silicone mat. Getting the oven to the right temperature is crucial—too cool and the cookies spread too much, too hot and they’ll burn before the centers set.
- In a medium mixing bowl, combine 1 cup creamy peanut butter, 1 cup granulated sugar, and 1 teaspoon baking soda. Use your electric mixer on medium speed or a wooden spoon to mix until everything comes together into a thick, cohesive dough. It should look like a stiff cookie dough—not too sticky, not too dry. If it feels crumbly, add 1 tablespoon of milk or water. If it’s too sticky, add 1 tablespoon of powdered sugar.
- Roll the dough into 1-inch balls. Using your palms, roll each portion into a smooth ball. The dough should feel slightly oily but not greasy. Place the balls about 2 inches apart on your prepared baking sheet. I fit 12 cookies per sheet—don’t crowd them or they’ll spread into each other.
- Optional but recommended: Roll each ball in additional granulated sugar. This gives the cookies that classic crackly, sparkly exterior. Just roll each ball in a small bowl of sugar before placing on the sheet. It adds a lovely crunch.
- Bake for 8-10 minutes, or until the cookies are puffed and lightly golden on the edges. The centers will look slightly underdone—that’s exactly what you want. They’ll continue cooking from residual heat after you take them out. At 8 minutes, they’ll be softer and more tender. At 10 minutes, they’ll be slightly firmer with crisper edges. I prefer 9 minutes for that perfect middle ground.
- Remove from the oven and immediately press a chocolate kiss into the center of each cookie. Work quickly while the cookies are still hot—the warmth will soften the chocolate just enough to create that signature blossom look. Press down gently until the kiss is nestled into the cookie but the top is still visible. Don’t push all the way through!
- Let the cookies cool on the baking sheet for 5 minutes. This is important—the cookies are very tender when hot and need time to set. After 5 minutes, transfer them to a wire cooling rack to cool completely.
- Optional: Sprinkle with flaky sea salt. Just a tiny pinch on top of each chocolate kiss creates that incredible sweet-salty contrast. I never skip this step.
Pro Tip: If a few cookies crack around the edges when you press in the chocolate, don’t worry—that’s normal and actually looks rustic and homemade. If the cracks are too wide, the cookie was slightly overbaked. Next time, pull them out a minute earlier.
Sensory Cue: Your kitchen will smell like warm peanut butter and chocolate—that unmistakable aroma that says “something good just happened.” The cookies should look slightly crackled on top with a deep golden-brown color around the edges. When you bite into one, you should feel a soft, almost fudgy center with a slight chewiness.
Cooking Tips & Techniques
After seven batches of testing (and a few failures), here’s what I’ve learned about making these cozy flourless peanut butter blossom cookies perfectly every time.
Don’t overmix the dough. I know it’s tempting to keep stirring until everything looks perfectly smooth, but overmixing can make the cookies tough. Just mix until the ingredients come together—about 30 seconds with an electric mixer or 1 minute by hand. A few tiny lumps are totally fine.
Chill the dough if it’s too sticky. On humid days, the dough can get tacky. Pop it in the fridge for 15-20 minutes before rolling. This makes the balls easier to handle and helps the cookies hold their shape better in the oven. I learned this trick after a particularly sticky summer batch that turned into peanut butter puddles.
Use a timer, not your intuition. These cookies go from perfectly done to overbaked in about 60 seconds. Set a timer for 8 minutes and check them. If they look puffed and slightly golden around the edges, they’re done. The centers will look soft—that’s correct. Don’t wait until they look fully set, because they’ll continue cooking on the hot baking sheet.
Press the chocolate kisses in while the cookies are hot. This is non-negotiable. If you wait too long, the cookies will cool and the chocolate won’t sink in properly. I unwrap all my kisses before I start baking so I’m ready to go the second the cookies come out. It’s a small prep step that saves major stress.
Rotate your baking sheet halfway through. Most ovens have hot spots. At the 4-minute mark, quickly spin the baking sheet 180 degrees. This ensures even browning across all cookies. I forgot to do this once and ended up with half a batch of perfectly golden cookies and half that were pale on one side.
Let them cool completely before storing. I know it’s hard to wait, but warm cookies in an airtight container create steam that makes them soggy. Let them cool completely on a wire rack—about 30 minutes—before moving to a storage container.
Variations & Adaptations
These cozy flourless peanut butter blossom cookies are incredibly versatile. Here are some of my favorite ways to change them up:
Chocolate Peanut Butter Swirl: Before rolling into balls, fold in 2 tablespoons of cocoa powder and an extra tablespoon of sugar. The result is a chocolate-peanut butter hybrid that’s dangerously good. I made these for a Super Bowl party and they disappeared before halftime.
Vegan Version: Use a vegan creamy peanut butter (most are naturally vegan) and dairy-free chocolate kisses. The recipe doesn’t use eggs or butter, so it’s already halfway there. Just check your chocolate kisses—some contain milk solids.
Spiced Holiday Version: Add ½ teaspoon of cinnamon and ¼ teaspoon of nutmeg to the dough. Roll the balls in a mixture of sugar and cinnamon before baking. These taste like Christmas morning and pair beautifully with a peppermint mocha.
Lower Sugar Option: Replace half the granulated sugar with a monk fruit sweetener blend. The cookies will be slightly less tender but still delicious. I’ve also used coconut sugar, which gives a deeper, caramel-like flavor—just note the cookies will be darker in color.
Different Chocolate Toppings: Swap the classic kisses for chocolate stars, caramel-filled kisses, or even mini peanut butter cups pressed upside-down into the cookies. For a fun holiday twist, use candy cane kisses or white chocolate kisses with sprinkles.
Nut-Free Version: Use sunflower seed butter instead of peanut butter. Just be aware that the cookies will turn a slightly greenish color due to a natural reaction between sunflower seeds and baking soda. They taste fine—it’s just a visual thing. Add a tablespoon of lemon juice to minimize the color change.
Serving & Storage Suggestions
These cozy flourless peanut butter blossom cookies are best served at room temperature, when the chocolate kiss is firm but the cookie is still soft and tender. I love arranging them on a simple white platter with a sprinkle of flaky sea salt on top—it looks beautiful and tastes incredible.
Perfect Pairings: Serve these cookies with a cold glass of milk (dairy or plant-based), a warm mug of hot cocoa, or a strong cup of coffee. For a dessert board, arrange them alongside fresh strawberries, dark chocolate squares, and a wedge of aged cheddar—the salty-sweet combination is surprisingly wonderful.
Storage Instructions: Store cooled cookies in an airtight container at room temperature for up to 5 days. Layer them between sheets of parchment paper to prevent the chocolate kisses from sticking together. Do not refrigerate—the fridge dries them out and makes the cookies hard.
Freezer Instructions: These cookies freeze beautifully! Place cooled cookies in a single layer in a freezer-safe container with parchment paper between layers. Freeze for up to 3 months. To thaw, let them sit at room temperature for about 15 minutes. The chocolate kisses will look slightly dull after freezing, but the flavor is still perfect.
Reheating Tip: If you like your cookies slightly warm, pop one in the microwave for 8-10 seconds. The chocolate will soften just a bit, and the cookie will become extra tender. Don’t overdo it—15 seconds and the chocolate starts melting everywhere.
Flavor Development: Honestly, these cookies taste even better the next day. The flavors meld together overnight, and the texture becomes even more fudgy and tender. If you can resist eating them all on day one, you’re in for a treat on day two.
Nutritional Information & Benefits
Here’s the approximate nutritional breakdown for one cozy flourless peanut butter blossom cookie (based on 36 cookies):
| Nutrient | Amount per Cookie |
|---|---|
| Calories | 110 |
| Total Fat | 6g |
| Saturated Fat | 2g |
| Carbohydrates | 13g |
| Sugar | 11g |
| Protein | 3g |
| Fiber | 1g |
| Sodium | 85mg |
Health Benefits: Peanut butter is a good source of plant-based protein and healthy monounsaturated fats. It also contains vitamin E, magnesium, and potassium. While these cookies are definitely a treat, they offer more nutritional value than traditional flour-based cookies. The absence of refined flour means they won’t spike your blood sugar as dramatically.
Dietary Considerations: These cookies are naturally gluten-free and dairy-free (depending on your chocolate choice). They contain peanuts and may contain traces of other tree nuts. Always check your ingredients if you’re serving someone with allergies.
I personally love that these cookies feel indulgent but aren’t loaded with empty calories. One or two satisfy my sweet tooth completely, unlike traditional cookies where I could eat half the batch without thinking.
Conclusion
These cozy flourless peanut butter blossom cookies are proof that sometimes the simplest recipes are the best ones. With just four ingredients and about 15 minutes, you can create something that tastes like it came from a fancy bakery—minus the fancy price tag and complicated techniques.
What I love most about this recipe is how forgiving it is. Whether you’re a seasoned baker or someone who’s never made cookies from scratch, these turn out beautifully every time. The texture is that perfect combination of tender and chewy, the chocolate kiss adds just the right amount of sweetness, and that little sprinkle of sea salt? Pure magic.
I’d love to hear how these turn out for you! Did you try any fun variations? Did your family gobble them up as fast as mine does? Drop a comment below and let me know. And if you’re looking for more simple, cozy dessert ideas, you might enjoy my flourless chocolate cookies or these 3-ingredient peanut butter cookies. Happy baking, friend—you’ve got this!
Frequently Asked Questions
Can I use natural peanut butter for these cookies?
You can, but the texture will be different. Natural peanut butter has more oil and less stabilizer, which can cause the cookies to spread more and become greasy. If using natural peanut butter, stir it very well, and consider adding 2 tablespoons of powdered sugar to help stabilize the dough. Your cookies will still taste great—they just might not look as picture-perfect.
Why did my cookies spread too much?
This usually happens for one of three reasons: your peanut butter was too oily, your dough was too warm, or your oven wasn’t hot enough. Try chilling the dough for 15 minutes before baking, and make sure your oven is fully preheated to 350°F. Also, check that you’re using a standard creamy peanut butter—not the natural kind that separates.
Can I make these cookies ahead of time?
Absolutely! You can prepare the dough up to 2 days ahead and keep it covered in the refrigerator. When you’re ready to bake, let the dough sit at room temperature for 10 minutes to soften slightly, then roll and bake as directed. You can also freeze the baked cookies for up to 3 months.
How do I keep the chocolate kisses from falling off?
Press the kisses into the cookies while they’re still hot from the oven. The residual heat softens the chocolate just enough to create a secure bond. Let the cookies cool completely on the baking sheet before moving them—this gives the chocolate time to set. If a few kisses still fall off, just press them back in gently.
Can I double this recipe?
Yes, this recipe doubles beautifully! Just make sure you have enough oven space or bake in batches. The dough keeps well at room temperature for about an hour, so you can take your time rolling the balls. Store any leftover dough covered in the fridge if you need a longer break between batches.
PrintCozy Flourless Peanut Butter Blossom Cookies: Easy 4-Ingredient Recipe

These cozy flourless peanut butter blossom cookies are naturally gluten-free, use just four ingredients, and come together in under 20 minutes. The chocolate kiss on top melts just slightly, creating that perfect sweet-salty moment.
- Prep Time: 10 minutes
- Cook Time: 10 minutes
- Total Time: 20 minutes
- Yield: 36 cookies 1x
- Category: Dessert
- Cuisine: American
Ingredients
- 1 cup (240g) creamy peanut butter (e.g., Jif or Skippy)
- 1 cup (200g) granulated sugar
- 1 teaspoon baking soda
- About 36 chocolate candy kisses (e.g., Hershey’s)
- Optional: Flaky sea salt for sprinkling
Instructions
- Preheat your oven to 350°F (175°C) and line a baking sheet with parchment paper or a silicone mat.
- In a medium mixing bowl, combine 1 cup creamy peanut butter, 1 cup granulated sugar, and 1 teaspoon baking soda. Mix with an electric mixer on medium speed or a wooden spoon until a thick, cohesive dough forms.
- Roll the dough into 1-inch balls and place them about 2 inches apart on the prepared baking sheet.
- Optional: Roll each ball in additional granulated sugar for a crackly exterior.
- Bake for 8-10 minutes, until puffed and lightly golden on the edges. The centers will look slightly underdone.
- Remove from the oven and immediately press a chocolate kiss into the center of each cookie.
- Let the cookies cool on the baking sheet for 5 minutes, then transfer to a wire cooling rack to cool completely.
- Optional: Sprinkle with flaky sea salt.
Notes
For best results, use a standard creamy peanut butter like Jif or Skippy. Natural peanut butter may cause spreading. If dough is too sticky, chill for 15-20 minutes. Press chocolate kisses in while cookies are hot. Cookies taste even better the next day.
Nutrition
- Serving Size: 1 cookie
- Calories: 110
- Sugar: 11
- Sodium: 85
- Fat: 6
- Saturated Fat: 2
- Carbohydrates: 13
- Fiber: 1
- Protein: 3
Keywords: flourless peanut butter blossom cookies, gluten-free cookies, 4-ingredient cookies, easy peanut butter cookies, holiday cookies