Love this? Save it for later!
Share the inspiration with your friends
My neighbor wasn’t trying to impress anyone. I’d stopped by to borrow a cooling rack—mine had mysteriously vanished after a particularly ambitious cookie marathon—and the smell hit me before I even made it past her front door. Something sweet, something faintly toasted, something that made me forget why I was even there. She was standing in her kitchen in sweatpants, holding a piping bag like it was no big deal, while these little white puffs sat on a baking sheet looking back at me with tiny chocolate eyes.
“Oh, those,” she said when I asked. “Just ghost cookies. My kid wanted something spooky but not scary.” She shrugged like she’d just made toast. But honestly? I stood there staring at these little guys for a solid minute. They weren’t just cute—they were cozy. Like, the kind of thing you’d want to make on a rainy October afternoon when the air gets chilly and you’re craving something that feels like a hug. I mean, how often do you look at a cookie and feel genuinely comforted?
I practically begged for the recipe, and she scribbled it on a sticky note while her cat wound around her ankles. Let me tell you, I’ve made a lot of cookies in my day. But these ghost meringues? They’re different. They’re light as air, sweet but not cloying, and those chocolate chip eyes give them so much personality you almost feel bad biting into one. Almost. That first batch disappeared in two days, and I’ve been making them ever since whenever I need a little cozy magic.
Why You’ll Love This Recipe
Look, I get it. There are a million spooky-season recipes out there. But these ghost meringue cookies with chocolate chip eyes aren’t just another Halloween treat—they’re the kind of recipe that makes you slow down and actually enjoy the process. Here’s why they’ve become my go-to for cozy evenings at home:
- Surprisingly Simple: You only need a handful of basic ingredients—egg whites, sugar, vanilla, cream of tartar, and chocolate chips. No fancy extracts or hard-to-find items.
- Naturally Gluten-Free: Since meringues are just egg whites and sugar, they’re perfect for anyone avoiding gluten without sacrificing that melt-in-your-mouth texture.
- Low-Fat and Light: Each cookie has minimal fat, making them a guilt-free indulgence when you’re curled up on the couch watching a scary movie.
- Perfect for Kids (and Kids at Heart): Piping those little ghosts and pressing in the chocolate chip eyes is genuinely fun. My niece called them “the happiest ghosts she’s ever seen.”
- Great for Gifting: They keep for weeks in an airtight container, so you can make a big batch and share them with friends, coworkers, or your book club.
What makes this recipe different from other meringue cookies I’ve tried is the texture. My neighbor’s secret? She lets the egg whites sit out for exactly 30 minutes before whipping—room temperature whites whip up fluffier and more stable. That extra step makes these ghosts light, crisp on the outside, and slightly chewy in the center. It’s not just another version—it’s the best version I’ve found after testing half a dozen recipes.
And honestly? There’s something deeply satisfying about making something this cute. You know that feeling when you pull a tray of perfectly piped ghosts out of the oven and they’re all smiling up at you with their little chocolate eyes? It’s pure comfort. The kind of cozy that makes a cold evening feel warm again.
What Ingredients You Will Need
This recipe uses simple, pantry-friendly ingredients to create something that looks way more impressive than it actually is. Most of these are probably already in your kitchen, which is exactly how I like my recipes to start.
- 3 large egg whites (room temperature, about 100g total) — Room temperature whites whip up to a greater volume than cold ones. I set mine out on the counter for 30 minutes before starting. If you’re in a hurry, place the bowl of egg whites in a warm water bath for a few minutes.
- ¾ cup granulated sugar (150g) — Regular white sugar works best here. Avoid superfine or powdered sugar; granulated sugar dissolves properly and gives the meringue its structure. I’ve tried this with coconut sugar and it didn’t hold its shape as well, so stick with the real deal.
- ½ teaspoon cream of tartar — This stabilizes the egg whites and helps them hold stiff peaks. If you don’t have cream of tartar, you can substitute 1 teaspoon of lemon juice or white vinegar. I personally prefer cream of tartar because it doesn’t affect the flavor.
- 1 teaspoon vanilla extract — Pure vanilla extract gives the best flavor, but imitation vanilla works in a pinch. I’ve also made these with almond extract for a different twist, and they turned out lovely.
- ⅓ cup mini chocolate chips (about 60g) — Mini chips are perfect for the eyes because they’re small and cute. Regular chocolate chips work too, but they look a bit oversized for the ghost faces. I recommend Ghirardelli or Enjoy Life brand for consistent quality.
- Pinch of salt — Just a tiny pinch enhances the sweetness and balances the flavors. Don’t skip it—it makes a surprising difference.
Optional additions:
- Pink gel food coloring — For rosy-cheeked ghosts. Just a tiny dot on a toothpick swirled into each ghost before baking.
- Edible glitter dust — For a magical, sparkly finish. Sprinkle it on right after piping while the meringue is still tacky.
- Peppermint extract — Substitute ½ teaspoon of the vanilla for a minty version that’s perfect for Christmas ghost cookies.
One thing I’ve learned the hard way: make sure your bowl and whisk are completely clean and free of any grease. Even a tiny bit of oil can prevent egg whites from whipping properly. I wipe my bowl with a lemon wedge before starting—old pastry chef trick that never fails.
Equipment Needed
You don’t need a professional pastry kitchen for these cookies. Here’s what I use and what you can substitute if needed:
- Stand mixer or hand mixer — A stand mixer with the whisk attachment makes this recipe effortless. But honestly, a hand mixer works just fine—it’ll take 6-8 minutes instead of 4-5. I’ve made these with a hand mixer at my sister’s house and they turned out perfectly.
- Large mixing bowl — Glass or metal works best. Avoid plastic bowls as they can retain grease even after washing.
- Piping bag with a round tip — A Wilton #12 or #1A tip creates nice round ghosts. If you don’t have a piping bag, a sturdy zip-top bag with the corner snipped off works surprisingly well. I’ve done both and honestly, the zip-top bag method is perfect for beginners.
- Baking sheets — Two large baking sheets lined with parchment paper. Silicone mats also work great and help the meringues release easily.
- Electric scale (optional but helpful) — Weighing your egg whites ensures consistent results, but using 3 large eggs is reliable enough for home baking.
Budget-friendly tip: If you don’t want to buy a piping bag, grab a pack of quart-sized zip-top bags from the grocery store. They cost pennies and work beautifully. Just don’t overfill them or the seam might split—learned that one the messy way!
Preparation Method
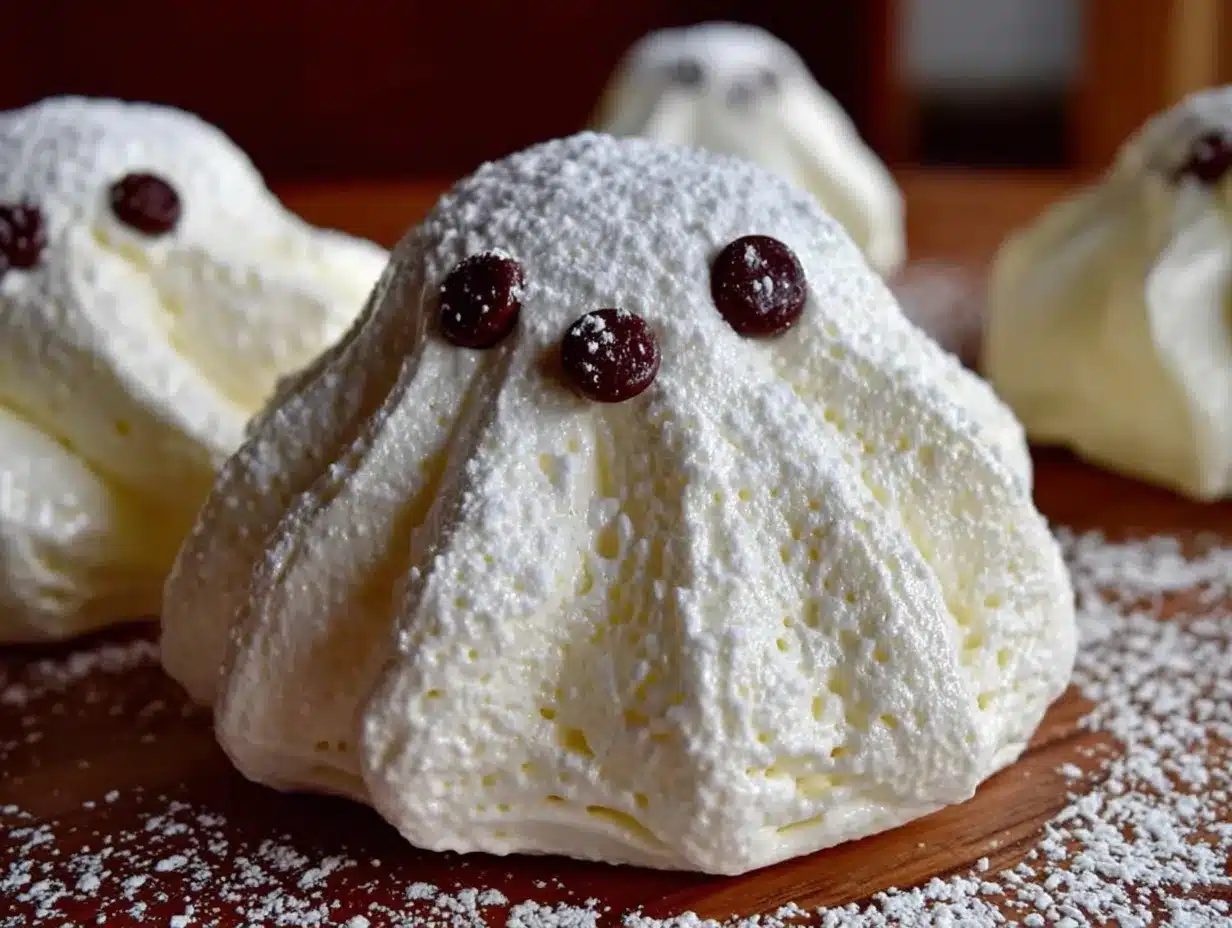
Let me walk you through this step by step. I’ve made these ghost cookies at least a dozen times now, so I’ve got all the little tricks to share.
Step 1: Prep your workspace.
Preheat your oven to 200°F (93°C). Line two baking sheets with parchment paper. This low temperature is crucial—we’re drying the meringues, not baking them. If your oven runs hot, use an oven thermometer to check. I once accidentally set mine to 250°F and ended up with brown ghosts instead of white ones. Not cute.
Step 2: Whip the egg whites.
Place the room-temperature egg whites and cream of tartar in your clean, grease-free mixing bowl. Beat on medium speed until frothy and bubbly, about 1 minute. The mixture should look like soapy foam. This is where patience starts—don’t rush this stage.
Step 3: Add the sugar gradually.
With the mixer running on medium-high, add the sugar one tablespoon at a time. I know it’s tempting to dump it all in at once, but trust me on this—gradual addition helps the sugar dissolve properly. Each addition should take about 10 seconds. After all the sugar is in, increase the speed to high and beat until stiff, glossy peaks form. This takes about 4-5 minutes with a stand mixer, 6-8 with a hand mixer. You’ll know it’s ready when you lift the whisk and the meringue stands up straight without drooping. Rub a tiny bit between your fingers—if it feels gritty, keep beating until smooth.
Step 4: Add flavoring.
Gently fold in the vanilla extract and a tiny pinch of salt using a rubber spatula. Do this by hand—don’t use the mixer or you’ll deflate all that beautiful volume. Fold just until combined, about 10 strokes. The mixture should look like marshmallow fluff, thick and luscious.
Step 5: Pipe the ghosts.
Transfer the meringue to your piping bag fitted with a round tip. Hold the bag perpendicular to the baking sheet, about ½ inch above the surface. Squeeze gently to create a round base, then lift the bag straight up while continuing to squeeze. As you lift, the meringue will form a teardrop shape—that’s your ghost body! Release pressure and pull away with a quick flick. Each ghost should be about 1½ inches wide and 2 inches tall. Leave about 1 inch between each one—they won’t spread much, but they need a little breathing room.
Step 6: Add the eyes.
Here’s the fun part! While the meringue is still wet and tacky, gently press two mini chocolate chips into each ghost for eyes. Position them about halfway down the ghost body. Don’t press too hard or you’ll flatten the meringue. I like to place them slightly asymmetrical—it gives each ghost its own little personality. Some of mine end up looking surprised, others sleepy. It’s adorable.
Step 7: Bake low and slow.
Place the baking sheets in the preheated oven and bake for 1 hour 30 minutes to 1 hour 45 minutes. The meringues should be dry to the touch and easily lift off the parchment paper. They’ll still be pale white—that’s exactly what you want. If they start browning, your oven is too hot. After baking, turn off the oven and leave the meringues inside with the door slightly ajar for another 30 minutes to cool completely. This step ensures they’re dry all the way through.
Step 8: Cool completely.
Transfer the baking sheets to a wire rack and let the ghosts cool completely, about 15 minutes. Don’t try to remove them while they’re warm—they’re fragile and might crack. Once cool, they should lift off the parchment easily. If they stick, they need more drying time.
Cooking Tips & Techniques
I’ve made every mistake in the book with meringues, so you don’t have to. Here’s what I’ve learned:
Humidity is the enemy. Meringues are basically sugar and air, and humidity makes them sticky and soft. If you’re making these on a rainy day, add an extra 15 minutes to the baking time. I learned this the hard way when I tried to make them during a summer thunderstorm—they never crisped up properly.
Don’t overbeat the egg whites. You want stiff peaks, but if you beat too long, the meringue becomes grainy and starts to separate. Stop the mixer every 30 seconds after the 4-minute mark to check. The meringue should be glossy and smooth, not dry or clumpy.
Use fresh eggs if possible. Fresh egg whites whip up better than older ones. If your eggs are a few weeks old, that’s fine—they’ll still work—but fresher is better for maximum volume.
Pipe with confidence. Don’t overthink the ghost shapes. Even if they look a little wonky, they’ll still be adorable. My first batch looked like sad blobs, but they tasted amazing. Practice makes perfect, and honestly, imperfect ghosts have more charm.
Store properly. Meringues are hygroscopic, meaning they absorb moisture from the air. Store them in an airtight container at room temperature for up to 2 weeks. If they lose their crunch, pop them in a 200°F oven for 10 minutes to re-crisp.
Variations & Adaptations
One of the best things about this recipe is how easy it is to customize. Here are some of my favorite variations:
Chocolate Ghosts: Swap 2 tablespoons of the granulated sugar for unsweetened cocoa powder. Sift it into the meringue after whipping and fold gently. You’ll get beautiful chocolate ghosts with white chocolate chip eyes.
Vegan Version: Use aquafaba (the liquid from a can of chickpeas) instead of egg whites. Three tablespoons of aquafaba equals one egg white. Whip it with cream of tartar just like egg whites—it behaves almost identically. I tested this for a friend with egg allergies and honestly, I couldn’t tell the difference.
Peppermint Ghosts: Replace the vanilla extract with ½ teaspoon peppermint extract. Add a drop of red food coloring for a subtle pink tint. These are perfect for Christmas—they look like little snow ghosts!
Lemon Ghosts: Add 1 teaspoon of lemon zest and replace the vanilla with ½ teaspoon lemon extract. The citrus flavor brightens the sweetness beautifully. These are my go-to for spring.
Spooky Variations: Instead of chocolate chip eyes, try using black sesame seeds for a more subtle look, or press in a tiny piece of dried cranberry for a little mouth. I made a batch with “scared” ghosts—eyes placed close together and a tiny open mouth—and my kids couldn’t stop laughing.
Serving & Storage Suggestions
These ghost meringue cookies are best served at room temperature, right after they’ve cooled from the oven. They’re perfect for:
- Halloween parties — Arrange them on a platter with some fake spiderwebs for a spooky but cute display.
- Cozy movie nights — Serve them alongside hot cocoa or warm apple cider. The sweetness pairs perfectly with a warm drink.
- Gift giving — Pack them in a clear cellophane bag tied with a ribbon. They make adorable hostess gifts or teacher treats.
- Kids’ lunchboxes — They’re sturdy enough to survive a lunchbox and add a little fun to an ordinary day.
Storage: Place the cooled meringues in an airtight container at room temperature. Don’t refrigerate them—the moisture will make them sticky. They’ll keep for up to 2 weeks, though mine never last that long. If you live in a humid climate, add a silica gel packet to the container to absorb excess moisture.
Freezing: You can freeze baked meringues for up to 3 months. Place them in a single layer in a freezer-safe container with parchment paper between layers. Thaw at room temperature for 15 minutes before serving. Don’t thaw in the fridge—again, moisture is the enemy.
One thing I love about these cookies is that the flavor actually improves after a day or two. The vanilla mellows and the texture becomes perfectly crisp. So if you can resist eating them all immediately, they’ll be even better tomorrow.
Nutritional Information & Benefits
Each ghost meringue cookie (based on 24 cookies per batch) contains approximately:
- Calories: 35
- Fat: 0.5g
- Carbohydrates: 7g
- Protein: 1g
- Sugar: 6g
These cookies are naturally low in fat and calories compared to traditional butter-based cookies. Egg whites are an excellent source of protein and contain no cholesterol, making this a heart-friendly treat. The chocolate chips add a small amount of antioxidants from cocoa, though let’s be honest—we’re eating these for the joy, not the health benefits!
Dietary considerations: This recipe is naturally gluten-free, nut-free, and contains no dairy. For a vegan version, use aquafaba as mentioned above. Always check your chocolate chip labels if you have specific allergen concerns—some brands process chocolate on shared equipment with nuts or dairy.
From a wellness perspective, I love that these cookies let me indulge without overdoing it. One or two ghosts satisfy my sweet tooth without the sugar crash I get from heavier desserts. Plus, the process of making them is meditative—whipping egg whites, piping little ghosts, placing those tiny eyes. It’s a cozy activity that feels almost like therapy.
Conclusion
These ghost meringue cookies with chocolate chip eyes have become a staple in my kitchen, and I hope they become one in yours too. They’re proof that you don’t need complicated techniques or fancy ingredients to create something truly special. Just a few basic items, a little patience, and a willingness to have fun with your food.
I love that each batch turns out a little different—some ghosts are tall and proud, others are short and round. Some have wide, surprised eyes, while others look sleepy or mischievous. It’s like they each have their own little personality, and that makes them feel personal and handmade in a way that store-bought treats never can.
So go ahead—preheat that oven, whip up some egg whites, and let yourself enjoy the process. Play some cozy music, pour a cup of tea, and take your time. These ghosts aren’t going anywhere. And honestly? The world could use a little more cozy magic right now.
I’d love to hear how yours turn out! Drop a comment below with your favorite variation, or tag me in your ghost cookie photos. Happy baking, friend!
Frequently Asked Questions
Can I make these ghost meringue cookies without a piping bag?
Absolutely! A sturdy zip-top bag with one corner snipped off works perfectly. Just don’t overfill it—fill it about halfway to avoid the seam splitting. You can also use a spoon to drop dollops of meringue and shape them into ghost forms with the back of the spoon. They won’t be as perfectly shaped, but they’ll still be delicious and cute.
Why did my meringues turn out sticky and soft?
Sticky meringues usually mean they weren’t baked long enough or the humidity was too high. Make sure your oven is at the correct temperature (use an oven thermometer!) and bake until they’re completely dry to the touch. If they’re still sticky after baking, return them to the oven at 200°F for another 15-20 minutes. On rainy days, add extra drying time.
Can I use liquid egg whites from a carton?
You can, but I don’t recommend it. Carton egg whites often contain stabilizers that prevent them from whipping up as fluffy as fresh egg whites. If you must use them, look for “100% liquid egg whites” without additives, and expect them to take longer to reach stiff peaks. Fresh eggs really do give the best results here.
How do I know when the meringue is whipped enough?
You’re looking for stiff, glossy peaks that hold their shape when you lift the whisk. The meringue should look like marshmallow fluff and feel smooth, not grainy. Rub a tiny bit between your fingers—if it feels gritty, keep beating. If it looks dry or curdled, you’ve overbeaten and need to start over with fresh egg whites.
Can I add food coloring to make colored ghosts?
Yes! Gel food coloring works best because it doesn’t add extra liquid. Add it after the meringue reaches stiff peaks, using a toothpick to swirl in just a tiny amount. Fold gently to avoid deflating the meringue. I love making pale pink ghosts for Valentine’s Day or lavender ghosts for spring. Just remember to use gel, not liquid, food coloring.
Pin This Recipe!
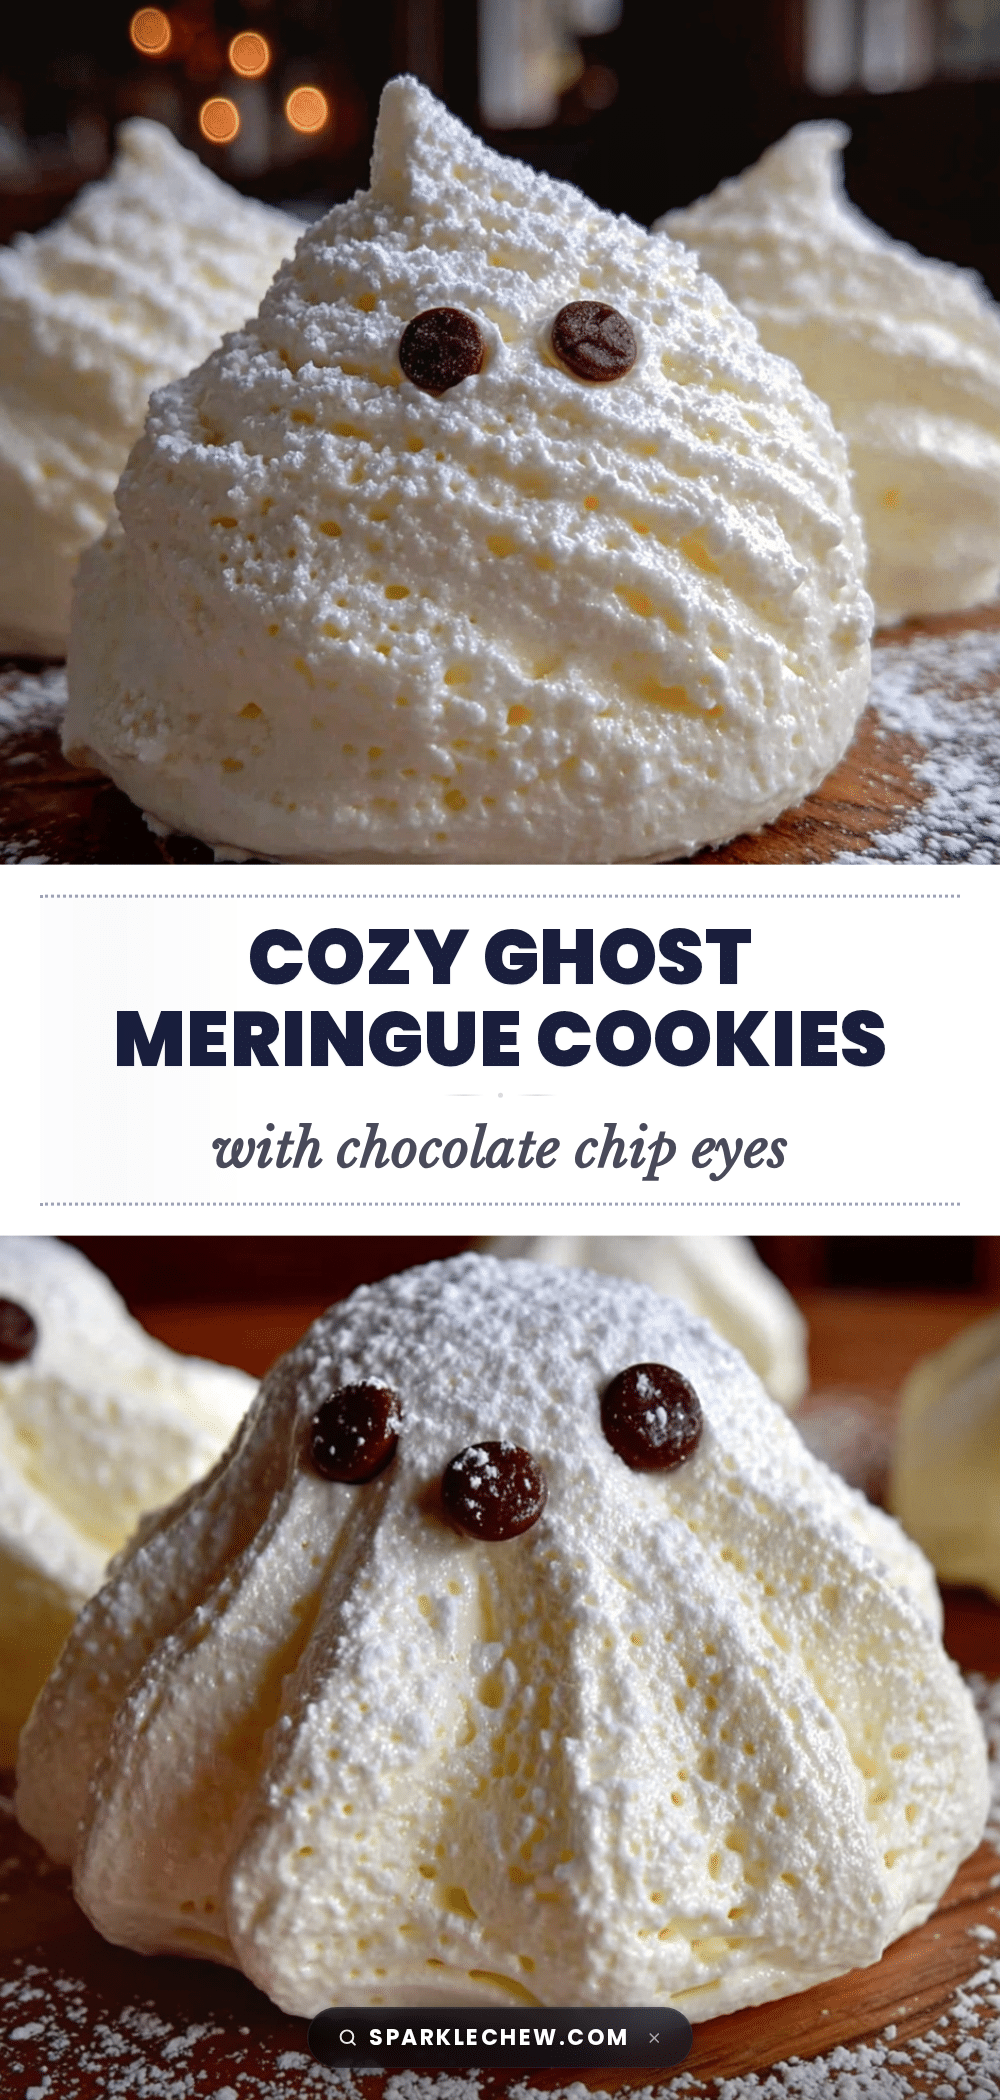
Cozy Ghost Meringue Cookies with Easy Chocolate Chip Eyes
Light as air meringue cookies shaped like adorable ghosts with chocolate chip eyes. These naturally gluten-free, low-fat treats are perfect for Halloween or any cozy occasion, with a crisp exterior and slightly chewy center.
- Prep Time: 30 minutes
- Cook Time: 1 hour 45 minutes
- Total Time: 2 hours 45 minutes
- Yield: 24 cookies 1x
- Category: Dessert
- Cuisine: American
Ingredients
- 3 large egg whites (room temperature, about 100g total)
- ¾ cup granulated sugar (150g)
- ½ teaspoon cream of tartar
- 1 teaspoon vanilla extract
- ⅓ cup mini chocolate chips (about 60g)
- Pinch of salt
- Pink gel food coloring (optional)
- Edible glitter dust (optional)
- Peppermint extract (optional, substitute ½ teaspoon of vanilla)
Instructions
- Preheat your oven to 200°F (93°C). Line two baking sheets with parchment paper.
- Place the room-temperature egg whites and cream of tartar in a clean, grease-free mixing bowl. Beat on medium speed until frothy and bubbly, about 1 minute.
- With the mixer running on medium-high, add the sugar one tablespoon at a time, each addition taking about 10 seconds. After all sugar is added, increase speed to high and beat until stiff, glossy peaks form, about 4-5 minutes with a stand mixer or 6-8 minutes with a hand mixer. The meringue should stand up straight without drooping and feel smooth between your fingers.
- Gently fold in the vanilla extract and a tiny pinch of salt using a rubber spatula, about 10 strokes, until just combined. The mixture should look like marshmallow fluff.
- Transfer the meringue to a piping bag fitted with a round tip (Wilton #12 or #1A). Hold the bag perpendicular to the baking sheet, about ½ inch above the surface. Squeeze gently to create a round base, then lift the bag straight up while continuing to squeeze to form a teardrop shape. Release pressure and pull away with a quick flick. Each ghost should be about 1½ inches wide and 2 inches tall, spaced about 1 inch apart.
- While the meringue is still wet and tacky, gently press two mini chocolate chips into each ghost for eyes, positioned about halfway down the ghost body. Don’t press too hard.
- Bake for 1 hour 30 minutes to 1 hour 45 minutes, until dry to the touch and easily lifting off the parchment. They should remain pale white. After baking, turn off the oven and leave the meringues inside with the door slightly ajar for another 30 minutes to cool completely.
- Transfer the baking sheets to a wire rack and let the ghosts cool completely, about 15 minutes. Once cool, they should lift off the parchment easily.
Notes
Humidity is the enemy of meringues—add 15 minutes to baking time on rainy days. Make sure bowl and whisk are completely clean and grease-free; wipe bowl with lemon wedge before starting. Store in an airtight container at room temperature for up to 2 weeks. If meringues lose crunch, re-crisp in a 200°F oven for 10 minutes. For vegan version, use aquafaba (3 tablespoons per egg white).
Nutrition
- Serving Size: 1 cookie
- Calories: 35
- Sugar: 6
- Sodium: 10
- Fat: 0.5
- Carbohydrates: 7
- Protein: 1
Keywords: ghost cookies, meringue cookies, Halloween cookies, gluten-free cookies, low-fat cookies, spooky treats, easy meringue, chocolate chip eyes


