Love this? Save it for later!
Share the inspiration with your friends
I had a long-standing, deeply held position on one-pan meals. For years, I claimed they were a compromise—a sad concession to a busy schedule where flavor got traded for convenience. I mean, honestly, how could chicken, rice, and a sauce all cooked in the same pan possibly turn out right? The chicken would be dry, the rice would be mushy, and the whole thing would taste like one big, bland puddle. That was my story, and I was sticking to it.
Then last Tuesday happened. My neighbor, a woman named Carol who gardens like it’s a competitive sport, showed up at my door holding a cast iron skillet wrapped in a dish towel. “I made too much,” she said, which I’ve learned is code for “I made this for you because I know you’ve had a week.” I took the pan, still warm, and peeked under the foil. There it was. A golden, fragrant landscape of chicken thighs nestled into creamy, speckled rice. The garlic hit me first—not harsh, but sweet and roasted. I was suspicious. I was intrigued. I was caught, spoon in hand, eating a cold bite right there on the porch before I even brought the pan inside.
The rice was impossibly creamy, but not heavy. The chicken was so tender it practically fell apart when I breathed on it. And the parmesan? It had melted into every nook and cranny, creating this nutty, savory backbone that made me close my eyes. I had to admit it. I was wrong. This cozy one-pan garlic parmesan chicken and rice wasn’t a compromise. It was a revelation. Maybe you’ve been there—dismissing a whole category of food only to have one perfect version prove you wrong. This is that version. And now, I make it at least twice a month, usually on a chilly Wednesday when I need the kitchen to feel like a warm hug. Let me tell you, it never gets old.
Why You’ll Love This Recipe
This isn’t just another chicken and rice recipe that leaves you with a sink full of dishes and a mediocre dinner. After testing this dish about seven times (Carol’s version was good, but I’m a tinkerer), I can confidently say this is the one. It has earned a permanent spot in my dinner rotation, and here’s why it will in yours too.
- Truly One-Pan: From searing the chicken to simmering the rice, everything happens in a single skillet. Your sink will thank you, and you’ll have dinner on the table in about 45 minutes with minimal cleanup.
- Simple Pantry Ingredients: You likely have garlic, parmesan, chicken, and rice in your kitchen right now. No trips to a specialty store for obscure ingredients.
- Perfect for Cozy Nights: This dish is the definition of comfort food. It’s warm, creamy, and deeply satisfying—ideal for a rainy Sunday or a busy weeknight when you need something reliable.
- Crowd-Pleaser Status: I’ve served this to my picky nephew, my in-laws, and a friend who “doesn’t really like rice.” All of them asked for seconds. It’s magic.
- Foolproof Technique: The method here is designed for success. We sear the chicken for flavor, then cook the rice in the same pan, absorbing all those browned bits. The result is rice that’s flavorful, not bland.
What makes this recipe different from the rest is the technique. Instead of just dumping everything together, we build flavor in layers. The chicken gets a good sear, creating a fond on the bottom of the pan. That fond is where the magic lives. We deglaze with a little broth, then toast the rice in the garlicky fat before adding the liquid. This step ensures every grain of rice is infused with flavor from the inside out. It’s not more work—it’s smarter work. And the payoff is a dish that tastes like you spent hours tending to it, when really, you just let the pan do the work.
Honestly, this recipe makes me feel like I’ve got my act together, even on days when I absolutely do not. It’s the kind of meal that makes you take a deep breath and think, “Okay, I’ve got this.”
What Ingredients You Will Need
This recipe relies on simple, high-quality ingredients to create something truly special. The beauty of it is that most of these are staples you probably already have on hand. Let’s break down what you’ll need and why each one matters.
- For the Chicken:
- 4 bone-in, skin-on chicken thighs (about 1.5 lbs or 680g): The bone and skin are key here. They keep the meat incredibly moist during cooking, and the skin gets beautifully crispy. You can use boneless, skinless thighs, but you’ll need to reduce the cooking time by about 10 minutes. I prefer thighs for their richer flavor, but chicken breasts (halved horizontally) can work too.
- 1 teaspoon kosher salt (5g): Season generously. Don’t be shy.
- 1/2 teaspoon black pepper (2g): Freshly ground is always best.
- 1 tablespoon olive oil (15ml): For searing. Avocado oil works too.
- For the Rice and Aromatics:
- 1 tablespoon unsalted butter (14g): Adds richness and helps toast the rice.
- 1 medium yellow onion, finely diced (about 150g): Provides a savory base. Shallots are a great substitute.
- 6 cloves garlic, minced (about 20g): This is non-negotiable. Fresh garlic is a must; don’t use the jarred stuff. It won’t have the same sweet, pungent punch.
- 1 1/2 cups long-grain white rice (300g): I recommend jasmine or basmati for their fluffy texture and fragrant aroma. Do not use instant rice or brown rice without adjusting the liquid and time.
- 1/2 cup dry white wine (120ml), optional: This adds a lovely acidity that cuts through the richness. Chicken broth can be used instead.
- For the Creamy Sauce:
- 2 1/2 cups low-sodium chicken broth (590ml): Low-sodium is important so you can control the salt level. Homemade broth makes this even better.
- 1 cup whole milk (240ml): For ultimate creaminess. 2% milk works, but avoid skim milk as it can make the sauce watery. Half-and-half is a decadent option.
- 1 cup freshly grated parmesan cheese (100g): Please, please grate your own! Pre-shredded cheese contains anti-caking agents that prevent it from melting smoothly. I recommend a good quality Parmigiano-Reggiano for the best nutty, salty flavor.
- 1 teaspoon dried thyme (1g): Earthy and warm. Fresh thyme is lovely too—use 1 tablespoon (3g) of fresh leaves.
- 1/2 teaspoon red pepper flakes (1g), optional: For a tiny whisper of heat. It doesn’t make the dish spicy, just more interesting.
- For the Garnish:
- Fresh parsley, chopped (about 2 tablespoons or 8g): For color and freshness.
- Additional grated parmesan for serving.
Ingredient Note: I’ve tested this with different types of rice. Arborio rice (risotto rice) creates an even creamier, more risotto-like dish, but you’ll need to stir it more frequently and add an extra 1/2 cup of liquid. For a gluten-free option, simply ensure your chicken broth is certified gluten-free.
Equipment Needed
One of the best things about this recipe is that it doesn’t require a pantry full of specialized tools. You need a good, sturdy pan and a few basics. Here’s the list.
- A Large, Heavy-Bottomed Skillet or Dutch Oven: This is the star of the show. A 12-inch (30cm) skillet with a tight-fitting lid is ideal. Cast iron is my personal favorite because it holds heat so evenly, but a good stainless steel or non-stick pan will work too. I’ve made this in a 5.5-quart enameled Dutch oven as well, and it was perfect. Avoid thin pans, as the rice can burn on the bottom before it’s fully cooked.
- Wooden Spoon or Silicone Spatula: For stirring and scraping up those delicious browned bits from the bottom of the pan. A wooden spoon is sturdy and won’t scratch your cookware.
- Chef’s Knife and Cutting Board: For dicing the onion and mincing the garlic.
- Measuring Cups and Spoons: Accuracy matters, especially with the liquid-to-rice ratio.
- Box Grater or Microplane: For grating your own parmesan cheese. A Microplane is fantastic for getting that fluffy, melt-in-your-mouth texture.
- Tongs: For flipping the chicken thighs safely without piercing the skin.
Budget-Friendly Tip: You don’t need a fancy $200 skillet. I started with a $30 cast iron pan from a discount store, and it served me well for years. Just make sure it’s heavy enough to hold heat. If you don’t have a lid, a large sheet of aluminum foil crimped tightly around the edges works in a pinch!
Preparation Method
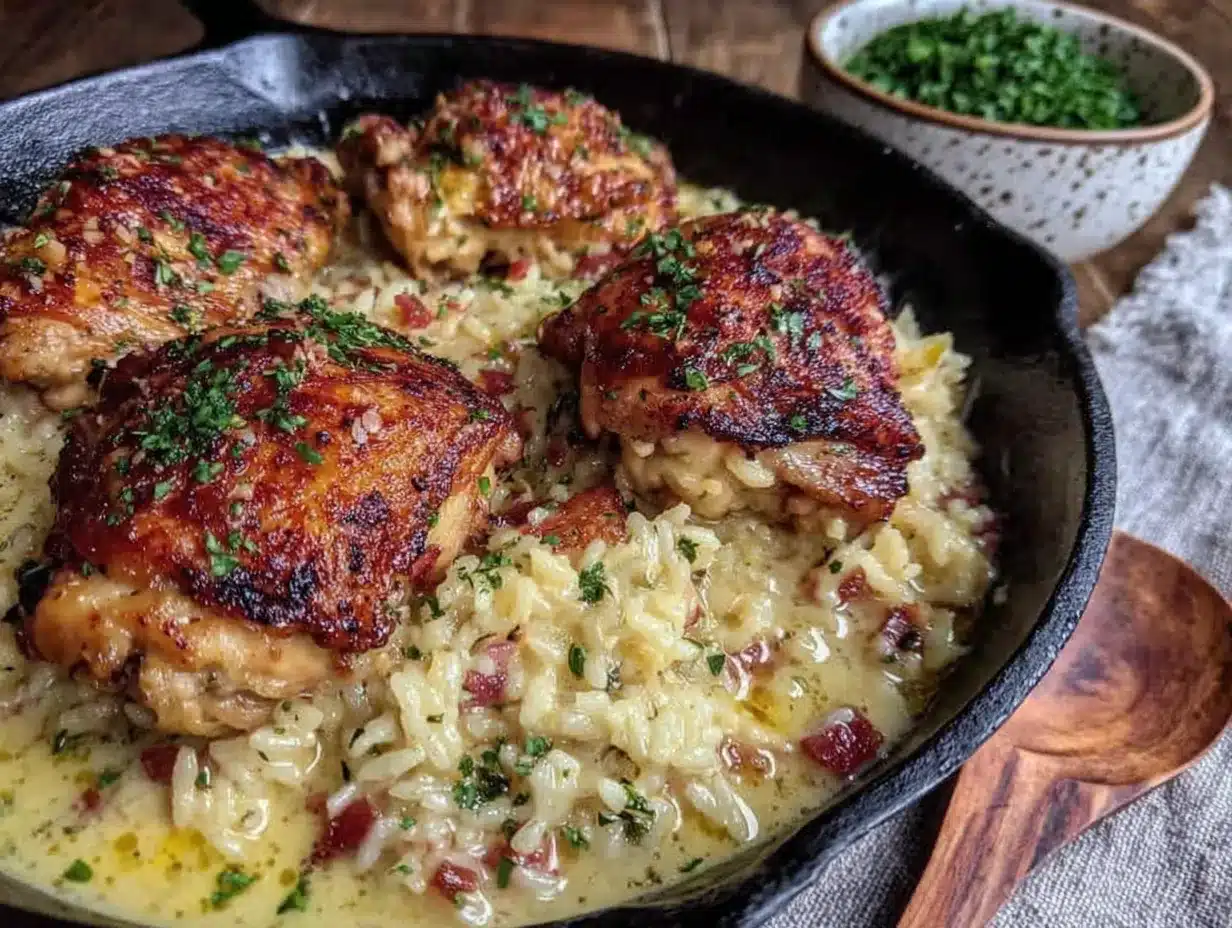
Alright, let’s get cooking! This method is designed to be straightforward, but I’ll walk you through each step with all the little details I’ve learned from making this dish more times than I can count. Take your time, and trust the process.
- Prep the Chicken and Pan (5 minutes): Pat the chicken thighs dry with paper towels. This is a crucial step—dry skin equals crispy skin. Season them generously on both sides with the kosher salt and black pepper. Place your large skillet over medium-high heat and add the olive oil. Let it get hot, shimmering, until it just starts to smoke. You want a good sear.
- Sear the Chicken (12-15 minutes): Carefully place the chicken thighs skin-side down in the hot skillet. Don’t crowd the pan; if your skillet is small, do this in two batches. Let them cook undisturbed for 5-7 minutes. The skin should be a deep, golden brown. I know it’s tempting to peek, but leave them alone! Use your tongs to flip them. Cook for another 4-5 minutes on the second side. The chicken won’t be cooked through yet, and that’s fine. Transfer the seared chicken to a plate. Don’t wipe out the pan! Those browned bits on the bottom are pure flavor.
- Sauté the Aromatics (5-7 minutes): Reduce the heat to medium. Add the butter to the pan. Once it melts, add the diced onion. Sauté for 3-4 minutes, stirring occasionally, until the onion is soft and translucent. Scrape the bottom of the pan with your wooden spoon to release any stuck-on bits. Add the minced garlic and cook for another 1 minute, until fragrant. Be careful not to burn the garlic—it can turn bitter quickly. Your kitchen should smell amazing right now.
- Toast the Rice (2 minutes): Add the rice to the pan. Stir it around in the buttery, onion-garlic mixture for about 1-2 minutes. You want the rice to look slightly translucent at the edges and hear a faint crackling sound. This step toasts the grains, which helps them stay separate and fluffy, not mushy. It’s a small step that makes a big difference.
- Deglaze and Add Liquid (2 minutes): If you’re using the white wine, pour it in now. Stir and let it bubble for about 1 minute, scraping up any last bits from the pan, until most of the liquid has evaporated. Then, pour in the chicken broth, milk, dried thyme, and red pepper flakes (if using). Give everything a good stir to combine. Bring the mixture to a gentle simmer—you should see small bubbles around the edges, but not a rolling boil.
- Nestle and Cook (25-30 minutes): Carefully place the seared chicken thighs back into the pan, nestling them into the rice mixture. The liquid should come about halfway up the sides of the chicken. If it looks a little low, add a splash more broth. Cover the skillet with a tight-fitting lid. Reduce the heat to low—the lowest setting your stove has. Let it cook, undisturbed, for 25 minutes. Do not lift the lid! The steam is what cooks the rice perfectly. I set a timer and walk away.
- Add the Cheese and Rest (5 minutes): After 25 minutes, turn off the heat. Remove the lid carefully (watch out for the steam). The rice should be tender and most of the liquid should be absorbed. Sprinkle the freshly grated parmesan cheese over the top of the entire dish. Don’t stir it in yet. Replace the lid and let the pan sit off the heat for another 5 minutes. This resting time allows the cheese to melt into a creamy blanket and the rice to finish absorbing any remaining moisture.
- Finish and Serve (2 minutes): Remove the lid. The cheese will be melted and gooey. Garnish generously with fresh chopped parsley and an extra sprinkle of parmesan. The chicken skin should be crispy on top, while the meat below is fall-apart tender. Serve directly from the skillet for a beautiful, rustic presentation. Be careful—the handle will be hot!
Sensory Cue: When you lift the lid after the final rest, you should see a creamy, cohesive dish. The rice will have puffed up and absorbed the flavorful liquid. The smell of garlic, parmesan, and thyme will hit you all at once. It’s the kind of smell that makes everyone in the house wander into the kitchen asking, “What’s for dinner?”
Cooking Tips & Techniques
Over the many times I’ve made this (and a few times I’ve messed it up), I’ve picked up some tricks that will help you nail it on the first try. Here’s what I’ve learned.
- The Lid is Your Best Friend: I cannot stress this enough. Do not lift the lid during the 25-minute cooking time. Every time you lift it, you release precious steam and heat. This can lead to undercooked rice. Trust the steam. If you’re worried about it sticking, make sure your heat is on the lowest setting.
- Don’t Skip the Toast: Toasting the rice in the fat might seem like an unnecessary extra step, but it’s the secret to perfectly textured rice. It creates a barrier around each grain, preventing them from clumping together and turning into a starchy paste. It’s a 2-minute step that pays off big time.
- Freshly Grated Cheese is a Must: I learned this the hard way. I once used a bag of pre-shredded parmesan because I was in a hurry. The sauce turned out grainy and never fully melted. The cellulose coating on pre-shredded cheese is the culprit. Grate your own—it melts like a dream and tastes so much better.
- Manage Your Heat: Every stove is different. After you bring the liquid to a simmer and add the chicken, you need to reduce the heat to low. If your rice is still crunchy after 25 minutes and the liquid is gone, your heat was too high. If it’s soupy, your heat was too low or your lid wasn’t sealed properly. Next time, adjust accordingly.
- The Chicken Skin Trick: If you want extra crispy chicken skin, after the final 5-minute rest, you can pop the skillet under the broiler for 2-3 minutes. Just keep a close eye on it so it doesn’t burn. I do this when I’m feeling fancy, but honestly, it’s delicious either way.
A Personal Failure: The first time I made this, I used a non-stick pan that was too small. I crowded the chicken, so it steamed instead of searing. The skin was pale and rubbery, and the rice was a mushy mess. I was so disappointed. It taught me that a good sear is non-negotiable, and the right pan size matters. Learn from my mistake!
Variations & Adaptations
This recipe is a fantastic base that welcomes creativity. Here are some ways I’ve adapted it to keep things interesting or to fit different needs.
- Vegetarian Version: Skip the chicken entirely. Sauté a large, diced portobello mushroom cap along with the onions. Use vegetable broth instead of chicken broth. For protein, add a can of drained and rinsed chickpeas (about 240g) along with the liquid. The chickpeas will absorb all that garlic-parmesan flavor beautifully.
- Lemony Herb Twist: For a brighter, more spring-like flavor, add the zest of one lemon along with the garlic. Replace the dried thyme with 1 tablespoon of fresh chopped rosemary and 1 tablespoon of fresh chopped sage. Squeeze the juice of half a lemon over the finished dish before serving. It cuts through the richness perfectly.
- Spicy Arrancini Style: If you have leftovers (lucky you!), this rice is incredible for making arancini. Roll the cold rice mixture into balls, stuff a cube of mozzarella in the center, coat in breadcrumbs, and fry until golden. It’s a whole second meal from one pan of work!
- Dairy-Free Adaptation: Use a high-quality unsweetened oat milk or canned coconut milk (the full-fat kind from a can, not the carton) in place of the whole milk. Omit the parmesan cheese, or use a good quality dairy-free parmesan alternative. Nutritional yeast (about 2 tablespoons) can also add a cheesy, nutty flavor. The texture will be slightly different, but still very creamy and delicious.
- Add Some Greens: Stir in a couple of handfuls of fresh spinach or baby kale during the last 5 minutes of cooking, right before you add the cheese. They’ll wilt down into the rice, adding color and nutrients. I do this often and it never feels like a compromise.
I once made a version with leftover roasted butternut squash cubed and stirred in at the end. The sweetness of the squash against the savory, salty parmesan was a fantastic combo. Don’t be afraid to experiment!
Serving & Storage Suggestions
This dish is a complete meal in itself, but a few thoughtful accompaniments can make it feel even more special. Here’s how I like to serve and store it.
- Serving Temperature and Presentation: Serve this dish hot, straight from the skillet. The visual of the golden-brown chicken nestled in the creamy, speckled rice is stunning. Place the skillet on a trivet in the center of the table and let everyone serve themselves. Garnish with fresh parsley and an extra shower of parmesan right before serving.
- What to Serve With It: A simple side salad with a bright lemon vinaigrette is my go-to. The acidity cuts through the richness of the dish. Steamed green beans or roasted asparagus also work wonderfully. For a starchier meal, a slice of crusty bread is perfect for sopping up any extra creamy sauce from the bottom of the pan.
- Storage Instructions: Let the dish cool completely to room temperature (within 2 hours). Transfer leftovers to an airtight container. It will keep in the refrigerator for up to 4 days. The flavors actually meld and deepen overnight, making it even better the next day.
- Reheating Methods: The best way to reheat is in a skillet over medium-low heat. Add a splash of chicken broth or milk (about 2 tablespoons per serving) to loosen the rice, cover, and heat through for 5-7 minutes, stirring occasionally. You can also use the microwave, but add a splash of liquid and cover the bowl to create steam. Reheat in 30-second bursts, stirring in between, until hot.
- Freezer Tips: This dish freezes surprisingly well. Portion it into freezer-safe containers. It will keep for up to 3 months. Thaw overnight in the refrigerator before reheating. The texture of the rice might be slightly softer after freezing, but the flavor will still be fantastic.
Flavor Development: Honestly, I think this dish tastes even better the next day. The rice has had time to fully absorb all the garlic and parmesan goodness. It’s a wonderful meal prep option for busy weeks.
Nutritional Information & Benefits
While this is definitely a comfort food dish, it also offers some solid nutritional benefits. Here’s a breakdown of what you’re getting in a serving (one chicken thigh and about 1 cup of rice).
- Estimated Nutritional Values (per serving):
- Calories: 585 kcal
- Protein: 35g
- Fat: 28g
- Saturated Fat: 11g
- Carbohydrates: 48g
- Fiber: 1g
- Sugar: 5g
- Sodium: 780mg
- Health Benefits of Key Ingredients:
- Chicken Thighs: Rich in protein, iron, and zinc. The dark meat provides more iron and zinc than chicken breast, which is great for energy and immune function.
- Garlic: Known for its anti-inflammatory and immune-boosting properties. It’s also great for heart health.
- Parmesan Cheese: A good source of calcium and protein. It’s also high in flavor, so a little goes a long way.
- Rice: Provides quick energy from carbohydrates. Using long-grain rice gives you a lower glycemic index than short-grain varieties.
- Dietary Considerations: This recipe can be made gluten-free by using certified gluten-free broth. For a lower-carb option, you can substitute the rice with cauliflower rice, but you’ll need to adjust the cooking time significantly (about 10-15 minutes, and you’ll want to skip the toasting step).
- Potential Allergens: This recipe contains dairy (milk, butter, parmesan). It does not contain nuts, eggs, or soy, but always check your specific ingredient labels.
I believe in balance. This dish is rich and satisfying, and it makes me feel good—not just because it tastes amazing, but because I know I’m getting a solid dose of protein and nutrients along with the comfort. It’s a meal that nourishes both body and soul.
Conclusion
So there you have it. My journey from a one-pan skeptic to a full-blown convert. This cozy one-pan garlic parmesan chicken and rice isn’t just a recipe; it’s a solution. It’s the answer to the question, “What can I make for dinner that’s delicious, comforting, and doesn’t require a sink full of dishes?” It’s the dish I turn to when I need a guaranteed win, whether it’s a quiet Tuesday or a Sunday dinner with friends.
What I love most about this recipe is how forgiving it is. You can swap the herbs, add some greens, or use a different cut of chicken, and it still works. It’s a recipe that invites you to make it your own. Don’t be afraid to play with the flavors and see what happens. That’s where the best cooking discoveries are made.
I’d love to hear how it turns out for you! Did you add a special twist? Did your family ask for the recipe? Drop a comment below and share your experience. And if you’re looking for another cozy, one-pan meal, you might enjoy my creamy tuscan chicken skillet for a similar weeknight hero. Until next time, happy cooking, and remember—the best meals are the ones shared.
Frequently Asked Questions
Can I use boneless, skinless chicken breasts instead of thighs?
Yes, you can! Use about 1.5 lbs (680g) of boneless, skinless chicken breasts. Pound them to an even thickness for uniform cooking. Sear them for 3-4 minutes per side. Reduce the covered cooking time to about 20-22 minutes, as they cook faster than bone-in thighs. Check for doneness with a meat thermometer—they should reach 165°F (74°C).
My rice turned out mushy. What went wrong?
Mushy rice is usually a sign of too much liquid or the heat being too high. Make sure you’re using a heavy-bottomed pan that distributes heat evenly. Also, ensure your lid fits tightly. If steam escapes, the rice won’t cook properly. Next time, try reducing the liquid by 1/4 cup (60ml) and cooking on the absolute lowest heat setting.
Can I make this in a slow cooker or Instant Pot?
I haven’t tested this exact recipe in a slow cooker, as the rice can easily become overcooked. For an Instant Pot, you can use the sauté function for the chicken and aromatics. Then, add the rice and liquid, place the chicken on top, and pressure cook on high for 6 minutes with a natural release. The texture will be different—more like a porridge—but still tasty. You’ll need to adjust the liquid slightly.
How can I make this recipe lower in fat?
To lighten it up, use boneless, skinless chicken thighs and remove the skin after searing. Replace the whole milk with 2% milk or unsweetened almond milk. Reduce the butter to 1/2 tablespoon. You can also use a reduced-fat parmesan cheese, though the texture won’t be quite as creamy. The flavor will still be wonderful.
Can I add vegetables to this dish?
Absolutely! This is a great way to add more nutrients. Sauté a diced bell pepper or a cup of sliced mushrooms along with the onions. Stir in a handful of frozen peas or chopped spinach during the last 5 minutes of cooking. Just be mindful not to overcrowd the pan, as it can affect the cooking time and liquid absorption.
Pin This Recipe!
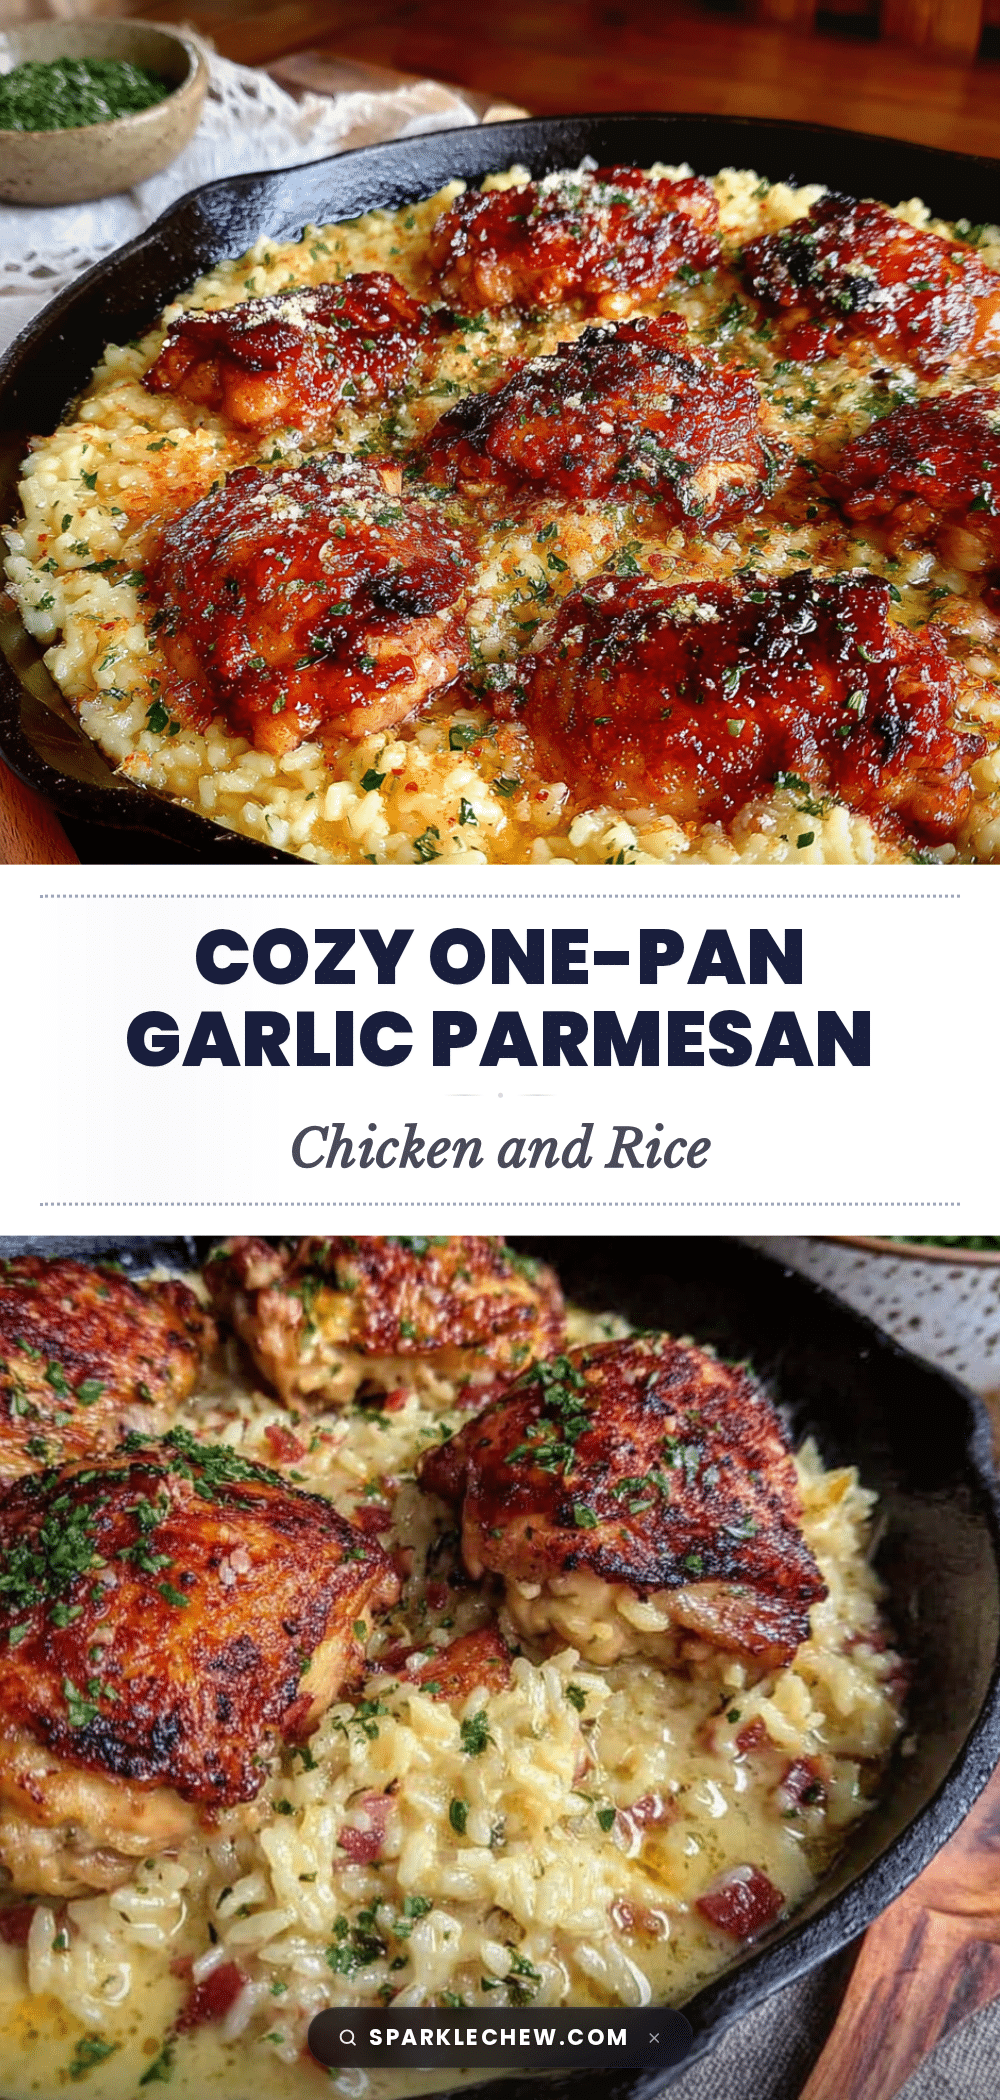
Cozy One-Pan Garlic Parmesan Chicken and Rice
A creamy, comforting one-pan meal featuring tender chicken thighs and flavorful rice, all cooked in a single skillet for easy cleanup. This recipe builds flavor in layers for a dish that tastes like you spent hours, but comes together in about 45 minutes.
- Prep Time: 15 minutes
- Cook Time: 30 minutes
- Total Time: 45 minutes
- Yield: 4 servings 1x
- Category: Main Course
- Cuisine: American
Ingredients
- 4 bone-in, skin-on chicken thighs (about 1.5 lbs or 680g)
- 1 teaspoon kosher salt (5g)
- 1/2 teaspoon black pepper (2g)
- 1 tablespoon olive oil (15ml)
- 1 tablespoon unsalted butter (14g)
- 1 medium yellow onion, finely diced (about 150g)
- 6 cloves garlic, minced (about 20g)
- 1 1/2 cups long-grain white rice (300g), such as jasmine or basmati
- 1/2 cup dry white wine (120ml), optional
- 2 1/2 cups low-sodium chicken broth (590ml)
- 1 cup whole milk (240ml)
- 1 cup freshly grated parmesan cheese (100g)
- 1 teaspoon dried thyme (1g)
- 1/2 teaspoon red pepper flakes (1g), optional
- Fresh parsley, chopped (about 2 tablespoons or 8g), for garnish
- Additional grated parmesan, for serving
Instructions
- Prep the Chicken and Pan (5 minutes): Pat the chicken thighs dry with paper towels. Season generously on both sides with kosher salt and black pepper. Place a large skillet over medium-high heat and add olive oil. Heat until shimmering and just starting to smoke.
- Sear the Chicken (12-15 minutes): Carefully place chicken thighs skin-side down in the hot skillet. Cook undisturbed for 5-7 minutes until deep golden brown. Flip and cook for another 4-5 minutes. Transfer to a plate; do not wipe out the pan.
- Sauté the Aromatics (5-7 minutes): Reduce heat to medium. Add butter to the pan. Once melted, add diced onion and sauté for 3-4 minutes until soft and translucent, scraping up browned bits. Add minced garlic and cook for 1 minute until fragrant.
- Toast the Rice (2 minutes): Add rice to the pan and stir for 1-2 minutes until slightly translucent at the edges and crackling.
- Deglaze and Add Liquid (2 minutes): If using wine, pour it in and let bubble for 1 minute, scraping up bits, until mostly evaporated. Add chicken broth, milk, dried thyme, and red pepper flakes (if using). Stir to combine and bring to a gentle simmer.
- Nestle and Cook (25-30 minutes): Place seared chicken thighs back into the pan, nestling into the rice mixture. Cover with a tight-fitting lid, reduce heat to low, and cook undisturbed for 25 minutes. Do not lift the lid.
- Add the Cheese and Rest (5 minutes): After 25 minutes, turn off heat. Remove lid carefully. Sprinkle freshly grated parmesan over the top. Replace lid and let rest off heat for 5 minutes.
- Finish and Serve (2 minutes): Remove lid. Garnish with fresh parsley and extra parmesan. Serve directly from the skillet.
Notes
Do not lift the lid during the 25-minute cooking time to ensure proper steam cooking. Toasting the rice in fat prevents clumping. Freshly grated parmesan is essential for smooth melting. For extra crispy chicken skin, broil for 2-3 minutes after resting. Leftovers keep in the refrigerator for up to 4 days and freeze for up to 3 months.
Nutrition
- Serving Size: 1 chicken thigh and
- Calories: 585
- Sugar: 5
- Sodium: 780
- Fat: 28
- Saturated Fat: 11
- Carbohydrates: 48
- Fiber: 1
- Protein: 35
Keywords: one-pan chicken and rice, garlic parmesan chicken, easy dinner, comfort food, skillet meal, creamy chicken and rice