Love this? Save it for later!
Share the inspiration with your friends
The neighborhood cookie exchange was in four hours and I’d completely forgotten. Not just forgotten — I’d blocked it out, apparently, because the email had been sitting in my inbox for two weeks. Everyone else would be bringing their grandmother’s famous gingerbread, or those intricate little Danish butter cookies that look like they belong in a bakery window. I had a bag of marshmallows, a block of white chocolate, and absolutely no time. Honestly, I almost just grabbed a store-bought tin on the way. But then my daughter, who was watching me panic at the pantry, said something that changed everything: “Mom, what if we made snowman poop?”
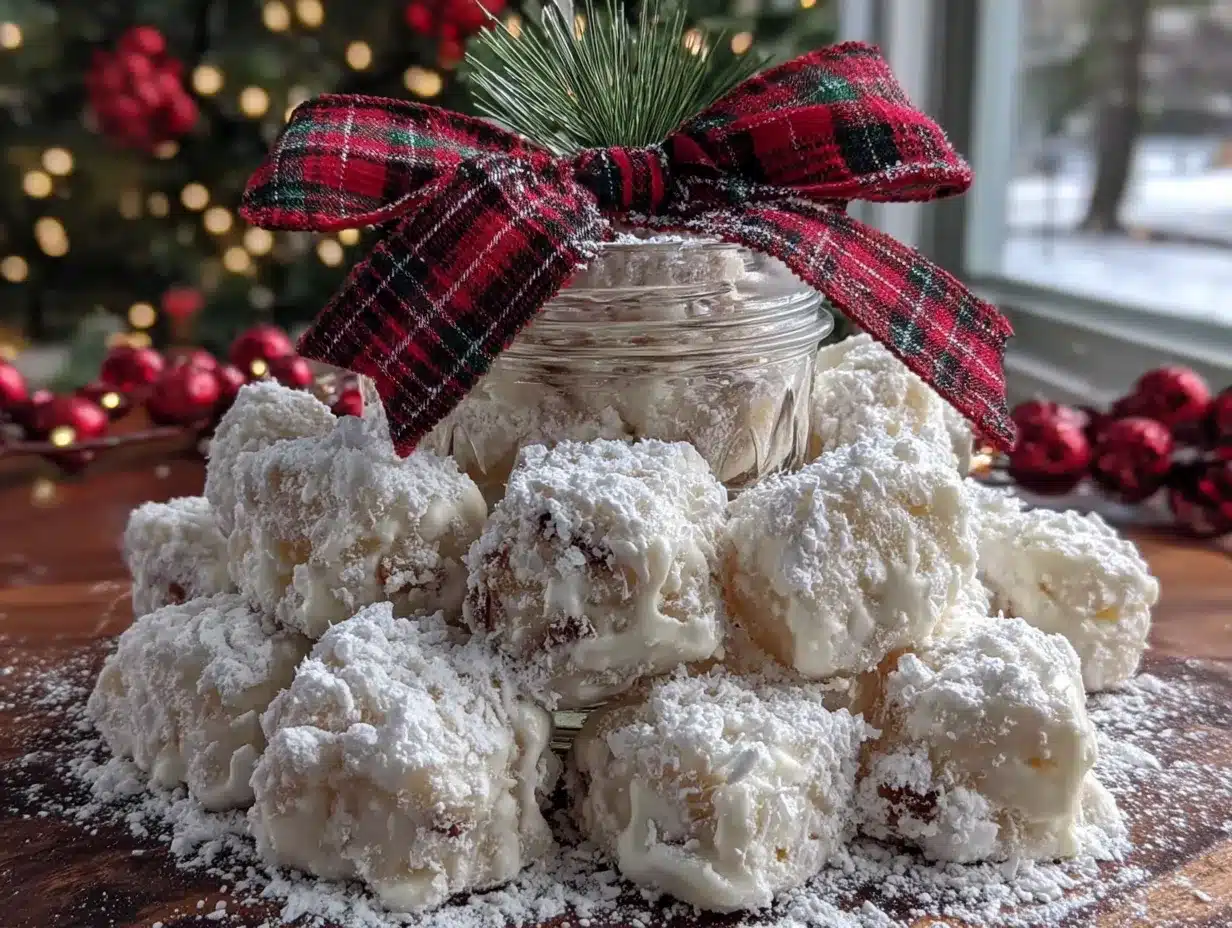
I laughed so hard I nearly cried. But she was serious — and brilliant. Let me tell you, that’s the kind of idea that sounds silly until you realize it’s actually genius. In under an hour, we melted white chocolate, dipped marshmallows, and rolled them in coconut and sprinkles. I threw them into little mason jars with a goofy tag I printed on the home printer, and honestly? I was still apologizing when I walked in the door. “I know these are ridiculous,” I said, setting them down next to a tower of perfectly frosted sugar cookies. But you know that feeling when something unexpected just works? By the end of the night, my jars were empty, and people were asking for the recipe. The woman who brought the three-day sourdough starter asked me to email her the instructions.
These Cozy Snowman Poop White Chocolate Marshmallow Candy Jars are now my go-to for every winter gathering. They’re silly, they’re sweet, and they somehow make everyone smile — even the people who pretend to be too sophisticated for themed treats. I keep making them because they remind me that the best recipes don’t have to be complicated. Sometimes they start with a panicked mom and a seven-year-old’s punchline.
Why You’ll Love This Recipe
I’ve tested this recipe more times than I’d like to admit — tweaking the chocolate-to-marshmallow ratio, trying different coatings, figuring out how to keep them from sticking together. What I ended up with is a treat that’s foolproof, fast, and somehow always the first thing to disappear from a dessert table. Here’s why this one’s a keeper:
- Quick & Easy : Comes together in under 30 minutes from start to finish. Perfect for last-minute holiday parties, classroom treats, or a snowy afternoon when the kids are bouncing off the walls.
- Simple Ingredients : You likely have everything in your kitchen right now. Marshmallows, white chocolate chips, coconut flakes, and sprinkles. That’s it.
- Perfect for Winter Gatherings : Cookie exchanges, ugly sweater parties, Christmas morning, or just a cozy night in with hot cocoa. The name alone gets people talking.
- Crowd-Pleaser : Kids adore the silly name, adults appreciate the nostalgic sweetness, and everyone loves that they’re bite-sized and mess-free (mostly).
- Unbelievably Delicious : The combination of creamy white chocolate, soft marshmallow, and crunchy coconut is next-level comfort food. It’s the kind of treat that makes you close your eyes after the first bite.
What makes this recipe different from every other white chocolate marshmallow treat out there? It’s the texture. Most recipes leave the marshmallows whole, which means you get a big bite of pure sugar. I chop them in half first — that way, every piece has the perfect ratio of chocolate to marshmallow to coating. It’s a tiny change that makes a huge difference. Plus, the coconut adds this subtle chewiness that balances the sweetness. Trust me on this one.
This recipe isn’t just good — it’s the kind that makes you feel like you’ve got it together, even when you’re running late and slightly panicked. It’s comfort food reimagined: faster, simpler, but with the same soul-soothing satisfaction. Perfect for impressing guests without stress, or turning a simple winter evening into something memorable.
What Ingredients You Will Need
This recipe uses simple, pantry-friendly ingredients to deliver a sweet, creamy treat with just the right amount of crunch. Everything here is easy to find and easy to customize, which is exactly what you want when you’re making something for a crowd.
For the Candy
- Large marshmallows — 1 standard bag (about 10 ounces). I recommend Jet-Puffed for consistent texture, but any brand works. Cut each marshmallow in half crosswise for the perfect bite-sized piece.
- White chocolate chips or melting wafers — 12 ounces. I prefer Ghirardelli white chocolate chips for a creamier melt, but Wilton candy melts are great if you want a slightly thicker coating. Avoid white chocolate bars — they don’t melt as smoothly for dipping.
- Coconut oil or shortening — 1 tablespoon. This is optional but highly recommended. It thins the chocolate just enough for easy dipping and gives a shinier finish. Refined coconut oil is best (no coconut flavor).
For the Coating
- Sweetened shredded coconut — 1 cup. Toast it lightly for extra flavor, or leave it raw for a softer texture. Unsweetened coconut works too, but you’ll lose a bit of sweetness.
- White sprinkles or jimmies — 1/4 cup. The little round ones look like snowflakes, but any white or silver sprinkle works. Avoid nonpareils — they bleed color into the chocolate.
- Powdered sugar — 2 tablespoons. For dusting at the end. It gives that “fresh snow” look that makes these jars so photogenic.
For the Jars and Decoration
- 8-ounce mason jars — 6 to 8 jars, depending on how full you pack them. Wide-mouth jars are easier to fill.
- Ribbon or twine — For tying around the jar lids. Red and white baker’s twine is my go-to for a cozy winter look.
- Printable gift tags — I design my own with a silly snowman face and the words “Cozy Snowman Poop” on them. You can find free templates online or just write on plain tags with a marker.
Ingredient Selection Tip : When buying white chocolate, check the label. Real white chocolate contains cocoa butter, which melts more smoothly and has a creamier flavor. If you see “white confectionery coating” or “white morsels” on the package, those are technically not white chocolate — they’re cheaper and can be waxy. For this recipe, real white chocolate makes a noticeable difference in taste and texture.
Substitution Guidance : If coconut isn’t your thing, try crushed graham crackers, crushed candy canes, or finely chopped pecans instead. For a dairy-free version, use vegan white chocolate chips and skip the coconut oil (or use a vegan butter substitute). The marshmallows themselves are typically gelatin-based, so they’re not vegan — look for Dandies brand if you need a plant-based option.
Equipment Needed
You don’t need a fancy kitchen to pull these off. Here’s what you’ll need:
- Microwave-safe bowl — For melting the white chocolate. Glass or ceramic works best. Avoid plastic — it can hold onto odors and affect the chocolate.
- Parchment paper — Line a baking sheet or two with this. The candies will stick to wax paper, so don’t substitute.
- Baking sheets — Two standard half-sheet pans give you enough room to lay out all the marshmallows in a single layer.
- Small offset spatula or fork — For dipping and lifting the marshmallows out of the chocolate. A fork works fine, but an offset spatula gives you more control.
- Sharp knife and cutting board — For halving the marshmallows. A serrated knife works best — it cuts through the sticky marshmallow without squishing it.
- Small bowls — For holding the coconut, sprinkles, and powdered sugar separately.
- Mason jars — 6 to 8 jars, 8-ounce size. You can find these at any grocery store or craft store. I reuse old jam jars too.
- Ribbon or twine — For decoration. Nothing fancy needed.
Budget-Friendly Tip : Don’t own mason jars? Use small paper treat bags instead — the kind you’d use for party favors. They’re cheaper and you can still tie them with ribbon. Just make sure the bags are lined with wax paper or parchment to prevent sticking.
Personal Experience : I’ve tried making these with a double boiler instead of the microwave, and honestly? It’s not worth the extra dishes. The microwave method works perfectly as long as you go in 30-second bursts and stir between each one. My first batch seized up because I got impatient and blasted it for a full minute. Learn from my mistake — low and slow is the way to go.
Preparation Method
These come together fast, so read through the whole method before you start. Once the chocolate is melted, you’ll want to work quickly.
Step 1: Prepare the Marshmallows
Line two baking sheets with parchment paper. Using a sharp serrated knife, cut each large marshmallow in half crosswise. You should end up with two flat, sticky rounds from each marshmallow. Place them cut-side up on the prepared baking sheets, leaving a little space between each one. This step takes about 5 minutes — put on some music and make it fun.
Pro Tip : Dip your knife in cold water between cuts to prevent sticking. Or spray the blade lightly with nonstick cooking spray. Your choice, but the water trick works better for me.
Step 2: Melt the White Chocolate
Place the white chocolate chips and 1 tablespoon of coconut oil in a microwave-safe bowl. Microwave on 50% power for 30 seconds. Stir well. Repeat in 20-second intervals, stirring after each, until the chocolate is completely smooth and glossy. This usually takes 2 to 3 intervals total. Do not rush this — white chocolate burns easily and turns into a grainy, unusable mess.
Sensory Cue : The chocolate should look shiny and feel warm but not hot to the touch when you dip a finger in. If it’s steaming, you’ve overheated it. Let it sit for a minute and stir vigorously — it might come back.
Step 3: Dip the Marshmallows
Working one at a time, pick up a marshmallow half by the rounded (non-cut) side and dip the cut side into the melted white chocolate. Use a small spoon to drizzle a little chocolate over the top and sides if needed. Let the excess drip off for a few seconds, then place the marshmallow back on the parchment paper, chocolate-side up. Repeat with all the marshmallow halves.
Time Estimate : Dipping all the marshmallows takes about 10 to 12 minutes. If the chocolate starts to thicken as it cools, pop it back in the microwave for 10 seconds.
Step 4: Add the Coating
Before the chocolate sets (work quickly here), sprinkle each dipped marshmallow with shredded coconut and a few white sprinkles. You can do this right on the baking sheet — just pinch the coconut between your fingers and let it fall over the chocolate. Don’t press it in; the chocolate will hold it naturally.
Warning : If the chocolate starts to set before you add the toppings, the coconut won’t stick. Work in batches of 5 to 6 marshmallows at a time to avoid this.
Step 5: Let Them Set
Allow the marshmallows to sit at room temperature until the chocolate is completely firm, about 20 to 30 minutes. Don’t put them in the refrigerator — condensation can make the chocolate look streaky and dull. If you’re in a hurry, set them in a cool, dry spot away from direct heat.
Step 6: Dust and Assemble
Once the chocolate is set, lightly dust the marshmallows with powdered sugar using a fine-mesh sieve. This gives them that “fresh snow” look. Now, carefully layer the marshmallows into the mason jars. Fill each jar about 3/4 full — you want them to look abundant but not crammed. Seal the jars with the lids.
Step 7: Decorate the Jars
Cut a piece of ribbon or twine long enough to wrap around the jar neck and tie a bow. Slip a gift tag under the ribbon before tying. If you’re giving these as gifts, you can also add a small sprig of artificial pine or a tiny candy cane tucked into the ribbon for extra flair.
Personal Efficiency Tip : I always make a double batch and keep one jar for ourselves. They last about a week in an airtight container — if you can resist eating them all in one sitting. Which, honestly, I cannot.
Cooking Tips & Techniques
After making these more times than I care to count, I’ve learned a few things the hard way. Here’s what I wish someone had told me before my first attempt:
The Chocolate Melt Mistake
White chocolate is finicky. It doesn’t like high heat, and it definitely doesn’t like water. If even a drop of water gets into your melted chocolate, it will seize up into a grainy, clumpy mess. I learned this when I washed my bowl but didn’t dry it thoroughly. Now I use a paper towel to wipe my bowl bone-dry before I start, and I make sure my spatula is dry too.
The Sticky Marshmallow Problem
Fresh marshmallows are incredibly sticky. If you’ve ever tried to cut one and had it glue itself to your knife, you know the struggle. The fix is simple: spray your knife with a light coating of nonstick cooking spray before each cut. Or, as I mentioned earlier, dip it in cold water. Either method works, but the spray method lasts longer between cuts.
Timing and Multitasking
Here’s how I structure my time: While the chocolate is melting in the microwave (3 minutes total), I cut all the marshmallows. While the chocolate is still warm, I dip and coat in batches of 5 to 6. Then I let the first batch set while I clean up. Total hands-on time is about 20 minutes. The rest is just waiting for the chocolate to harden.
Consistency Tips
If your chocolate is too thick for easy dipping, add another teaspoon of coconut oil. It should be thin enough that the excess drips off cleanly, but not so thin that it runs off the marshmallow entirely. Think of the consistency of warm honey — that’s your target.
The “Oops” Fix
If you accidentally drop a marshmallow into the chocolate and it sinks, fish it out with a fork and place it on the parchment. It’ll still taste fine — it just won’t look as pretty. I call those the “chef’s snack” and eat them myself. No one needs to know.
Variations & Adaptations
This recipe is endlessly adaptable. Here are a few variations I’ve tried and loved:
Peppermint Snowman Poop
Swap the shredded coconut for crushed candy canes. Use red and white sprinkles instead of plain white. The peppermint flavor pairs beautifully with the white chocolate, and the red flecks make these look extra festive. I made these for a Christmas movie night and they were gone before the first act of Elf.
Chocolate Snowman Poop
Use milk or dark chocolate instead of white. Dip the marshmallows in melted semisweet chocolate, then roll them in crushed graham crackers or chocolate cookie crumbs. These look like little truffles and taste like s’mores. My husband actually prefers these to the original.
Gingerbread Snowman Poop
Add 1/2 teaspoon of ground ginger and 1/4 teaspoon of cinnamon to the melted white chocolate before dipping. Use crushed gingersnap cookies as the coating instead of coconut. The warm spice flavor is perfect for winter, and the texture of the crushed cookies adds a nice crunch.
Dairy-Free Version
Use vegan white chocolate chips (Enjoy Life makes a good one) and skip the coconut oil. The vegan chocolate melts a bit differently — it’s thicker — so you might need to thin it with a teaspoon of vegetable shortening. The marshmallows themselves are not vegan, so use Dandies brand if you need a plant-based option.
Low-Sugar Version
Use sugar-free white chocolate chips (Lily’s brand works well) and unsweetened shredded coconut. Skip the powdered sugar dusting. The texture is slightly different — the sugar-free chocolate doesn’t melt as smoothly — but the taste is still satisfying. I made these for a friend who’s watching her sugar intake and she said they hit the spot.
Serving & Storage Suggestions
These candies are best served at room temperature. The marshmallow stays soft and pillowy, while the white chocolate coating has a satisfying snap. If you’ve stored them in the refrigerator, let them sit out for 15 minutes before serving to take the chill off.
Presentation Ideas : Arrange the jars on a dessert table with a small sign that says “Cozy Snowman Poop” in a cute font. I like to nestle them in a bed of fake snow (the kind you find at craft stores) for an extra whimsical touch. For gift-giving, tie a small wooden spoon or a candy cane to the ribbon — it makes the jar feel like a complete present.
Complementary Dishes : These pair beautifully with hot chocolate, peppermint mochas, or a warm cup of chai. If you’re serving them at a party, put out a bowl of fresh fruit or a cheese plate to balance the sweetness. I’ve also been known to crumble a few over a bowl of vanilla ice cream for an impromptu sundae.
Storage Instructions : Store the marshmallows in an airtight container at room temperature for up to 1 week. Do not refrigerate — the moisture will make the chocolate bloom (develop white streaks) and the marshmallows will become tough. If you’re stacking them in a container, place a piece of parchment paper between layers to prevent sticking.
Freezer Option : You can freeze these for up to 3 months. Place them in a single layer on a baking sheet and freeze until solid (about 1 hour), then transfer to a freezer-safe bag or container. Thaw at room temperature for 30 minutes before serving. The texture of the marshmallow will be slightly denser after freezing, but the taste is still wonderful.
Flavor Development Note : These actually taste better the next day. The flavors meld together overnight, and the coconut softens slightly, creating a more cohesive texture. If you can resist eating them immediately, make them a day ahead for best results.
Nutritional Information & Benefits
Let’s be real: these are a treat, not a health food. But here’s the estimated nutritional breakdown per serving (about 4 marshmallow halves, or one jar’s worth):
- Calories : Approximately 280-320
- Total Fat : 14g
- Saturated Fat : 10g
- Carbohydrates : 42g
- Sugar : 36g
- Protein : 2g
- Fiber : 1g
Health Considerations : White chocolate contains cocoa butter, which is a source of healthy fats, but it’s also high in sugar. The coconut adds a small amount of fiber and healthy medium-chain triglycerides (MCTs). Marshmallows are mostly sugar and gelatin — they’re not nutritionally dense, but they do make people happy.
Dietary Notes : This recipe contains dairy (white chocolate) and coconut. It is gluten-free as written, but check your white chocolate chips to be sure (some brands add wheat-based ingredients). For a nut-free version, skip the coconut and use sprinkles only. The recipe is egg-free and soy-free when made with standard ingredients.
Personal Wellness Perspective : I believe in balance. These are a special-occasion treat, not an everyday snack. I make them for holidays, parties, and the occasional snow day when we need something fun to do. They bring joy, and that counts for something in my book.
Conclusion
These Cozy Snowman Poop White Chocolate Marshmallow Candy Jars are everything I want in a holiday recipe: they’re quick, they’re silly, and they make people genuinely happy. The name gets a laugh, the taste gets a smile, and the jars themselves make perfect little gifts that feel thoughtful without requiring hours of effort. I’ve made them for cookie exchanges, teacher gifts, and neighbor surprises, and every single time, someone asks for the recipe.
I hope you’ll make them your own. Swap the coconut for crushed candy canes if that’s more your style. Use dark chocolate if white isn’t your thing. Add a pinch of cinnamon or a drizzle of caramel. The base recipe is forgiving and flexible — it wants to be customized. That’s the beauty of simple ingredients done right.
Here’s my favorite part: when you hand someone a jar of these, they laugh. Every single time. And in a world that can feel heavy, a little laughter goes a long way. So go ahead — make a batch, tie a ribbon around a jar, and share the joy. And if you come up with your own variation, I’d love to hear about it. Drop a comment below or tag me in your photos. Happy snowman poop making, friends!
Frequently Asked Questions
Can I use mini marshmallows instead of large ones?
You can, but they’re harder to dip and the chocolate-to-marshmallow ratio isn’t as balanced. If you use minis, skip the cutting step and dip them whole. You’ll need about 3 cups of mini marshmallows to replace the large ones.
Why did my white chocolate turn grainy?
White chocolate seizes when it comes into contact with water or gets overheated. Make sure all your bowls and utensils are completely dry, and always melt at 50% power in short bursts. If it does seize, you can try adding a teaspoon of vegetable shortening and stirring vigorously — sometimes it comes back.
How far in advance can I make these?
You can make them up to 1 week ahead. Store them in an airtight container at room temperature. If you’re giving them as gifts, assemble the jars the day you plan to give them to keep the marshmallows fresh and the chocolate from sticking to the jar sides.
Can I freeze the jars as gifts?
Yes, but leave the jars slightly loose (don’t seal them tightly) during freezing to allow for expansion. Thaw at room temperature for 30 minutes before giving. I’d recommend adding the ribbon and tag after thawing so they look their best.
What if I don’t have coconut for the coating?
No problem! Try crushed graham crackers, crushed pretzels for a sweet-salty twist, or finely chopped nuts like pecans or almonds. You can also skip the coating entirely and just use sprinkles — the marshmallows will still look festive and taste delicious.
PrintCozy Snowman Poop Candy Jars: Easy White Chocolate Treats
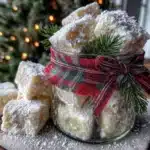
These silly, sweet, and easy white chocolate marshmallow treats are perfect for winter gatherings. Made with simple ingredients in under 30 minutes, they’re a crowd-pleaser that brings smiles and laughter to any holiday party.
- Prep Time: 20 minutes
- Cook Time: 3 minutes
- Total Time: 30 minutes
- Yield: 6-8 servings (1 jar per serving) 1x
- Category: Dessert
- Cuisine: American
Ingredients
- 1 bag (10 ounces) large marshmallows (e.g., Jet-Puffed)
- 12 ounces white chocolate chips or melting wafers (e.g., Ghirardelli)
- 1 tablespoon coconut oil or shortening (optional, for smoother melting)
- 1 cup sweetened shredded coconut
- 1/4 cup white sprinkles or jimmies
- 2 tablespoons powdered sugar
- 6 to 8 8-ounce mason jars
- Ribbon or twine (for decoration)
- Printable gift tags (optional)
Instructions
- Line two baking sheets with parchment paper. Using a sharp serrated knife, cut each large marshmallow in half crosswise to create two flat rounds. Place them cut-side up on the prepared sheets, leaving space between each.
- Place white chocolate chips and coconut oil in a microwave-safe bowl. Microwave on 50% power for 30 seconds, then stir. Repeat in 20-second intervals, stirring after each, until completely smooth and glossy (about 2-3 intervals total).
- Working one at a time, pick up a marshmallow half by the rounded side and dip the cut side into the melted white chocolate. Use a small spoon to drizzle chocolate over the top and sides if needed. Let excess drip off, then place back on parchment, chocolate-side up.
- Before the chocolate sets, sprinkle each dipped marshmallow with shredded coconut and a few white sprinkles. Work in batches of 5-6 marshmallows to ensure toppings stick.
- Allow marshmallows to sit at room temperature until chocolate is completely firm, about 20-30 minutes. Do not refrigerate.
- Once set, lightly dust marshmallows with powdered sugar using a fine-mesh sieve. Layer them into mason jars, filling each about 3/4 full.
- Cut ribbon or twine to wrap around jar necks and tie a bow. Slip a gift tag under the ribbon before tying. Optionally add a small sprig of artificial pine or a tiny candy cane for extra flair.
Notes
White chocolate is finicky—avoid water and high heat. Dip knife in cold water or spray with nonstick spray to prevent marshmallow sticking. Work in small batches to ensure toppings adhere before chocolate sets. These taste even better the next day as flavors meld. Store in airtight container at room temperature for up to 1 week. Do not refrigerate.
Nutrition
- Serving Size: 1 jar (about 4 marsh
- Calories: 300
- Sugar: 36
- Sodium: 50
- Fat: 14
- Saturated Fat: 10
- Carbohydrates: 42
- Fiber: 1
- Protein: 2
Keywords: snowman poop, white chocolate marshmallow, holiday treats, easy candy, mason jar gifts, winter dessert, no-bake