Love this? Save it for later!
Share the inspiration with your friends
There used to be a tiny, candlelit café tucked away on a side street in Portland called “The Velvet Fang.” It was the kind of place that felt like a secret—dark wood, mismatched velvet chairs, and a single chalkboard menu that changed with the seasons. They made a red velvet cupcake that was less about the frosting and more about the mysterious, almost savory depth of the cake itself. When they closed their doors three winters ago, I genuinely grieved. I mean, I actually stood outside on the sidewalk, staring at the “For Lease” sign, holding a half-eaten cupcake I’d bought the day before. After eleven tries—eleven!—and one particularly disastrous batch that turned out more brick-red than velvet, I finally cracked the code. This is that recipe. It’s the one that finally made me stop chasing a ghost and start baking my own cozy little bite of nostalgia.
These Cozy Vampire Bite Red Velvet Cupcakes are my love letter to that lost café. They’re not just about the color or the classic tangy cream cheese frosting. They’re about that first bite, where the subtle hint of cocoa meets a whisper of buttermilk, and the whole thing feels like wrapping yourself in a warm blanket on a cold night. Maybe you’ve been there—chasing a flavor from a place that no longer exists. This is for you.
Why You’ll Love This Recipe
Honestly, I’ve tested a lot of red velvet recipes over the years. Some are too dry, some taste like straight-up food coloring, and others are just chocolate cake in disguise. These Cozy Vampire Bite Red Velvet Cupcakes are different. They have a tender, almost velvety crumb that stays moist for days, and the flavor is perfectly balanced—slightly tangy, a little sweet, with that subtle cocoa finish that makes you take another bite just to figure out what’s in it.
- Quick & Easy: From start to finish, these come together in about 45 minutes. Perfect for a last-minute craving or a cozy night in.
- Simple Ingredients: You probably have most of these in your pantry right now. No weird extracts or hard-to-find flours.
- Perfect for Cozy Nights: Whether it’s a rainy afternoon, a Halloween movie marathon, or just a Tuesday that needs a little magic, these cupcakes deliver.
- Crowd-Pleaser: I’ve brought these to potlucks and book clubs, and they disappear faster than anything else on the table.
- Unbelievably Delicious: The texture is so soft, and the frosting is so creamy—it’s the kind of dessert that makes you close your eyes after the first bite.
What sets this version apart is the technique. I use a reverse-creaming method that gives the cake a finer, more tender crumb. Plus, I add a touch of vinegar to the buttermilk, which reacts with the baking soda to create an incredibly light texture. It’s not just another red velvet recipe—it’s the one I’ve been chasing for three years.
What Ingredients You Will Need
This recipe uses simple, everyday ingredients to create something truly special. The magic is in how they work together, not in fancy additions. Most of these are pantry staples, so you can whip these up whenever the craving strikes.
- All-purpose flour (1 ½ cups / 190g) – Provides structure. Spoon and level it for accuracy.
- Granulated sugar (1 cup / 200g) – Adds sweetness and helps with tenderness.
- Unsweetened cocoa powder (1 tablespoon / 5g) – Just a touch for that signature flavor. Don’t overdo it.
- Baking soda (1 teaspoon) – The leavening agent that makes them rise.
- Salt (½ teaspoon) – Balances the sweetness.
- Vegetable oil (½ cup / 120ml) – Keeps the cupcakes incredibly moist. I prefer a neutral oil like canola.
- Buttermilk (½ cup / 120ml) – Adds tang and tenderness. If you don’t have it, make a quick version by adding 1 tablespoon of lemon juice or vinegar to ½ cup of milk and letting it sit for 5 minutes.
- Large eggs (2, room temperature) – Binds everything together. Room temp is key for a smooth batter.
- White vinegar (1 teaspoon) – Reacts with the baking soda for extra lift.
- Vanilla extract (1 teaspoon) – Enhances the overall flavor.
- Red gel food coloring (1-2 tablespoons) – I prefer gel over liquid for a vibrant color without thinning the batter. Start with 1 tablespoon and add more if you want a deeper red.
- For the Cream Cheese Frosting:
- Unsalted butter (½ cup / 113g, softened) – Use a good brand like Kerrygold for the best flavor.
- Cream cheese (8 oz / 226g, softened) – Full-fat is non-negotiable here for the creamiest texture.
- Powdered sugar (3 cups / 360g) – Sifted to avoid lumps.
- Vanilla extract (1 teaspoon)
- Pinch of salt
For the “vampire bite” effect, you’ll also want a few fresh raspberries or strawberries (optional) and a small amount of red sanding sugar or edible glitter for that little sparkle. I like to use fresh raspberries because their tartness cuts through the sweetness of the frosting perfectly.
Equipment Needed
You don’t need a professional bakery setup for these. Here’s what you’ll need:
- Muffin tin (standard 12-cup) – I’ve had good luck with non-stick pans, but a light-colored metal pan works best for even baking.
- Paper liners – I like using white or red liners to match the theme.
- Mixing bowls (one large, one medium) – Glass or stainless steel is fine.
- Whisk and spatula – A good silicone spatula makes scraping the bowl easy.
- Electric hand mixer or stand mixer – For the frosting, you’ll want something with power. A hand mixer works perfectly.
- Cooling rack – Essential for letting the cupcakes cool completely before frosting.
- Piping bag with a star tip – For that classic bakery look. If you don’t have one, a zip-top bag with the corner snipped off works in a pinch.
I’ve made these with both a hand mixer and a stand mixer, and honestly, the hand mixer is easier to clean. If you’re on a budget, skip the fancy piping bag and just spread the frosting with a knife—they’ll still taste amazing.
Preparation Method
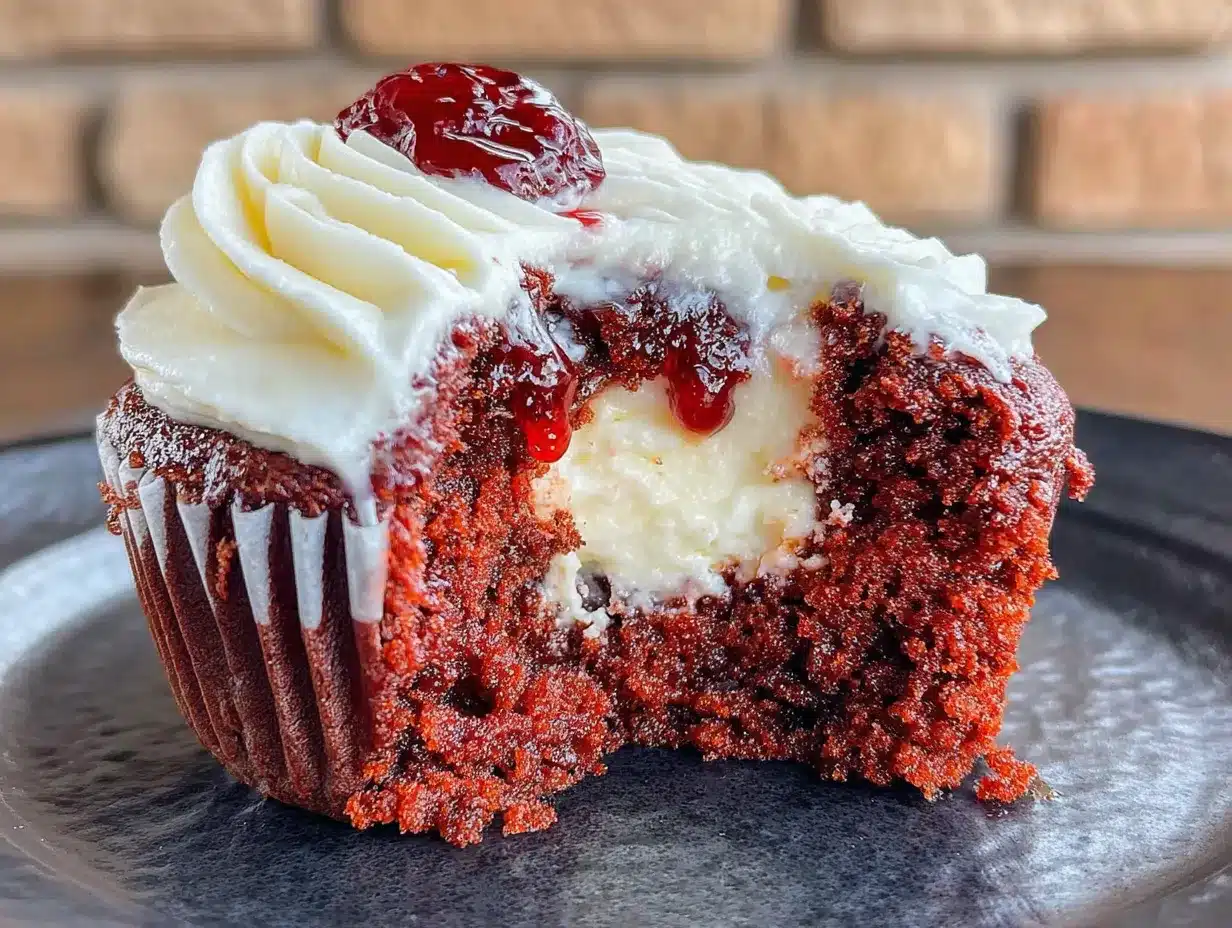
Let’s get baking. Preheat your oven to 350°F (175°C) and line your muffin tin with paper liners. Set them aside.
- Mix the dry ingredients: In a large bowl, whisk together the flour, sugar, cocoa powder, baking soda, and salt. Make sure there are no lumps of cocoa. Set aside.
- Combine the wet ingredients: In a separate medium bowl, whisk together the oil, buttermilk, eggs, vinegar, and vanilla extract until smooth. The mixture should look slightly thick and glossy.
- Add the color: Stir in the red gel food coloring until you reach your desired shade. I usually go for a deep, dark crimson—it looks more “vampire” than a bright, neon red.
- Combine wet and dry: Pour the wet ingredients into the dry ingredients. Use a spatula to fold everything together gently. Mix just until no streaks of flour remain. Do not overmix—overmixing will make the cupcakes tough. A few small lumps are okay.
- Fill the liners: Divide the batter evenly among the 12 liners. I use a cookie scoop for this—it’s clean and consistent. Each liner should be about ⅔ full.
- Bake: Place the tin in the preheated oven and bake for 18-22 minutes. The cupcakes are done when a toothpick inserted into the center comes out clean or with a few moist crumbs. The tops should spring back when lightly pressed.
- Cool completely: Let the cupcakes cool in the pan for 5 minutes, then transfer them to a wire rack to cool completely. Do not frost them while they’re still warm, or the frosting will melt into a puddle.
- Make the frosting: While the cupcakes cool, beat the softened butter and cream cheese together in a large bowl until smooth and creamy—about 2 minutes. Add the vanilla and salt, then gradually beat in the powdered sugar, one cup at a time, until the frosting is light and fluffy. If it’s too stiff, add a splash of milk. If it’s too soft, chill it for 10 minutes.
- Frost and decorate: Once the cupcakes are completely cool, pipe or spread the frosting on top. For the “vampire bite” effect, gently press a fresh raspberry into the side of the frosting, then sprinkle a little red sanding sugar on top. It looks like a little bite mark—perfect for the theme.
Cooking Tips & Techniques
I’ve messed up this recipe more times than I’d like to admit. Here’s what I learned the hard way so you don’t have to.
Don’t overmix the batter. I know I said it before, but it’s worth repeating. Overmixing develops gluten, which makes the cupcakes dense and rubbery. You want them tender, not tough. Mix until just combined, then stop.
Room temperature ingredients matter. Cold eggs and cold buttermilk won’t emulsify properly, leaving you with a greasy, uneven crumb. Take them out of the fridge 30 minutes before you start. If you forget, place the eggs in a bowl of warm water for 5 minutes.
The vinegar trick is real. That teaspoon of vinegar might seem weird, but it reacts with the baking soda to create extra lift. Don’t skip it. I once forgot, and my cupcakes came out flat and dense.
Color control. Red gel food coloring is much more concentrated than liquid. Start with 1 tablespoon and add more if you want a deeper shade. I’ve found that the color deepens slightly as the cupcakes bake, so don’t overdo it.
Frosting consistency. If your cream cheese frosting is too soft to pipe, pop it in the fridge for 15 minutes. If it’s too stiff, add a teaspoon of milk at a time. The perfect consistency should hold its shape but still be spreadable.
Variations & Adaptations
One of the best things about this recipe is how easy it is to tweak. Here are a few variations I’ve tried and loved.
- Gluten-Free Version: Swap the all-purpose flour with a 1:1 gluten-free baking blend. I’ve used Bob’s Red Mill with great results. Add an extra tablespoon of buttermilk to keep the batter moist.
- Dairy-Free Version: Use a plant-based buttermilk (like almond milk with lemon juice) and a dairy-free cream cheese for the frosting. Miyoko’s is my go-to brand—it’s rich and tangy.
- Chocolate Lover’s Twist: Increase the cocoa powder to 2 tablespoons for a deeper chocolate flavor. Just reduce the flour by 1 tablespoon to keep the balance.
- Halloween Edition: Skip the raspberries and top each cupcake with a plastic vampire fring ring or a small candy bat. It’s a fun touch for a party.
I once made a batch with a splash of peppermint extract in the frosting for a wintery twist. It was surprisingly good—like a red velvet candy cane. Don’t be afraid to experiment.
Serving & Storage Suggestions
These cupcakes are best served at room temperature. The frosting is creamy, the cake is tender, and the flavors really shine when they’re not straight out of the fridge.
For a cozy presentation, arrange them on a vintage cake stand or a wooden board. They pair beautifully with a hot cup of coffee, a spiced chai latte, or even a glass of cold milk. If you’re feeling extra indulgent, serve them with a side of fresh berries and a dollop of whipped cream.
Storage: Keep any leftover cupcakes in an airtight container in the refrigerator for up to 4 days. The cream cheese frosting needs to stay chilled. Let them sit at room temperature for 15 minutes before serving to soften the frosting.
Freezing: You can freeze the unfrosted cupcakes for up to 2 months. Wrap each one tightly in plastic wrap, then place them in a freezer bag. Thaw at room temperature before frosting. The frosting itself can also be frozen in an airtight container for up to a month—just give it a good stir after thawing.
Honestly, the flavors actually get better after a day in the fridge. The cake absorbs a bit of moisture, and the tanginess of the frosting melds with the cake. It’s a little bit of magic.
Nutritional Information & Benefits
Let’s be real—these are a treat, not a health food. But that doesn’t mean they can’t have a few redeeming qualities.
Each cupcake (with frosting) contains approximately 380-420 calories, 22g of fat, 48g of carbohydrates, and 4g of protein. The exact numbers vary depending on your ingredients and frosting amount.
Health highlights: The cocoa powder is rich in antioxidants, and the buttermilk provides a small amount of calcium and probiotics. The cream cheese frosting offers a bit of protein and calcium, though it’s primarily a decadent indulgence. If you’re looking for a lighter option, you can use a reduced-fat cream cheese and cut the sugar in the frosting by a third.
Dietary considerations: This recipe contains gluten, dairy, and eggs. For gluten-free and dairy-free options, see the variations section above. It’s also relatively low in fiber, so pair it with a piece of fruit if you’re looking for a more balanced snack.
I personally believe that food is about joy as much as nutrition. A cupcake like this, shared with someone you love on a rainy evening, is good for the soul. And that counts for something.
Conclusion
These Cozy Vampire Bite Red Velvet Cupcakes are more than just a dessert—they’re a little piece of comfort you can bake in your own kitchen. They bring back the memory of that tiny, candlelit café, but they’ve also become their own thing. A new tradition. A cozy ritual.
I hope you give them a try and make them your own. Maybe you’ll add a little extra cocoa, or swap the raspberries for a chocolate shard. That’s the beauty of baking—it’s a starting point, not a rulebook. If you do make them, I’d love to hear how they turned out. Drop a comment below or tag me in your photos. Honestly, nothing makes me happier than seeing someone else fall in love with a recipe I’ve poured my heart into.
So go ahead. Preheat that oven, put on some music, and bake yourself a little bit of magic. You deserve it.
Frequently Asked Questions
Can I use liquid food coloring instead of gel?
You can, but you’ll need to use more to get the same intensity, which can thin out the batter. Gel is much more concentrated and gives a better color without affecting the texture. If you only have liquid, start with 2 tablespoons and see how it looks.
Why did my cupcakes come out dry?
Dry cupcakes are usually a sign of overbaking or overmixing. Check your oven temperature with an oven thermometer—it might be running hot. Also, make sure you’re measuring your flour correctly by spooning it into the cup and leveling it off, rather than scooping directly.
Can I make these cupcakes ahead of time?
Absolutely. You can bake the cupcakes a day in advance and store them in an airtight container at room temperature. Frost them the day you plan to serve them for the best texture. The frosting can also be made a day ahead and kept in the fridge—just let it soften slightly before piping.
How do I get that perfect “vampire bite” look?
The trick is to use a small, sharp knife to make a tiny slit in the side of the frosting, then gently press a raspberry or strawberry slice into the opening. Sprinkle a little red sanding sugar around it to look like a bite mark. It’s surprisingly easy and looks so dramatic.
Can I turn these into a cake instead of cupcakes?
Yes! Pour the batter into two greased and floured 8-inch round cake pans. Bake at 350°F (175°C) for 25-30 minutes, or until a toothpick comes out clean. Use the same frosting recipe, but double it if you want a thick layer between the cakes and on top.
Pin This Recipe!
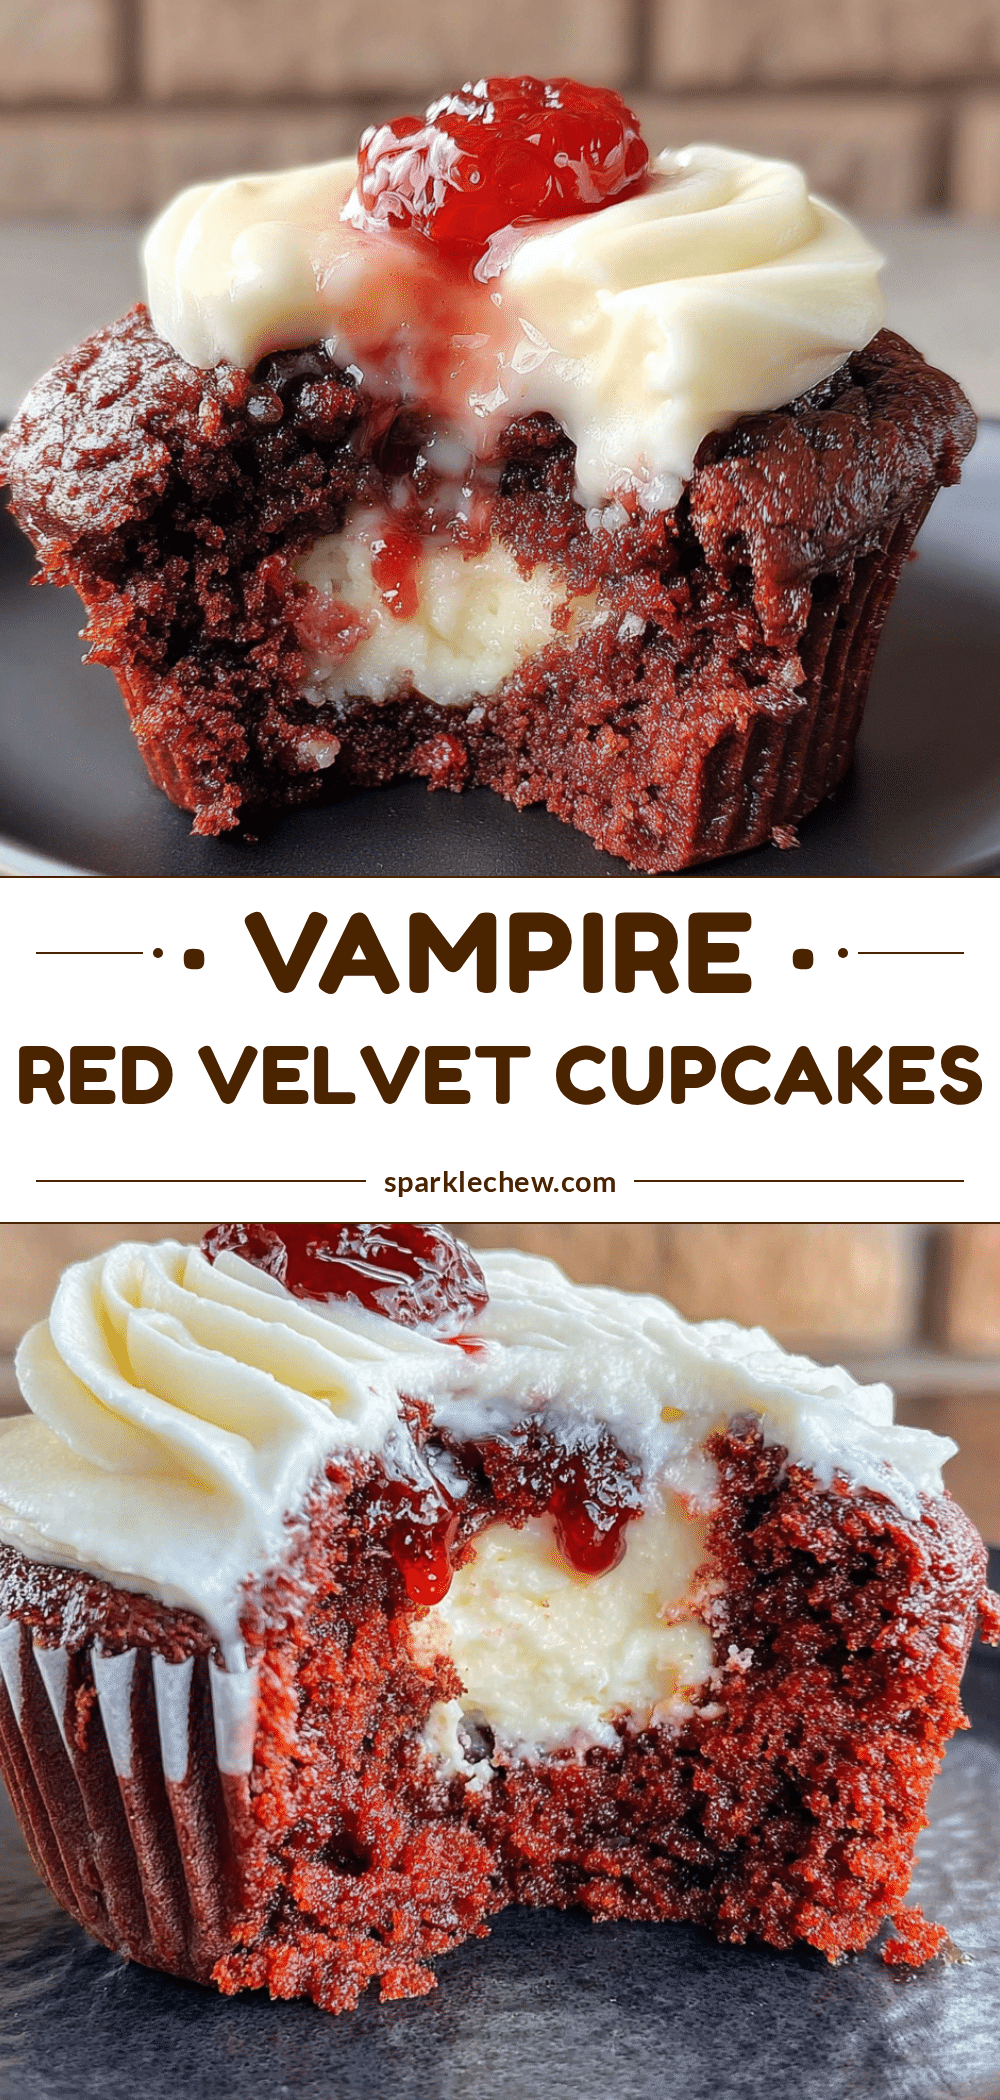
Cozy Vampire Bite Red Velvet Cupcakes
These Cozy Vampire Bite Red Velvet Cupcakes are a love letter to a lost café, featuring a tender, velvety crumb with a subtle cocoa flavor and a tangy cream cheese frosting. They’re perfect for cozy nights, Halloween parties, or any time you need a little magic.
- Prep Time: 15 minutes
- Cook Time: 20 minutes
- Total Time: 45 minutes
- Yield: 12 cupcakes 1x
- Category: Dessert
- Cuisine: American
Ingredients
- 1 ½ cups (190g) all-purpose flour
- 1 cup (200g) granulated sugar
- 1 tablespoon (5g) unsweetened cocoa powder
- 1 teaspoon baking soda
- ½ teaspoon salt
- ½ cup (120ml) vegetable oil
- ½ cup (120ml) buttermilk
- 2 large eggs, room temperature
- 1 teaspoon white vinegar
- 1 teaspoon vanilla extract
- 1–2 tablespoons red gel food coloring
- For the Cream Cheese Frosting:
- ½ cup (113g) unsalted butter, softened
- 8 oz (226g) cream cheese, softened
- 3 cups (360g) powdered sugar, sifted
- 1 teaspoon vanilla extract
- Pinch of salt
- For the vampire bite effect (optional):
- Fresh raspberries or strawberries
- Red sanding sugar or edible glitter
Instructions
- Preheat oven to 350°F (175°C). Line a 12-cup muffin tin with paper liners.
- In a large bowl, whisk together flour, sugar, cocoa powder, baking soda, and salt.
- In a separate medium bowl, whisk together oil, buttermilk, eggs, vinegar, and vanilla extract until smooth.
- Stir in red gel food coloring until desired shade is reached.
- Pour wet ingredients into dry ingredients. Fold gently with a spatula until just combined. Do not overmix.
- Divide batter evenly among the 12 liners, filling each about ⅔ full.
- Bake for 18-22 minutes, or until a toothpick inserted into the center comes out clean or with a few moist crumbs.
- Let cupcakes cool in the pan for 5 minutes, then transfer to a wire rack to cool completely.
- For the frosting: Beat softened butter and cream cheese together until smooth and creamy, about 2 minutes. Add vanilla and salt, then gradually beat in powdered sugar until light and fluffy.
- Once cupcakes are completely cool, pipe or spread frosting on top. For the vampire bite effect, gently press a fresh raspberry into the side of the frosting and sprinkle with red sanding sugar.
Notes
Use room temperature ingredients for best results. Do not overmix the batter. The vinegar reacts with baking soda for extra lift. For a gluten-free version, use a 1:1 gluten-free baking blend. For dairy-free, use plant-based buttermilk and dairy-free cream cheese. Cupcakes can be stored in an airtight container in the refrigerator for up to 4 days. Unfrosted cupcakes can be frozen for up to 2 months.
Nutrition
- Serving Size: 1 cupcake
- Calories: 400
- Sugar: 35
- Sodium: 280
- Fat: 22
- Saturated Fat: 10
- Carbohydrates: 48
- Fiber: 1
- Protein: 4
Keywords: red velvet cupcakes, vampire bite, cream cheese frosting, Halloween dessert, easy cupcake recipe, cozy dessert


