Love this? Save it for later!
Share the inspiration with your friends
There used to be a tiny bakery tucked between a laundromat and a vintage shop in downtown Portland that made a pumpkin cheesecake pie that ruined me for all others. When they closed their doors three years ago—literally overnight, with a handwritten sign taped to the window—I felt a genuine pang of loss that surprised me. I mean, it was just a pie, right? But it wasn’t. It was the one thing I craved every single autumn, the dessert I’d drive twenty minutes for on a rainy Tuesday just to feel like everything was right in the world.
After twelve attempts—twelve, let me tell you, some of which ended up in the trash bin—I finally got it. And honestly? This version might actually be better than the original. The secret, I discovered, wasn’t in some fancy technique or rare ingredient. It was in the texture. That impossibly creamy, almost mousse-like filling that somehow felt both light and decadent at the same time. The no-bake method isn’t just a shortcut here—it’s what makes the filling so silky smooth. No cracked tops, no water baths, no stress. Just pure, unapologetic pumpkin cheesecake bliss.
I spent a whole weekend testing ratios, swapping ingredients, and texting my friend Jen pictures of every single attempt. “Too dense,” she’d say. “Not enough spice,” she’d text back the next day. But when I finally brought her a slice of this version, she just closed her eyes and nodded. That’s the reaction you want. That quiet, satisfied nod that says, “Yep, you did it.” Maybe you’ve been chasing a recipe like that—one from a place that no longer exists, or from a memory you’re trying to recreate. If so, this creamy no-bake pumpkin cheesecake pie is for you. It’s the dessert that brought back that bakery for me, one silky bite at a time.
Why You’ll Love This Recipe
Let me be real with you—I’ve tested this creamy no-bake pumpkin cheesecake pie more times than I care to admit. And every single time, it delivers. Here’s why this recipe stands out from the countless pumpkin desserts floating around the internet this season:
- No Oven Required: This is a true no-bake dessert. No turning on the oven, no worrying about cracks, no water bath drama. Just mix, chill, and serve. Perfect for those days when you want something impressive without the heat.
- Incredibly Creamy Texture: The filling is velvety smooth—almost like a pumpkin mousse crossed with a classic cheesecake. It sets up beautifully in the fridge without any gelatin or weird ingredients.
- Simple Pantry Ingredients: You probably already have most of what you need. Cream cheese, pumpkin puree, spices, and a few other basics. No hunting down specialty items.
- Make-Ahead Friendly: This pie actually gets better after a day in the fridge. The flavors meld together, the texture firms up perfectly, and you get to cross “dessert” off your to-do list a full day early.
- Crowd-Pleasing Flavor: I’ve served this at Thanksgiving, Friendsgiving, and random Tuesday dinners. It disappears every single time. Even people who “don’t like pumpkin desserts” have asked for seconds.
What makes this creamy no-bake pumpkin cheesecake pie different from other recipes? It’s the ratio of cream cheese to pumpkin puree, and the way we stabilize the filling. Most recipes either end up too dense (like a brick of cheesecake) or too loose (like a pudding that never sets). This one hits that sweet spot—firm enough to slice cleanly, but soft enough to melt on your tongue. It’s comfort food reimagined: faster, easier, but with the same soul-soothing satisfaction that makes you close your eyes after the first bite.
What Ingredients You Will Need
This creamy no-bake pumpkin cheesecake pie uses simple, wholesome ingredients to deliver that rich, velvety texture and warm autumn flavor. Most of these are pantry staples, especially if you’ve done any fall baking before.
For the Crust
- 1 ½ cups graham cracker crumbs (about 12 full sheets, crushed finely—I use a food processor for consistent texture)
- ¼ cup granulated sugar
- 6 tablespoons unsalted butter, melted (salted butter works too, just reduce the added salt slightly)
- ¼ teaspoon ground cinnamon (optional, but highly recommended for that warm spice note in the crust)
For the Filling
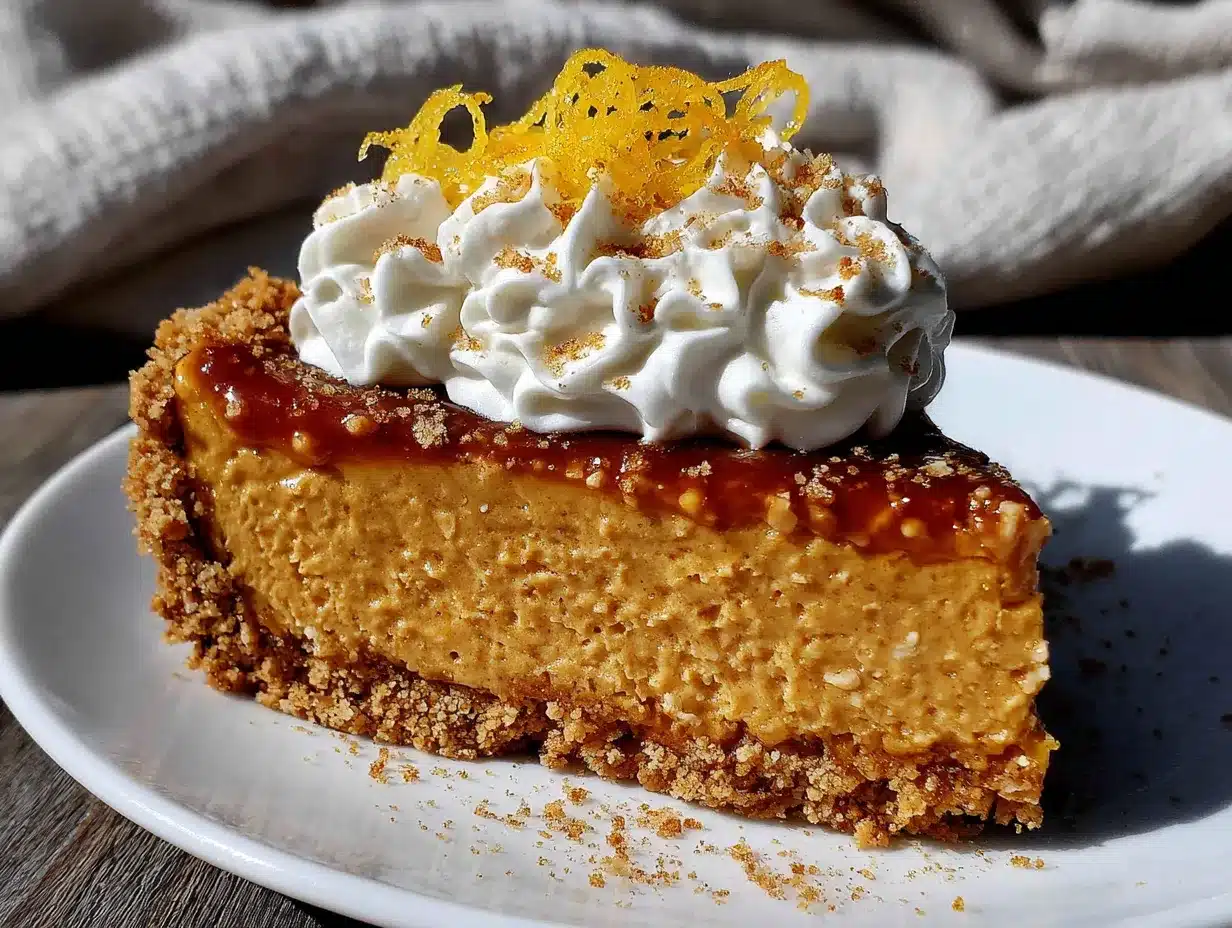
- 16 ounces cream cheese, softened to room temperature (full-fat is best for texture; I recommend Philadelphia for consistent results)
- 1 cup pumpkin puree (not pumpkin pie filling—make sure it’s 100% pure pumpkin. Libby’s is my go-to)
- ¾ cup packed light brown sugar (dark brown sugar works too for a deeper molasses flavor)
- 1 teaspoon vanilla extract
- 1 ½ teaspoons pumpkin pie spice (store-bought is fine, or make your own: ½ tsp cinnamon, ¼ tsp nutmeg, ¼ tsp ginger, ⅛ tsp cloves, ⅛ tsp allspice)
- ½ teaspoon ground cinnamon (for extra warmth)
- ¼ teaspoon salt (enhances all the flavors)
- 1 cup heavy whipping cream, cold (this is the secret to the light, mousse-like texture—don’t substitute with half-and-half)
- 2 tablespoons powdered sugar (for stabilizing the whipped cream)
For the Topping (Optional but Lovely)
- ½ cup heavy whipping cream, cold
- 1 tablespoon powdered sugar
- ¼ teaspoon vanilla extract
- Ground cinnamon or pumpkin pie spice, for dusting
A few notes on ingredients: The cream cheese absolutely needs to be at room temperature. I know, I know—we’re all in a hurry. But cold cream cheese will give you lumpy filling, and nobody wants that. Take it out of the fridge at least an hour before you start. For the pumpkin puree, I recommend blotting it with a paper towel to remove excess moisture. This little trick prevents the filling from being too wet and helps it set up firmer. Trust me on this one—it makes a difference.
Equipment Needed
- 9-inch pie dish (a deep-dish version works beautifully here; you’ll have plenty of filling)
- Electric hand mixer or stand mixer (you need this for whipping the cream and beating the cream cheese—a whisk by hand would take forever and your arm would hate you)
- Mixing bowls (at least two—one large, one medium)
- Rubber spatula (for scraping down the bowl and folding the whipped cream)
- Food processor or zip-top bag and rolling pin (for crushing graham crackers)
- Measuring cups and spoons
- Plastic wrap (for covering the pie while it chills)
If you don’t have a food processor, no worries. Place the graham crackers in a zip-top bag, seal it, and go to town with a rolling pin. It’s oddly satisfying, honestly. I’ve also used a store-bought graham cracker crust in a pinch—just skip the crust ingredients and the crust-making steps. The filling amount works perfectly for a standard 9-inch pre-made crust.
Preparation Method
- Make the crust. In a medium bowl, combine the graham cracker crumbs, ¼ cup sugar, and ¼ teaspoon cinnamon (if using). Pour the melted butter over the mixture and stir with a fork until all the crumbs are moistened. You want it to look like wet sand—when you squeeze a handful, it should hold together. Transfer the mixture to your 9-inch pie dish. Press it firmly into the bottom and up the sides. I use the bottom of a measuring cup to get it really compact and even. Pop it in the fridge to set while you make the filling, about 15 minutes.
- Whip the cream. In a medium mixing bowl, combine 1 cup cold heavy cream, 2 tablespoons powdered sugar, and ¼ teaspoon vanilla extract (if you want to add a touch—I usually just use the vanilla from the filling). Using an electric mixer with the whisk attachment, beat on medium-high speed until stiff peaks form. This takes about 3-4 minutes. You’re looking for peaks that stand straight up when you lift the beaters. Set this bowl in the fridge while you work on the cream cheese mixture.
- Beat the cream cheese. In a large mixing bowl, add the softened cream cheese. Beat with the electric mixer on medium speed until smooth and creamy, about 2 minutes. Scrape down the sides and bottom of the bowl with your spatula. Add the brown sugar and beat for another 2 minutes until light and fluffy. Scrape the bowl again.
- Add the pumpkin and spices. Add the pumpkin puree, vanilla extract, pumpkin pie spice, cinnamon, and salt to the cream cheese mixture. Beat on medium speed until everything is fully combined and smooth. Stop and scrape the bowl at least once. The mixture should be a beautiful orange color and smell like autumn in a bowl.
- Fold in the whipped cream. Take the whipped cream out of the fridge. Add about one-third of it to the pumpkin-cream cheese mixture. Gently fold it in with your rubber spatula—use a cutting motion through the center, then scrape around the edge. Don’t stir vigorously. You want to incorporate the whipped cream while keeping as much air as possible. Add the remaining whipped cream in two more batches, folding gently each time until no white streaks remain. The filling should be light, airy, and perfectly uniform in color.
- Assemble the pie. Retrieve the crust from the fridge. Spoon the filling into the crust, spreading it evenly with your spatula. Give the pie dish a few gentle taps on the counter to settle the filling and release any air bubbles. Smooth the top as best you can.
- Chill. Cover the pie loosely with plastic wrap and refrigerate for at least 6 hours, but overnight is better. I know, the waiting is the hardest part. But this no-bake pumpkin cheesecake pie needs that time to set up properly. The filling firms up, the flavors deepen, and the texture becomes perfectly sliceable. If you’re in a rush, 4 hours is the absolute minimum—but the slices will be a bit softer.
- Make the topping (optional). Just before serving, whip the remaining ½ cup cream with 1 tablespoon powdered sugar and ¼ teaspoon vanilla until soft peaks form. Dollop or pipe onto slices, or spread over the whole pie. Dust with a pinch of cinnamon or pumpkin pie spice.
A quick note on timing: The active prep time is about 20 minutes. The passive chilling time is where the magic happens. Plan accordingly, and you’ll have a stunning dessert with almost no effort on the day you serve it.
Cooking Tips & Techniques
After making this creamy no-bake pumpkin cheesecake pie more times than I can count (and definitely more than I needed to), I’ve picked up a few tricks that make the process smoother and the results even better.
Blot your pumpkin puree. This is my number one tip. Pumpkin puree contains a surprising amount of water. If you add it straight to the cream cheese, it can make your filling too wet and prevent it from setting properly. Spread the puree on a plate lined with paper towels, place another paper towel on top, and gently press to absorb excess moisture. Let it sit for 5 minutes. You’ll be amazed at how much liquid comes out—and how much firmer your filling sets.
Don’t over-whip the cream. Stiff peaks are what you want, but stop the second they form. If you keep going, you’ll end up with butter. I’ve done it. It’s not pretty. Watch your mixer closely during the last 30 seconds, and stop as soon as the cream holds its shape without collapsing.
Room temperature cream cheese is non-negotiable. I tried to speed things up once by microwaving cold cream cheese. It got warm in some spots and stayed cold in others, resulting in a lumpy, curdled-looking filling. Not my finest moment. If you forget to take it out ahead of time, cut it into small cubes and let it sit on the counter for 30 minutes. That usually does the trick.
Press that crust firmly. A loose crust crumbles when you try to slice the pie. Use the bottom of a measuring cup or a flat-bottomed glass to press the crumbs firmly into the pan. Pay extra attention to the edges where the crust meets the sides of the dish. A solid crust makes for clean, beautiful slices.
Chill overnight for best results. I know it’s tempting to rush this step. But the difference between a 6-hour chill and an overnight chill is noticeable. The filling becomes firmer, the flavors meld together more harmoniously, and the texture becomes that perfect mousse-like consistency. Your patience will be rewarded.
Variations & Adaptations
One of the best things about this creamy no-bake pumpkin cheesecake pie is how adaptable it is. I’ve played around with quite a few variations, and here are my favorites:
Gluten-Free Version: Swap the graham cracker crust for a gluten-free alternative. Use gluten-free graham crackers or crushed gluten-free vanilla cookies. The filling itself is naturally gluten-free, so this is an easy swap that doesn’t compromise flavor or texture.
Dairy-Free Adaptation: Use dairy-free cream cheese (I like Kite Hill or Violife) and coconut cream instead of heavy whipping cream. Chill the can of coconut cream overnight, scoop out the solid white part, and whip it just like regular cream. The flavor will be slightly different—more coconutty—but it’s still delicious. Just note that the texture might be a touch softer.
Spice It Up: If you’re a spice lover, add an extra ¼ teaspoon of ginger and a pinch of cayenne pepper to the filling. The heat is subtle but adds a lovely warmth that complements the pumpkin and cream cheese. I tried this on a whim one year and it’s become my secret weapon for fall gatherings.
Chocolate Twist: Melt 4 ounces of semi-sweet chocolate and let it cool slightly. Swirl it into the filling just before pouring it into the crust. Use a knife to create gentle swirls—don’t overmix or you’ll lose the marbled effect. The chocolate and pumpkin combination is unexpectedly wonderful.
Individual Servings: Instead of a pie dish, use 6 to 8 small mason jars or ramekins. Layer the crust and filling, then chill. These are perfect for parties or portion control. Plus, they look adorable on a dessert table.
Serving & Storage Suggestions
This creamy no-bake pumpkin cheesecake pie is best served cold, straight from the fridge. Let it sit at room temperature for about 10 minutes before slicing—this softens the filling just enough to make slicing clean and easy. Use a sharp knife dipped in hot water and wiped dry between cuts for the prettiest slices.
For presentation, I love adding a dollop of freshly whipped cream, a light dusting of cinnamon, and maybe a few candied pecans or a drizzle of caramel sauce. It looks impressive with minimal effort. This pie pairs beautifully with a hot cup of coffee, spiced apple cider, or even a glass of dessert wine like a late-harvest Riesling.
Storage: Cover the pie tightly with plastic wrap or transfer slices to an airtight container. It will keep in the refrigerator for up to 5 days. The texture actually stays remarkably consistent over that time—it won’t get watery or weepy if you’ve blotted the pumpkin puree properly.
Freezing: This pie freezes beautifully! Place the fully chilled pie (without any whipped cream topping) in the freezer for about 2 hours until firm. Then wrap it tightly in plastic wrap, followed by a layer of aluminum foil. It will keep for up to 3 months. To serve, thaw overnight in the refrigerator. Add fresh whipped cream after thawing.
One thing I’ve noticed: the flavors actually develop and deepen after a day or two in the fridge. So if you can resist eating it all immediately, day two is even better than day one. The spices settle in, the cream cheese and pumpkin become best friends, and every bite tastes more cohesive.
Nutritional Information & Benefits
Here’s the estimated nutritional breakdown for one slice of this creamy no-bake pumpkin cheesecake pie (based on 10 servings):
| Nutrient | Amount Per Serving |
|---|---|
| Calories | 385 |
| Total Fat | 27g |
| Saturated Fat | 16g |
| Cholesterol | 85mg |
| Sodium | 310mg |
| Total Carbohydrates | 32g |
| Dietary Fiber | 2g |
| Sugars | 24g |
| Protein | 5g |
| Vitamin A | 120% DV |
| Calcium | 8% DV |
| Iron | 6% DV |
Pumpkin is packed with vitamin A (great for eye health and immune function), fiber, and antioxidants. The cream cheese adds calcium and protein, while the spices—cinnamon, ginger, nutmeg—have anti-inflammatory properties. This isn’t health food by any stretch, but it’s not empty calories either. It’s a dessert that brings genuine nutritional value to the table, along with serious comfort.
If you’re watching your sugar intake, you can reduce the brown sugar to ½ cup. The filling will be slightly less sweet but still delicious. For a lower-fat option, use reduced-fat cream cheese—just know the texture will be slightly less rich and creamy.
Conclusion
This creamy no-bake pumpkin cheesecake pie is more than just a dessert—it’s the recipe I reach for every single fall, the one that brings back memories of that little bakery and makes me feel like I’ve reclaimed something special. It’s the kind of pie that makes people close their eyes when they take a bite, the kind that sparks conversations about favorite autumn traditions and family recipes.
I hope you make this your own. Maybe you’ll add extra spice, or swap in a chocolate crust, or serve it in little jars for a party. Whatever you do, know that this recipe has been tested, tweaked, and loved into existence over many batches and many happy eaters. It’s foolproof, it’s forgiving, and it’s absolutely delicious.
I’d love to hear how it turns out for you! Drop a comment below and tell me about your version—did you add something unexpected? Serve it at a special occasion? Finally recreate that bakery memory you’ve been chasing? Share your photos and tag me, too. Nothing makes me happier than seeing this pie in your kitchen. Happy fall baking, friends!
Frequently Asked Questions
Can I use pumpkin pie filling instead of pumpkin puree?
I wouldn’t recommend it. Pumpkin pie filling already contains sugar and spices, which would throw off the balance of this recipe. Stick with 100% pure pumpkin puree for the best texture and flavor control.
Why did my filling turn out runny?
This usually happens for one of three reasons: the cream cheese wasn’t fully softened, the pumpkin puree wasn’t blotted dry, or the pie didn’t chill long enough. Make sure to blot your pumpkin puree, use room temperature cream cheese, and give the pie at least 6 hours (preferably overnight) to set.
Can I make this pie vegan?
Yes! Use dairy-free cream cheese and coconut cream (chilled overnight, solid part only) in place of the heavy cream. The texture will be slightly different—a bit softer and more coconut-forward—but it’s still a delicious dessert.
How far in advance can I make this pie?
You can make it up to 3 days ahead. In fact, the flavors improve after a day or two in the fridge. Just wait to add the whipped cream topping until right before serving.
Can I use a store-bought crust?
Absolutely. A 9-inch store-bought graham cracker crust works perfectly. You’ll save about 10 minutes of prep time. Just skip the crust ingredients and the crust-making steps in the instructions.
Pin This Recipe!
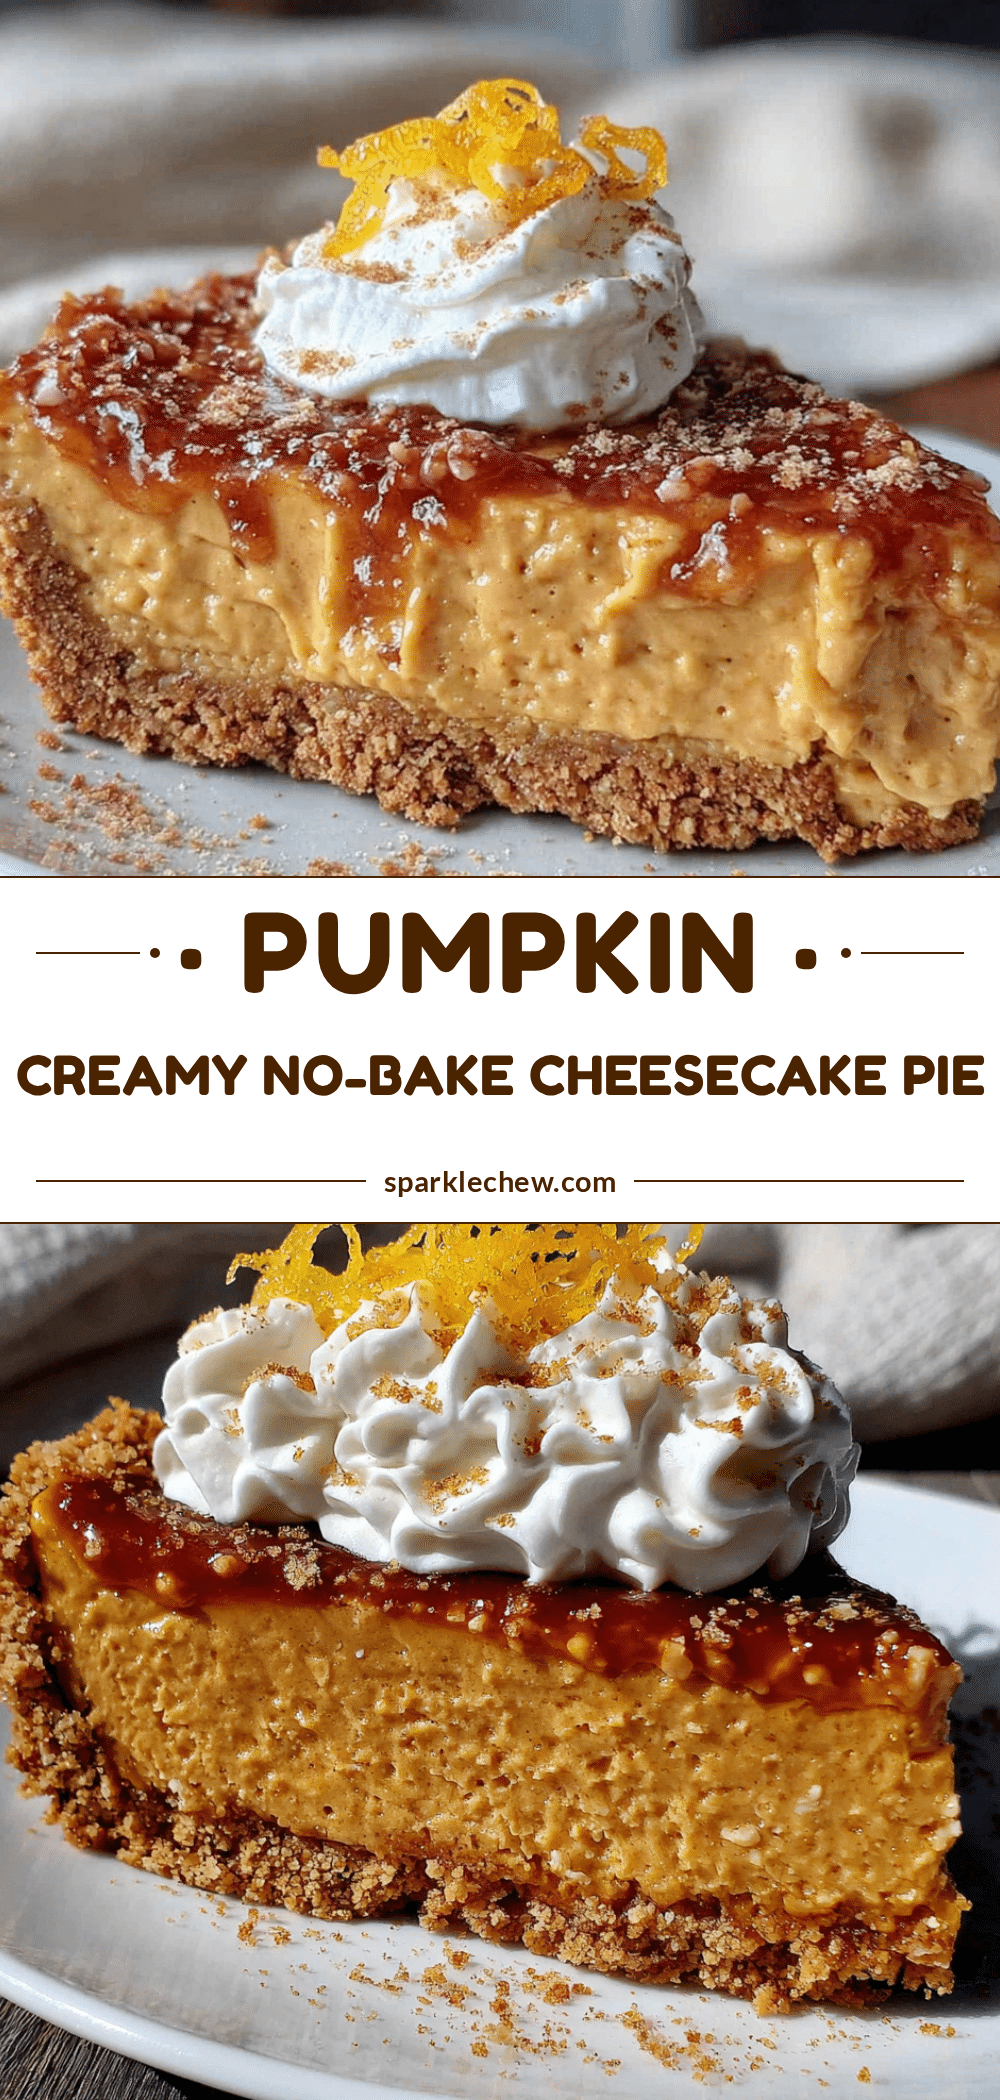
Creamy No-Bake Pumpkin Cheesecake Pie: Perfect Easy Dessert
A velvety smooth, no-bake pumpkin cheesecake pie with a graham cracker crust that sets beautifully in the fridge. This easy dessert delivers rich autumn flavor and a mousse-like texture without turning on the oven.
- Prep Time: 20 minutes
- Cook Time: 0 minutes
- Total Time: 6 hours 20 minutes (includes chilling)
- Yield: 10 servings 1x
- Category: Dessert
- Cuisine: American
Ingredients
- 1 ½ cups graham cracker crumbs (about 12 full sheets, crushed finely)
- ¼ cup granulated sugar
- 6 tablespoons unsalted butter, melted
- ¼ teaspoon ground cinnamon (optional)
- 16 ounces cream cheese, softened to room temperature
- 1 cup pumpkin puree (not pumpkin pie filling)
- ¾ cup packed light brown sugar
- 1 teaspoon vanilla extract
- 1 ½ teaspoons pumpkin pie spice
- ½ teaspoon ground cinnamon
- ¼ teaspoon salt
- 1 cup heavy whipping cream, cold
- 2 tablespoons powdered sugar
- ½ cup heavy whipping cream, cold (for topping)
- 1 tablespoon powdered sugar (for topping)
- ¼ teaspoon vanilla extract (for topping)
- Ground cinnamon or pumpkin pie spice, for dusting (for topping)
Instructions
- Make the crust: In a medium bowl, combine graham cracker crumbs, ¼ cup sugar, and ¼ teaspoon cinnamon (if using). Pour melted butter over mixture and stir with a fork until all crumbs are moistened. Transfer to a 9-inch pie dish and press firmly into bottom and up sides. Refrigerate for 15 minutes.
- Whip the cream: In a medium mixing bowl, combine 1 cup cold heavy cream, 2 tablespoons powdered sugar, and ¼ teaspoon vanilla extract. Beat with an electric mixer on medium-high speed until stiff peaks form, about 3-4 minutes. Refrigerate.
- Beat the cream cheese: In a large mixing bowl, beat softened cream cheese on medium speed until smooth and creamy, about 2 minutes. Add brown sugar and beat for another 2 minutes until light and fluffy. Scrape down sides.
- Add pumpkin and spices: Add pumpkin puree, vanilla extract, pumpkin pie spice, cinnamon, and salt. Beat on medium speed until fully combined and smooth.
- Fold in whipped cream: Add one-third of the whipped cream to the pumpkin-cream cheese mixture and gently fold with a rubber spatula. Repeat with remaining whipped cream in two batches until no white streaks remain.
- Assemble the pie: Retrieve crust from fridge. Spoon filling into crust, spreading evenly. Tap pie dish gently on counter to settle filling and release air bubbles. Smooth top.
- Chill: Cover pie loosely with plastic wrap and refrigerate for at least 6 hours, preferably overnight.
- Make the topping (optional): Just before serving, whip remaining ½ cup cream with 1 tablespoon powdered sugar and ¼ teaspoon vanilla until soft peaks form. Dollop or pipe onto slices and dust with cinnamon or pumpkin pie spice.
Notes
Blot pumpkin puree with paper towels to remove excess moisture for a firmer set. Cream cheese must be at room temperature to avoid lumps. Chill overnight for best texture and flavor. Pie can be made up to 3 days ahead. Freezes well for up to 3 months (without topping).
Nutrition
- Serving Size: 1 slice (1/10 of pie
- Calories: 385
- Sugar: 24
- Sodium: 310
- Fat: 27
- Saturated Fat: 16
- Carbohydrates: 32
- Fiber: 2
- Protein: 5
Keywords: no-bake pumpkin cheesecake, pumpkin cheesecake pie, easy pumpkin dessert, no-bake dessert, fall dessert, Thanksgiving dessert


