Love this? Save it for later!
Share the inspiration with your friends
My Aunt Clara wasn’t trying to impress anyone. I’d stopped by to drop off a casserole dish she’d loaned my mom, and the smell of chocolate and vanilla hit me before I even got through the screen door. It was a Tuesday afternoon, nothing special, and there she stood at her stove, stirring a pot with this completely bored look on her face, like she was making instant oatmeal.
I asked what she was making, and she just shrugged. “Oh, just some fudge. Your uncle’s been asking.” Just some fudge. Let me tell you, that “just some fudge” was the creamiest, most melt-in-your-mouth walnut fudge I’d ever tasted. No candy thermometer in sight. She didn’t even have one. She just knew when it was ready by how it looked and felt. Honestly, I was a little annoyed. How dare she make something that perfect look so effortless?
I stood there watching her, probably with my jaw hanging open, while she poured the glossy mixture into a pan, scattered walnuts on top, and barely even wiped the counter. She handed me a warm spoon to lick and said, “Don’t overthink it.” That was the whole lesson. Maybe you’ve been there—standing in someone’s kitchen, watching them do something you’ve struggled with for years, and they just make it look like breathing. That’s this fudge. It’s the recipe that made me stop being scared of candy making. It’s the one I’ve made for every holiday, every potluck, and every random Tuesday since. And I think you’re going to love it too.
Why You’ll Love This Recipe
Let’s be real for a second. Fudge can be intimidating. All that talk about soft-ball stages and sugar crystals and precise temperatures? It’s enough to make you want to buy the boxed stuff. But this old-fashioned walnut fudge recipe changes everything. It’s the kind of recipe that makes you feel like a kitchen hero without all the stress.
- No Candy Thermometer Needed: This is the big one. You don’t need any special equipment—just your eyes, a pot, and a little patience. The old-school cold water test does all the work.
- Simple, Pantry-Friendly Ingredients: Sugar, butter, milk, chocolate, vanilla, and walnuts. That’s it. No corn syrup, no condensed milk, no weird stabilizers. Real ingredients for real fudge.
- Perfect for Gifting: This fudge holds its shape beautifully and stays creamy for days. It’s the star of every holiday cookie tray and makes the best homemade gift.
- Crowd-Pleaser: I’ve brought this to office parties, family gatherings, and neighbor meet-and-greets. It disappears faster than anything else on the table.
- Unbelievably Creamy Texture: The secret is in the technique—beating the fudge just enough after it cools. You get that smooth, velvety texture that melts on your tongue, studded with crunchy walnuts.
What makes this recipe different? It’s not trying to be fancy. It’s the fudge your grandmother would have made, if she didn’t have a candy thermometer either. It’s tested, it’s trusted, and it works every single time. I’ve made this dozens of times, and I can tell you—it’s the kind of fudge that makes you close your eyes after the first bite. Pure, soul-soothing comfort.
What Ingredients You Will Need
This recipe uses simple, honest ingredients to create something truly special. Most of these are pantry staples, which is part of the magic. You don’t need a specialty grocery run for this one.
- 2 cups granulated sugar – White sugar is key for the right texture. Don’t substitute brown sugar here; it changes the consistency.
- 3/4 cup unsalted butter (1 1/2 sticks) – I prefer unsalted so I can control the salt level. If you only have salted, just skip the optional salt in the recipe. Cut it into chunks so it melts evenly.
- 2/3 cup evaporated milk – Not sweetened condensed milk. Evaporated milk gives the fudge its creamy, dense texture without making it overly sweet. I use Carnation brand.
- 2 cups semi-sweet chocolate chips – Quality matters here. I’ve had the best luck with Ghirardelli or Guittard. They melt smoothly and have a rich flavor. You can also use a chopped semi-sweet chocolate bar.
- 1 jar (7 oz) marshmallow creme – This is the secret to smooth, foolproof fudge. It stabilizes the sugar and prevents graininess. Don’t skip it.
- 1 teaspoon vanilla extract – Pure vanilla extract, not imitation. It makes a difference in the depth of flavor.
- 1 cup chopped walnuts – Toast them lightly for extra flavor, or use them raw. I like to chop them into medium pieces so you get a crunch in every bite. (Pecans work great too if that’s what you have.)
- Optional: 1/4 teaspoon salt – A pinch of flaky sea salt on top before the fudge sets is a game-changer. It balances the sweetness beautifully.
Ingredient tip: Make sure your marshmallow creme is at room temperature. If it’s cold, it won’t incorporate as smoothly. And please, please use a good quality vanilla. It’s one of the few ingredients you can really taste in the final fudge.
Equipment Needed
You don’t need a fancy kitchen for this. Most of these tools you probably already have.
- Medium to large heavy-bottomed saucepan (3-4 quart) – A heavy pot distributes heat evenly and prevents scorching. I use a stainless steel one. Avoid thin non-stick pans.
- Wooden spoon or heat-resistant silicone spatula – You’ll be stirring for a while, so make sure it’s comfortable to hold.
- 8×8-inch baking pan – For setting the fudge. Line it with parchment paper or foil for easy removal. I prefer parchment because it’s non-stick.
- Small bowl of ice water – For the cold water test. This is your candy thermometer replacement.
- Measuring cups and spoons – Precise measurements matter in candy making.
- Sharp knife – For cutting the fudge once it’s set. A chef’s knife works best.
If you don’t have an 8×8 pan, a 9×9 will work—your fudge will just be slightly thinner. A glass dish is fine, but metal conducts heat better for even setting. And honestly, I’ve used a plastic container in a pinch. It works, just be careful when cutting.
Preparation Method
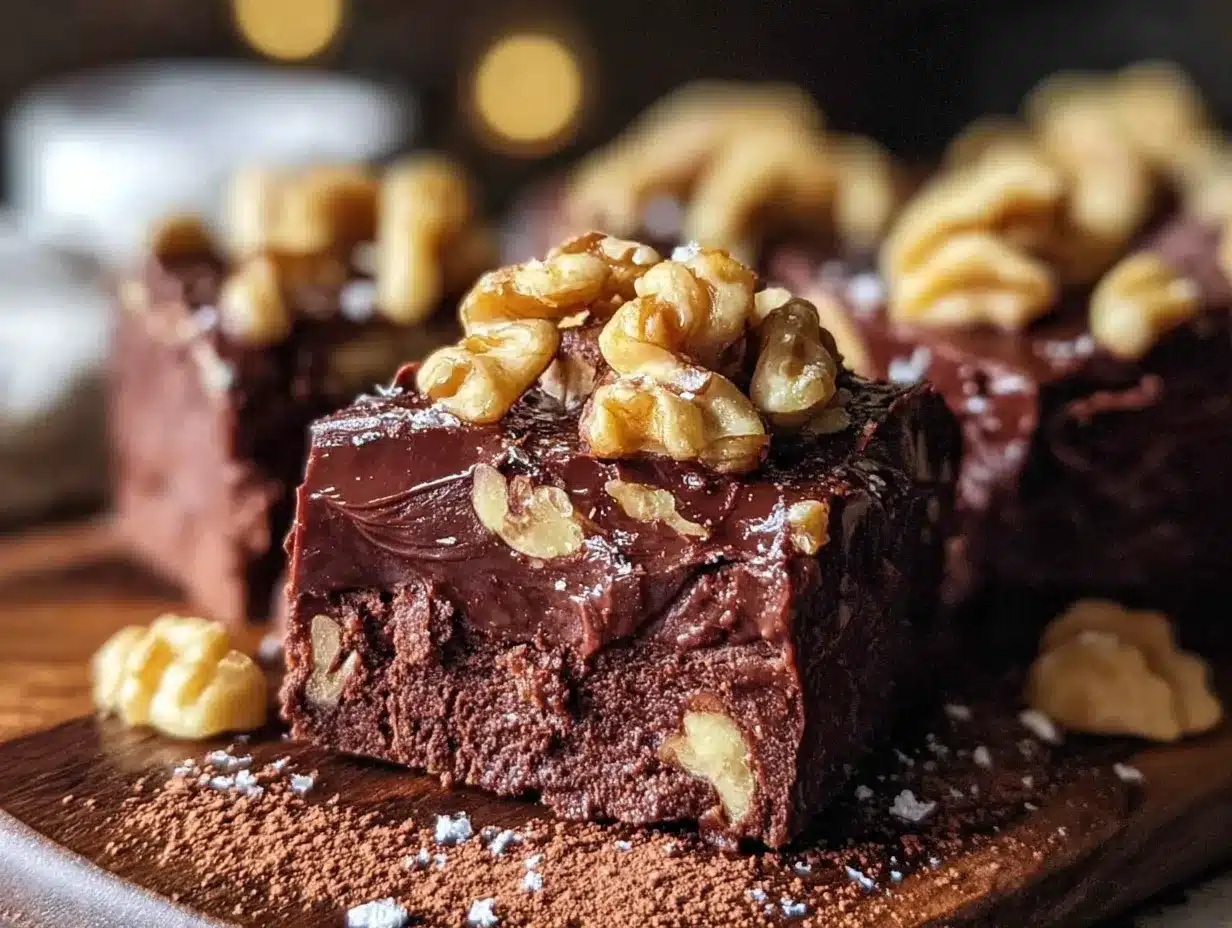
Okay, let’s make some fudge. Take a deep breath—it’s easier than you think.
- Prepare your pan. Line an 8×8-inch baking pan with parchment paper, leaving some overhang on two sides. This creates “handles” for lifting the fudge out later. Lightly butter the parchment if you’re feeling extra cautious. Set the pan aside.
- Combine the base. In your heavy-bottomed saucepan, combine the 2 cups of sugar, 3/4 cup of butter, and 2/3 cup of evaporated milk. Stir them together over medium heat. Keep stirring until the butter is completely melted and the mixture is smooth. This takes about 3-4 minutes.
- Bring to a boil. Once everything is melted and combined, increase the heat to medium-high. Stir constantly. You want the mixture to come to a full, rolling boil—the kind you can’t stir down. This is important: Once it reaches a full boil, stop stirring. Just let it boil. Set a timer for 4 minutes.
- Watch the clock and the color. Let the mixture boil for exactly 4 minutes, without stirring. The mixture will darken slightly and smell amazing. Don’t walk away! Boiling sugar can burn quickly. After 4 minutes, remove the pot from the heat.
- The cold water test (your thermometer). This is where the magic happens. Drop a small spoonful of the hot mixture into your bowl of ice water. Let it sit for a few seconds. Then, using your fingers, try to form it into a ball. If it forms a soft, pliable ball that flattens when you press it, you’re at the soft-ball stage (around 234-240°F). If it’s still runny, return the pot to the heat and boil for another 30 seconds, then test again. Pro tip: Let the mixture cool for just a second before touching it—it’s hot!
- Add the chocolate and marshmallow. Once you’ve reached the soft-ball stage, add the 2 cups of chocolate chips and the entire jar of marshmallow creme. Stir vigorously until everything is melted and smooth. The residual heat will do the work. This takes about 2 minutes of steady stirring.
- Add vanilla and walnuts. Stir in the 1 teaspoon of vanilla extract and the 1 cup of chopped walnuts. Mix until they’re evenly distributed. The fudge should look glossy and thick.
- Beat it (just a little). Here’s the trick for creamy fudge: Beat the mixture with your wooden spoon for about 1-2 minutes, until it starts to lose its shine and thickens slightly. Don’t over-beat, or it will become grainy. You’re looking for it to just start to hold its shape when you drop a spoonful back into the pot.
- Pour and spread. Immediately pour the fudge into your prepared pan. Use a spatula to spread it evenly into the corners. Tap the pan gently on the counter to release any air bubbles.
- Cool and set. Let the fudge cool at room temperature for at least 4 hours, or overnight. Don’t rush this by putting it in the fridge—it can cause the sugar to crystallize and make the fudge grainy. Patience is your friend here.
- Cut and enjoy. Once fully set, lift the fudge out of the pan using the parchment handles. Place it on a cutting board and use a sharp knife to cut it into 1-inch squares. Wipe the knife clean between cuts for neat edges.
Cooking Tips & Techniques
I’ve made this fudge more times than I can count, and I’ve definitely had my share of failures. Here’s what I’ve learned the hard way, so you don’t have to.
Don’t stir the boiling mixture. This is the number one mistake. Stirring while it’s boiling can cause the sugar to crystallize, giving you gritty fudge. Let it boil undisturbed. Trust the process.
Humidity is the enemy. Candy making is sensitive to weather. If it’s a rainy or super humid day, your fudge might not set as firmly. It will still taste amazing, just a bit softer. Try making it on a dry day if you can.
The cold water test takes practice. The first time I did it, I burned my fingers and the ball was way too soft. That’s okay. You’ll get a feel for it. The ball should feel like a soft, squishy caramel. If it’s hard, you’ve boiled it too long. If it dissolves in the water, it needs more time.
Use a heavy pot. I once used a thin saucepan because my good one was dirty. The fudge scorched on the bottom, and the whole batch tasted burnt. A heavy-bottomed pot distributes heat evenly and prevents hot spots.
Toast your walnuts. This is optional but highly recommended. Spread the walnuts on a baking sheet and toast them at 350°F for 5-7 minutes until they’re fragrant. Let them cool completely before adding them to the fudge. It brings out their nutty flavor and adds a lovely crunch.
Room temperature is best for setting. I know it’s tempting to stick the pan in the fridge to speed things up. Don’t do it. The rapid temperature change can cause the sugar to seize, making the fudge crumbly. Let it set slowly on the counter.
Variations & Adaptations
This fudge is a fantastic base recipe. Once you’ve mastered the classic, you can play around with it. Here are some of my favorite variations.
- Chocolate Peanut Butter Fudge: Reduce the chocolate chips to 1 1/2 cups and add 1/2 cup of creamy peanut butter along with the marshmallow creme. Swirl it in gently for a marbled effect. Skip the walnuts or use chopped peanuts instead.
- Mint Chocolate Walnut Fudge: Add 1/2 teaspoon of peppermint extract along with the vanilla. Use dark chocolate chips for a more intense flavor. The cool mint with the rich chocolate and crunchy walnuts is a holiday favorite.
- Gluten-Free Variation: This recipe is naturally gluten-free! Just double-check that your vanilla extract and chocolate chips are certified gluten-free if that’s a concern.
- Vegan Adaptation: Use a high-quality vegan butter stick (like Miyoko’s), full-fat coconut milk instead of evaporated milk, and vegan chocolate chips. You’ll also need a vegan marshmallow creme (Dandies makes a good one). The texture will be slightly different, but still delicious.
- White Chocolate Cranberry Fudge: Substitute the semi-sweet chips with good quality white chocolate chips. Add 1/2 cup of dried cranberries and 1/2 cup of chopped pistachios instead of walnuts. It’s festive and beautiful.
I’ve personally tried the peanut butter version for a Super Bowl party, and it was gone in minutes. The mint version is my go-to for Christmas. Don’t be afraid to experiment—that’s half the fun.
Serving & Storage Suggestions
This fudge is perfect at room temperature. Let it sit out for about 10 minutes before serving if it’s been in a cooler spot. The texture is at its best when it’s soft and creamy, not cold and hard.
Presentation ideas: Arrange the fudge squares on a pretty plate or in a tin lined with wax paper. For gifts, stack them in a small box with parchment paper between layers. A dusting of flaky sea salt on top before serving adds a beautiful finishing touch.
What to serve with it: A glass of cold milk is the classic pairing. For adults, it’s wonderful with a cup of black coffee or a small glass of bourbon or dark rum. It also makes a fantastic dessert alongside a scoop of vanilla ice cream.
Storage: Store the fudge in an airtight container at room temperature for up to 2 weeks. Separate layers with parchment paper to prevent sticking. Do not refrigerate—it can dry out the fudge and make it crumbly.
Freezing: This fudge freezes beautifully. Wrap the entire block or individual pieces tightly in plastic wrap, then place them in a freezer-safe bag or container. Freeze for up to 3 months. Thaw at room temperature for about an hour before serving. The flavor actually gets better after freezing!
Flavor development: Honestly, this fudge tastes even better the next day. The flavors meld together, and the texture becomes even creamier. If you can resist eating it all on day one, you’re in for a treat on day two.
Nutritional Information & Benefits
Let’s be honest—this is a treat, not a health food. But that doesn’t mean it can’t fit into a balanced lifestyle. A 1-inch square of this fudge contains approximately 120-140 calories, 7g of fat, 16g of carbohydrates, and 1g of protein.
The walnuts are the star from a nutritional standpoint. They’re packed with omega-3 fatty acids, which are great for heart and brain health. They also add a little fiber and protein, which helps slow down the sugar rush a bit. Dark chocolate (if you use semi-sweet) contains antioxidants called flavonoids, which have been linked to various health benefits.
Dietary considerations: This recipe contains dairy (butter, evaporated milk) and tree nuts (walnuts). It is gluten-free as written. For a vegan or dairy-free option, check the variations section above.
My personal take? This is a recipe for joy. It’s for holiday traditions, for surprising a neighbor, for treating yourself after a long week. A small piece goes a long way, and the happiness it brings is absolutely worth it. Enjoy it mindfully, and don’t forget to share.
Frequently Asked Questions
Can I use sweetened condensed milk instead of evaporated milk?
No, please don’t. Sweetened condensed milk is much thicker and sweeter, and it will change the texture and chemistry of the fudge completely. Stick with evaporated milk for the classic, creamy result.
My fudge turned out grainy. What went wrong?
Grainy fudge is usually caused by sugar crystallization. This can happen if you stirred the mixture while it was boiling, or if you let the mixture come to a boil too slowly. Next time, make sure you have a full rolling boil before you start timing, and resist the urge to stir.
Can I make this fudge in the microwave?
I don’t recommend it. The stovetop method gives you much better control over the temperature and the boiling process. The cold water test is also harder to do with microwave-heated mixtures. Trust the pot and the stove.
How do I know when the fudge is done beating?
You’re looking for the fudge to lose its glossy shine and start to thicken. When you lift your spoon, the fudge should fall back into the pot in a thick ribbon that holds its shape for a moment before sinking back in. This usually takes about 1-2 minutes of vigorous stirring.
Why did my fudge not set?
This usually means you didn’t boil it long enough to reach the soft-ball stage. The mixture needs to reach the right concentration of sugar. Next time, boil for the full 4 minutes and perform the cold water test carefully. A humid day can also prevent fudge from setting properly.
Conclusion
This creamy old-fashioned walnut fudge is more than just a recipe—it’s a little piece of kitchen confidence. It’s the recipe that proved to me that I didn’t need fancy tools or a culinary degree to make something truly special. It’s the recipe I turn to when I want to feel like I’ve got this whole cooking thing figured out.
I hope you give it a try, and I hope it becomes that recipe for you too. Don’t be afraid to make it your own—add a little extra vanilla, swap in pecans, sprinkle some sea salt on top. The best recipes are the ones that feel like yours.
If you make this fudge, I’d love to hear about it. Leave a comment below and tell me how it turned out, or share a photo on Pinterest and tag me. Your success stories make my day. Now go make some fudge—you’ve got this!
PrintCreamy Old-Fashioned Walnut Fudge – Easy No Thermometer Recipe
This creamy old-fashioned walnut fudge is made without a candy thermometer, using simple pantry ingredients and the classic cold water test. It’s the perfect, foolproof fudge for holidays, gifting, or any day you need a little chocolate comfort.
- Prep Time: 15 minutes
- Cook Time: 10 minutes
- Total Time: 4 hours 25 minutes (includes setting time)
- Yield: 36 servings (1-inch squares) 1x
- Category: Dessert
- Cuisine: American
Ingredients
- 2 cups granulated sugar
- 3/4 cup unsalted butter (1 1/2 sticks)
- 2/3 cup evaporated milk
- 2 cups semi-sweet chocolate chips
- 1 jar (7 oz) marshmallow creme
- 1 teaspoon vanilla extract
- 1 cup chopped walnuts
- Optional: 1/4 teaspoon salt
Instructions
- Prepare your pan. Line an 8×8-inch baking pan with parchment paper, leaving some overhang on two sides. Lightly butter the parchment if desired. Set aside.
- Combine the base. In a heavy-bottomed saucepan, combine the sugar, butter, and evaporated milk. Stir over medium heat until the butter is melted and the mixture is smooth (about 3-4 minutes).
- Bring to a boil. Increase heat to medium-high and stir constantly until the mixture reaches a full, rolling boil. Once boiling, stop stirring and let it boil for exactly 4 minutes. The mixture will darken slightly.
- Perform the cold water test. Drop a small spoonful of the hot mixture into a bowl of ice water. Let it sit for a few seconds, then try to form it into a ball. If it forms a soft, pliable ball that flattens when pressed, it’s ready. If still runny, boil for another 30 seconds and test again.
- Add chocolate and marshmallow. Remove the pot from heat. Add the chocolate chips and marshmallow creme. Stir vigorously until melted and smooth (about 2 minutes).
- Add vanilla and walnuts. Stir in the vanilla extract and chopped walnuts until evenly distributed. The fudge should look glossy and thick.
- Beat the fudge. Beat the mixture with a wooden spoon for 1-2 minutes until it starts to lose its shine and thickens slightly. Do not over-beat.
- Pour and spread. Immediately pour the fudge into the prepared pan. Spread evenly with a spatula. Tap the pan gently on the counter to release air bubbles.
- Cool and set. Let the fudge cool at room temperature for at least 4 hours or overnight. Do not refrigerate.
- Cut and enjoy. Once fully set, lift the fudge out of the pan using the parchment handles. Cut into 1-inch squares with a sharp knife, wiping the knife clean between cuts.
Notes
Do not stir the mixture while it is boiling to prevent sugar crystallization. Humidity can affect the fudge’s setting; make it on a dry day if possible. The cold water test takes practice—the ball should feel like soft, squishy caramel. Toast walnuts at 350°F for 5-7 minutes for extra flavor. Let fudge set at room temperature, not in the fridge, to avoid graininess.
Nutrition
- Serving Size: 1 square (1-inch)
- Calories: 130
- Sugar: 14
- Sodium: 30
- Fat: 7
- Saturated Fat: 3.5
- Carbohydrates: 16
- Fiber: 1
- Protein: 1
Keywords: walnut fudge, old-fashioned fudge, no thermometer fudge, creamy fudge, easy fudge recipe, homemade fudge, chocolate walnut fudge